It’s scary.
Once you start using Integromat or Make, you really start creating a lot of workflows with it. It’s so easy and powerful you just can’t help yourself 🤩
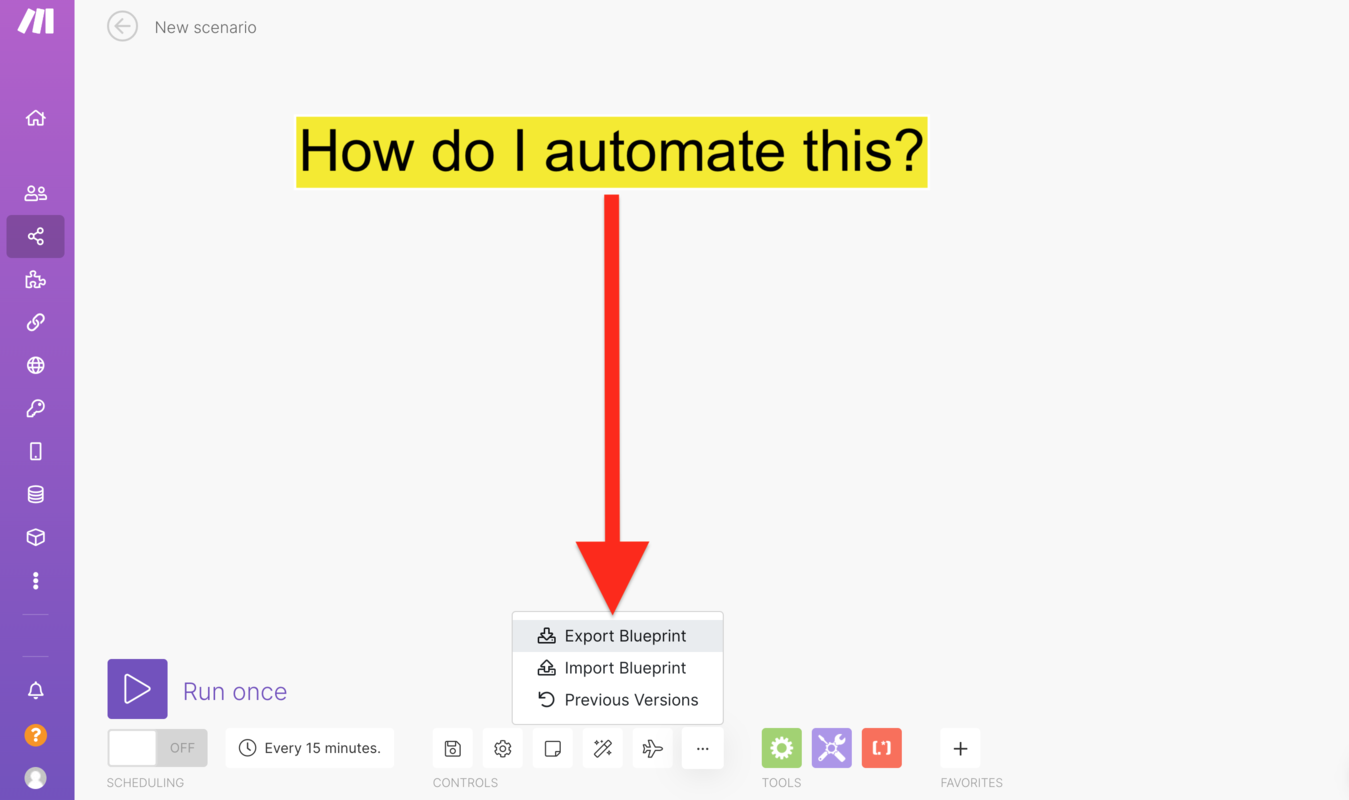
But… you’ve spent weeks (if not months) worth of your time to create all of these workflows and none of it is backed up 😱
The only way to make sure you don’t loose all of your hard work is to open up each and every Scenario and click the “Export Blueprint” button.
Painful. Waste of time.
Here’s how to avoid that pain, and quickly solve your problem the easy way.
Now that Integromat has migrated to their new Make.com product, they’ve added a whole bunch of new useful features.
-
1️⃣ The ability to access Make’s very own API from a Make Scenario.
-
2️⃣ Even better, they’ve extended what their API can do.
One of the things their API can now do is Export Scenario Blueprints.
That means you can have a Make Scenario that is triggered on a schedule to export any and all of your Make Scenario’s into an external Google (or wherever) drive.
Let’s do that right now.
Open up Make.com and create a new Scenario.
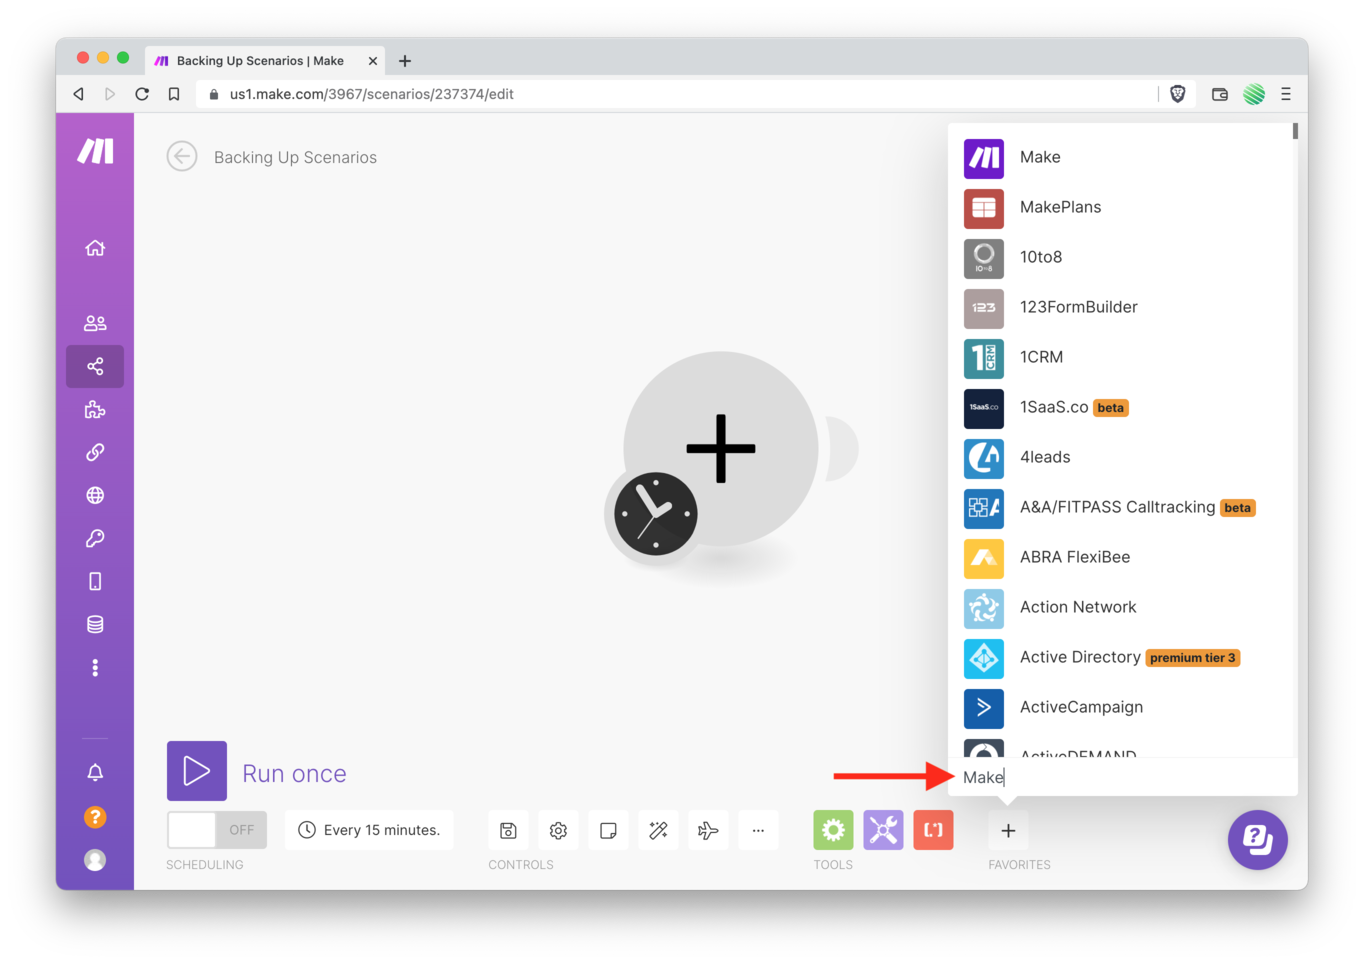
Create a new module by searching for “Make”.
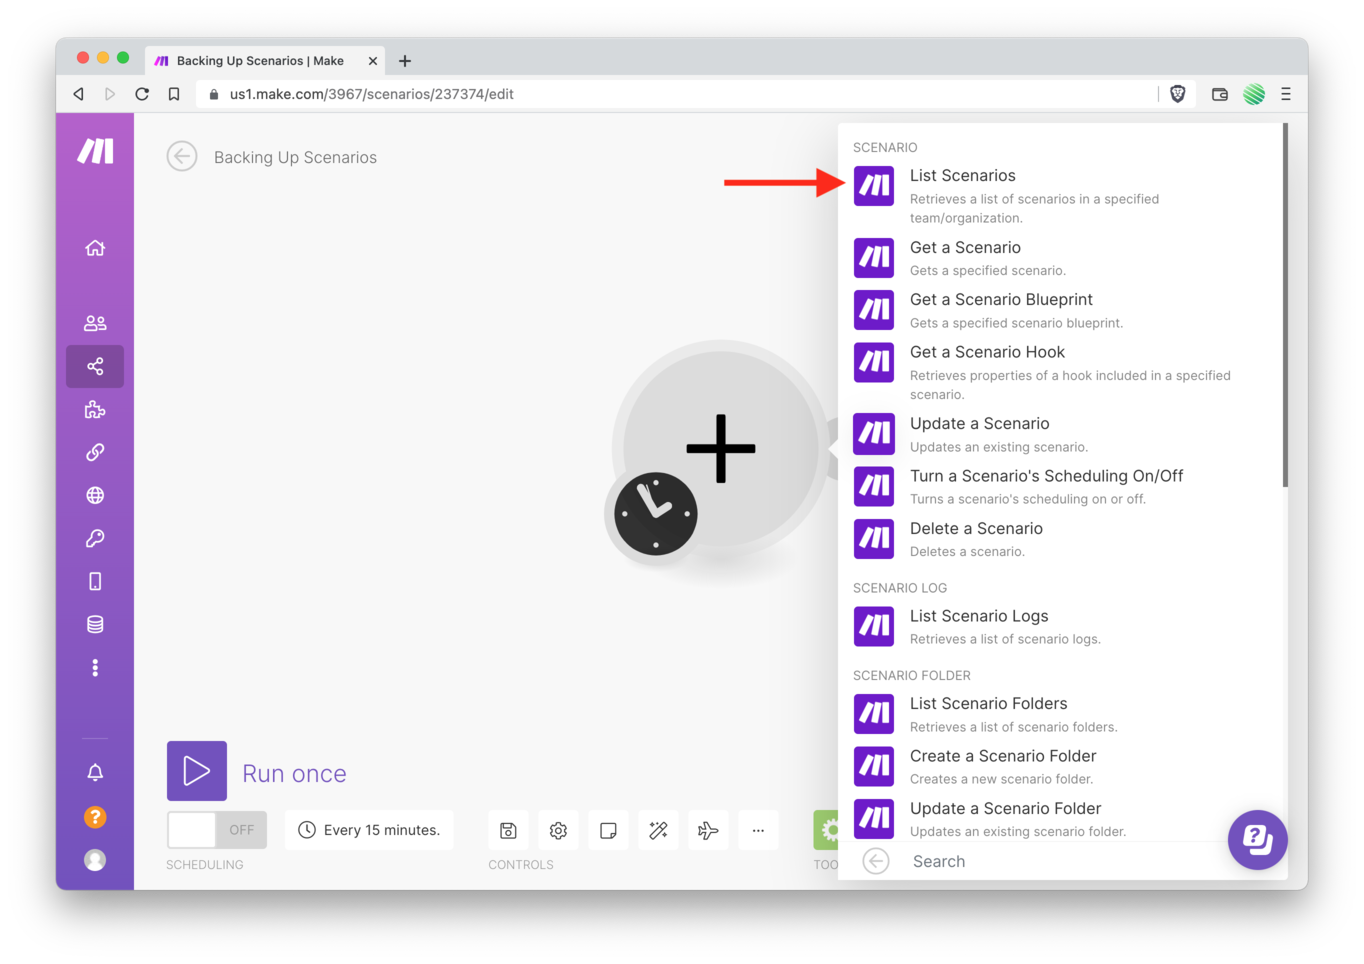
Choose “List Scenarios” from the options.
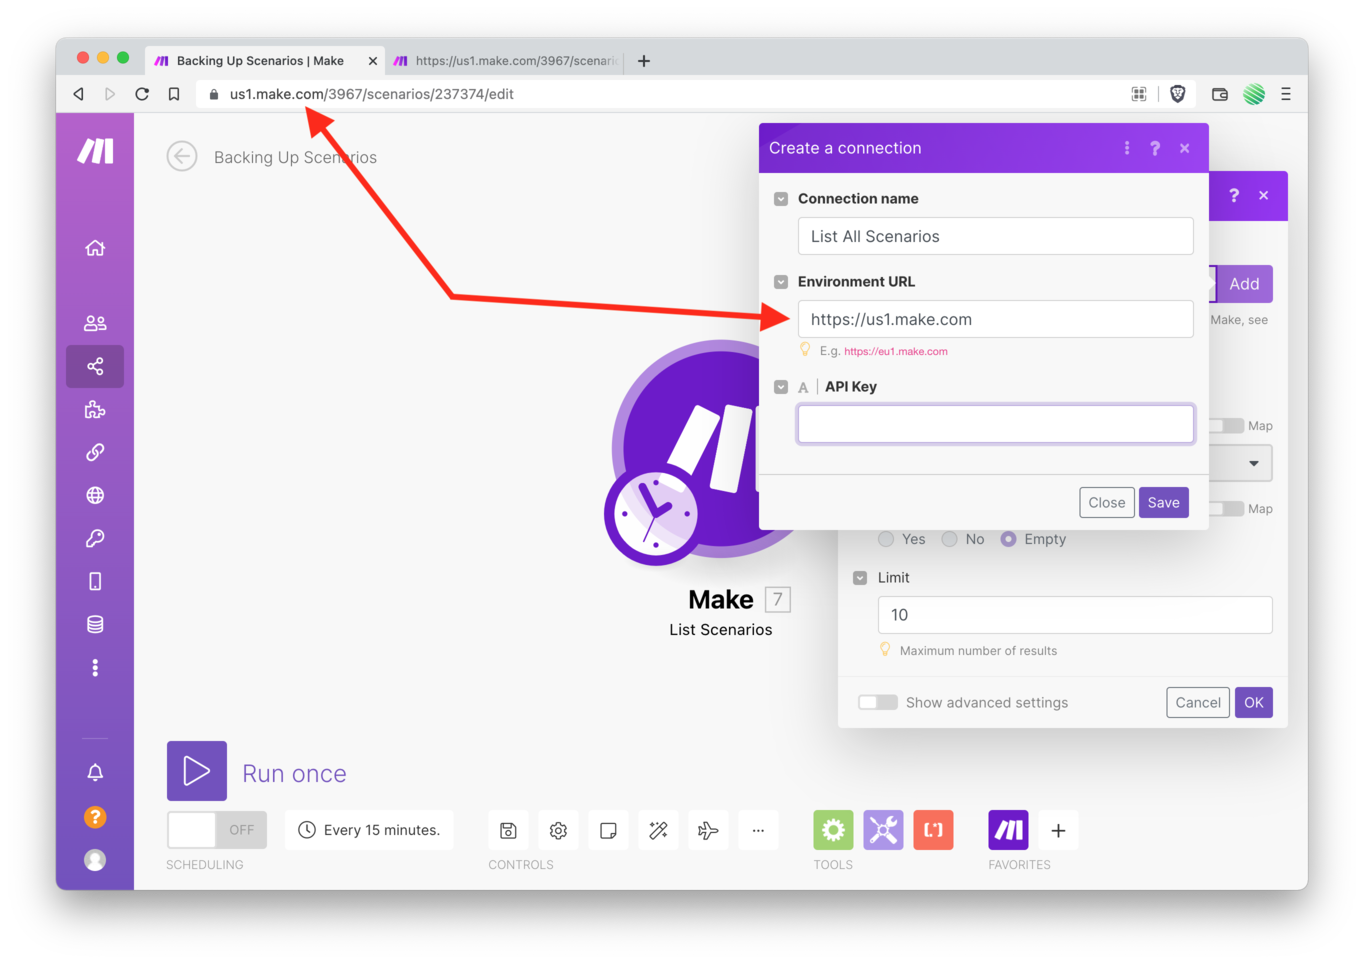
Give your new module a good name. Choose an “Environment URL” based upon the current url listed in your web browsers address bar.
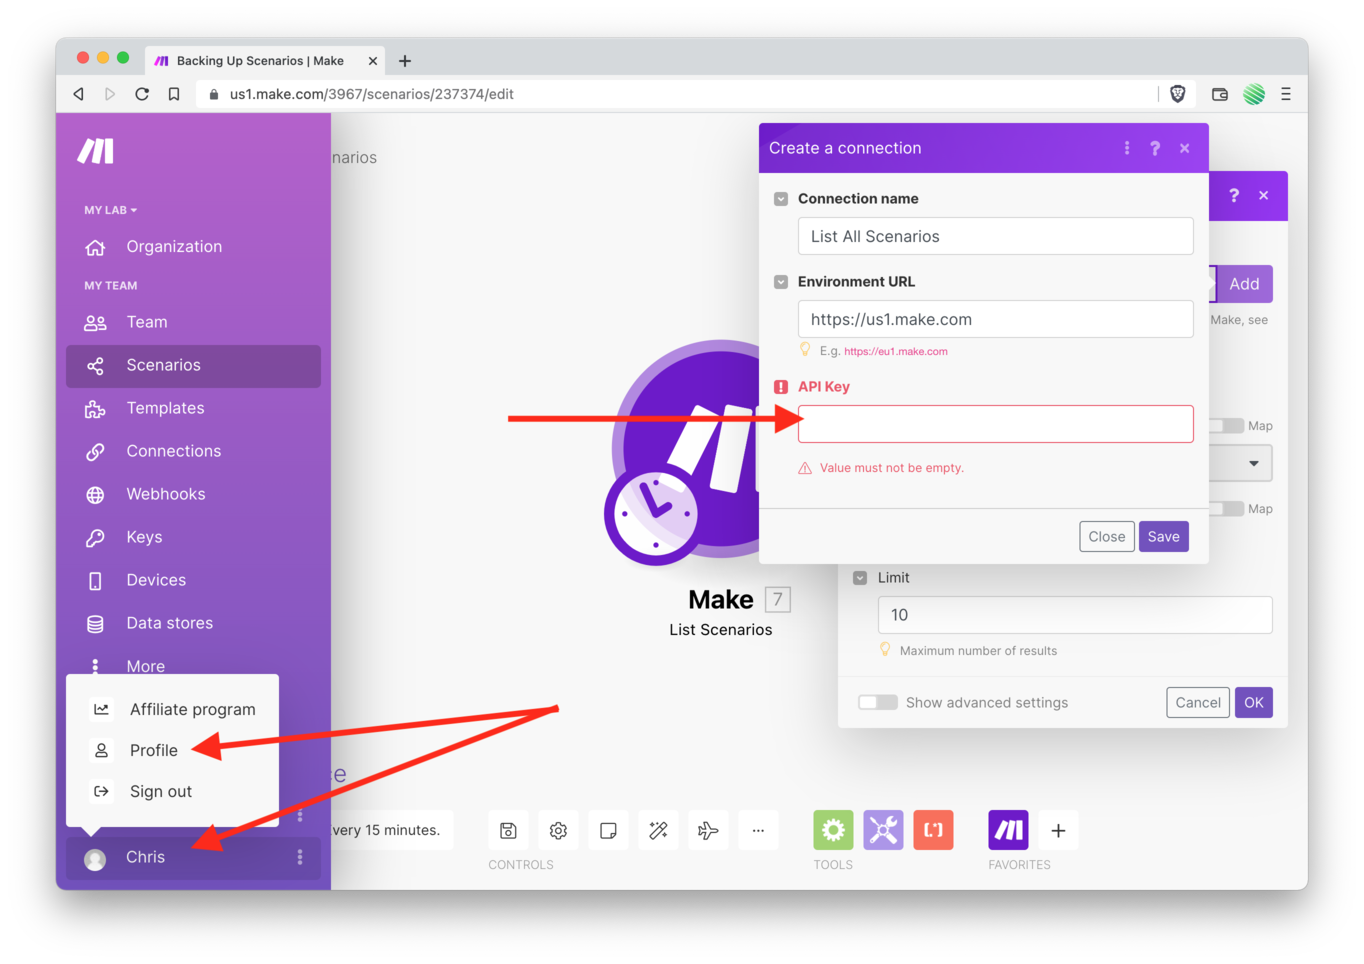
Now you need to add Make.com’s API key for your own account 😃
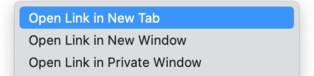
In the bottom left corner of this screen, find your username. Tap it and select “Profile” but do this by right clicking the Profile link and selecting “Open Link in New Tab” as shown below.
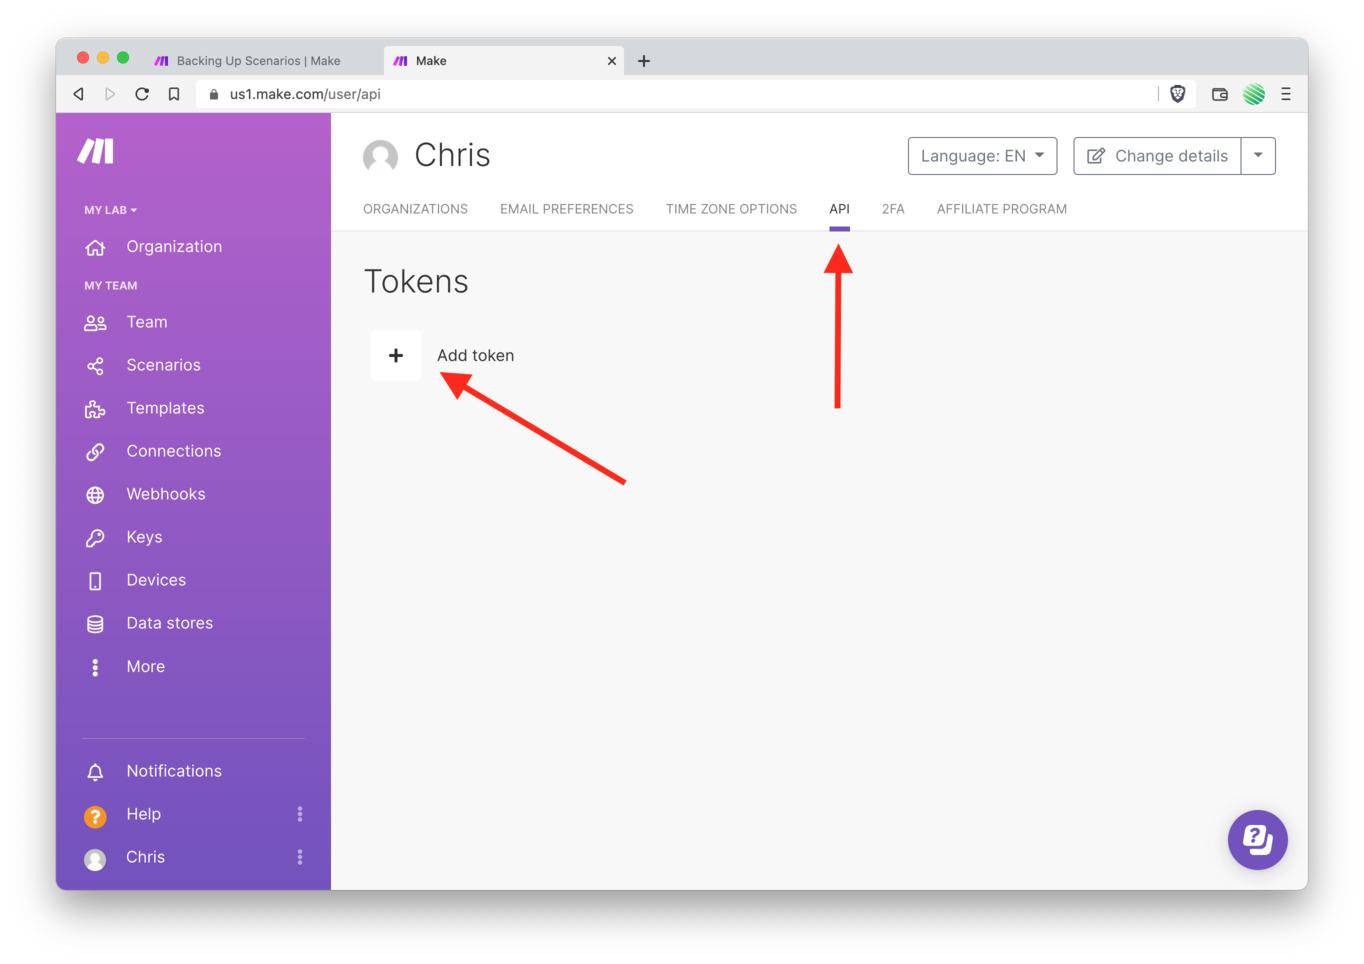
Tap on the “API” tab and then tap on the “Add Token” link.
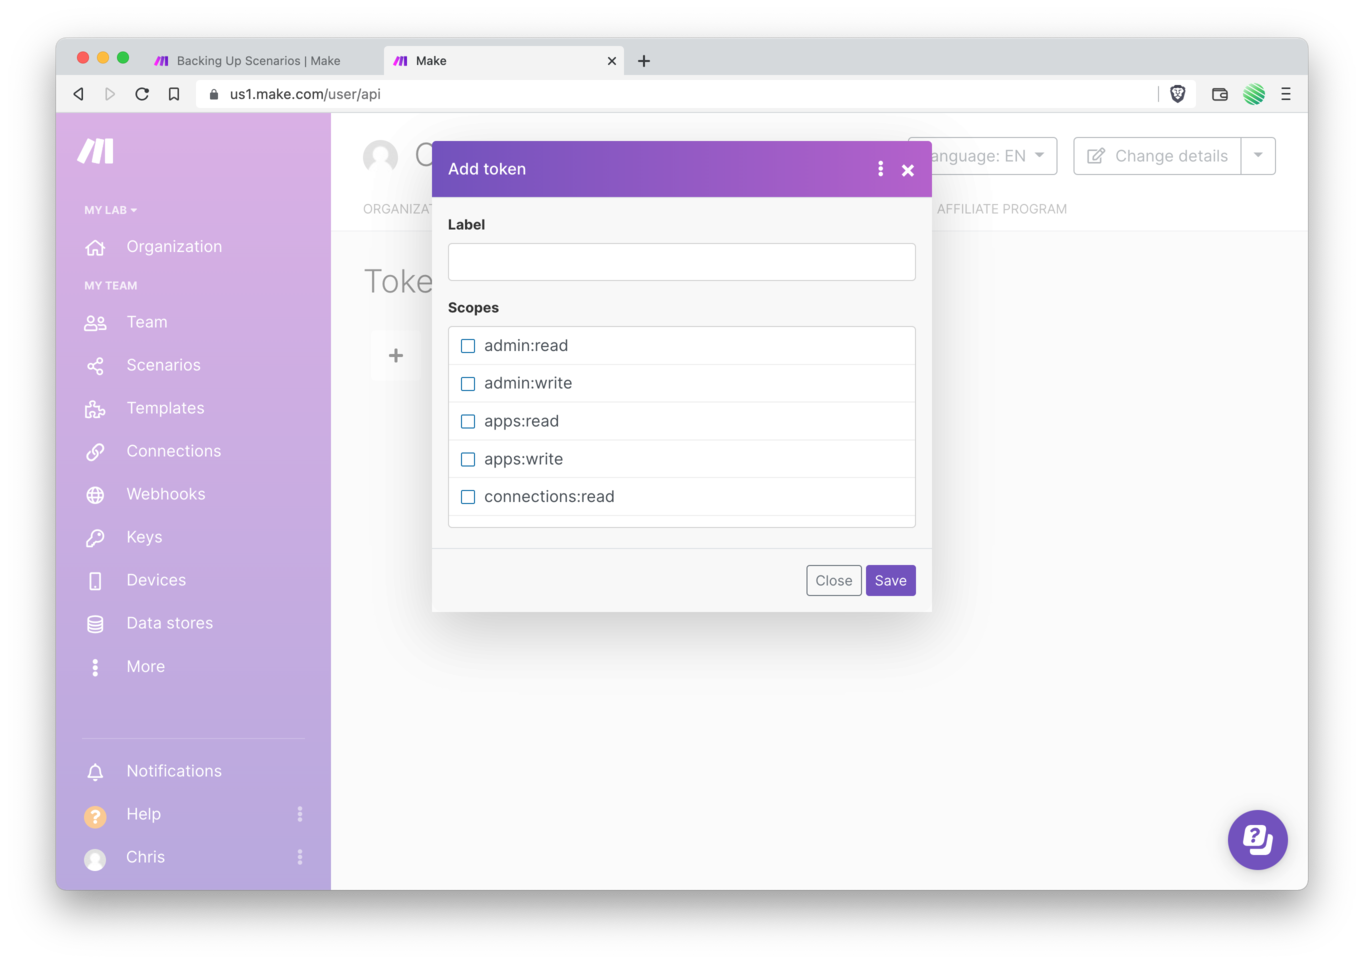
You’ll need to add “scopes” or permissions to your new API token. This tells Make what this API token is allowed to do.
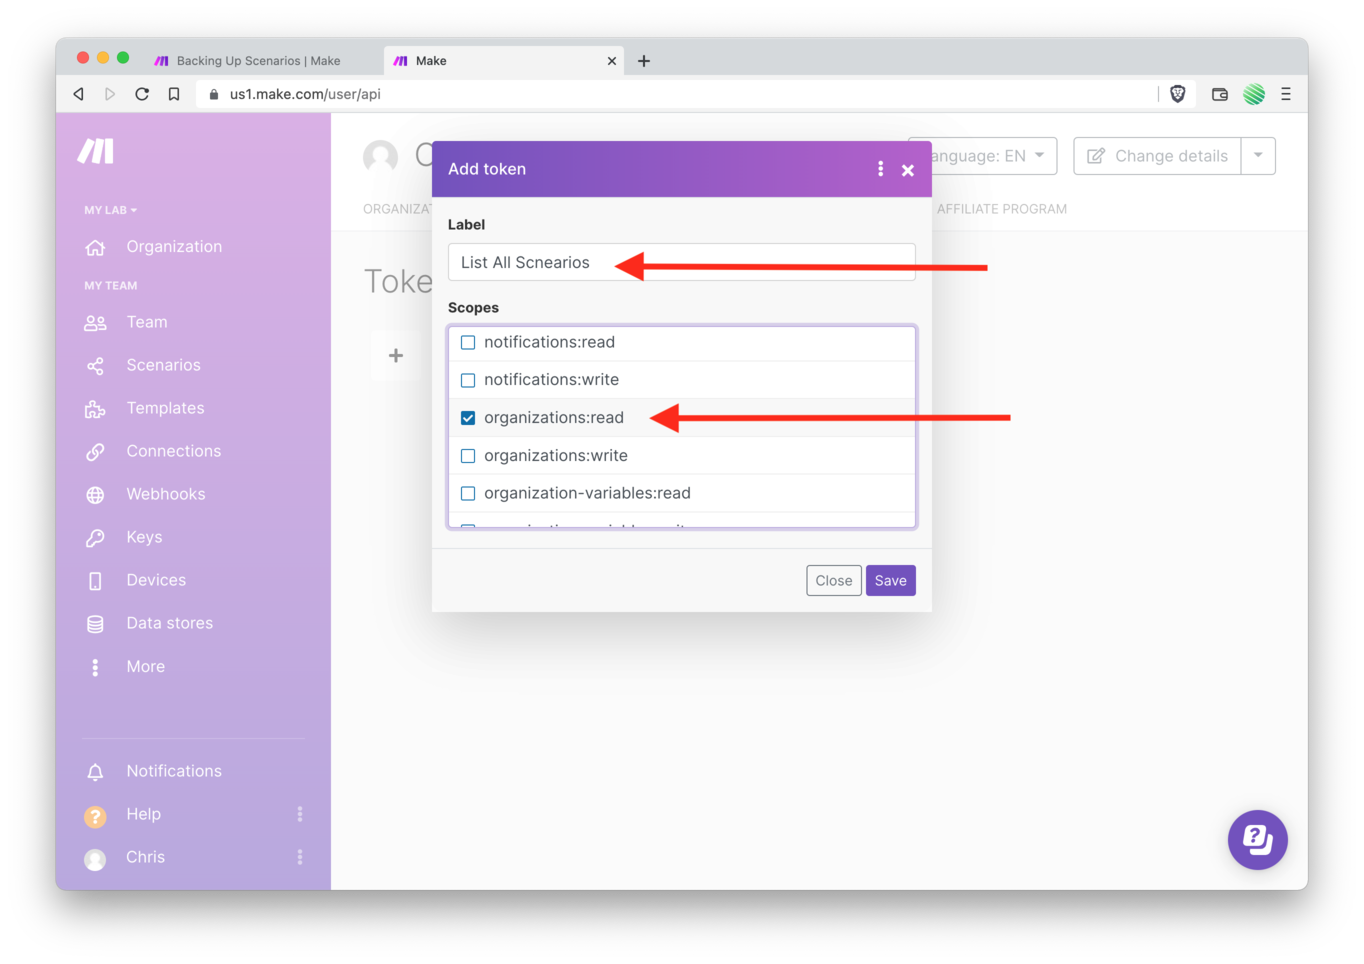
Give you new API token a descriptive name, something that the scopes will allow it to do. In this case “List All Scenarios” tells us exactly what it’s allowing anyone with that API token to do to your account.
For the scopes…
Select “organizations:read” which means all of your Make account Organizations are readable by anyone who has this API token.
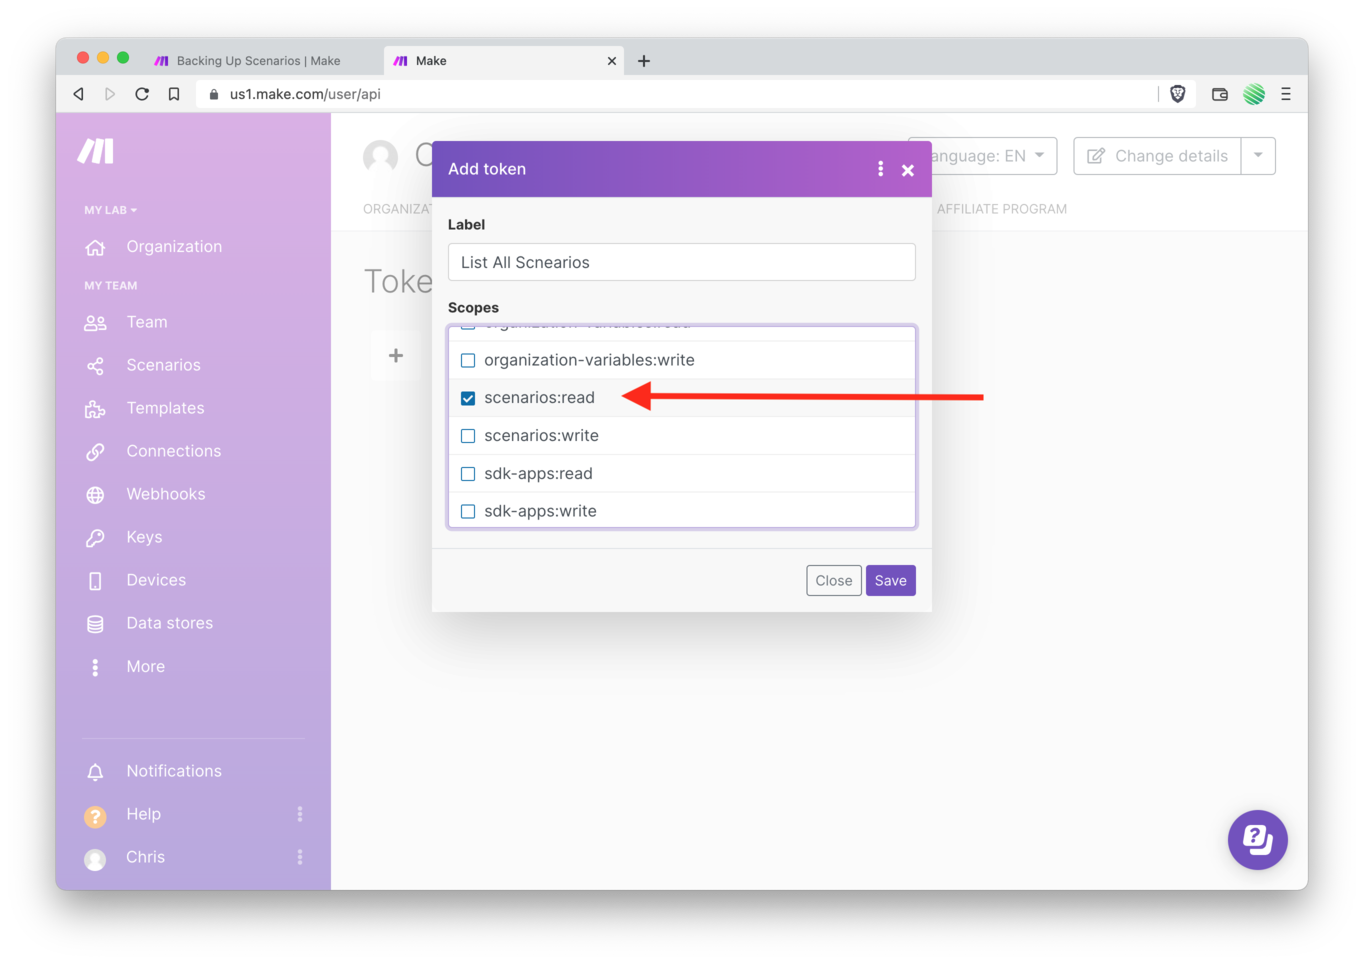
Next, select the “scenarios:read” scope which allows anyone who has this API token to read the Scenarios you have in your Make account.
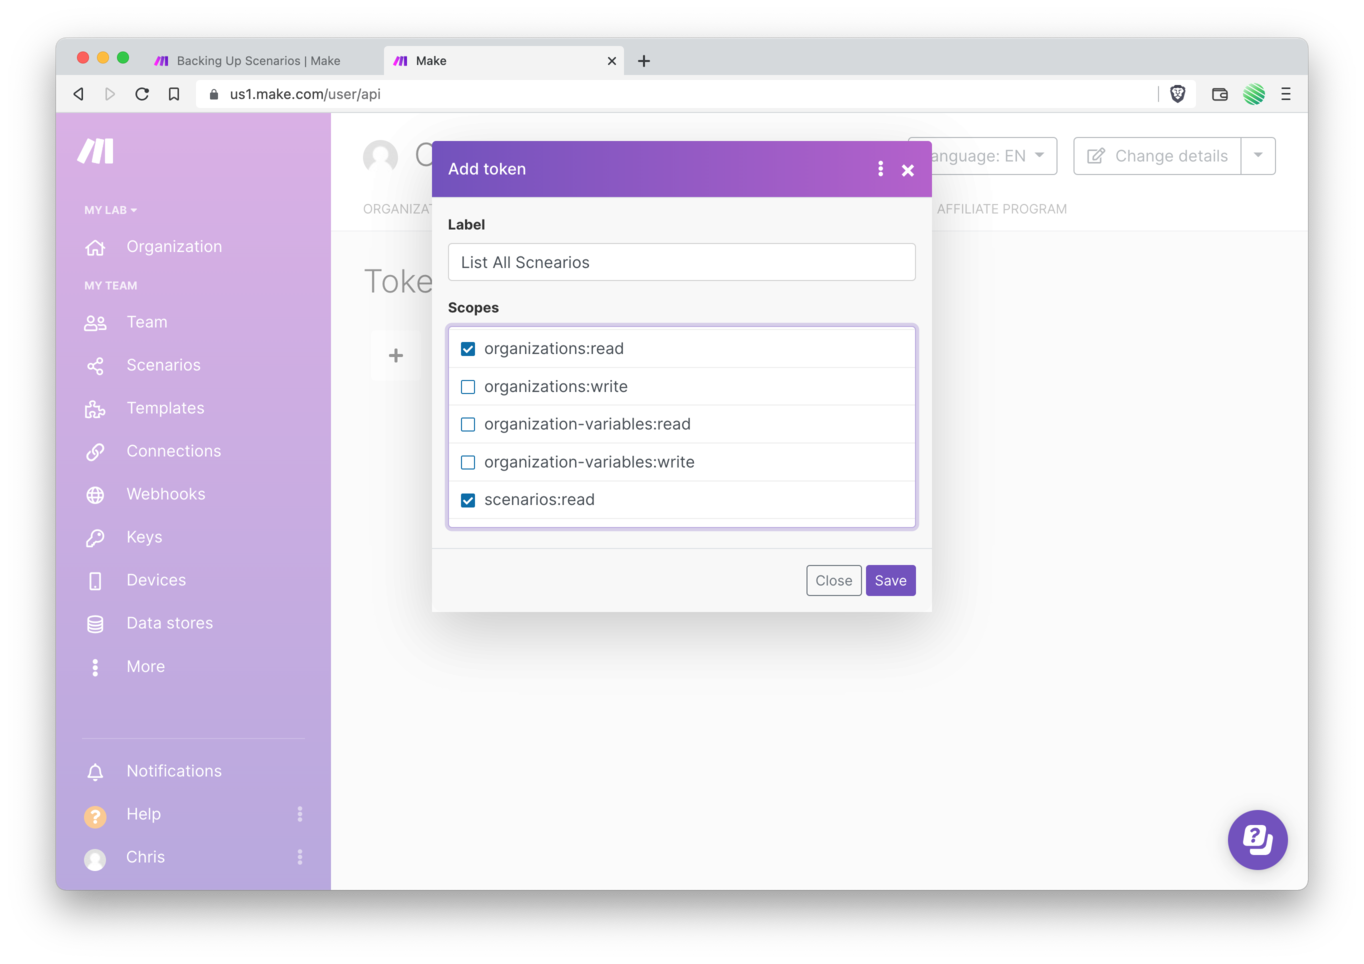
All you need are just these two scopes. Notice how this API token does NOT give permissions to created or edit anything within your Make account.
This is really handy and if you’ve ever used API tokens with other services you’ll notice that most grant you access to do ANYTHING in your account. Make has done a great job giving you the ability to add scopes (or permissions) for each token you create 👍
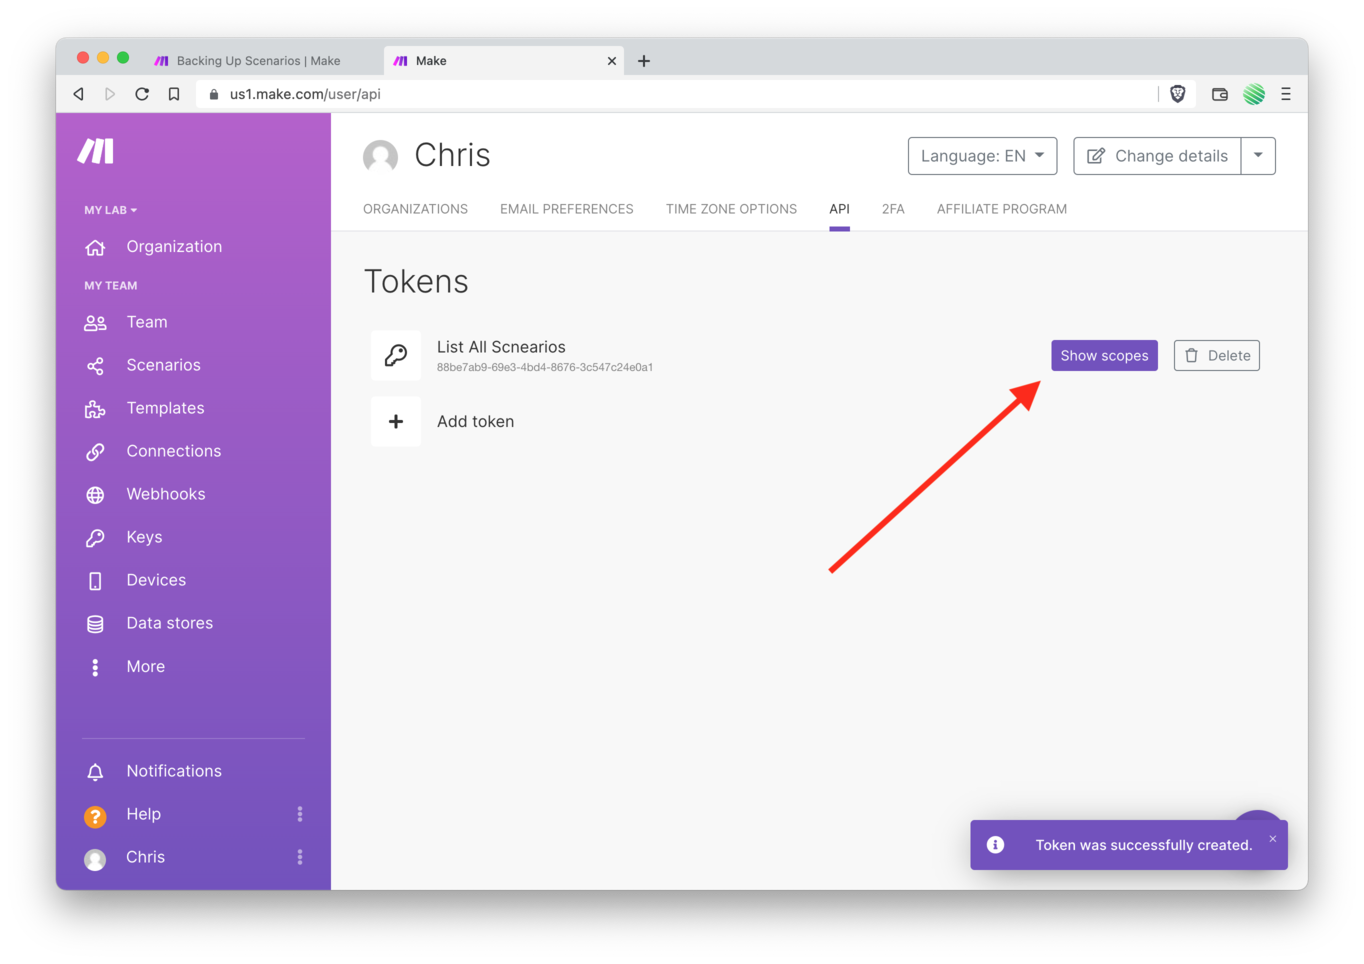
If you want to see the details of what permissions, or scopes, each of your tokens has, tap on the “Show Scopes” button to see more.

Your new scope looks good.
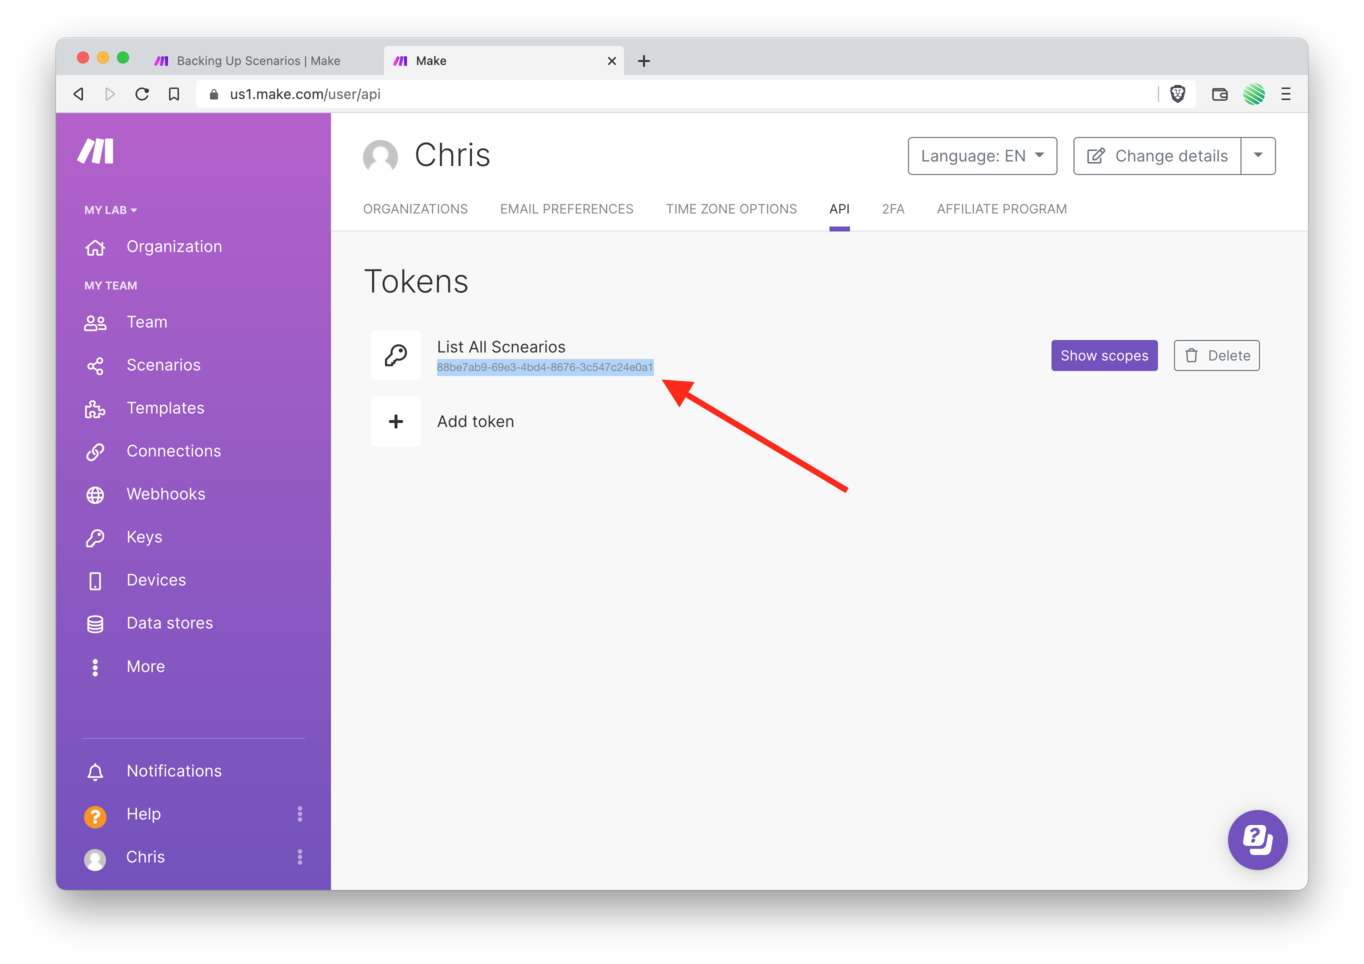
Next, highlight and copy your new API token as shown in the screenshot above.
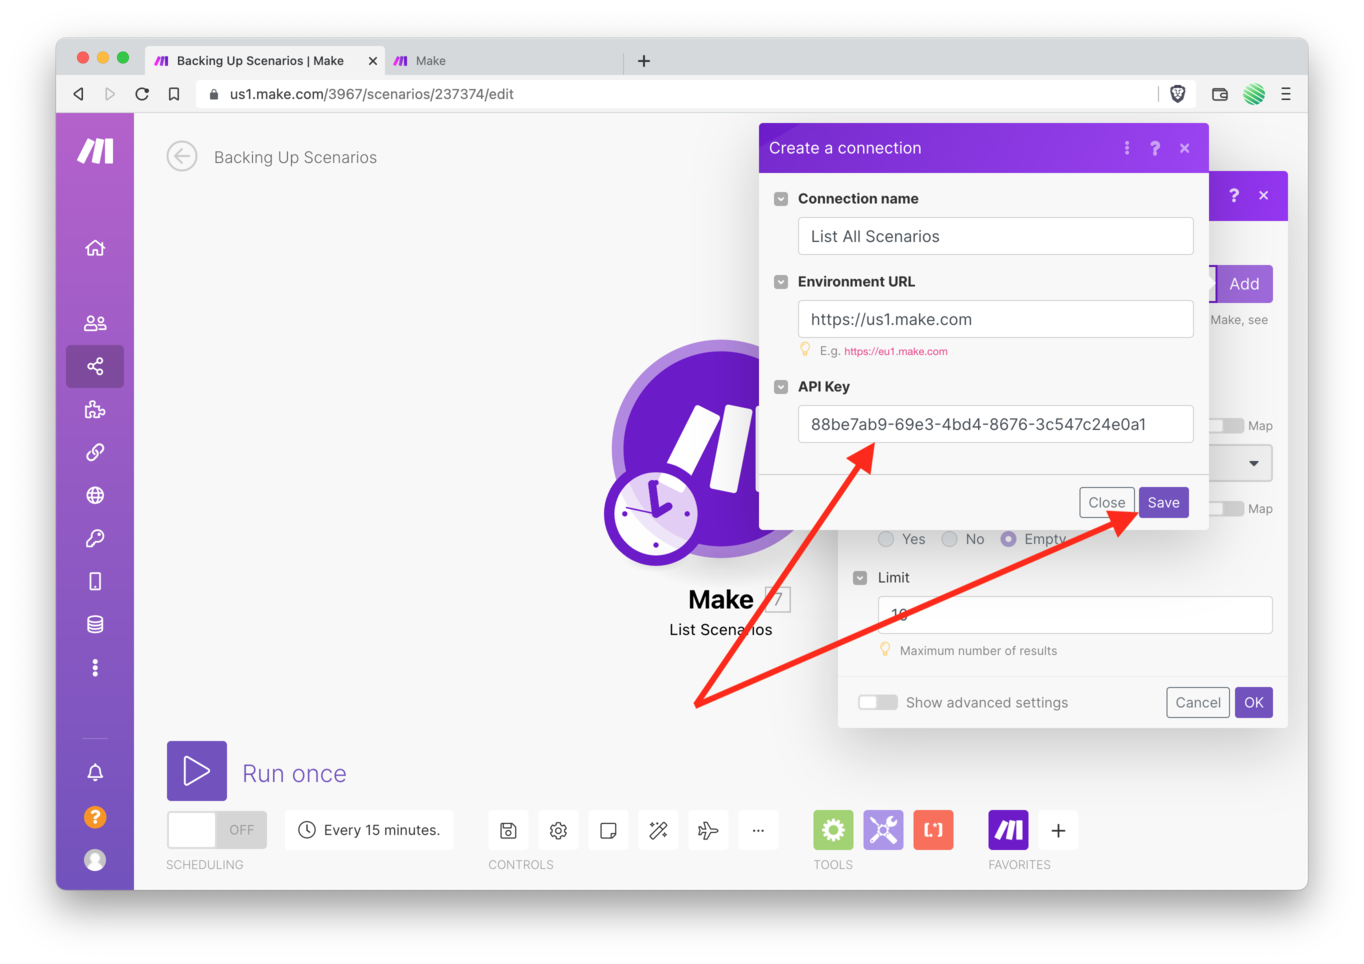
Flip back to your Make Scenario tab and paste it into the “API Key” field, then tap the “Save” button.
Your new connection is now created. With it, you can connect to the Make API, with only the permissions (or scopes) that you’ve allowed for that API token.

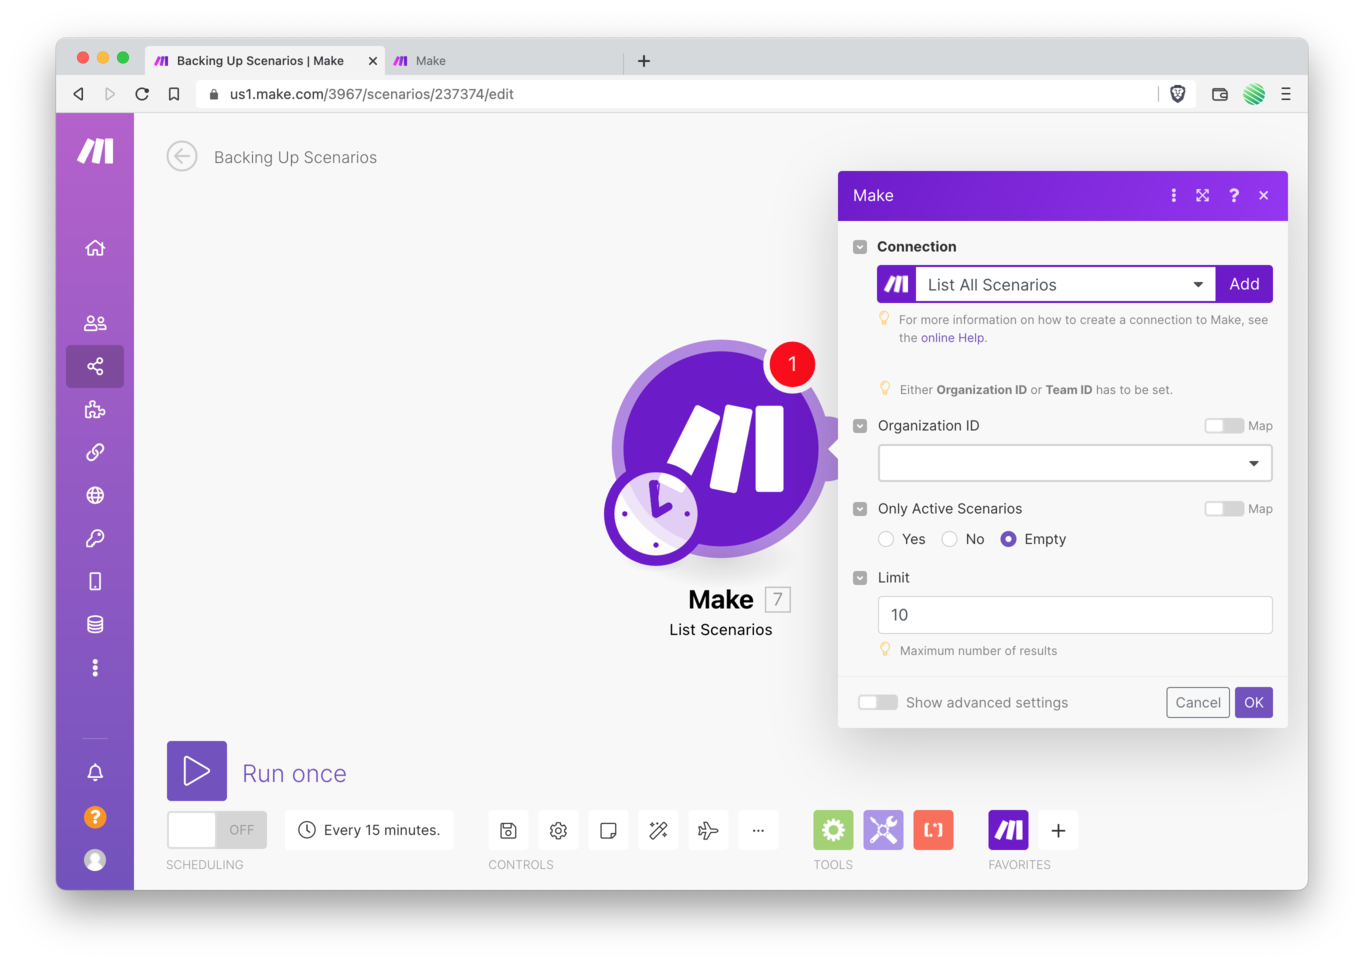
Now select the Organization you want to use, Team, and Folder.
The Folder is an interesting field. You can select one or not. If you do, you’ll get all of the Scenarios listed within that Folder.
Next choose if you only want active scenarios (or select empty to ignore it).
Then, select “Scenario ID” and “Name” from the fields section.
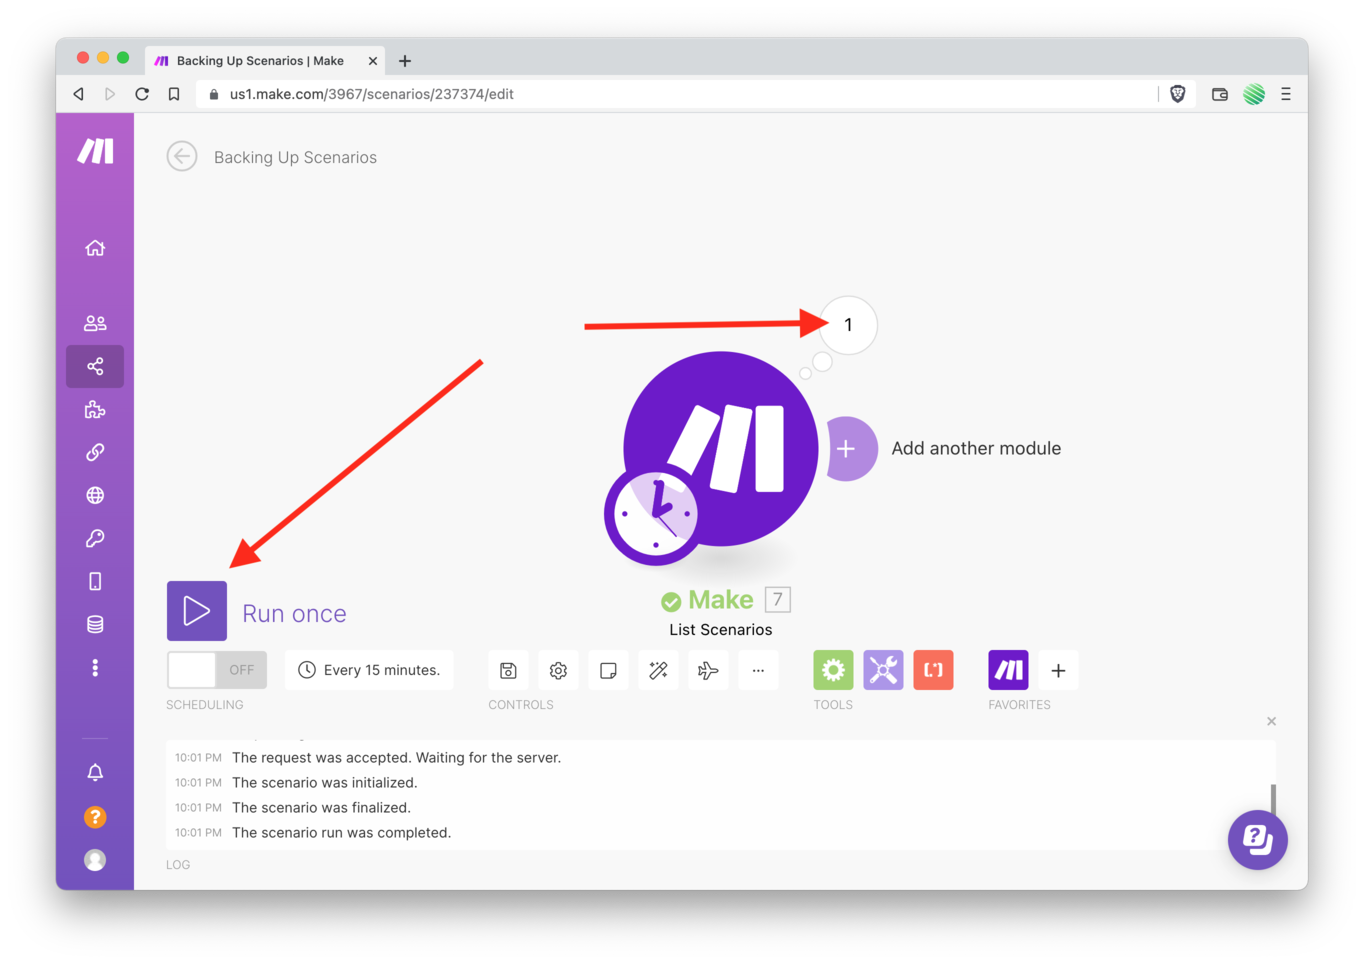
Tap the “Run once” button and open up the results.
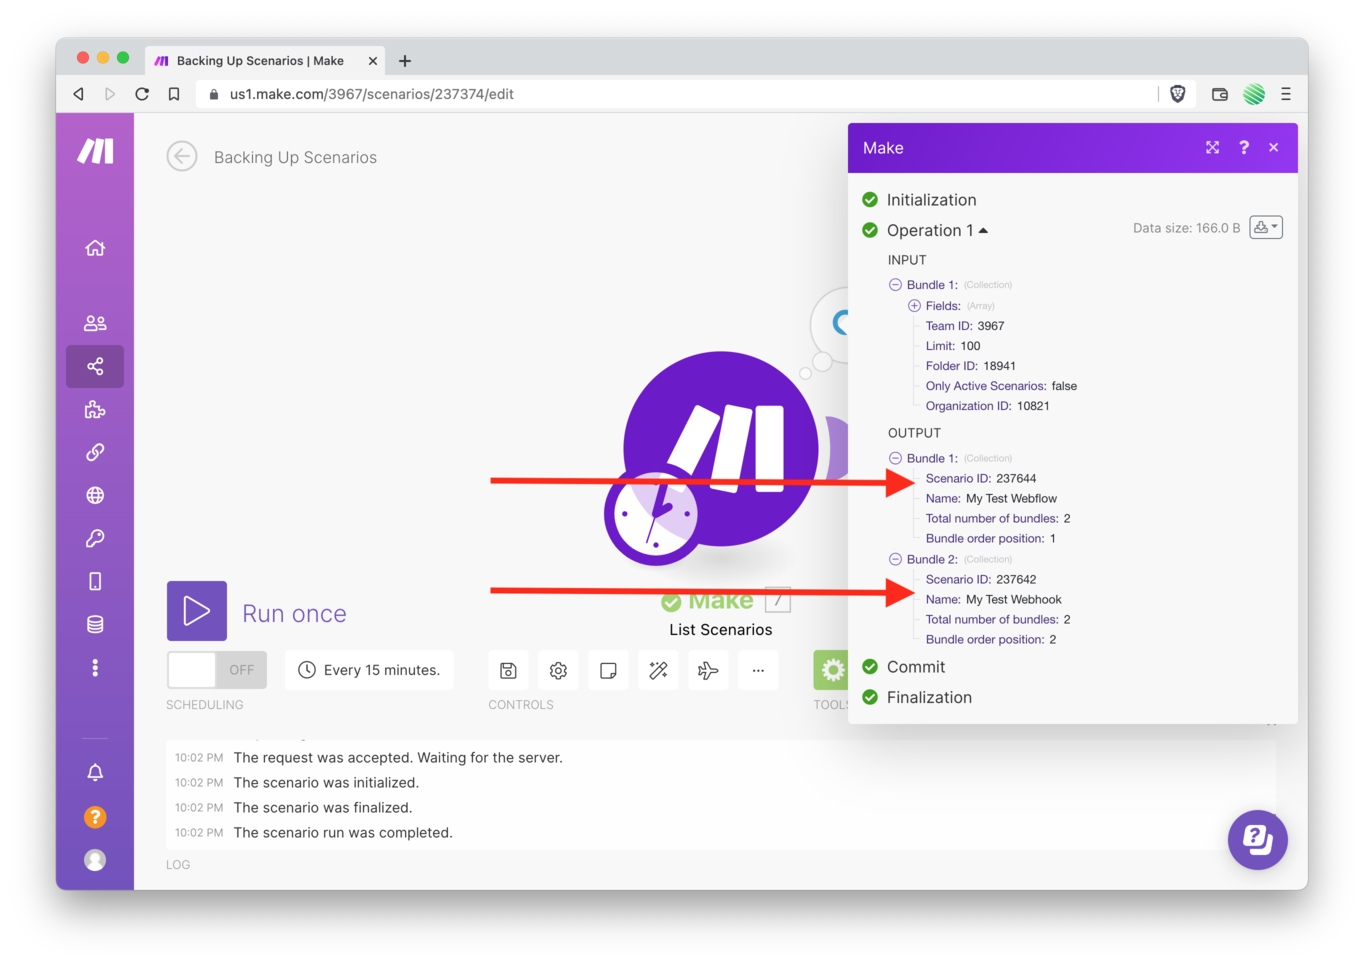
My test Folder has two Scenarios and you can see them in the screenshot above.
Everything’s working, let’s continue…
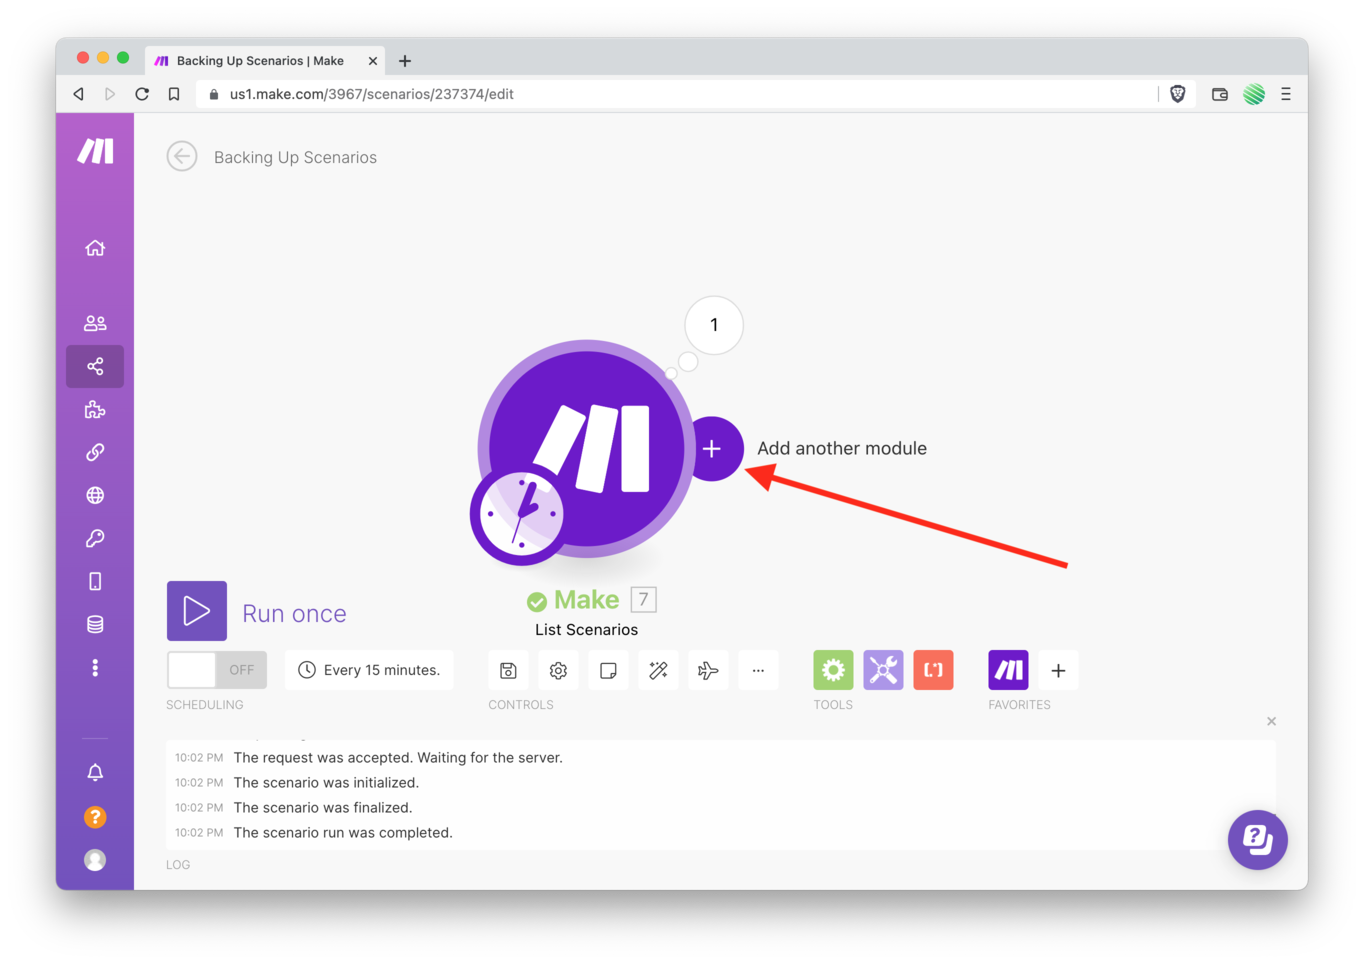
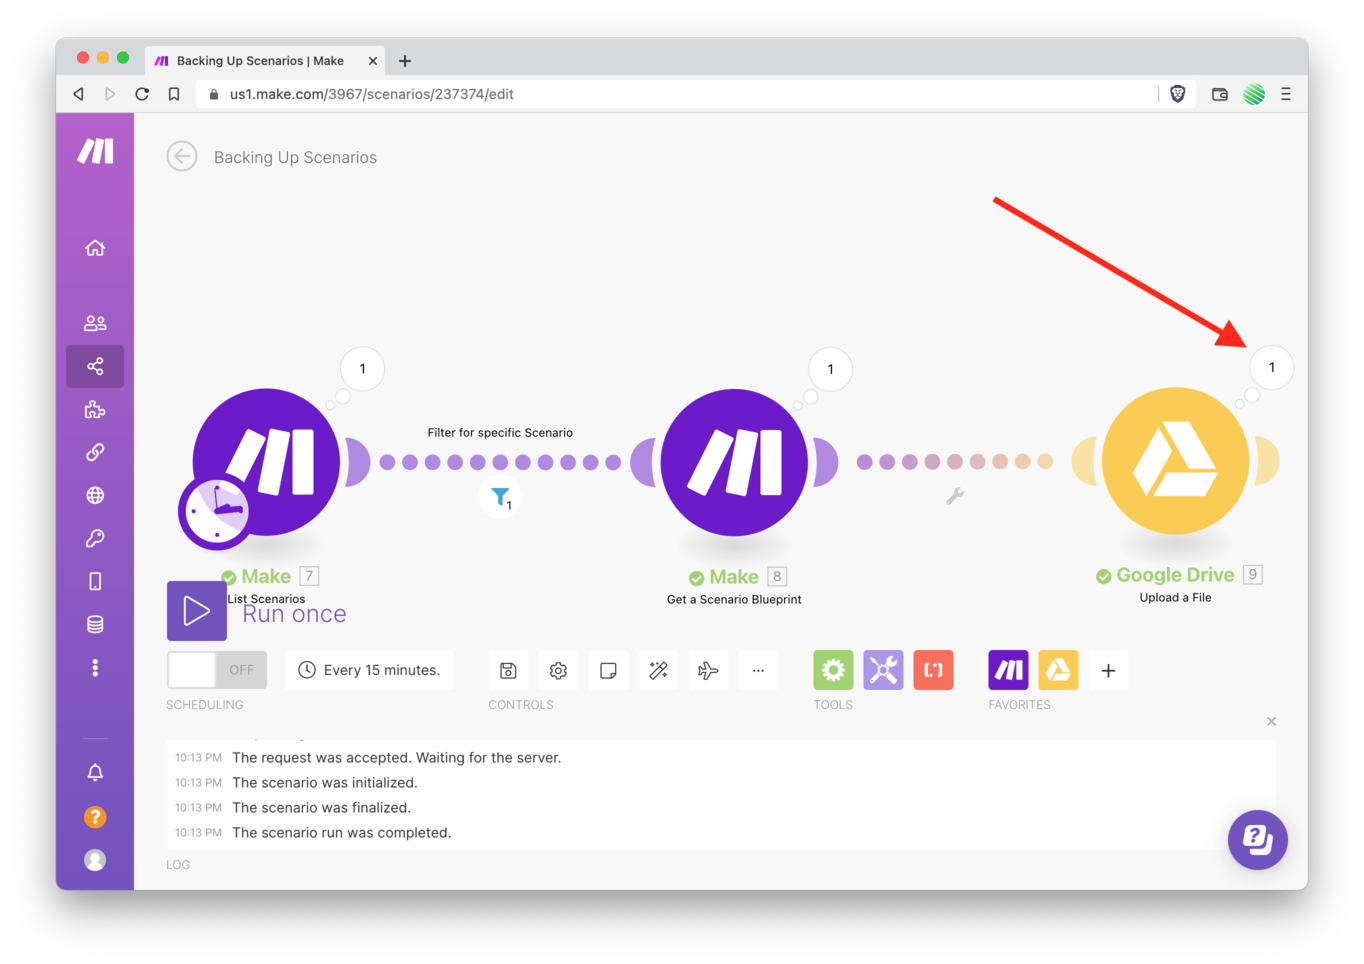
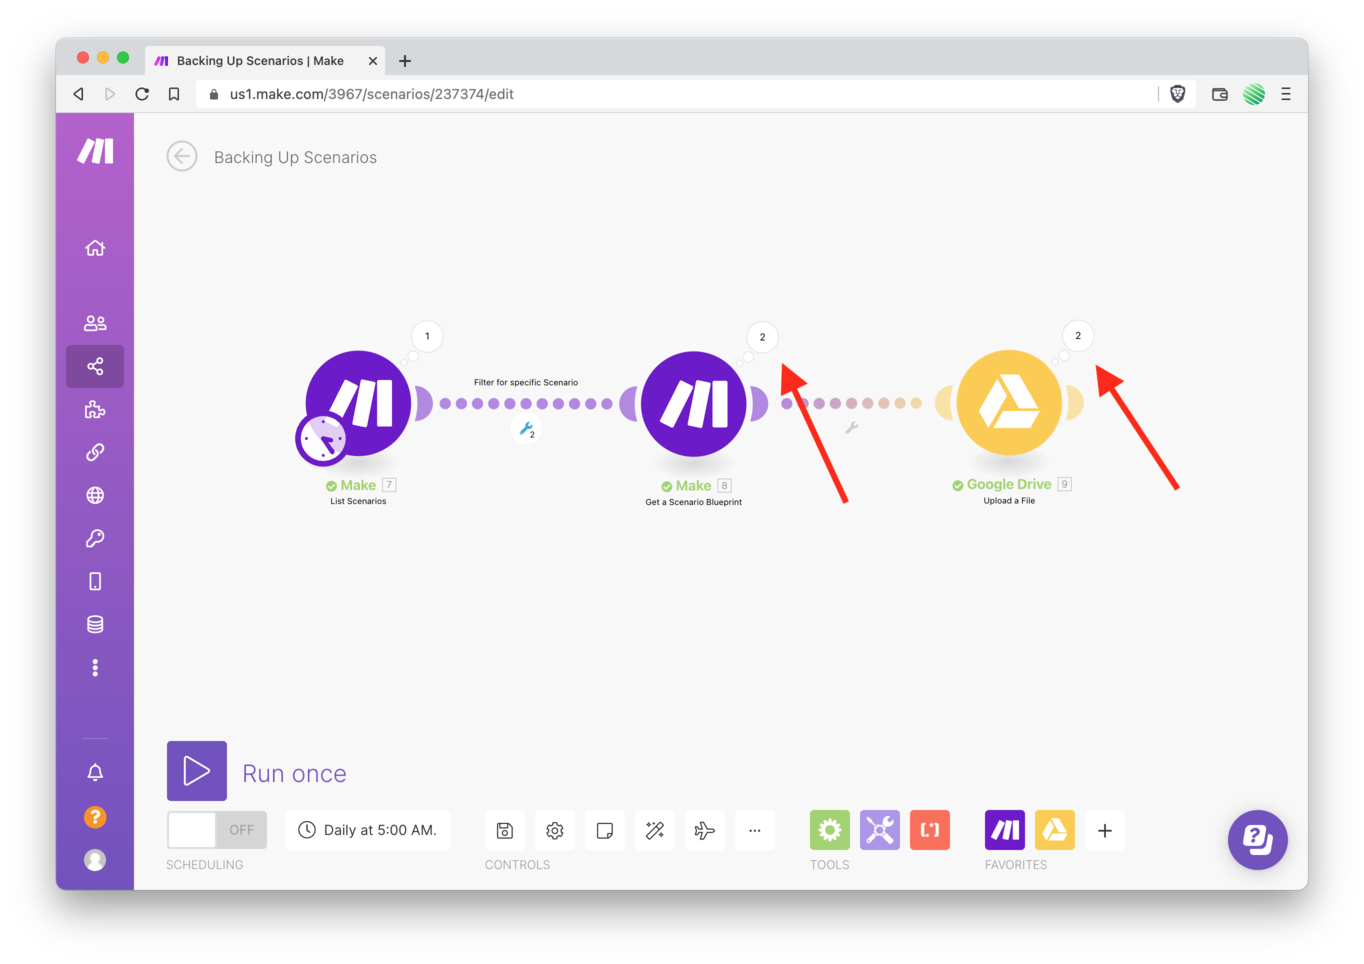
Now you’ll grab the Blueprint for the Scenario’s you want to back up.
Add another module.
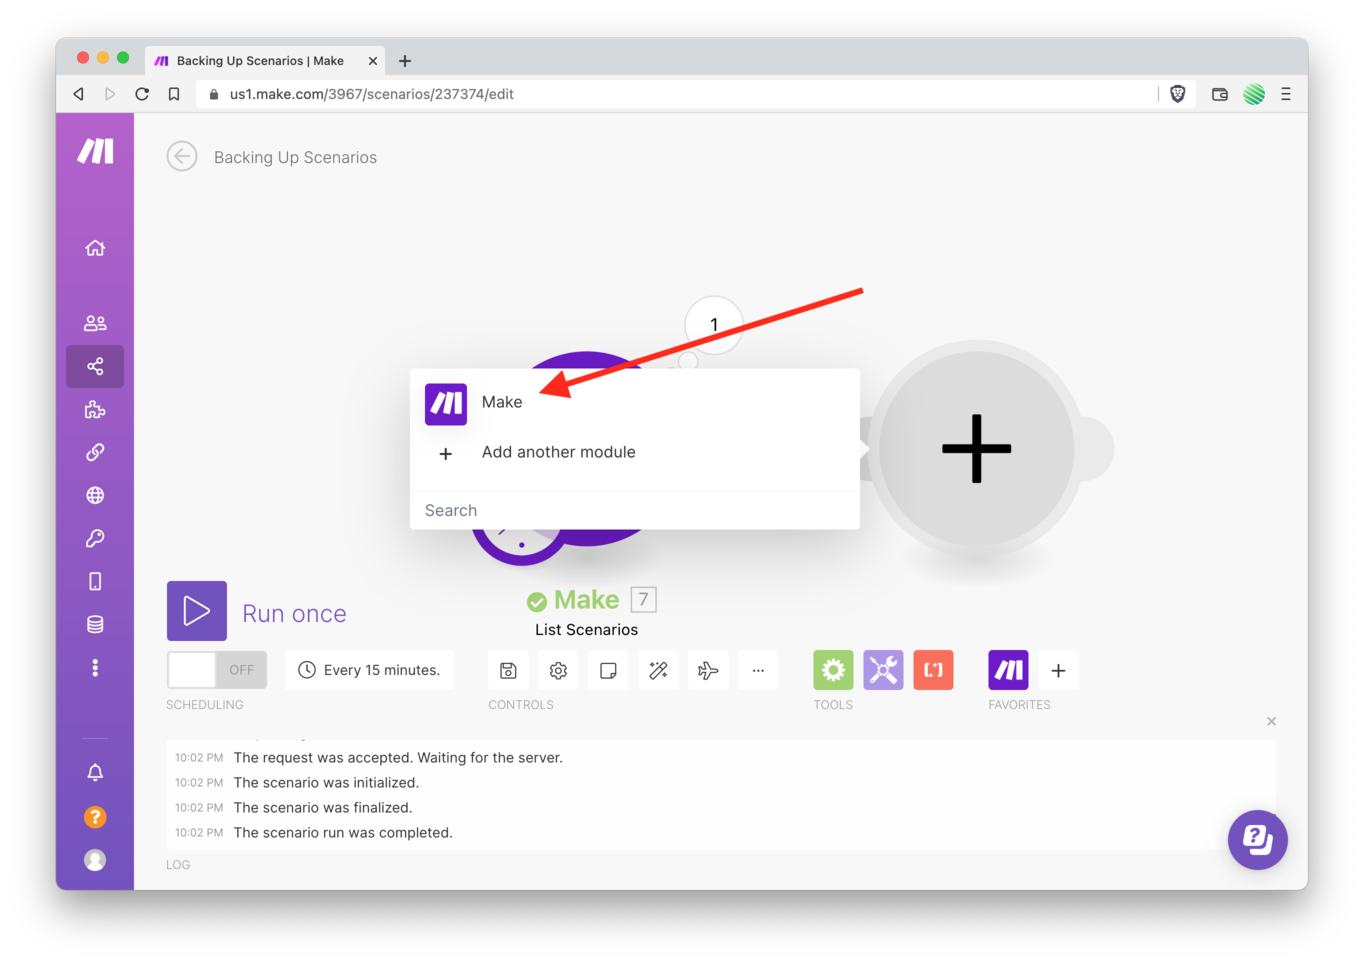
Choose Make from the popup options.
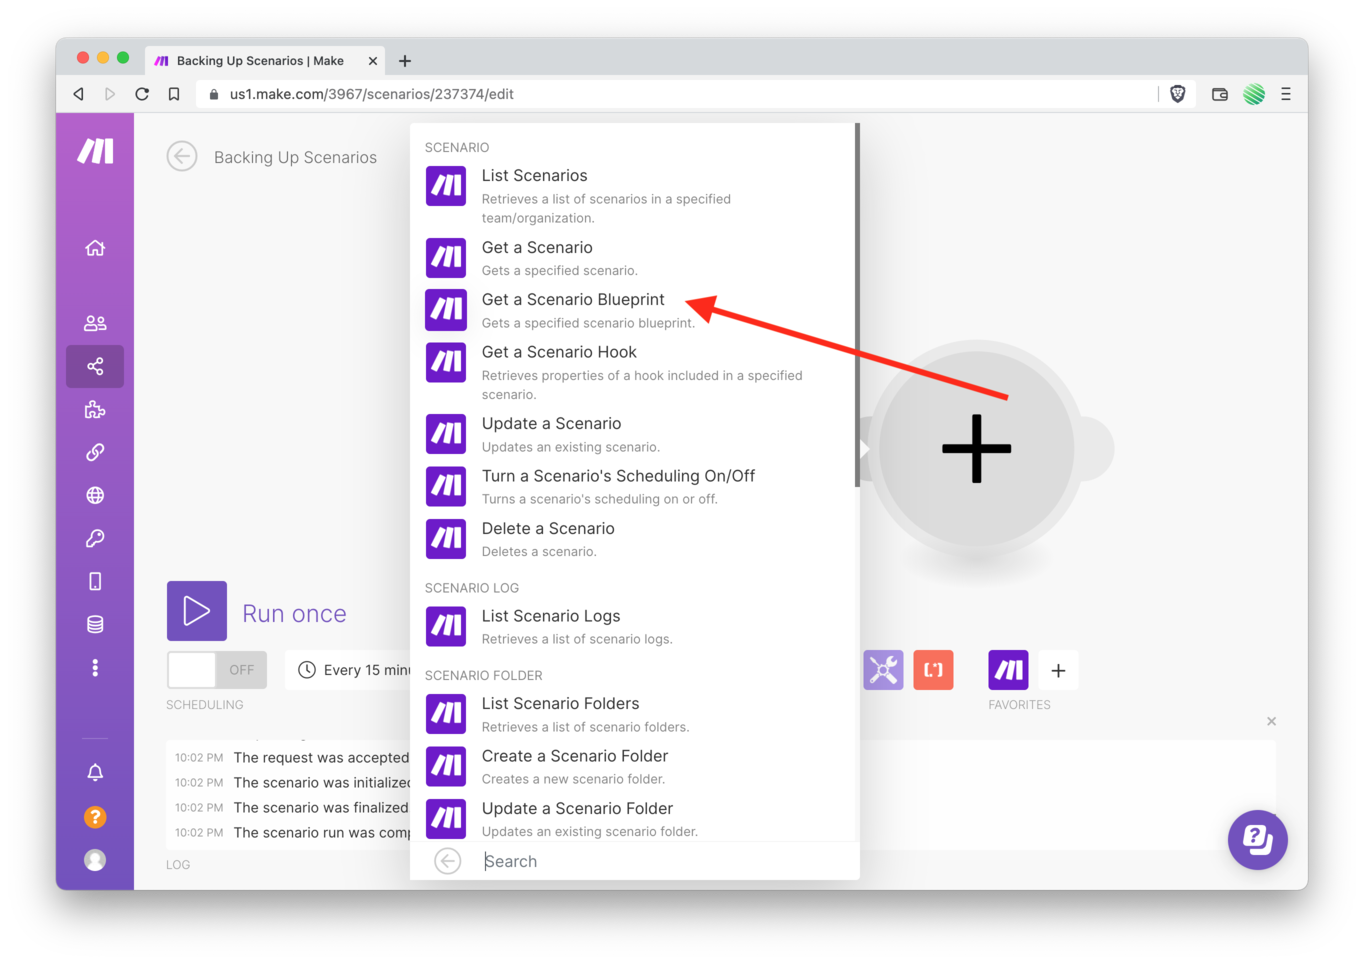
Select “Get a Scenario Blueprint” from the list.
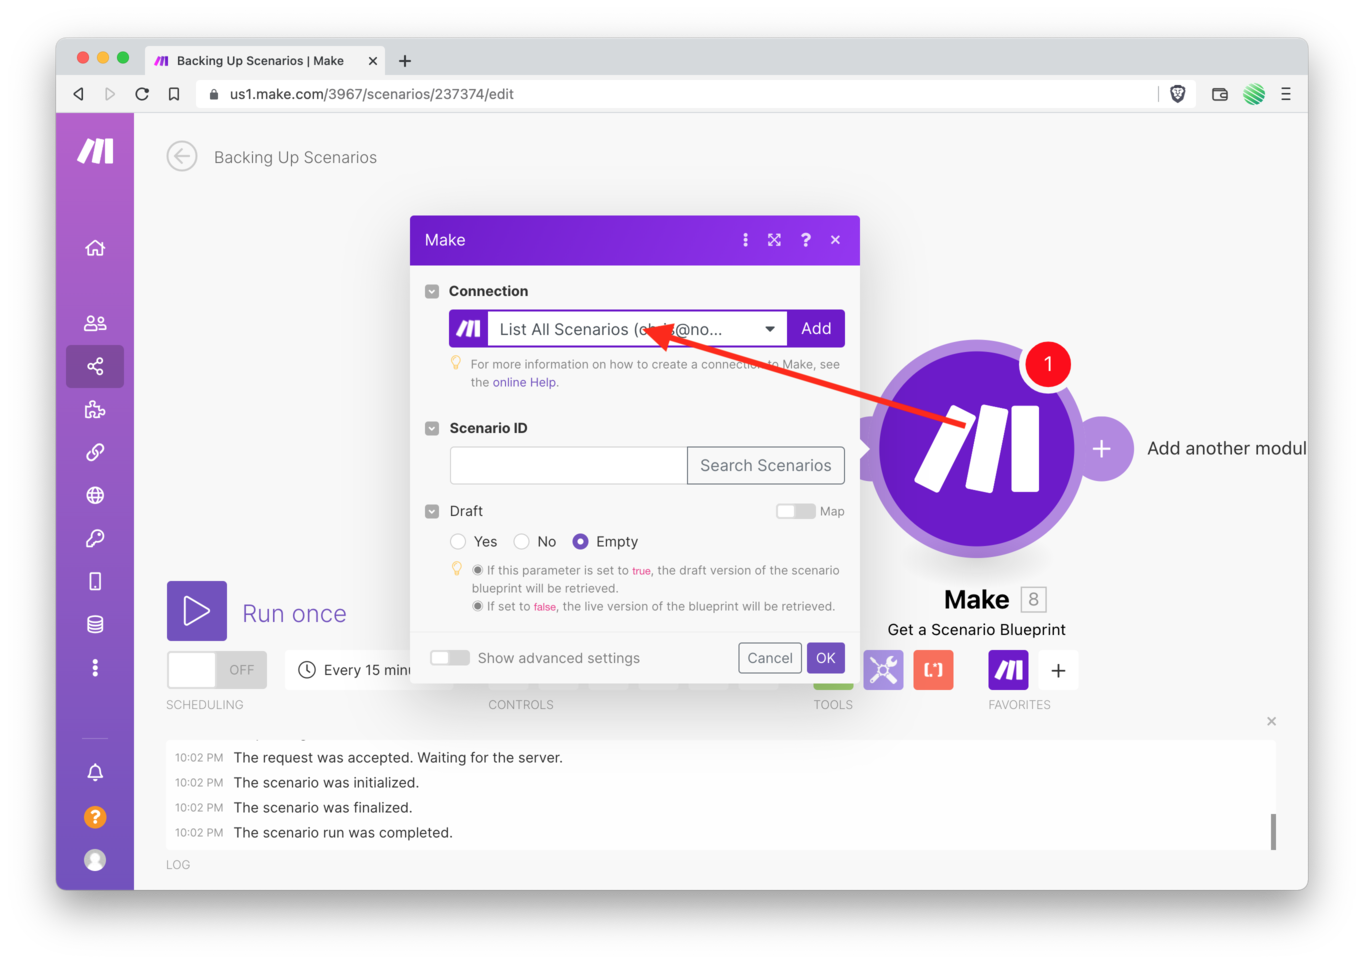
Reuse the connection you’ve just set up (“List All Scenario’s”).
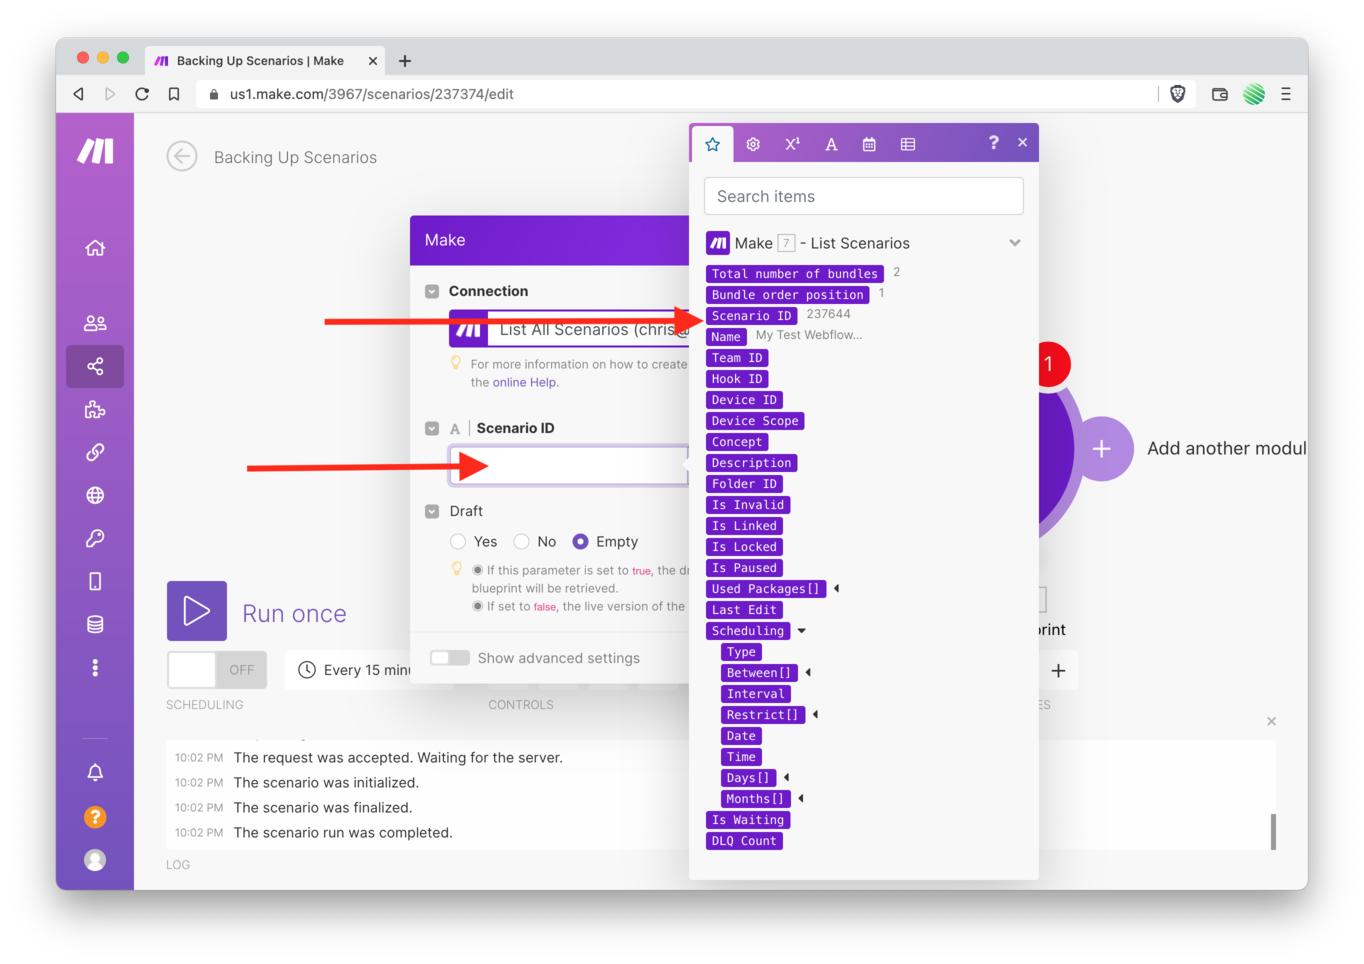
Choose the Scenario ID from the popup list.
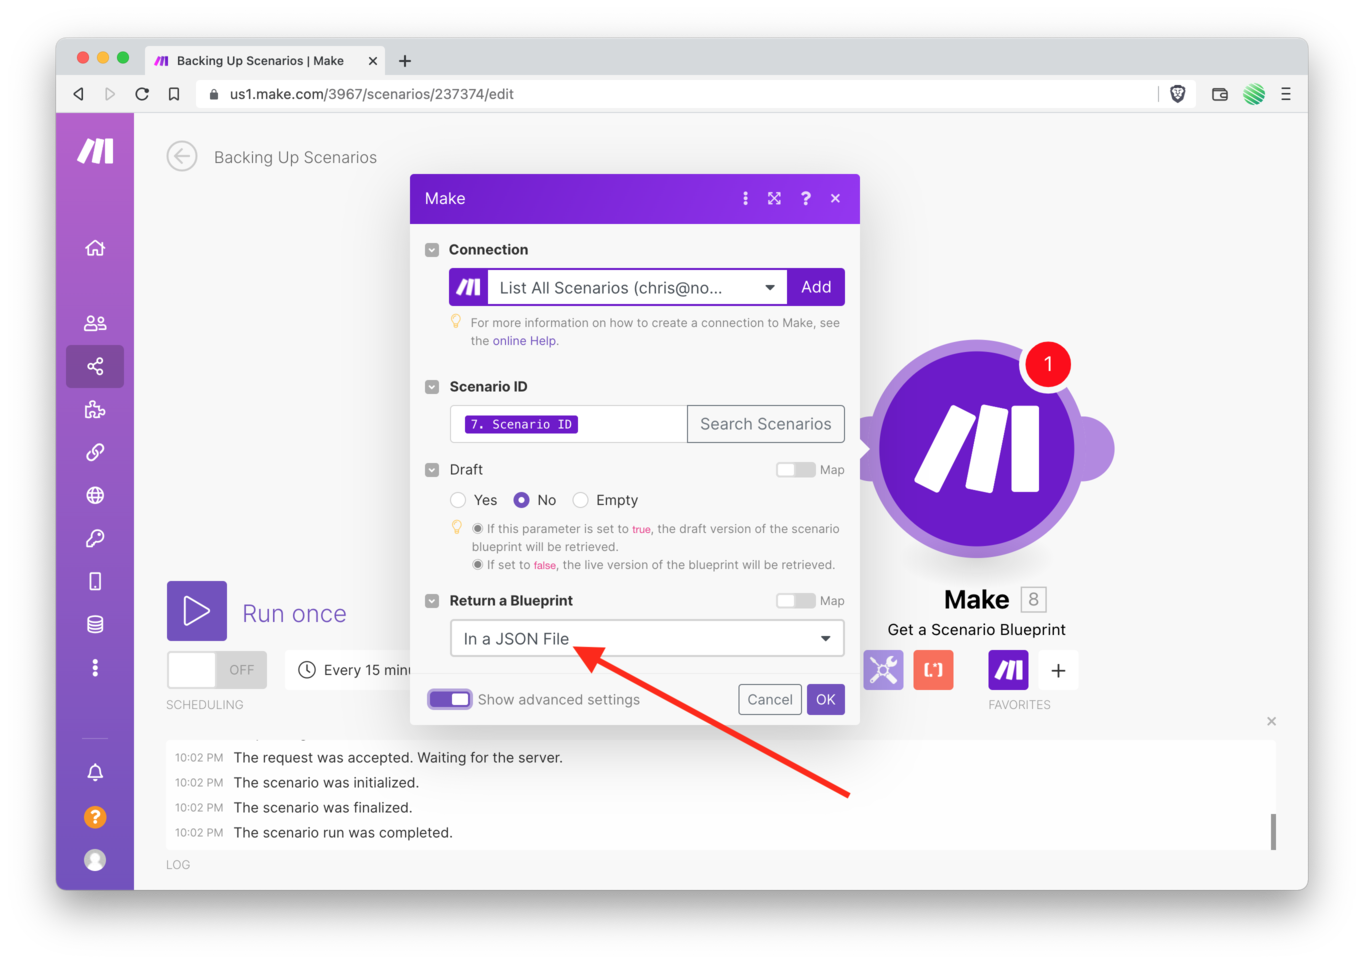
Select a JSON file to be returned.
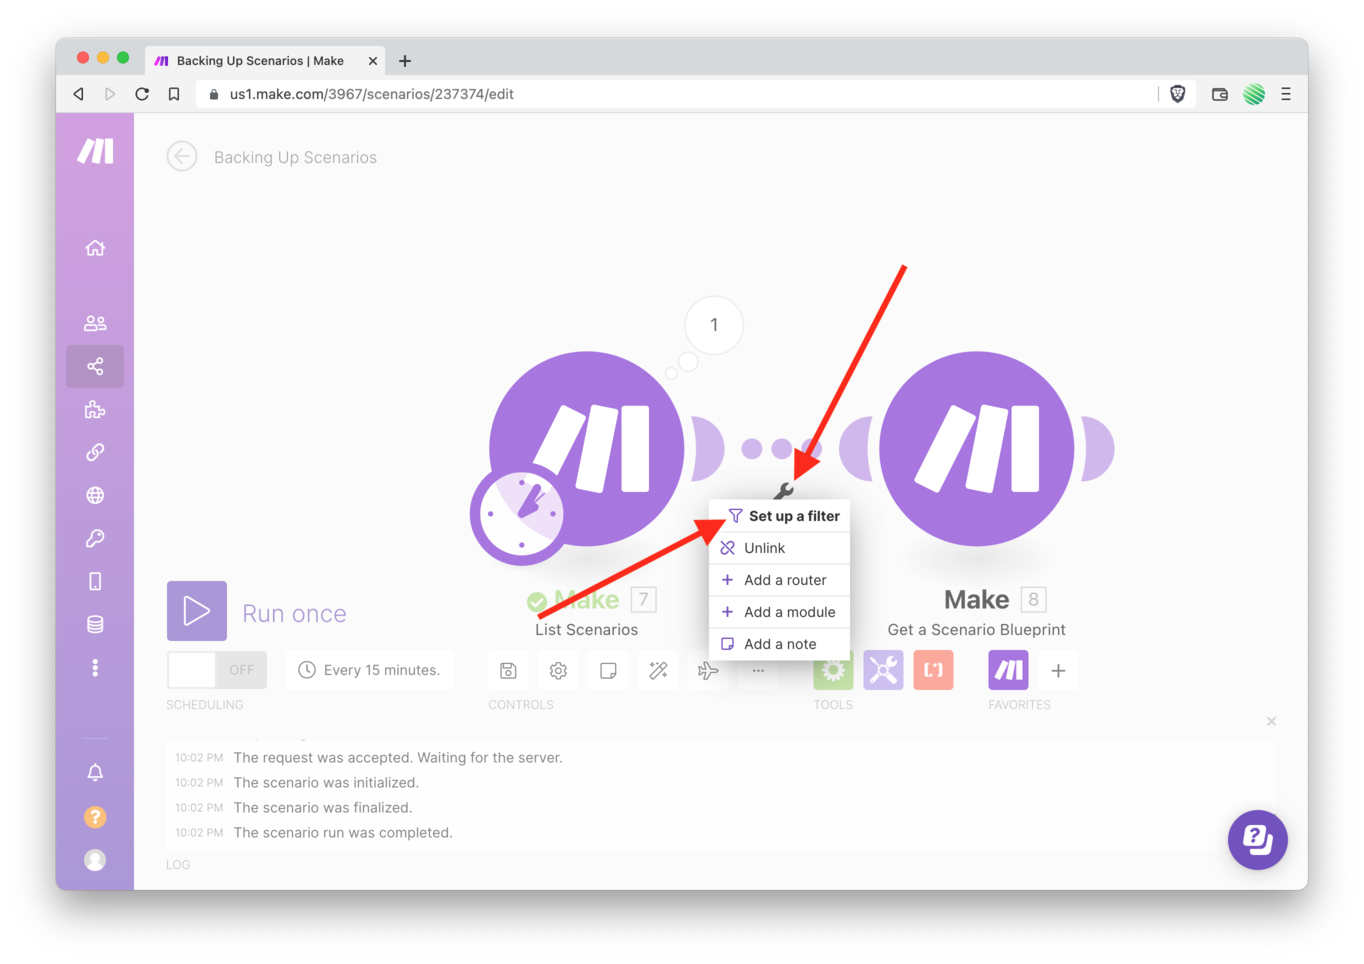
Problem is… maybe you only want one specific Scenario listed in a Folder or the root directory of your Make account. But when you list Scenario’s it returns ALL Scenario’s.
Let’s fix that.
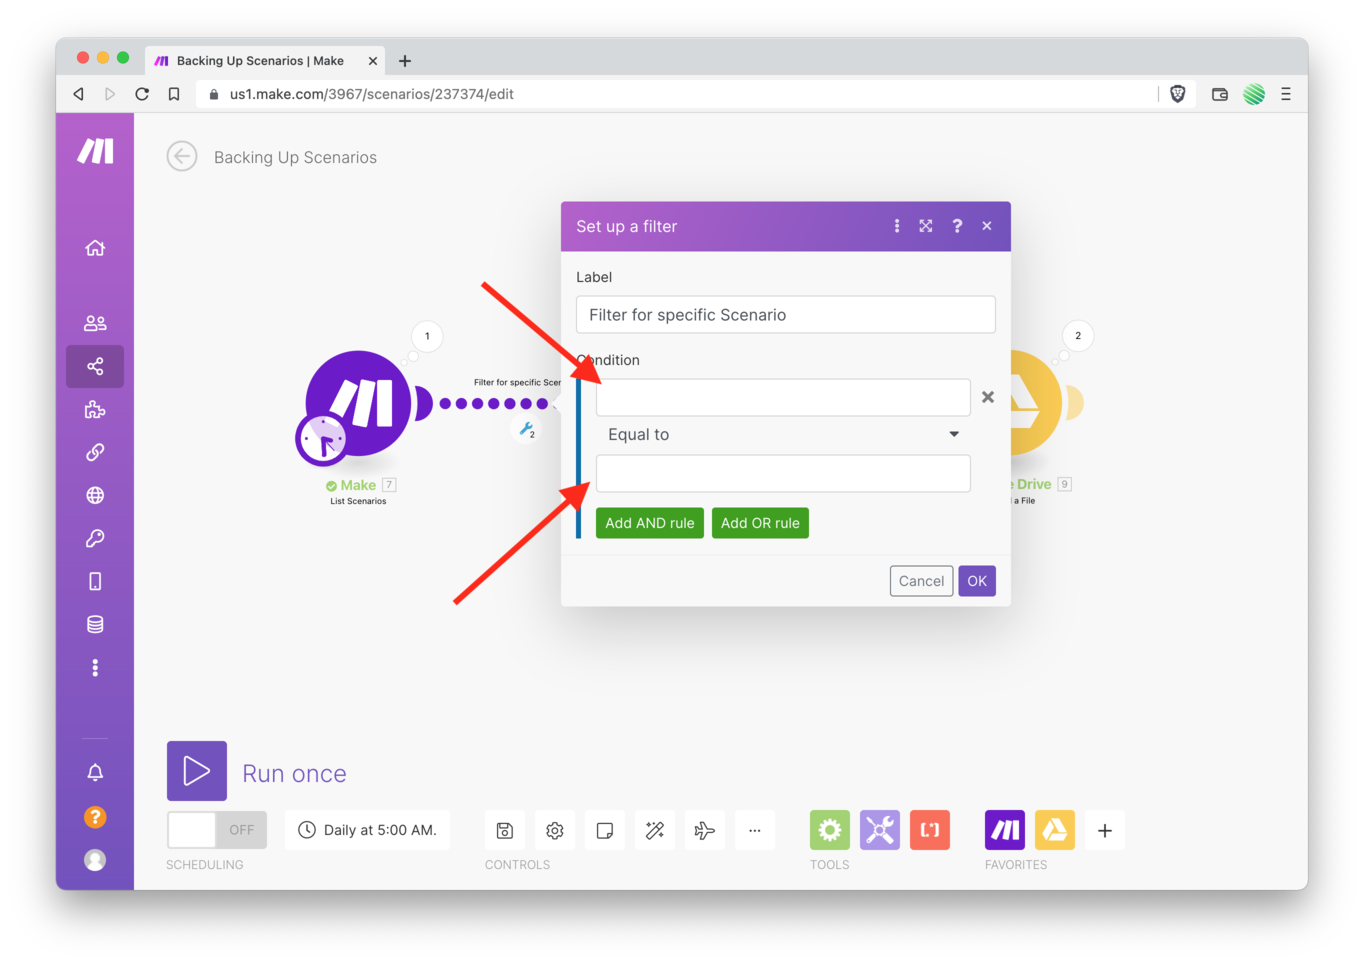
Hovering your mouse over the connection dots between your modules will display a little wrench icon. Tap it. Select “Setup a filter” from the menu.
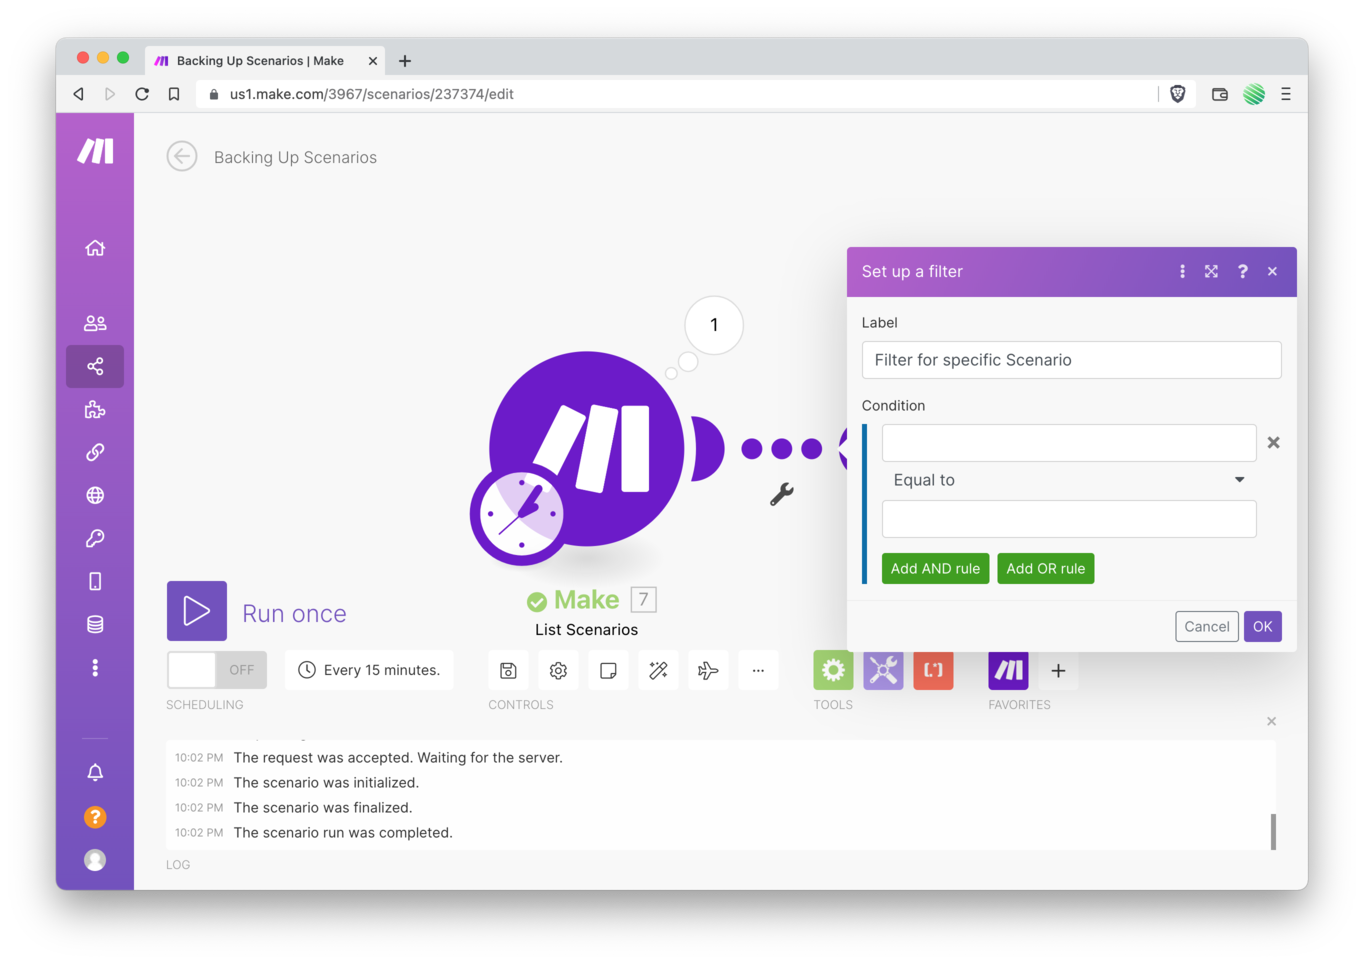
Give your new filter a descriptive name.
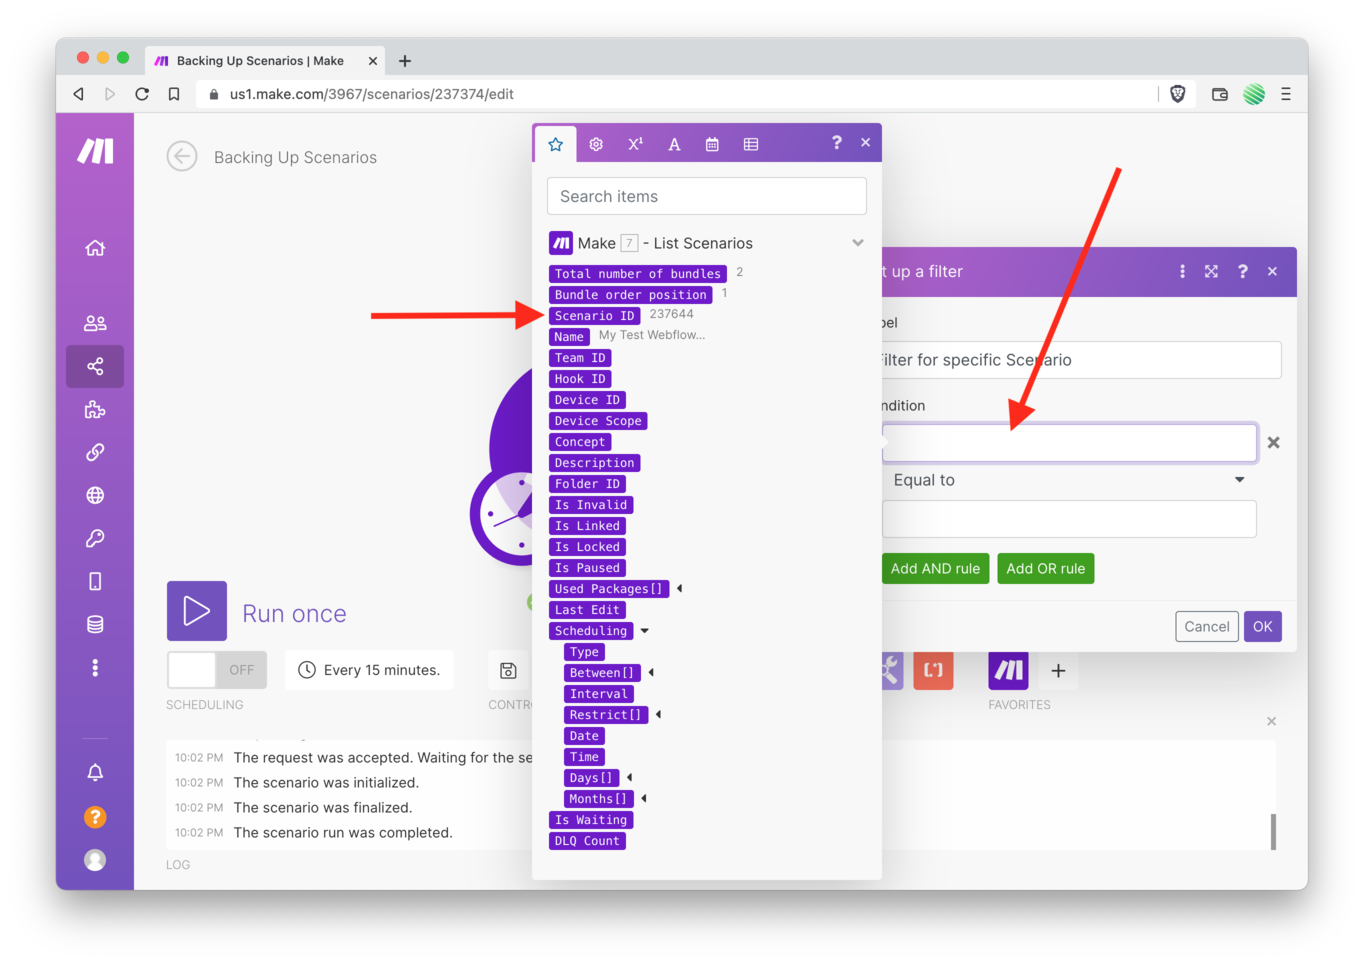
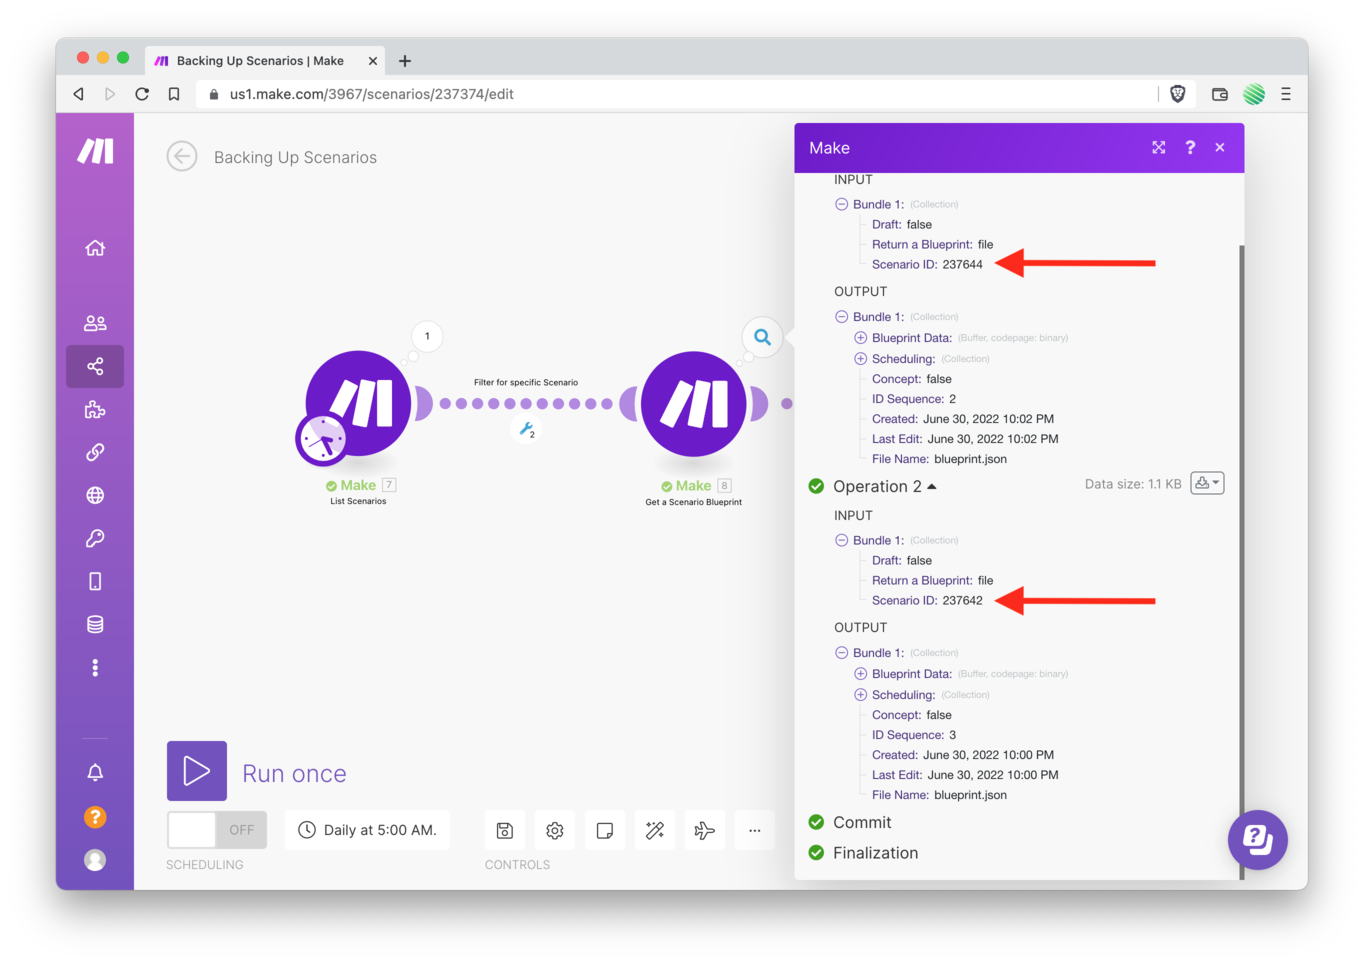
Now setup the conditions that will filter your data. Tap on the “Condition” field and select “Scenario ID” from the list of options.
This says that when a Scenario get’s passed from the first module to the second, it’ll look at the Scenario ID field. If it matches the value you’ll add next, it’ll continue to the second module, otherwise it won’t.
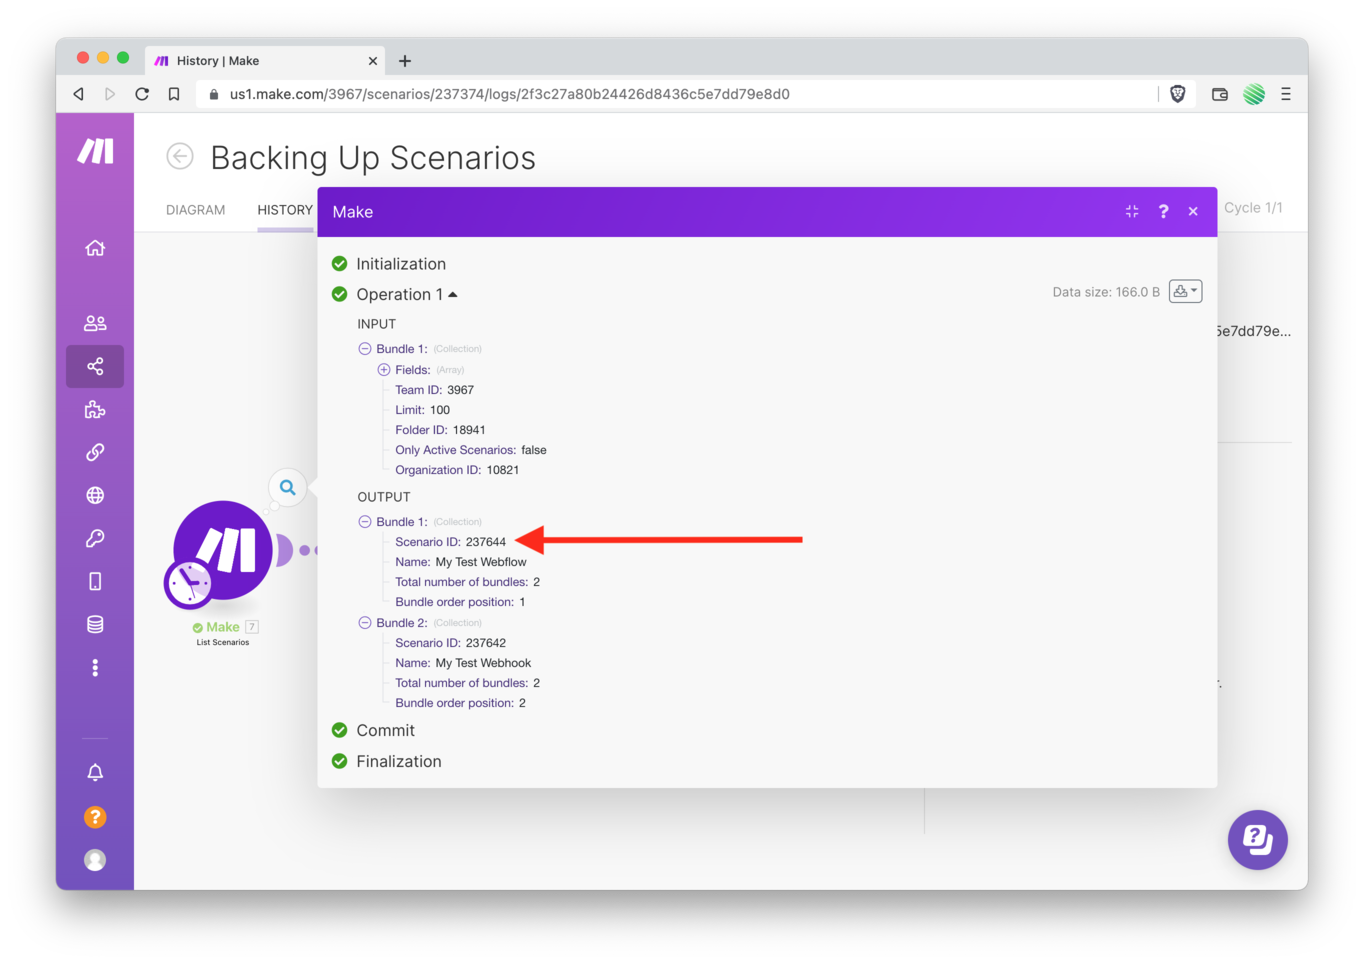
You’ll need to re-open the results of your first module and find the Scenario ID that you’d like to pass from the first module to the second module. Take a look at the screenshot above for the one I’m using.
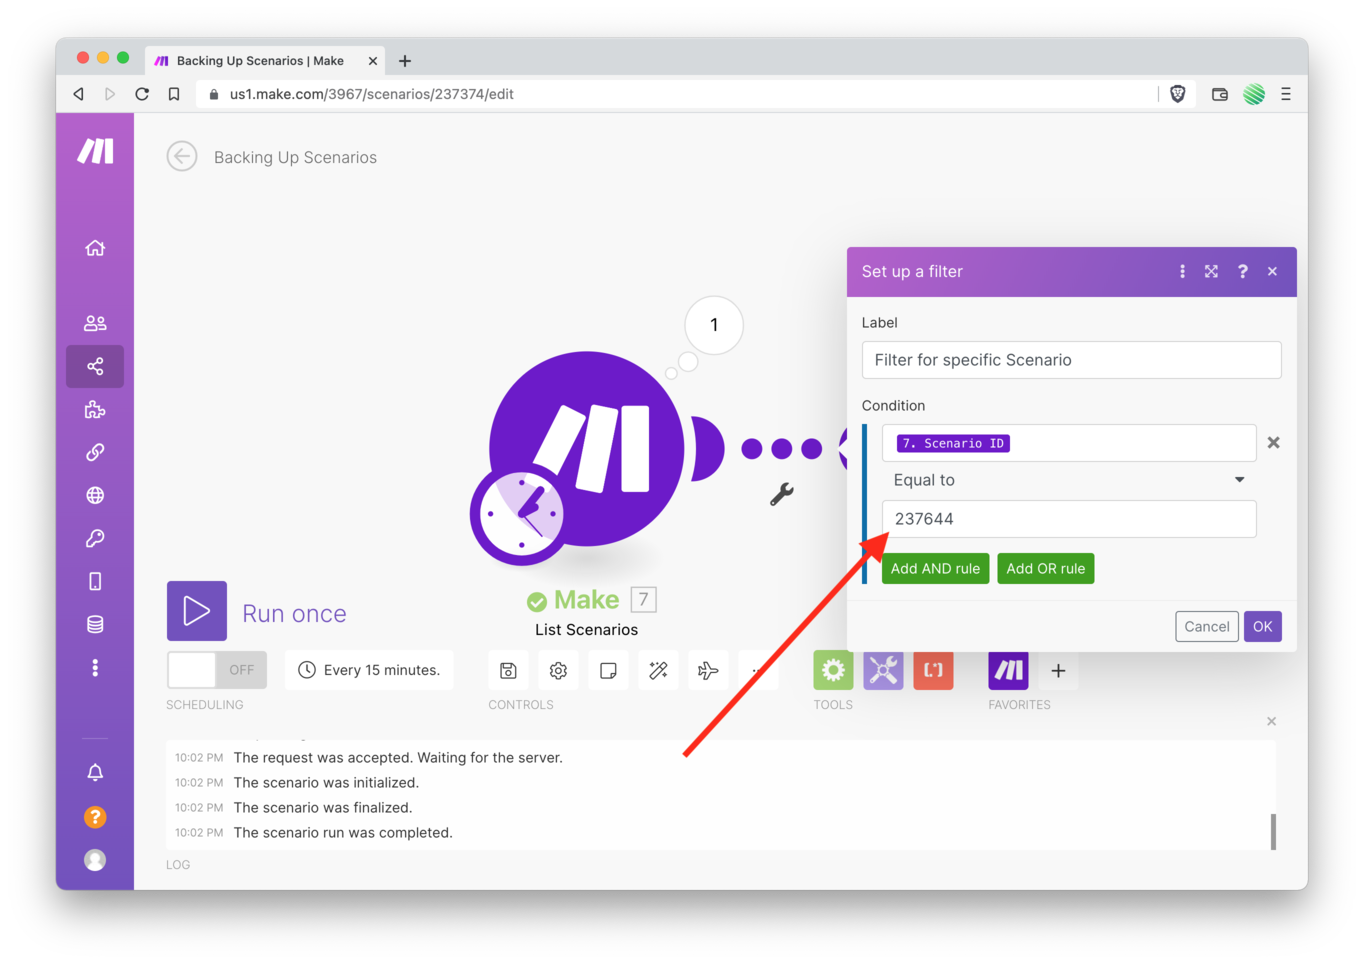
I copy & paste into the “Equals to” field of the filter.
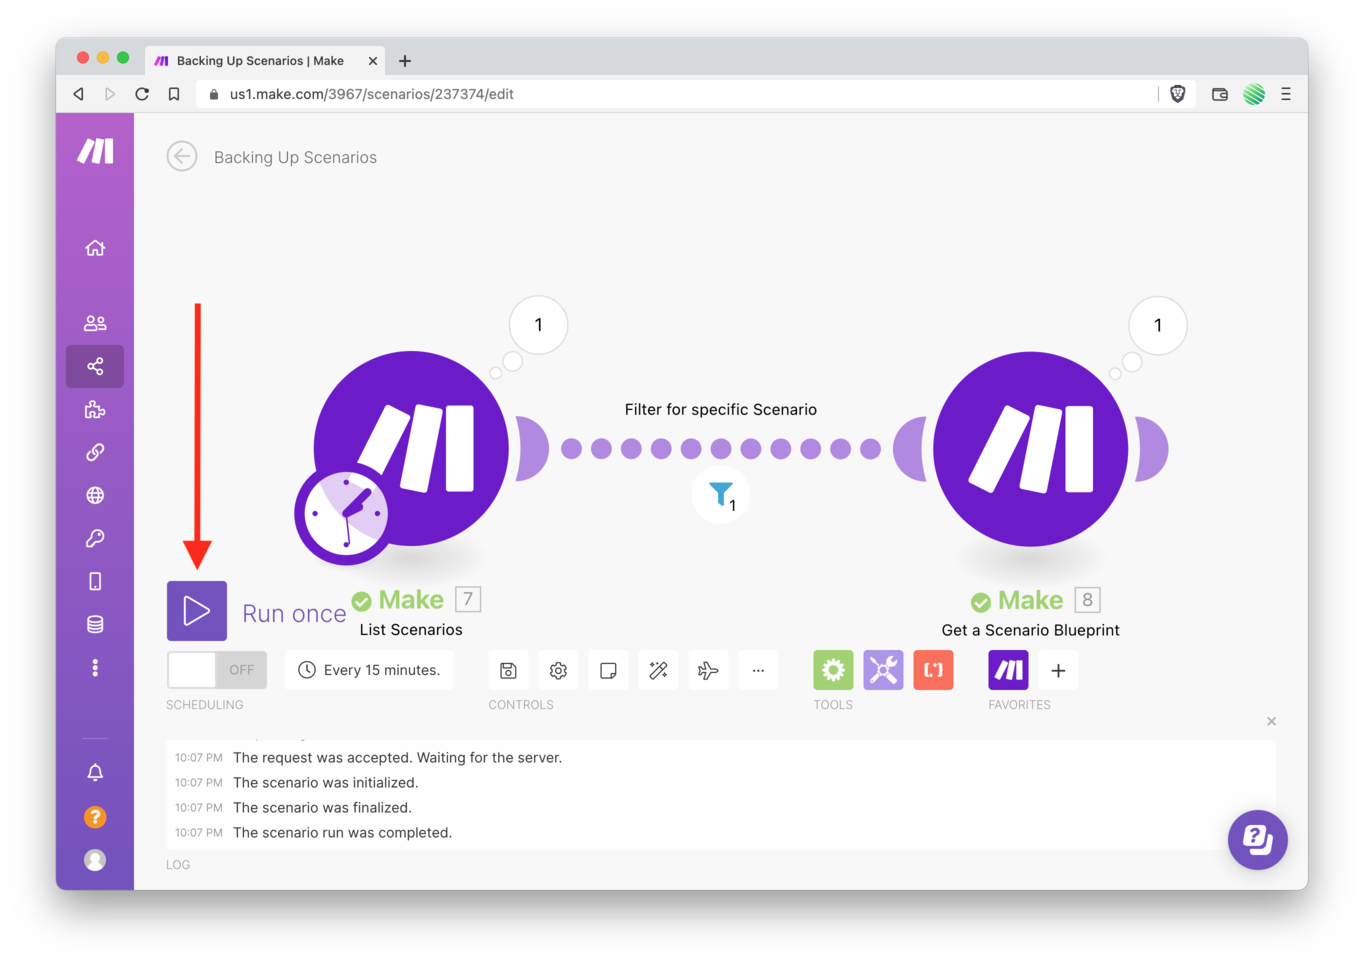
All set up. Give it a try.
Tap on the “Run once” button.
Check the results of your second module.
Boom 💥
Out of the 2 Scenario’s listed in the Test Folder only one of them passed through the new filter setup.
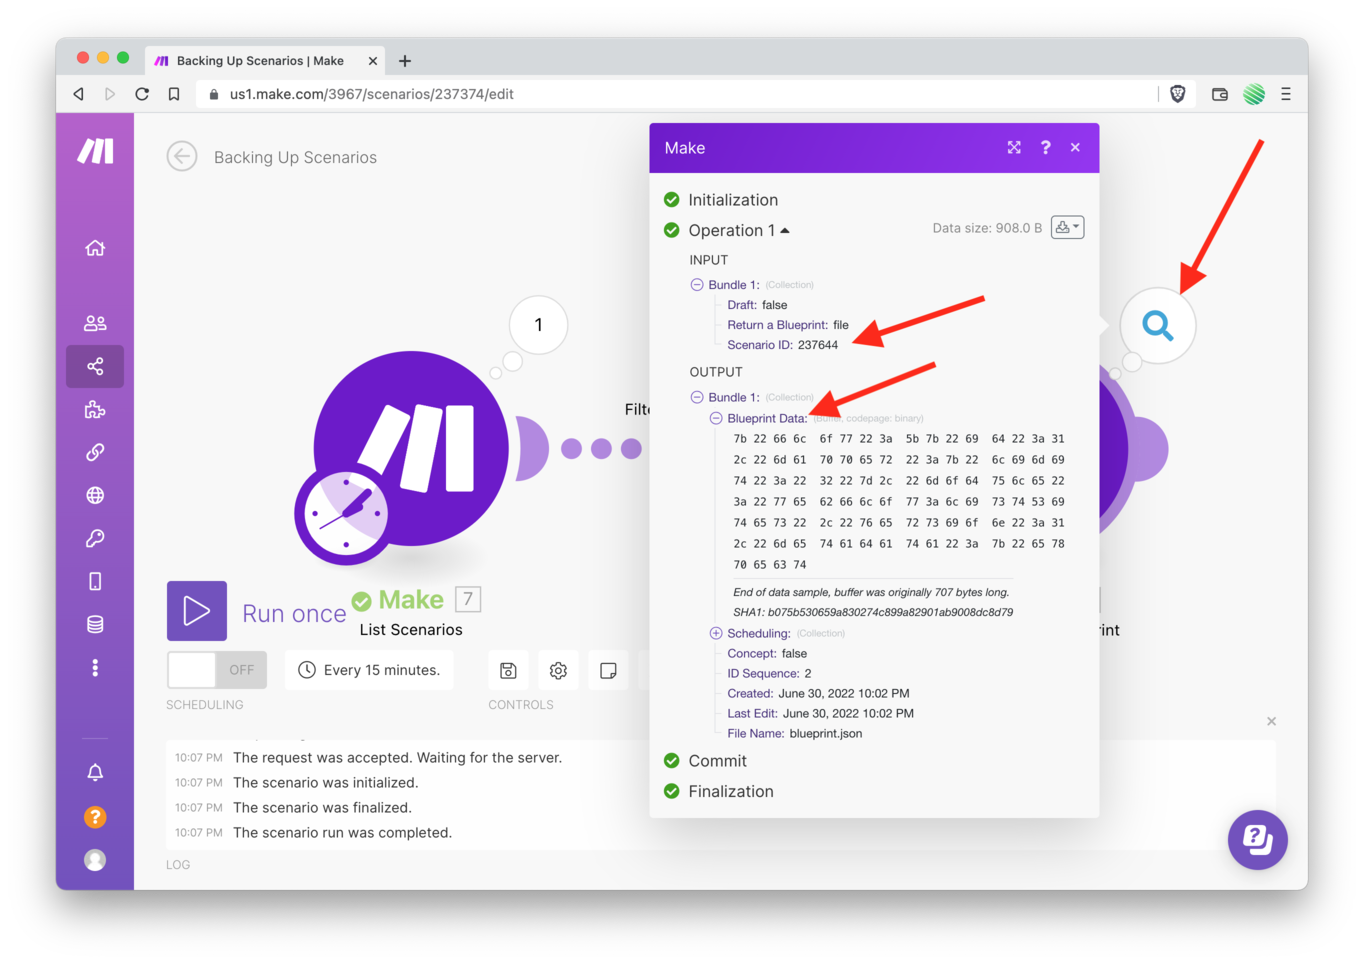
Notice the “Blueprint Data” field in the results. That’s the encoded file that contains the exported Blueprint. You can’t read it in this format, but that’s okay. Next you’ll upload this to Google Drive where it will be readable.
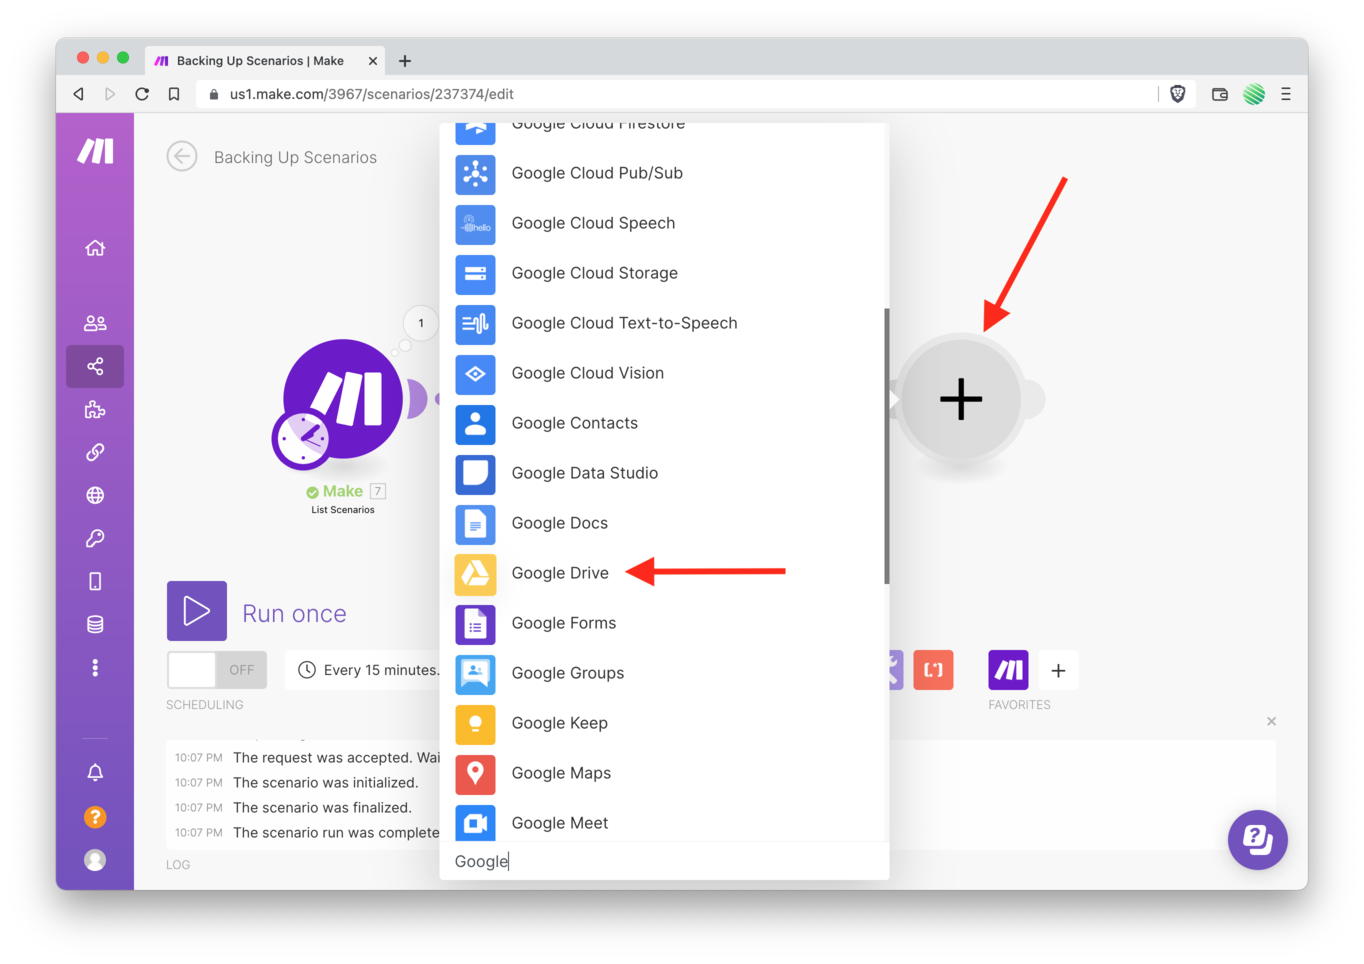
Add another module, search for Google, and select Google Drive from the list of results.
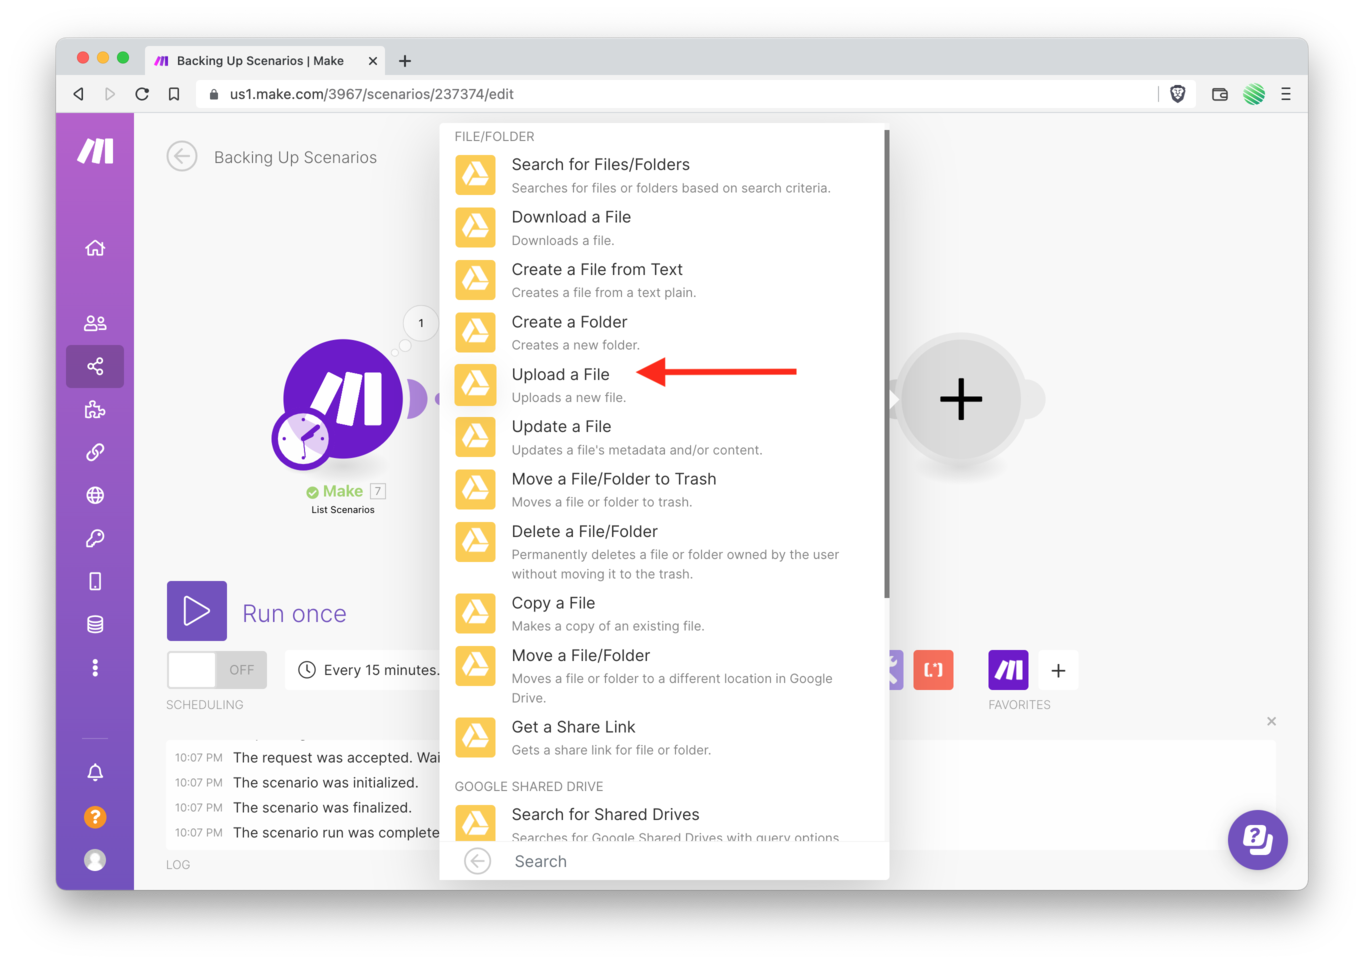
Next select “Upload a File” from the list options.
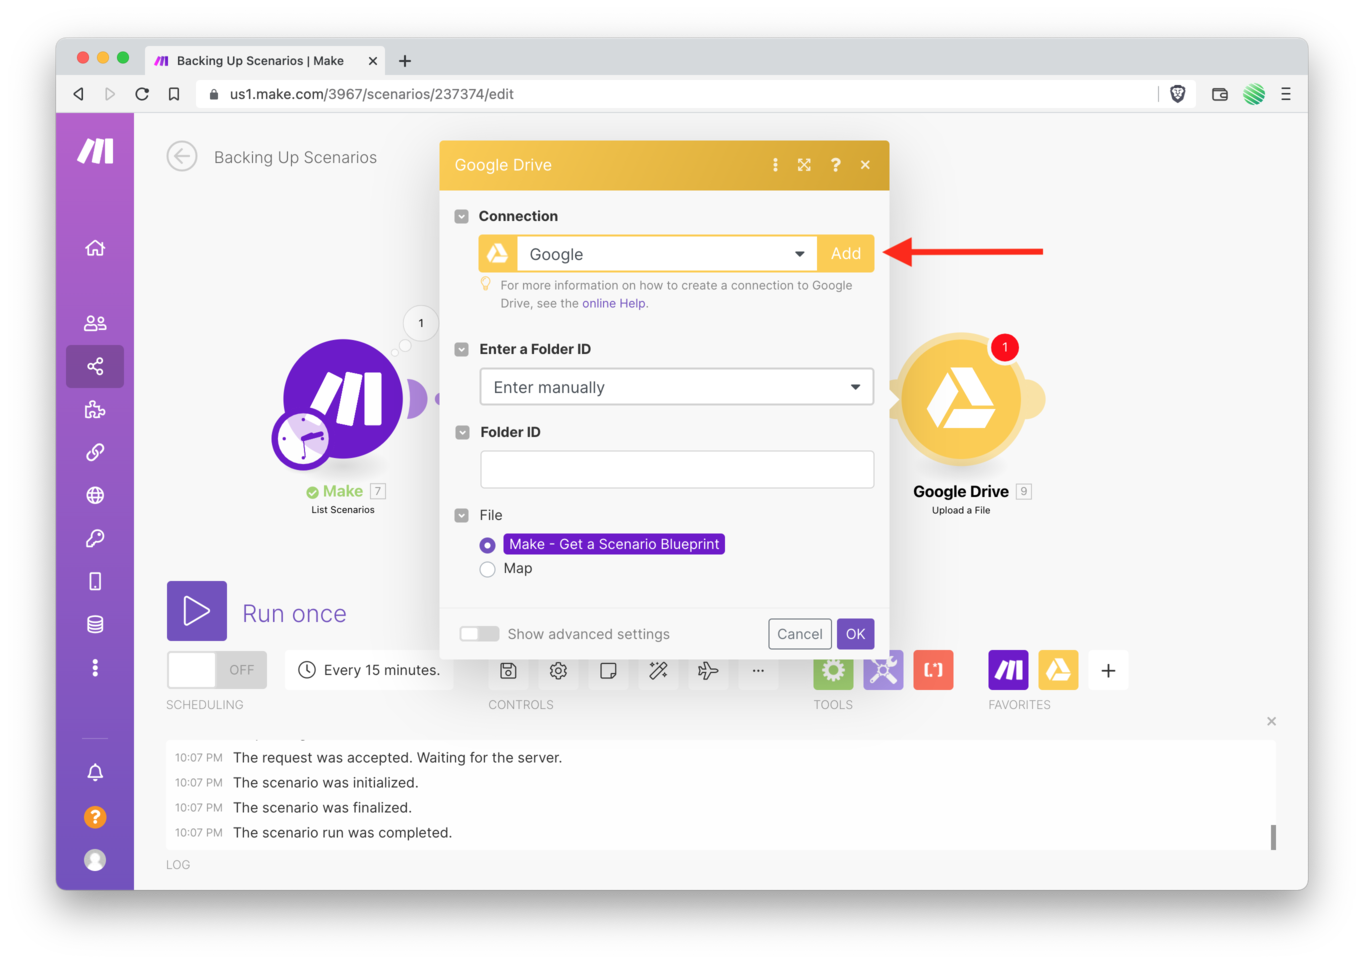
Tap the “Add” button on the new popup. Here you’ll go through the process of granting access to your Google account so the file may be uploaded.
Do that now.
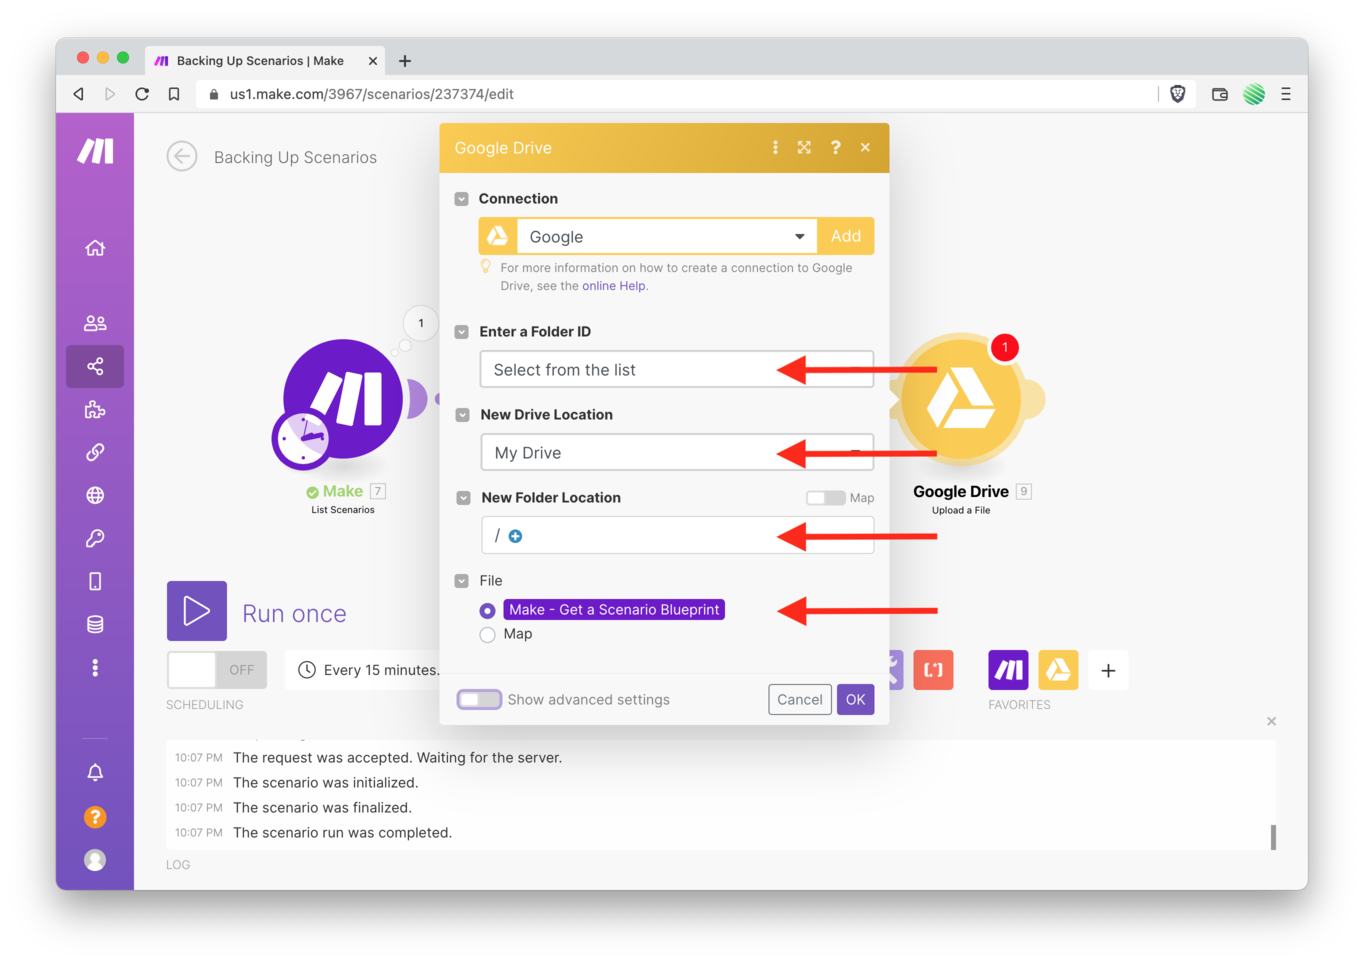
Once done, select the options as shown in the screenshot above.
Easy!
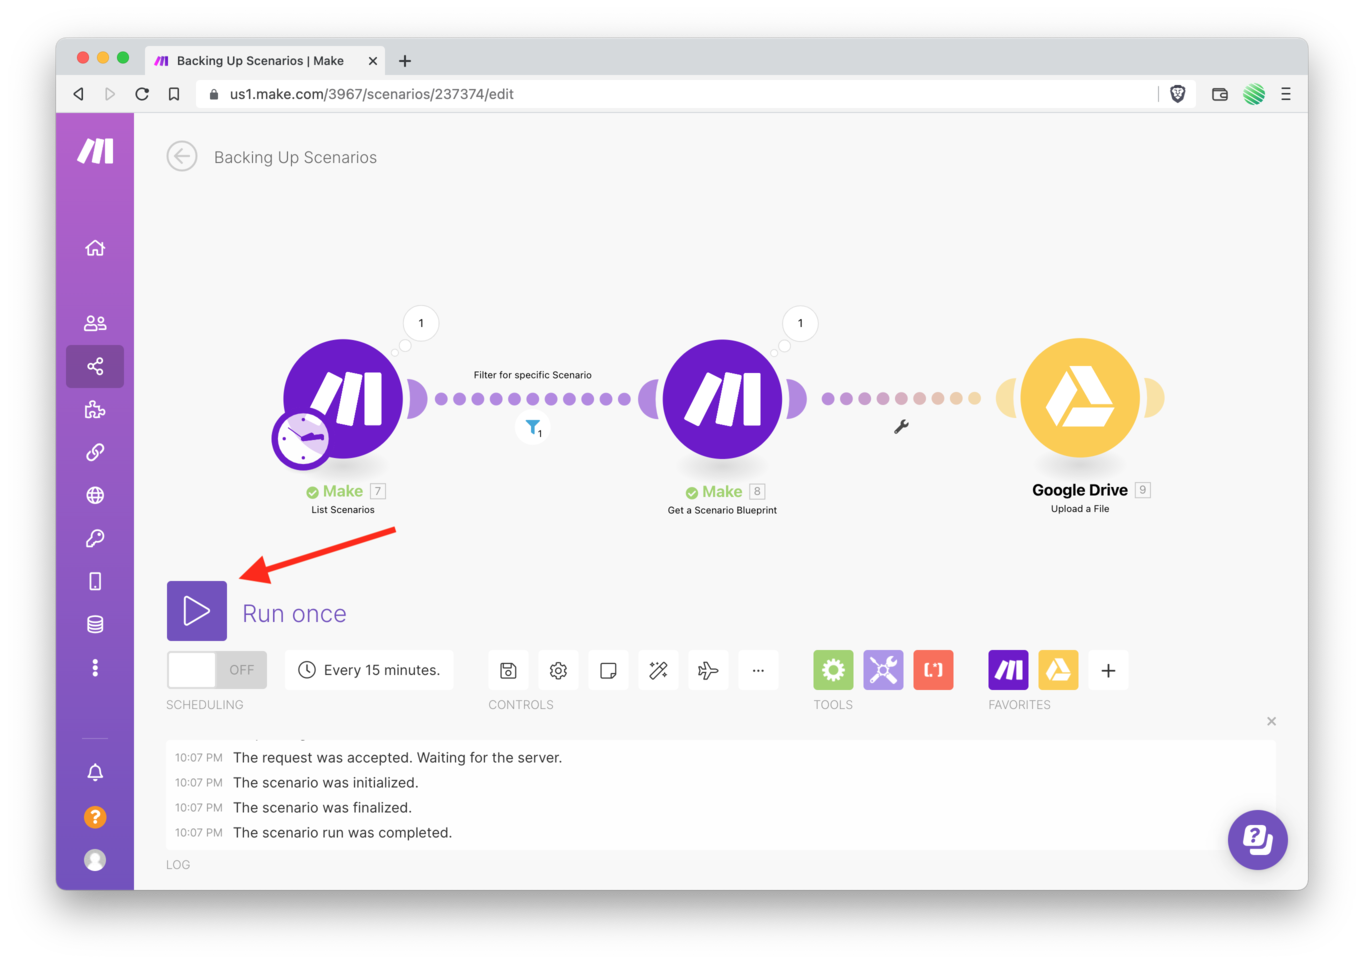
Let’s give it a try.
Tap the “Run once” button.
See that the Google Drive module had a successful result.

Open up your Google Drive and find the upload Scenario Blueprint.

Open up the file in Google Drive and see the JSON formatted text that represents your Make Scenario.
Worked great.
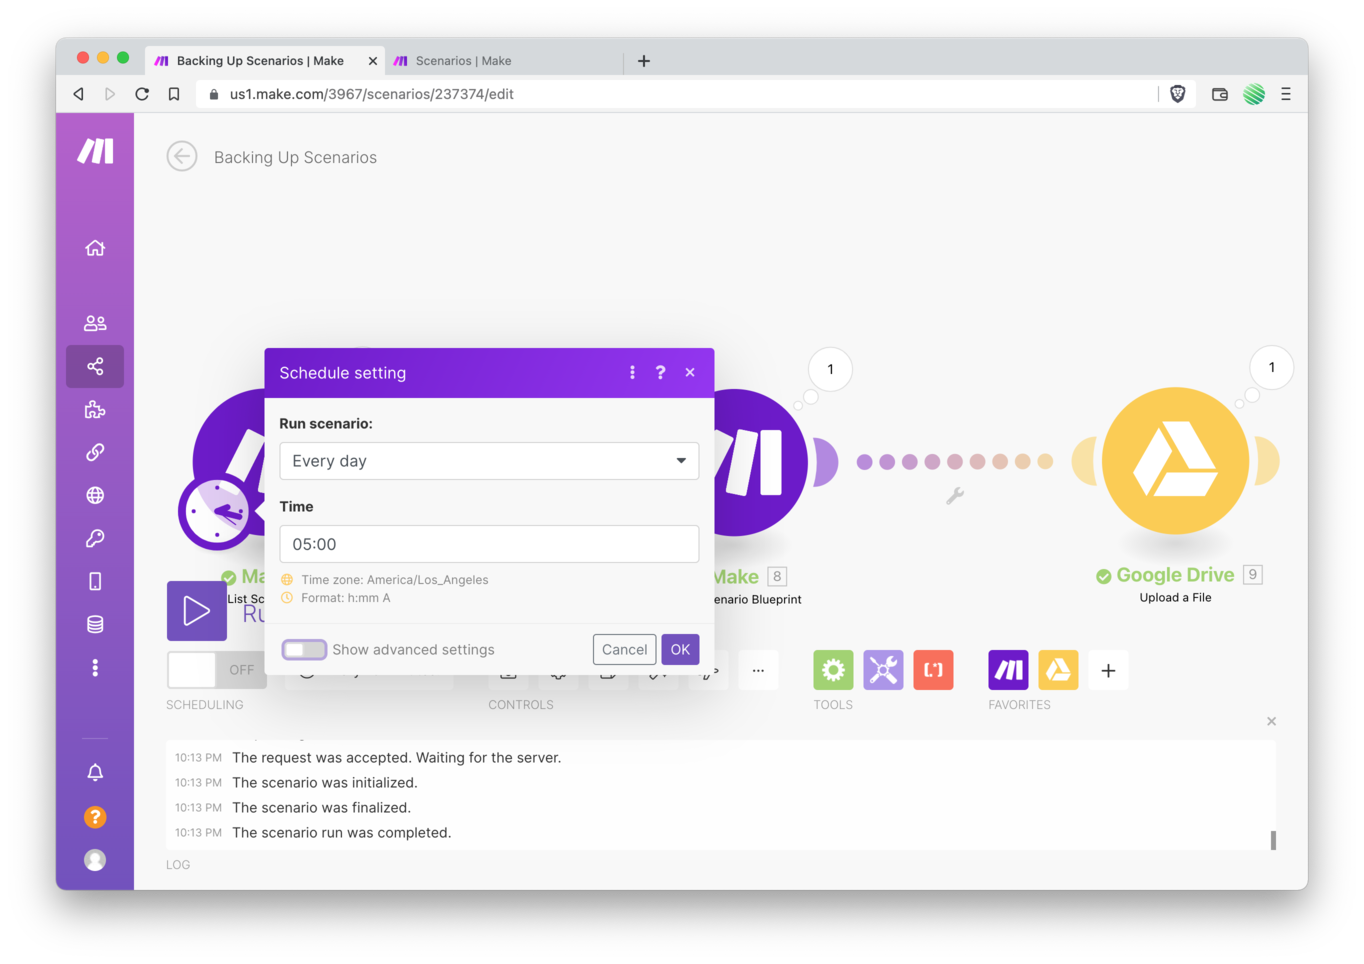
Next, setup a schedule for your Blueprint Backup Scneario.
I choose once per day at 5:00am. But you can choose anything you like here.
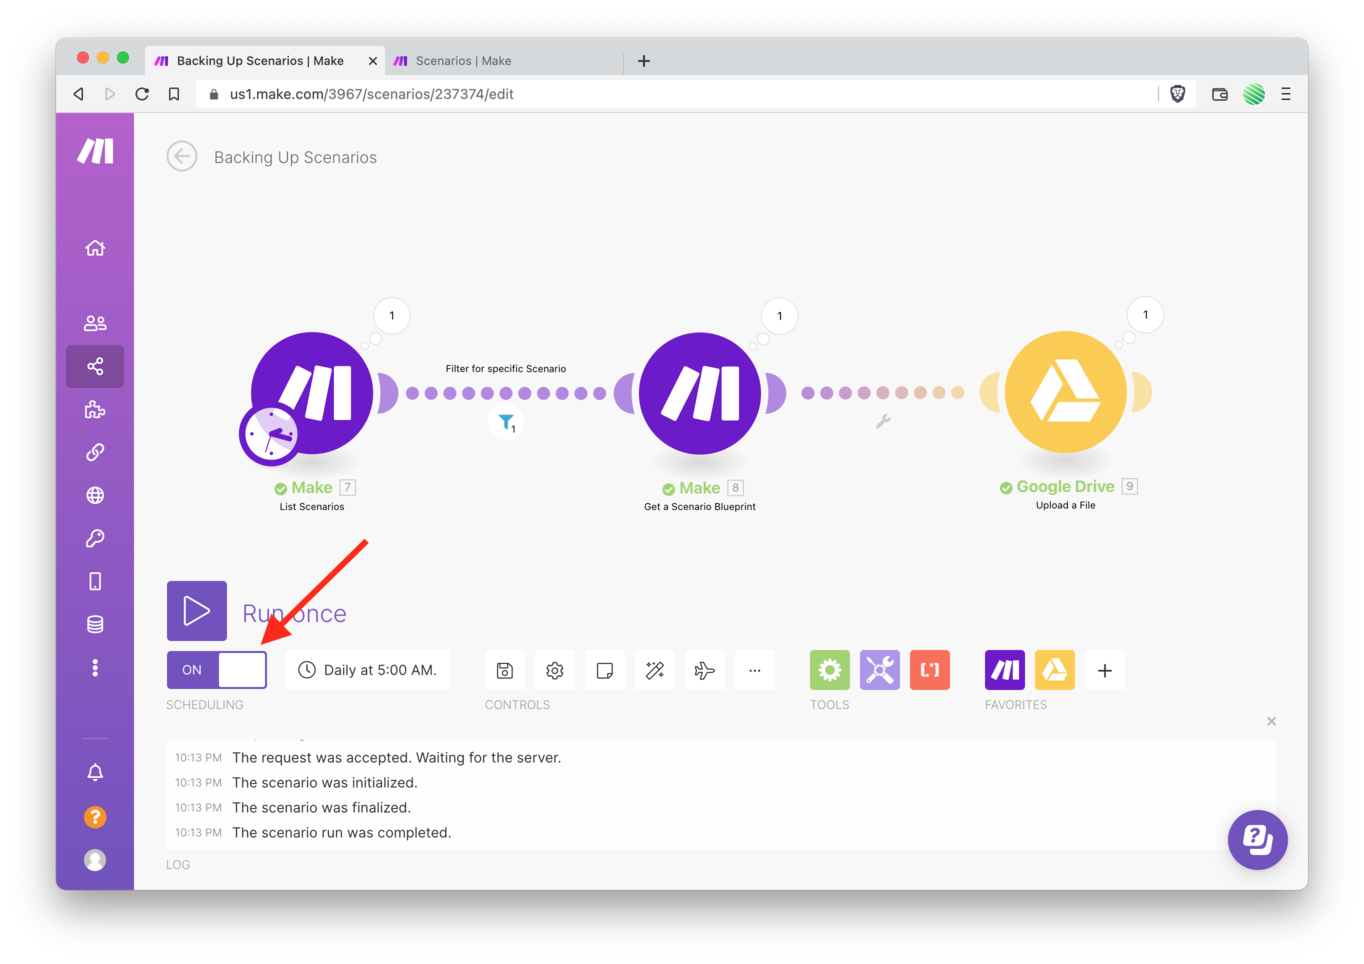
Turn on your Scenario and you’re good to go.
But how do you this really works? If you need to use that backed up Blueprint are you confident that it’ll work when you need it to?
Let’s test it.
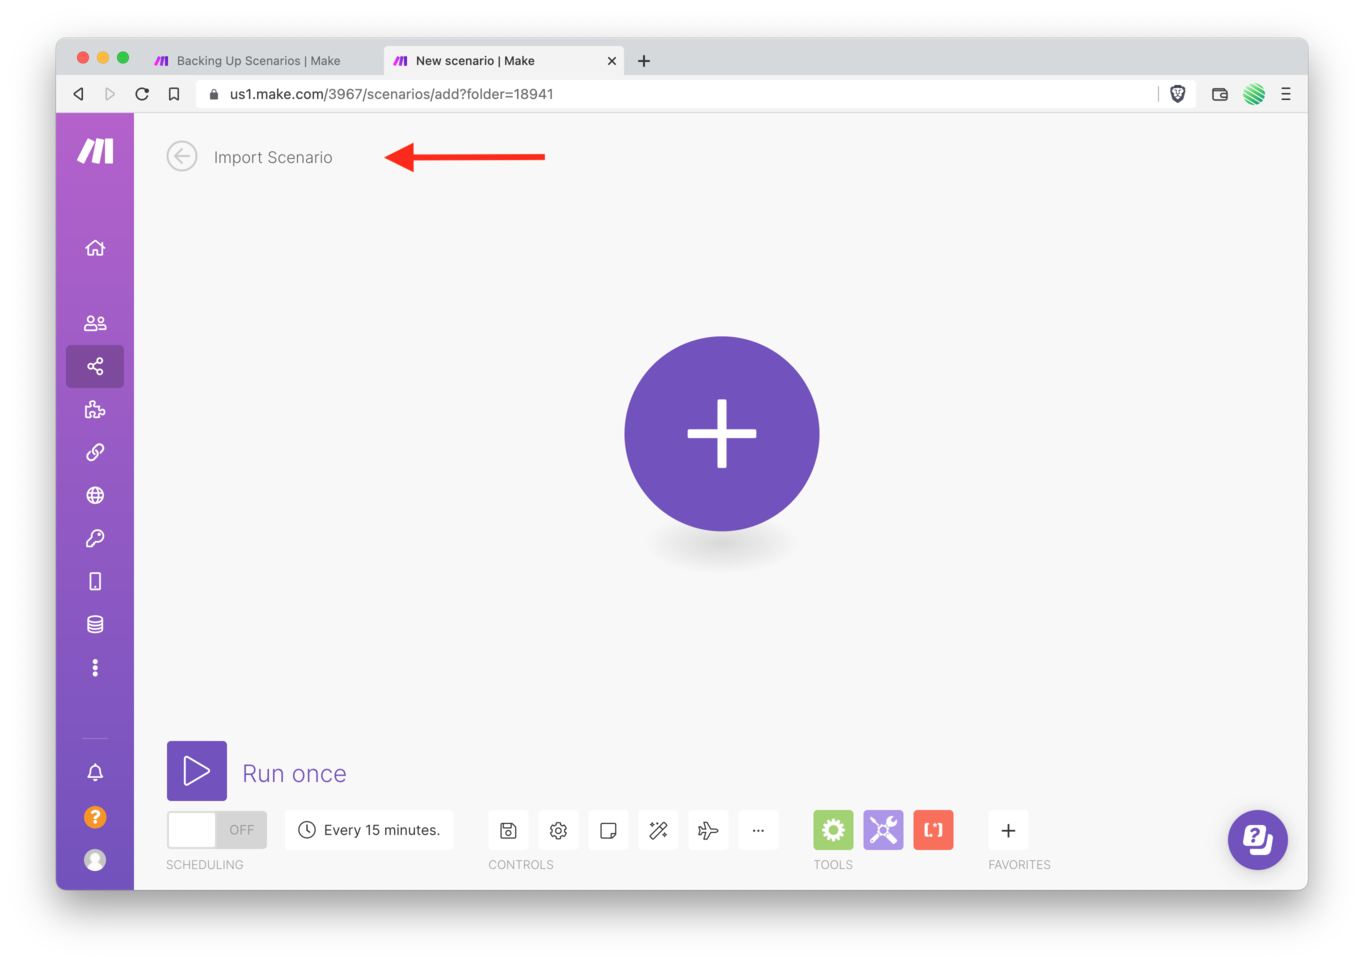
Create a new Make Scenario.
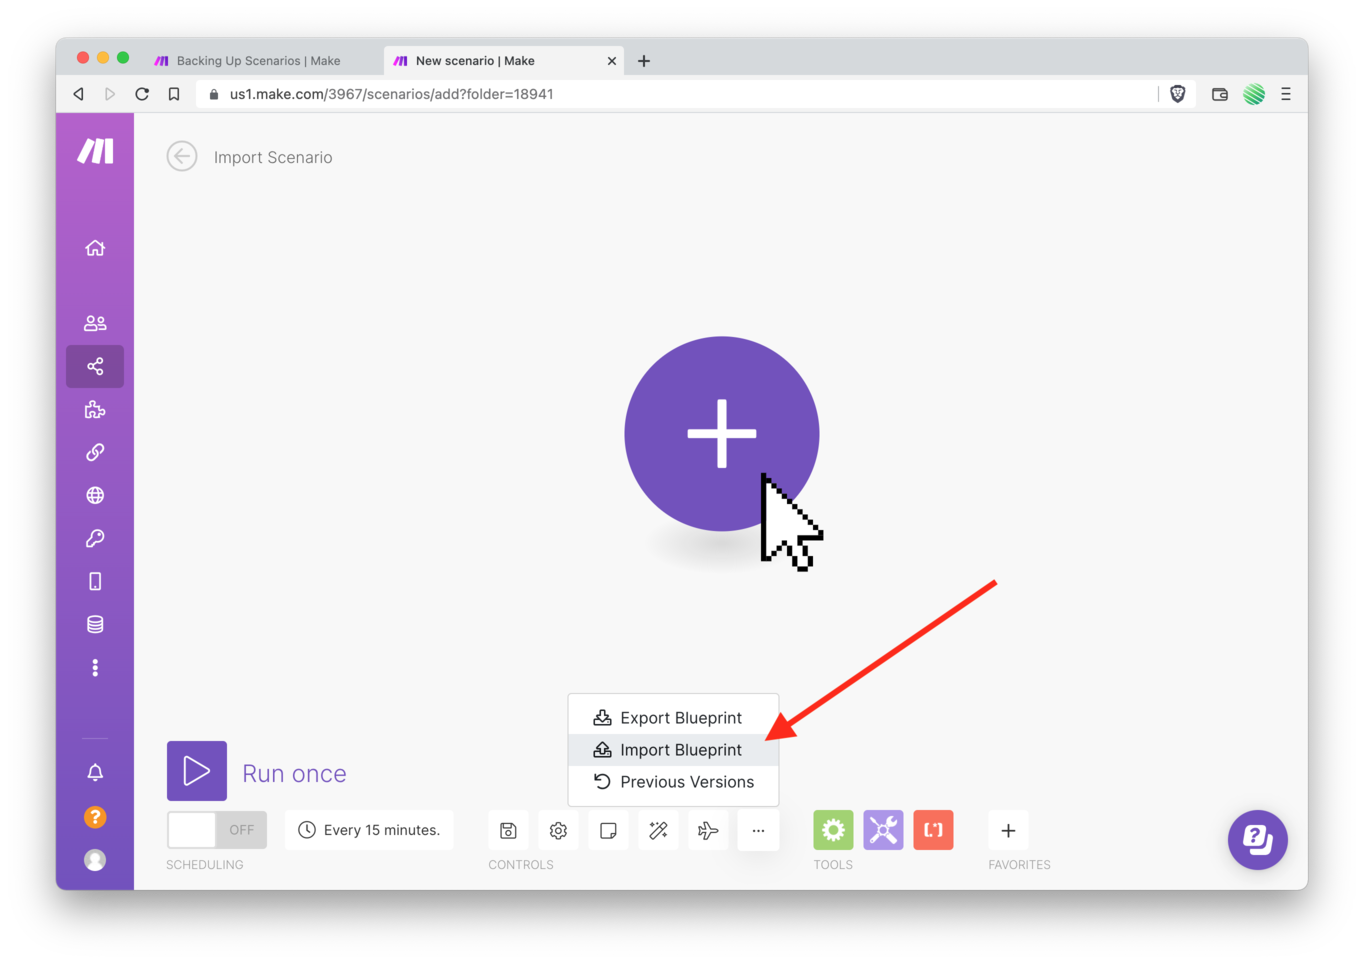
Find and tap the “Import Blueprint” link.
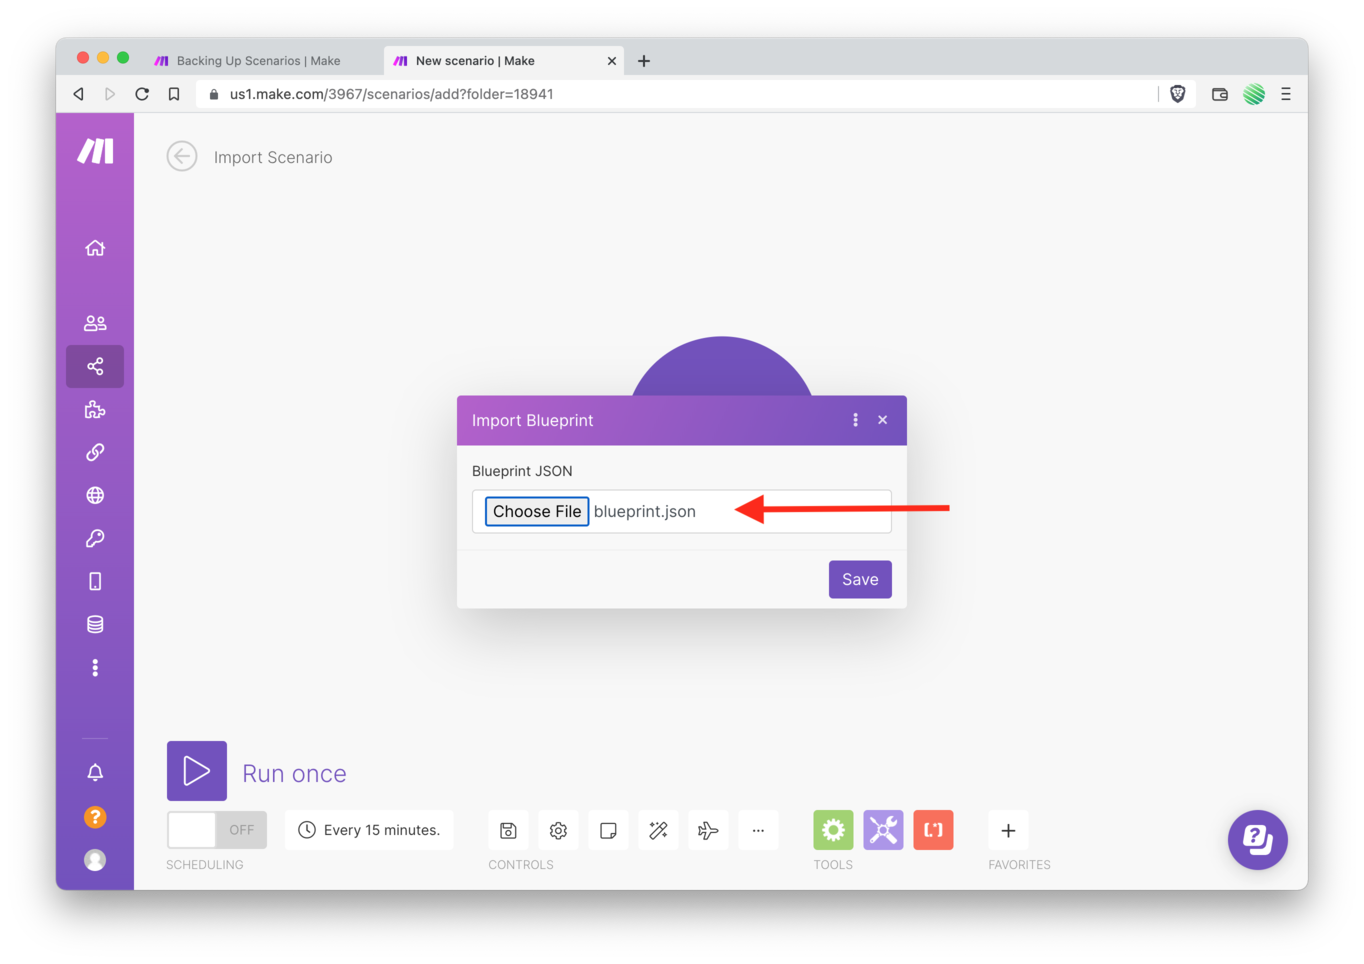
Download your blueprint file from Google Drive and select it for upload as shown in the screenshot above.
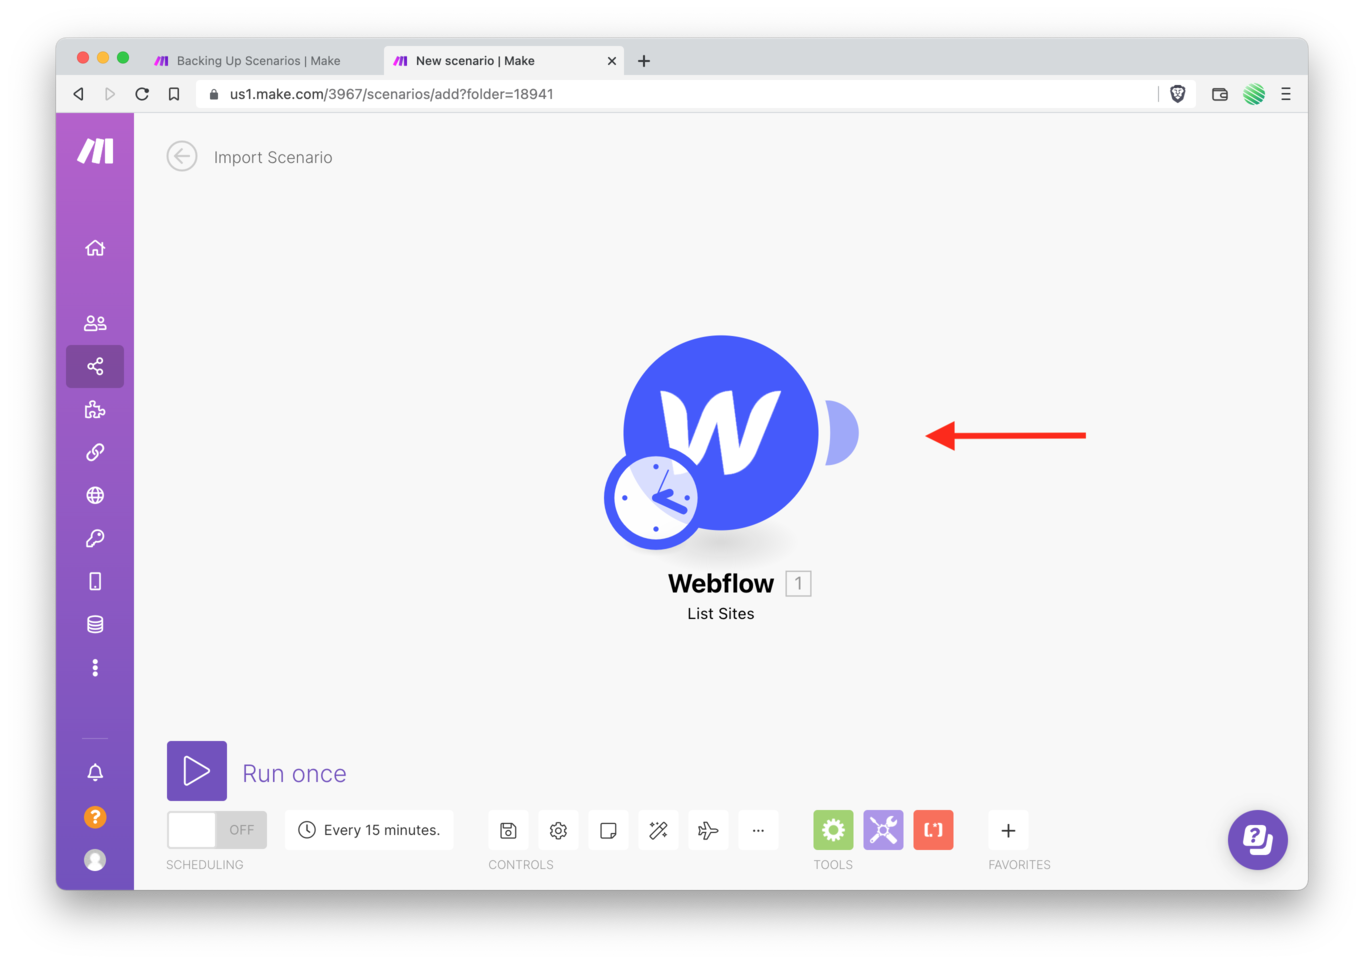
Tap the “Save” button and boom 💥 the Scenario you backed up and instantly setup and ready to go.
Amazing.
But… what if you want to back up all of your Scenario’s?
Well, the filter you setup stops that. Re-open your filter, remove the “Condition” fields, and save it.
Re-run your Scenario.
Notice how the results show 2 results (versus only 1 result with the filter). Remember, my Test Folder had 2 Scenario’s so you just grabbed all of the Scenario’s in that folder and backed them all up to your Google Drive.
If you checkout the results in the second Scenario you’ll see both are successfully listed.
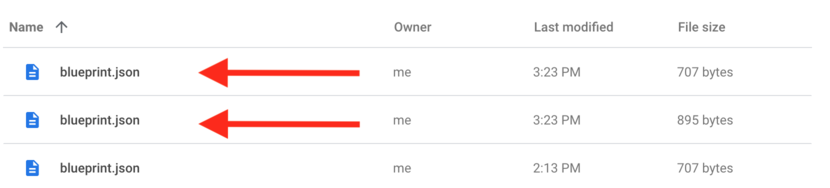
Re-open your Google Drive and there are the two new Blueprints.
But… what if you backup a lot of different Scenario’s? Having the files all named “blueprint.json” doesn’t tell you which Scenario it is.
Let’s fix that.
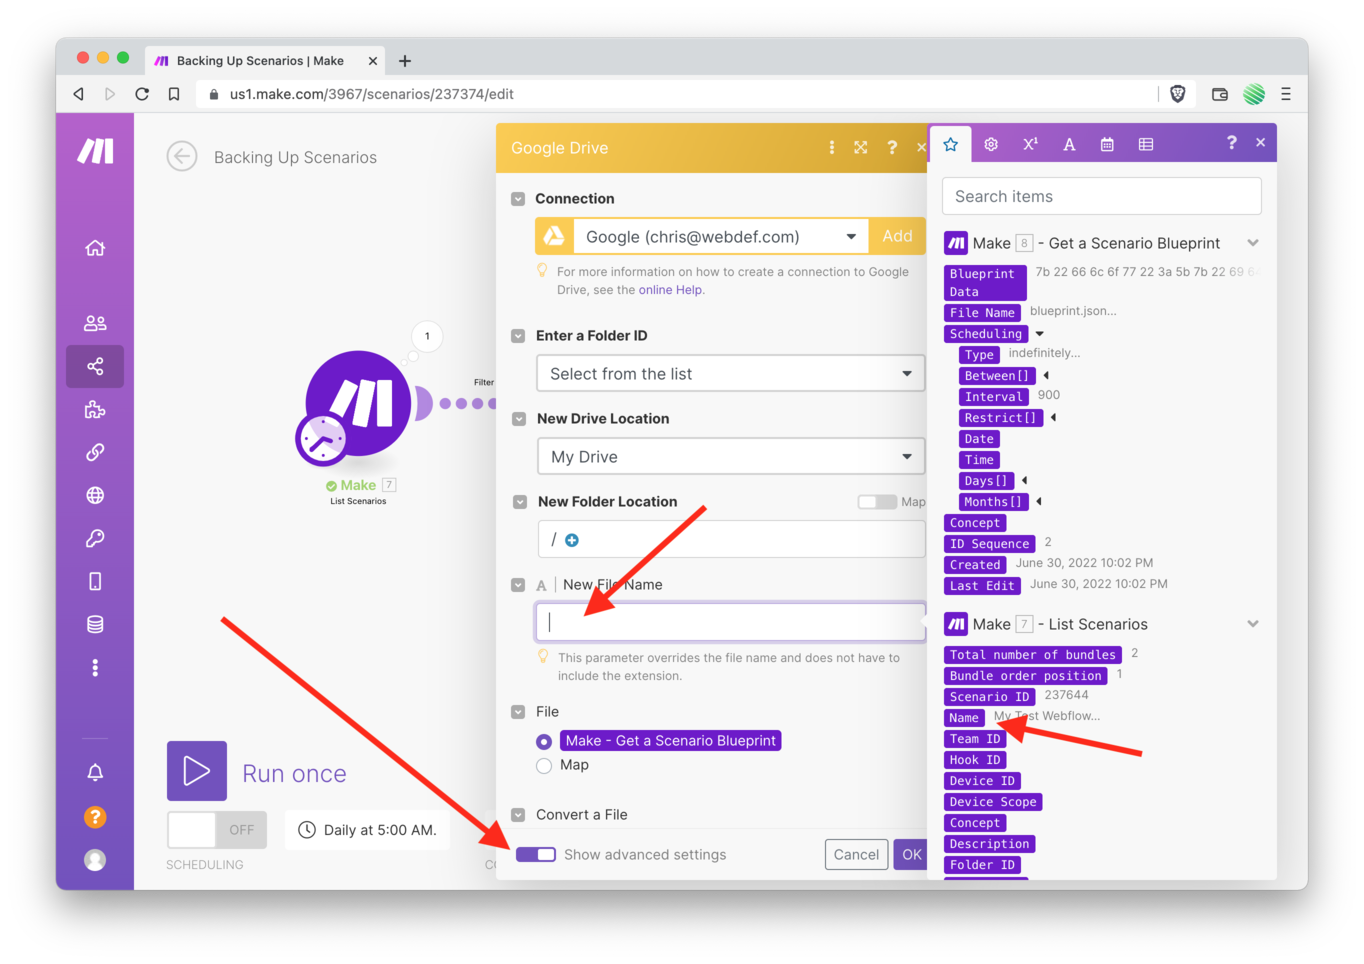
Re-open your third Scenario (Google Drive) and turn on the “Show advanced settings” toggle.
Next, tap within the “New Filename” field. In the options list that pops up select the “Name” option.
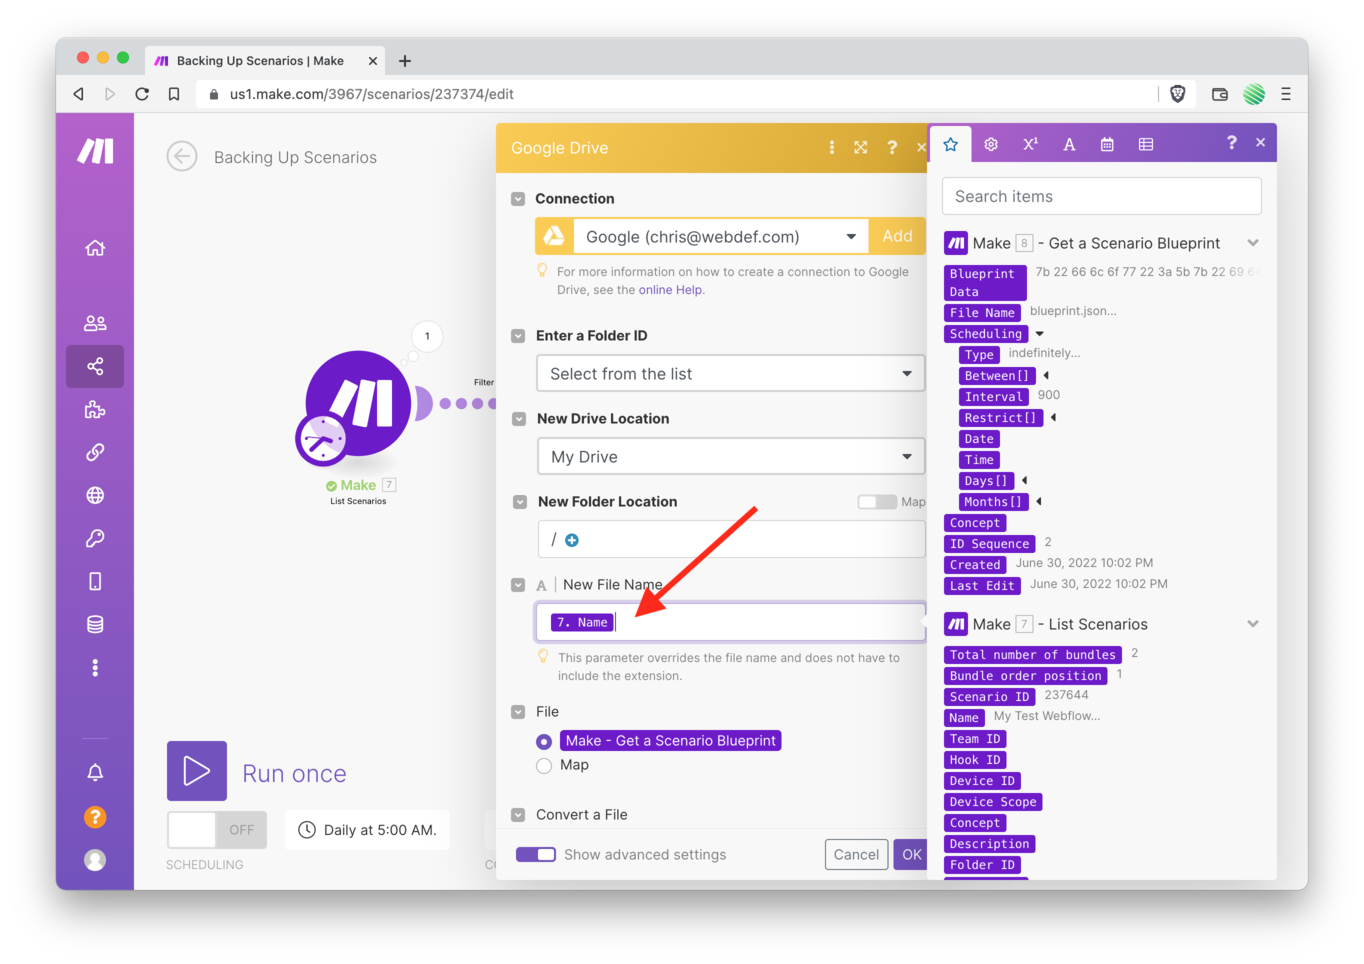
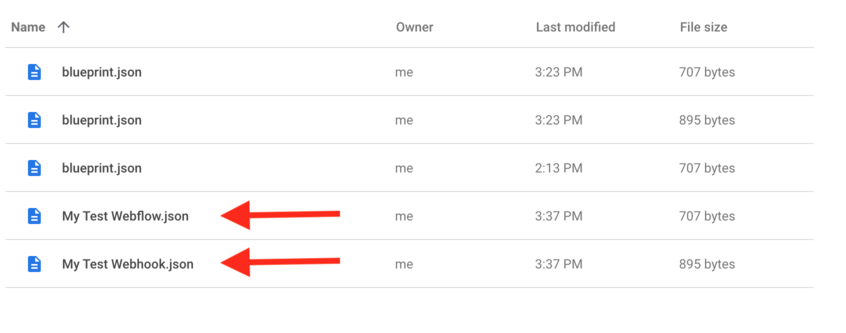
Now your Google Drive filename will be auto-saved with the name you’ve given your Scenario.
🍻 Cheers!