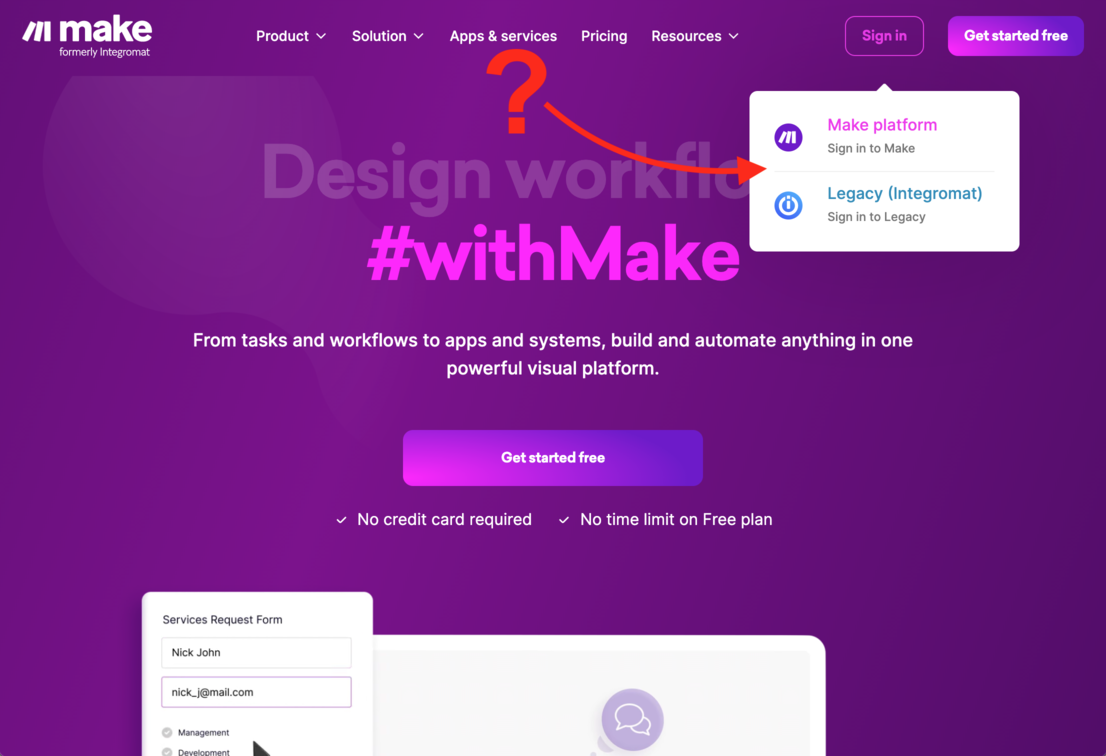
You may have heard.
Integromat is now Make.com💥
Problem is…
You’ve already spent a TON of time learning Integromat, wiring up Webflow to it, integrating other 3rd party services so you can create solutions for you and your clients.
But…
Does that mean you have to waste your time relearning everything just to successfully make the switch?
Nope!
Under the hood I’m sure they’ve done a lot to improve speed, etc…
But as far as your concerned the only real difference is a logo change, a landing page refresh, and a new branding color.
Phew! 😅
To show you just how little change there is, I’m going to walk you through a quick build submitting a native Webflow form into the Webflow CMS using both Make & Integromat as your glue service.
You’ll see each step of the process with each service, side-by-side, and it should be VERY clear just how little has changed as far as your builds are concerned 🤩
Let’s get started.
Form Submits
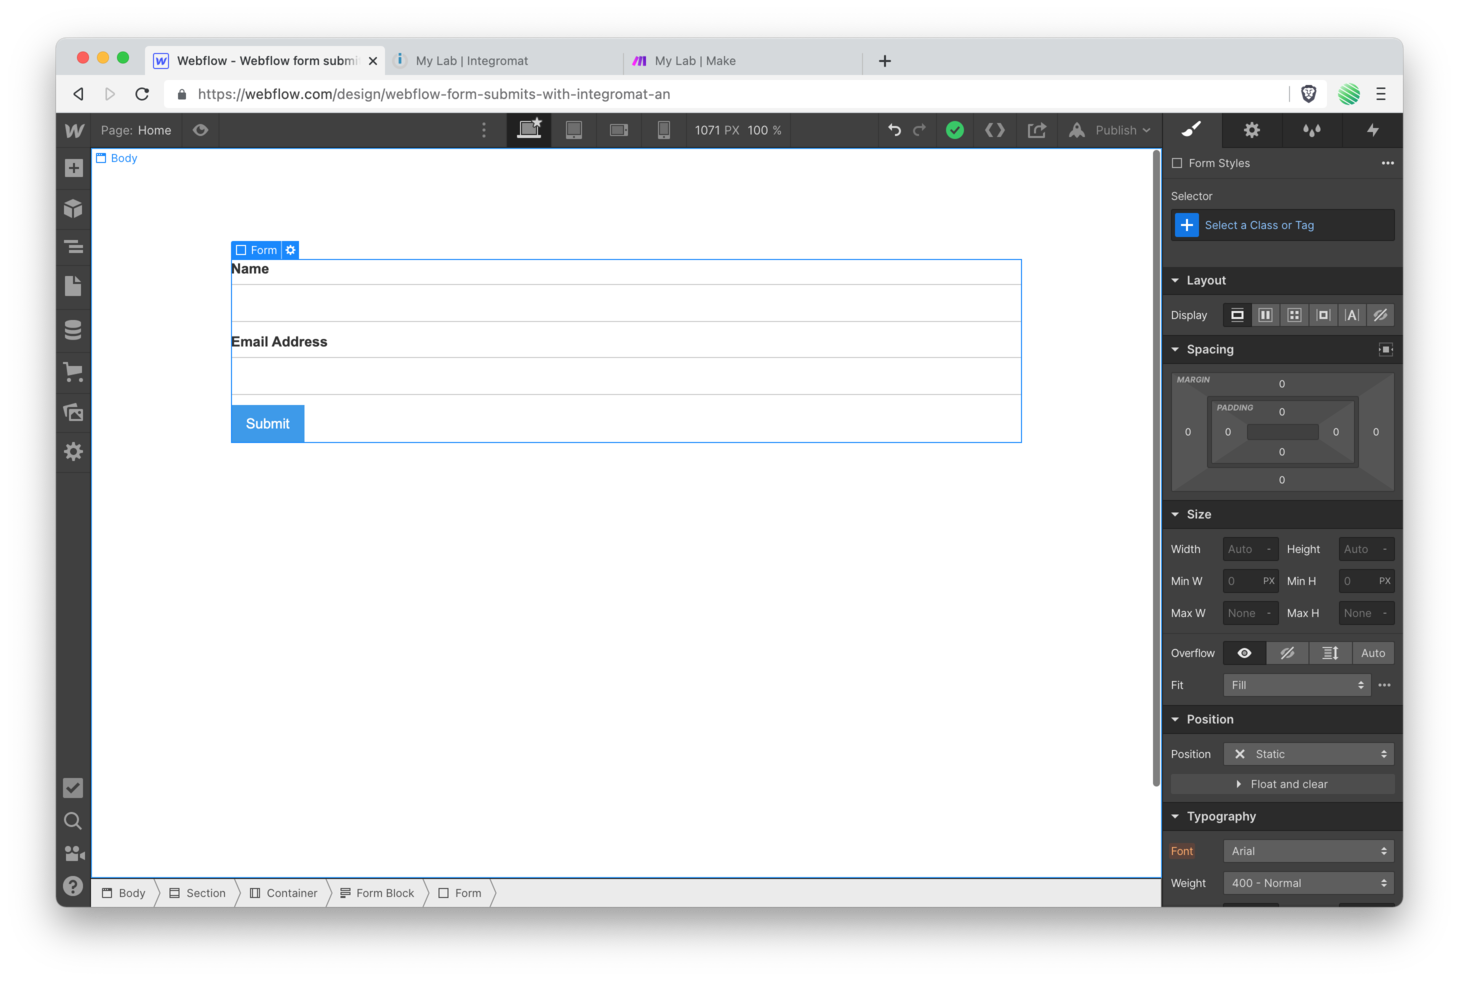
Create a new Webflow project.
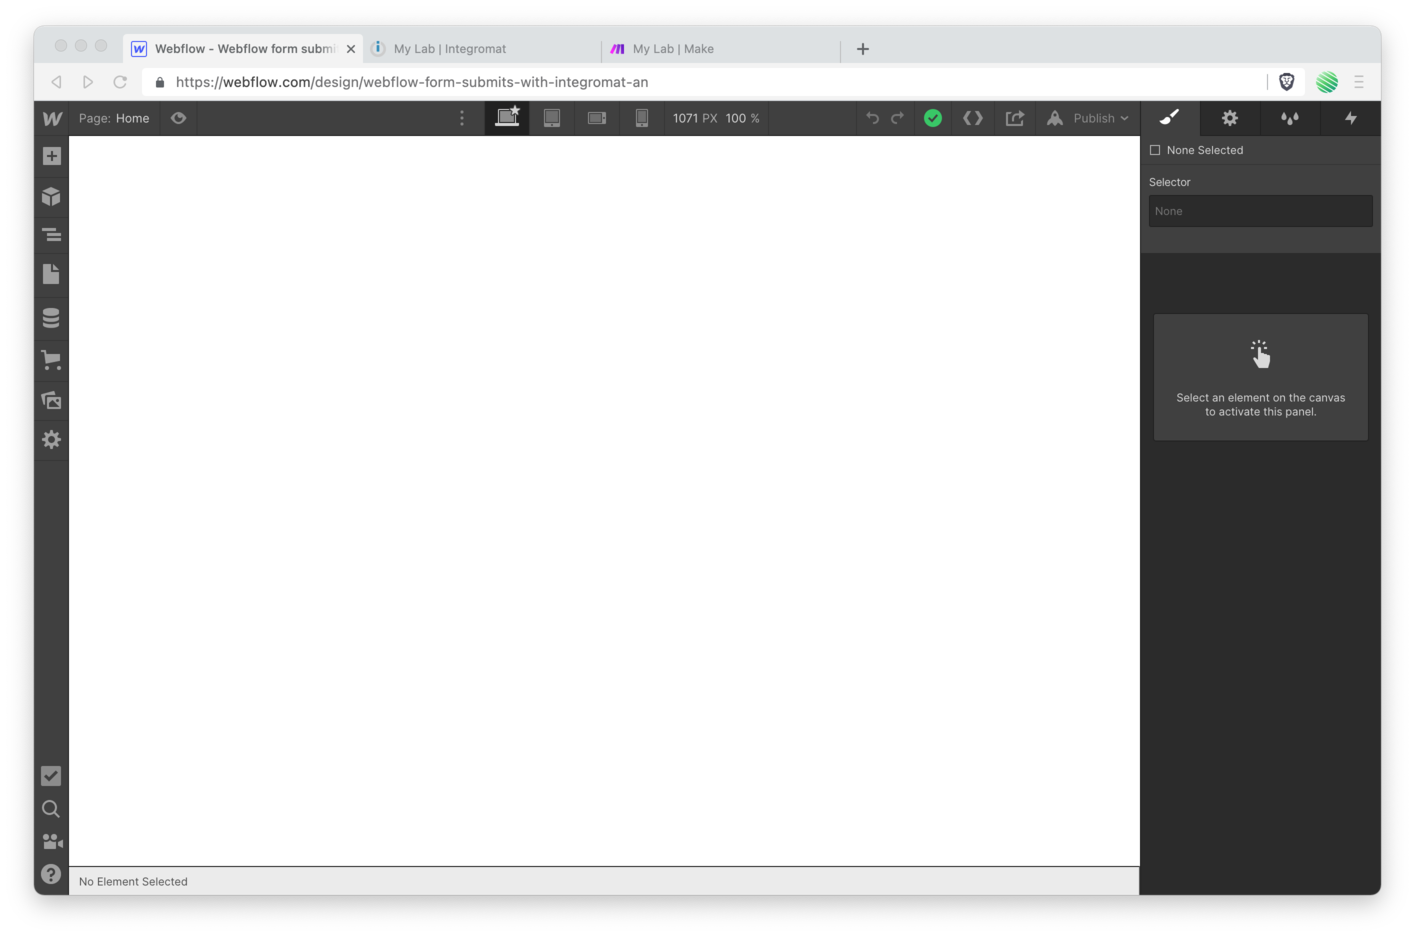
Add a default form block.
Now you need to set up a Webhook in both Make & Integromat so the form submission has somewhere to go.
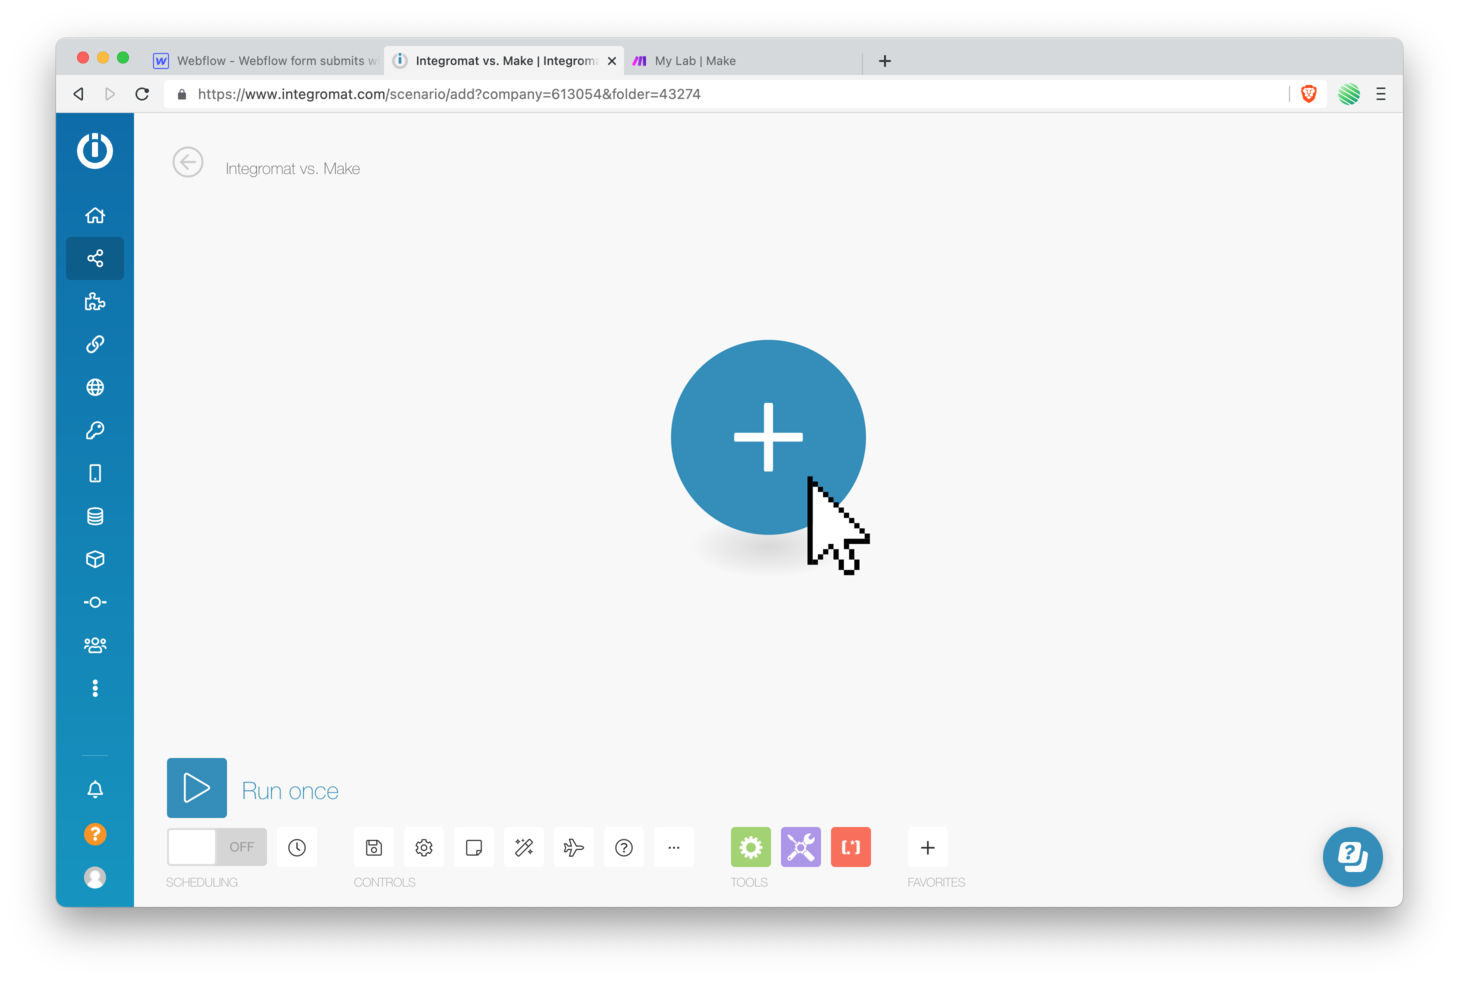
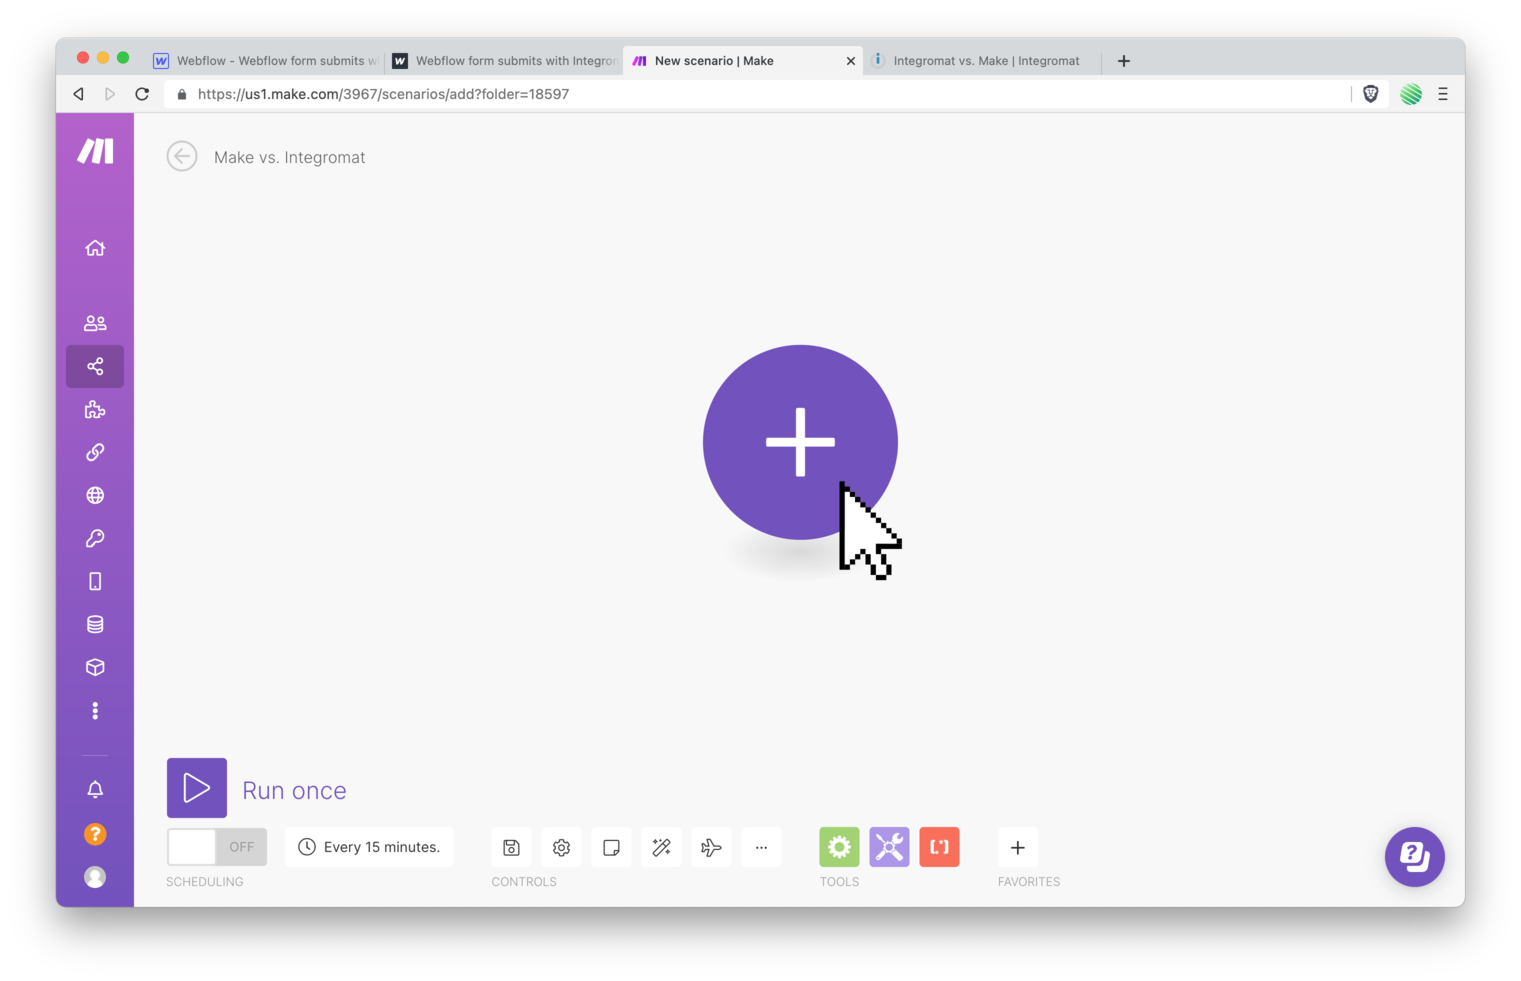
Open up Integromat.com and create a new Scenario.
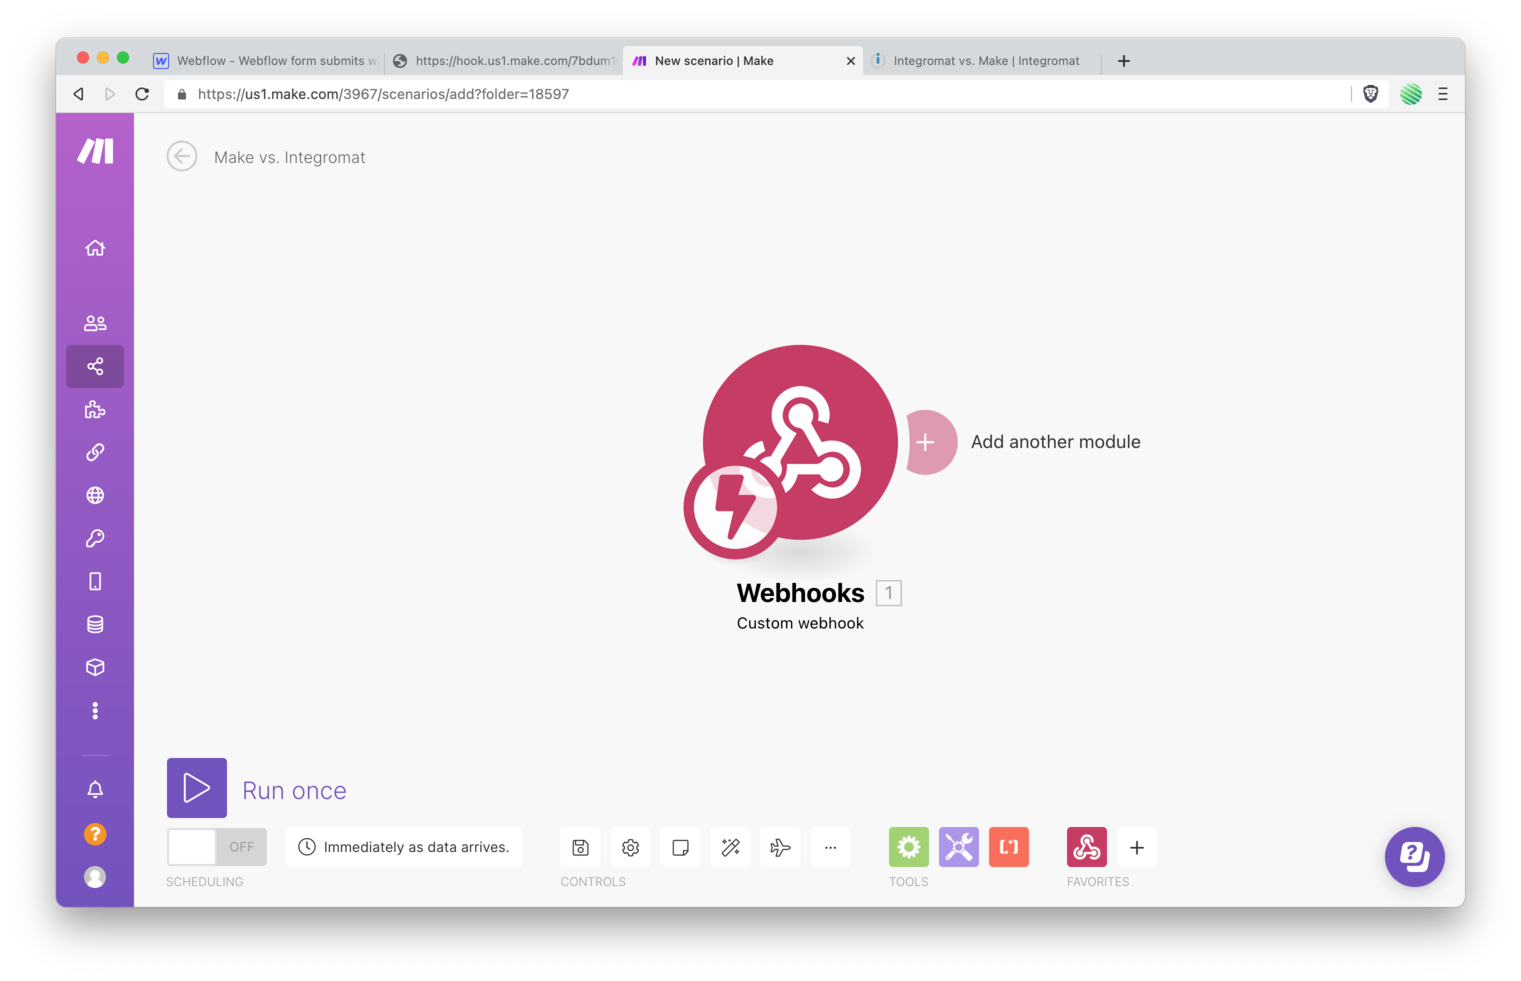
Open up Make.com and create a new Scenario.
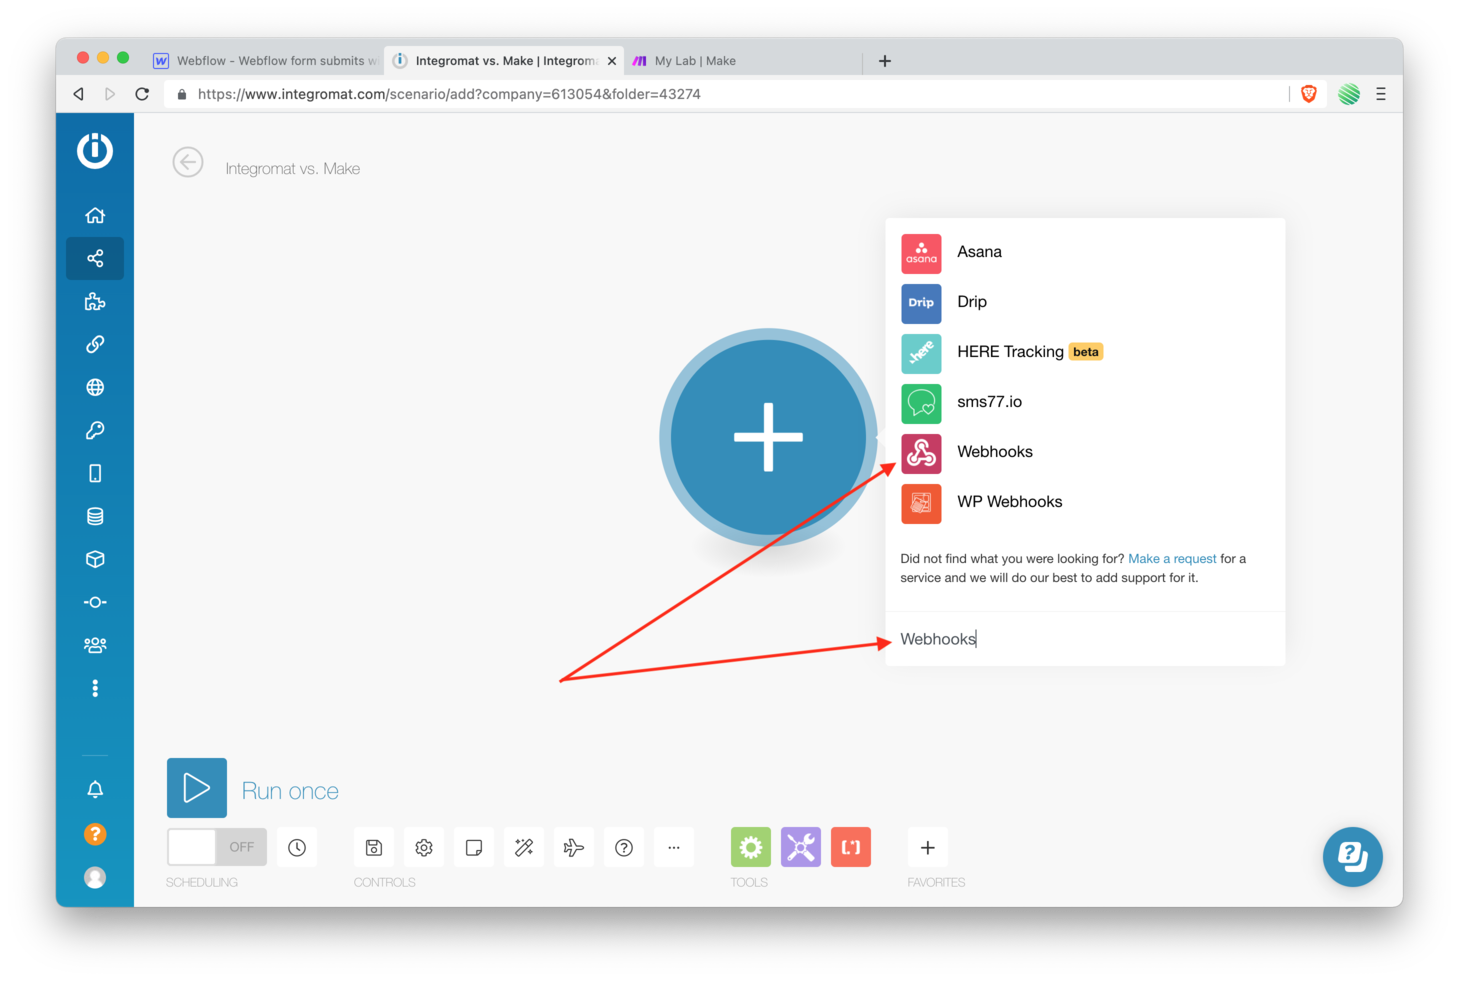
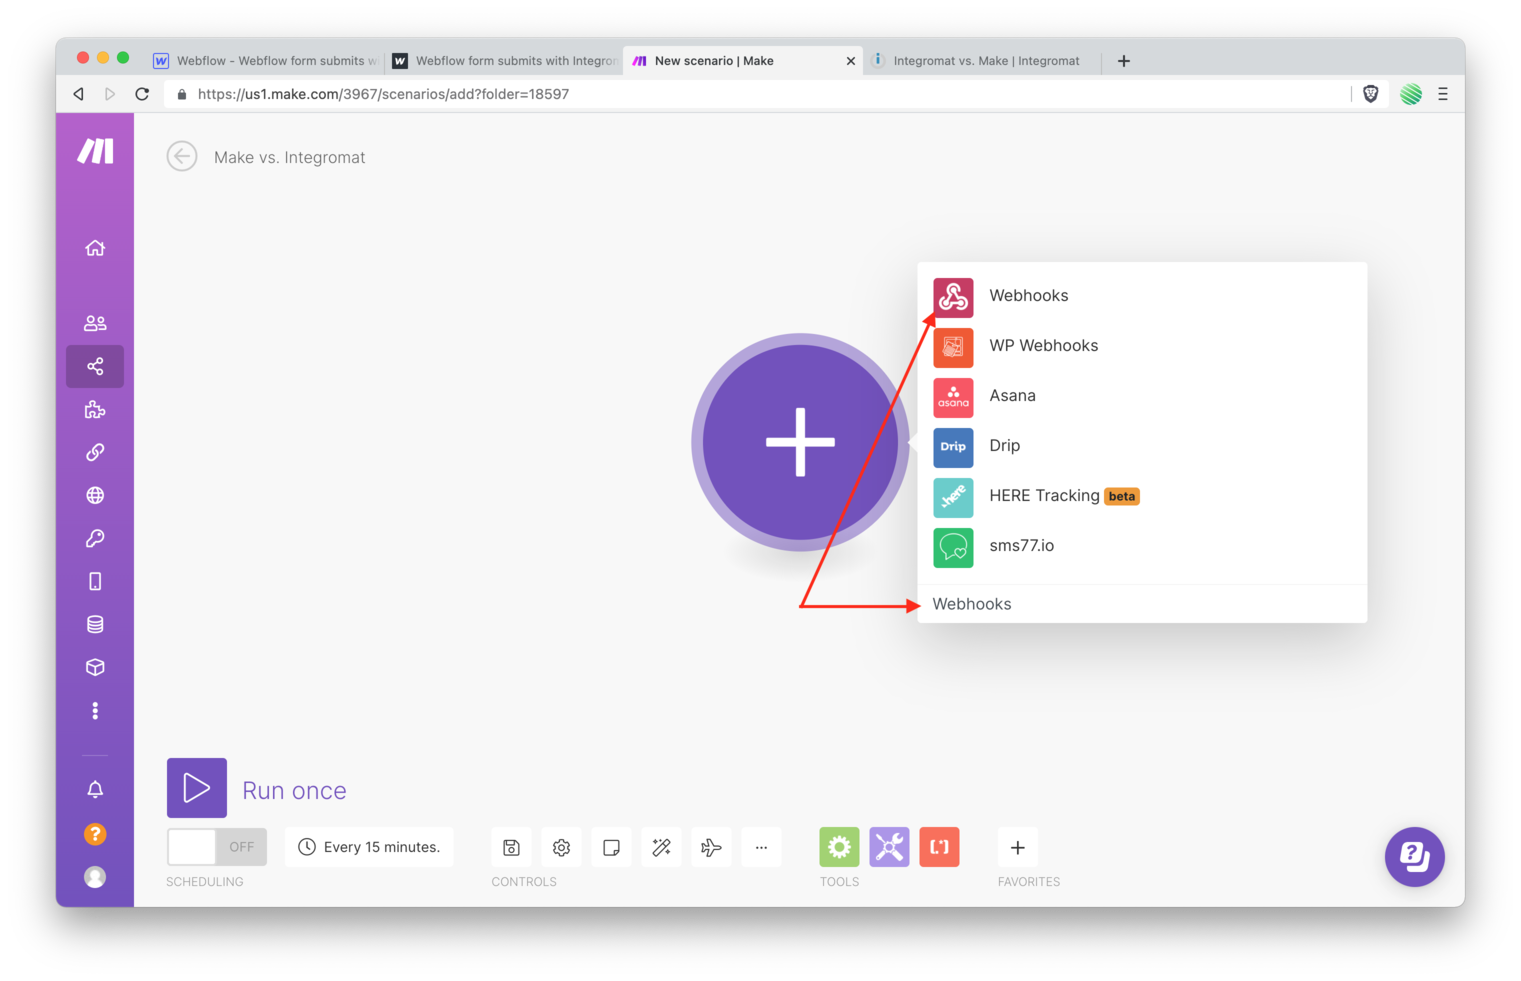
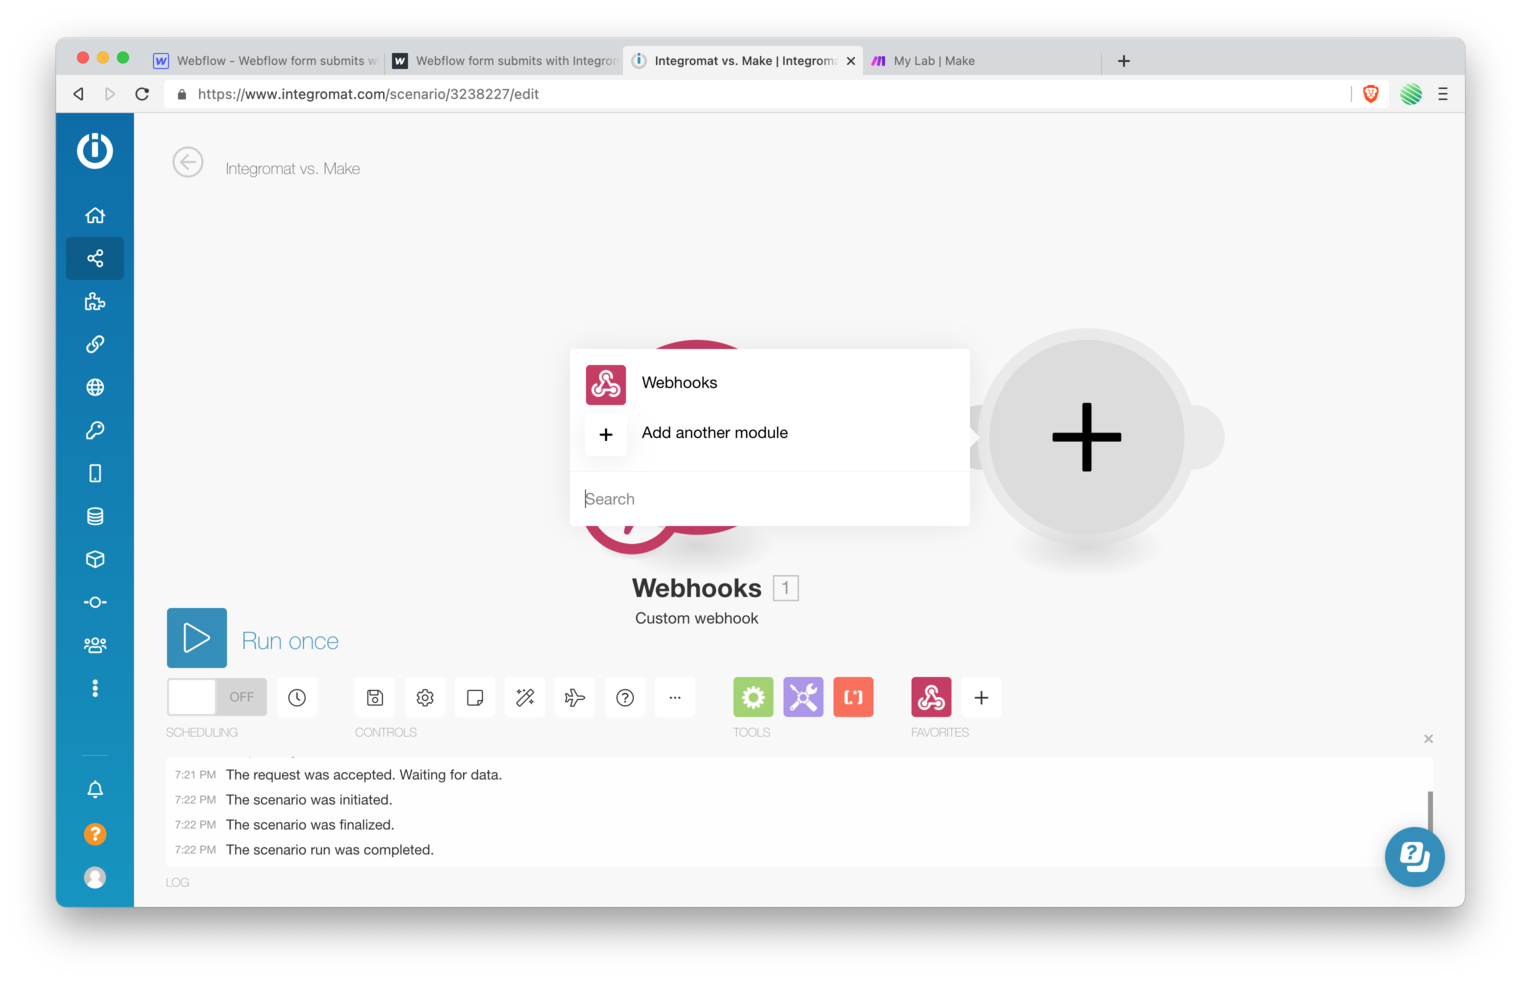
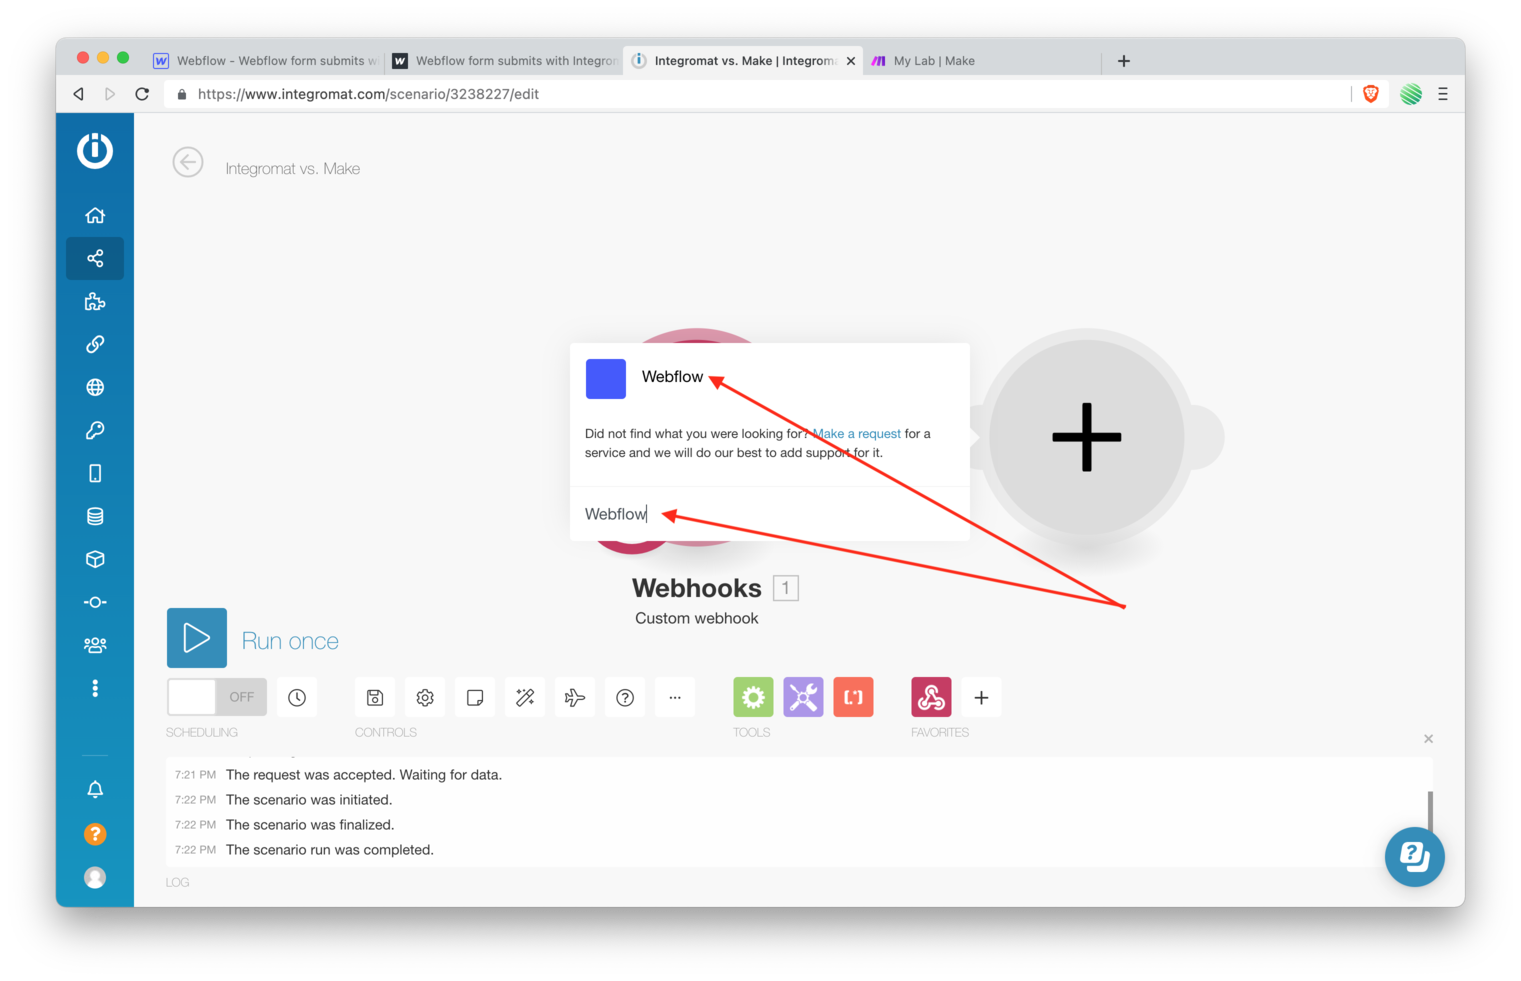
Search for and select Webhooks.
Integromat:
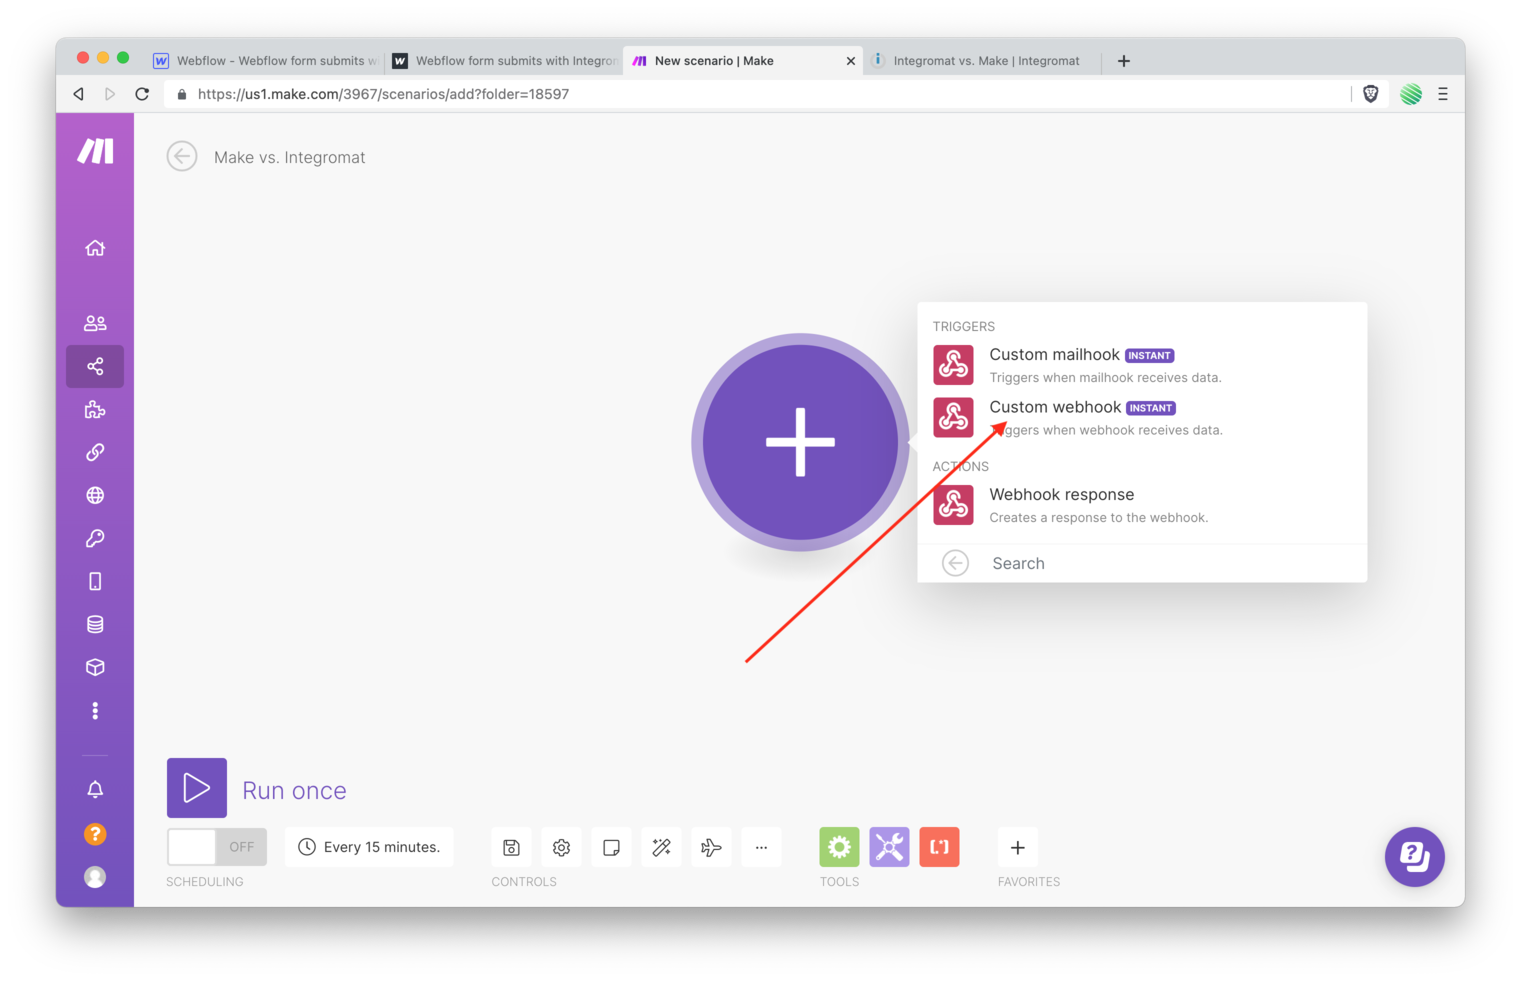
Make:
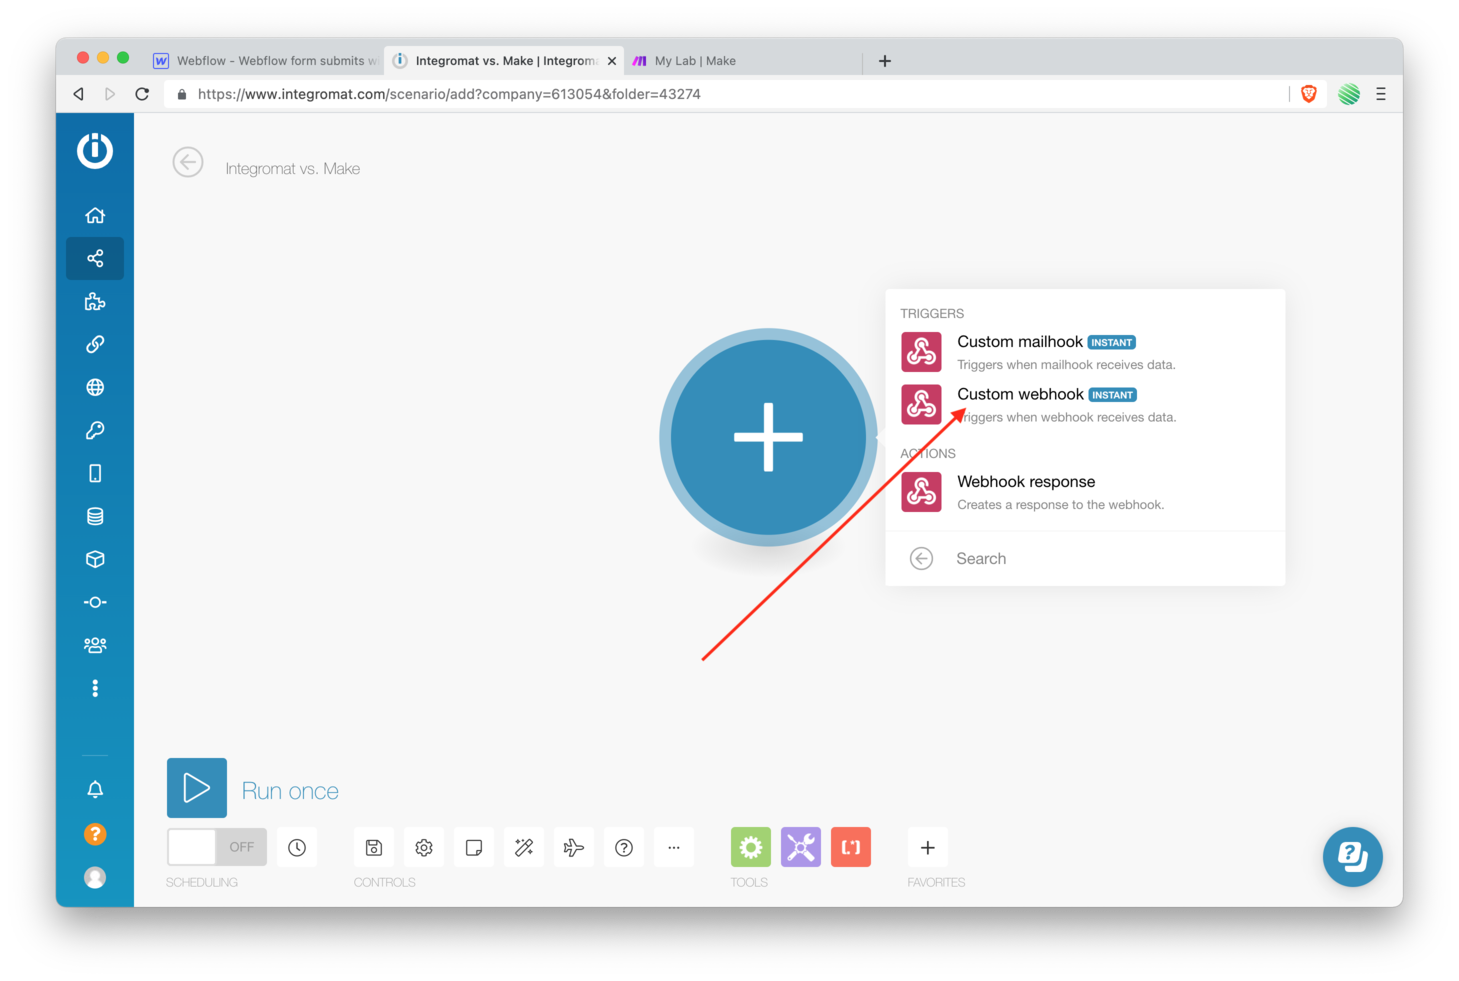
Select a Custom webhook trigger.
Integromat:
Make:
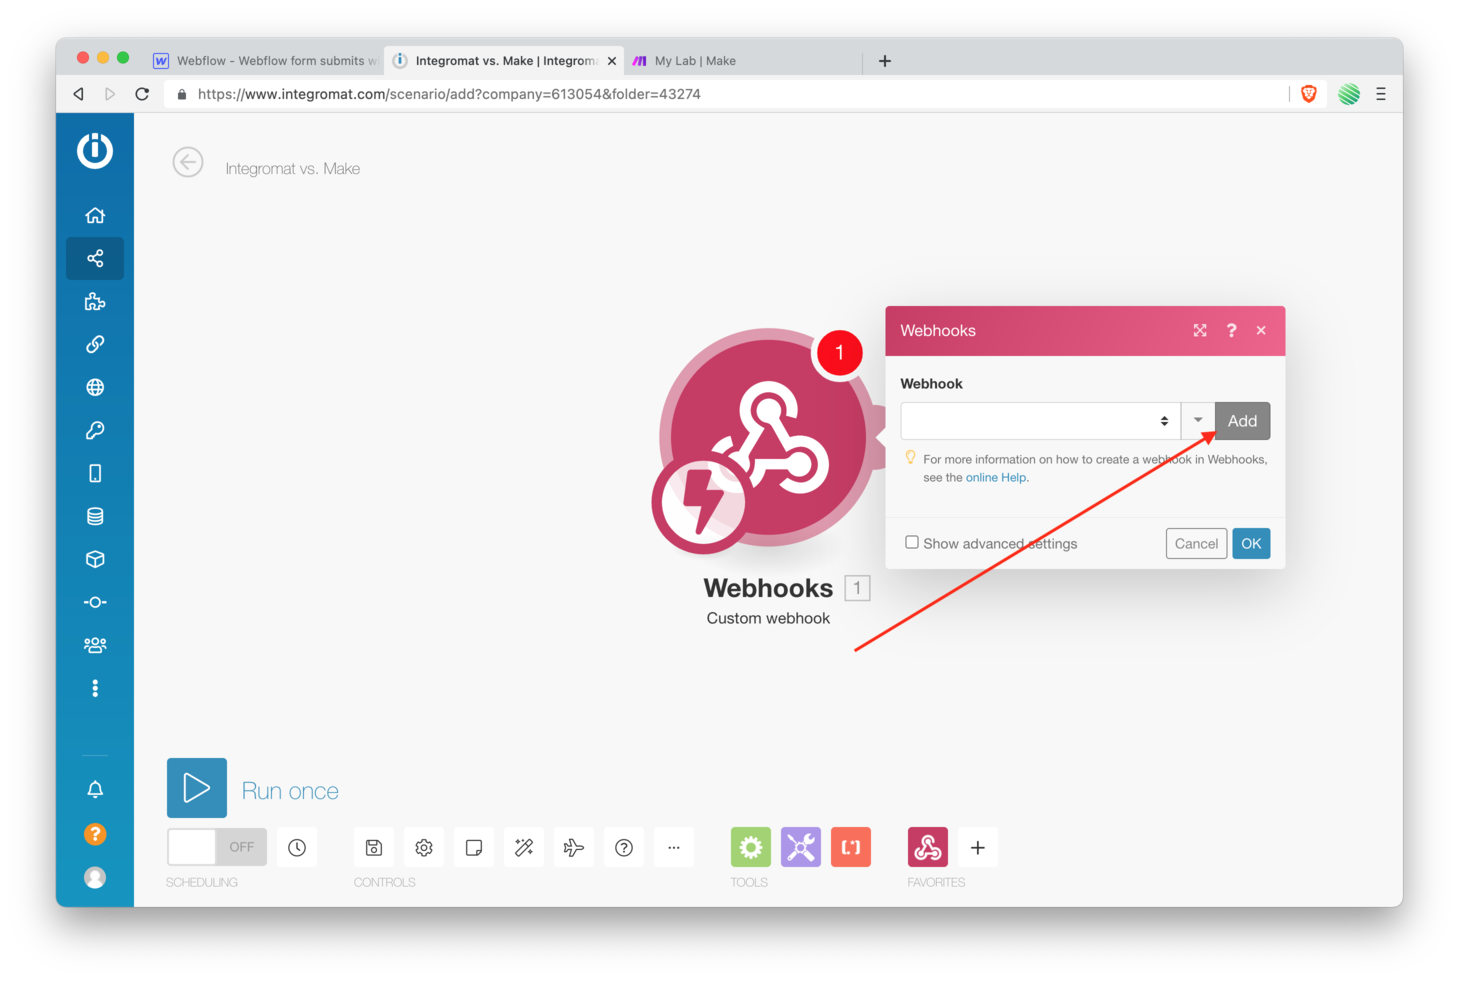
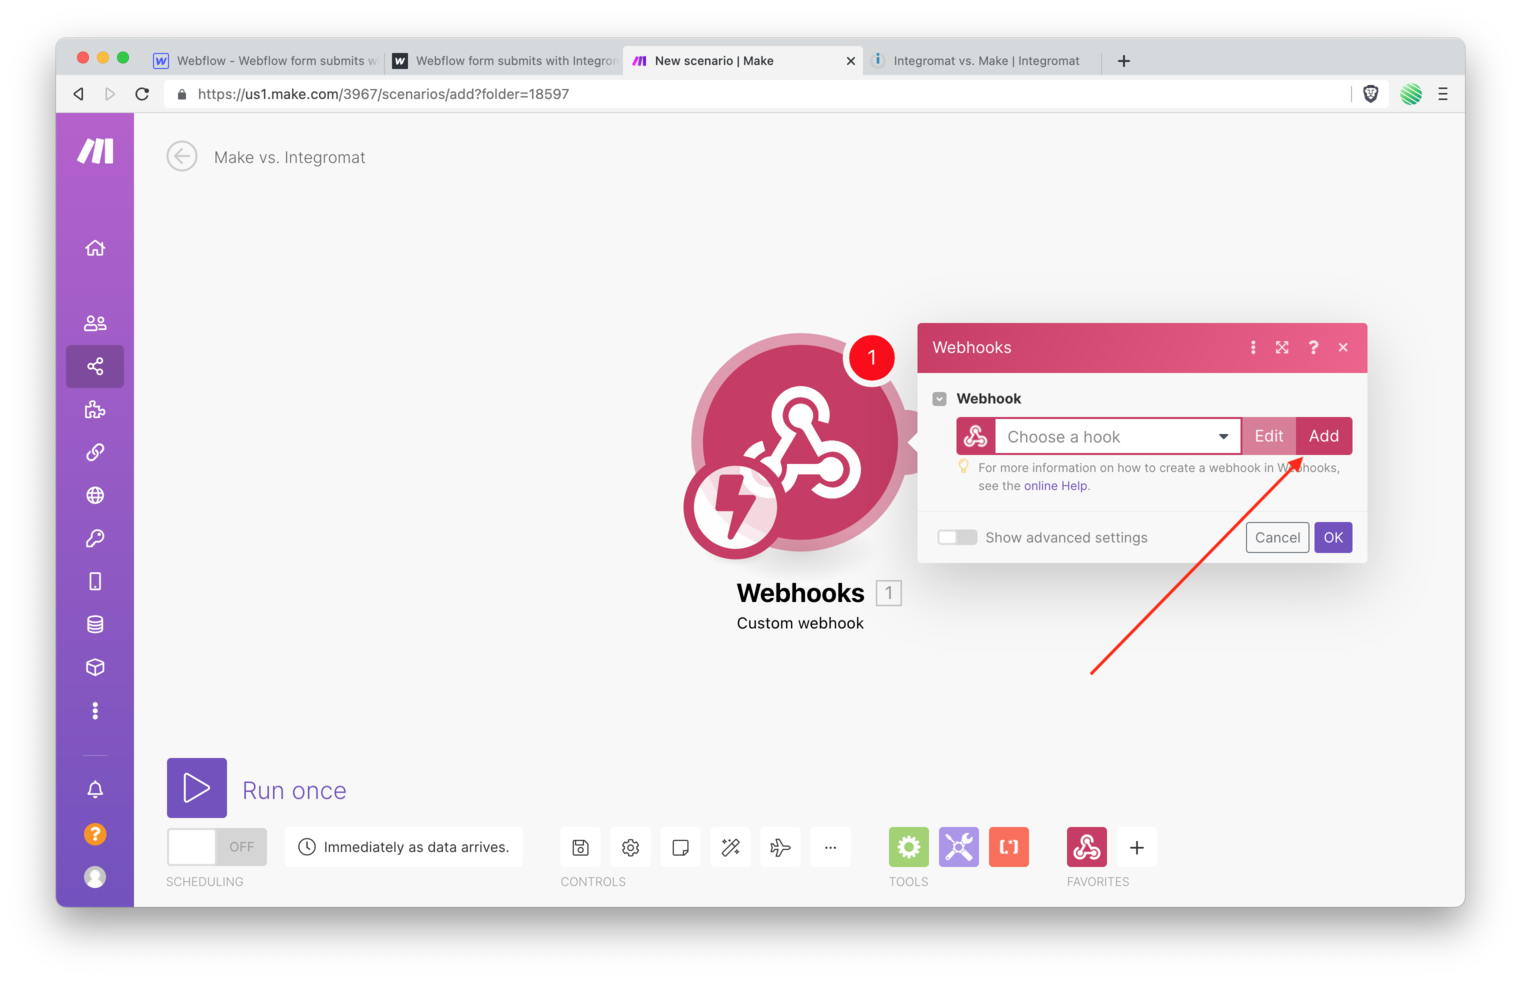
Add a new Webhook into Integromat.
Integromat:
Make:
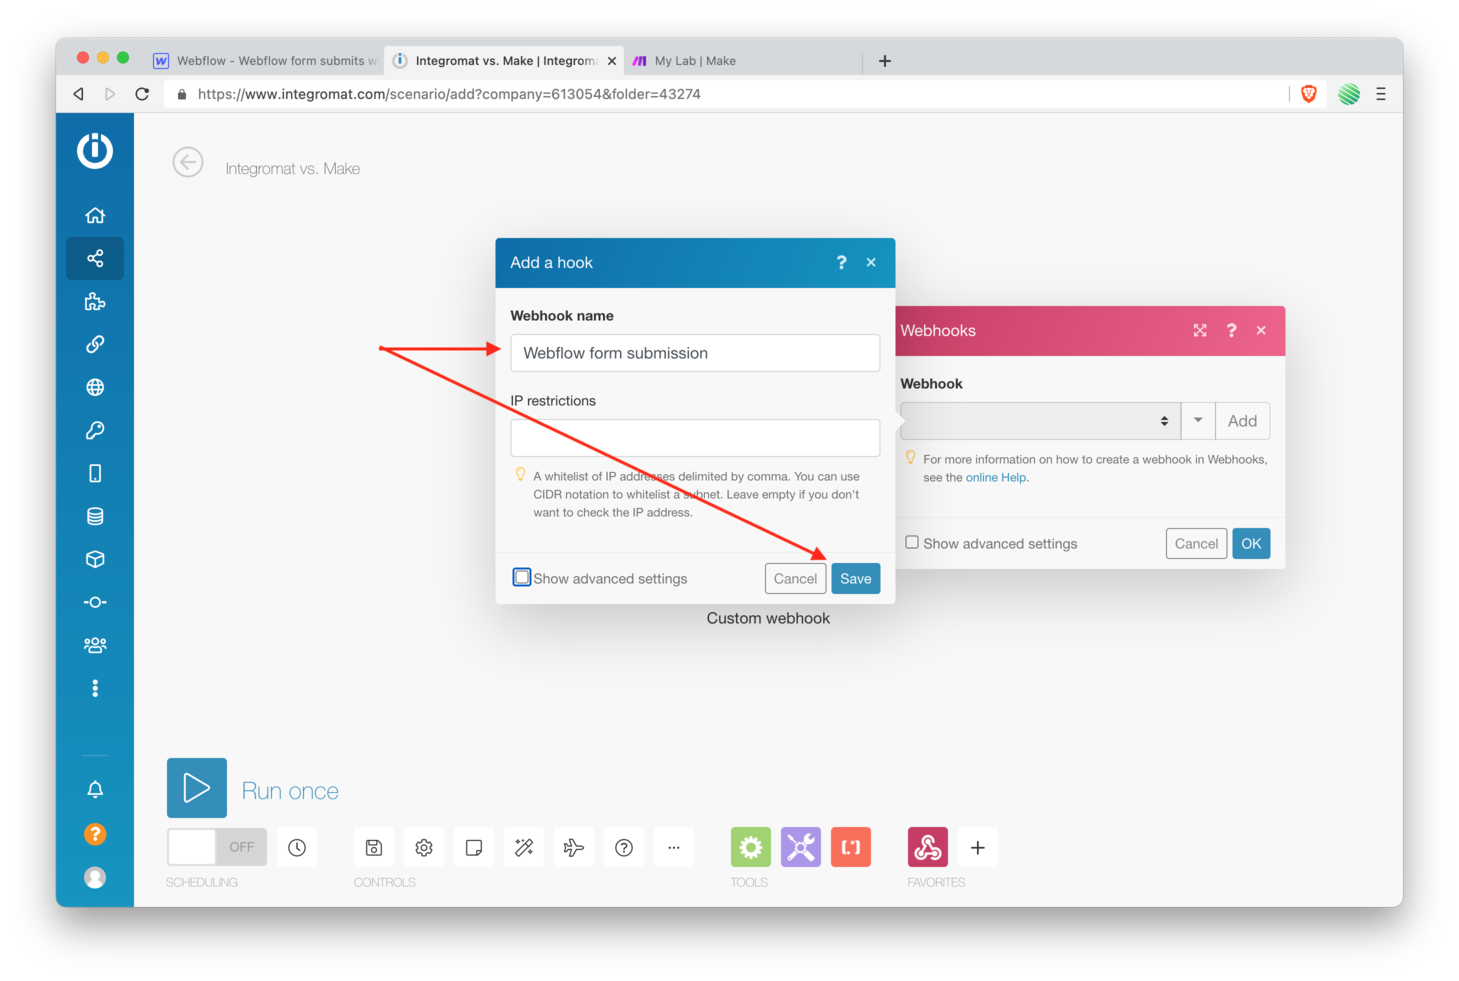
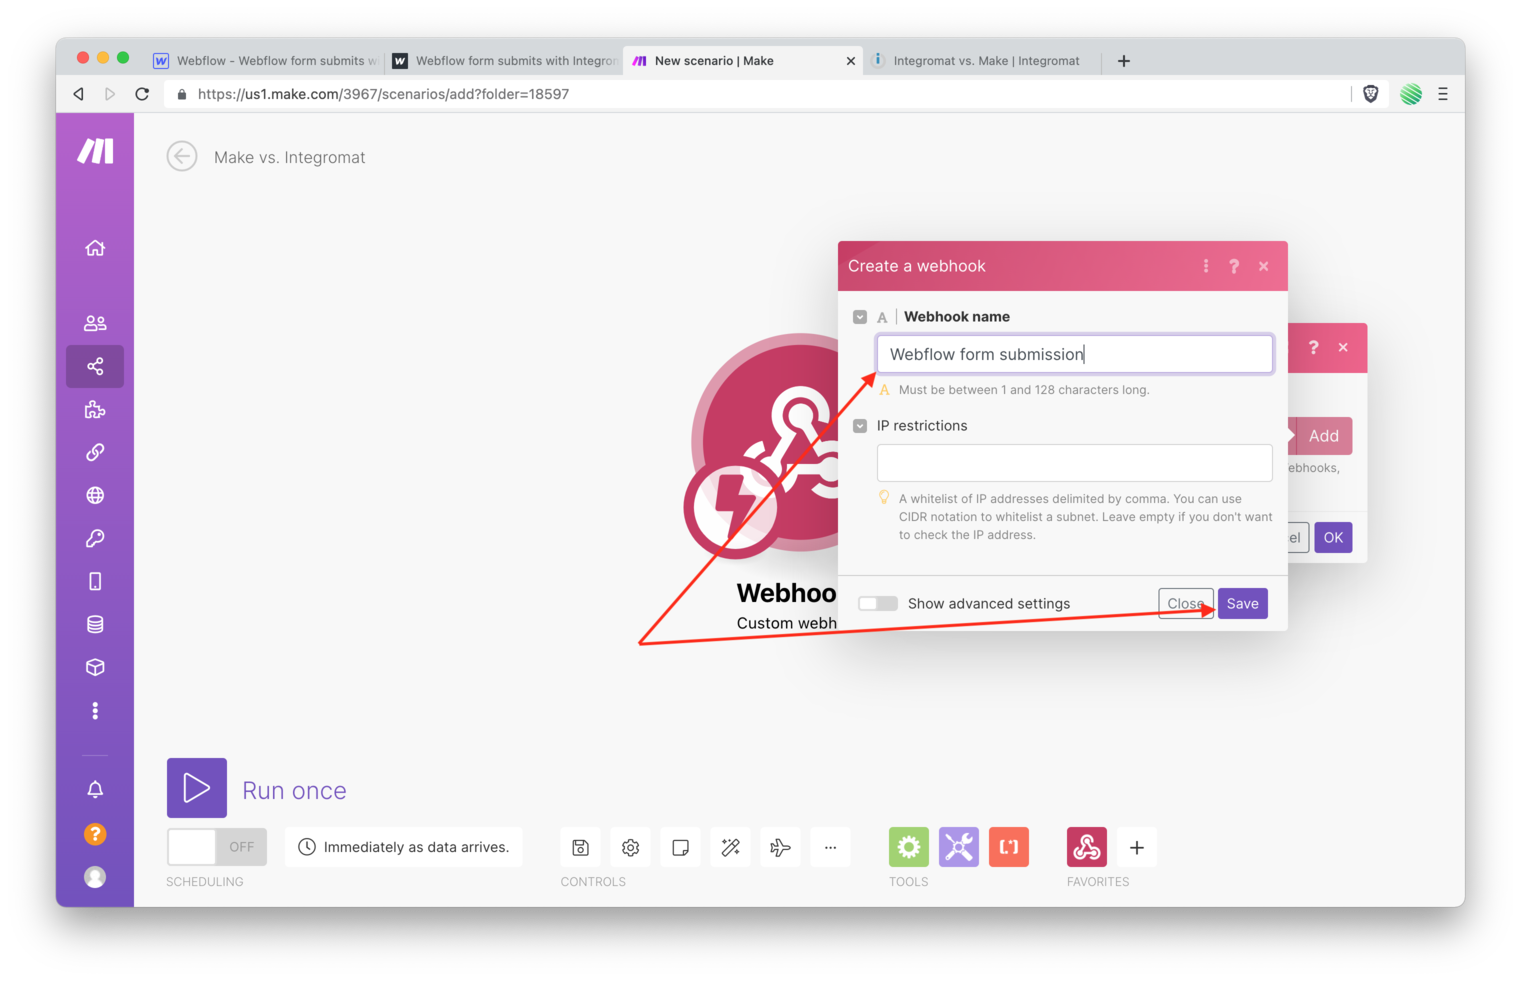
Give your new Webhook a descriptive name.
Integromat:
Make:
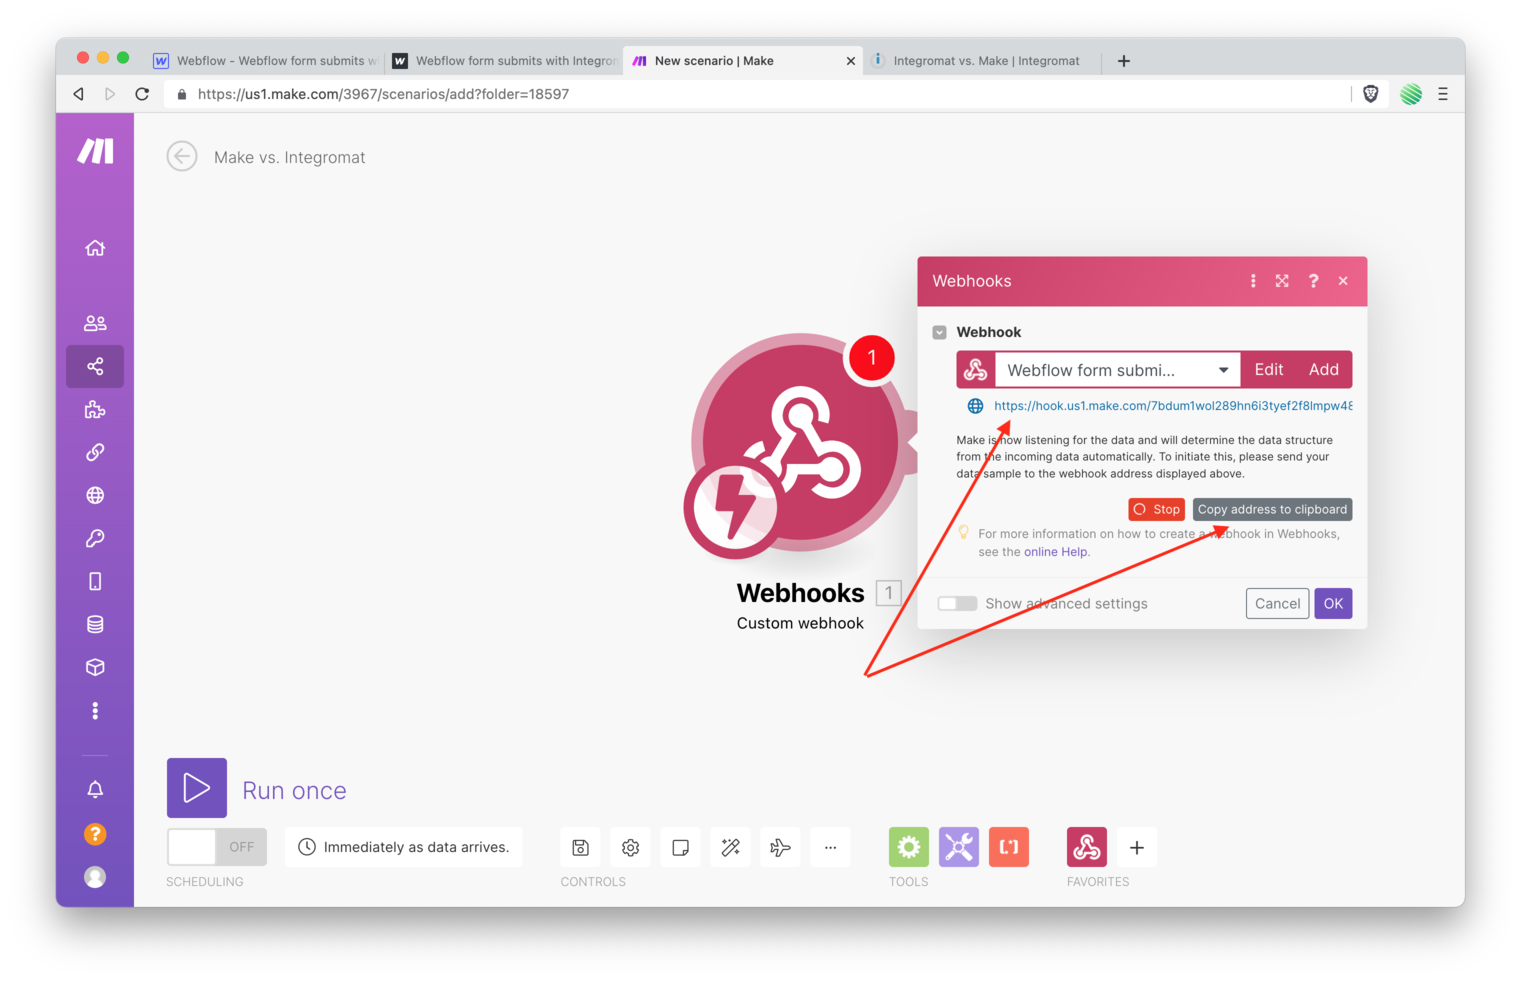
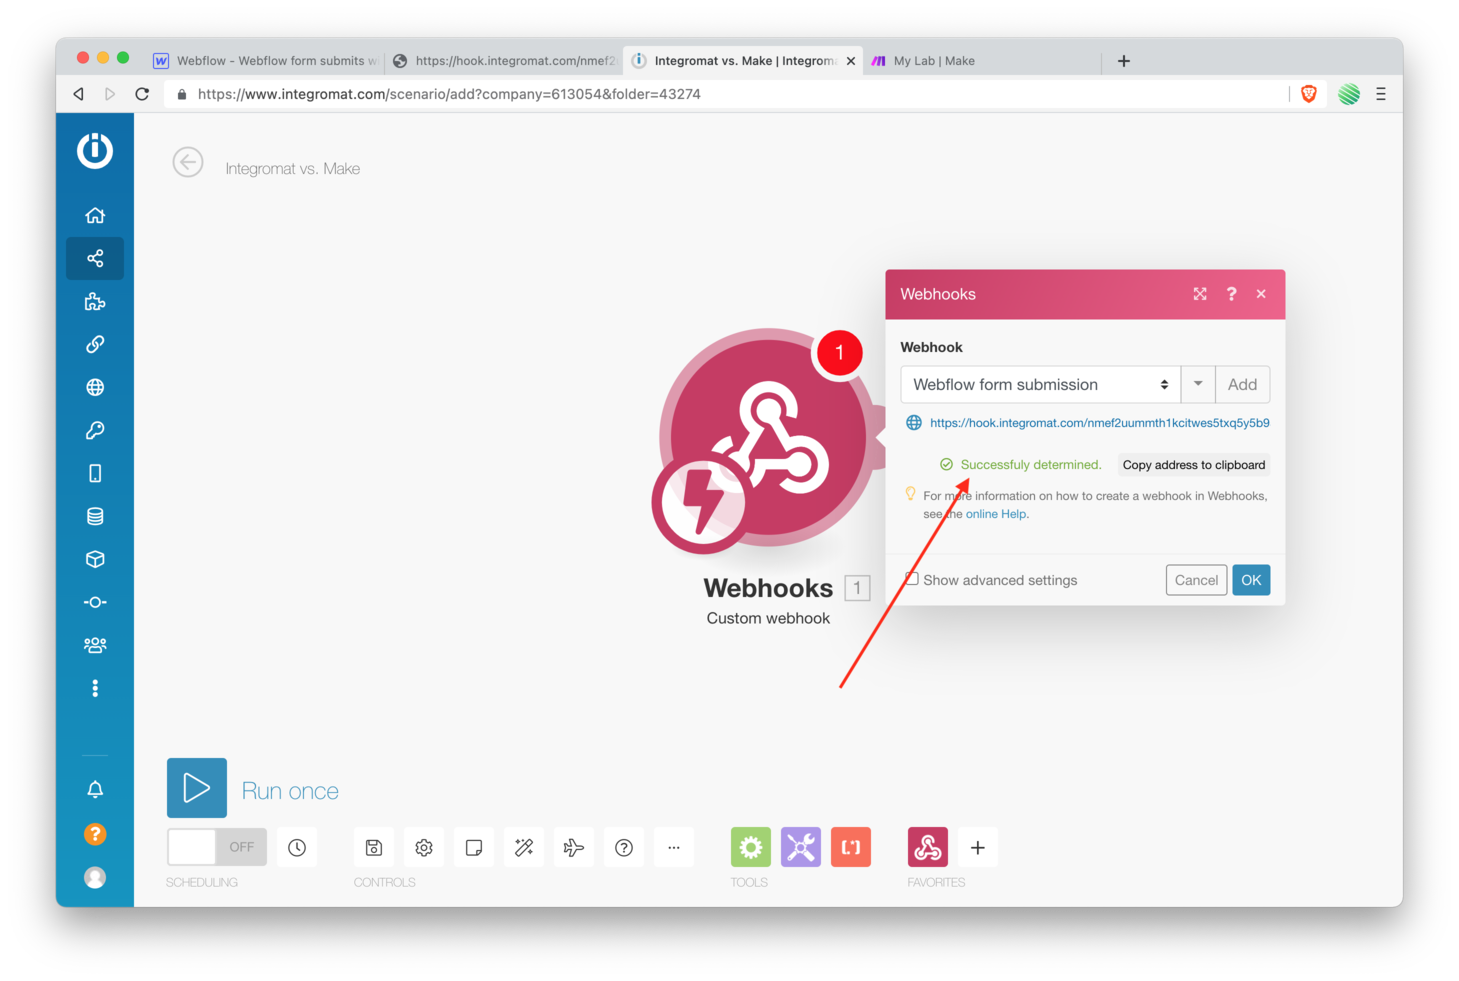
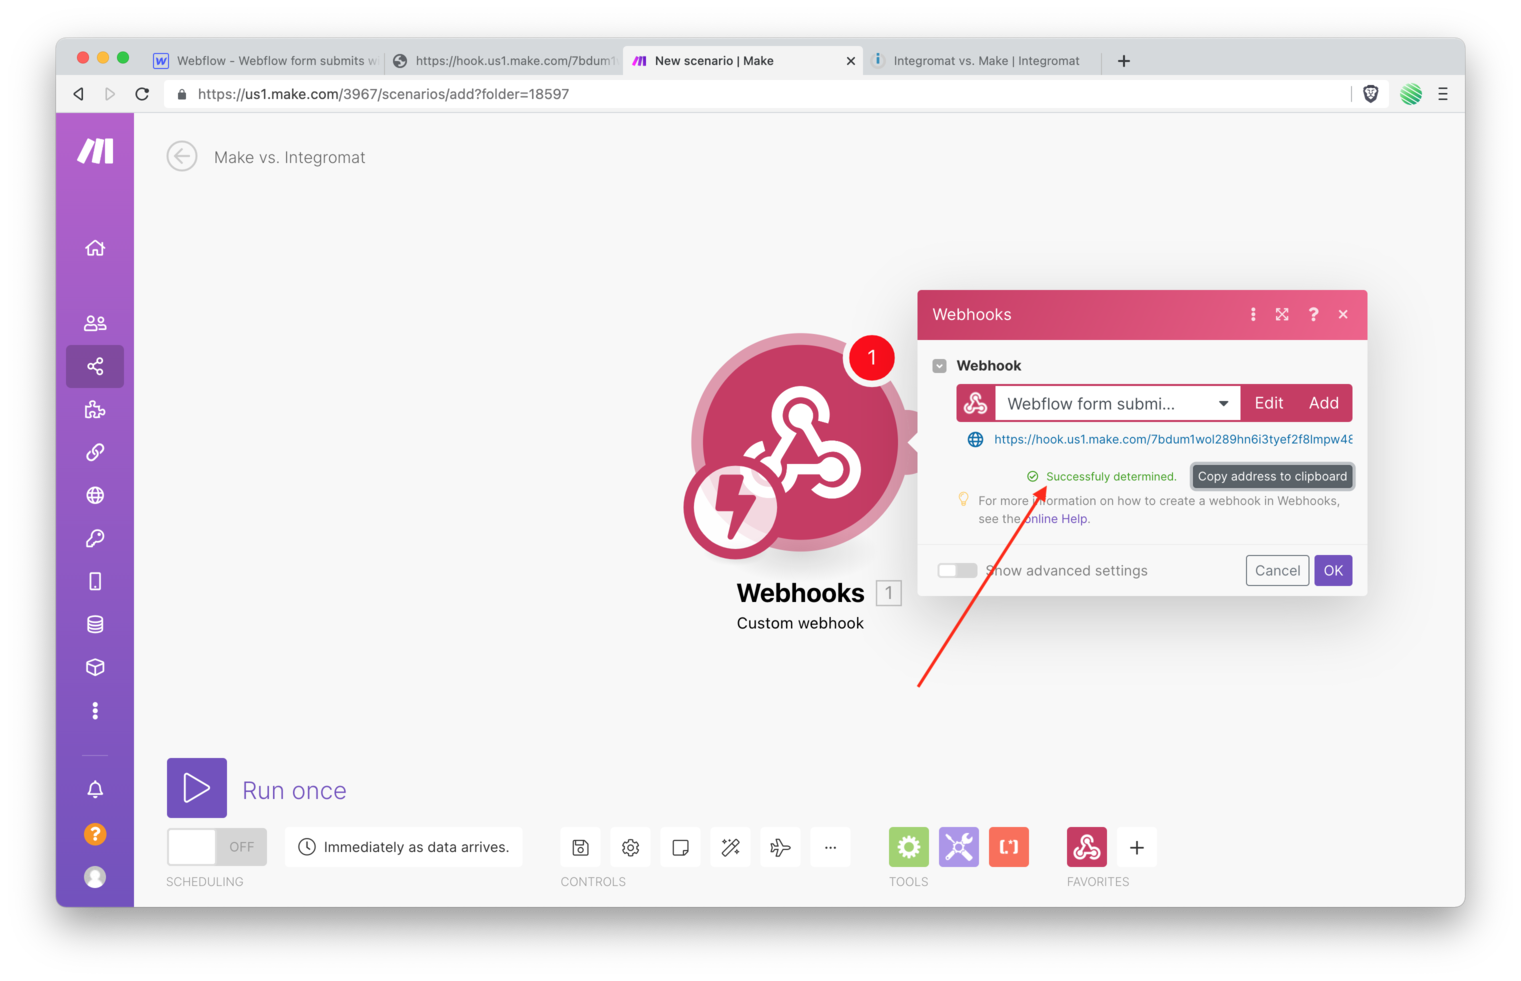
Tap the “copy address to clipboard” button.
Integromat:
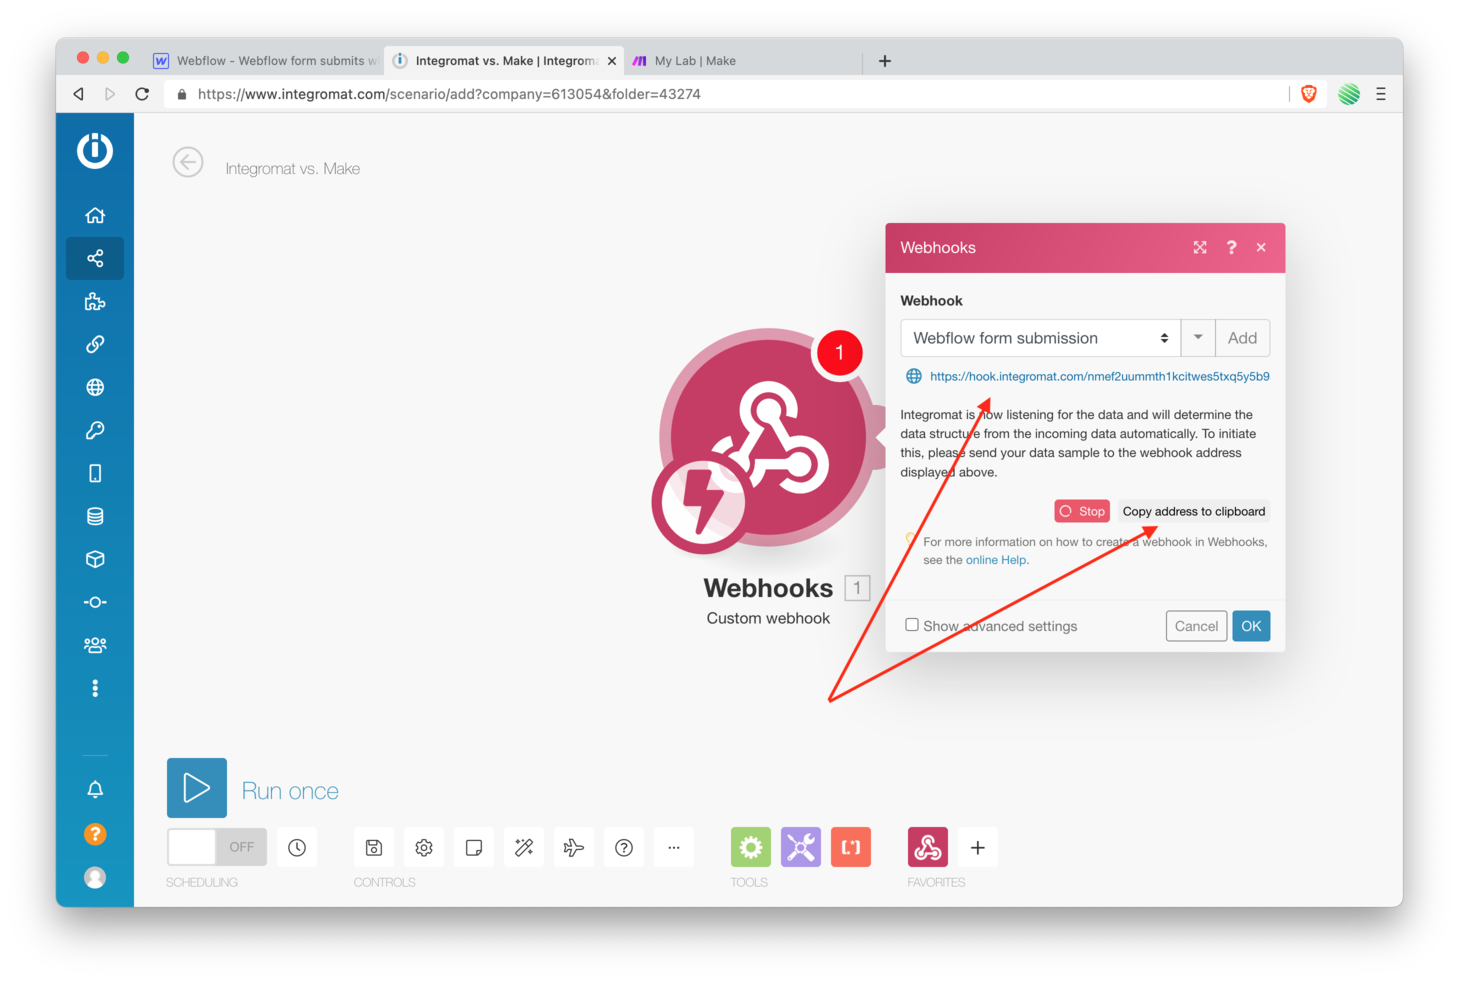
Make:
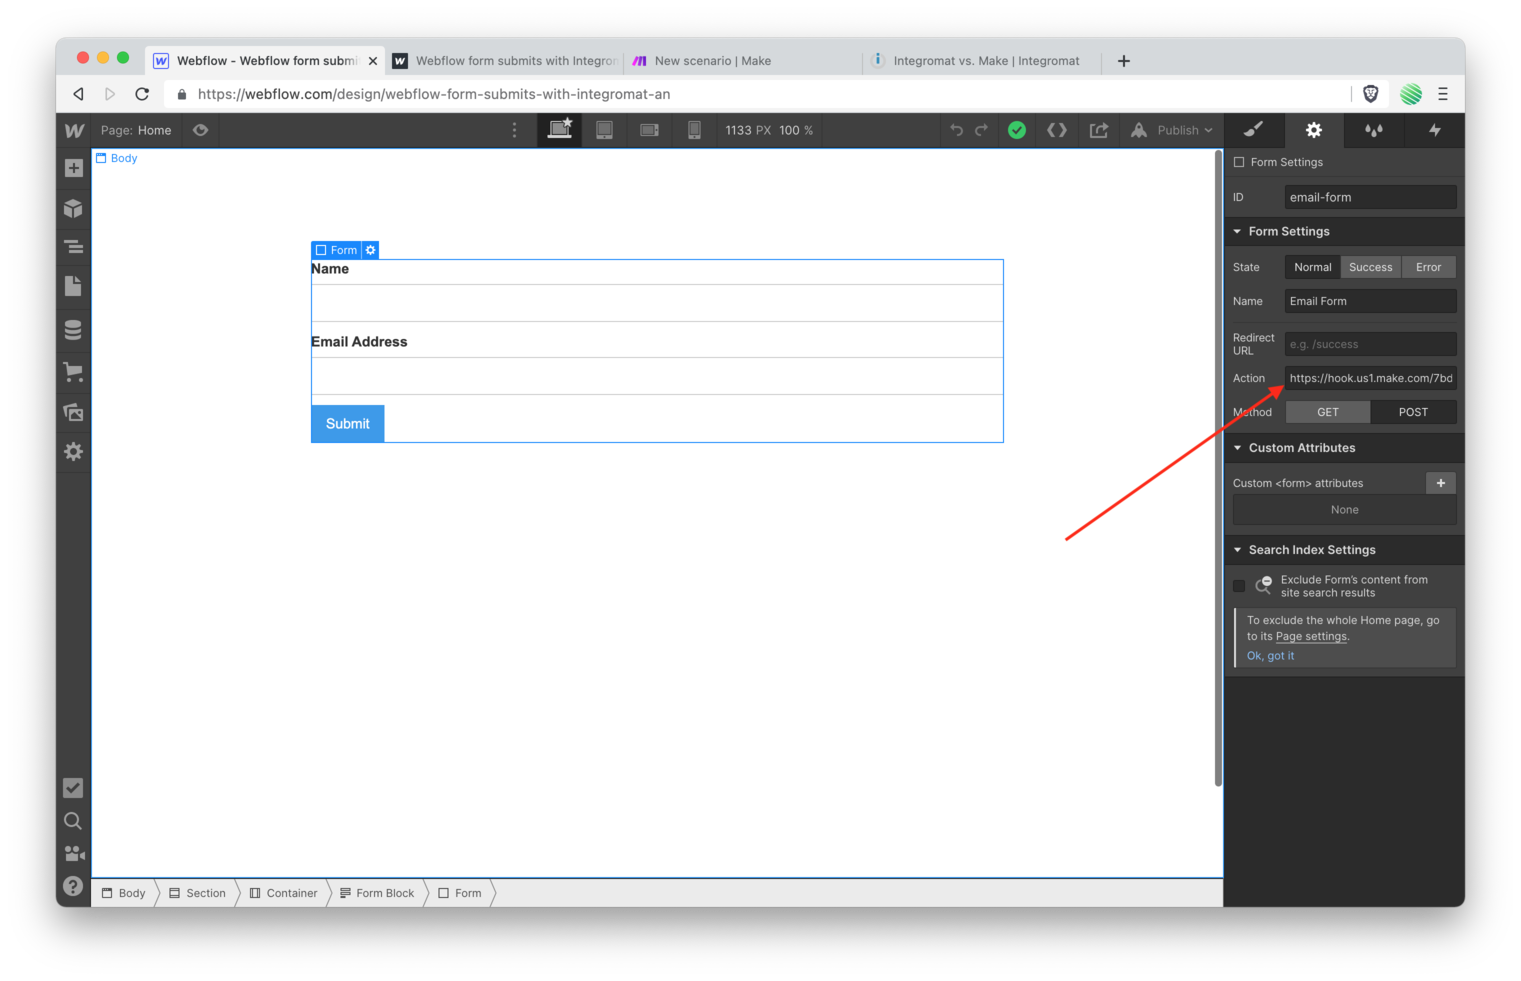
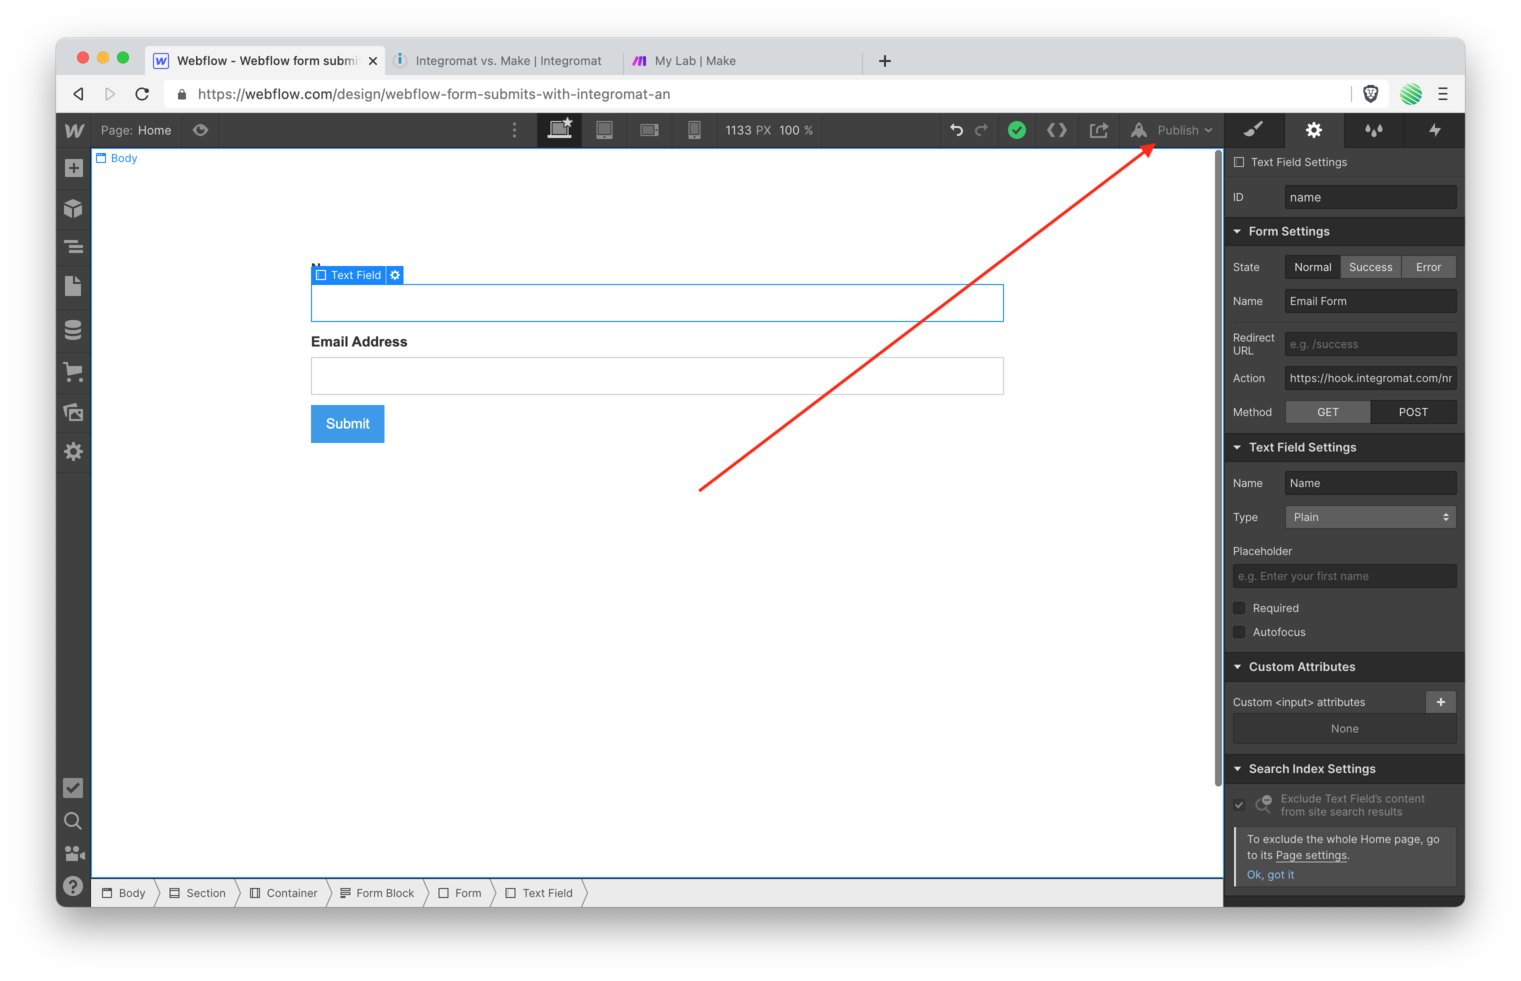
Back to your Webflow Designer. Select the Form Settings tab. Paste the URL you just copied from Integromat into the “Action” field. Choose the “POST” method.
Integromat:
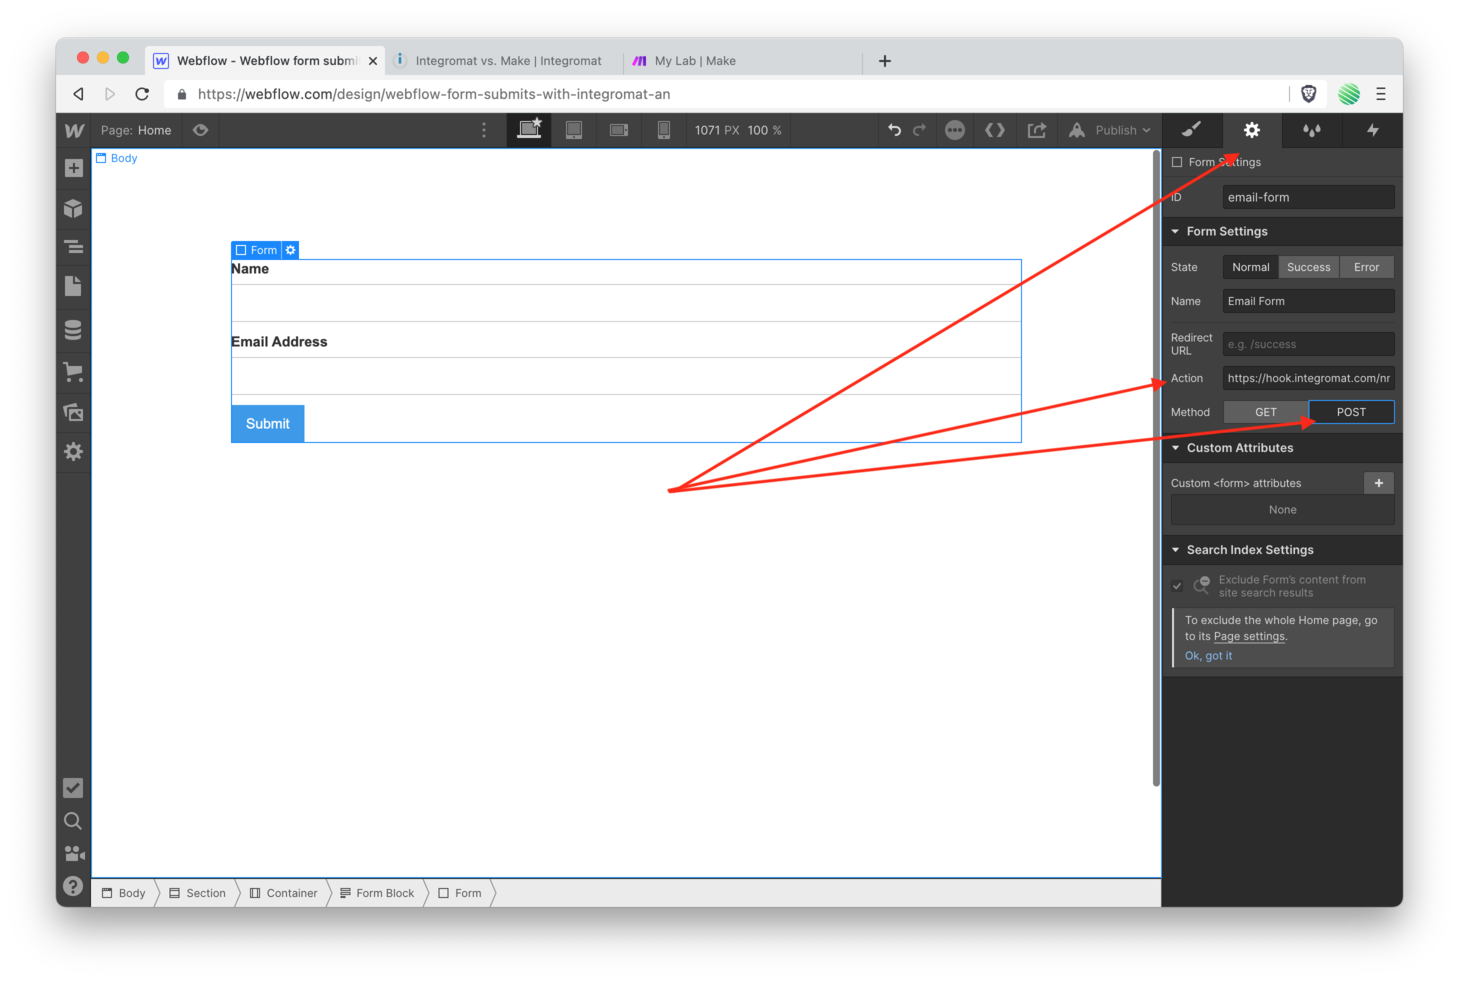
Make:
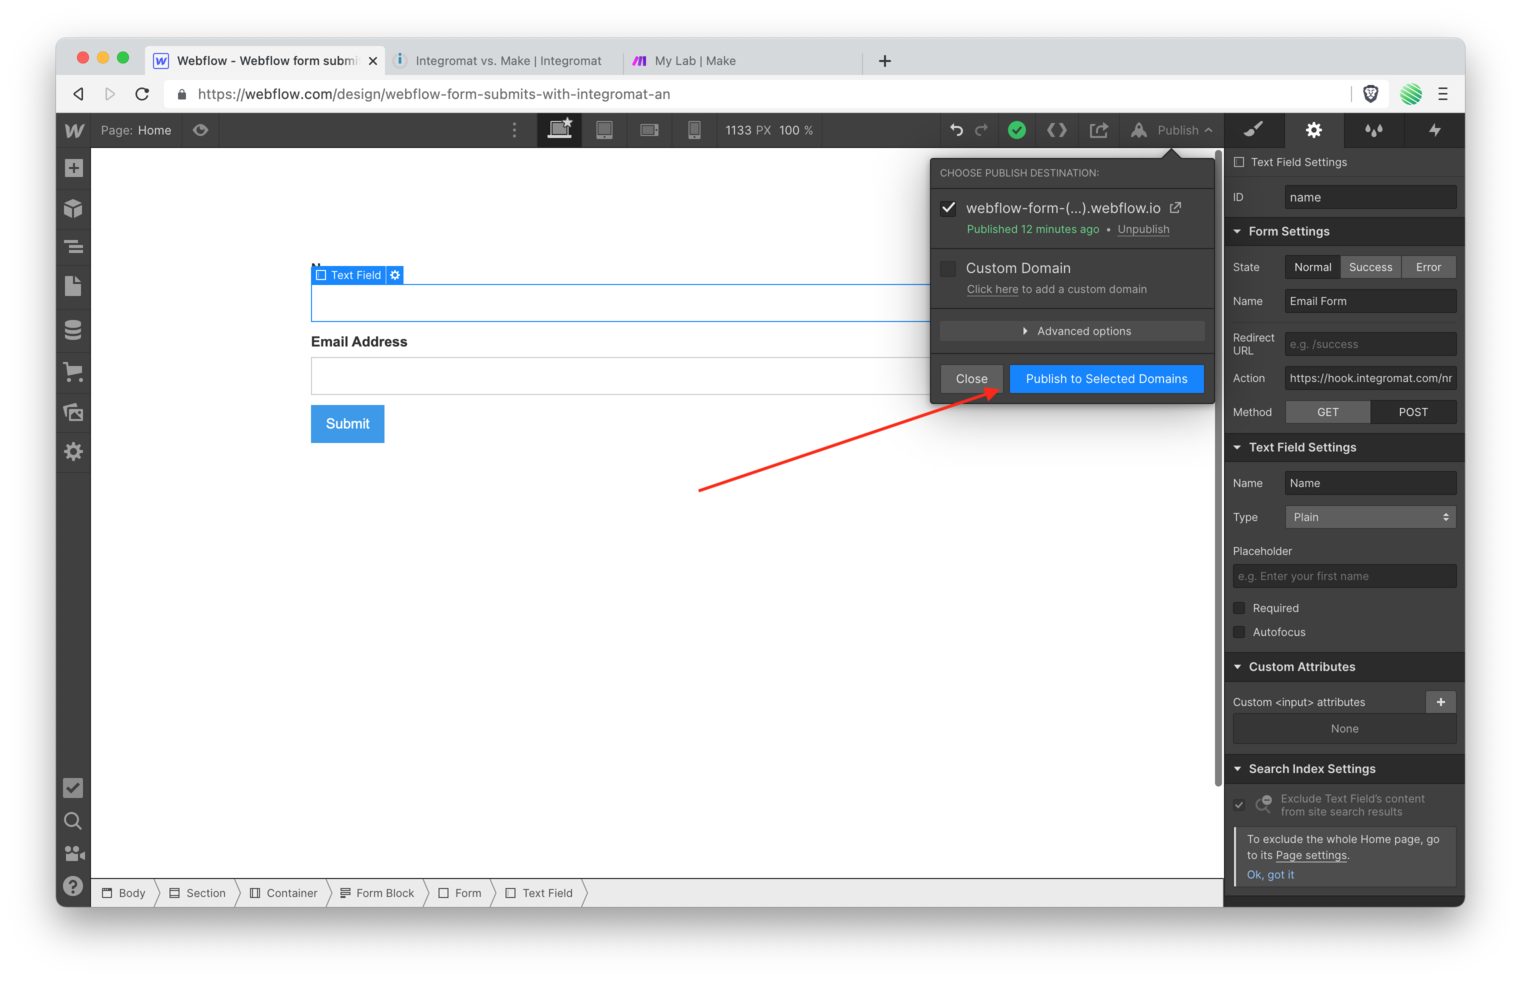
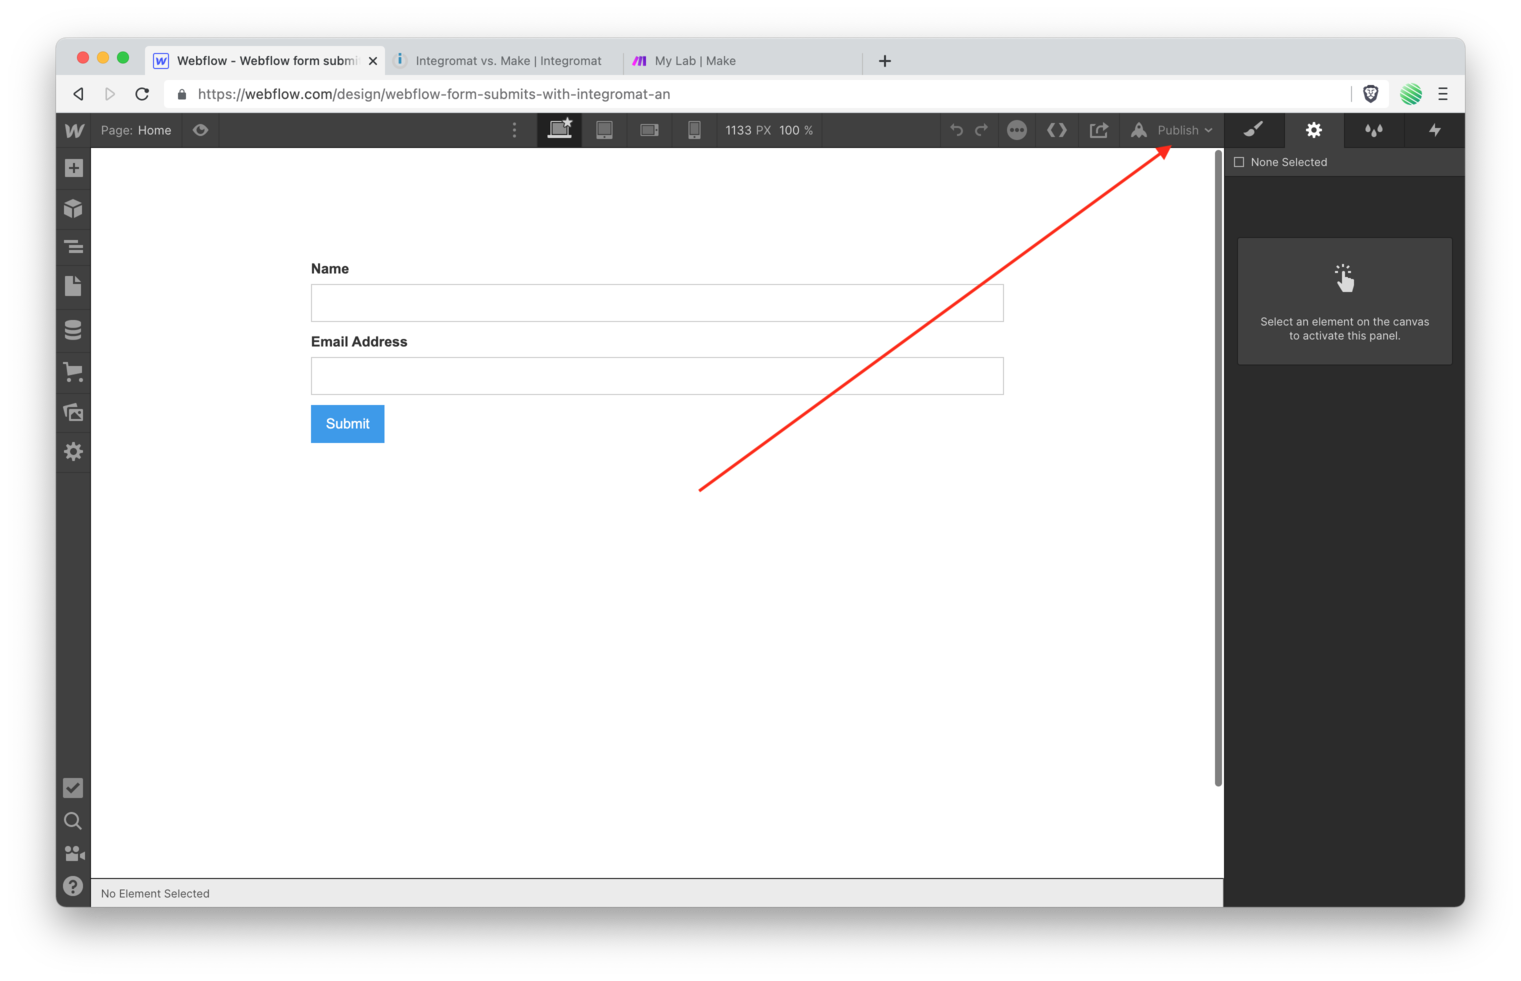
Tap the Publish button and publish the site.
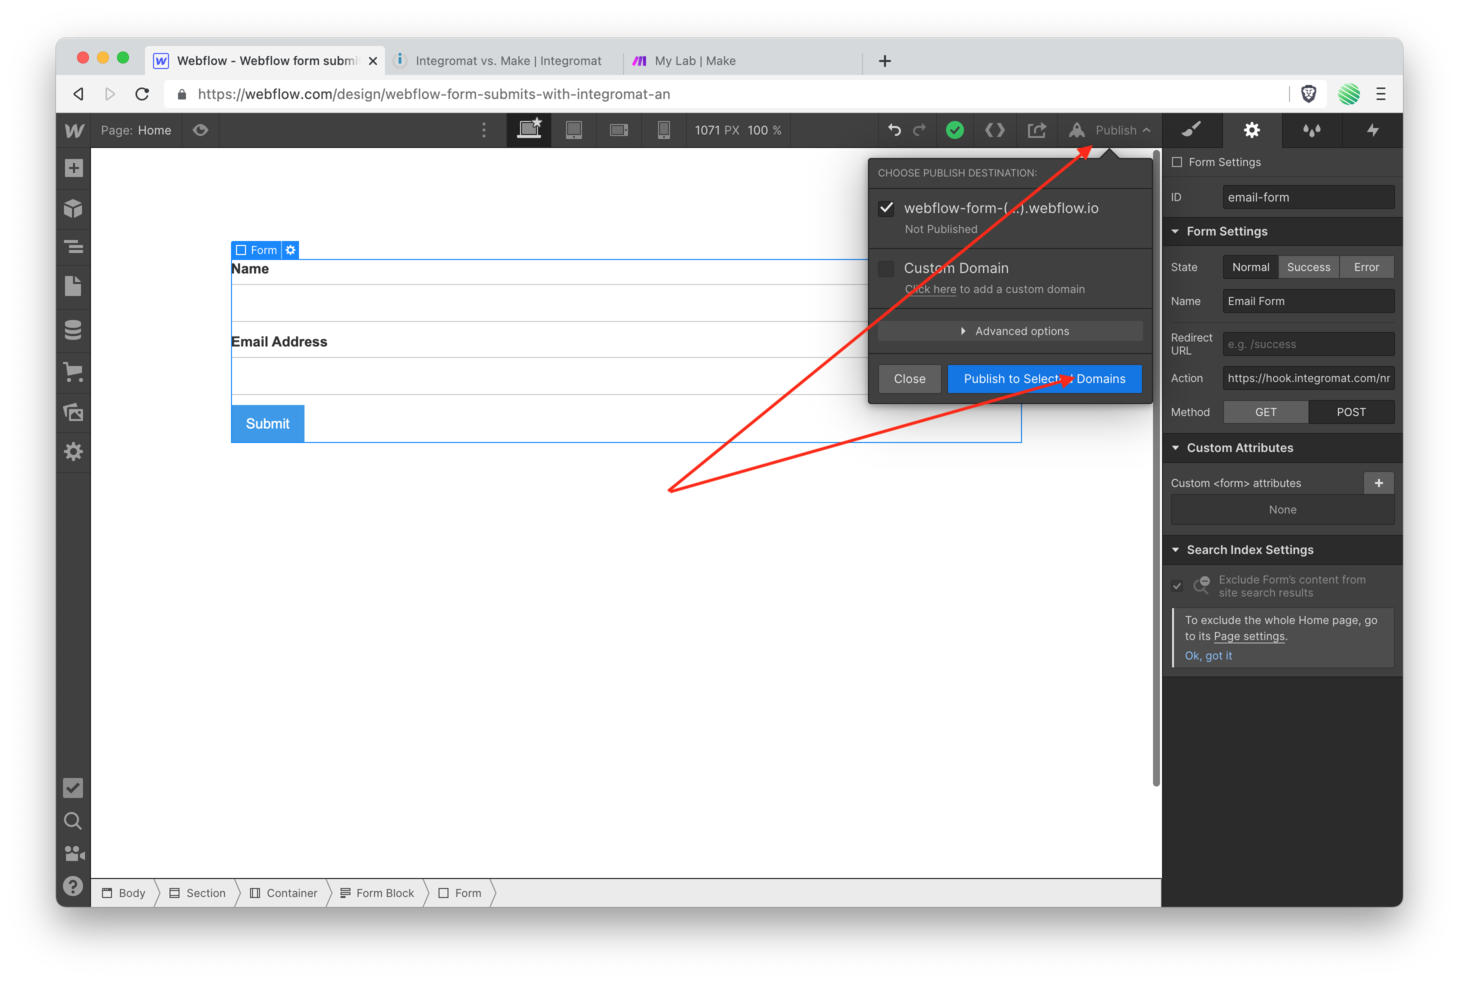
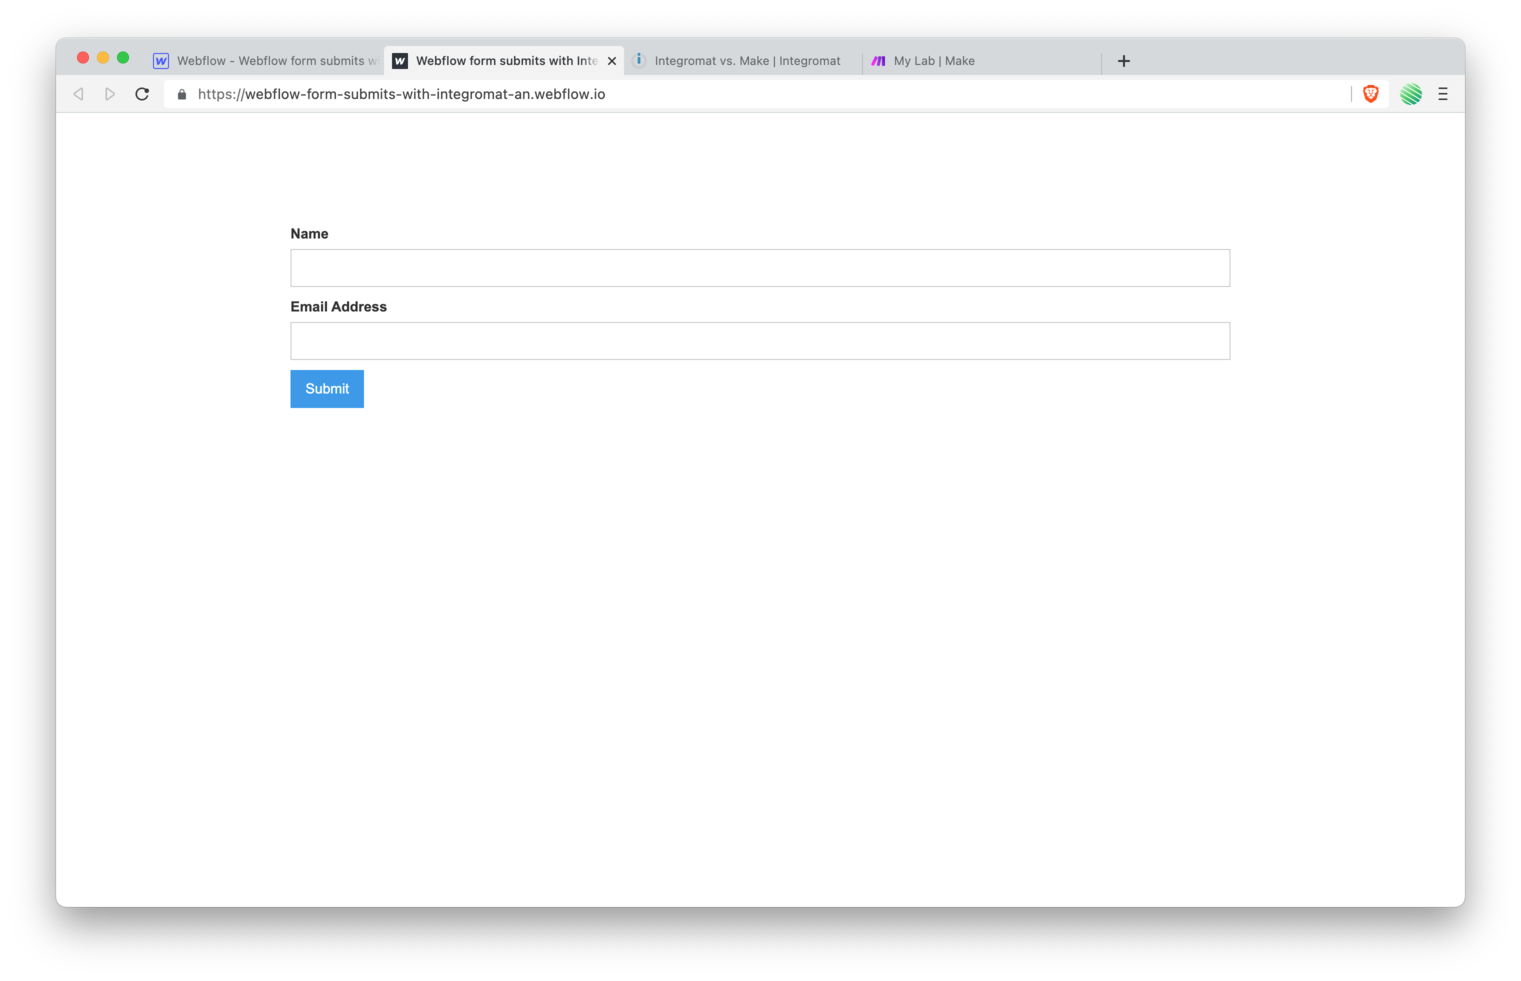
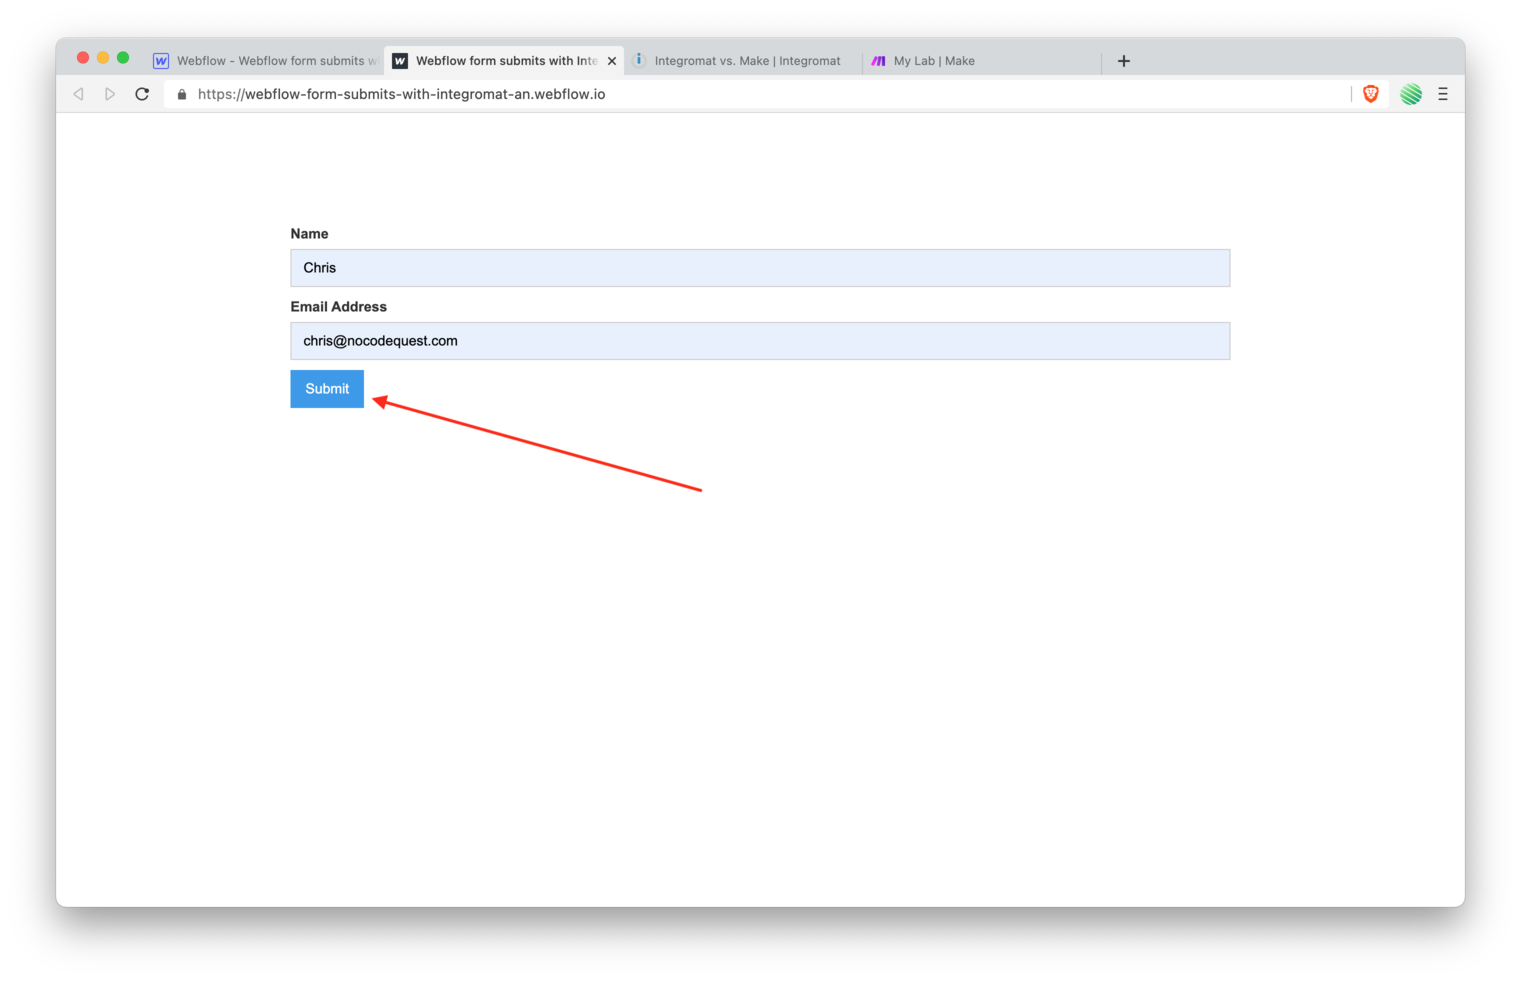
Open the site once published.
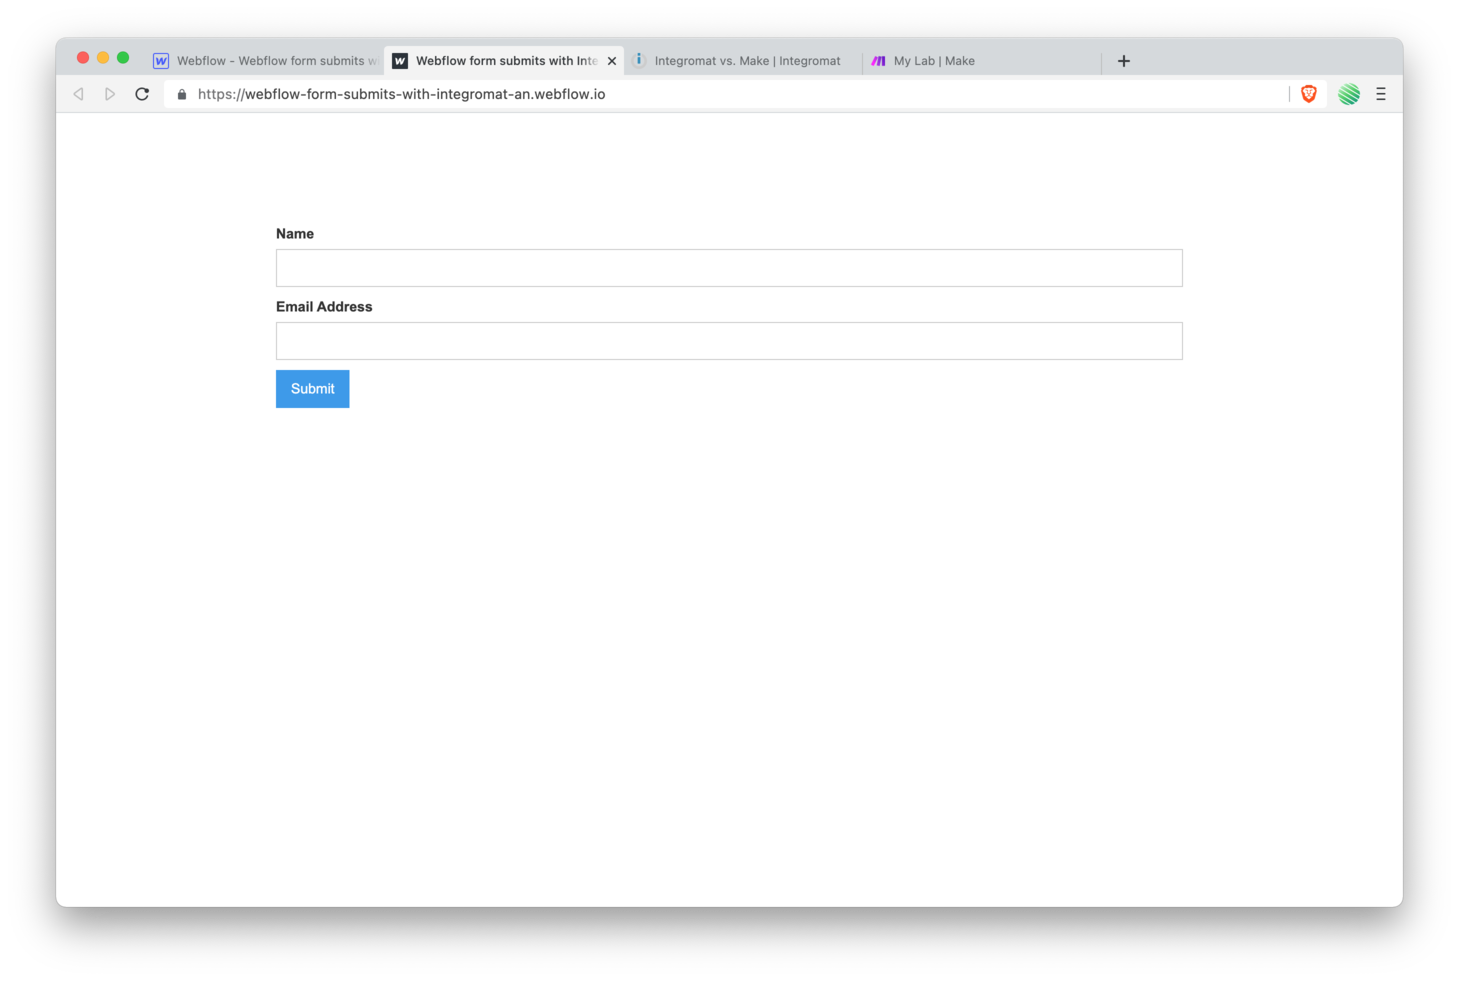
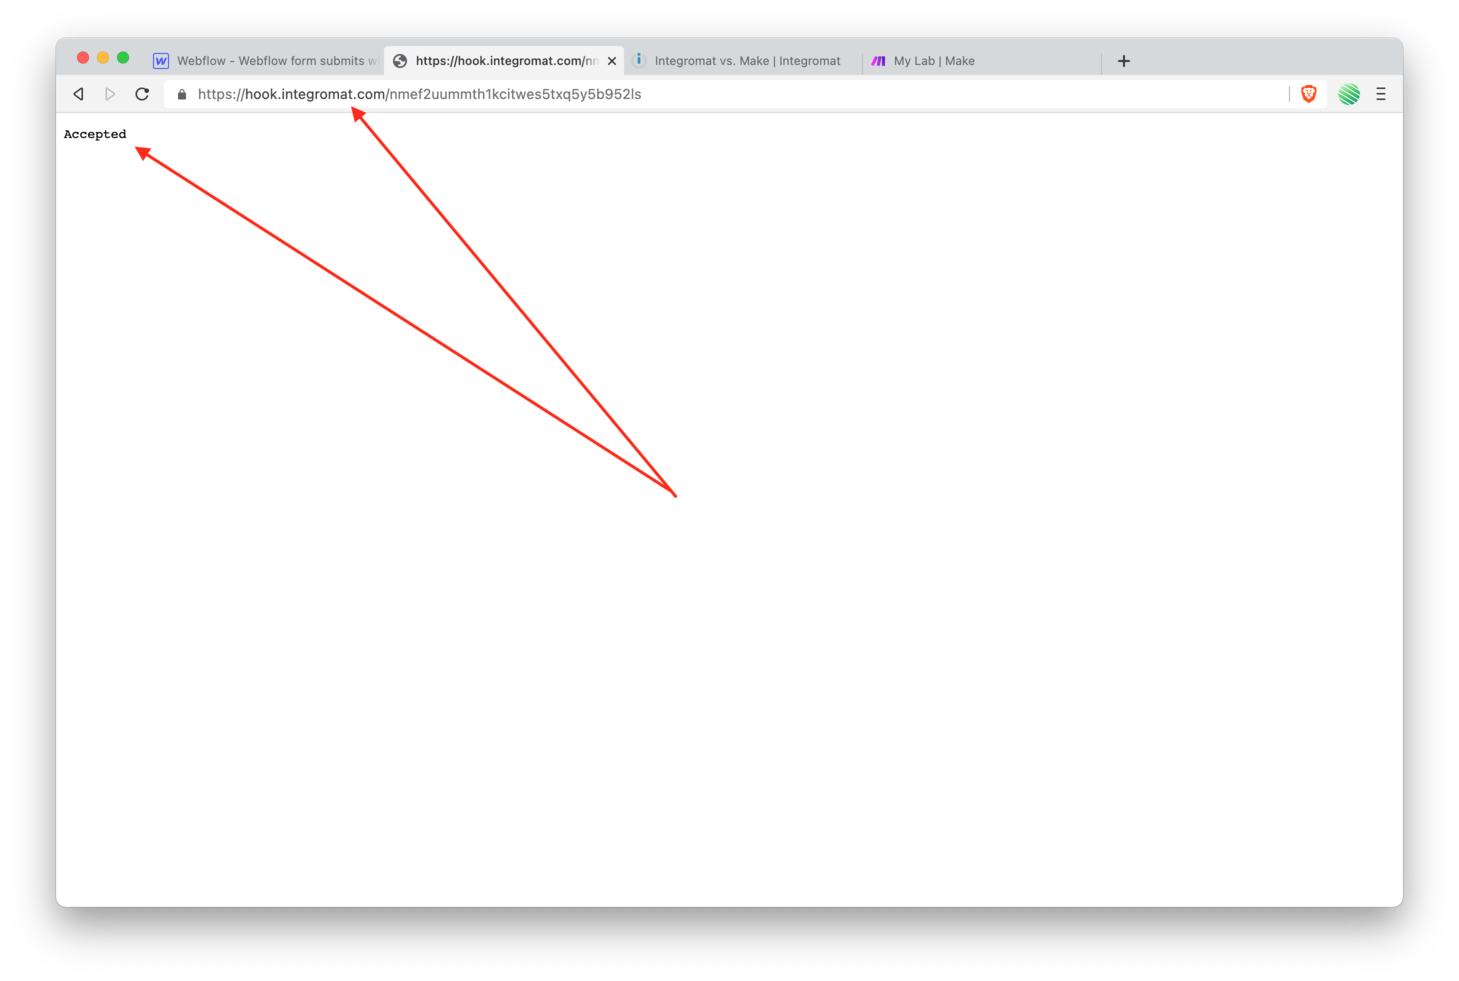
Fill out the form and submit.
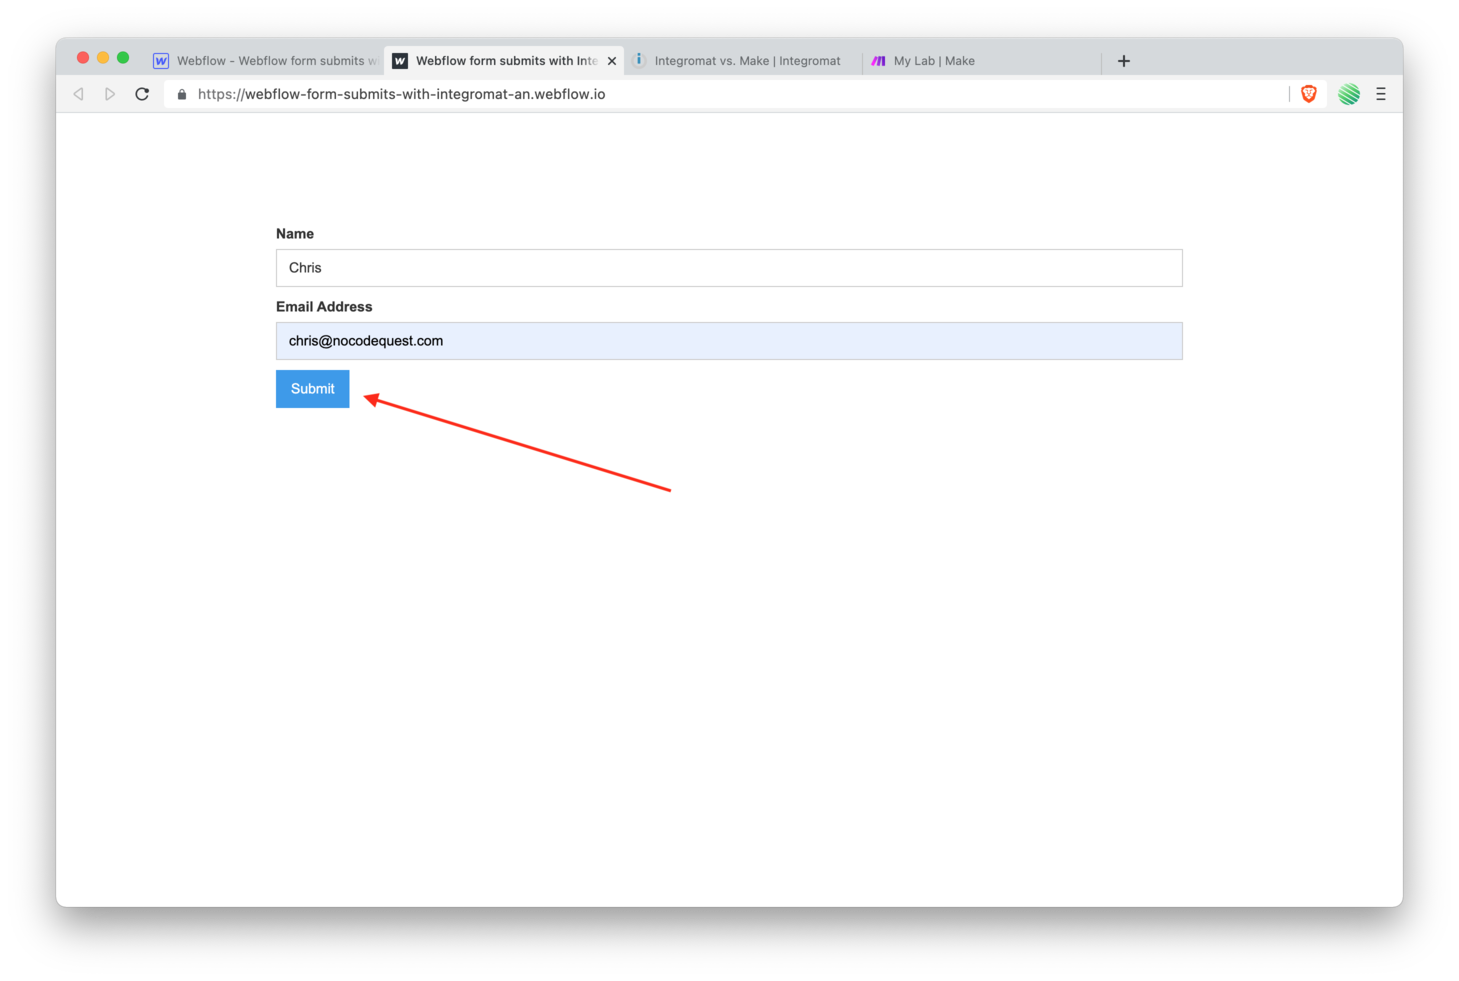
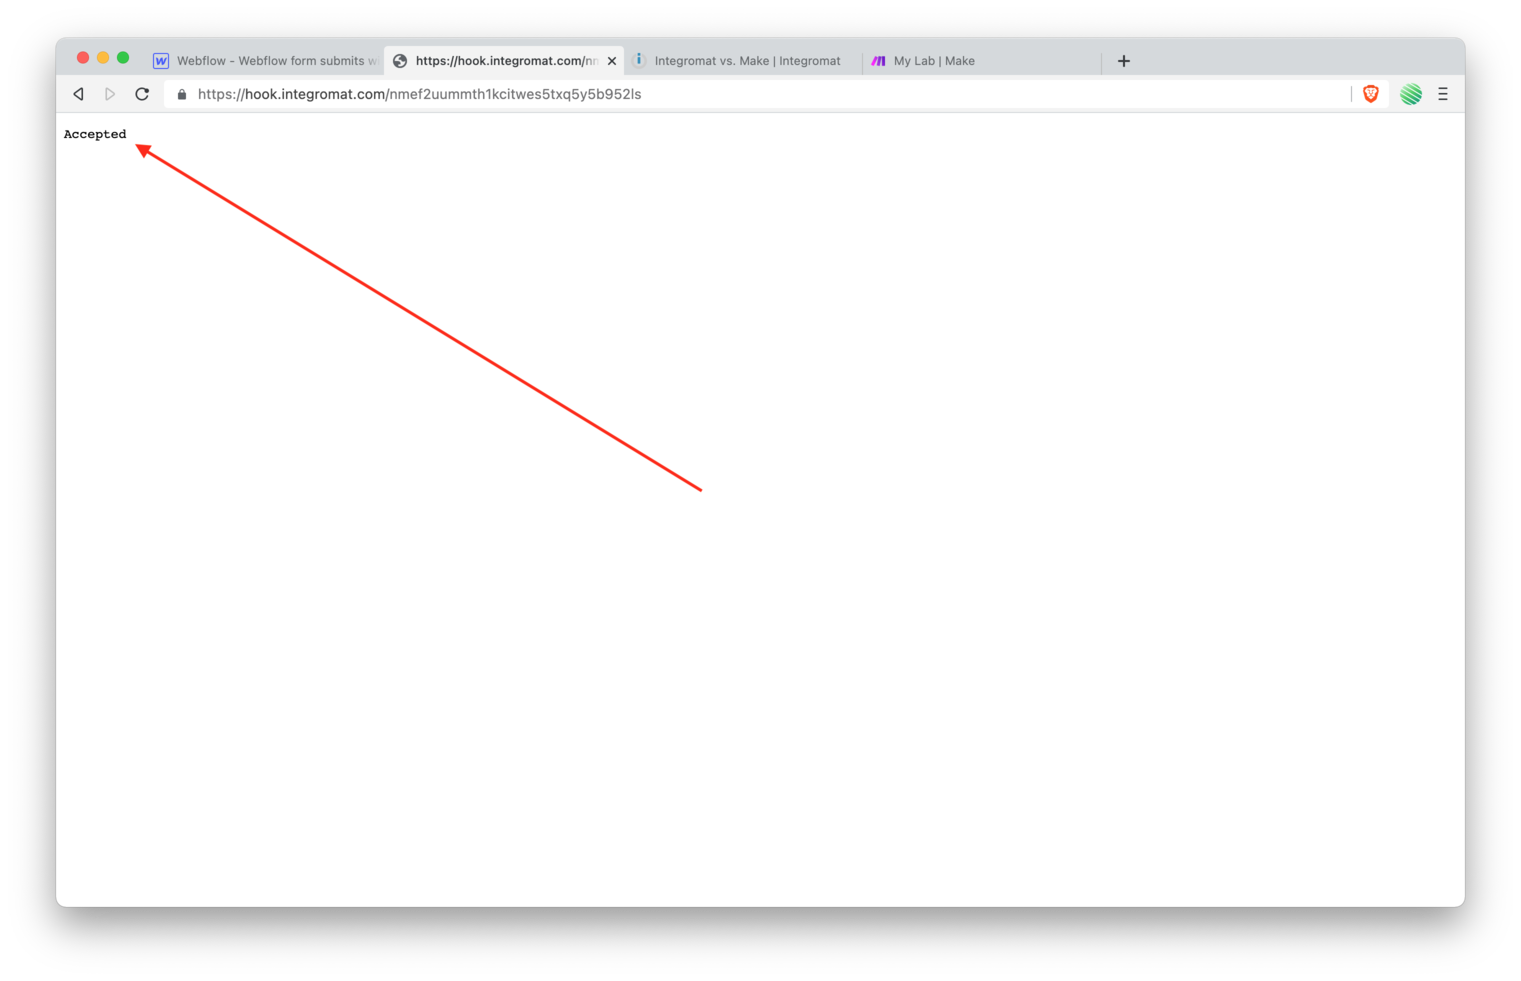
Notice you land on a blank page with the word “Accepted” on the screen. This is normal 😃 Also notice the url is your Integromat Webhook URL that you added to the Forms Action field.
What happened is that you submitted the form to the Integromat (and Make) Webhook and this is how Integromat (and Make) responded to the form submission. You’ll change this shortly.
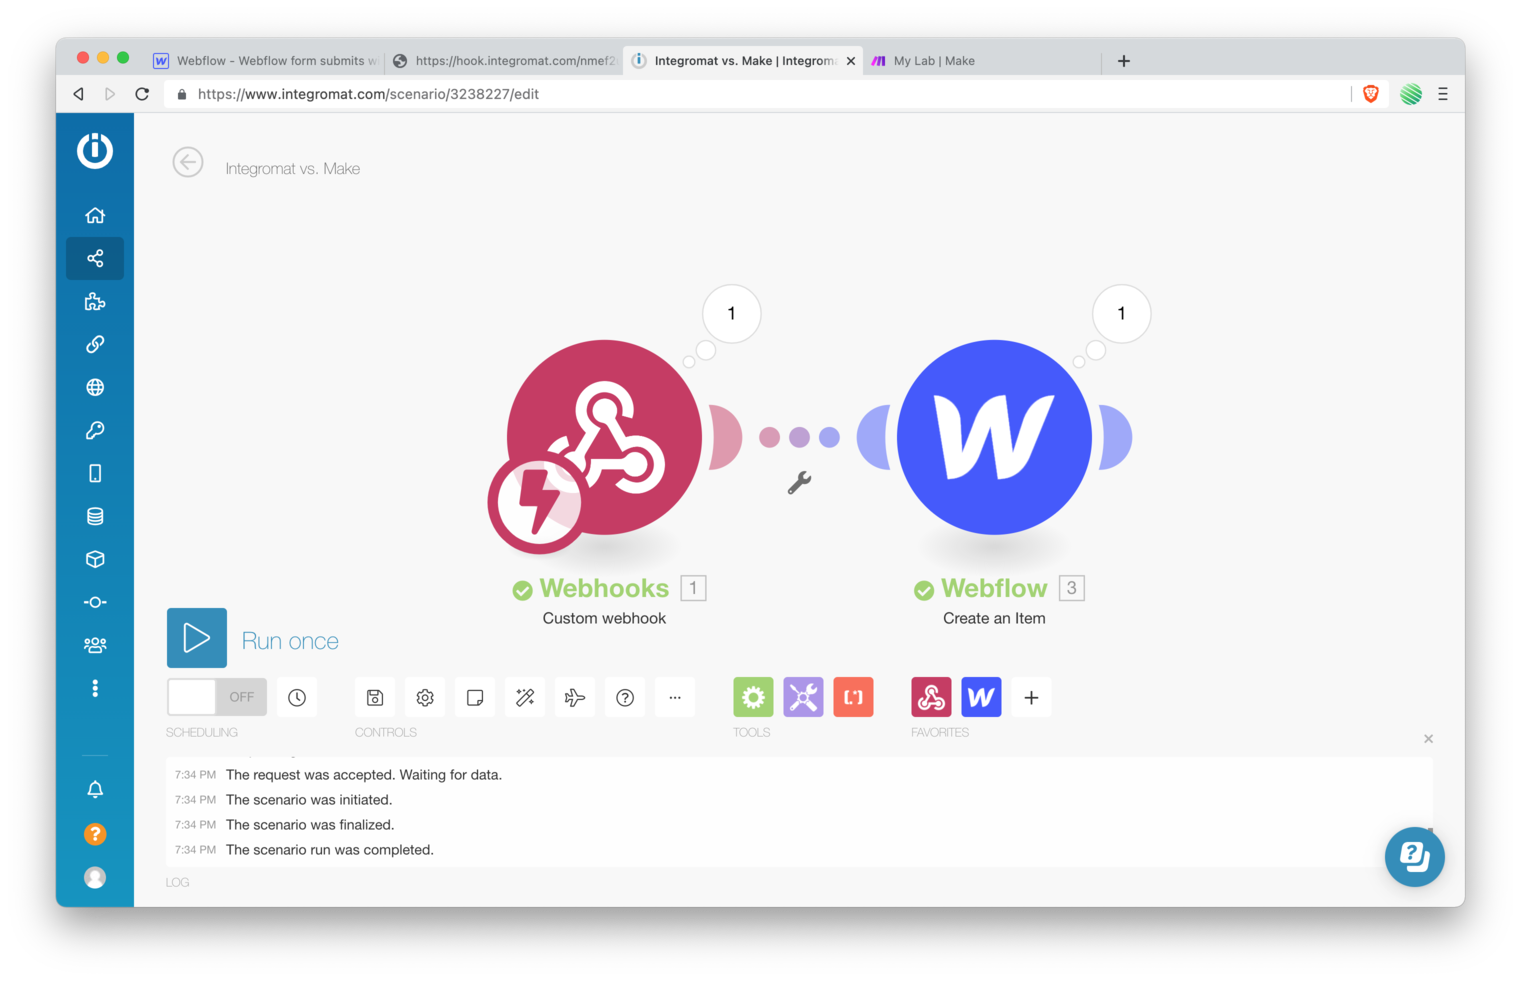
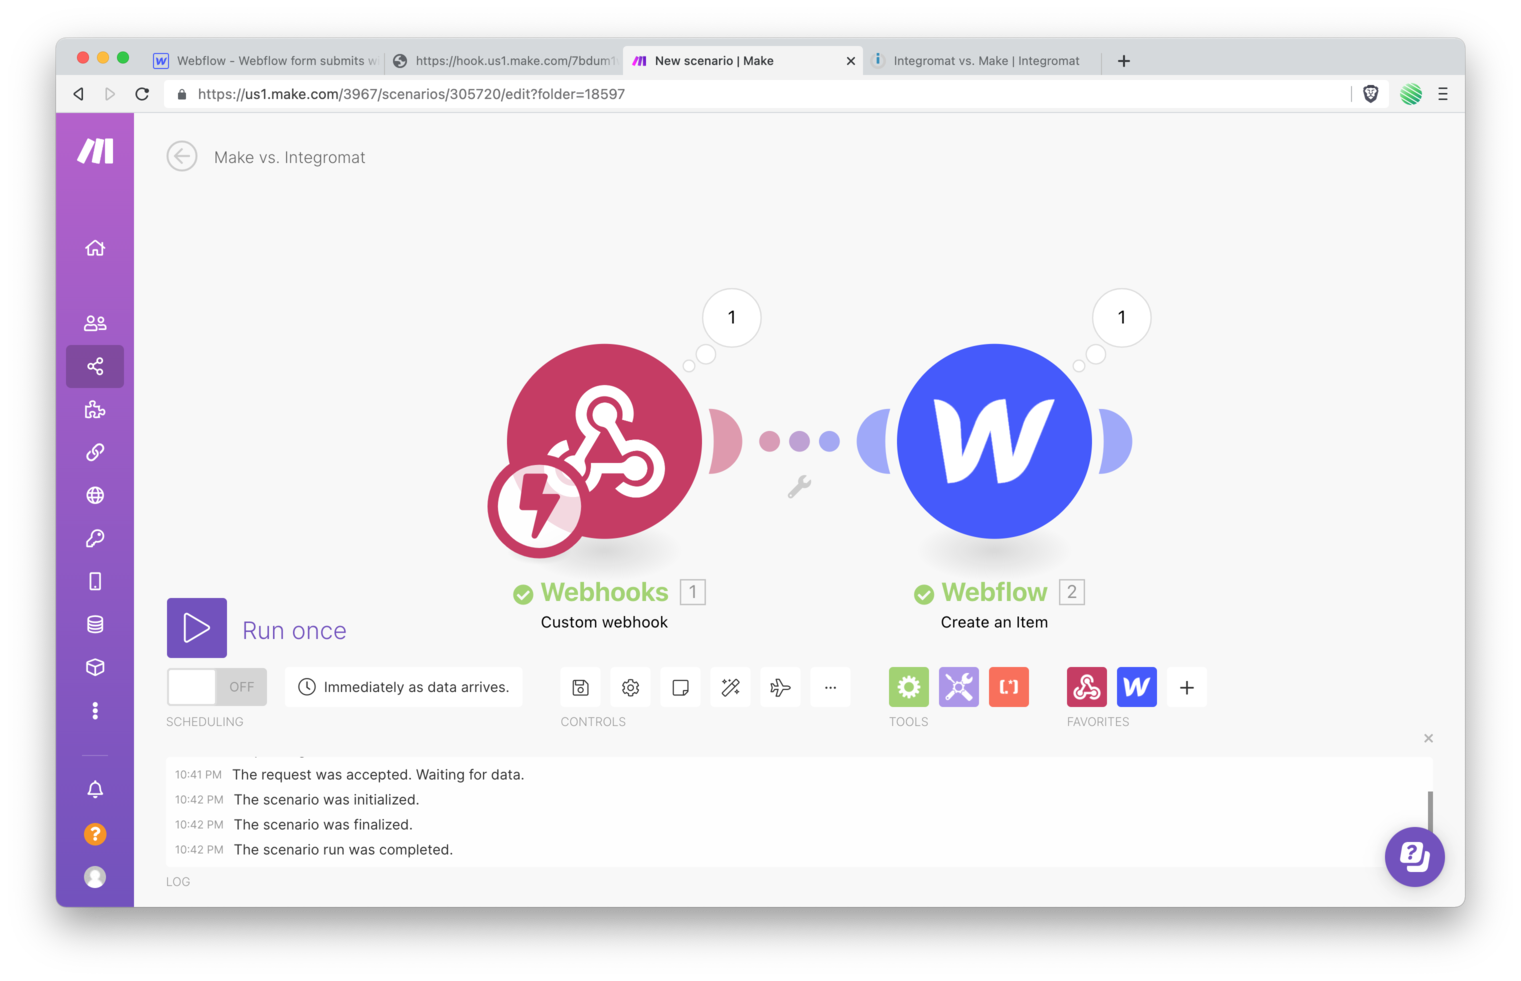
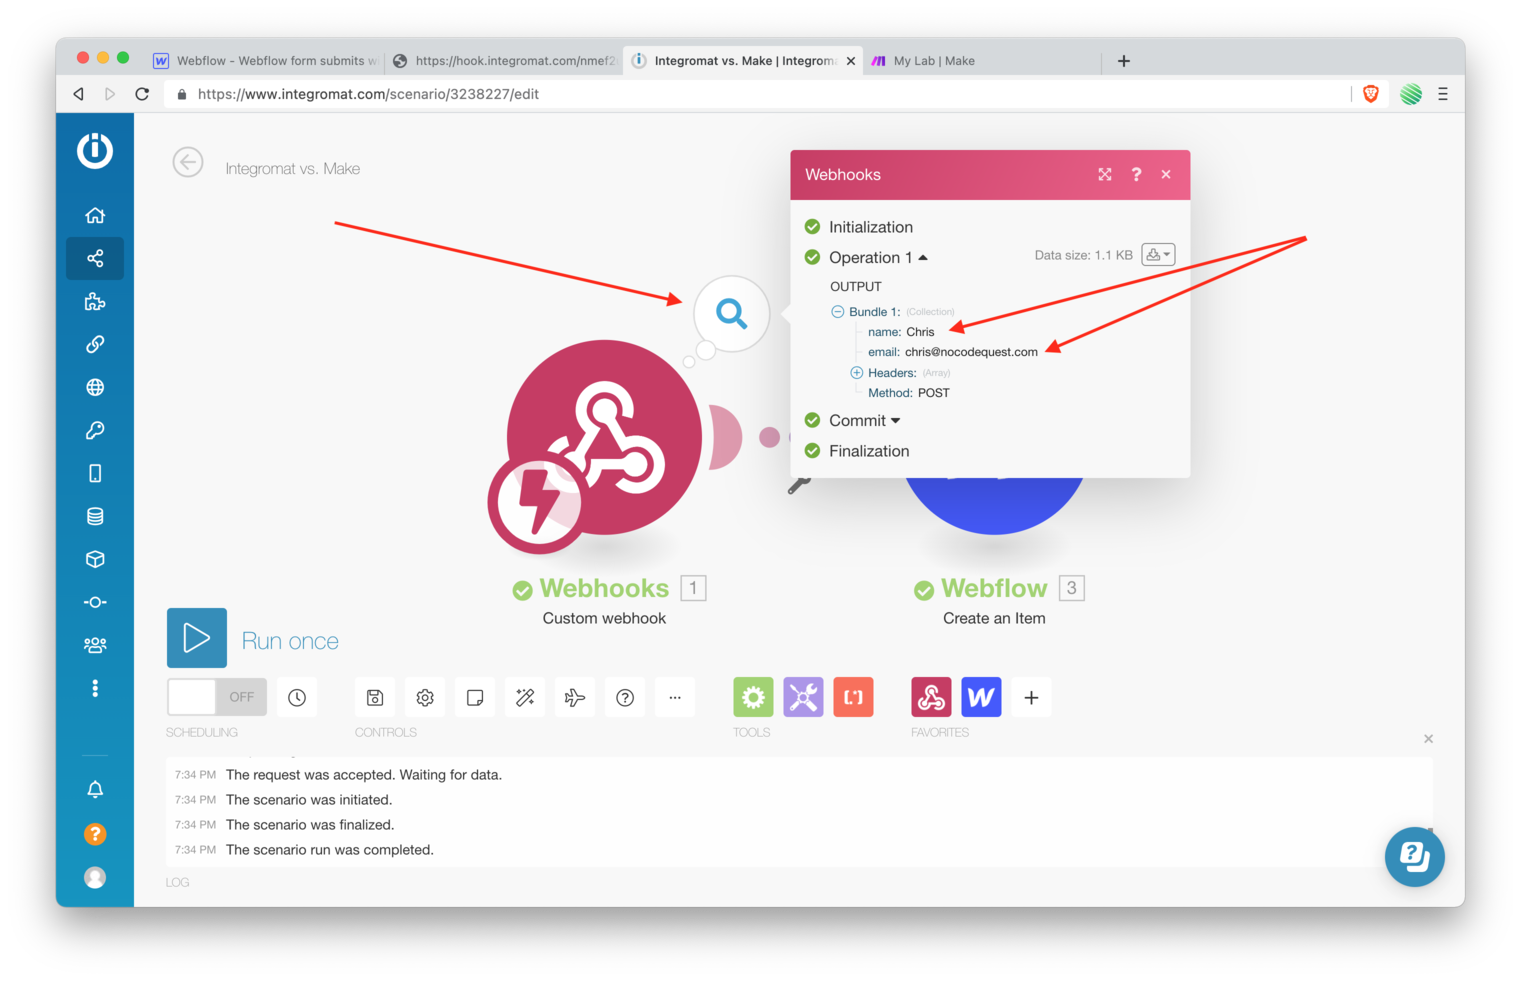
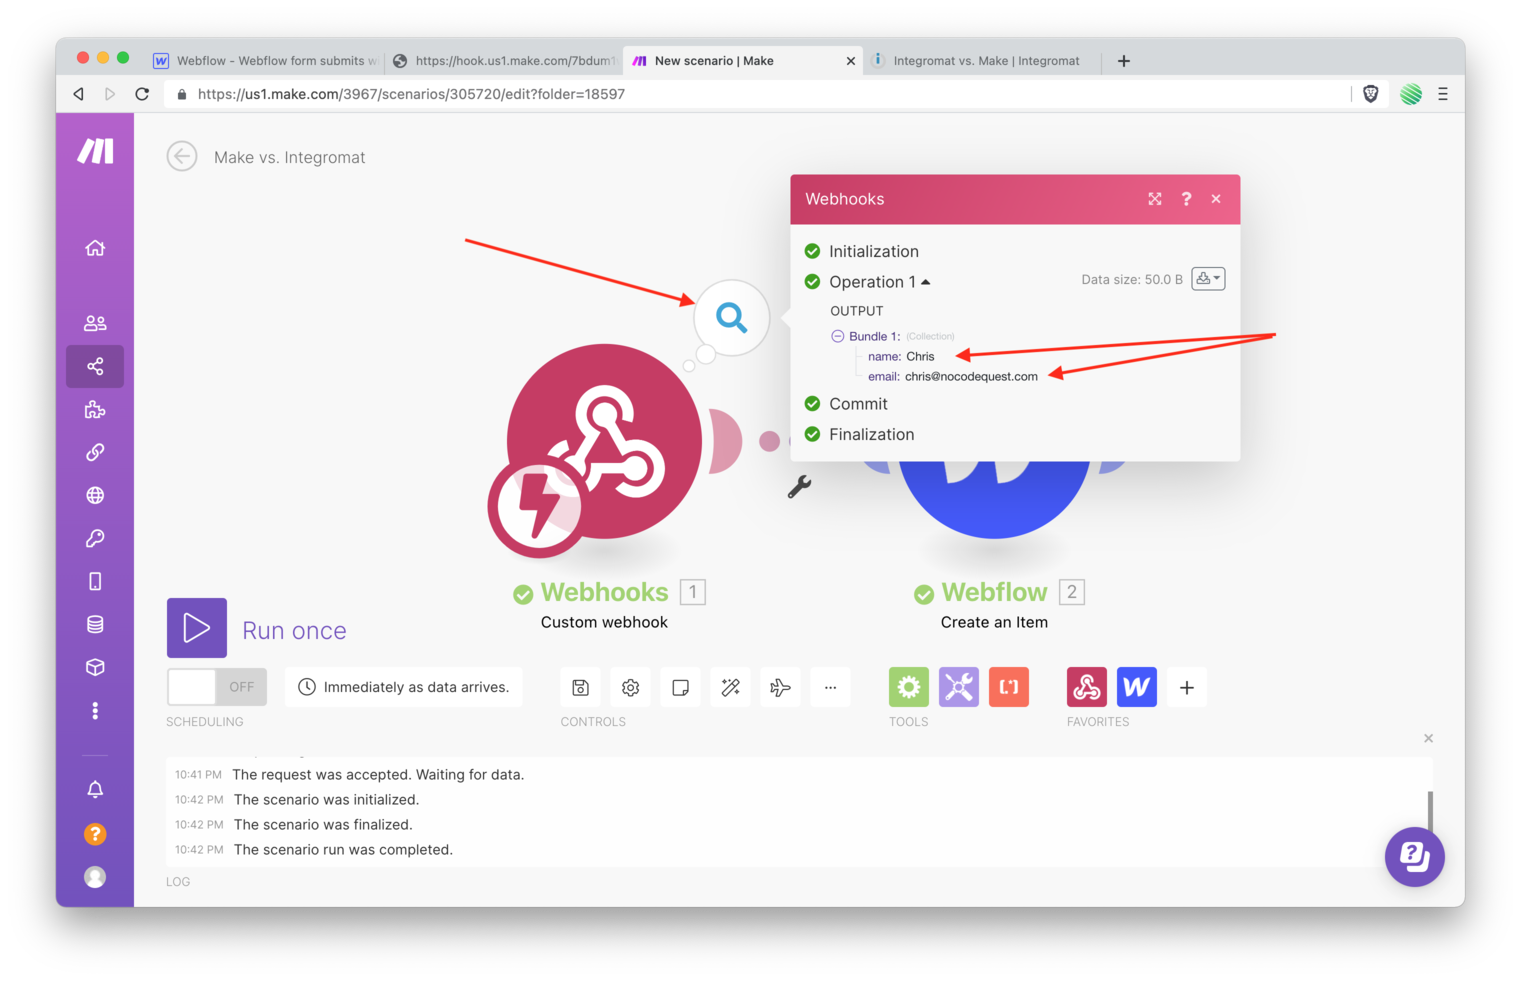
Flip back over to Make & Integromat and notice the Webhook was successfully received from your form submission.
Integromat:
Make:
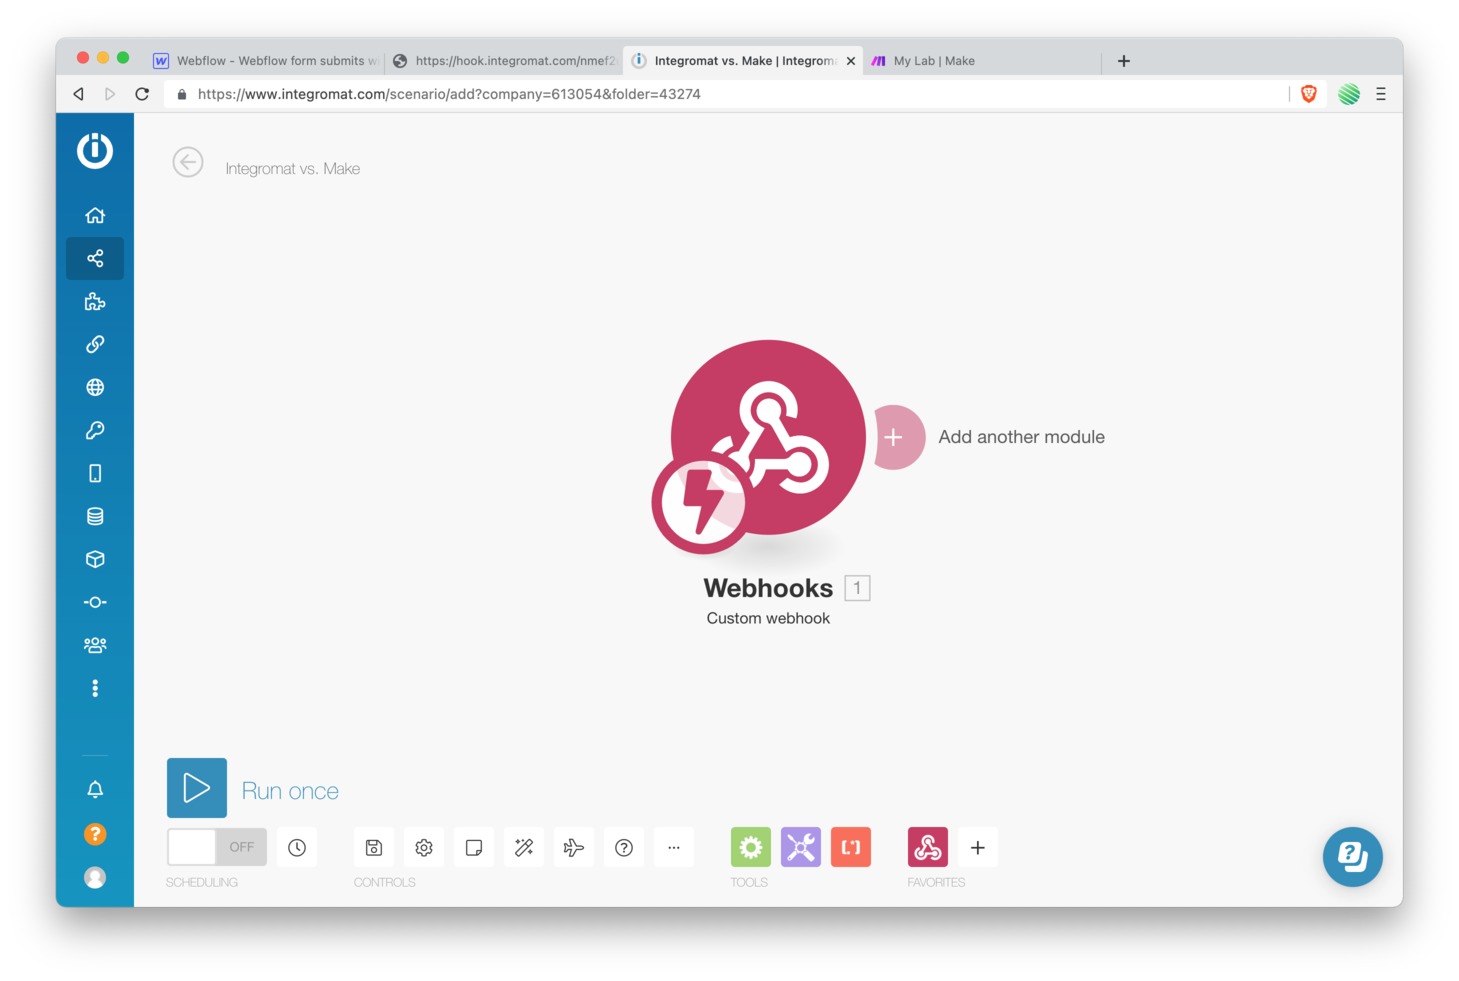
Everything is looking great so far!
Integromat:
Make:
Next you’ll create a Webflow CMS Collection, have Make & Integromat create a new CMS item with whatever you submitted in the form, and then redirect the users browser to another Webflow page.
CMS Collection
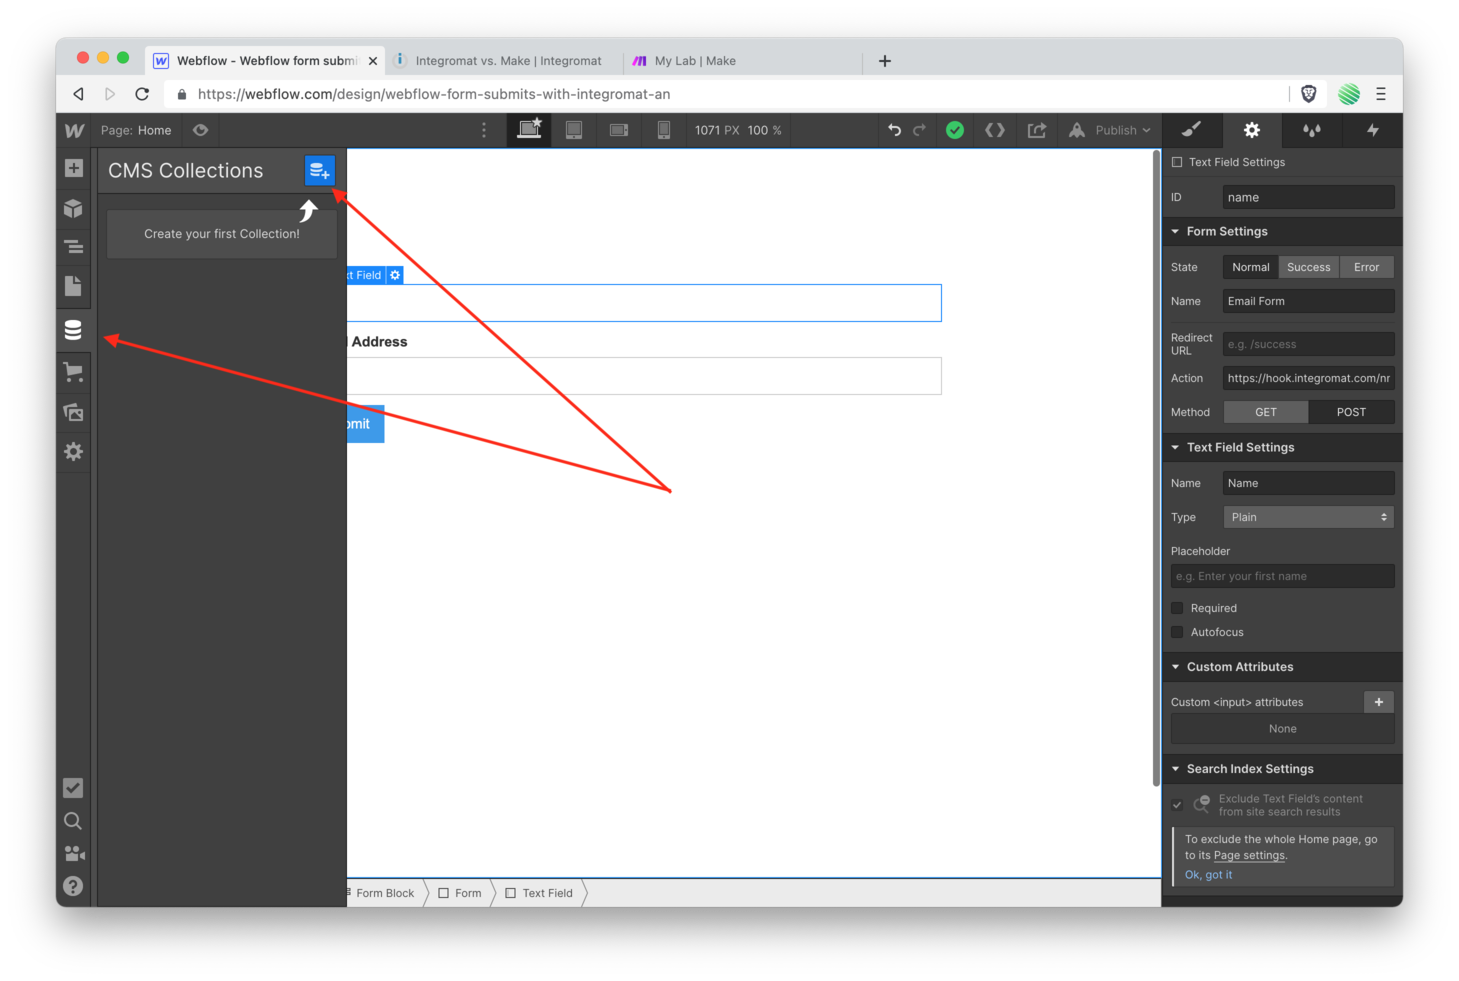
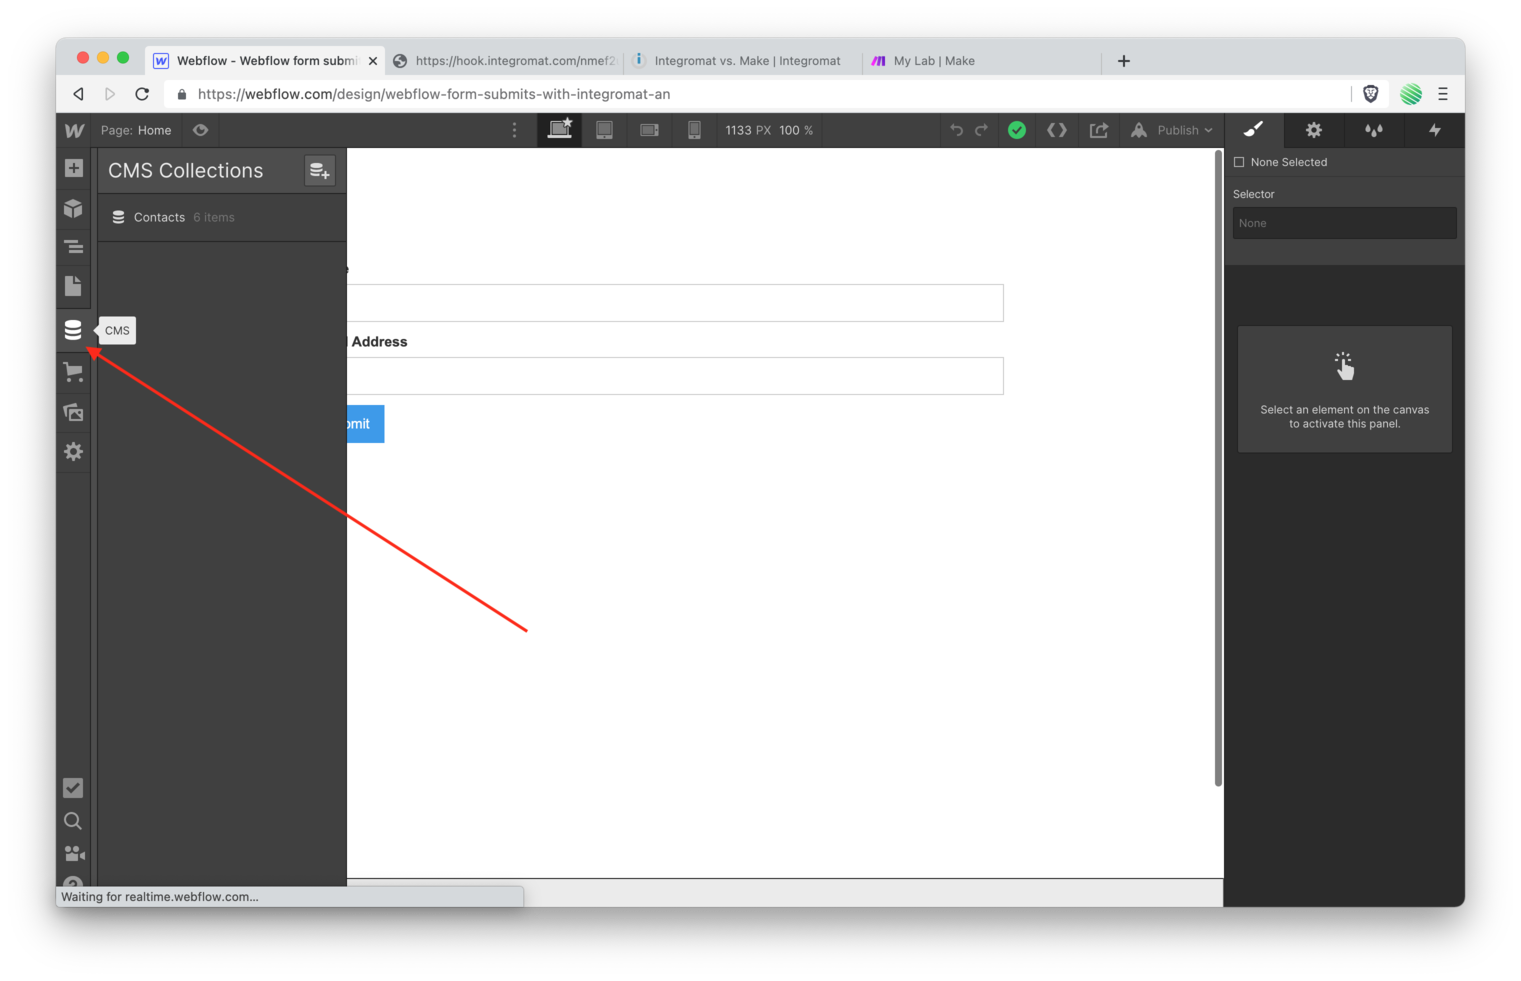
Flip back over to your Webflow Designer and open up the CMS Editor (shown in the screenshot below). Tap the create collection button.
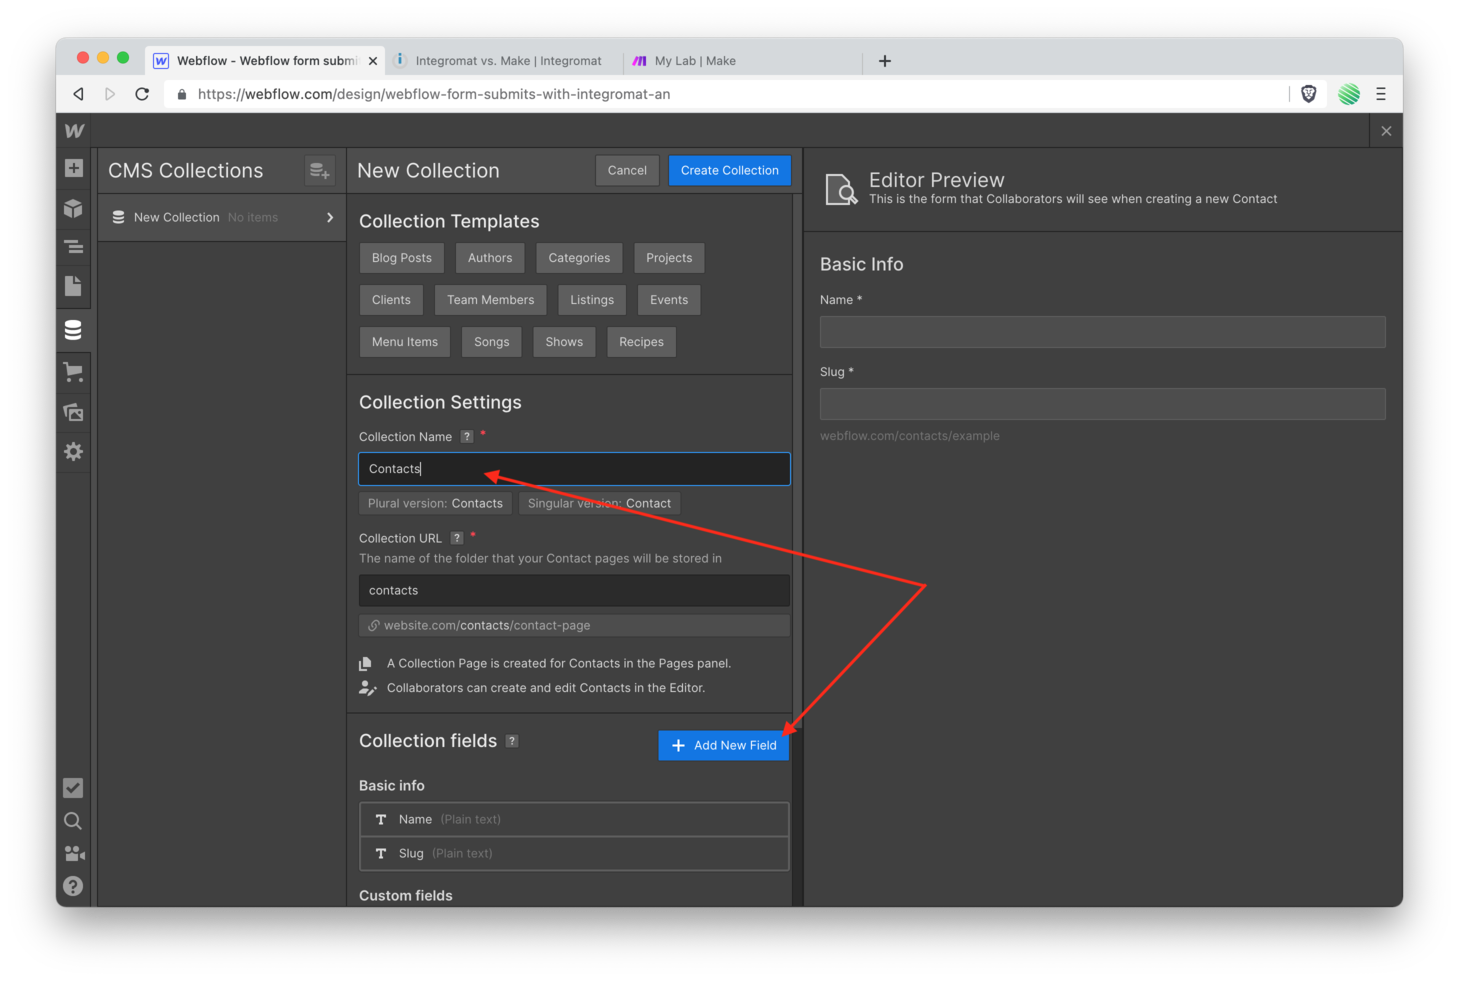
Give your new Collection a name. I named mine “Contacts” since I’m collecting the default name & email address on the form block.
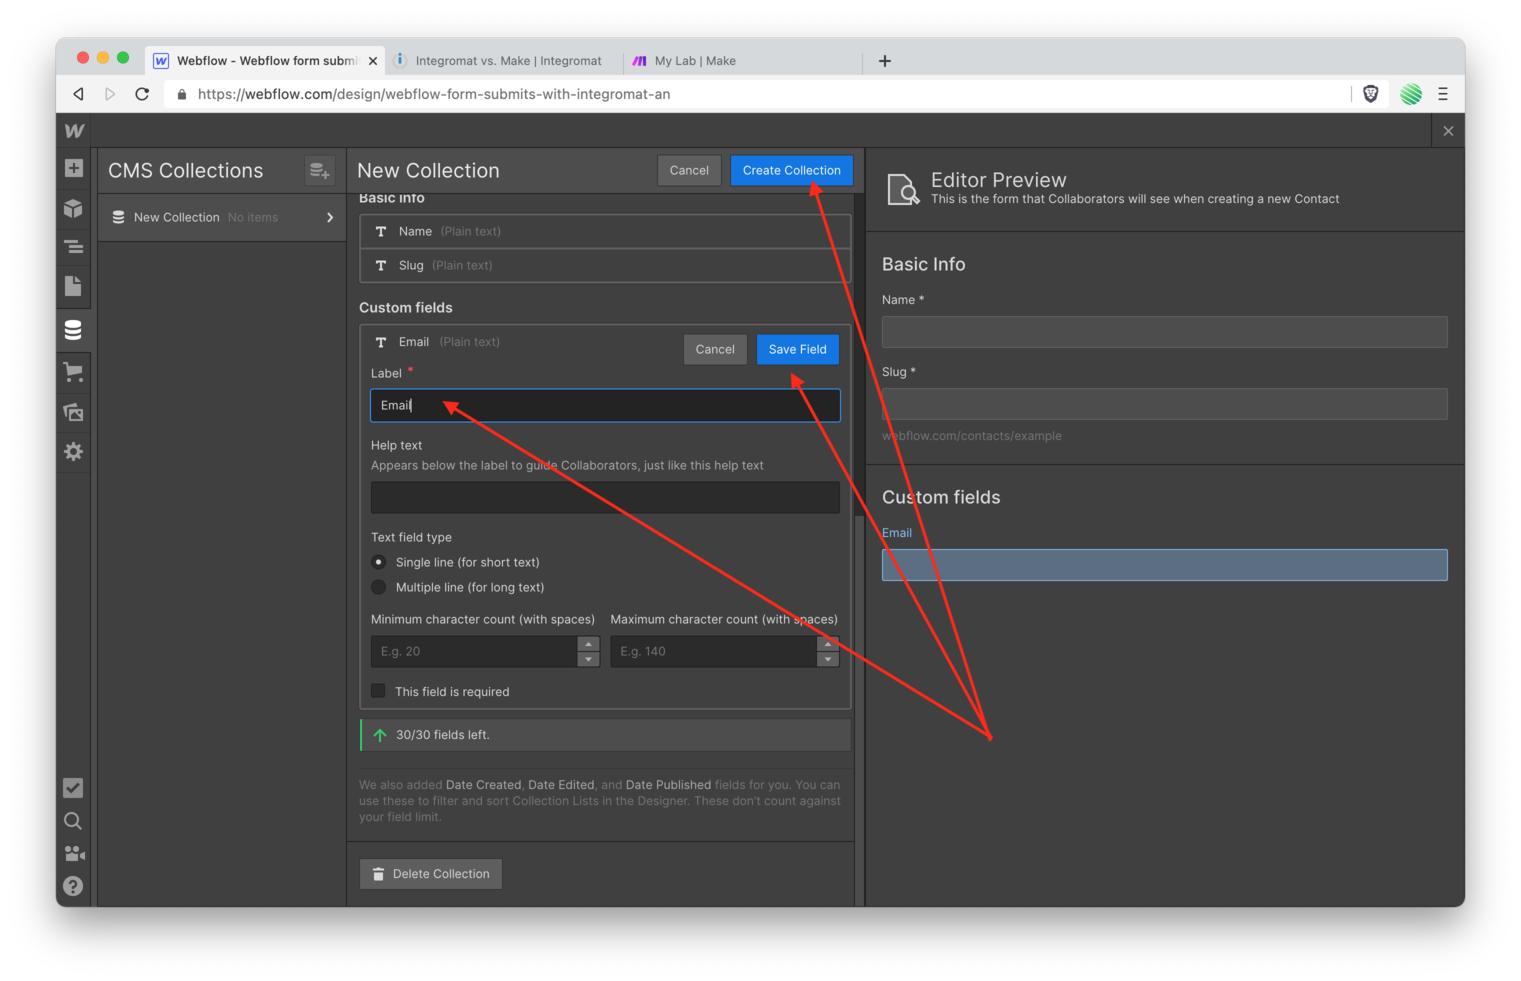
Tap the “Add New Field” button.
Select the “Plain text” option.
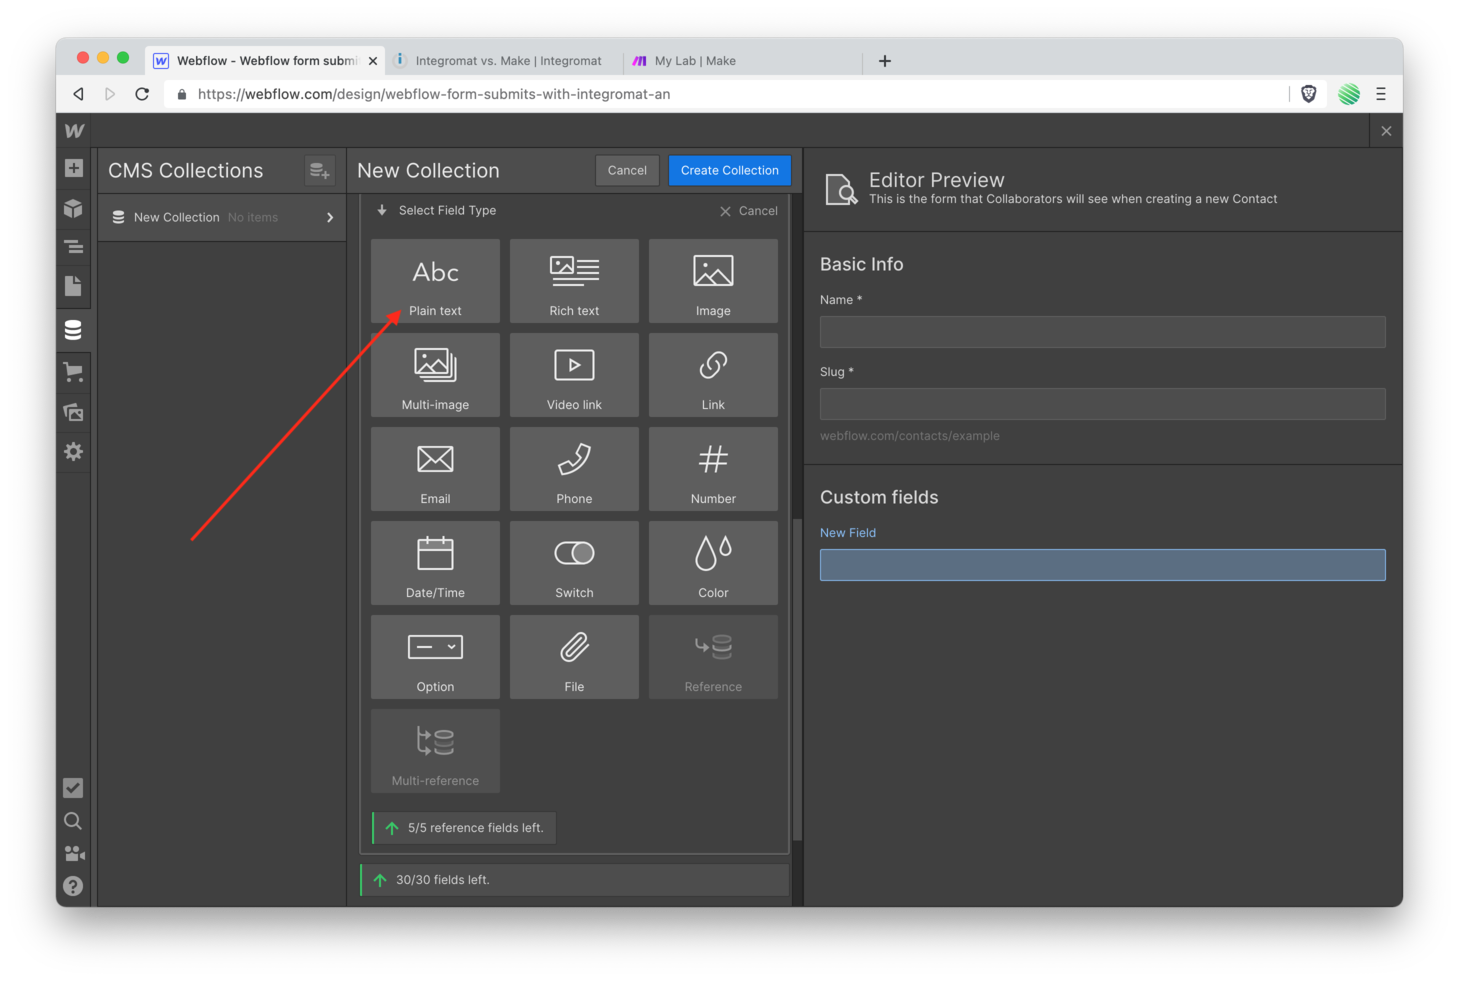
Name it “Email”, since that’s what you’ll be collecting from the form submission. Also you may have noticed but the “Name” field, which you also collect on the form submission exists by default.
Save the form field and create the collection.
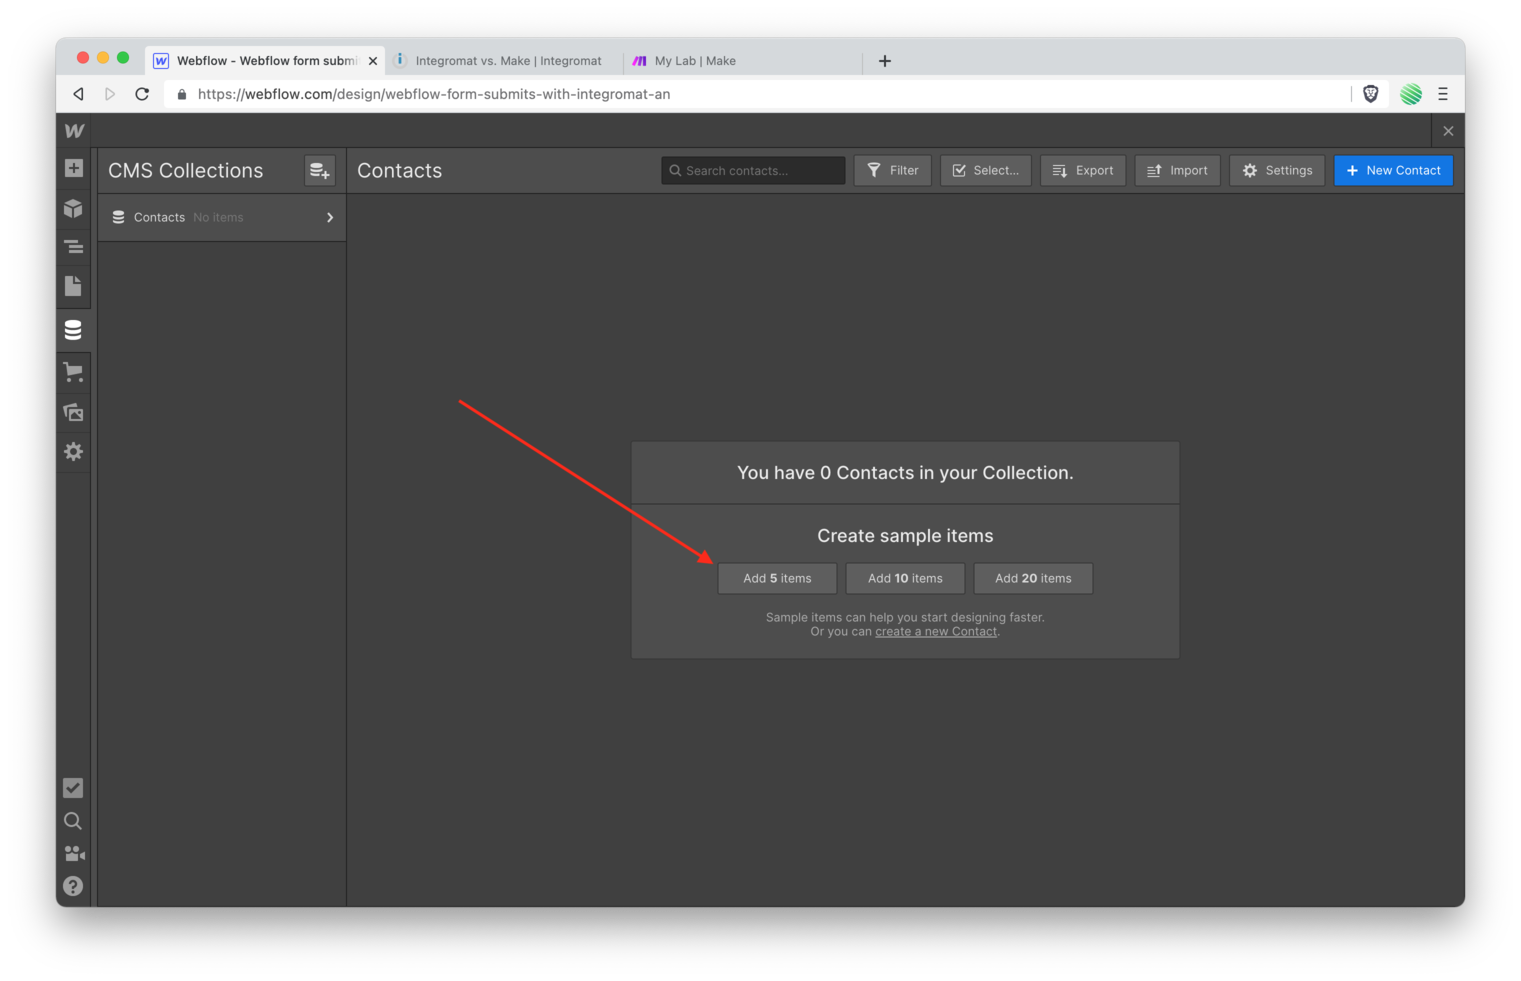
Go ahead and create 5 sample items. You’ll be creating a CMS Collection page in a moment and it helps to have some CMS items when you’re creating it.
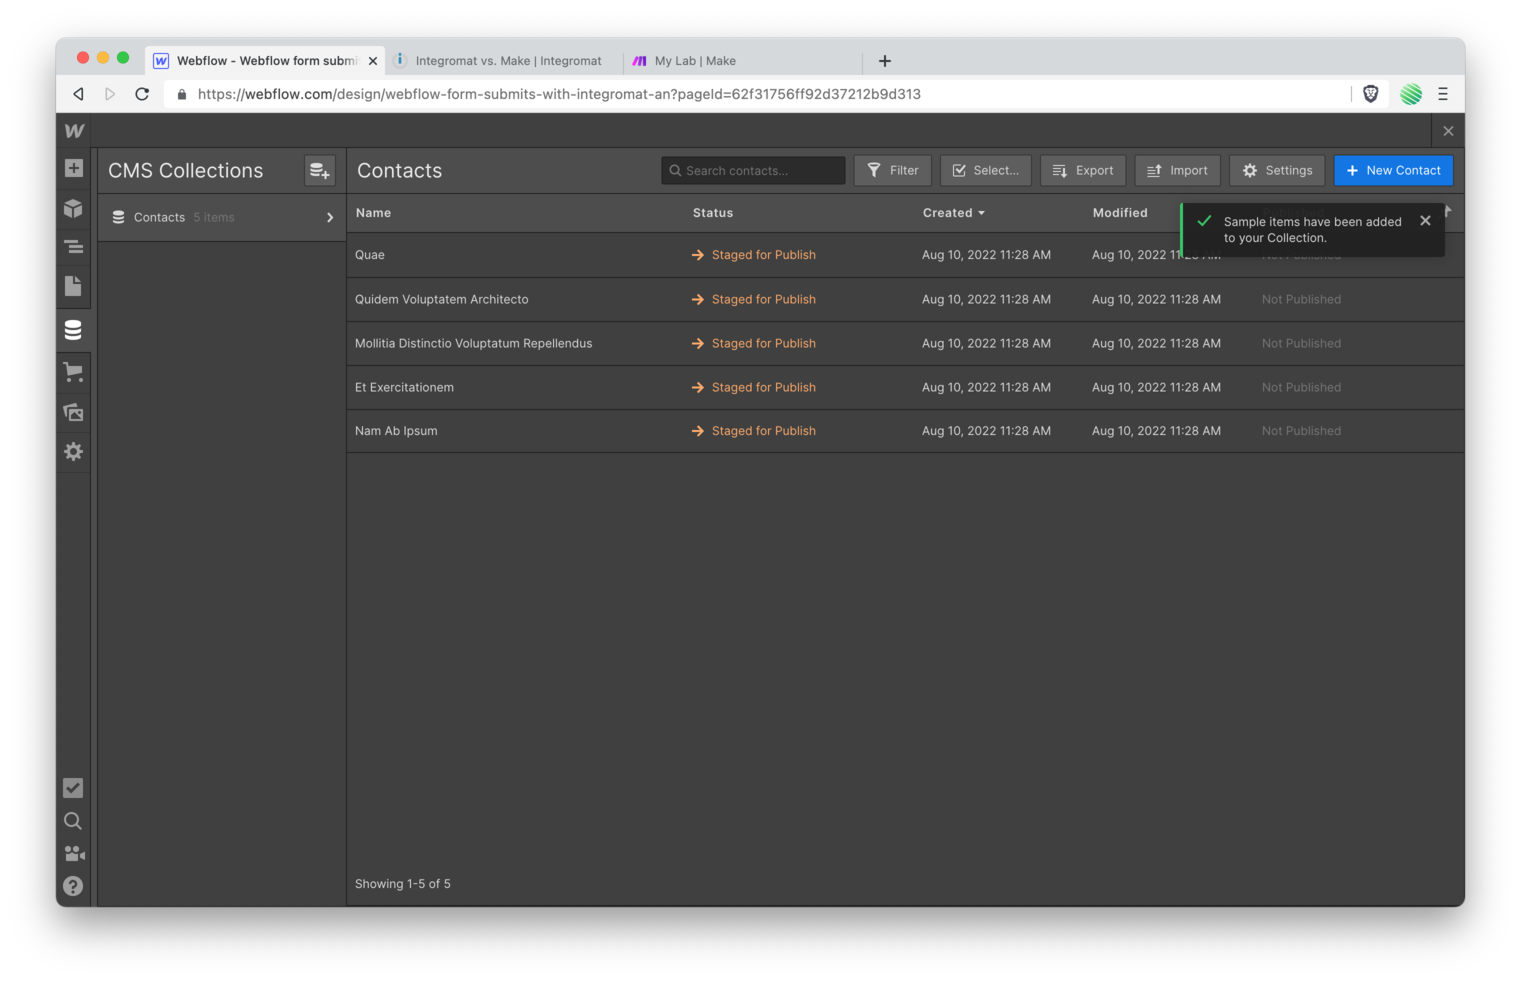
Next republish your site.
This will get all of your CMS Collection additions added to the live site.
CMS Collection Page
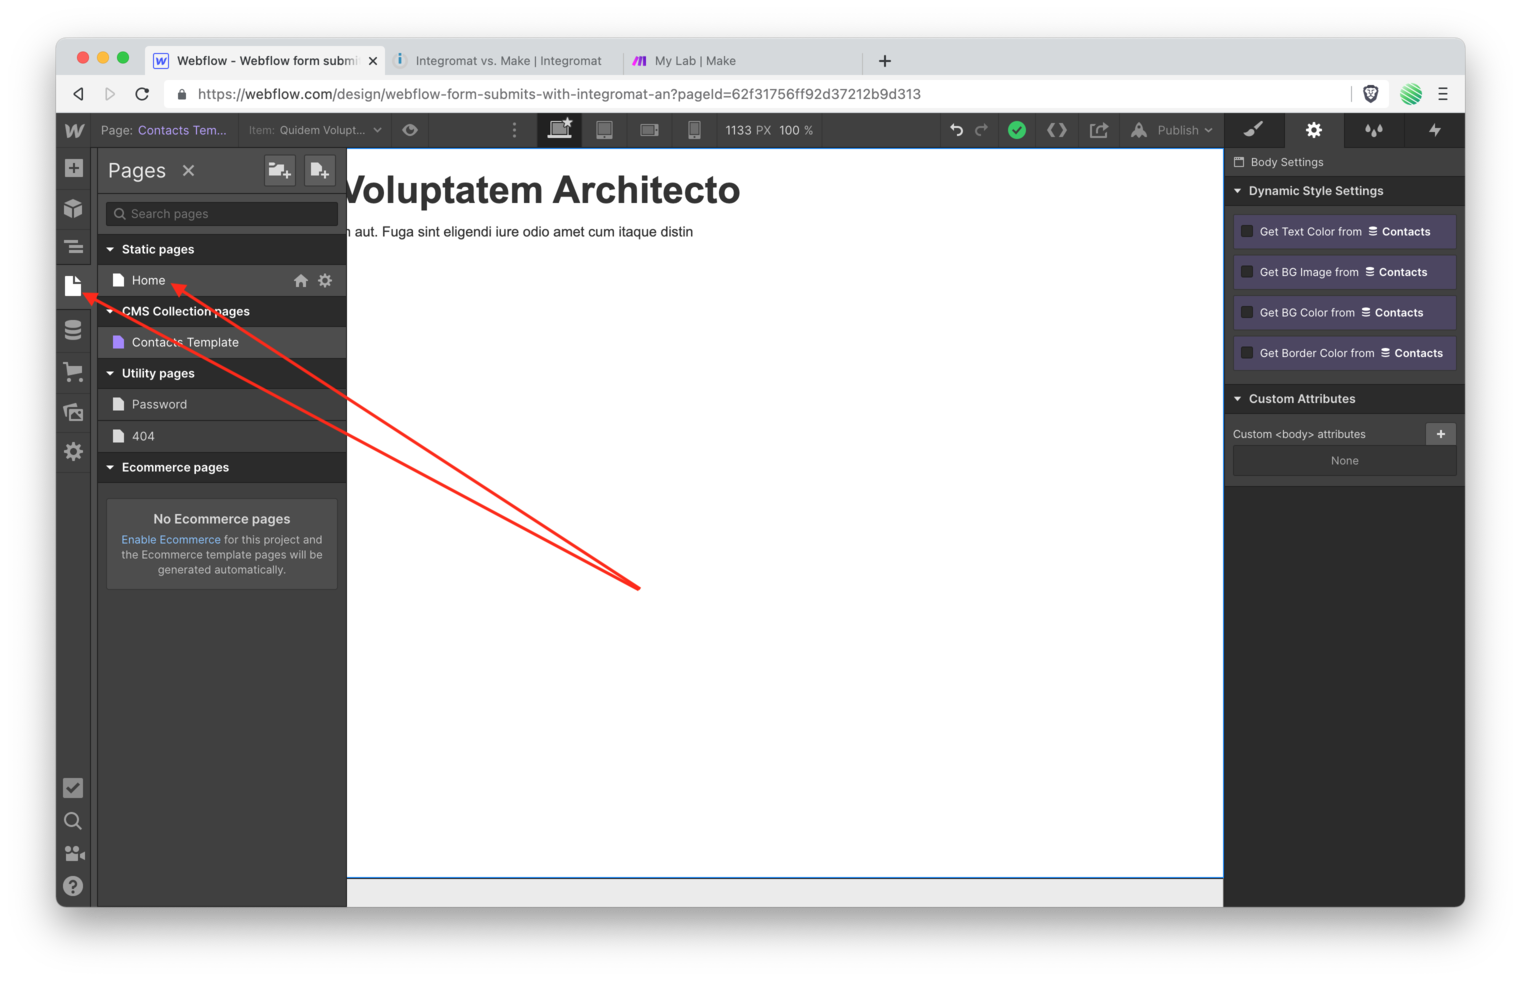
Go back to the page menu item in your Webflow Designer and select the “Contacts Template” under CMS Collection pages.
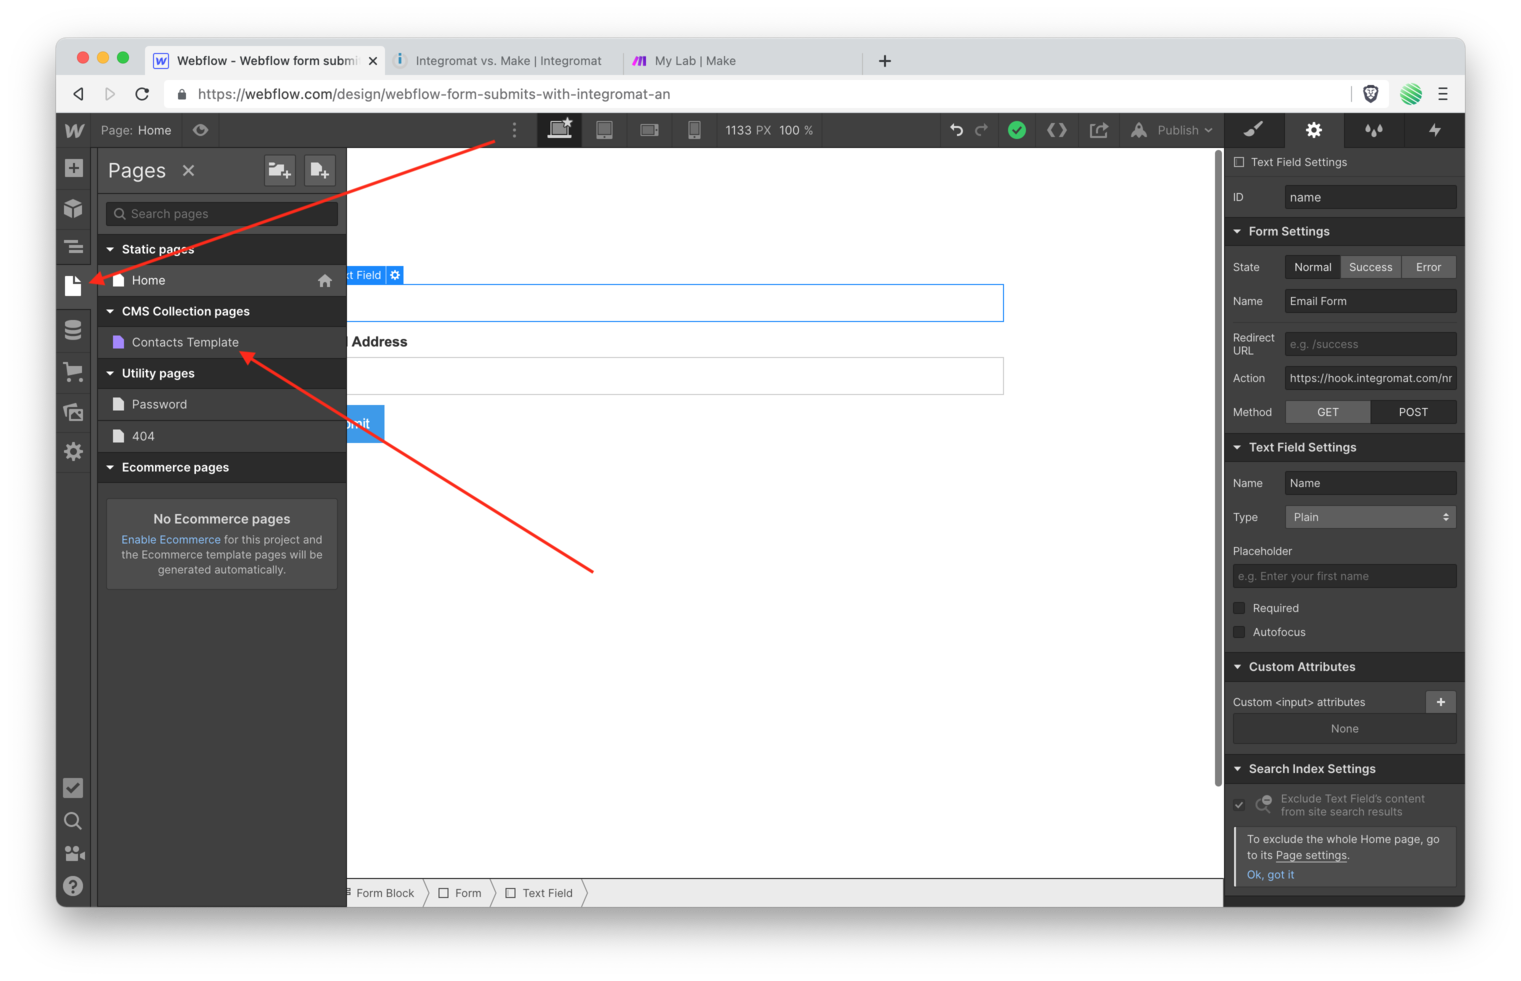
A CMS Collection page is automatically created for you when you create a CMS Collection. It’s a special page that has access to this specific Collections items.
Add a Heading element to your new page.

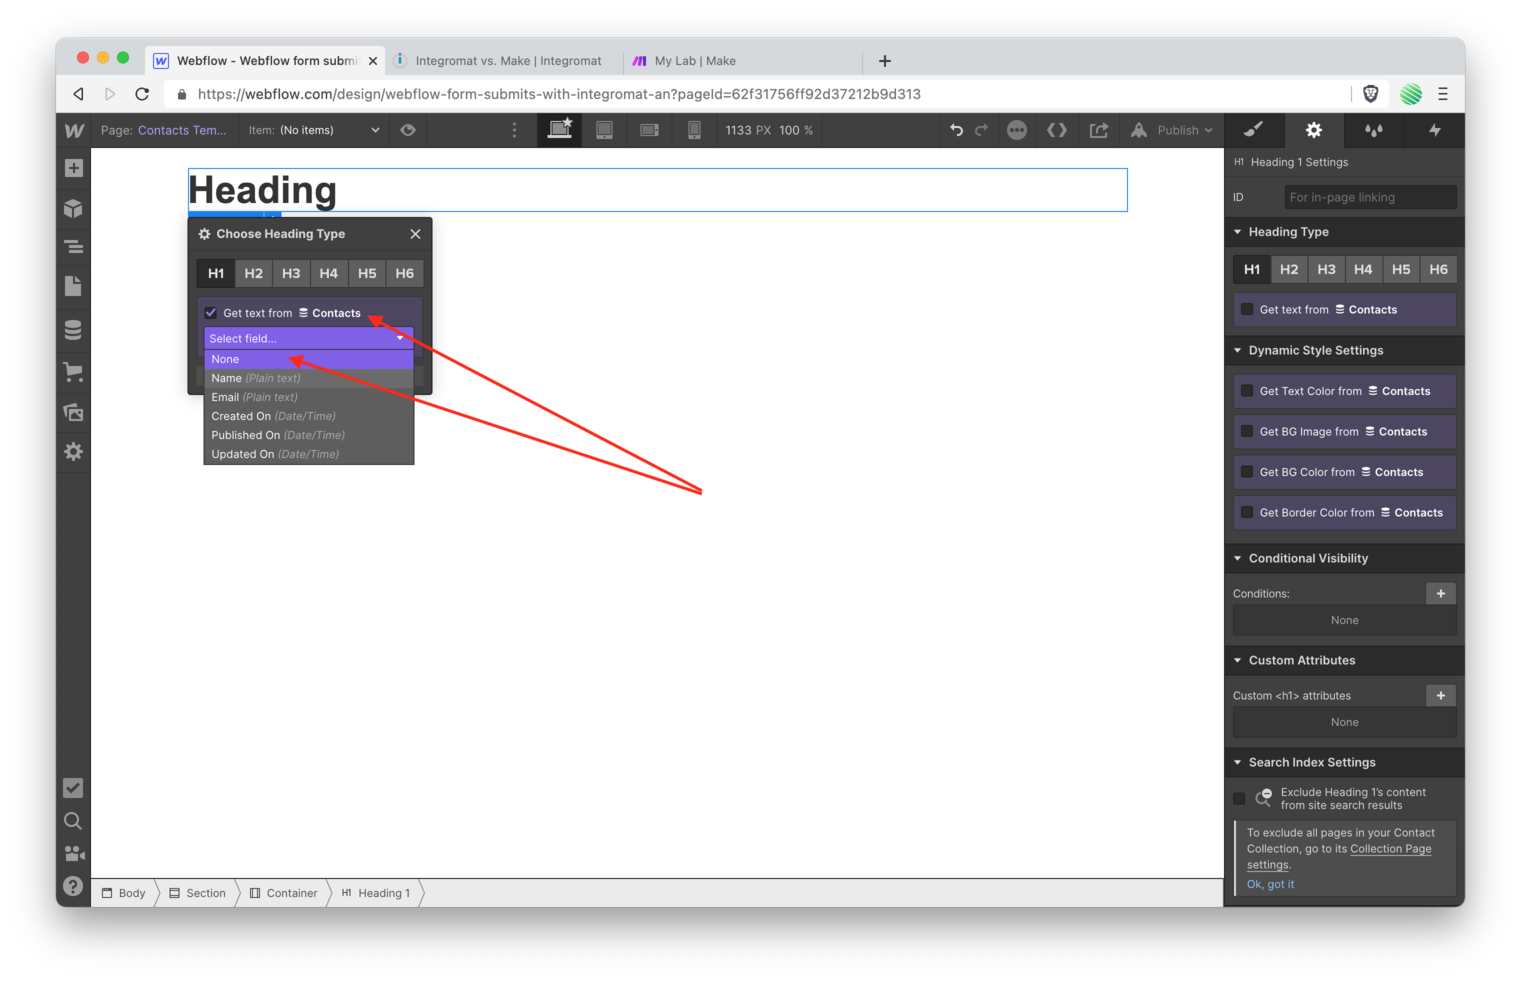
Within the Heading elements settings, check the “Get text from Contacts” option. This gives you access to all of the fields within this Collection.
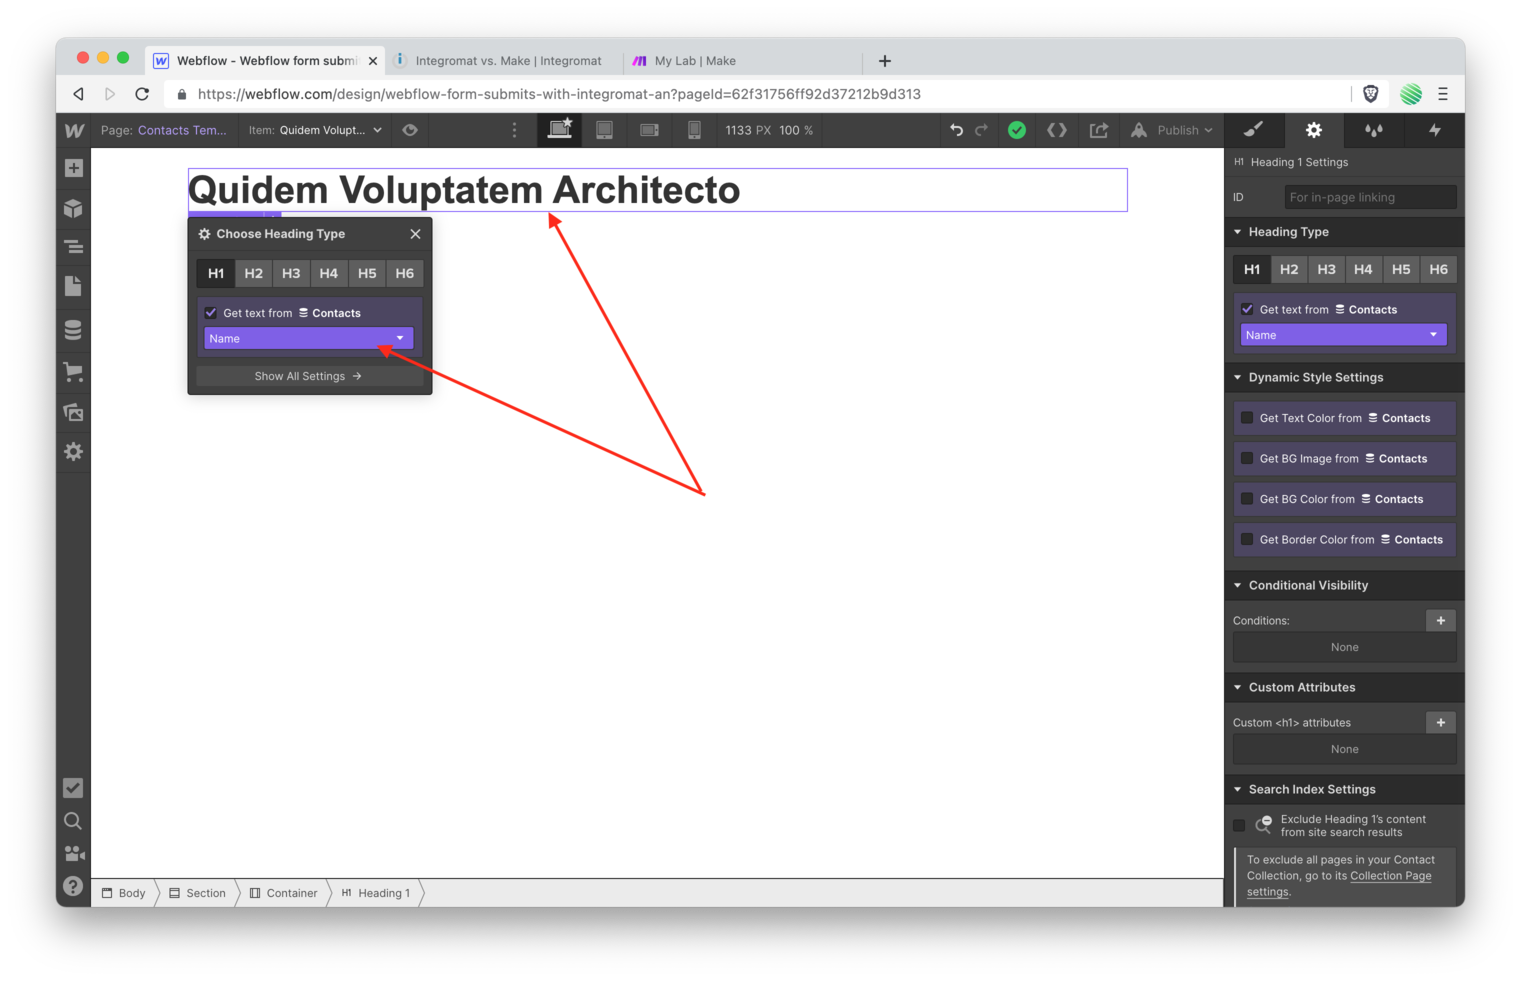
Choose “Name” from the drop down list.
You’ll see the sample data’s name populate that field. Nice!
Add a new Text element below your Headline element. Make sure to check the “get text from Contacts” option.
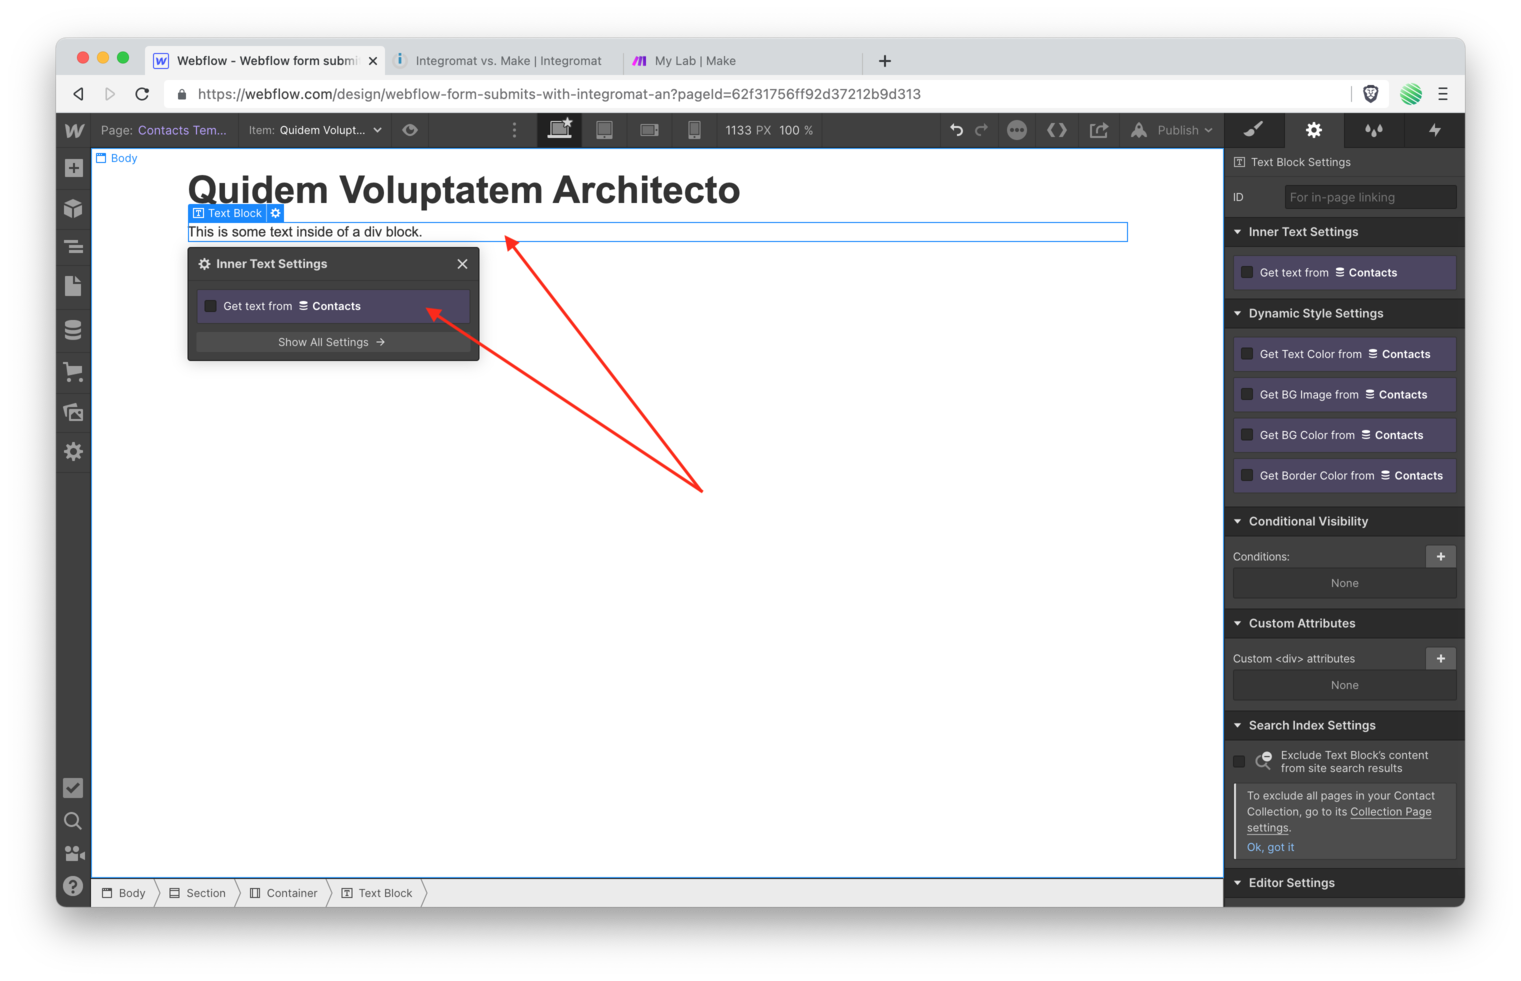
This time choose the Email field.
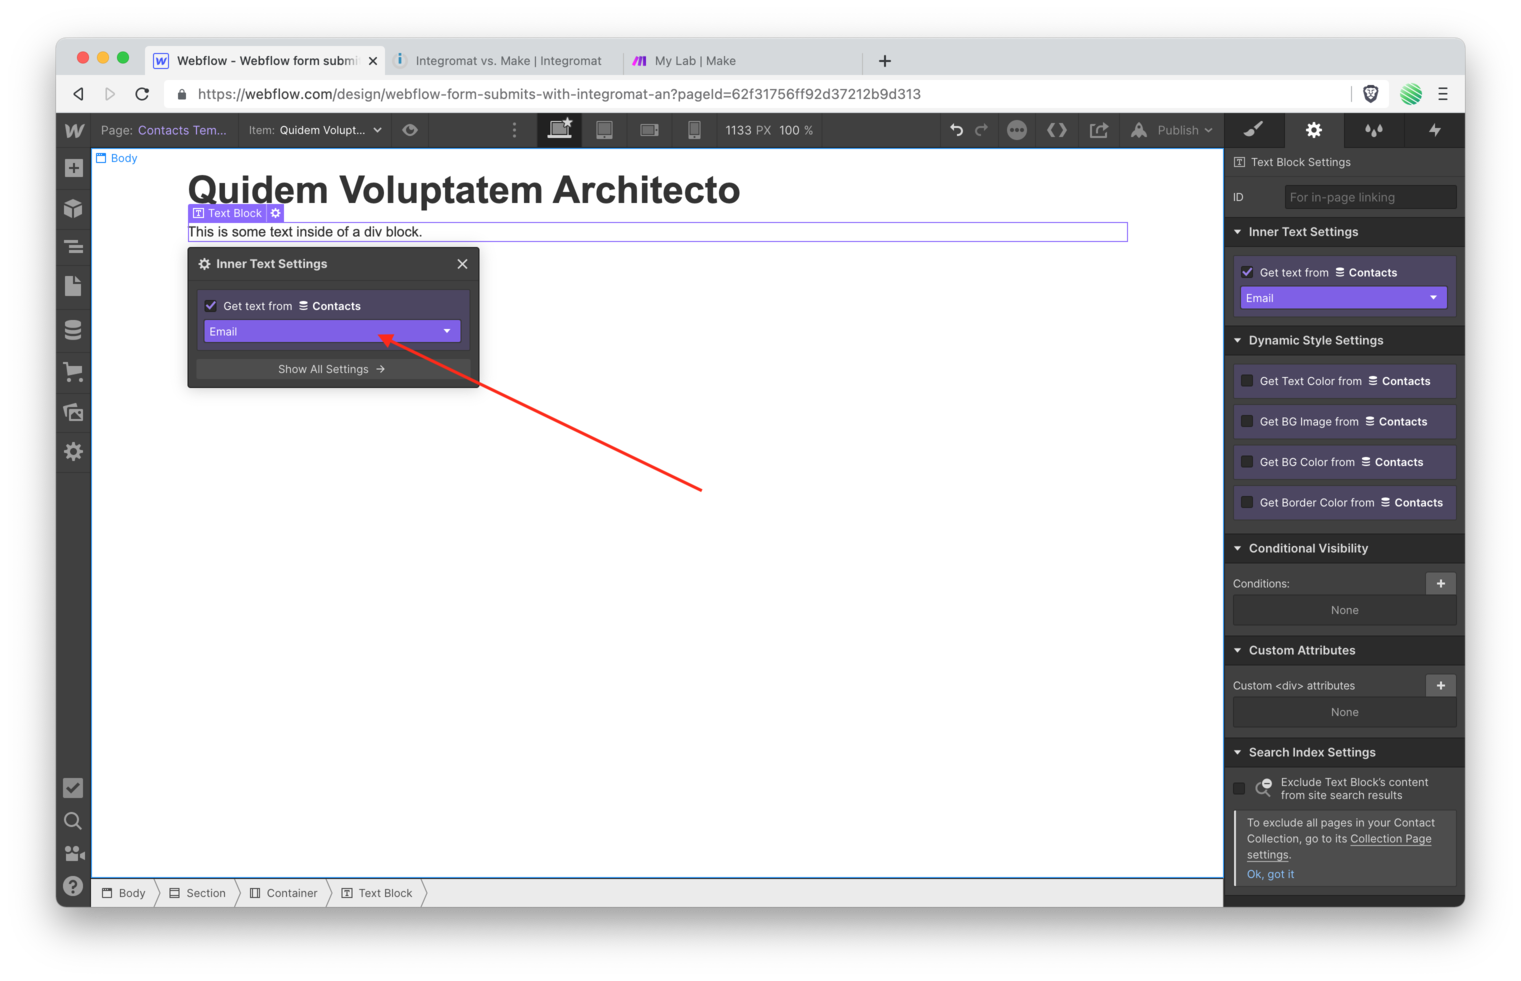
And it’ll now be populated with the data in that Collection items field. Notice in the screenshot below that it’s not an email address.
You selected a “text field” type for the email so it auto-populated with random text. If you had selected an email address field, it would have populated with a fake email address.
Using a text field in this case was done on purpose, it’s less restrictive for our quick walk through.
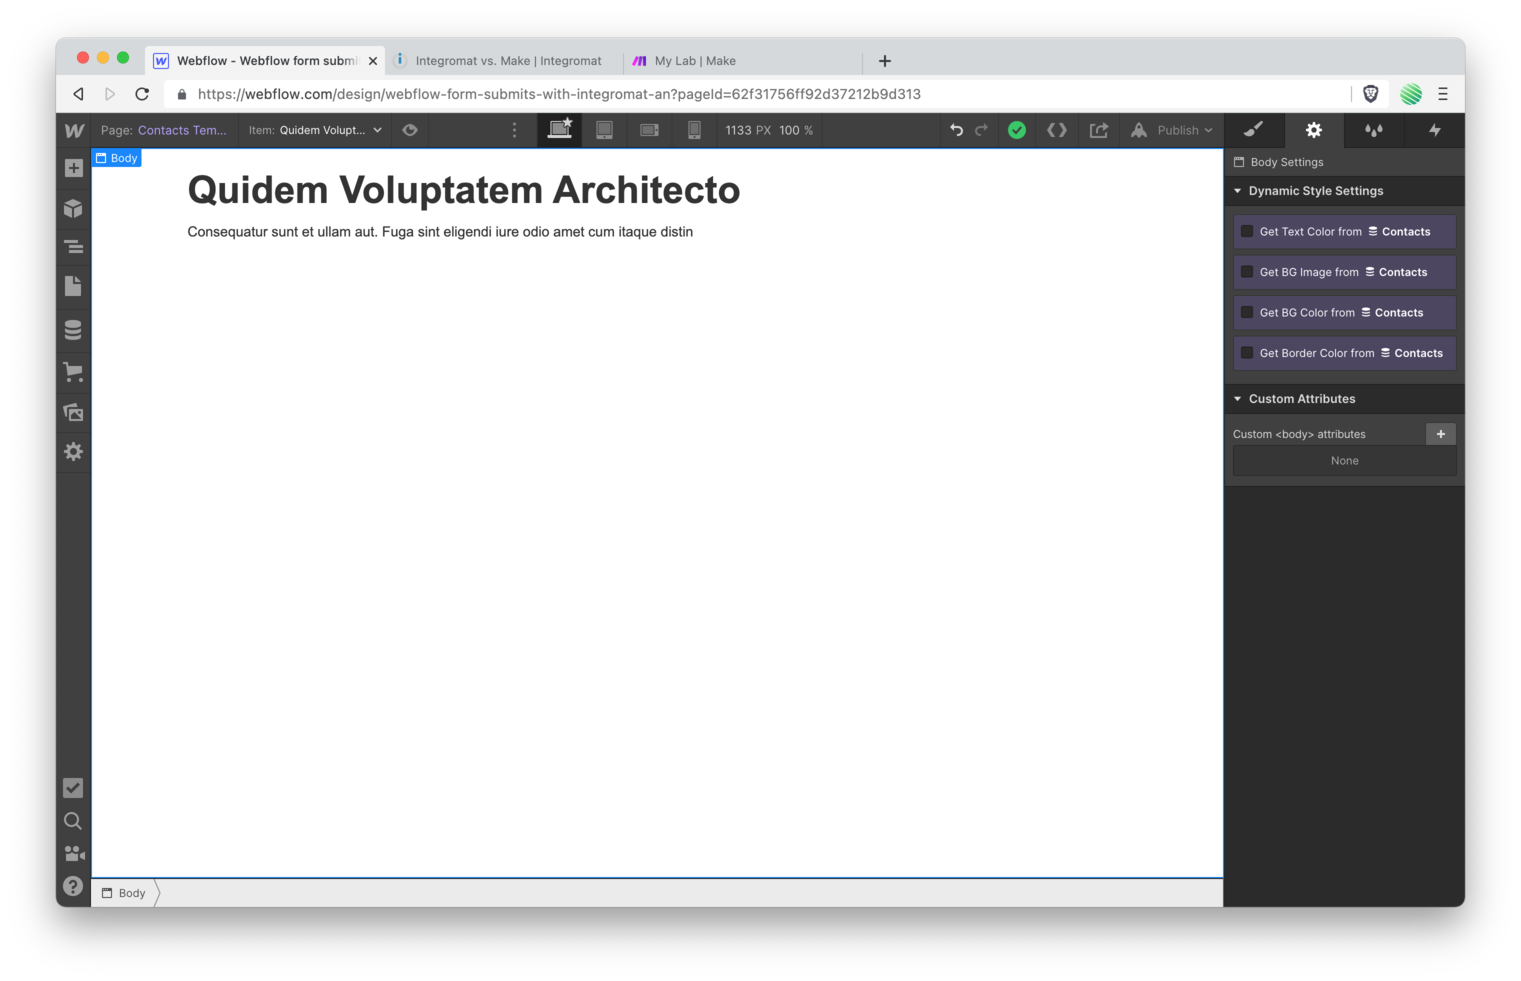
Republish your site so the new additions are included on the live site.
Open up the pages menu item and select your home page.
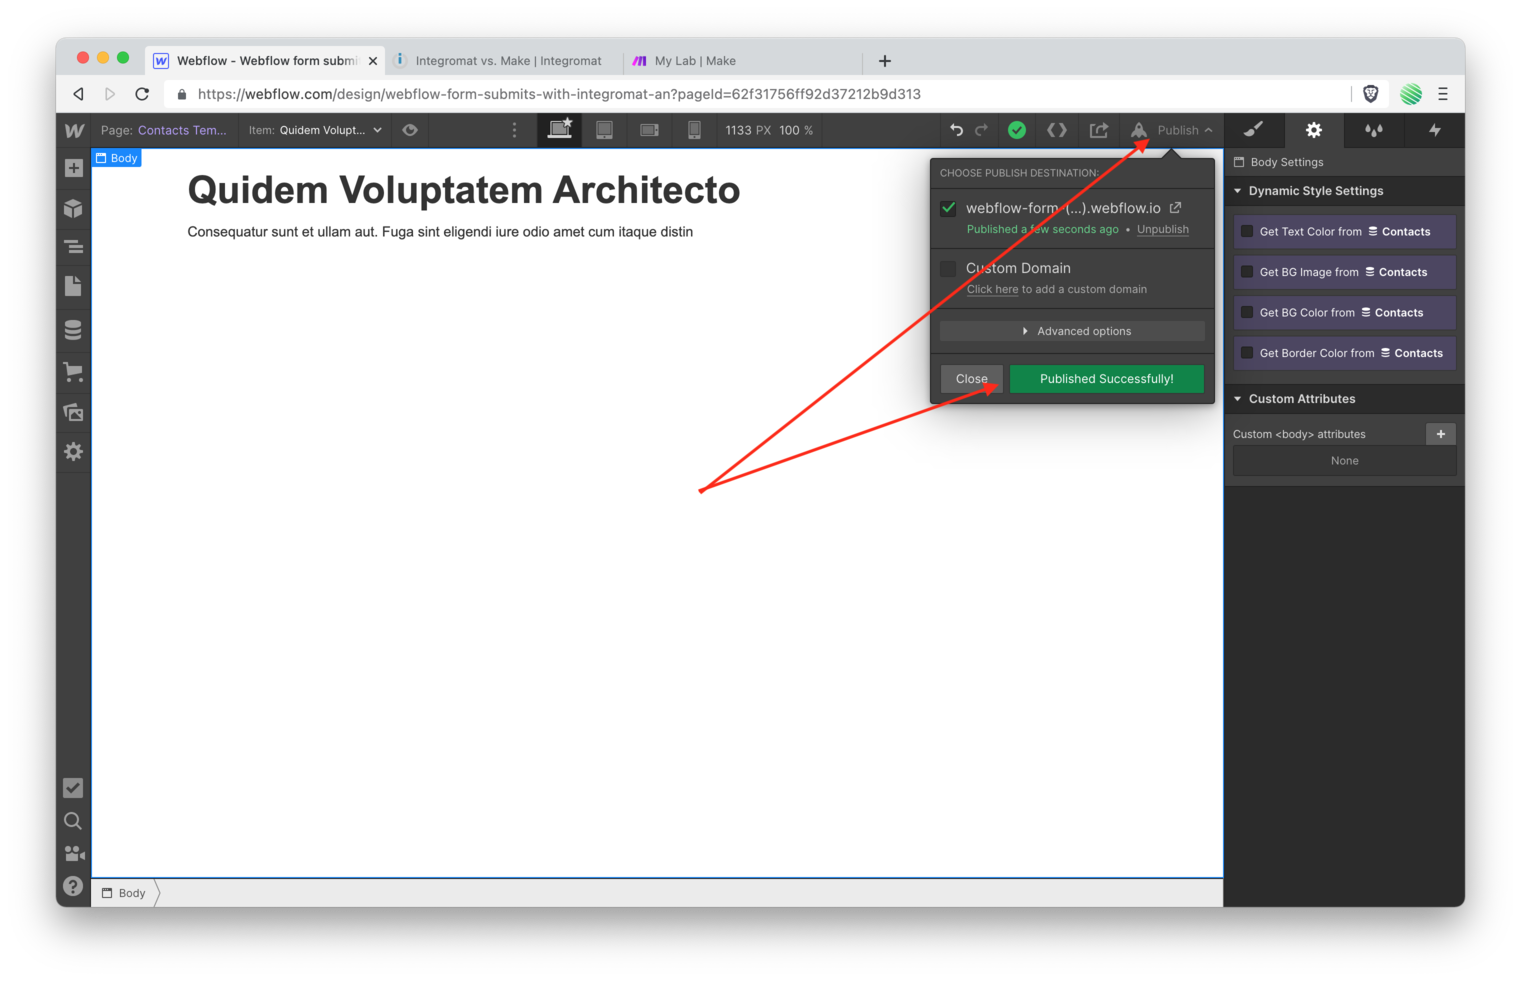
Now that you’re on the home page open up the live site from the publish button.
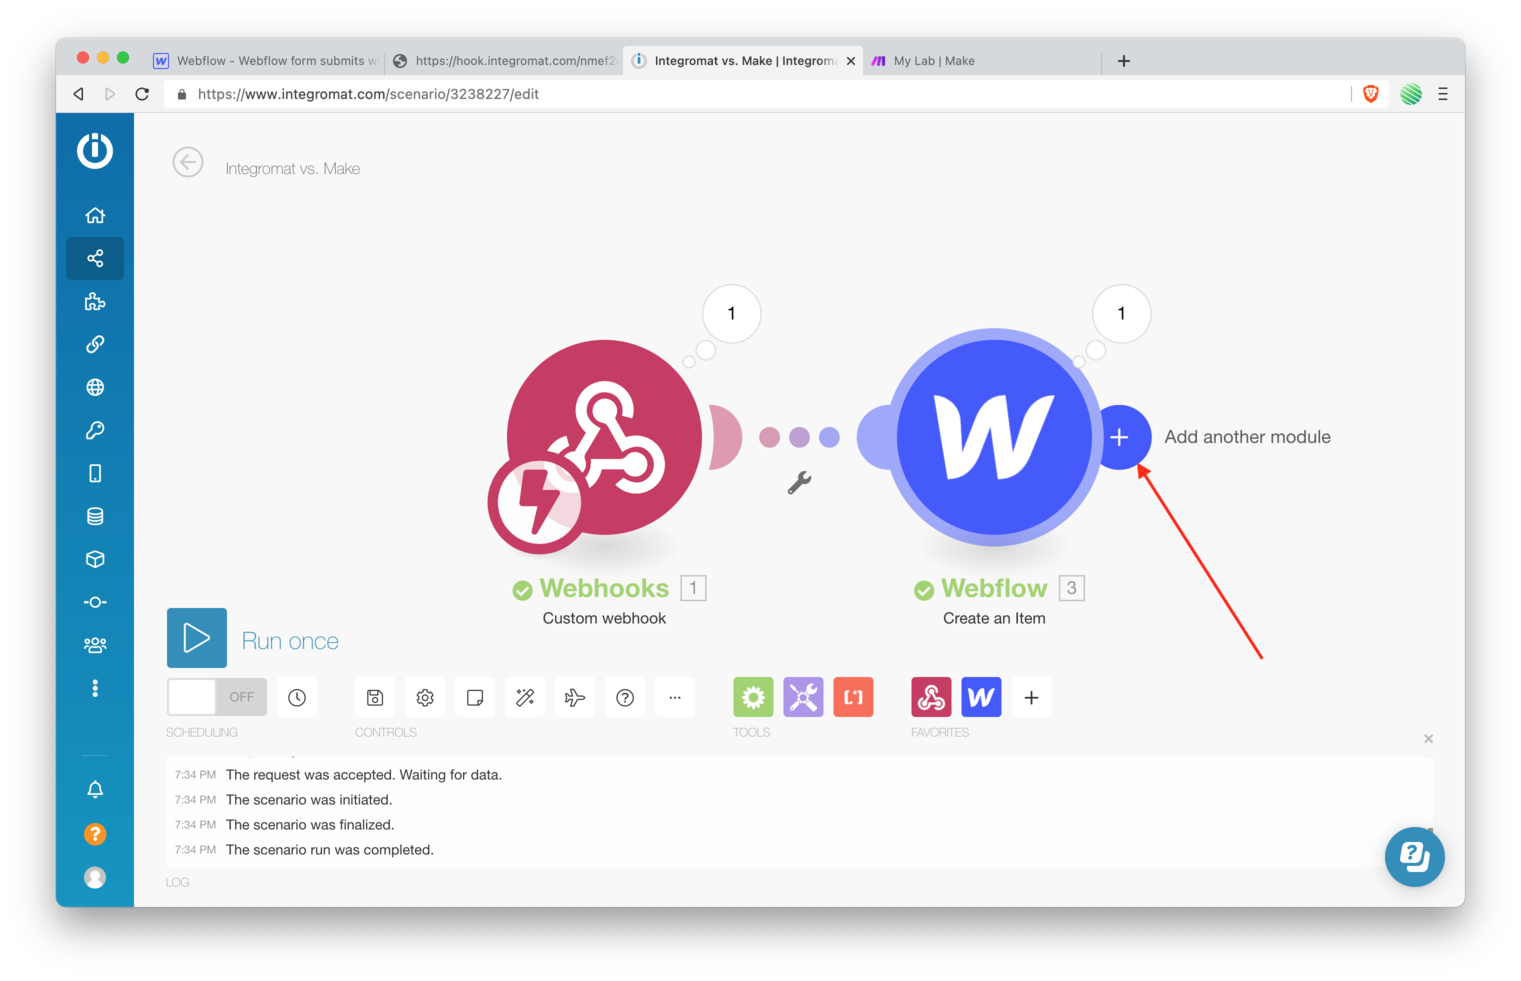
…and your live site is ready for you to fill out and submit the form. But don’t do that just yet, first you’ll want to add another module to your Integromat Scenario.
This new module will take the form submission and create a new Collection item for you.
Make & Integromat Creating CMS Items
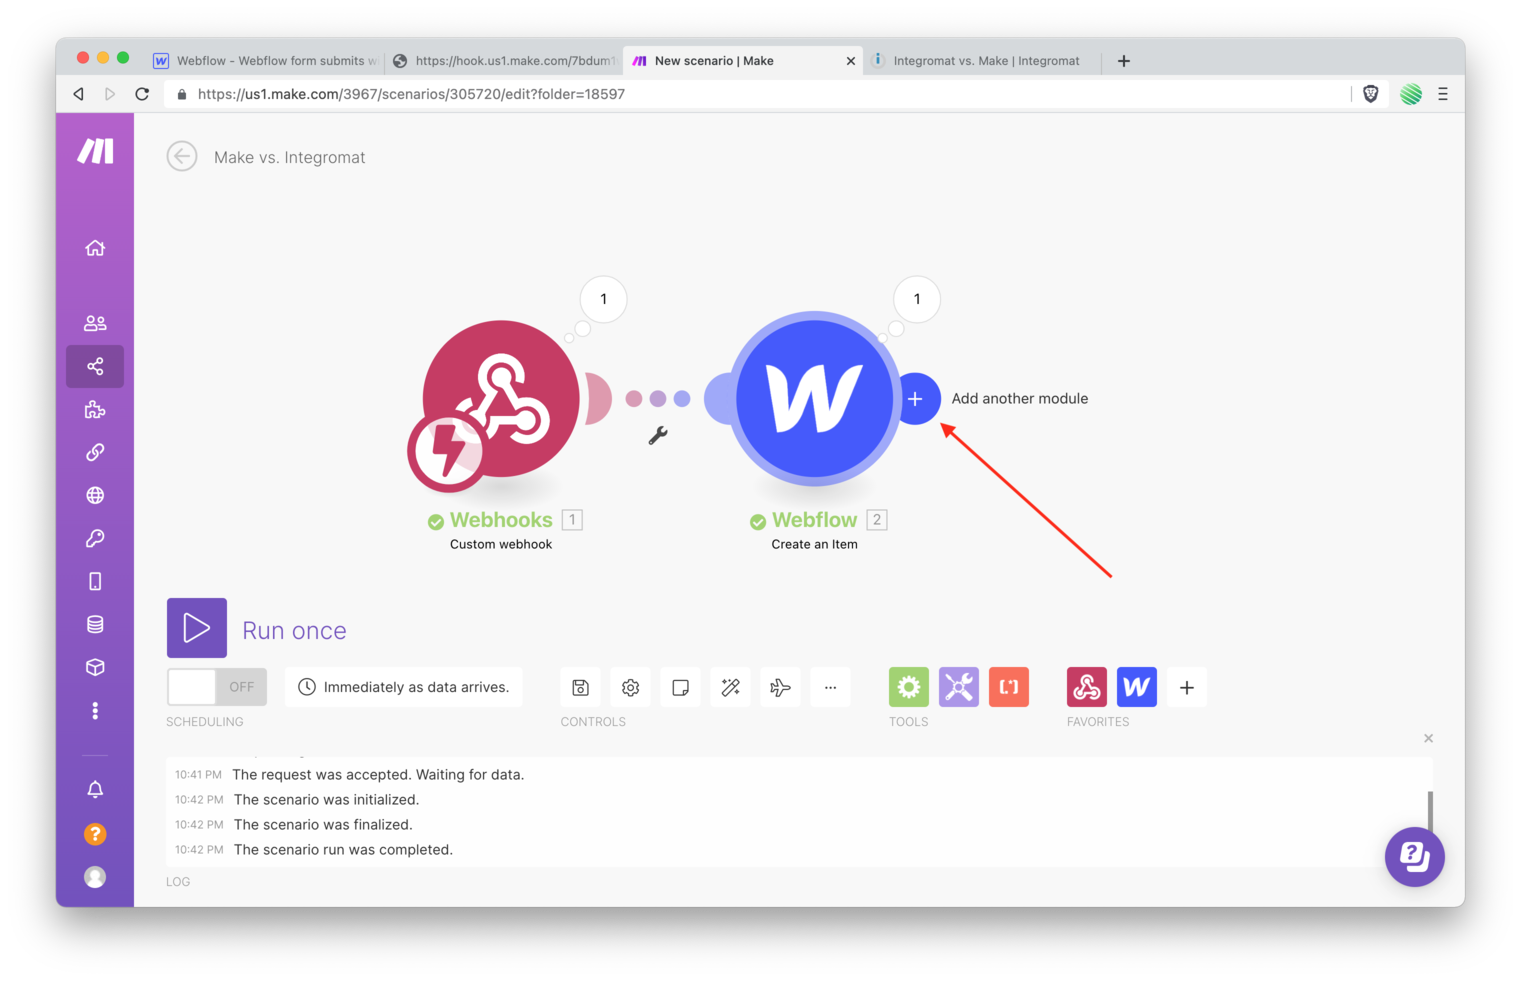
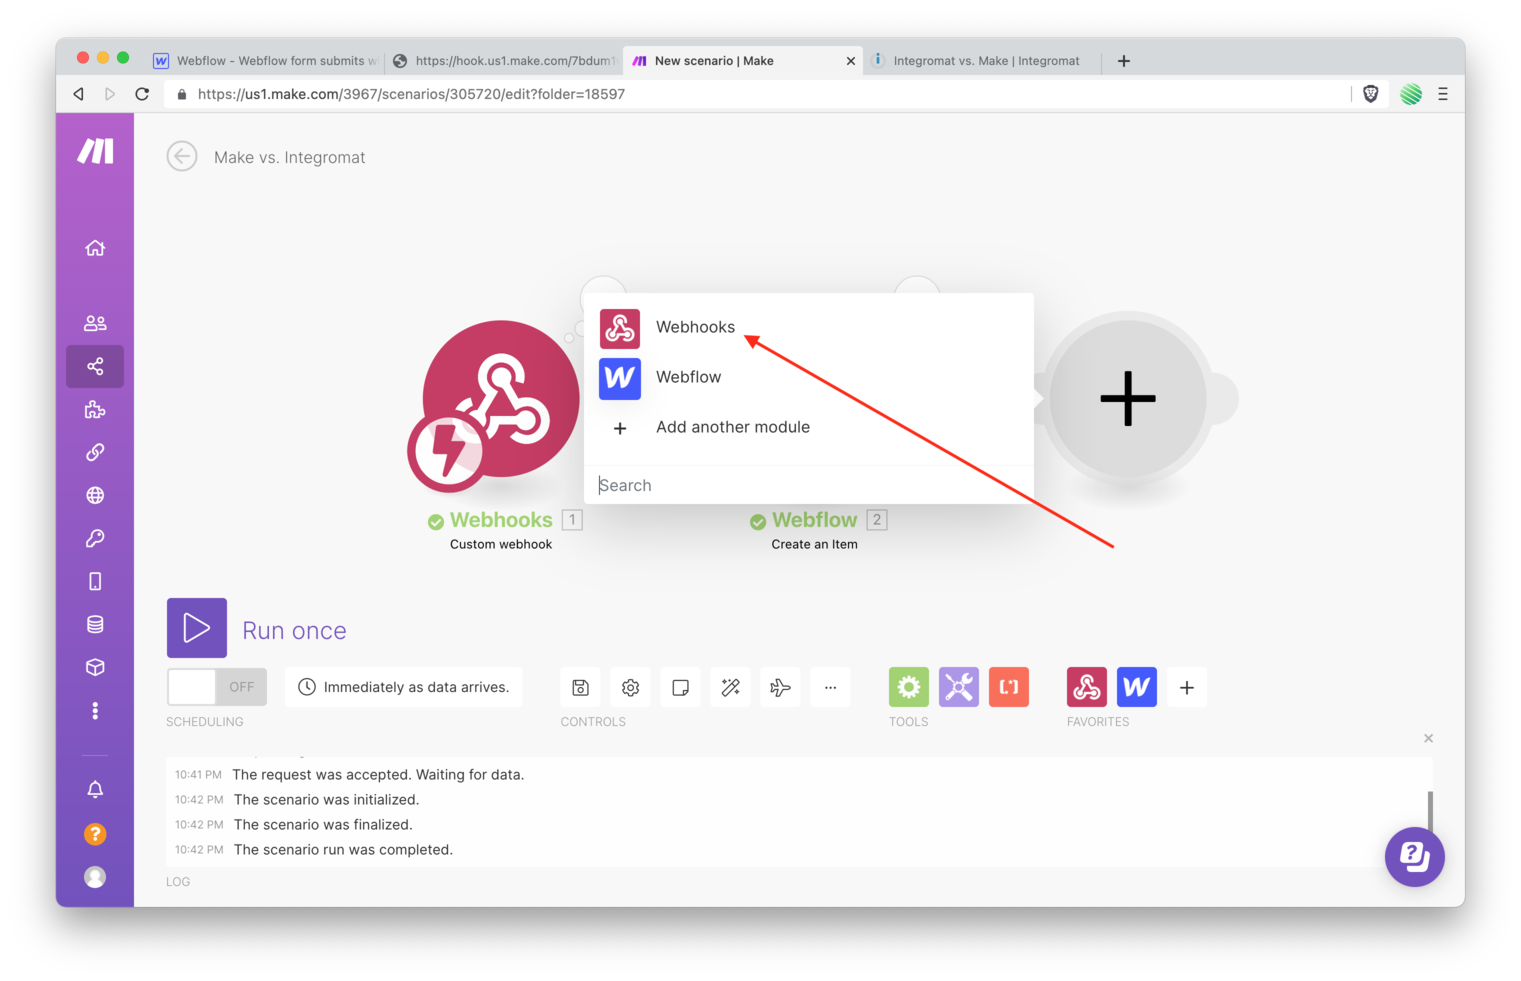
Flip back to Make & Integromat and add another module.
Integromat:
Make:

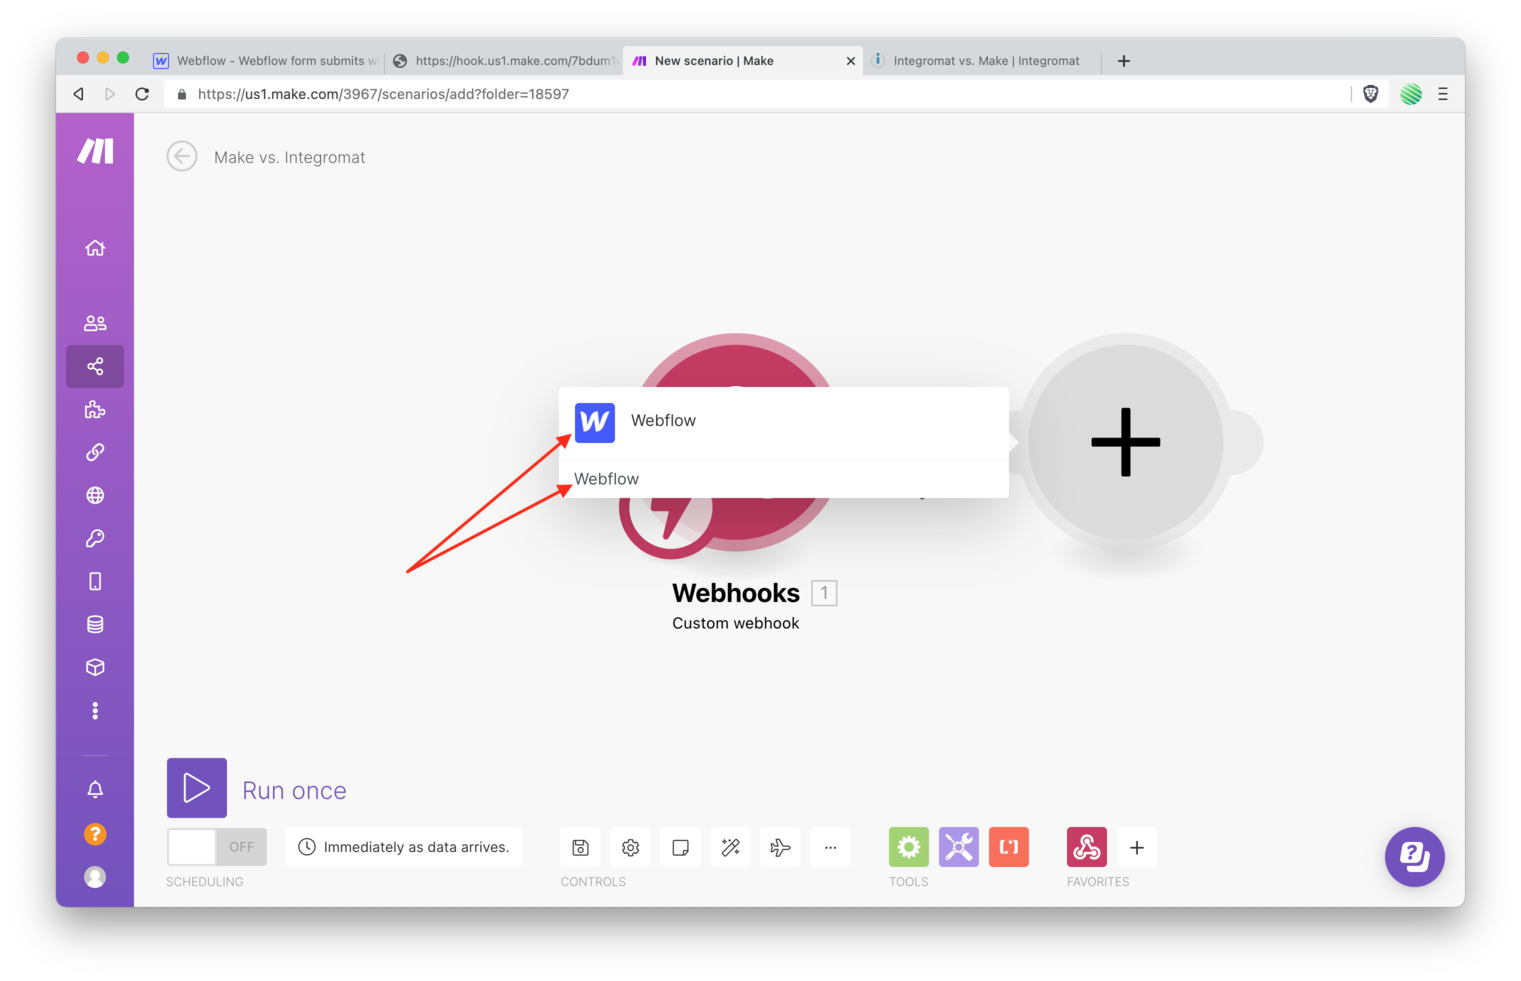
Search for and select “Webflow”.
Integromat:
Make:
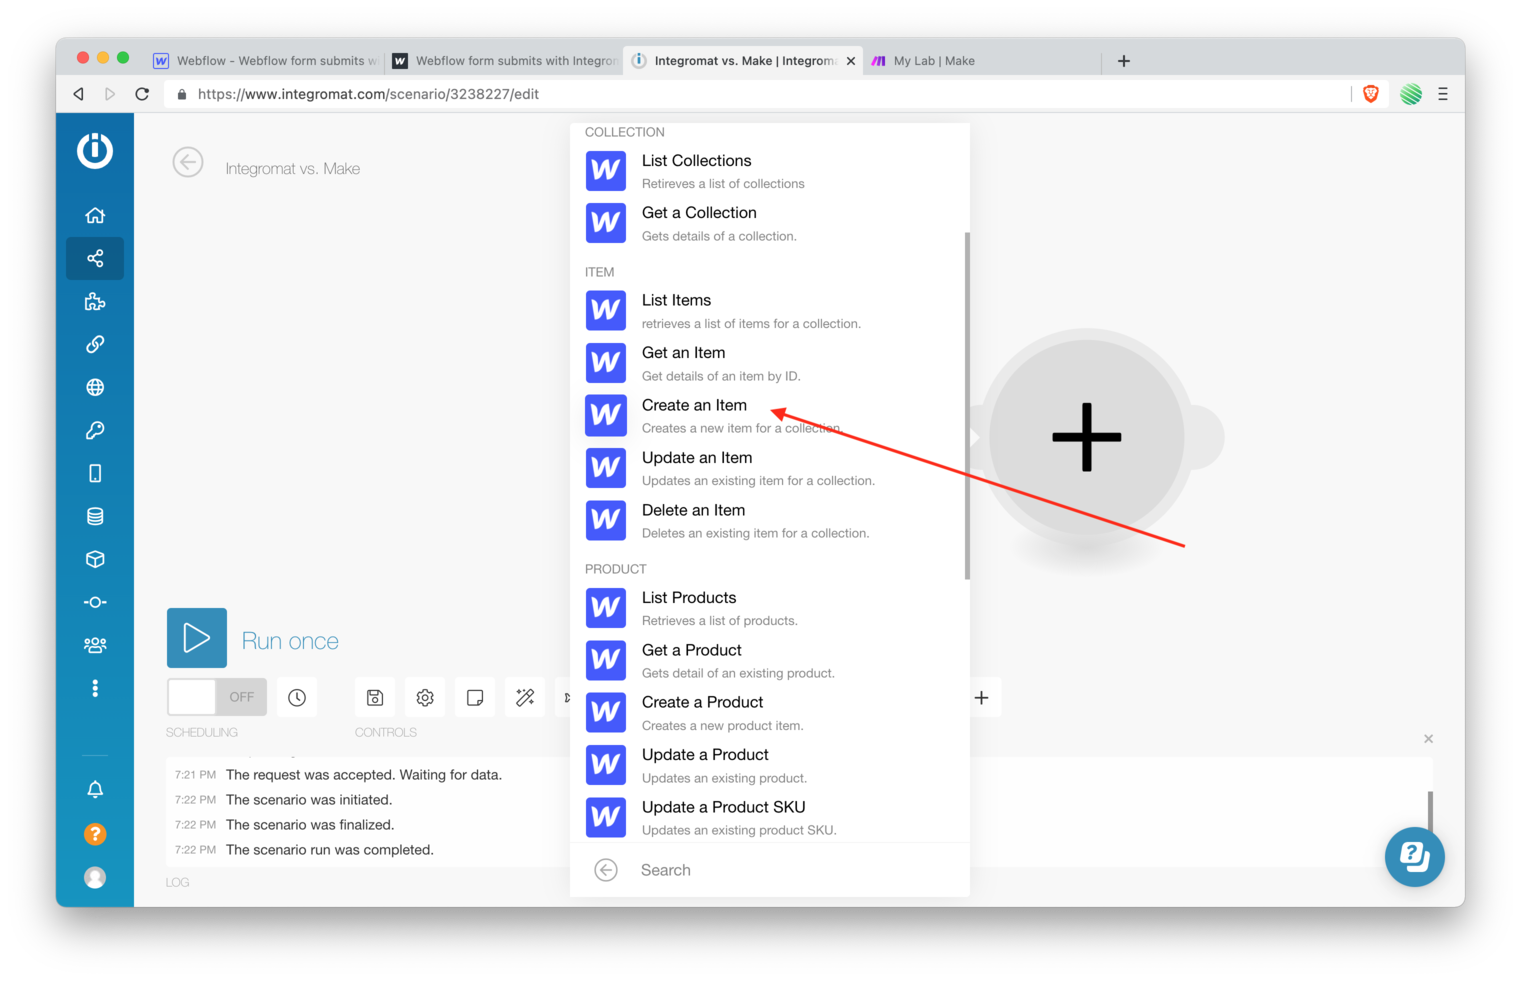
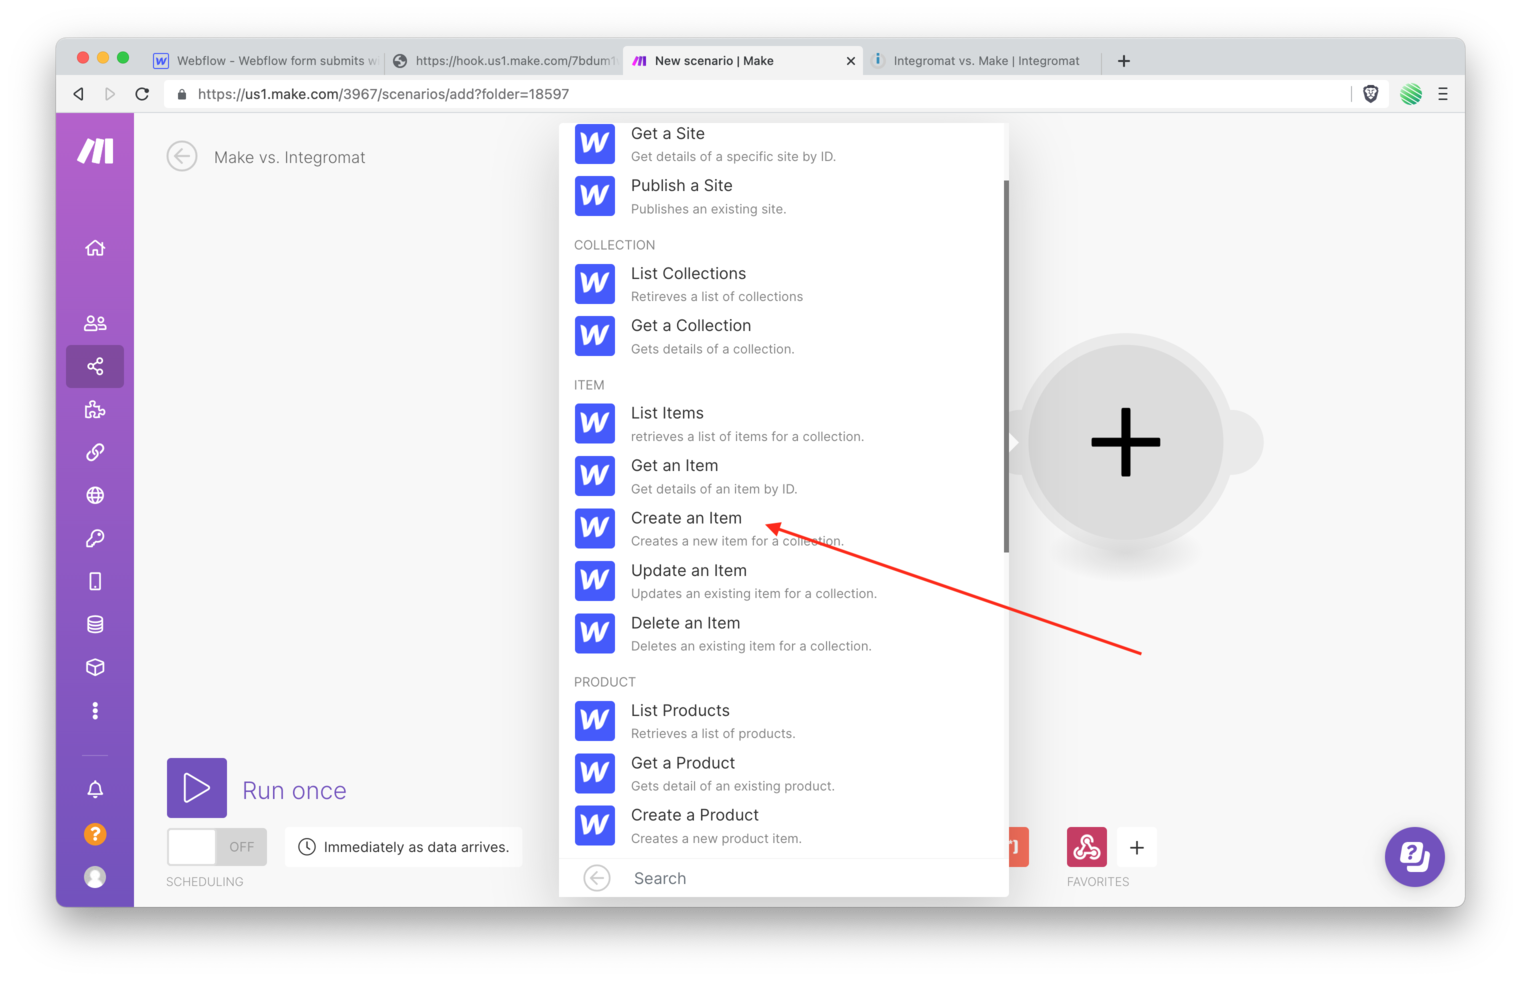
Choose the “Create an Item” option.
Integromat:
Make:
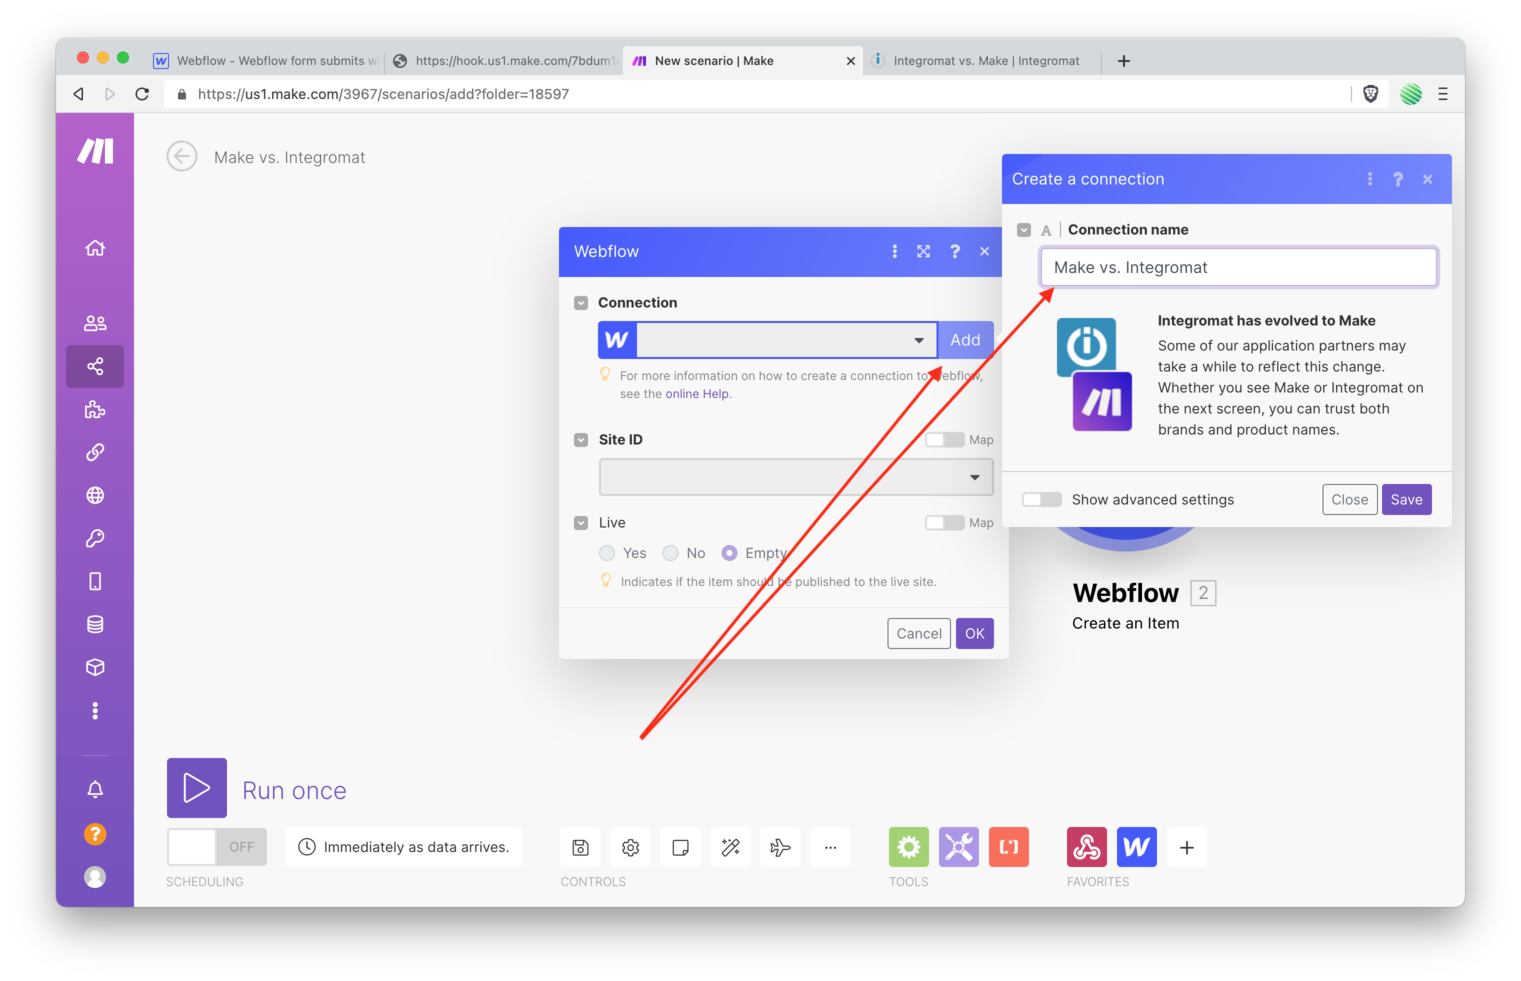
Create a new connection. Go through the authorization process.
Integromat:
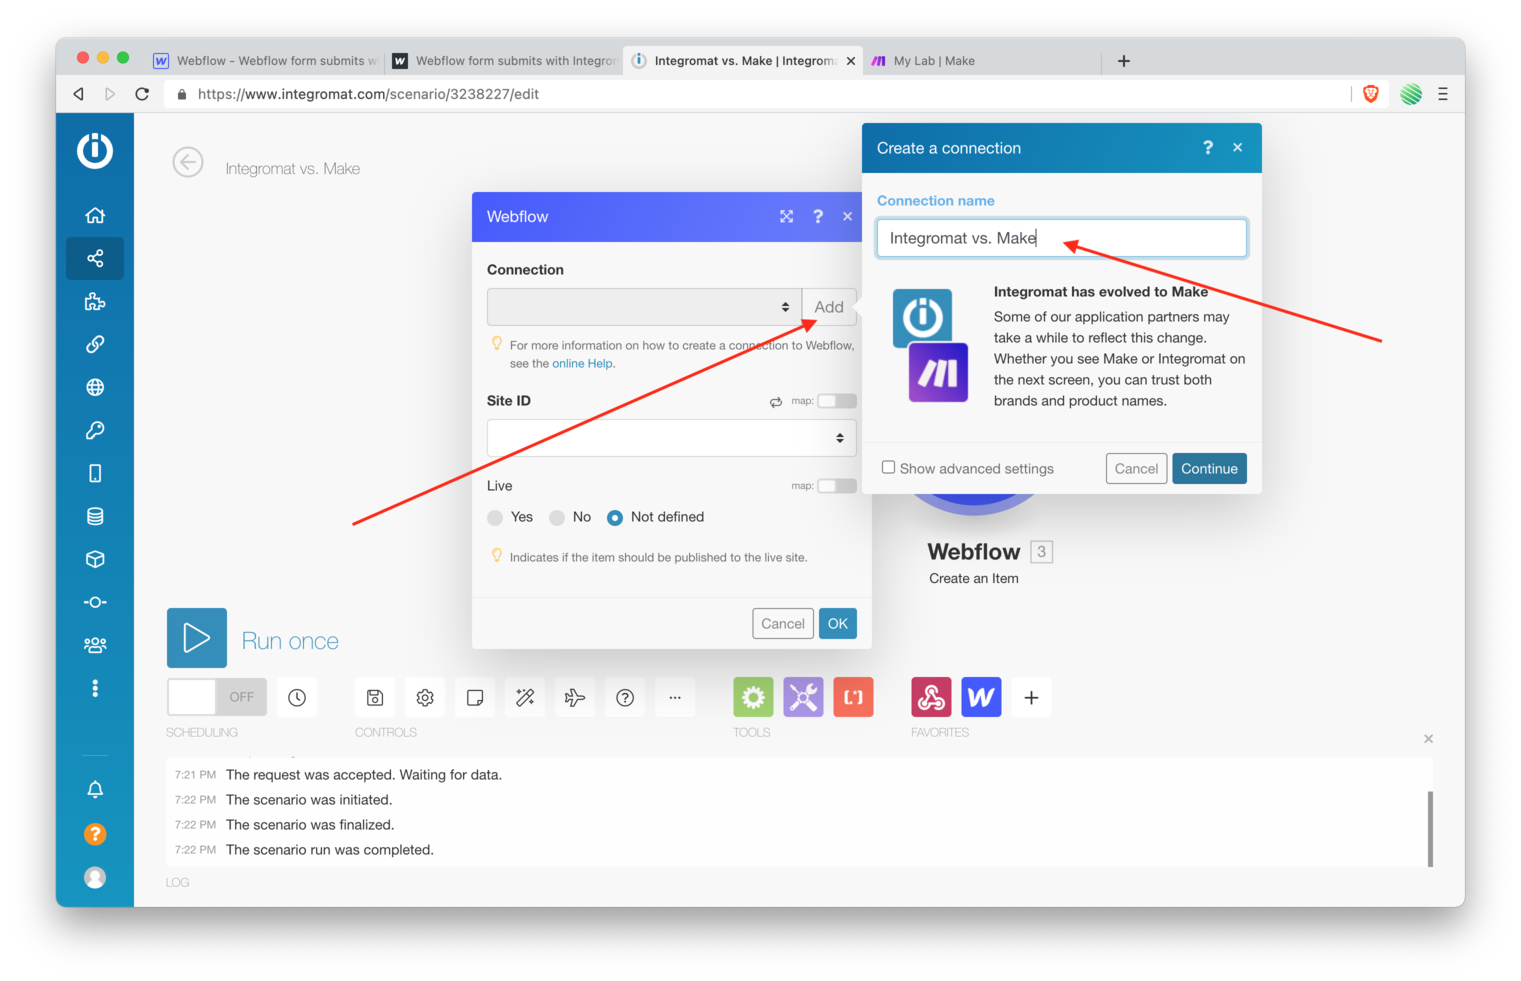
Make:
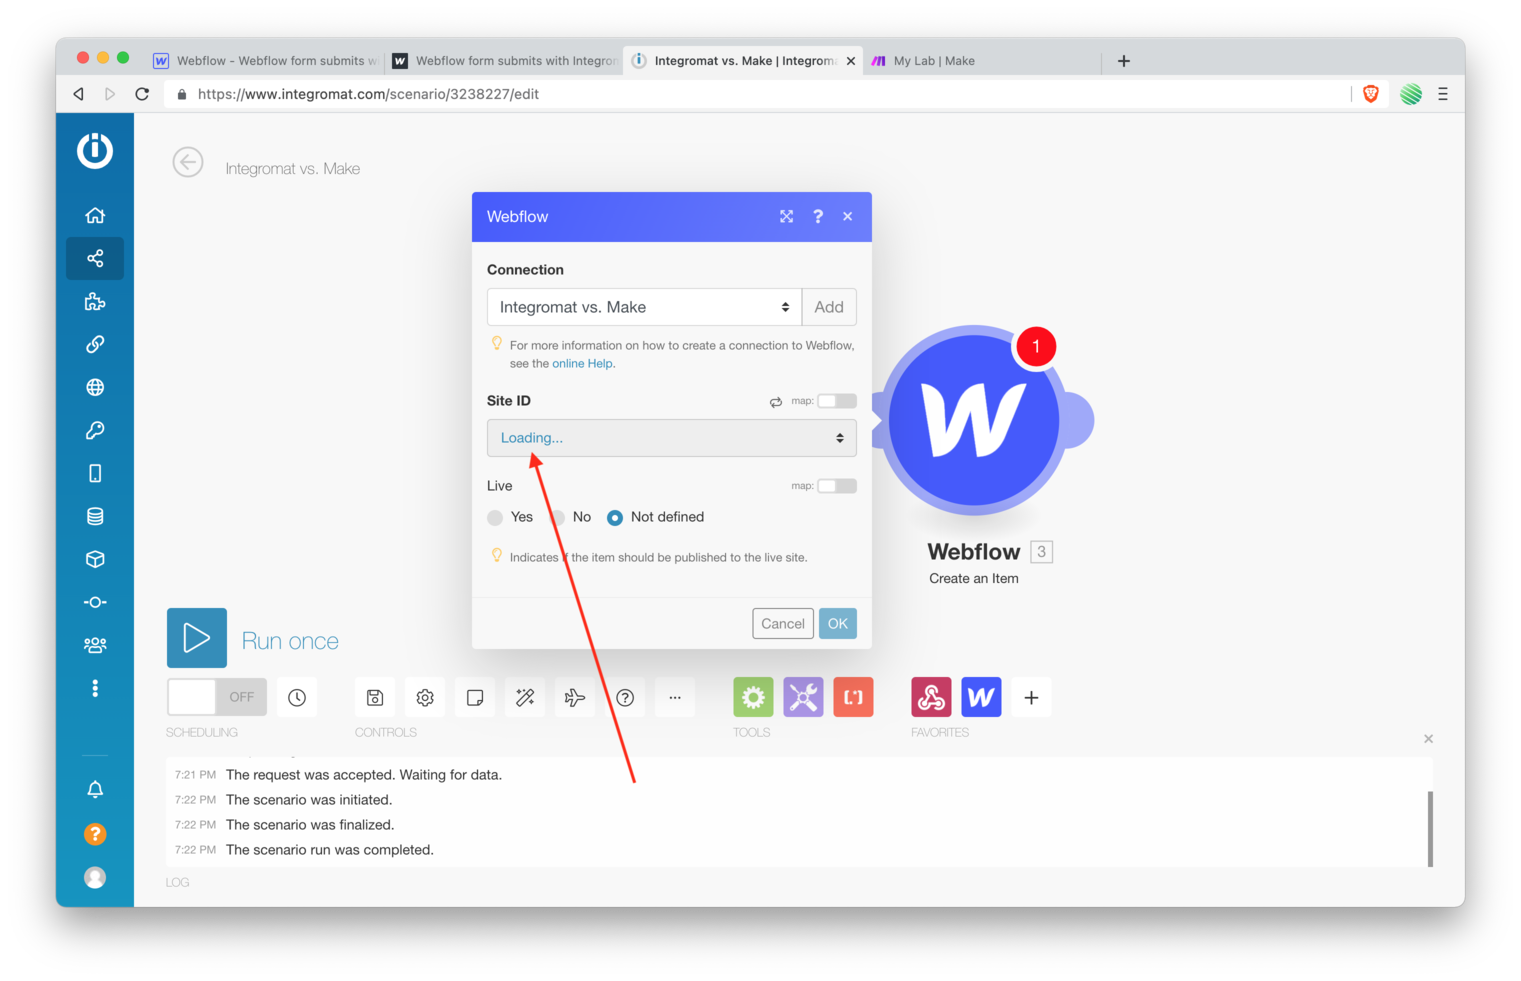
Once authorized you’ll see your site being loaded into Integromat.
Integromat:
Make:
(Note: With Make my site loaded almost instantly versus Integromat took a bit and showed me a “loading” message. Your experience may vary.)
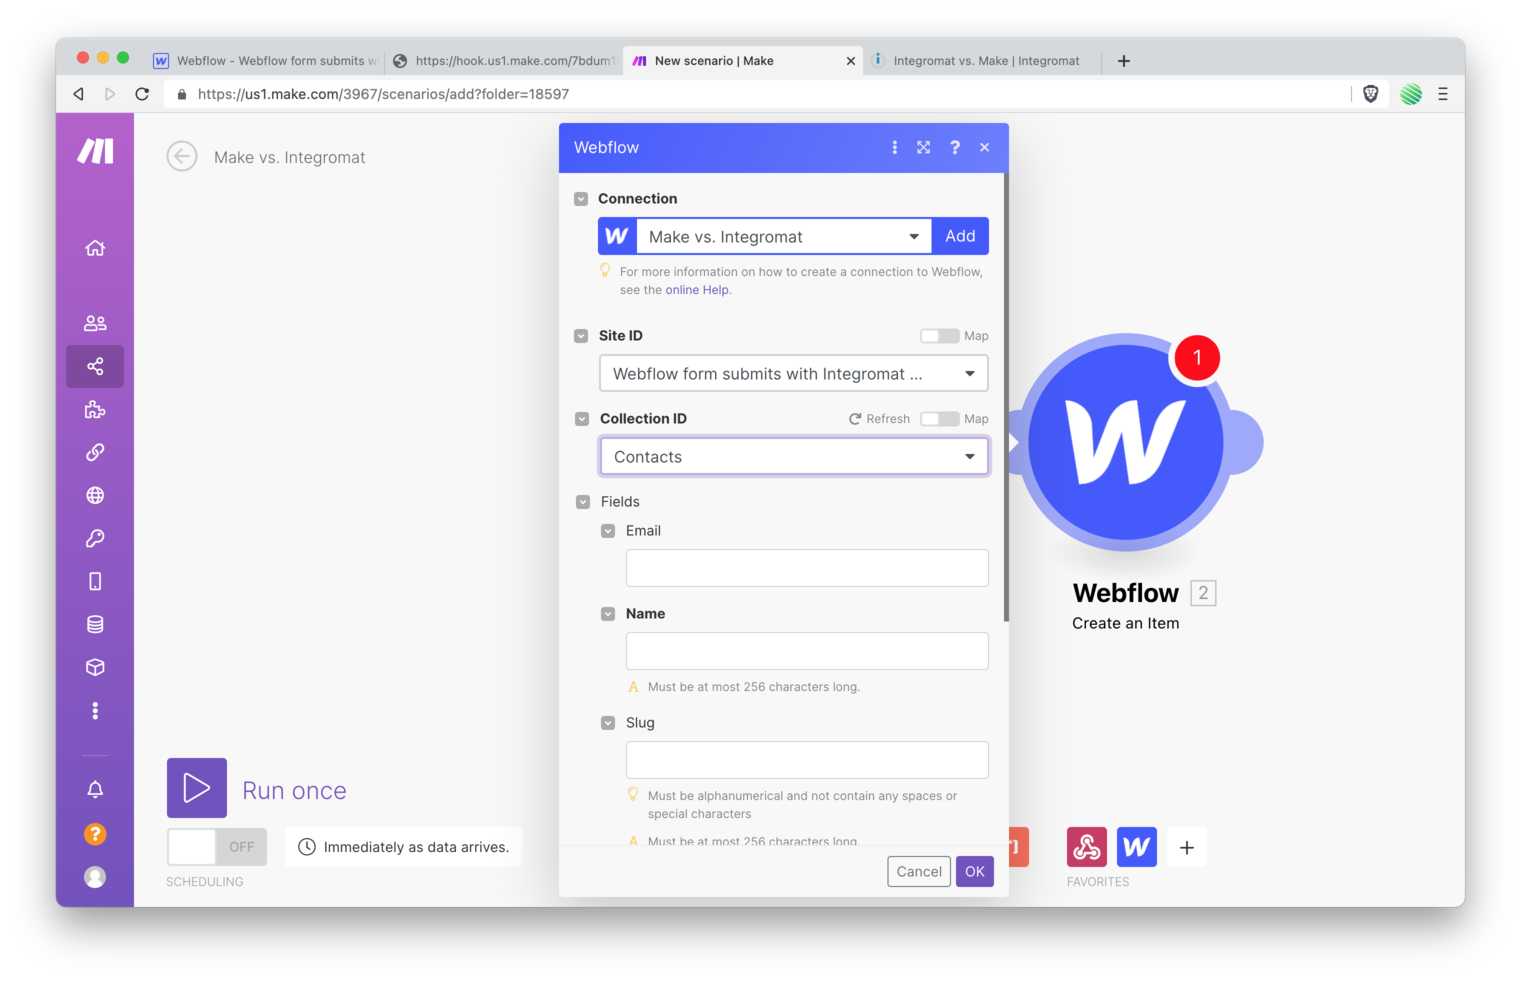
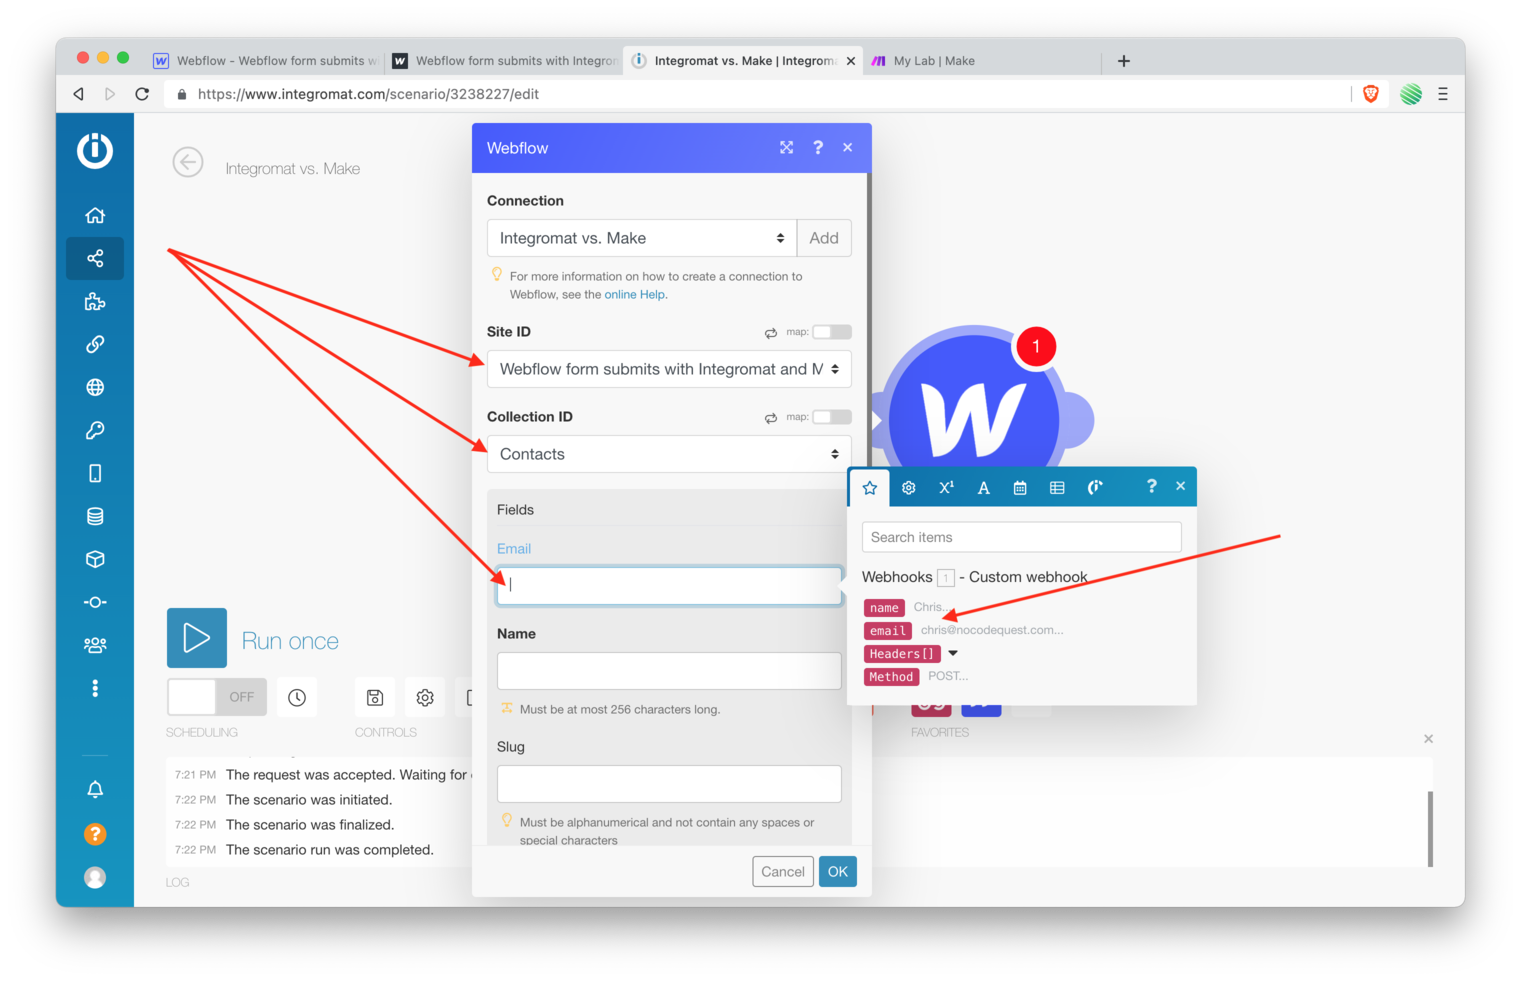
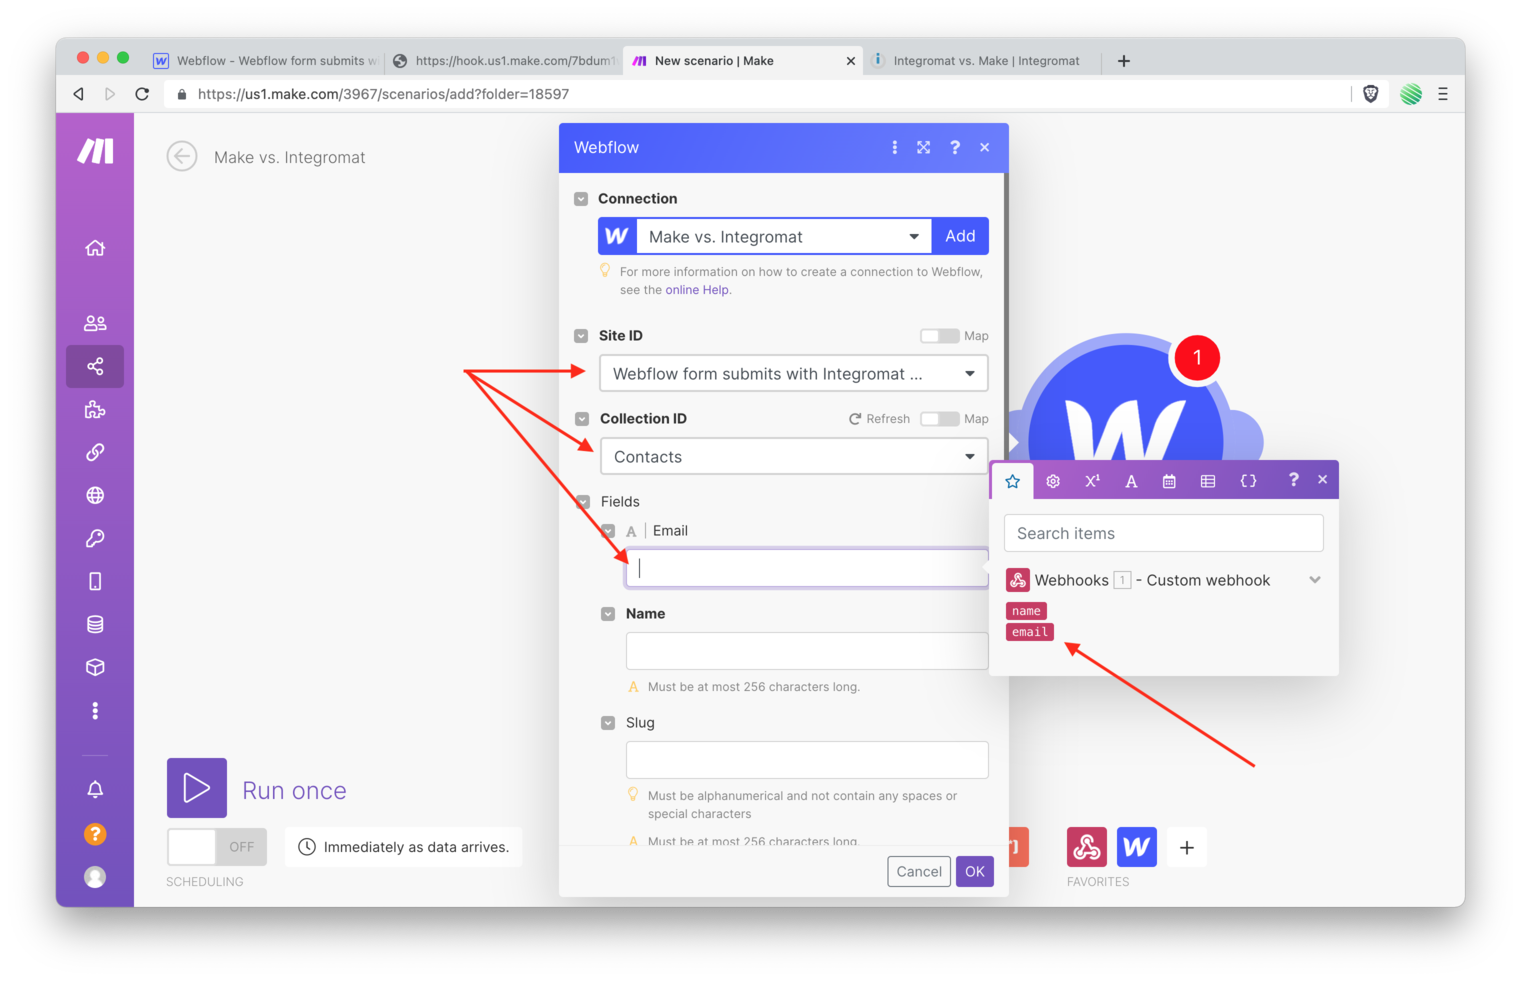
Select your site and Collection from the dropdown list.
Tap on the “Email” field and choose the email submitted the first time you tried this.
Integromat:
Make:
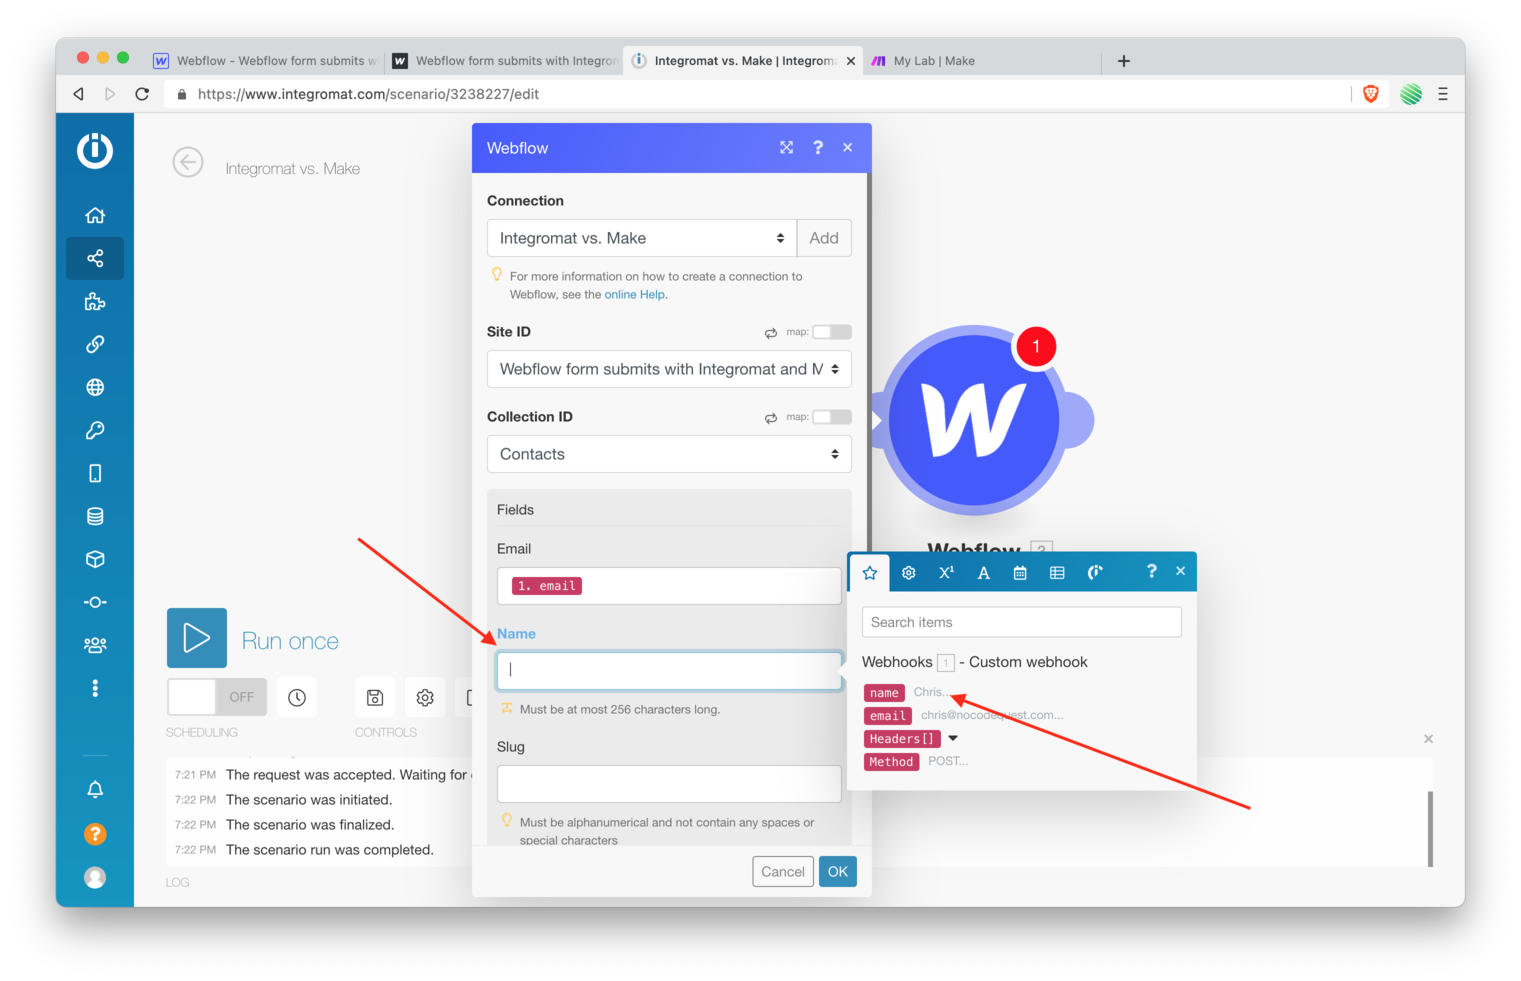
Tap on the “Name” field and choose the name submitted in the form the first time you submitted it. Leave the “Slug” field blank, we’ll let it auto-populate.
Integromat:
Make:
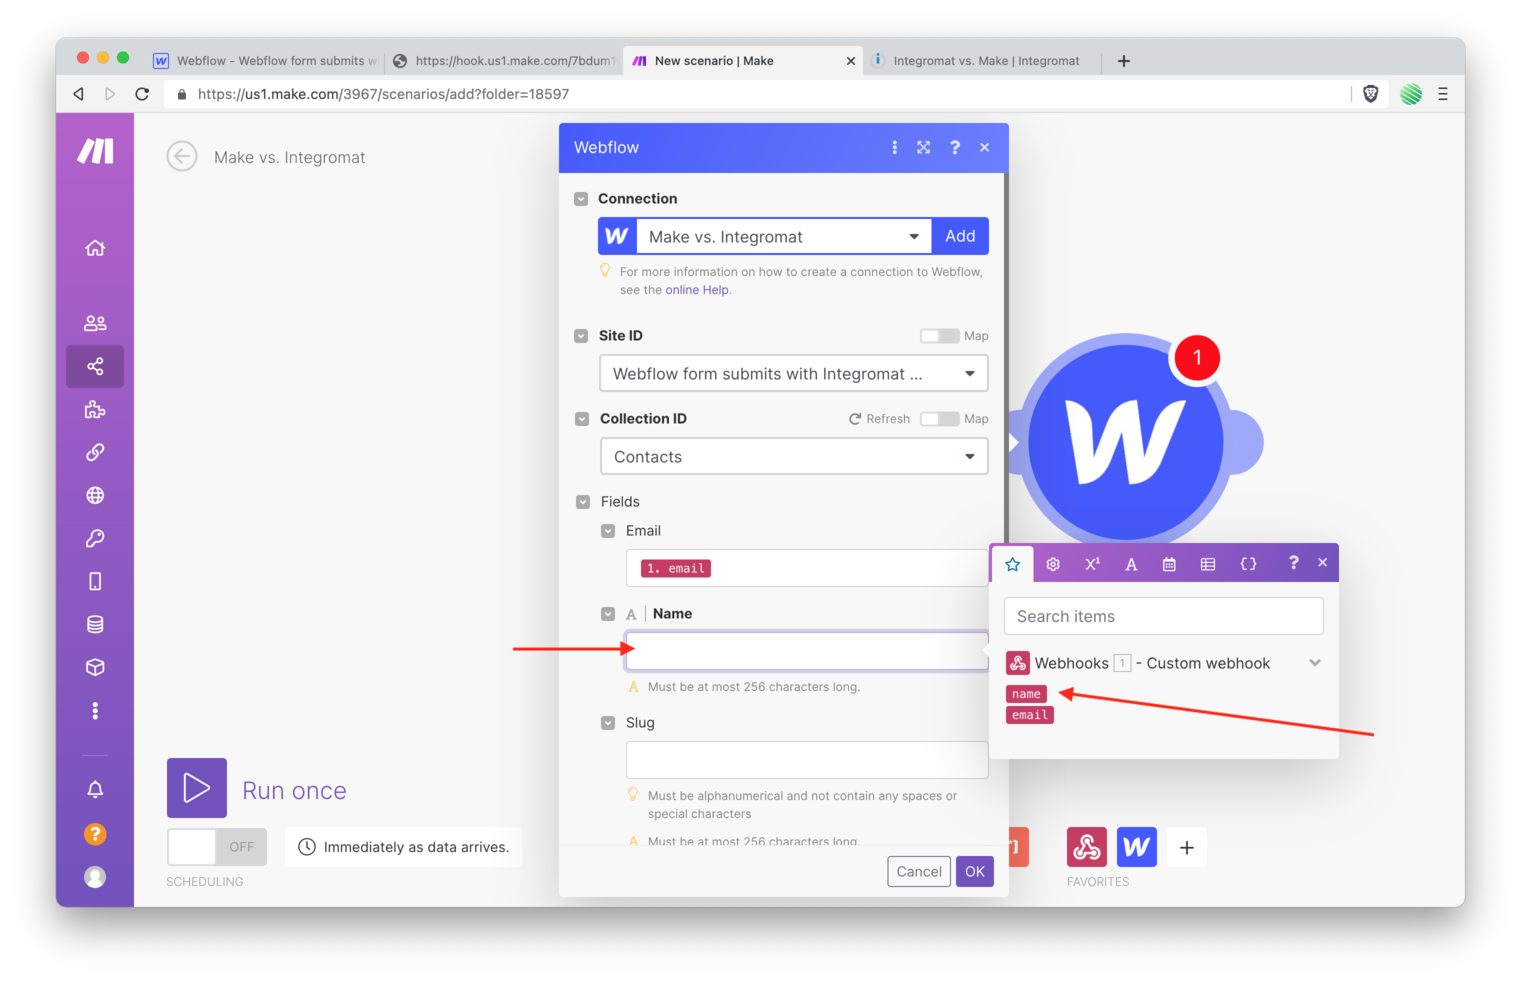
(Note: You’ll notice the lack of “Header” and “Method” fields in the popup list between Make & Integromat. That’s due to advanced options in the first Webhooks module. I turned them on with Integromat, but did not in Make.)
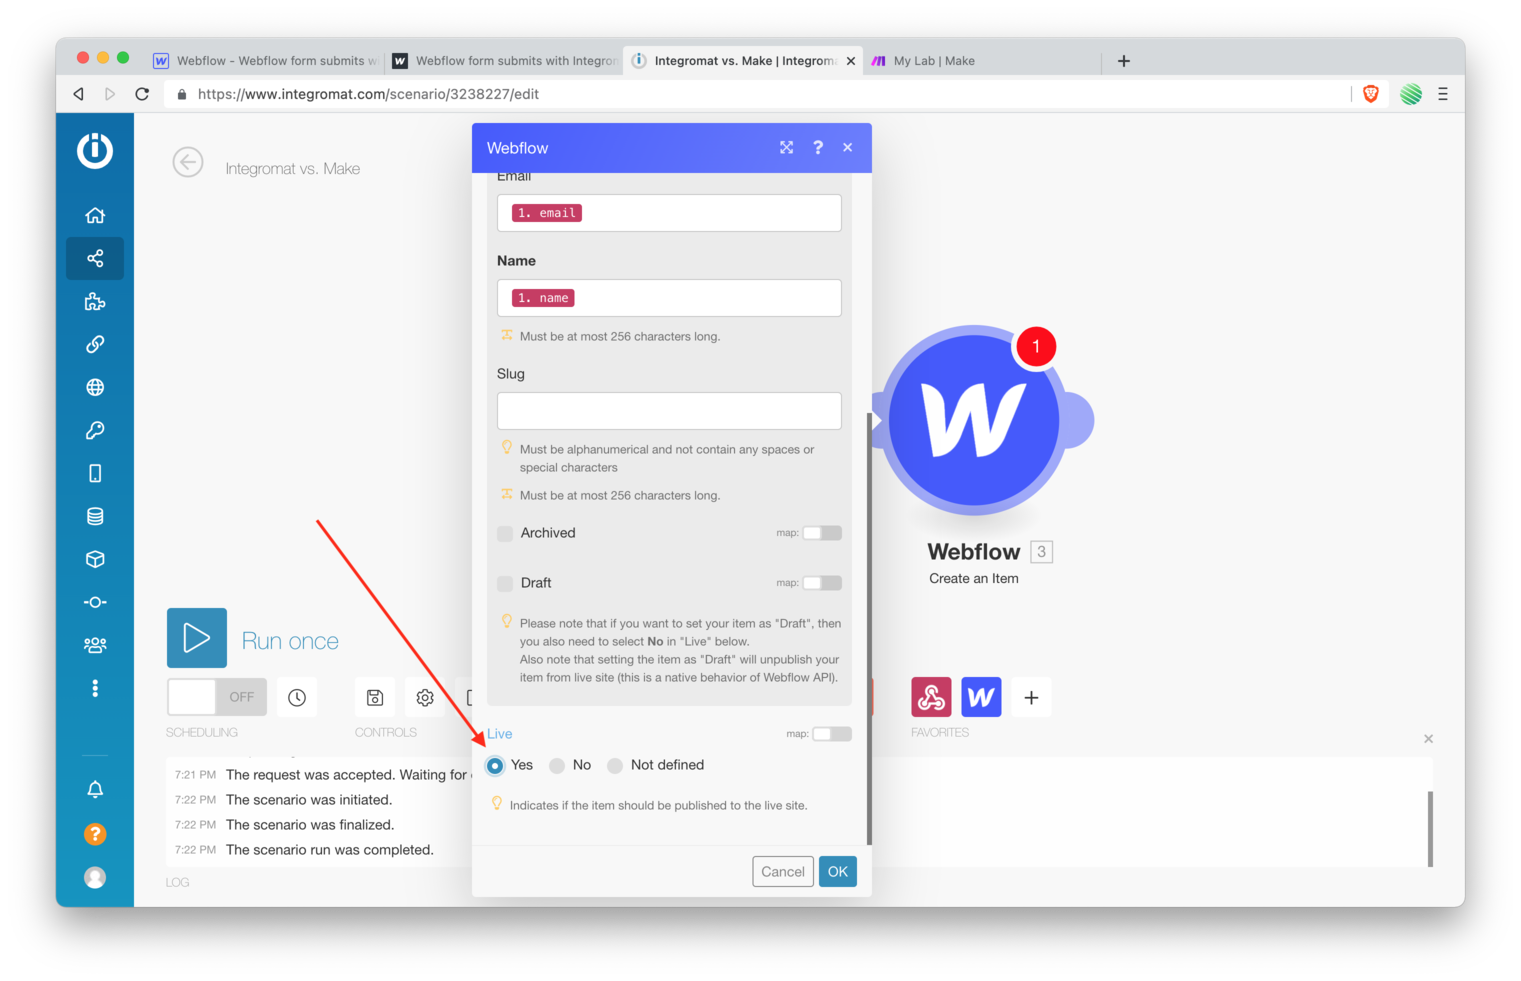
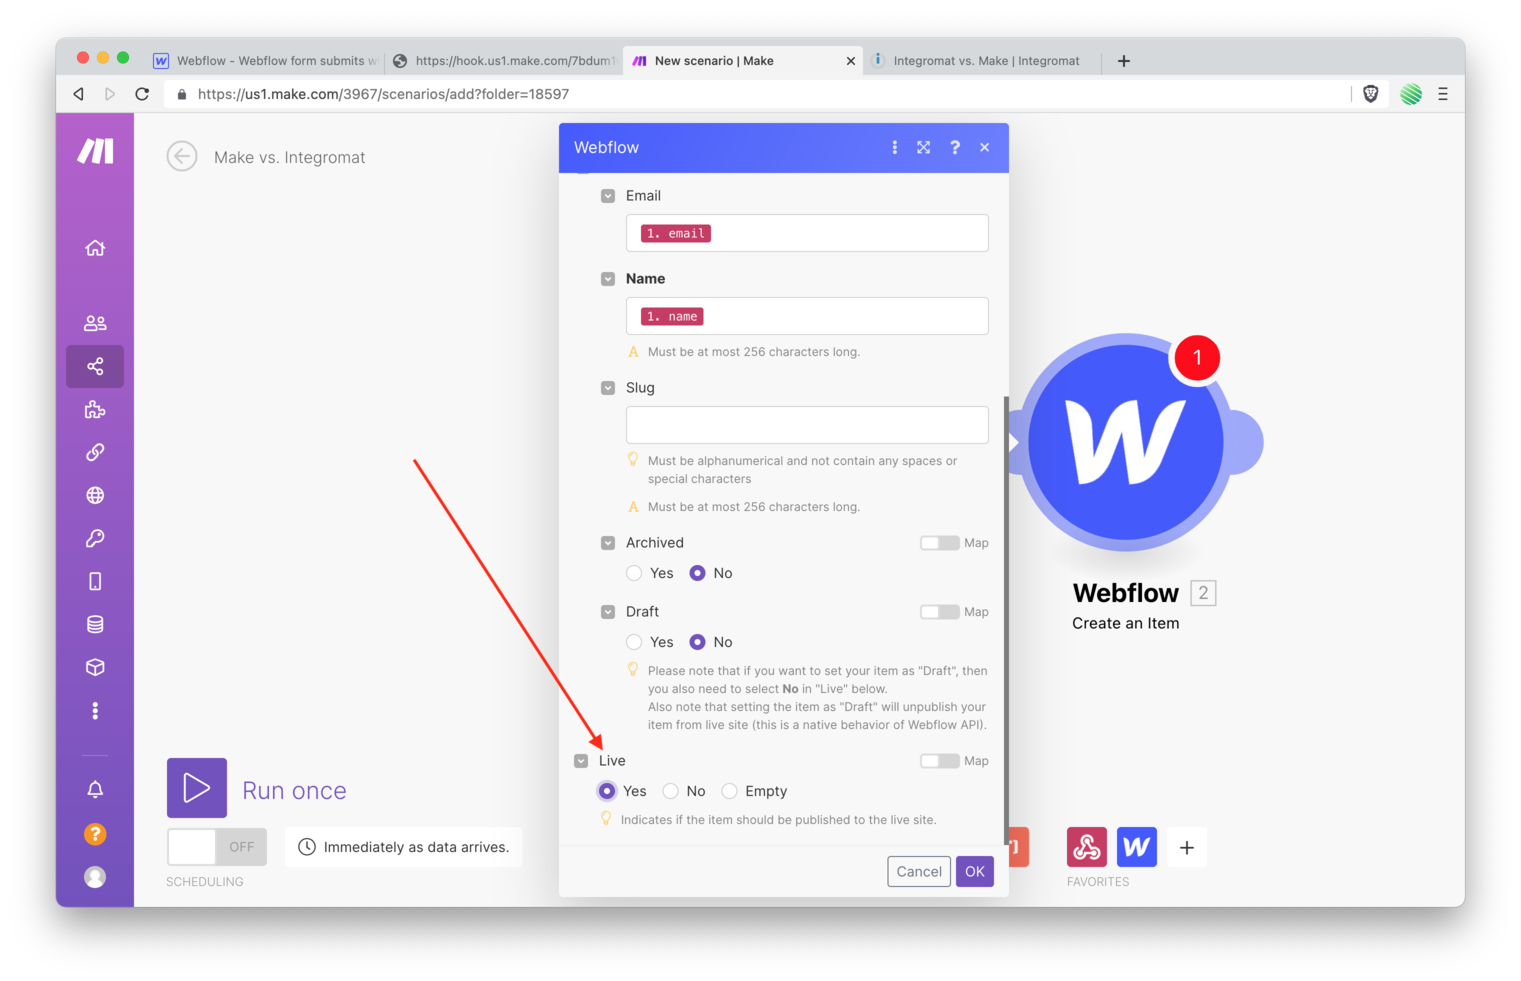
Make sure to check the “Yes” option under the “Live” field at the very bottom. Otherwise your form submissions will be staged in the Webflow CMS instead of automatically published for you.
Integromat:
Make:
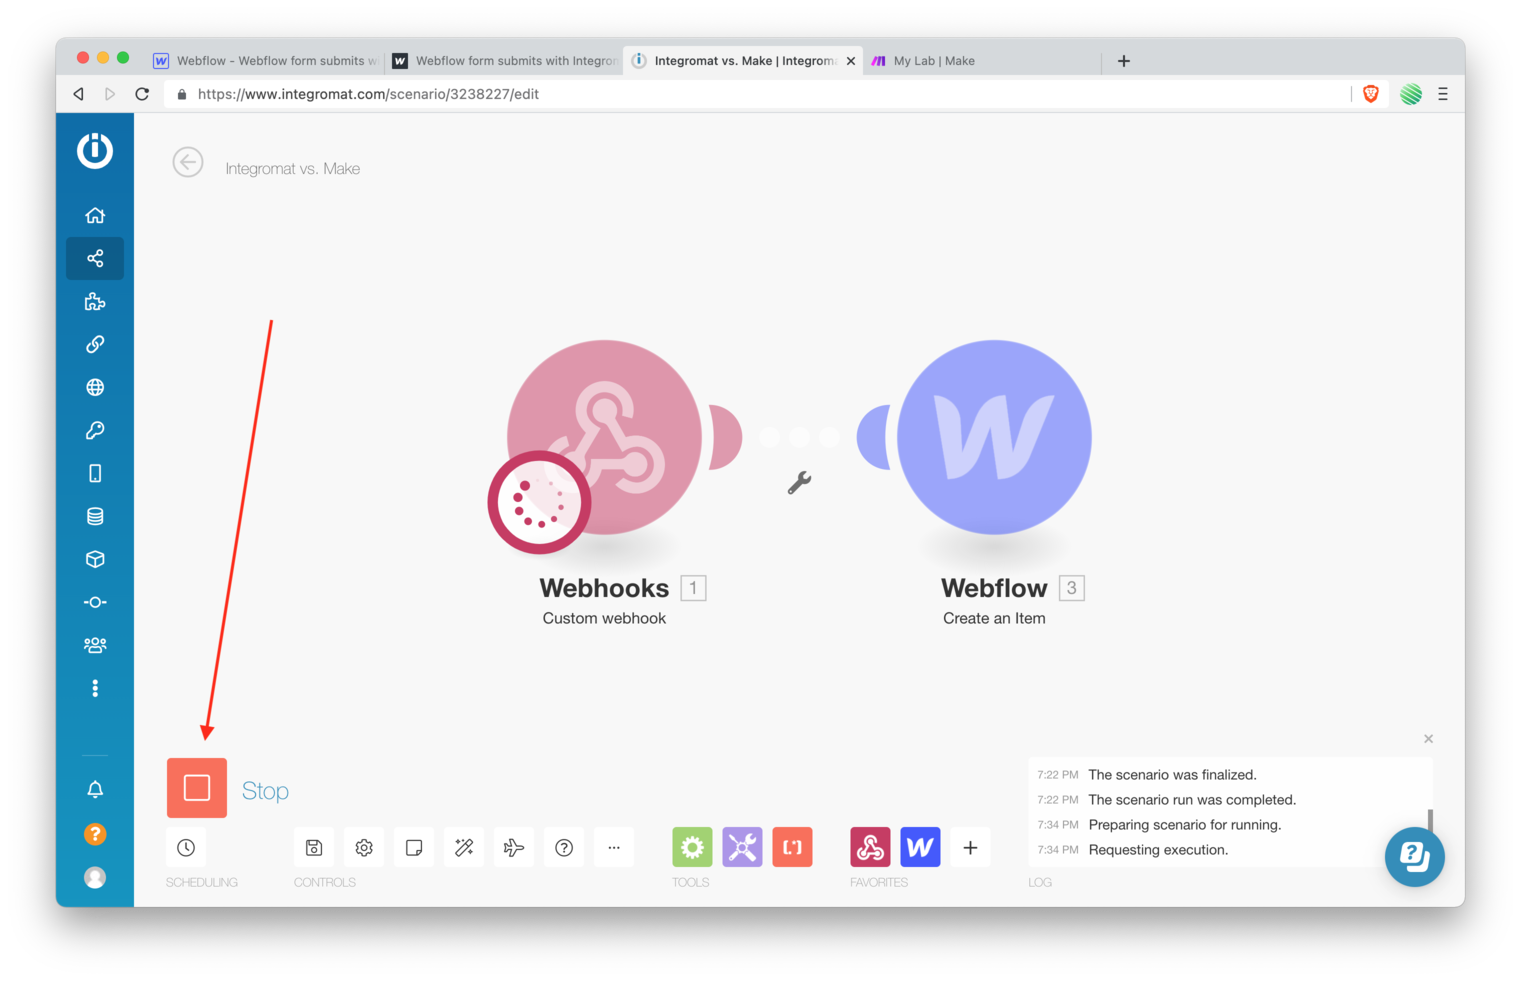
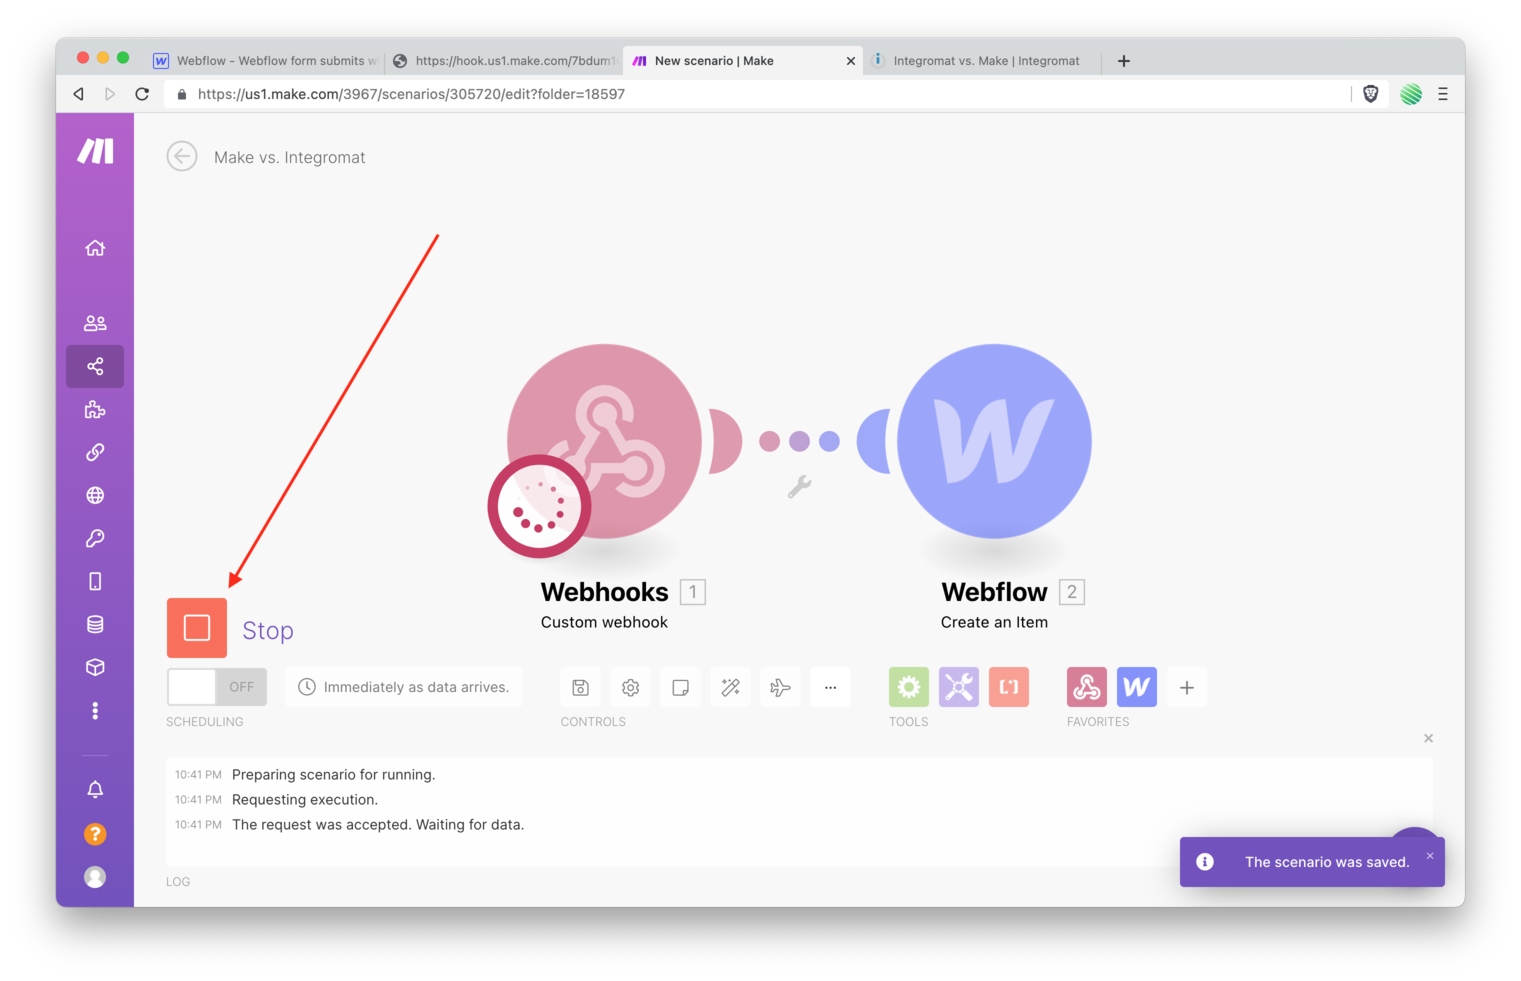
Tap the “Run once” button.
Integromat:
Make:
Go back to your live site that you left open. Fill out and submit the form.
You’ll find the same “Accepted” screen. That’s okay, will fix this shortly.
Flip back to Make & Integromat and find that your Scenario successfully ran.
Integromat:
Make:
Check for the data submitted in the form.
Integromat:
Make:
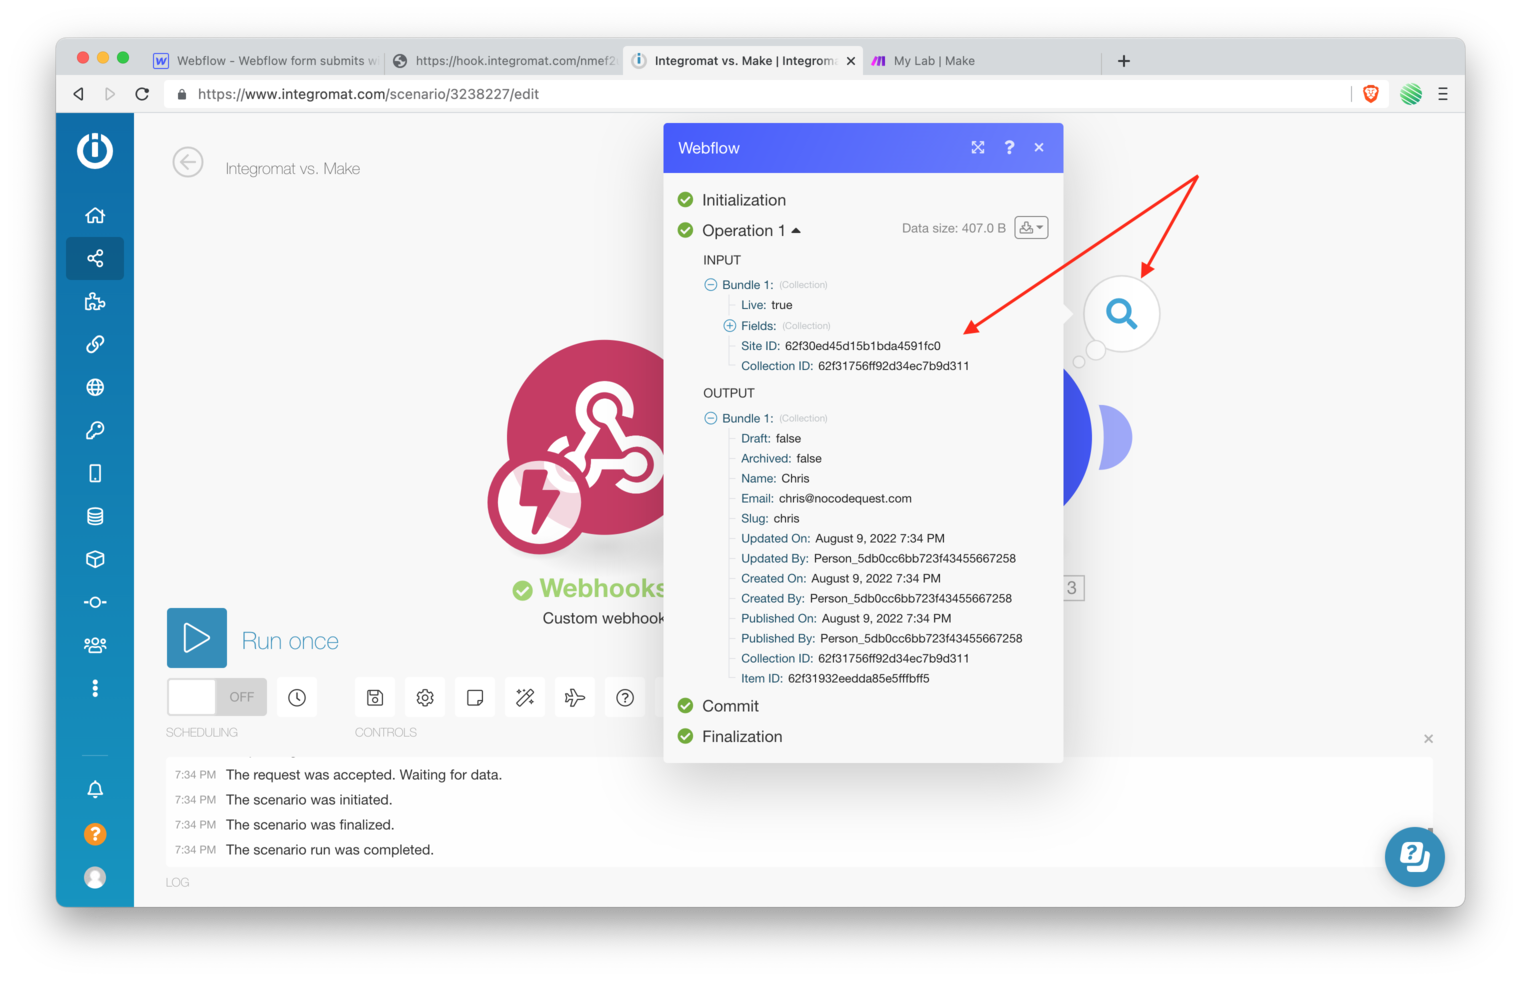
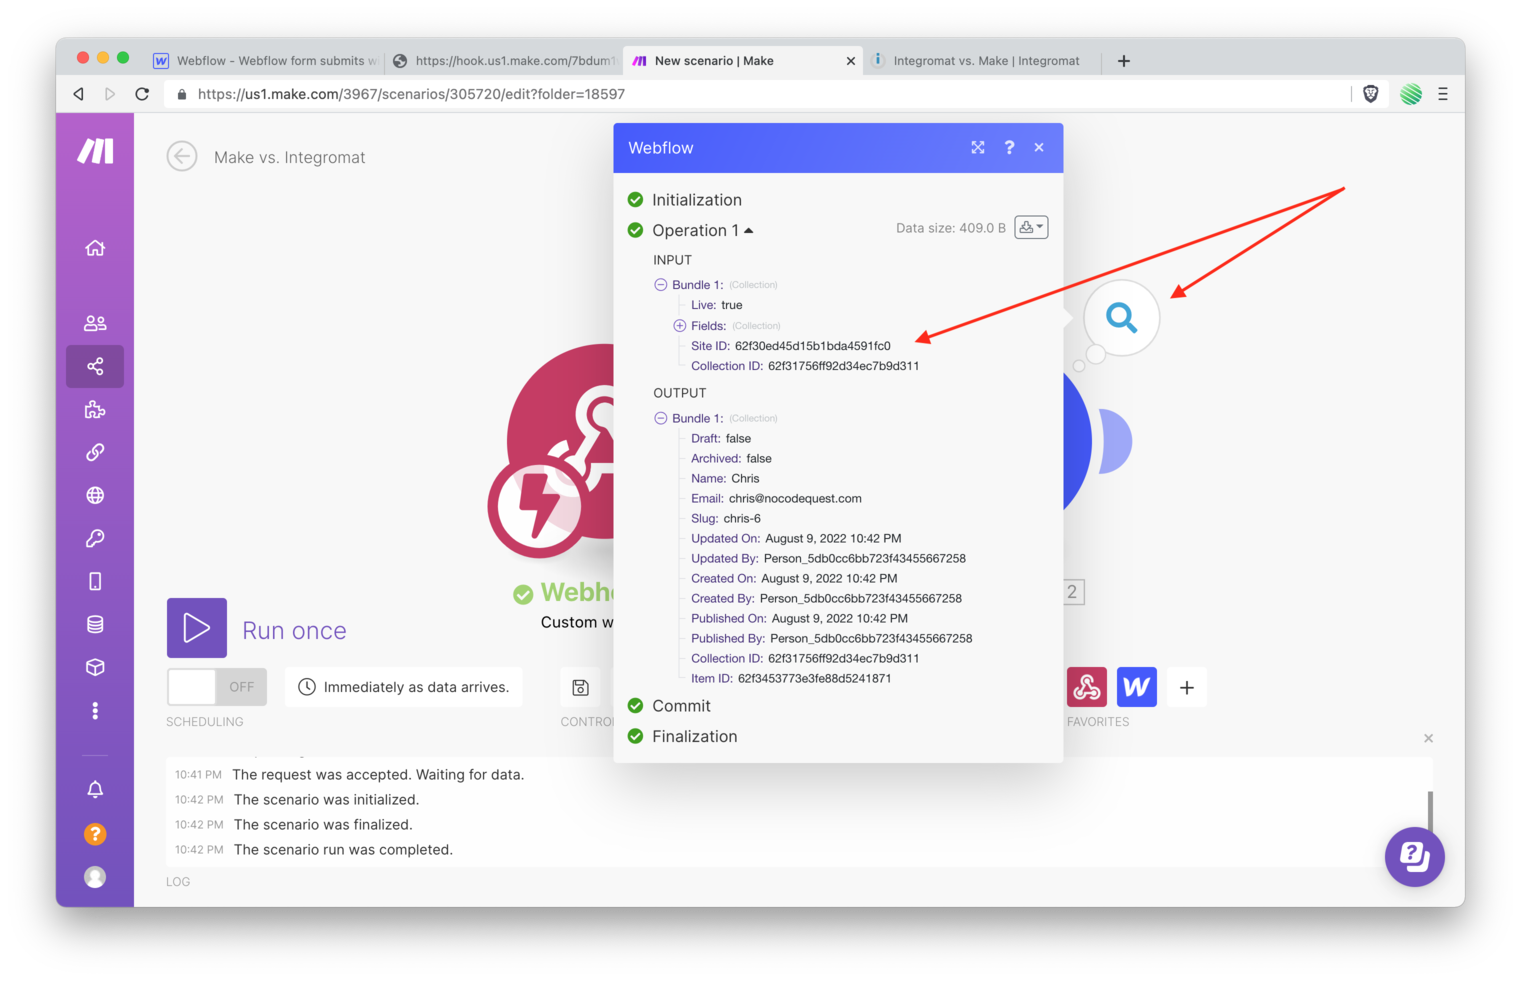
Check to see if Make & Integromat created a new CMS item. According the screenshots below, they both did just that.
Integromat:
Make:
Flip back to your Webflow Designer and reload this browser tab. This is needed so that the latest form submission will show up in your CMS Collection.
Once reloaded, go back to your CMD Editor.
Find you new form submission listed the top of the list.
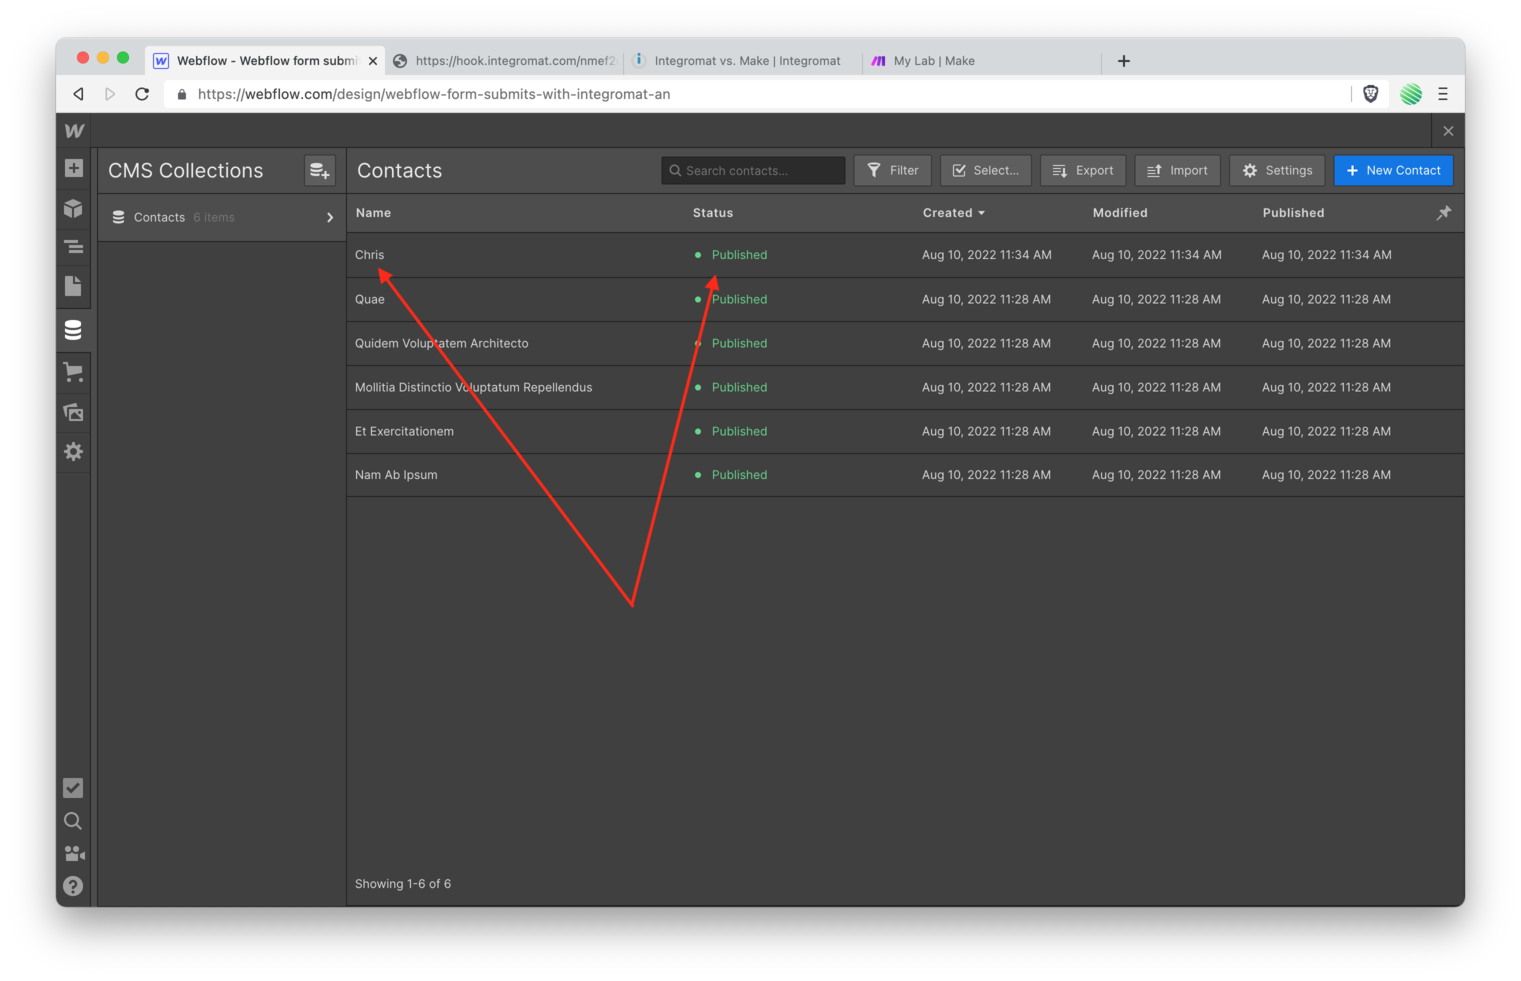
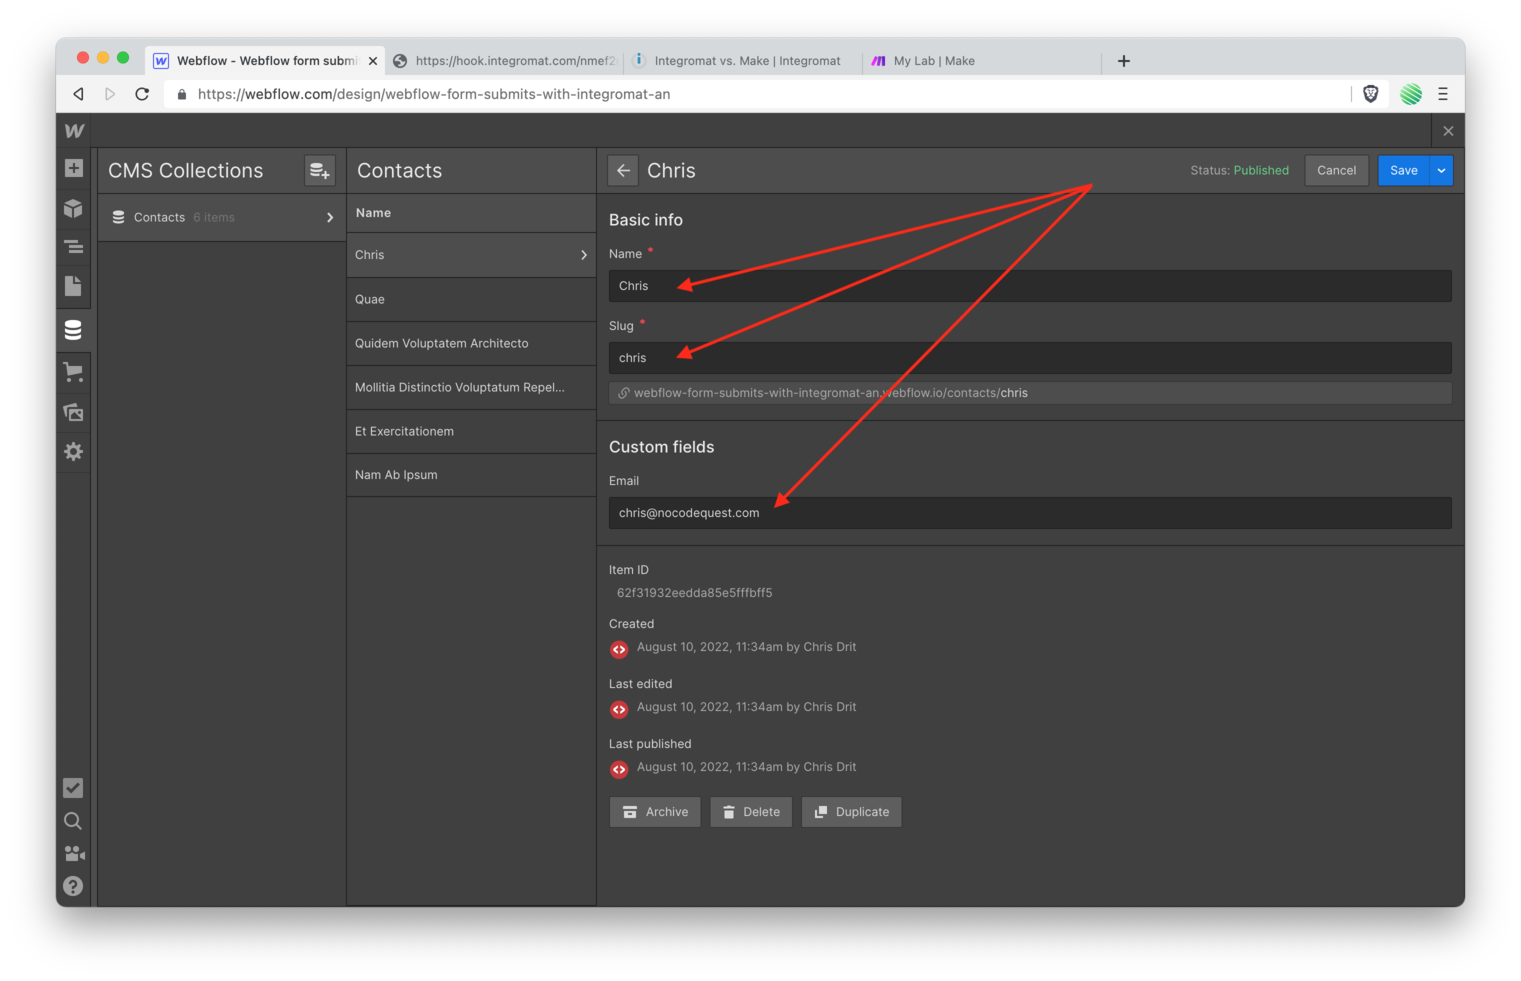
Open it and find everything you submitted successfully added to the Webflow CMS.
Easy peasy!
Make & Integromat Browser Redirect
Remember that “accepted” message with a blank white page after you submit the form? Yep. Now you’ll fix that 😃
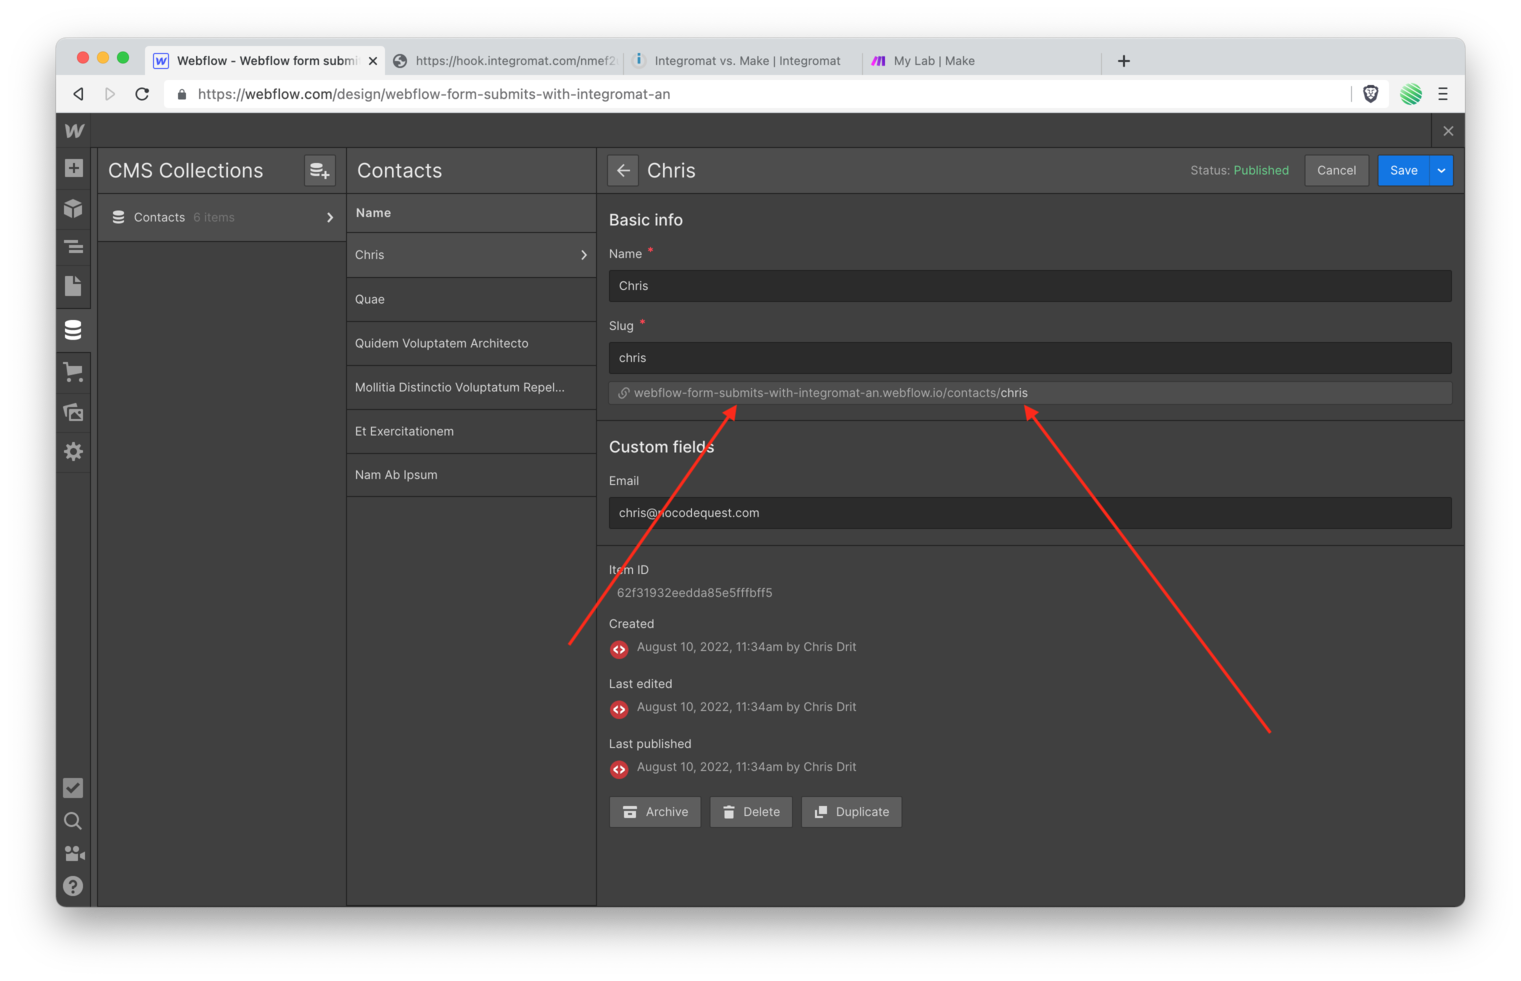
If you look at that CMS item (screenshot below) you’ll notice a url for it. Each CMS item has a unique url.
The first part of the URL is always the same:
webflow-form-submits-with-integromat-an.webflow.io/contacts
The last part, the “Slug” is unique for each CMS item:
/chris
And that’s the page you’re going to tell Integromat to redirect to 🤩
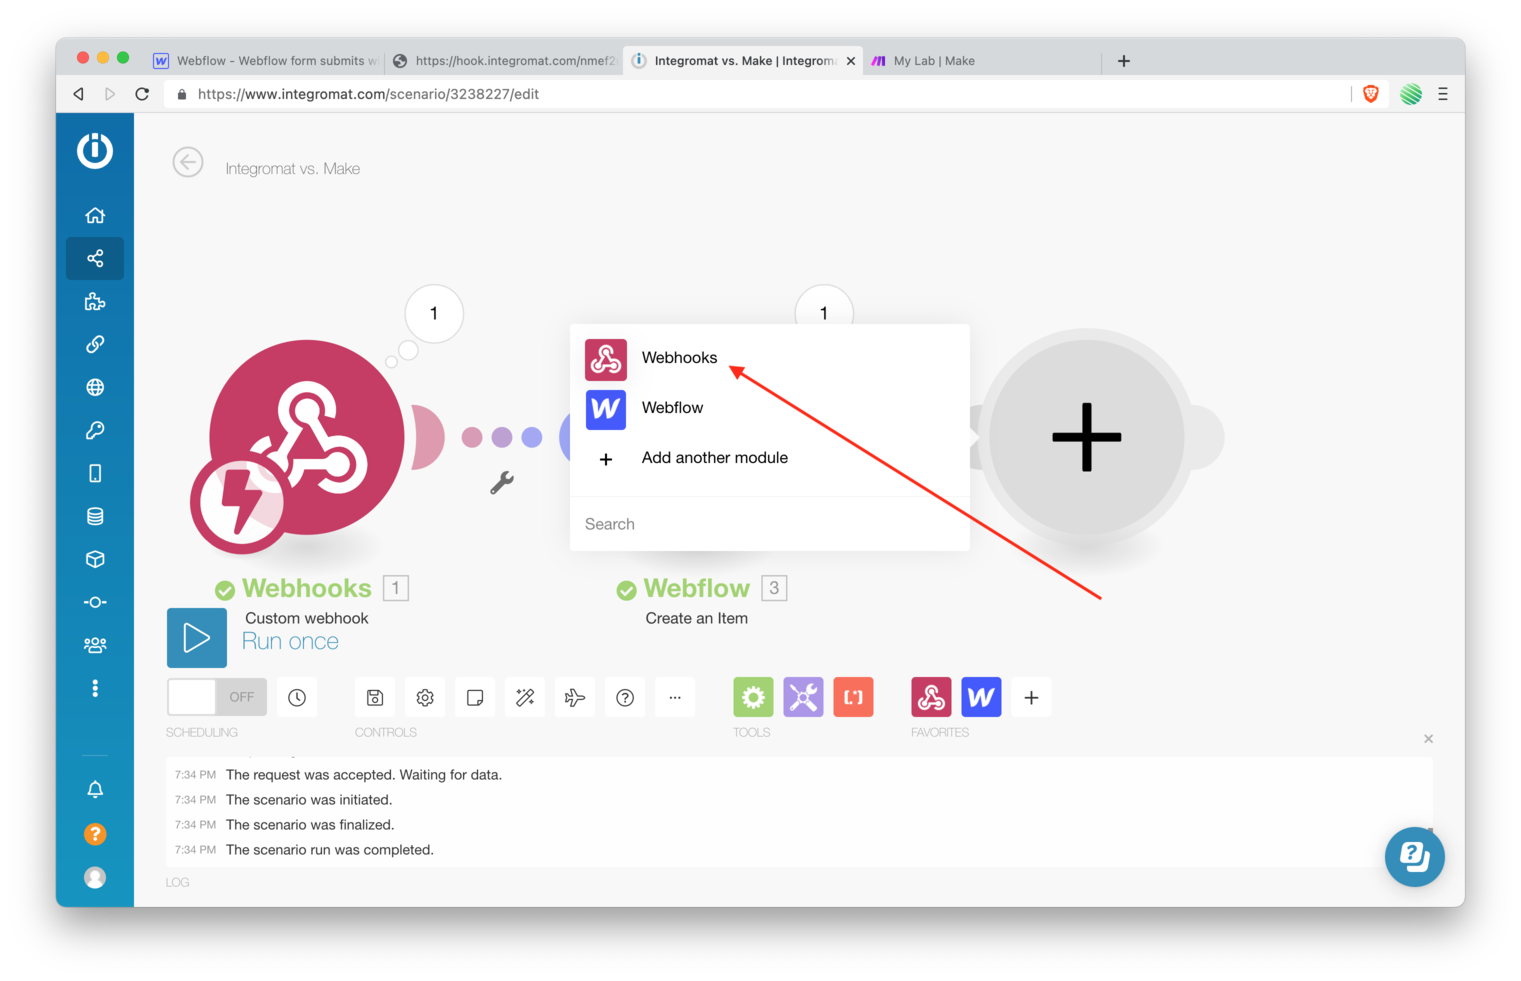
Flip back over to Make & Integromat and add another module.
Integromat:
Make:
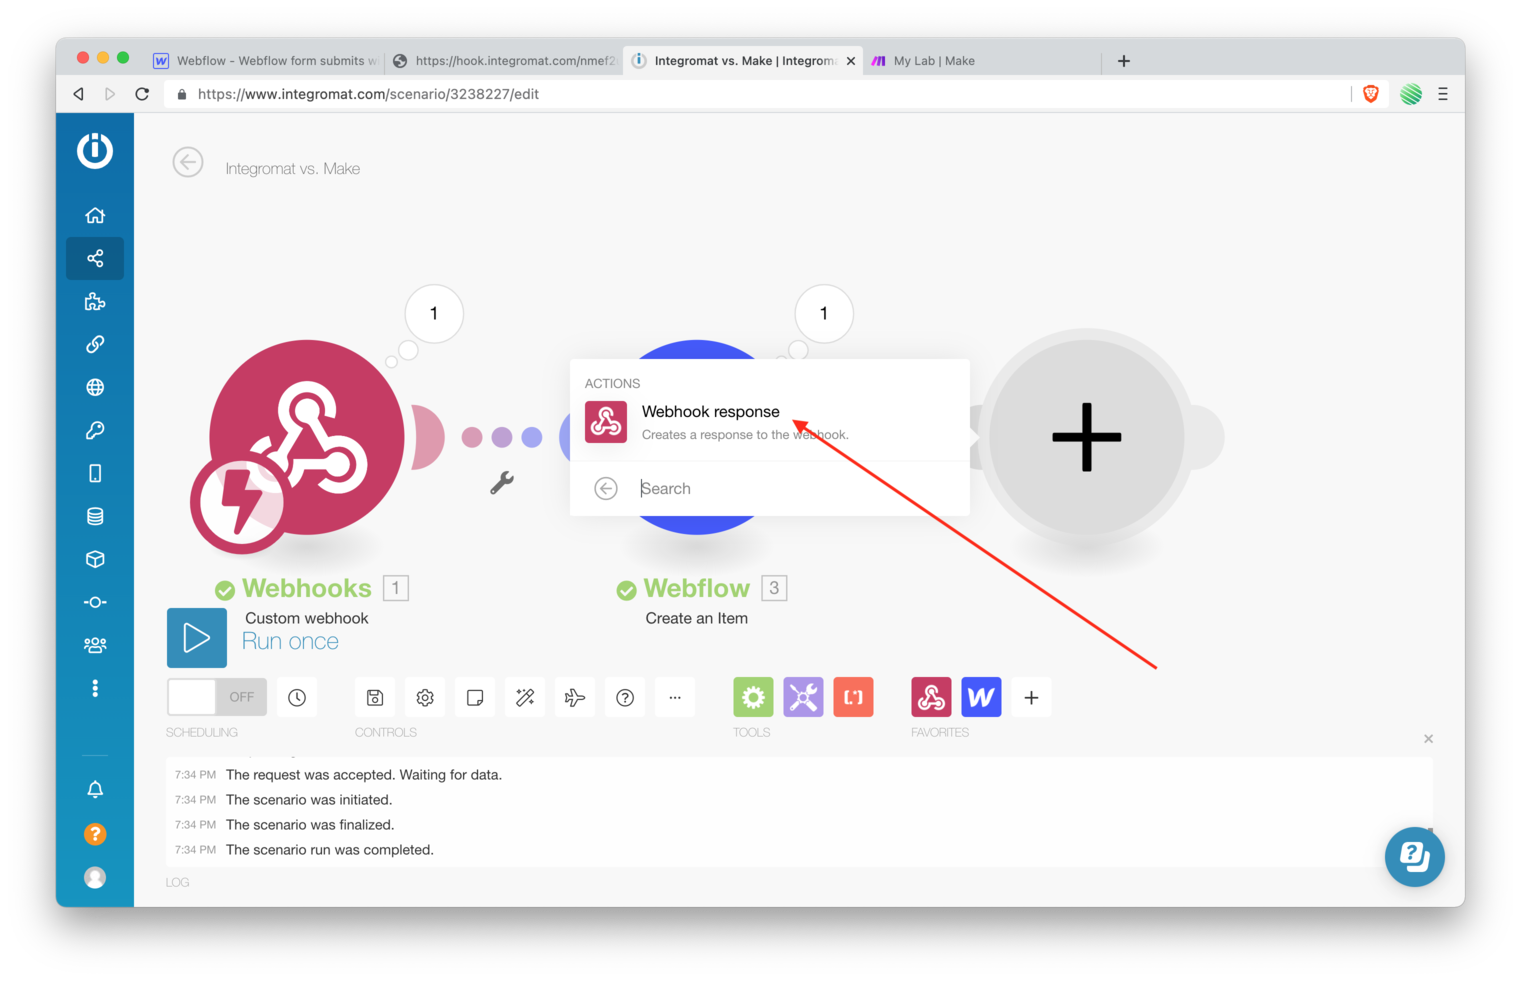
Choose Webhooks again.
Integromat:
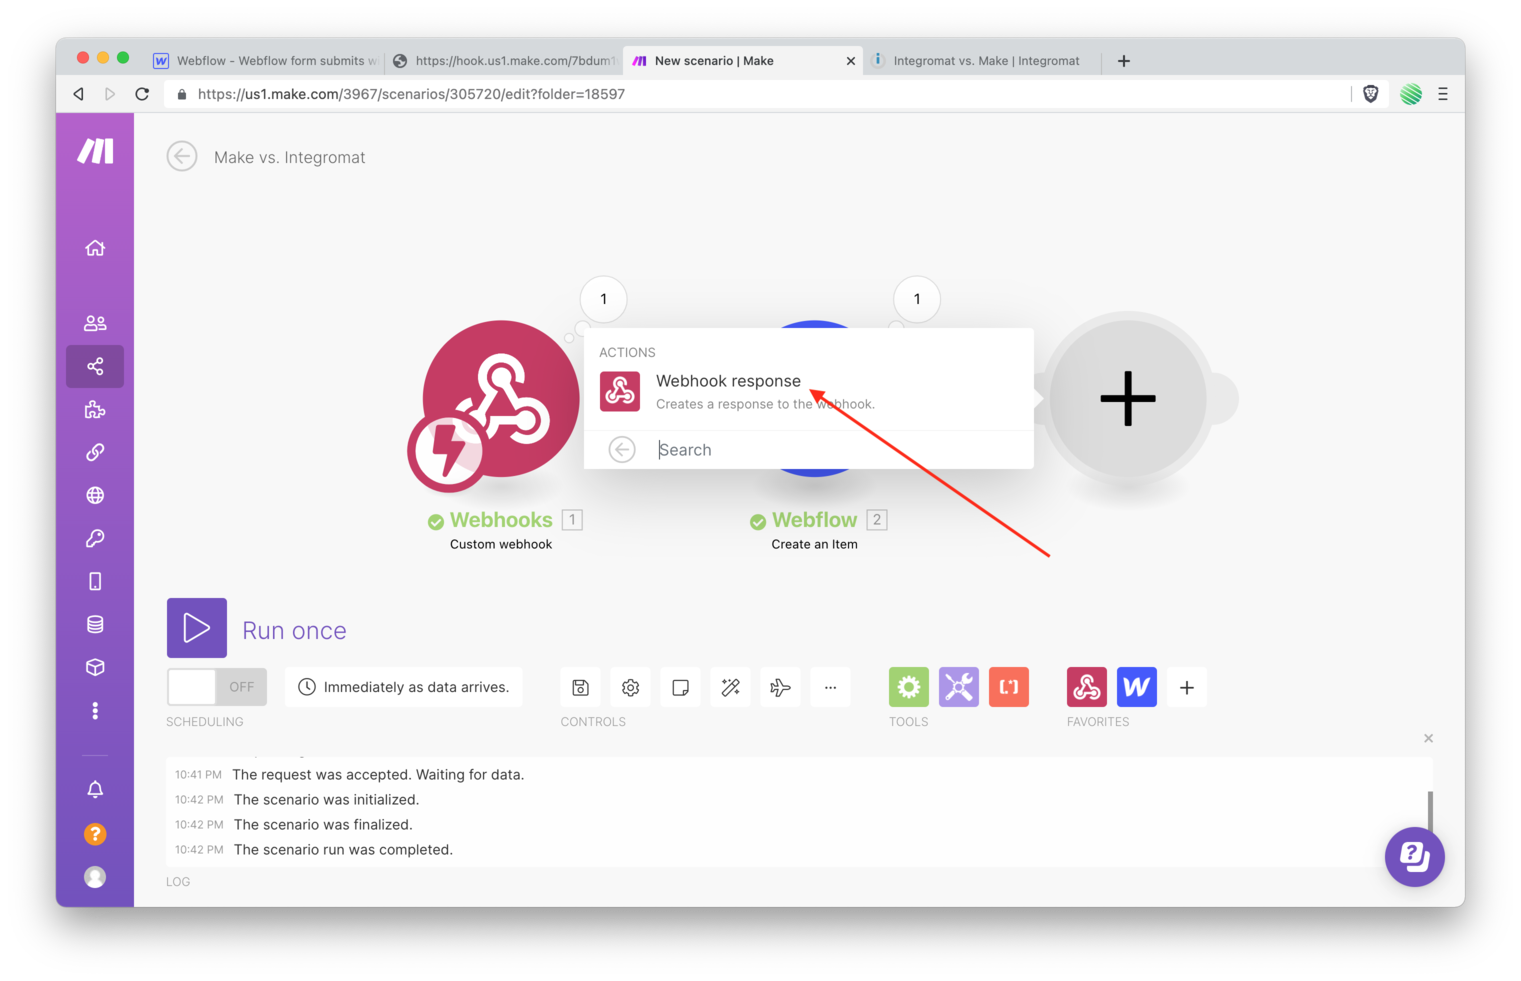
Make:
This time select “Webhook response” which should be the only option.
This is paired with your first module, the “Webhooks” module.
What this does, and this is something Zapier can’t do, is respond the web browser telling it what to do.
In our case, we are going to tell the web browser that we want it to redirect to the newly create Contact page.
Integromat:
Make:
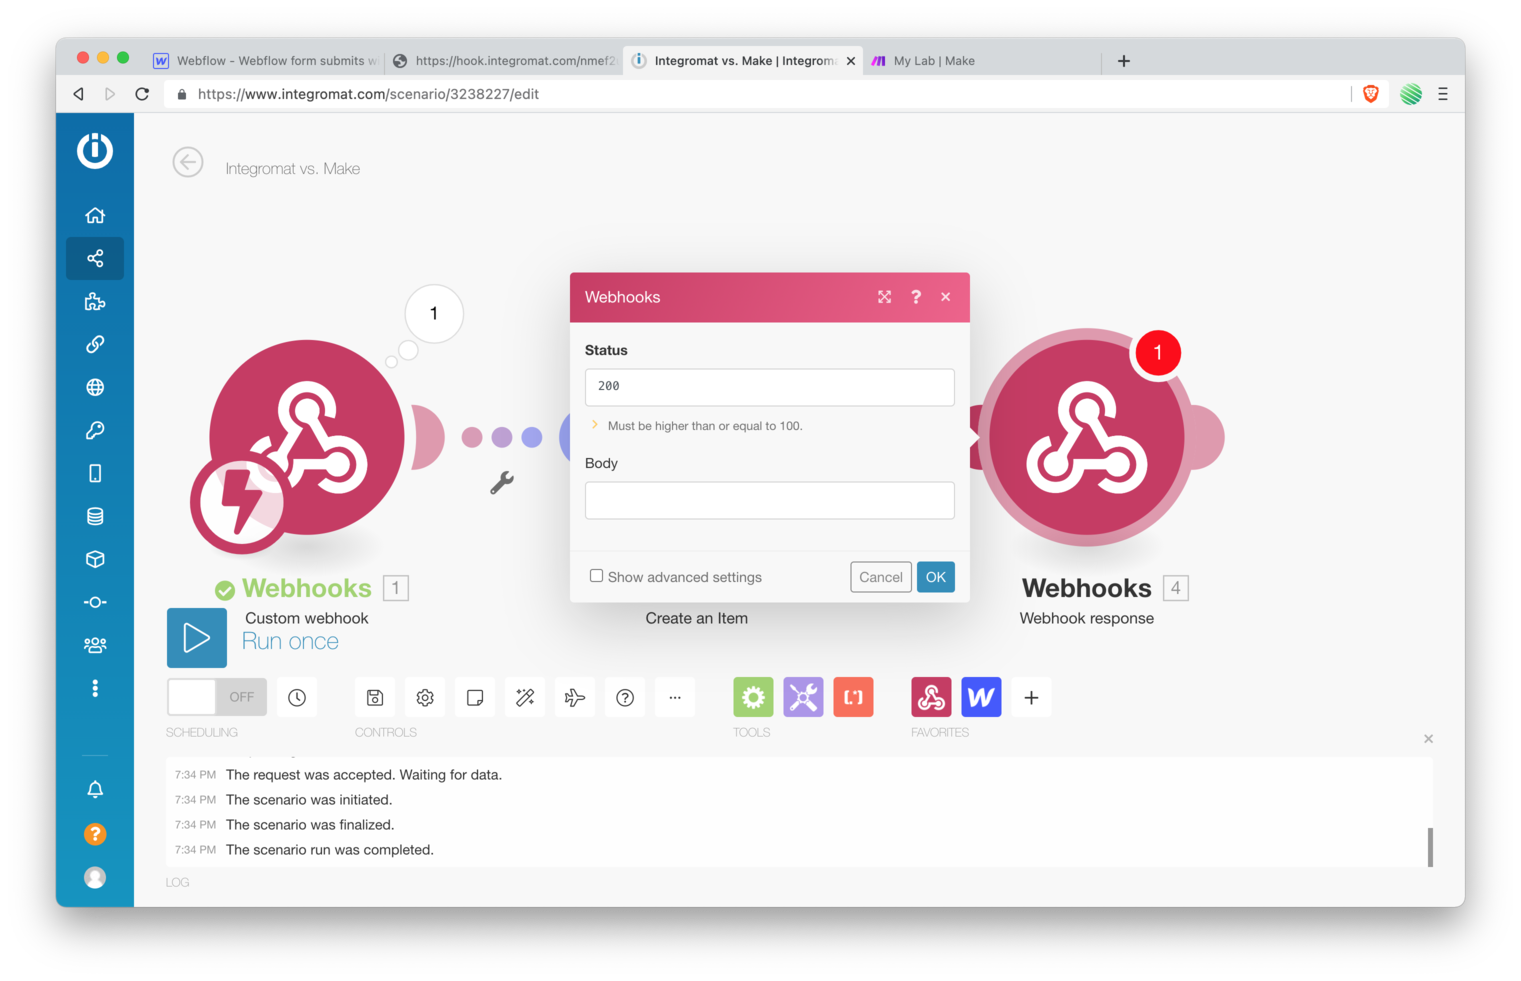
The Webhook response module opens up with a Status field filled out of “200”. These are the HTTP Status Codes that the web browser understands what to do with.
You don’t need to understand them all, if your curious, checkout the link above.
Integromat:
Make:
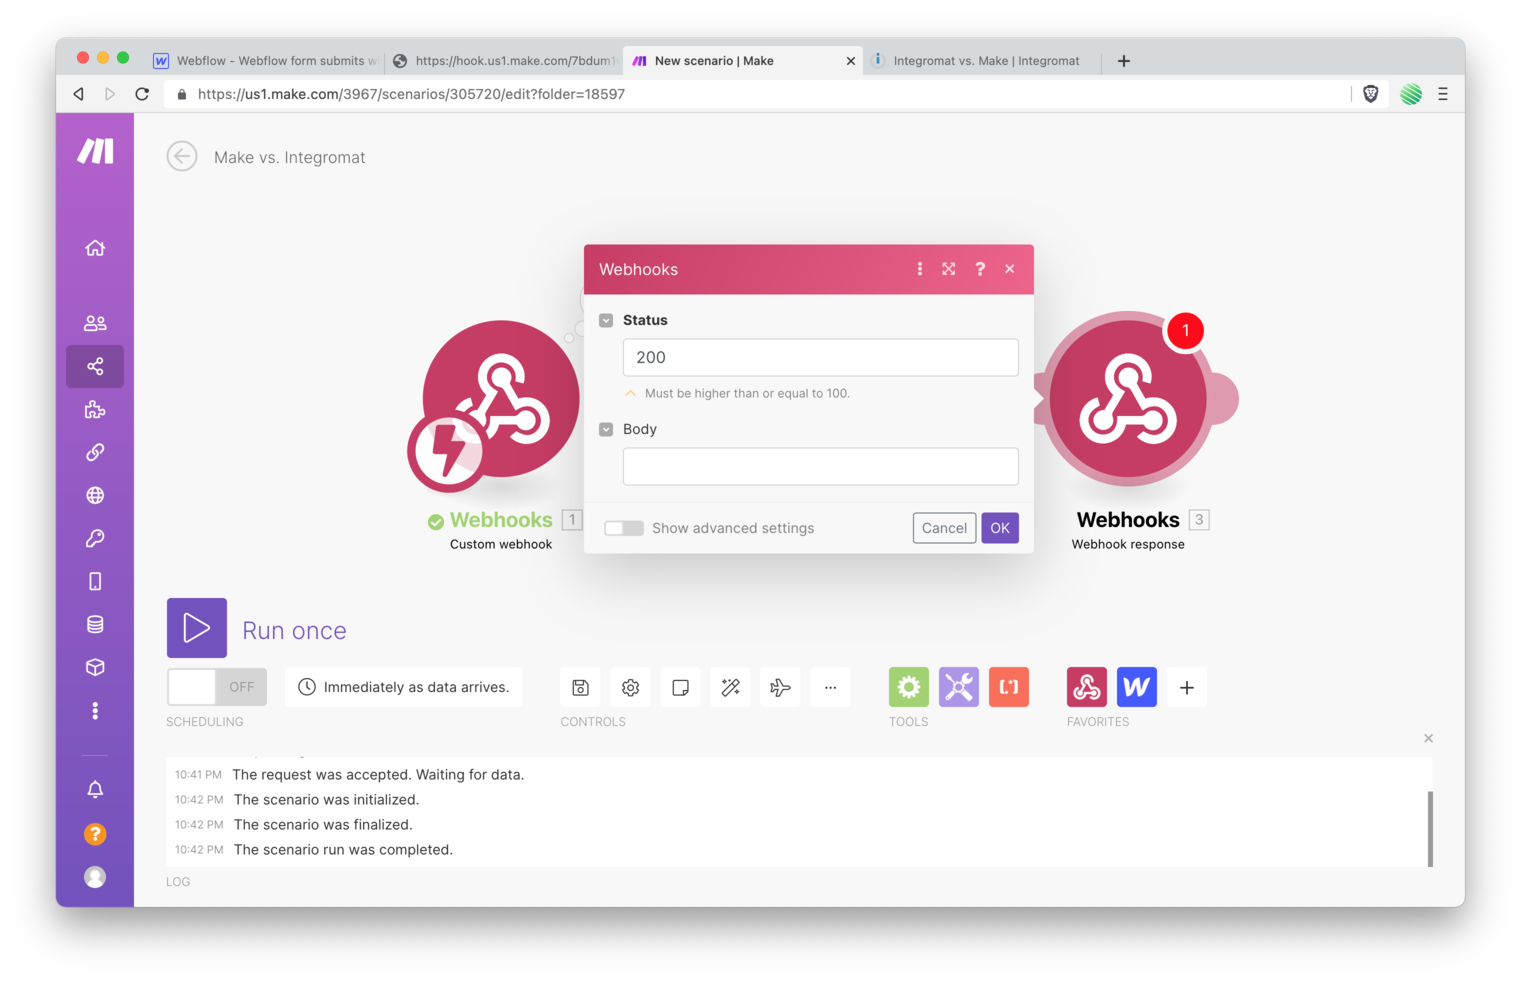
What’s important for you to know is that a response of “200” tells the web browser everything is okay and don’t do anything.
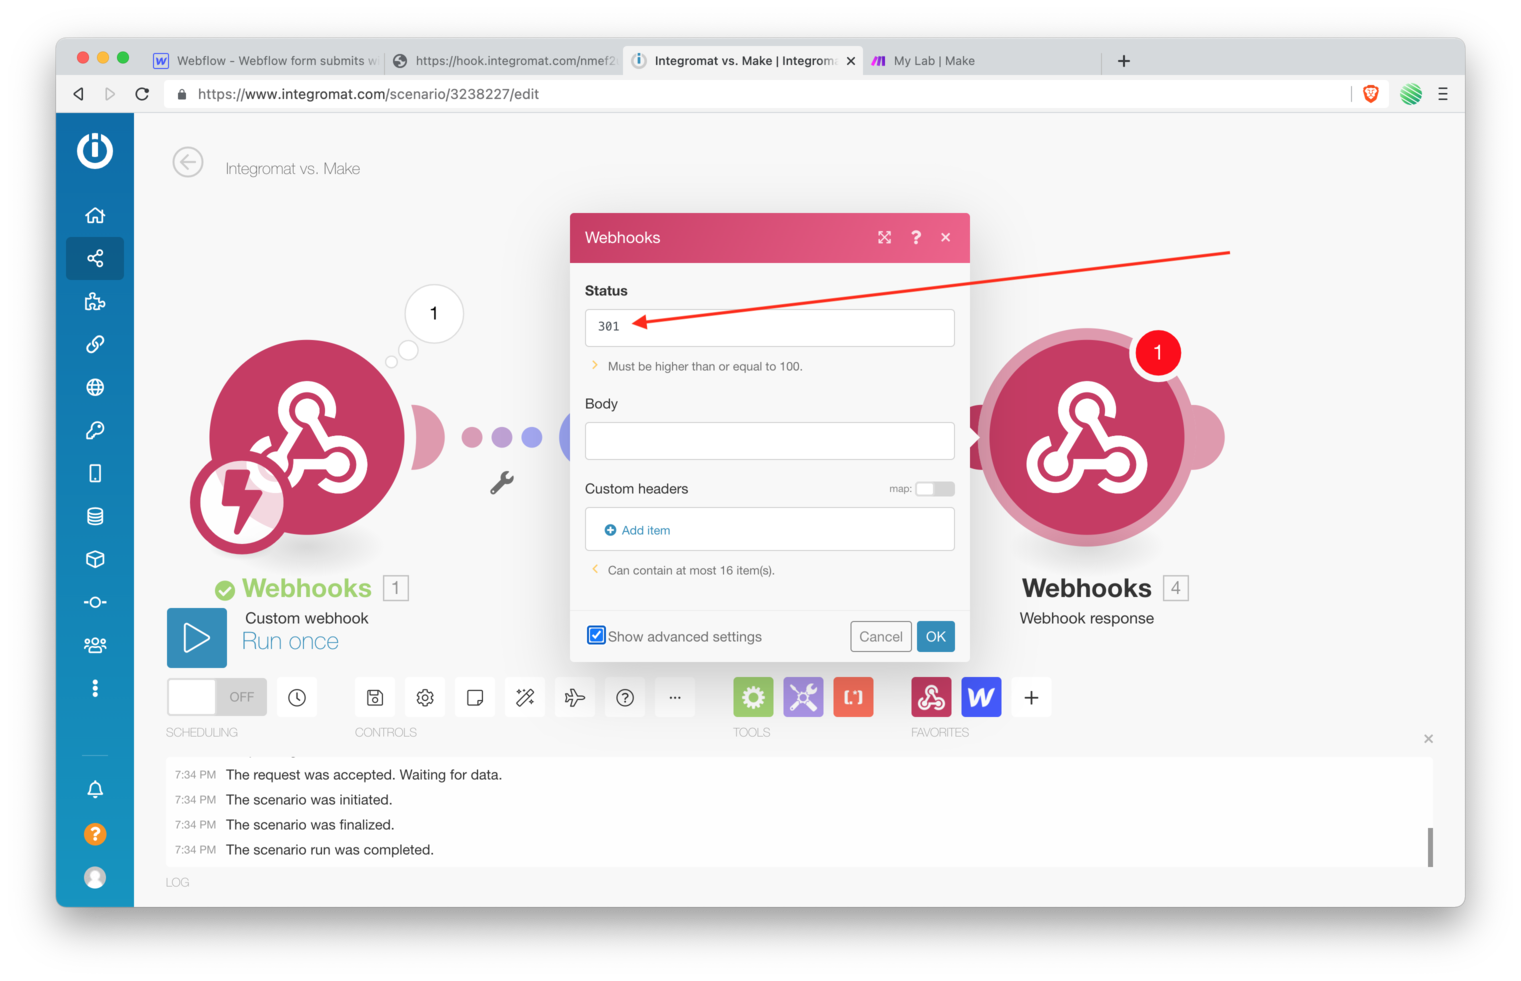
Instead, we want a response of “301” which tells the web browser, everything is okay but we want you to redirect the web browser to another page.
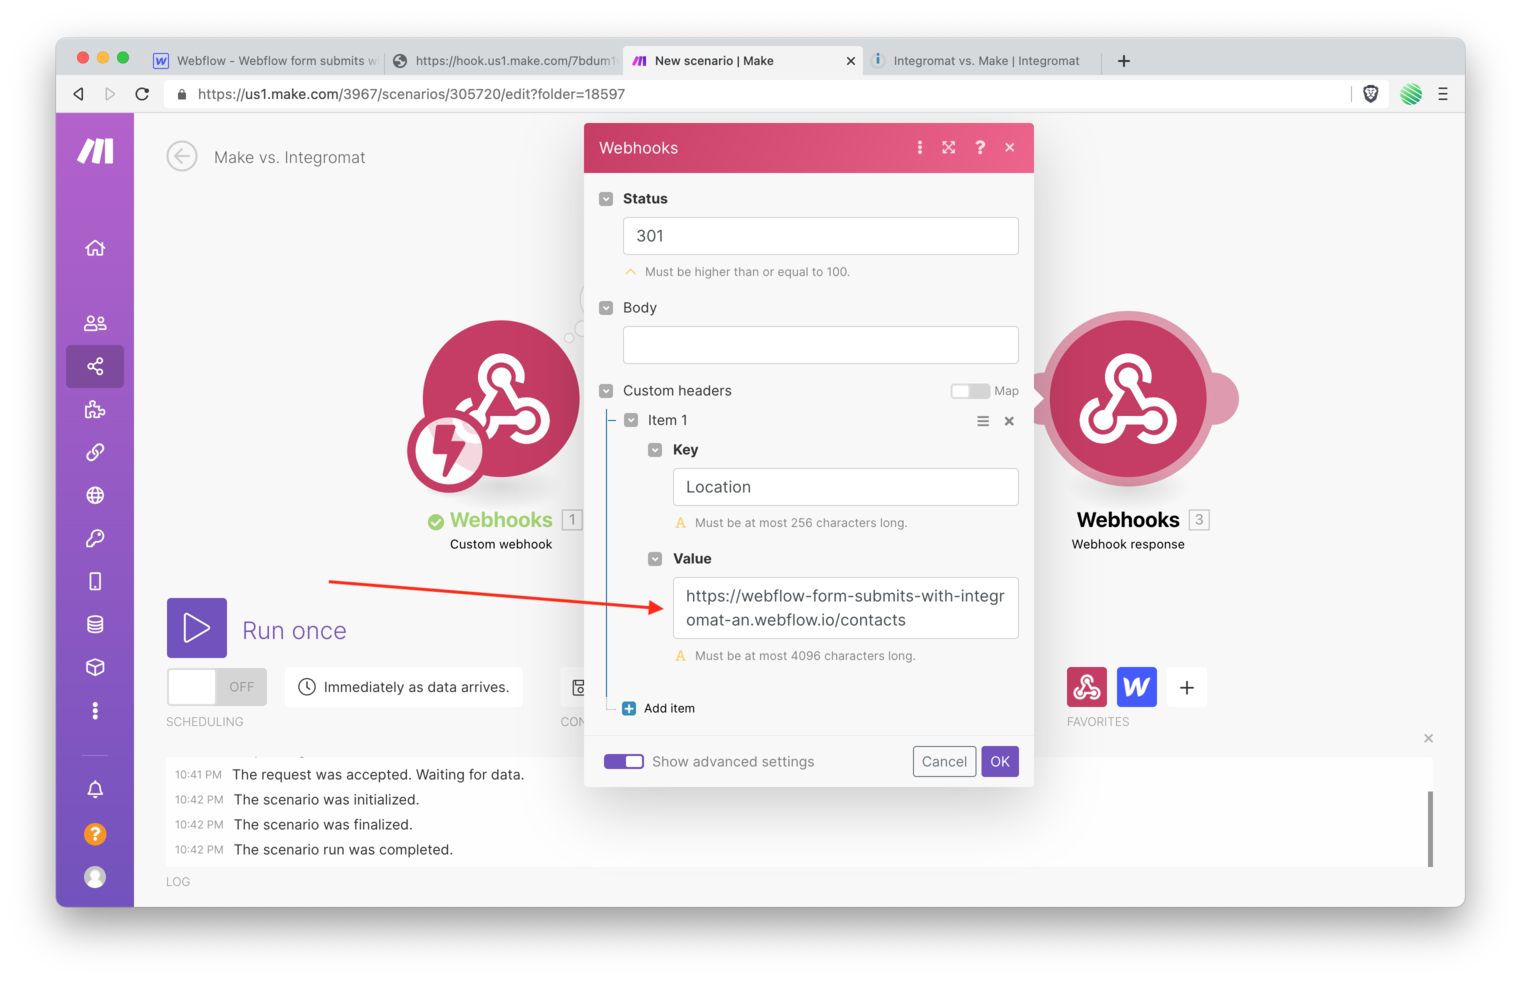
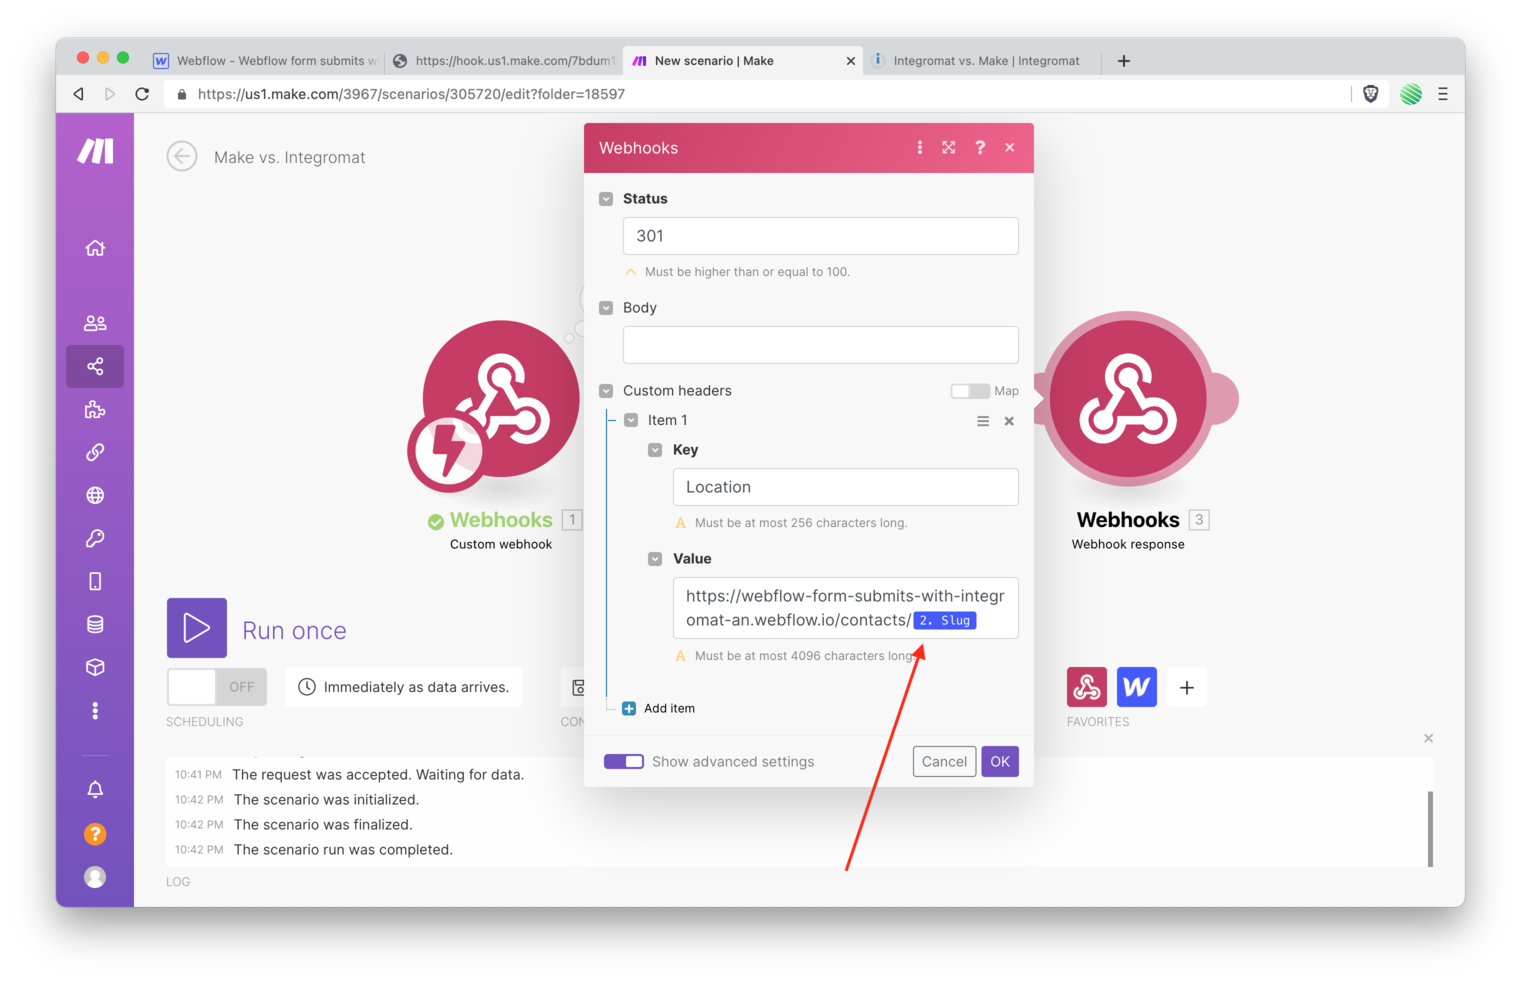
With the “301” response code added, tap on the “show advanced settings” option at the bottom of the popup.
Integromat:
Make:

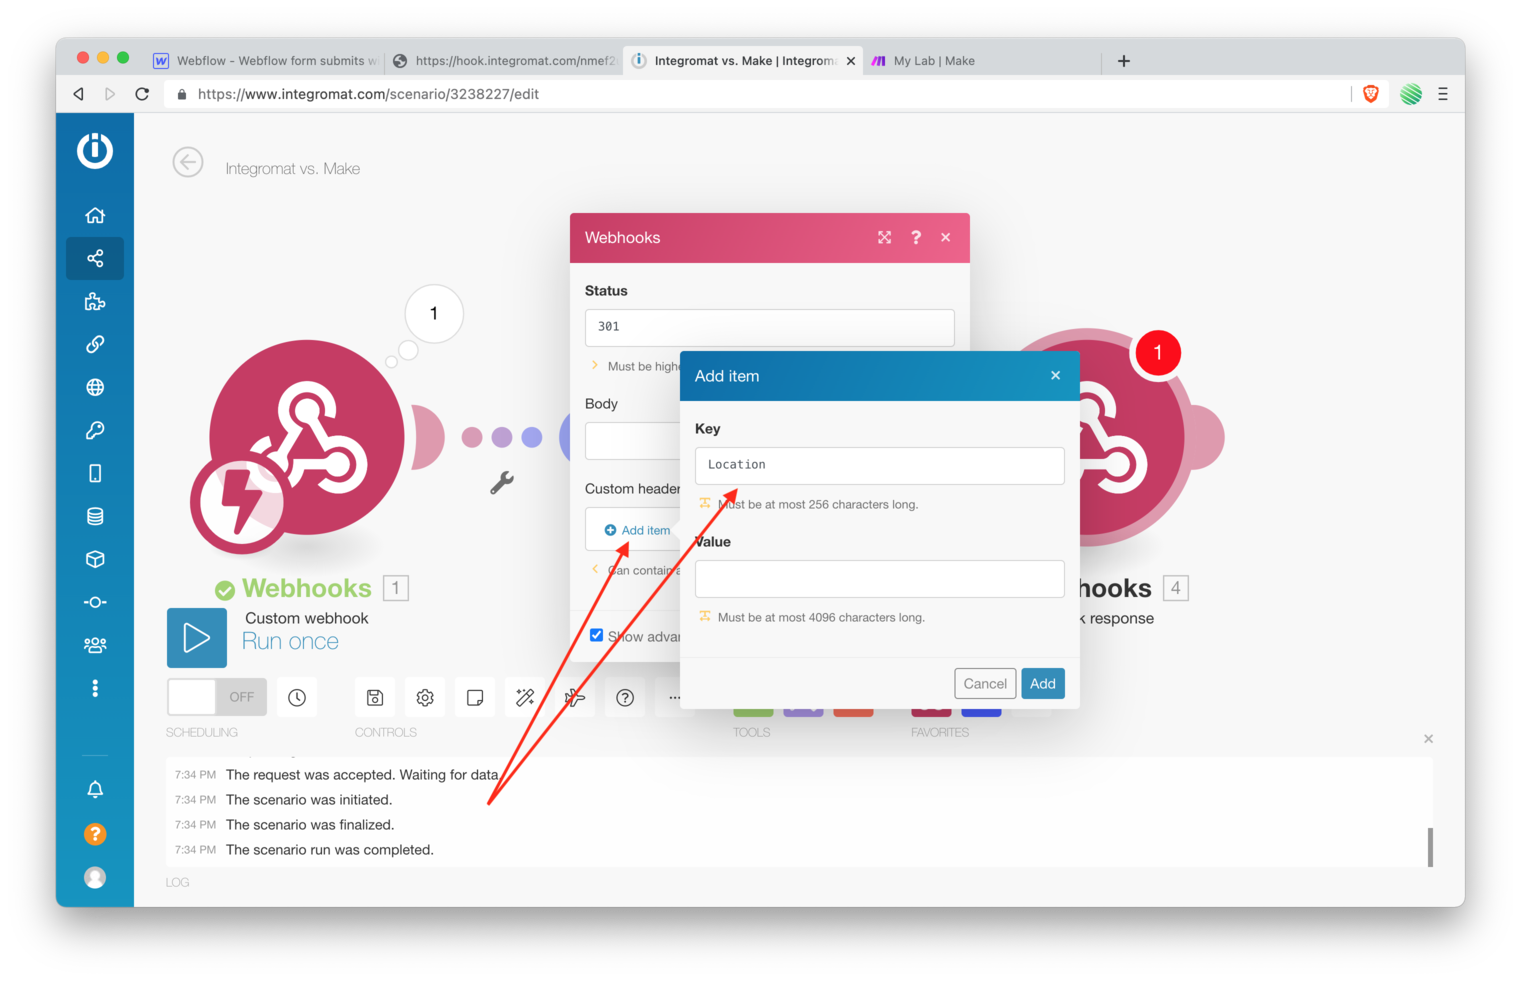
Now tap on the “Add item” link.
Within this new popup are some fields for you to fill out. What you are doing is telling the web browser, with the 301 code, that it needs to redirect to another page.
But what page?
Well, that’s what you’ll add here. This is called a “custom header” and it is information required to be sent back to the web browser in order for this to work.
The specific type of header, there can be many “types” of headers, but this specific type of header is a “Location” header.
So go ahead and add that as the value for the “Key” field.
Integromat:
Make:
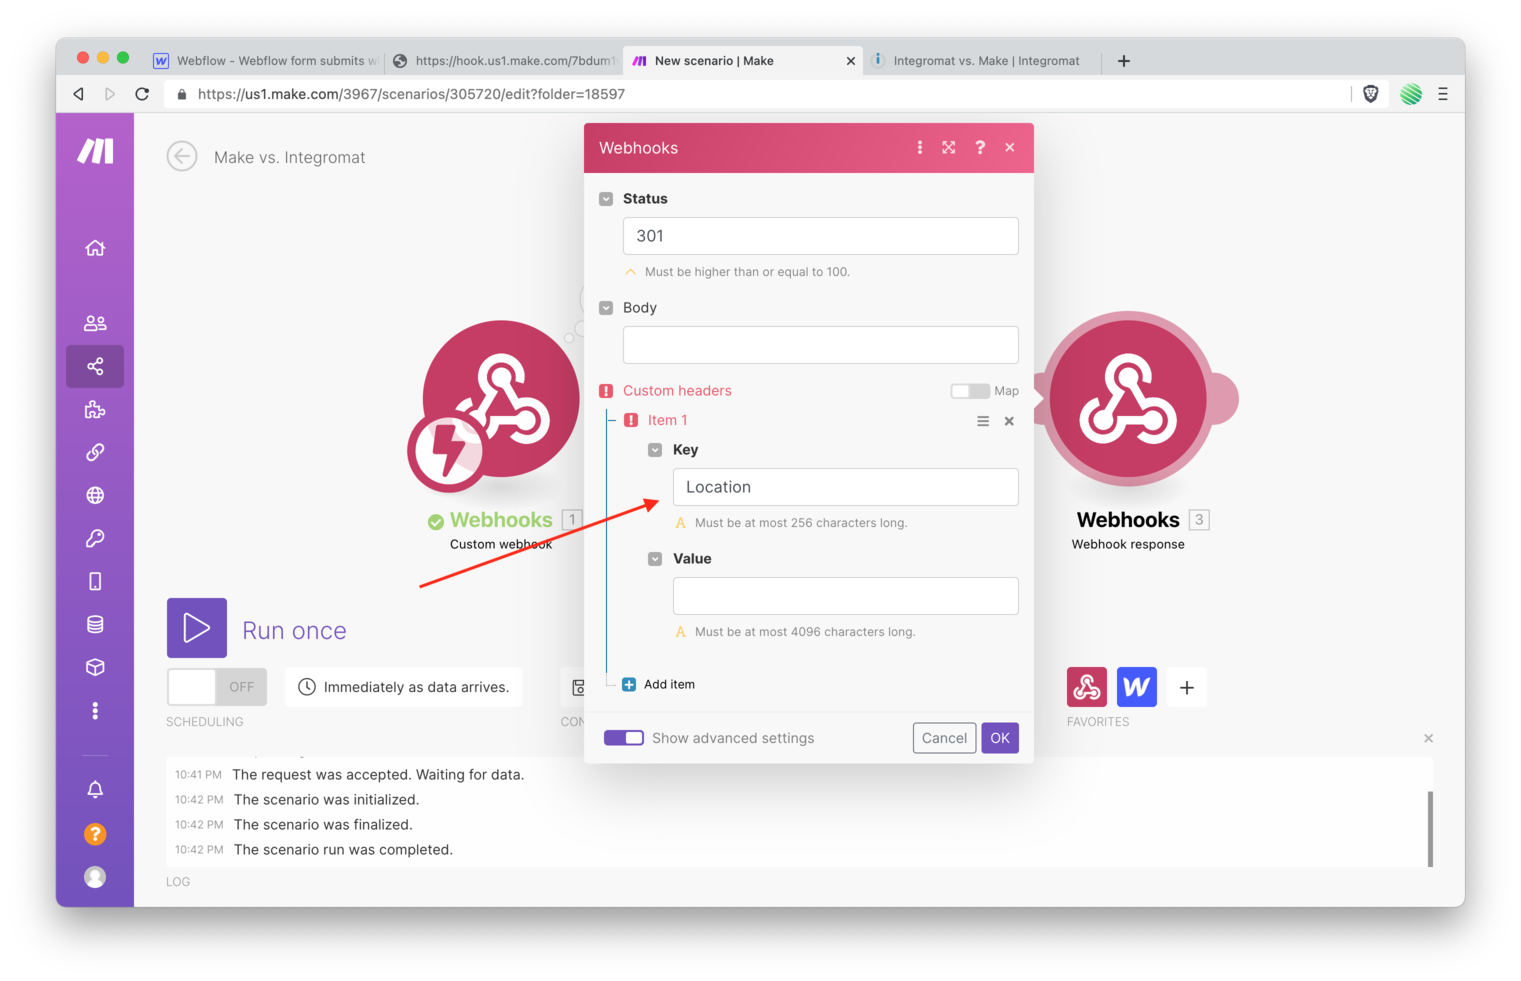
The location header is the header a web browser looks for when it receives a 301 response. When it find the location entry, it looks at it’s value for a URL. This is the URL the browser will redirect your user to.
In our case, we want to redirect to the URL for our site and CMS Collection. You saw that just a moment ago:
webflow-form-submits-with-integromat-an.webflow.io/contacts
Add that into the value field and make sure to prepend https:// to it.
https://webflow-form-submits-with-integromat-an.webflow.io/contacts
Integromat:

Make:
But that’s not all.
If you remember, each unique item is accessed by its “Slug” value. You saw that in the Webflow CMS a few steps back. A Slug is unique to each CMS item.
Luckily for us, when we created our new CMS item from Integromat, Webflow sends back to Integromat the Slug that it automatically created.
That now makes it available to us and we can add it to our redirect URL 🤯
Tap your mouse into the Value field and up pops the list of fields we can add. Choose the “Slug” field from the “Create an Item” step.
Integromat:
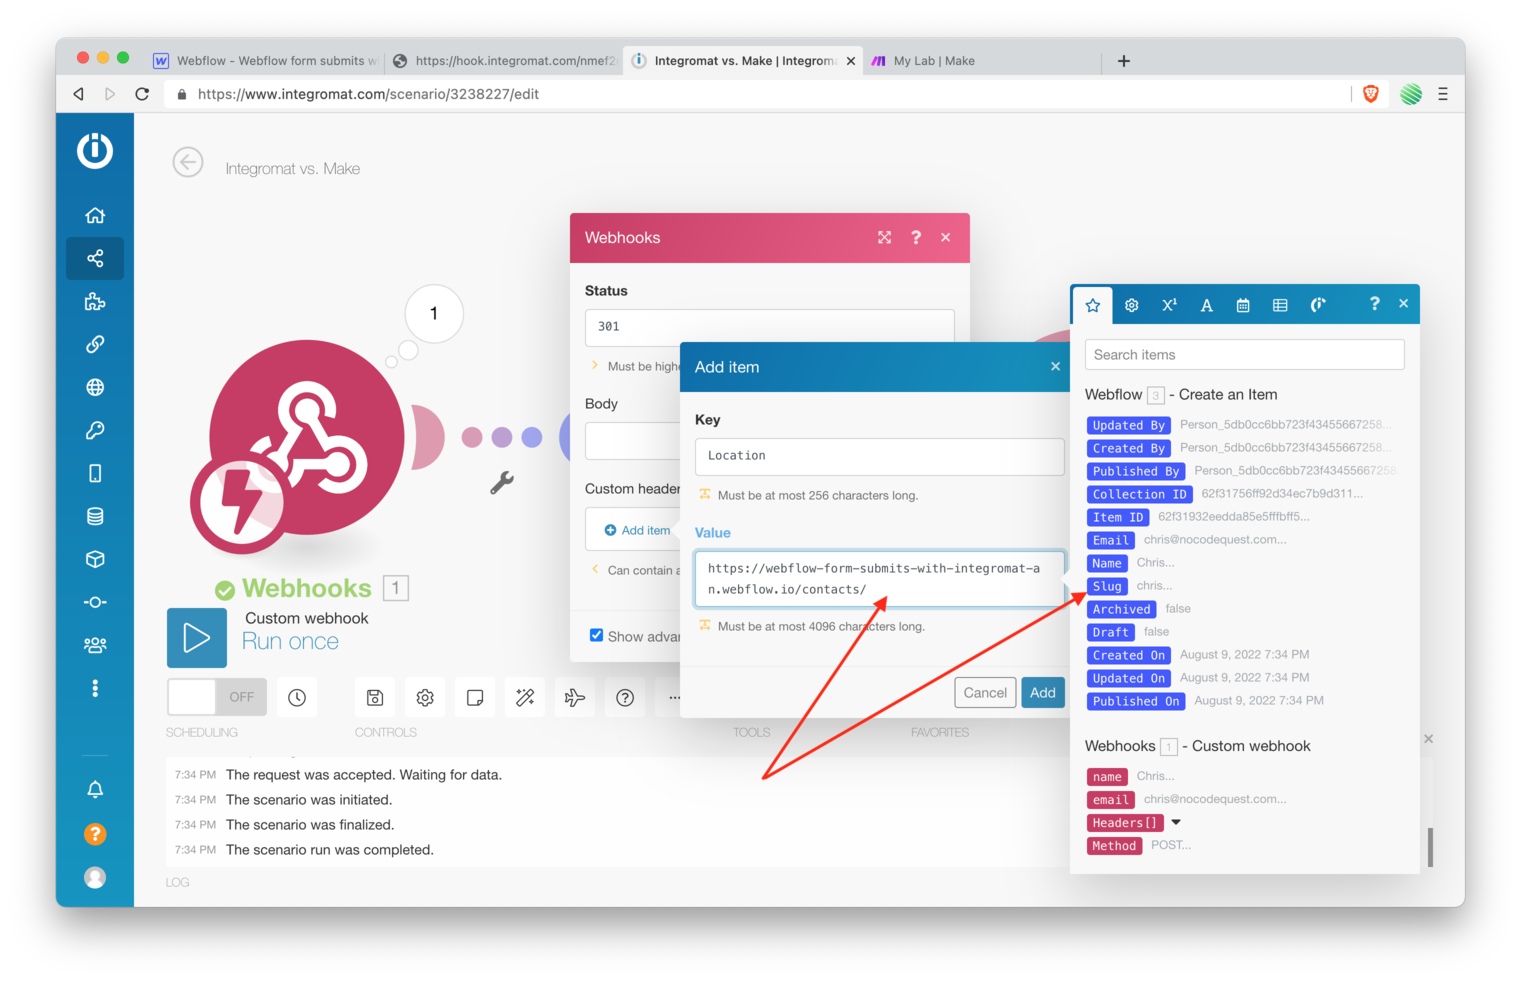
Make:

Each time a user submits a form, we create a CMS item, Webflow responds with the unique Slug that it created for this item, we grab it and stuff it into the URL that the web browser will redirect to.
Integromat:
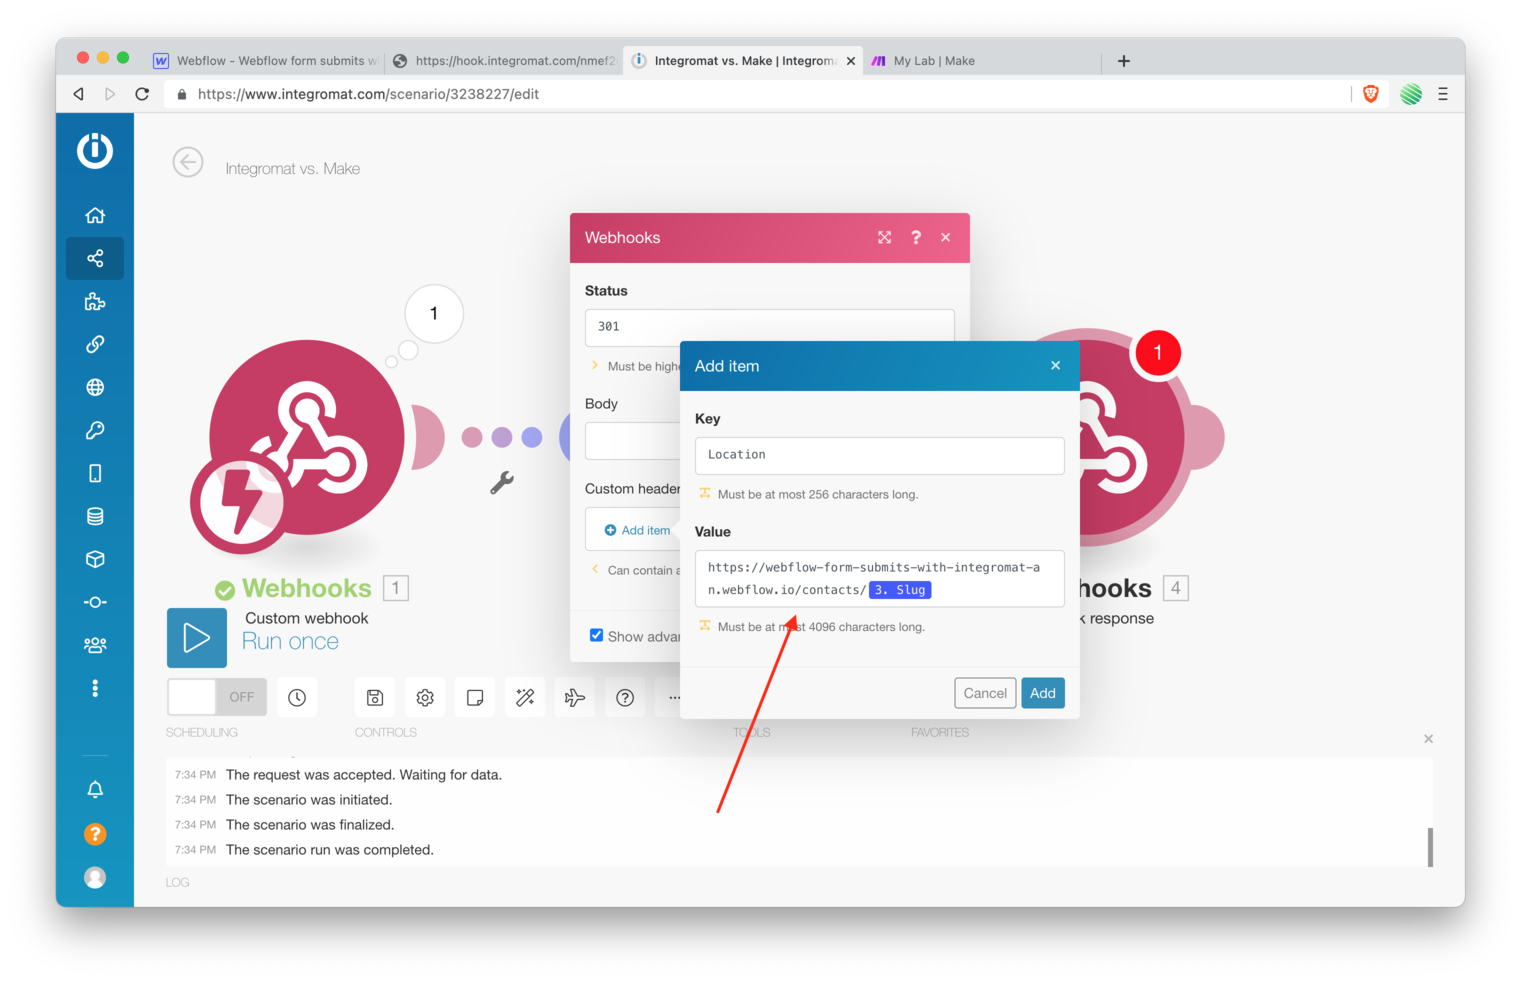
Make:

It should look like the screenshot below when you’re done.
Integromat:
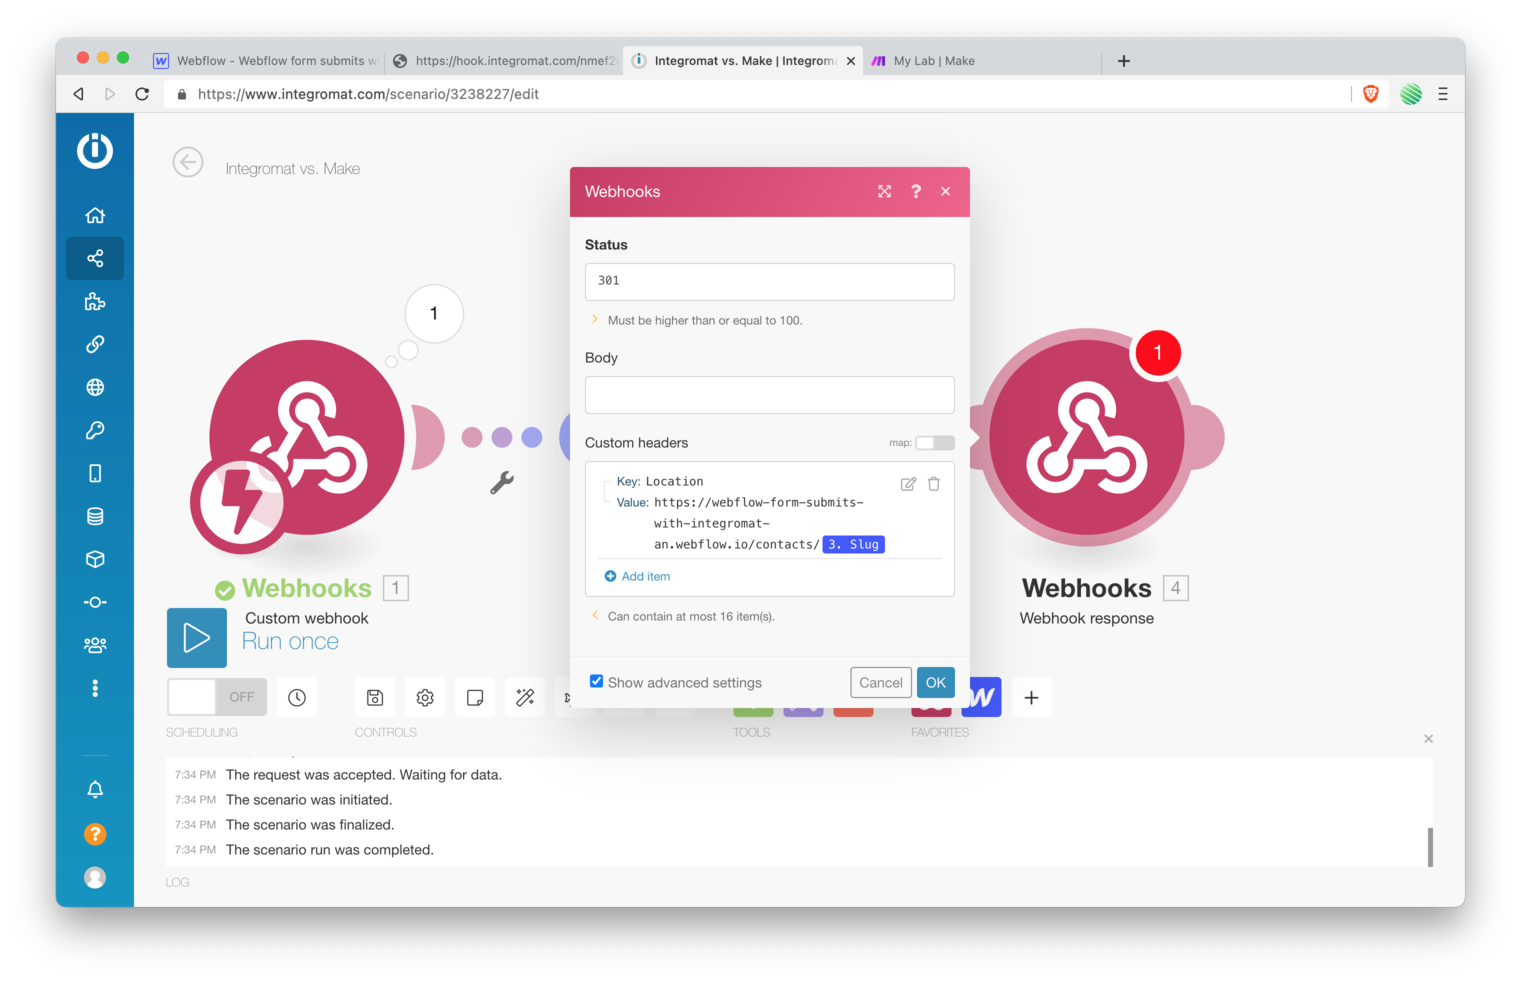
Make:
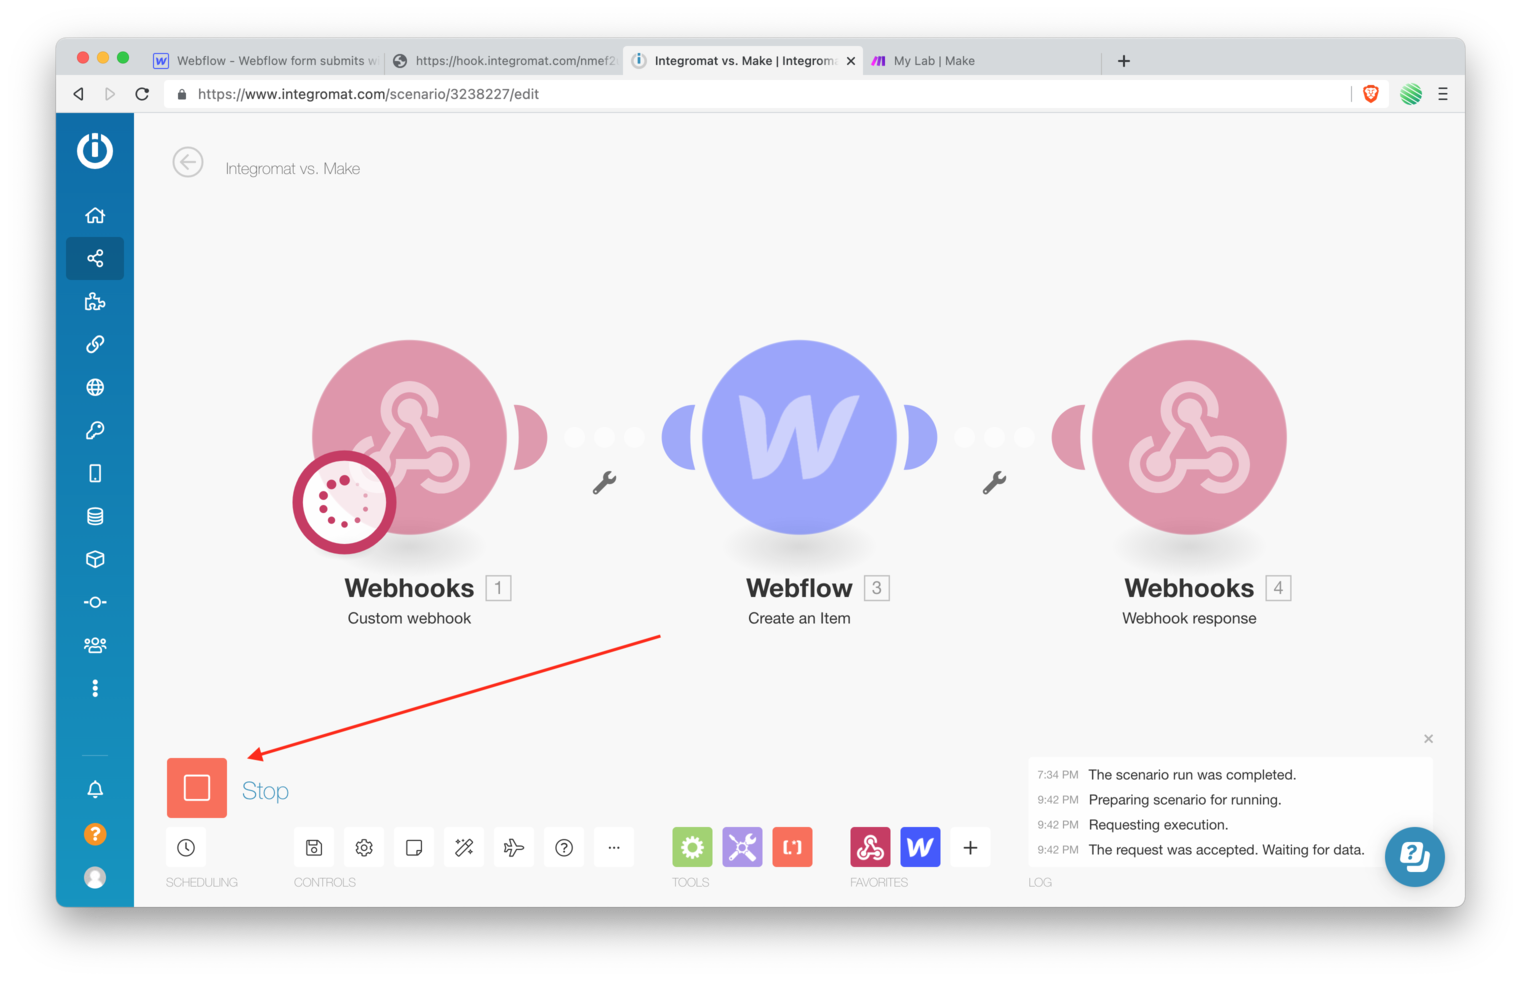
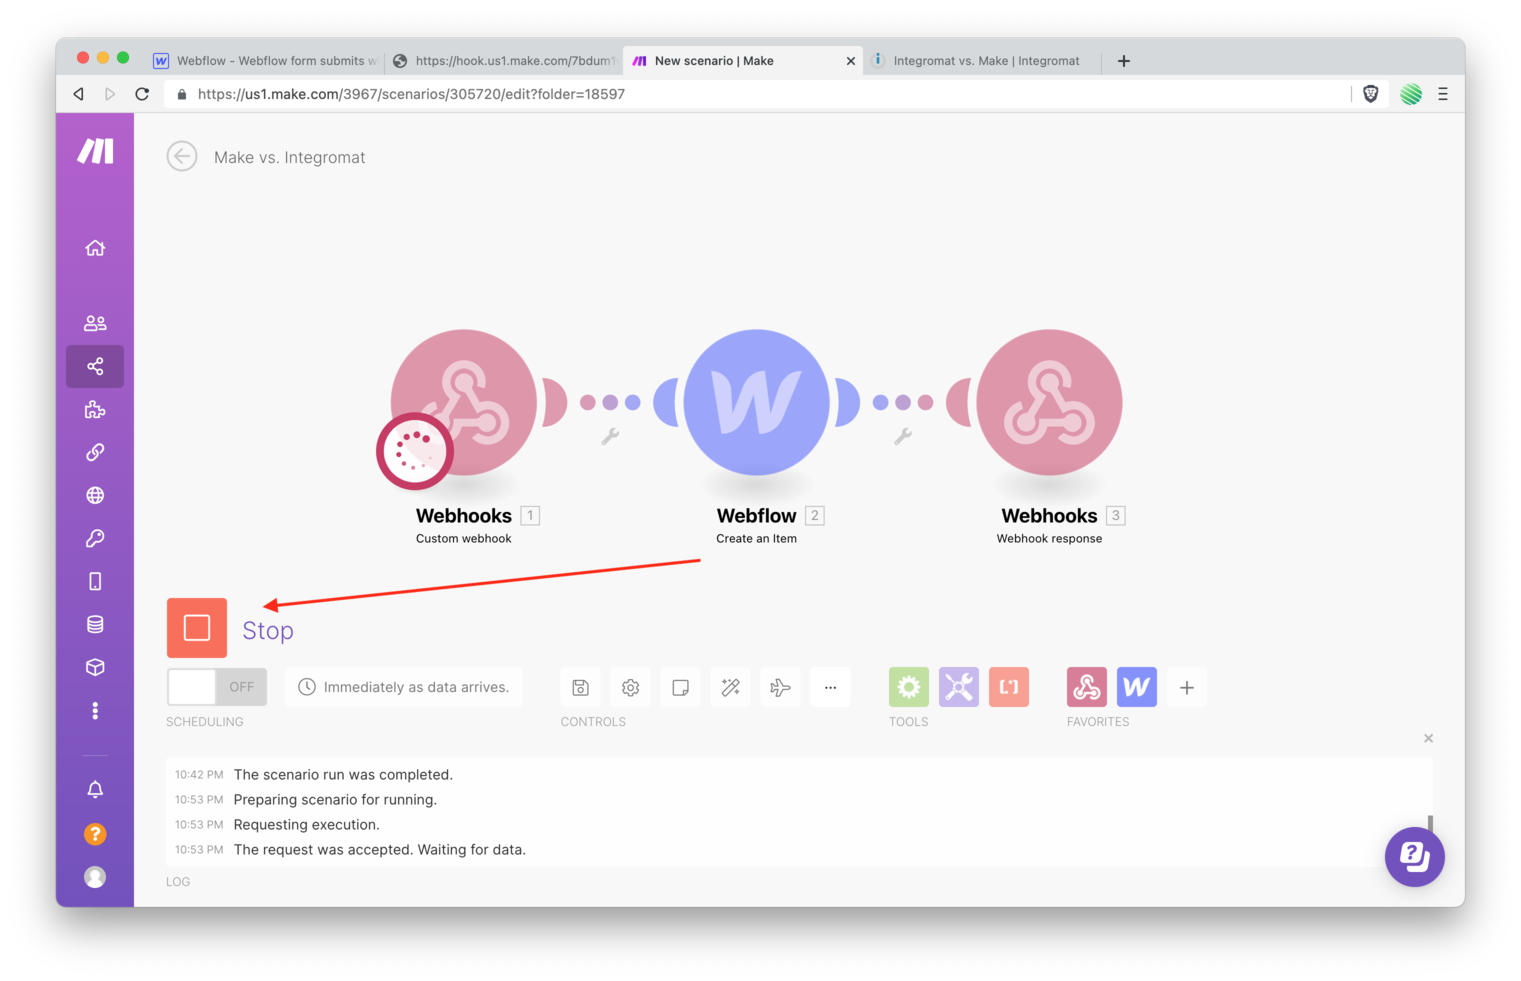
Tap the “Run once”, let’s give a try!
Integromat:
Make:
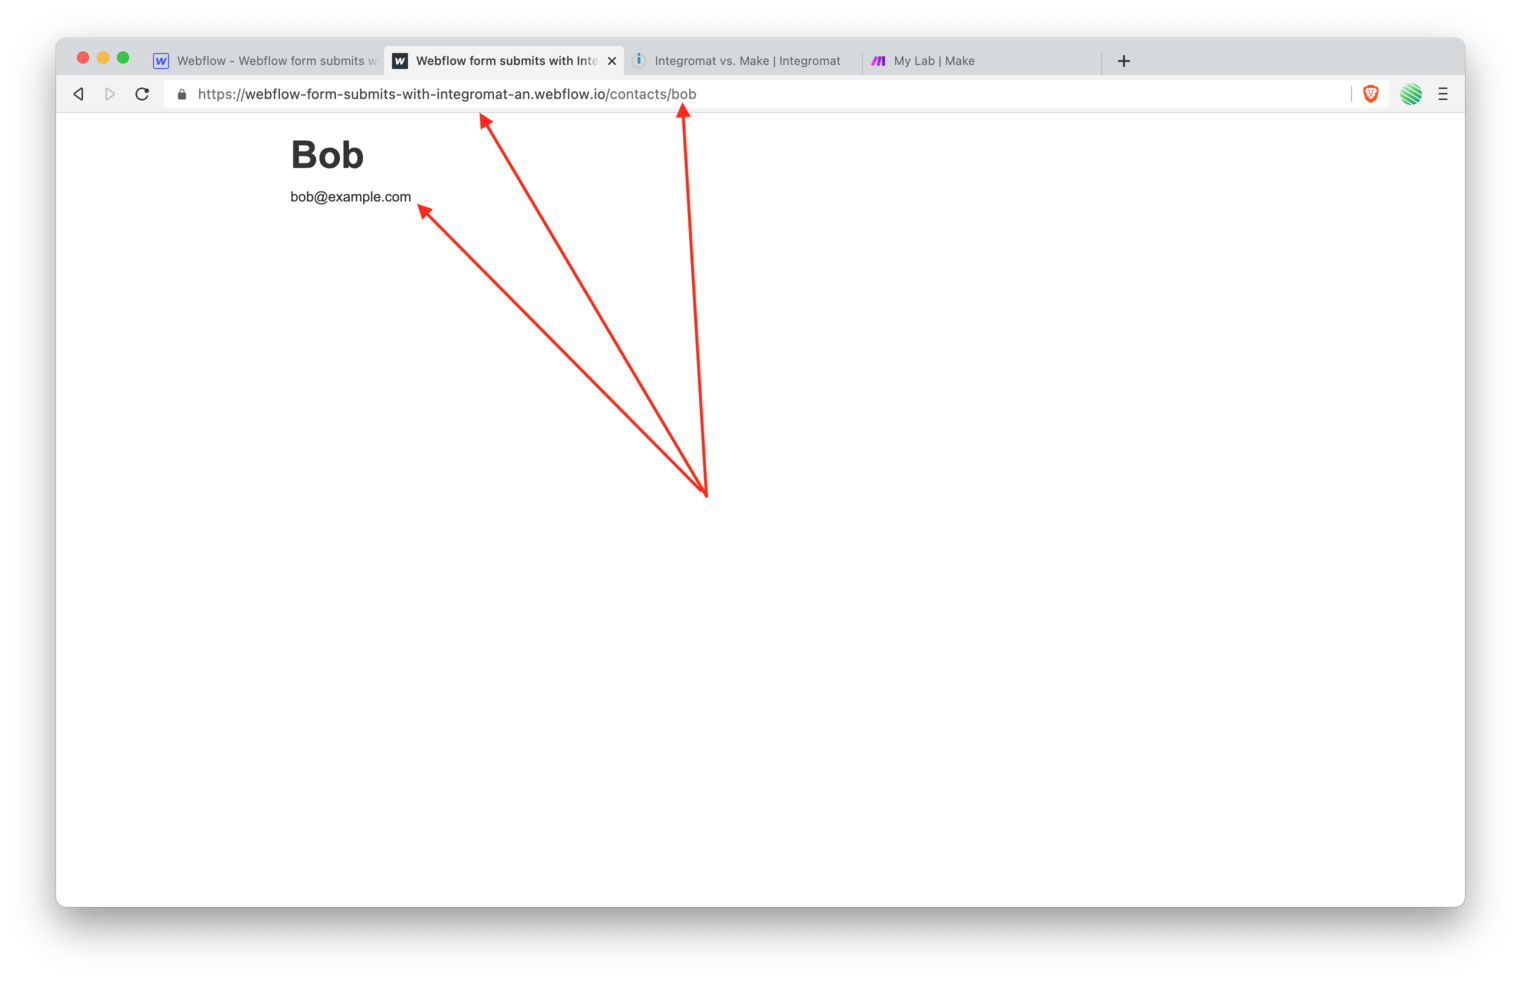
Go back to your live site and enter new contact info. Tap the submit button.
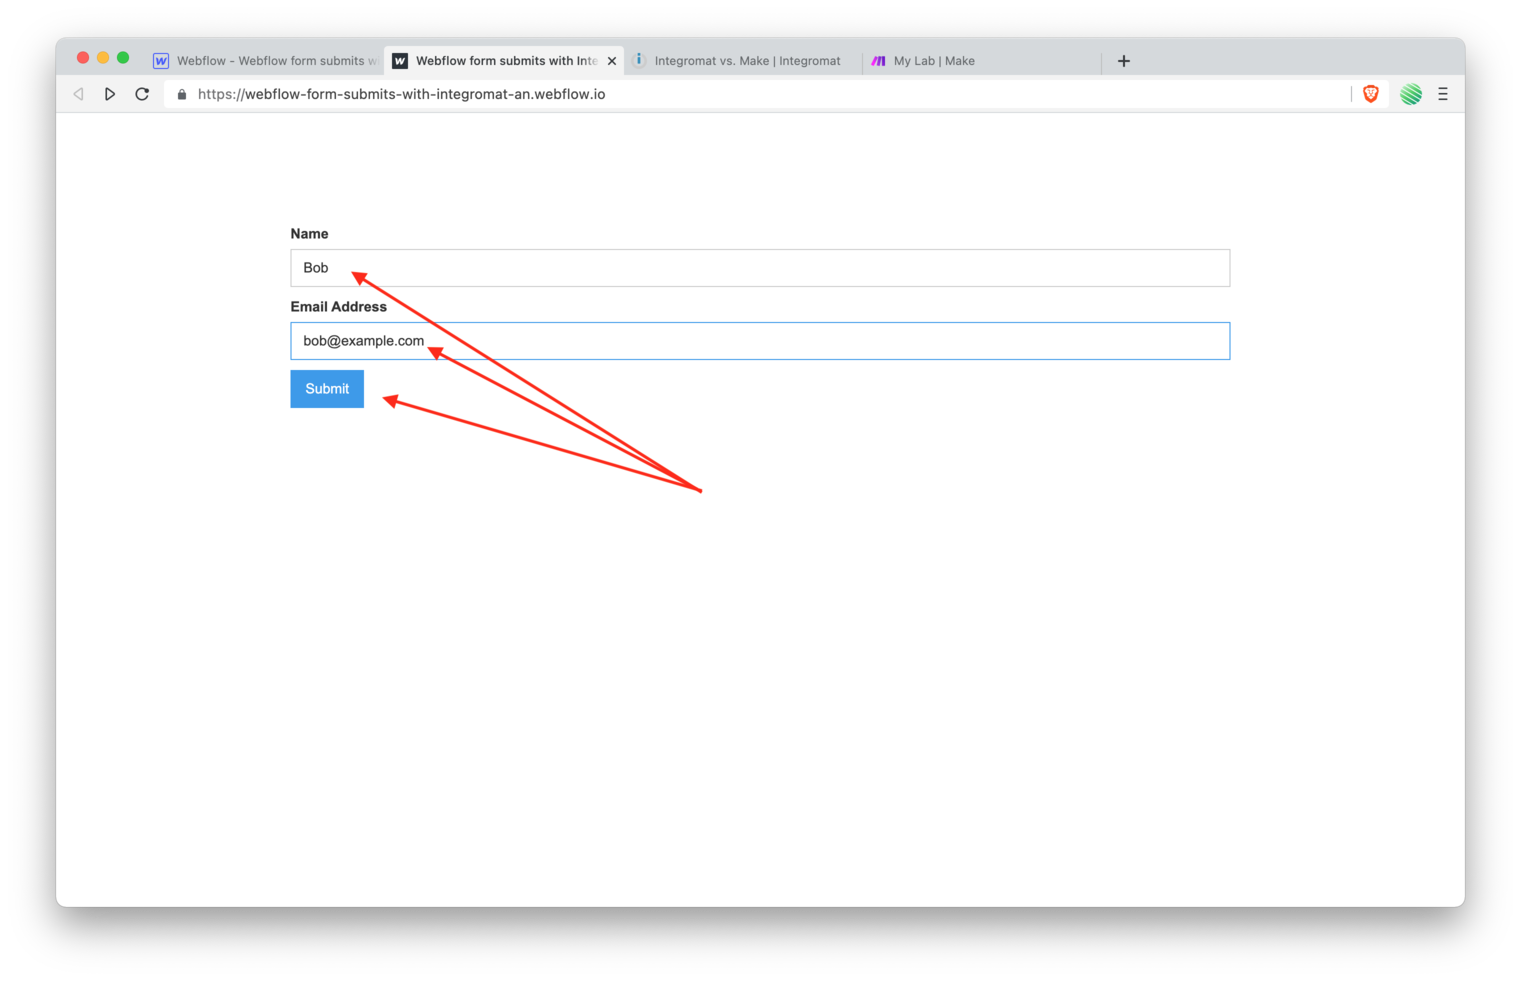
💥 Boom! You’ve been redirected to your new CMS Collection Page pulling and displaying the correct item from the Webflow CMS.
So good!
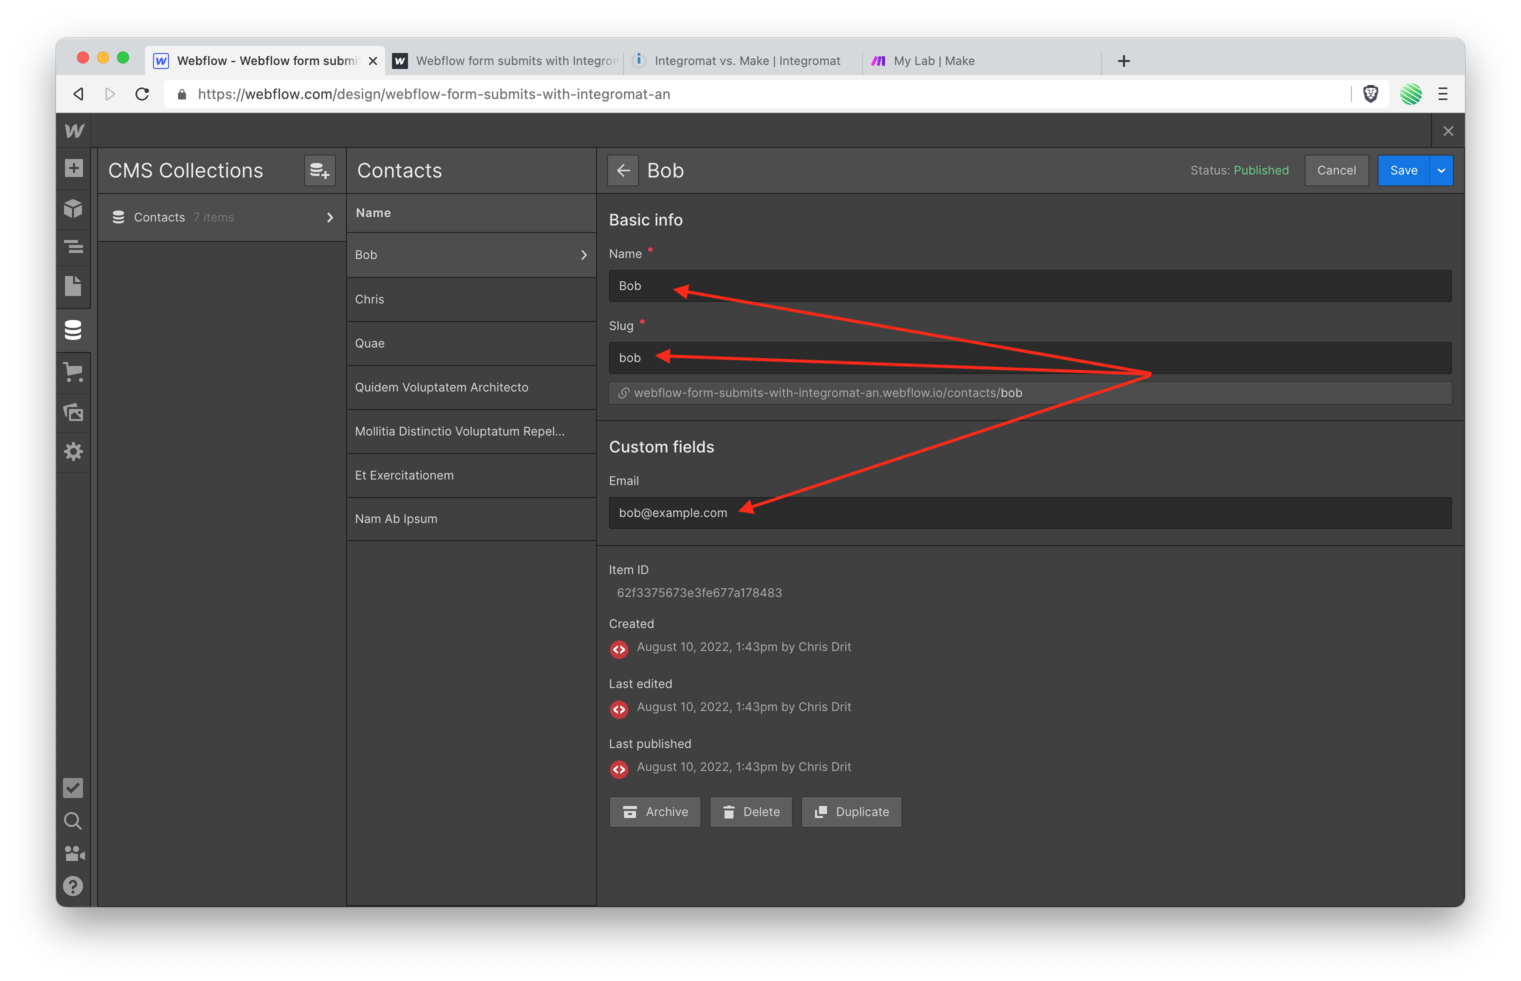
Go back to the Webflow Designer and reload the page.

Open up the CMS Editor and find your newly created contact, Bob.

Open up the Bob contact and find all the info, along with the auto-generated Slug.
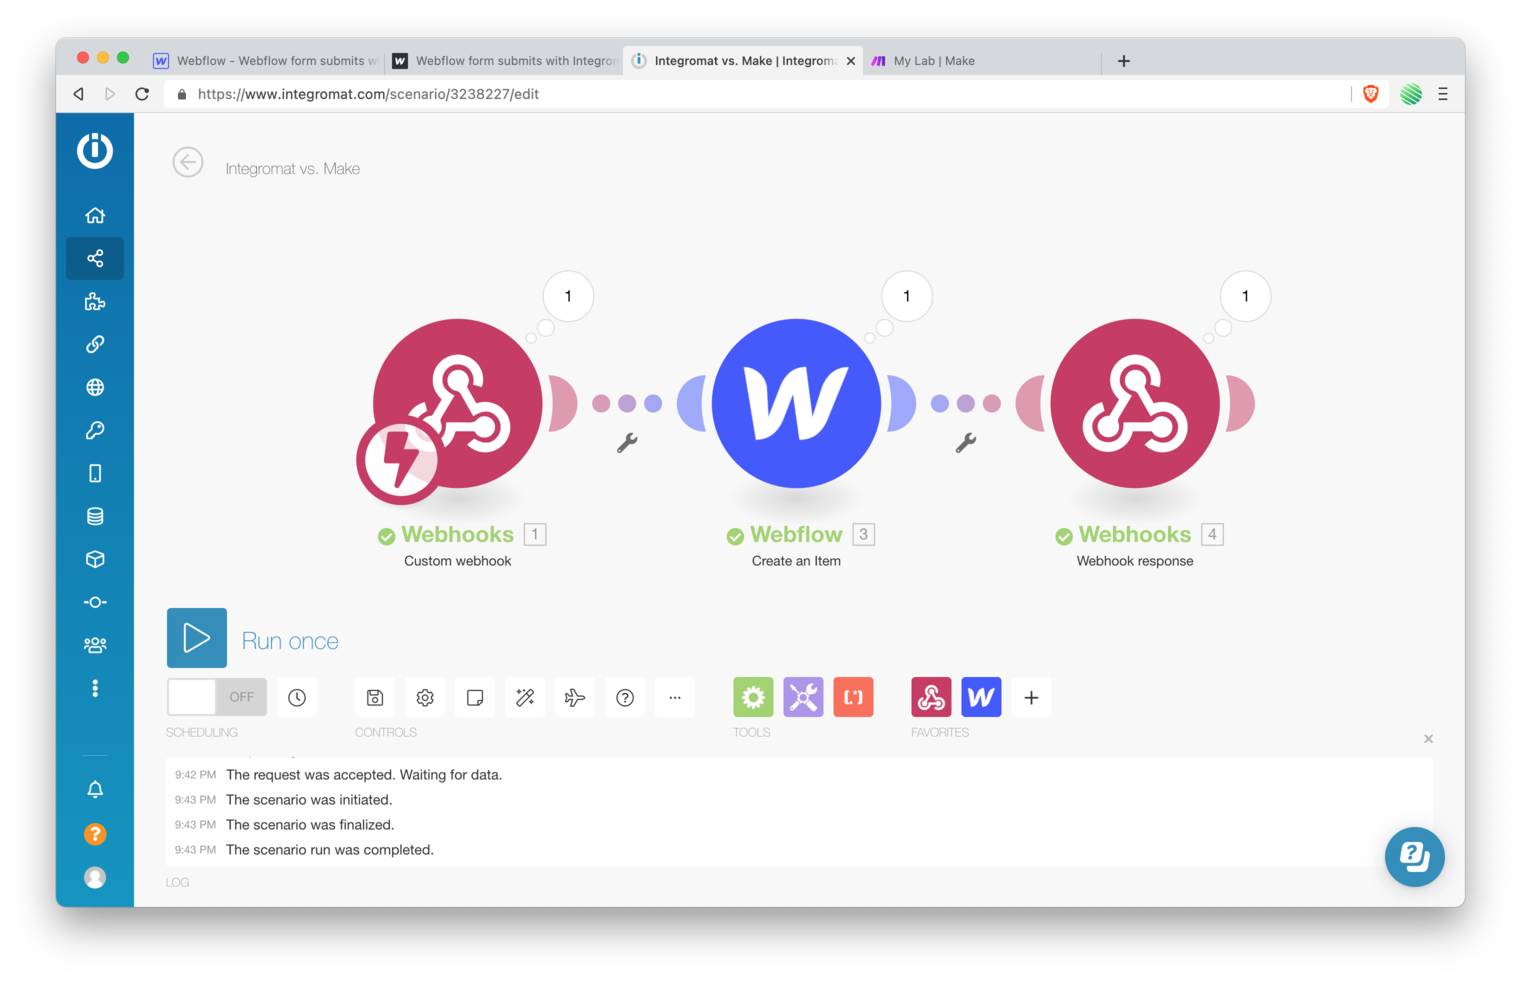
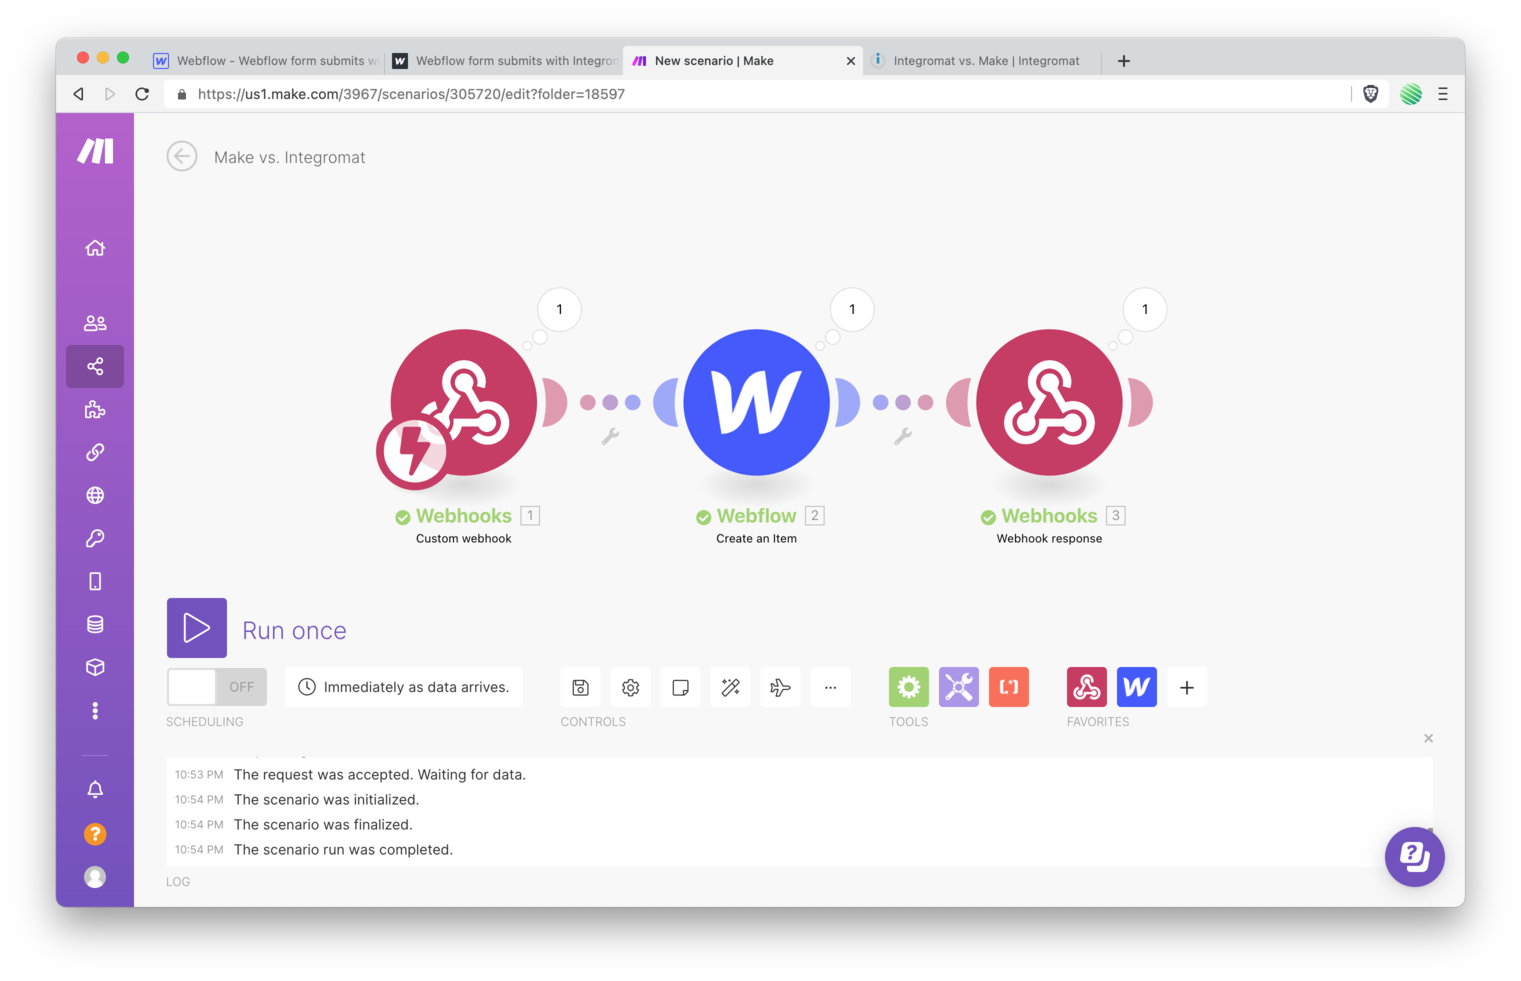
Flipping back to Make & Integromat you’ll see that it all ran successfully!
Integromat:
Make:
Success with Make & Integromat
Notice how little changes there are between the two?
Notice how you don’t have to relearn anything? 😍
Life is good…
Everything you’ve already learned, all the time you’ve already invested with Integromat, applies just the same with Make.
No extra time, effort, work, or pain required 😃
🍻 Just success.