Catch Hook. Catch Raw Hook. Retrieve Poll?
What do these options mean? You know you need to setup a Webhook, but after struggling with it, you’re not sure if you can do it. Zapier was supposed to be simple 😡
"It would be ideal if I could do this with Zapier because I already have a lot of Zaps configured for my clients."
Zapier is ideal when you’ve heavily invested in it for your clients or for your own projects. So let’s walk through how simple it is to setup a Webhook in Zapier right now.
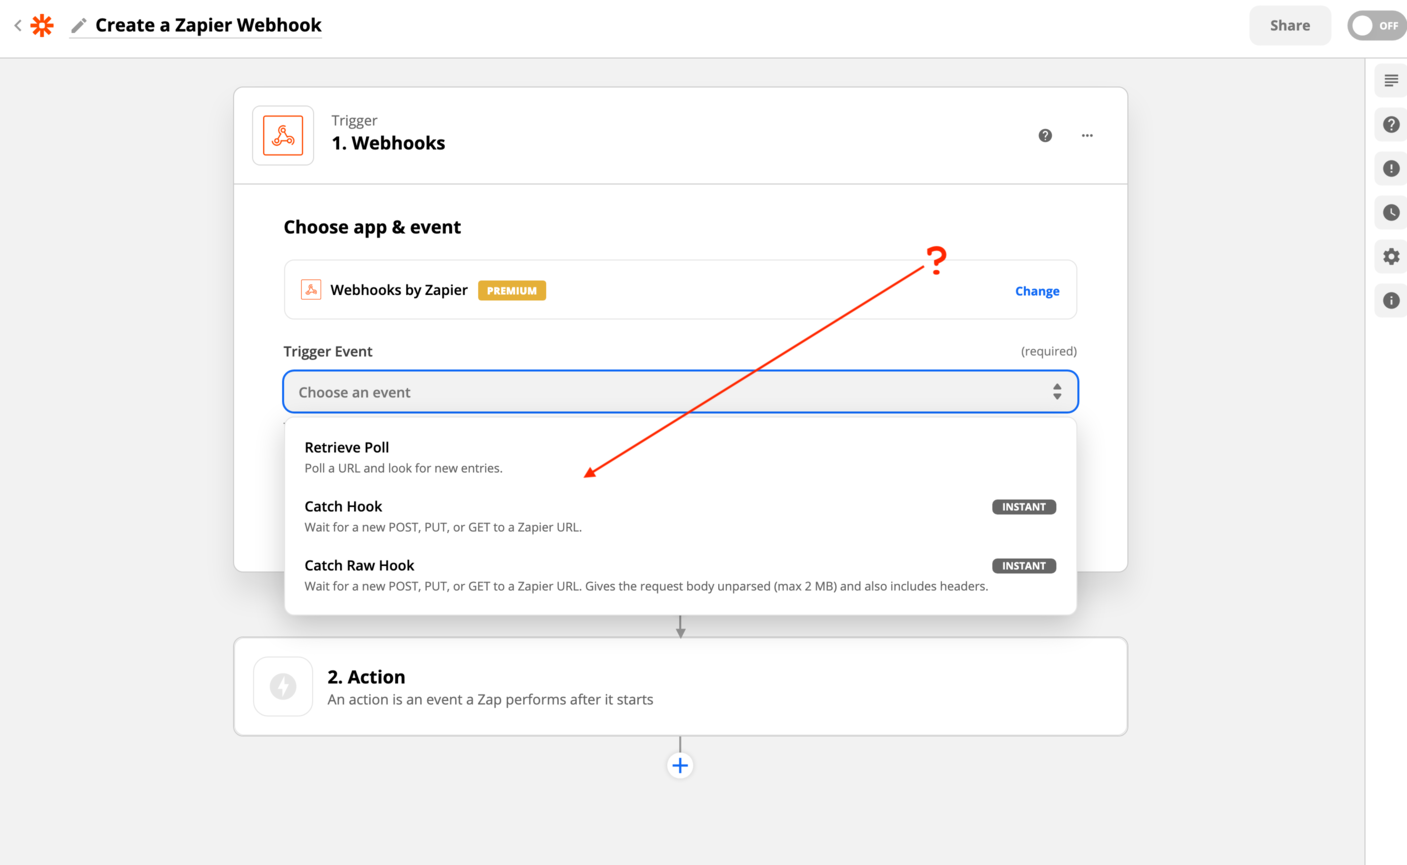
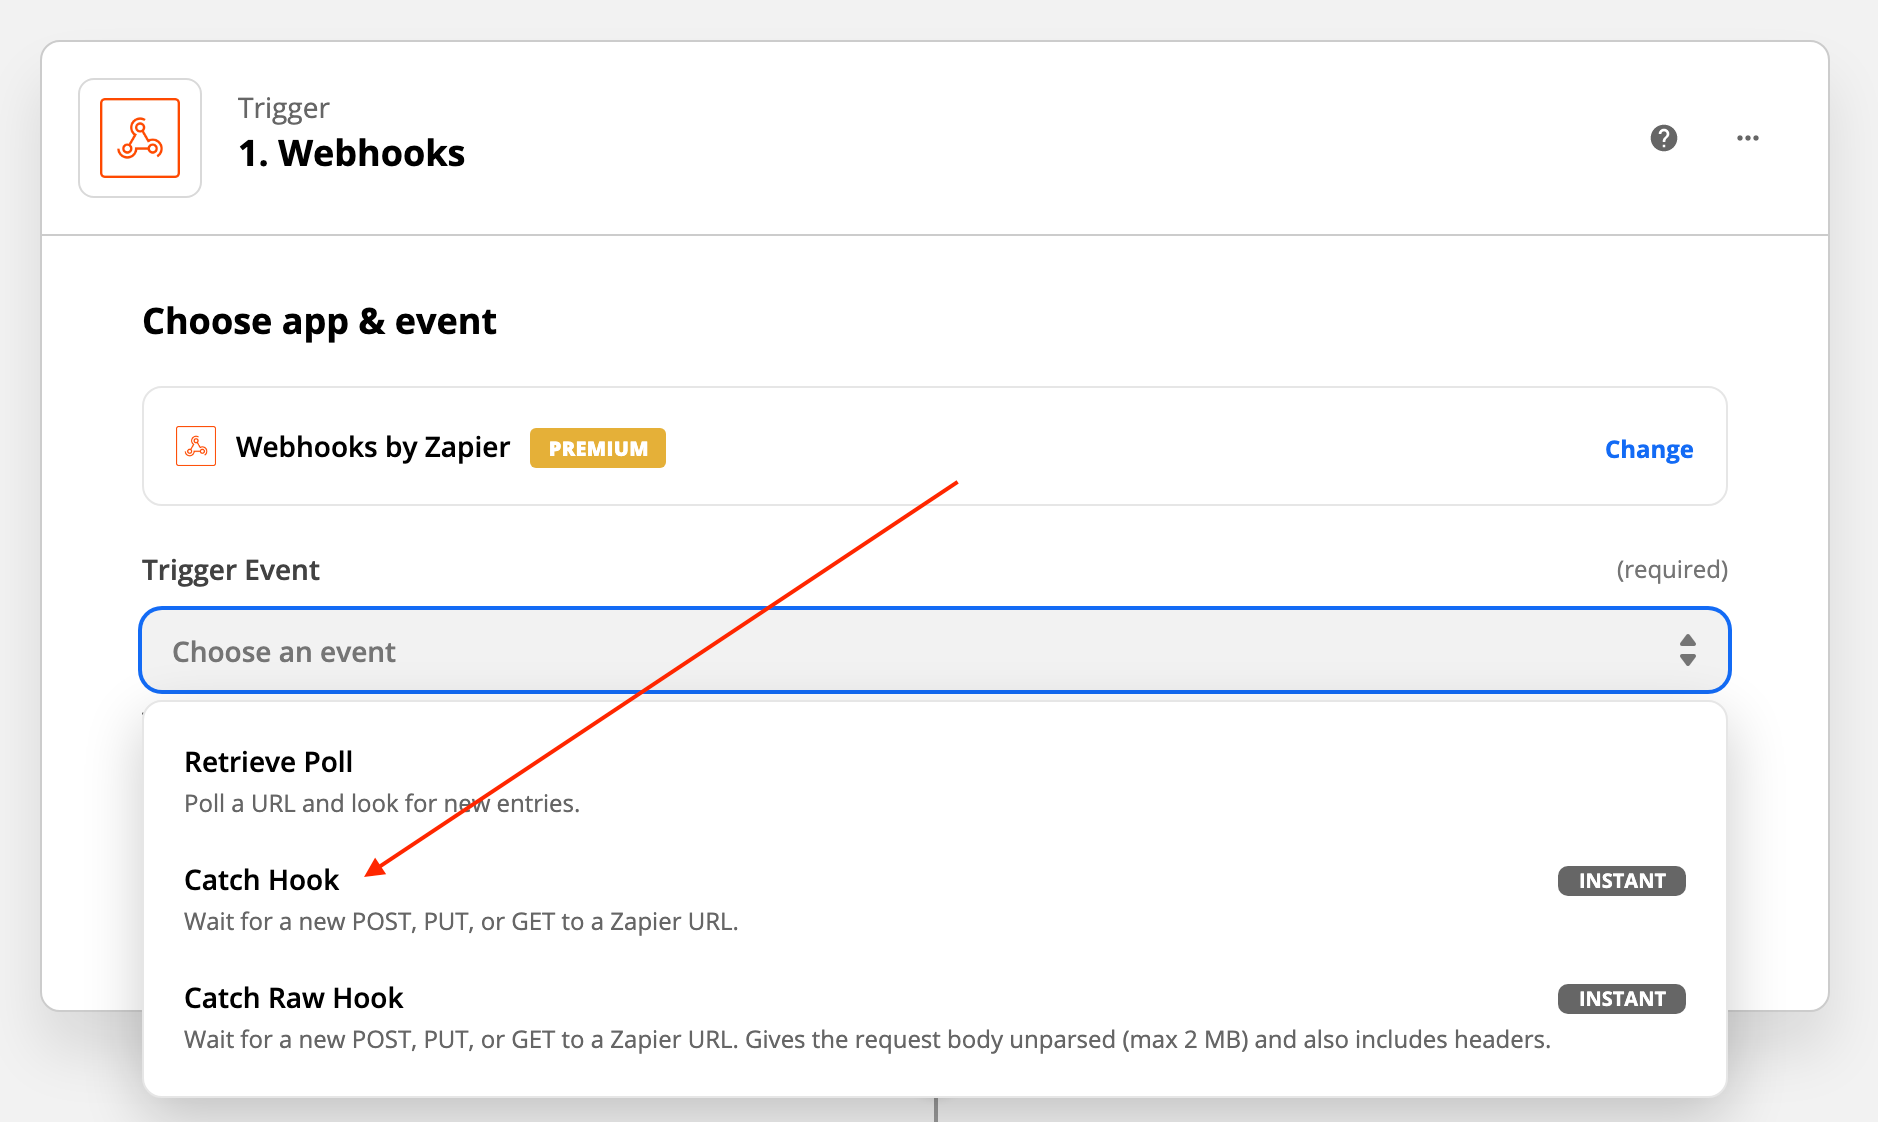
Create a new Zapier Webhook
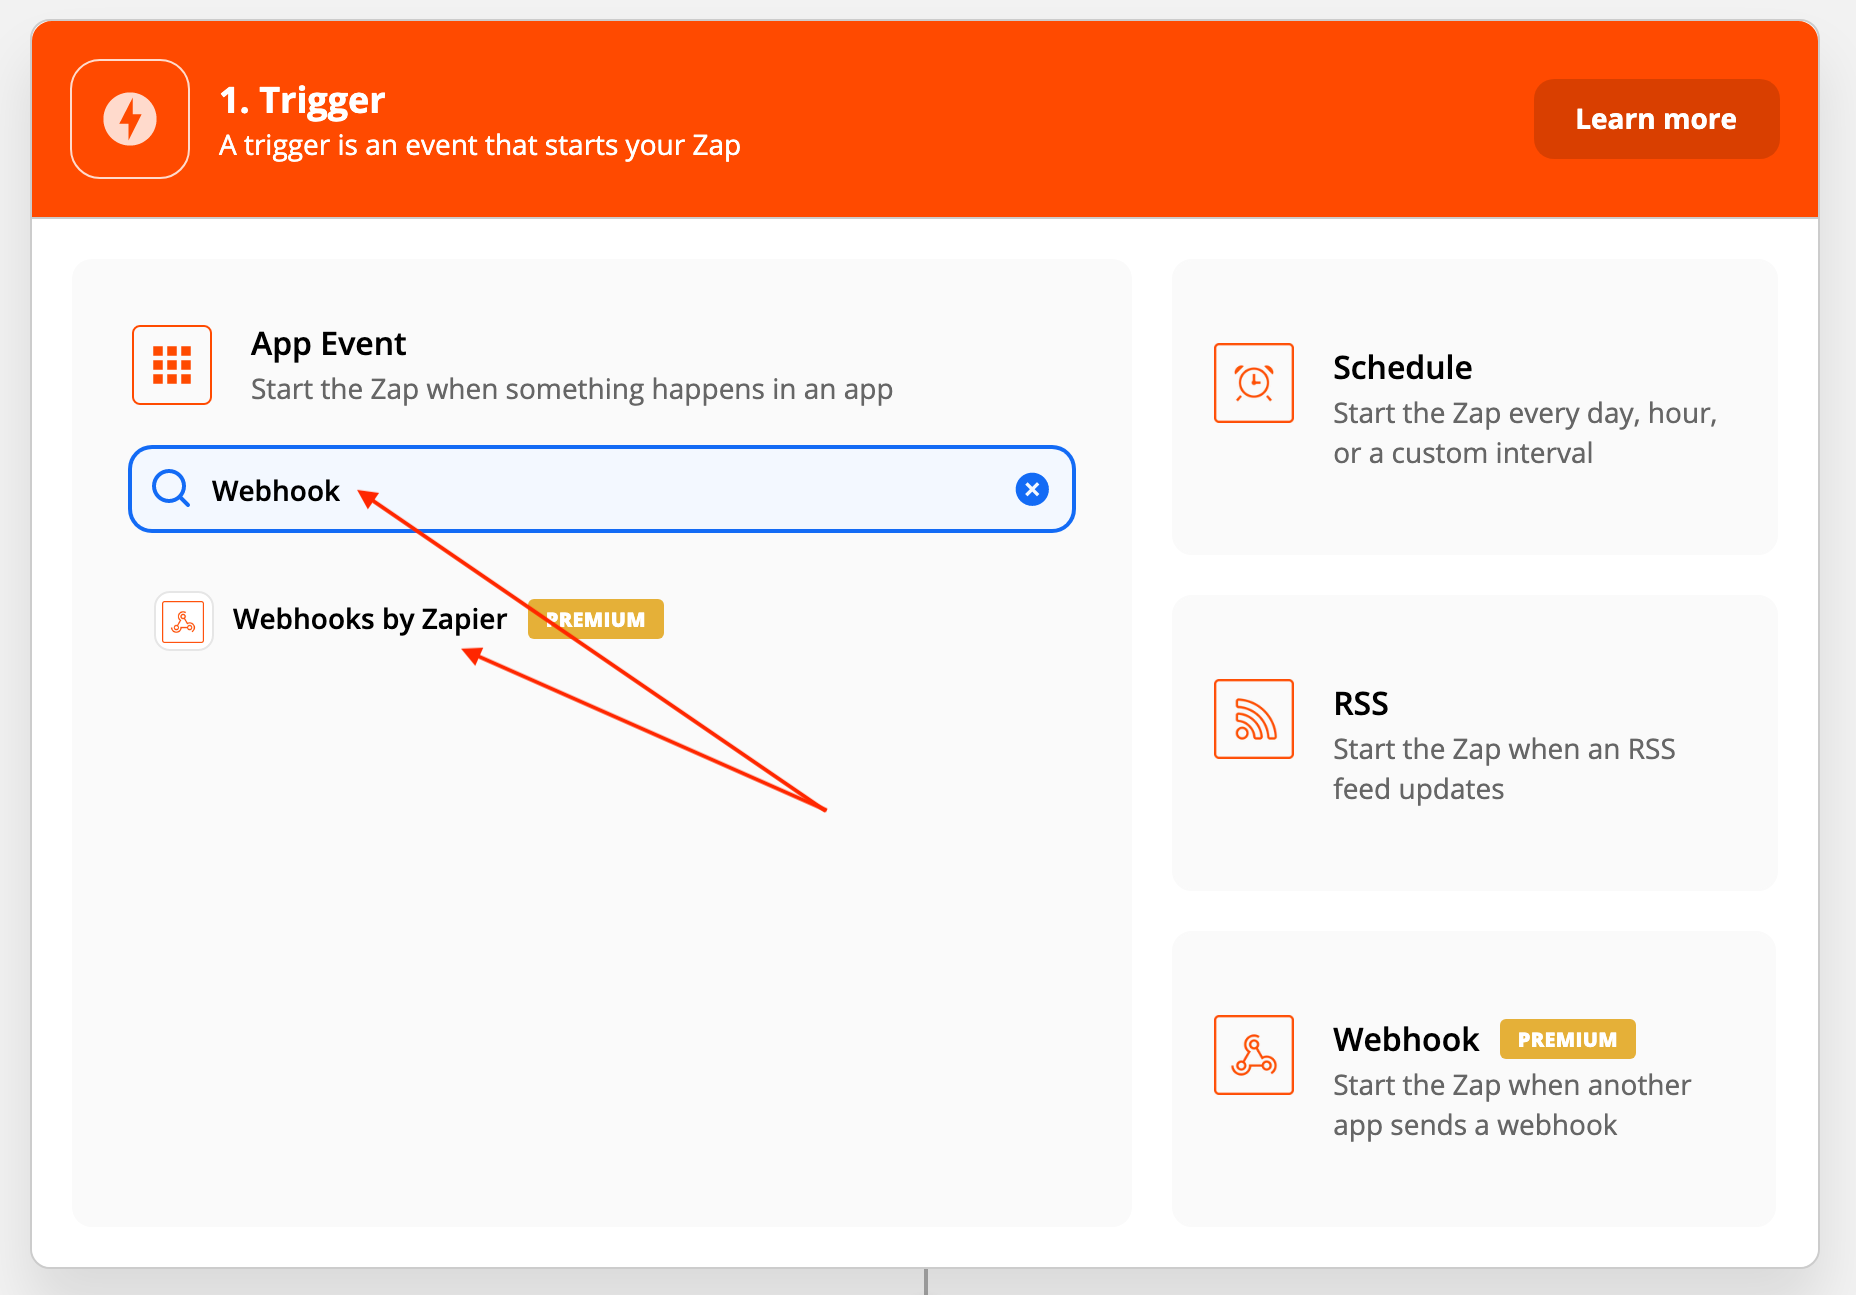
Search for and select “Webhooks by Zapier,” yup it’s just that simple 🙂
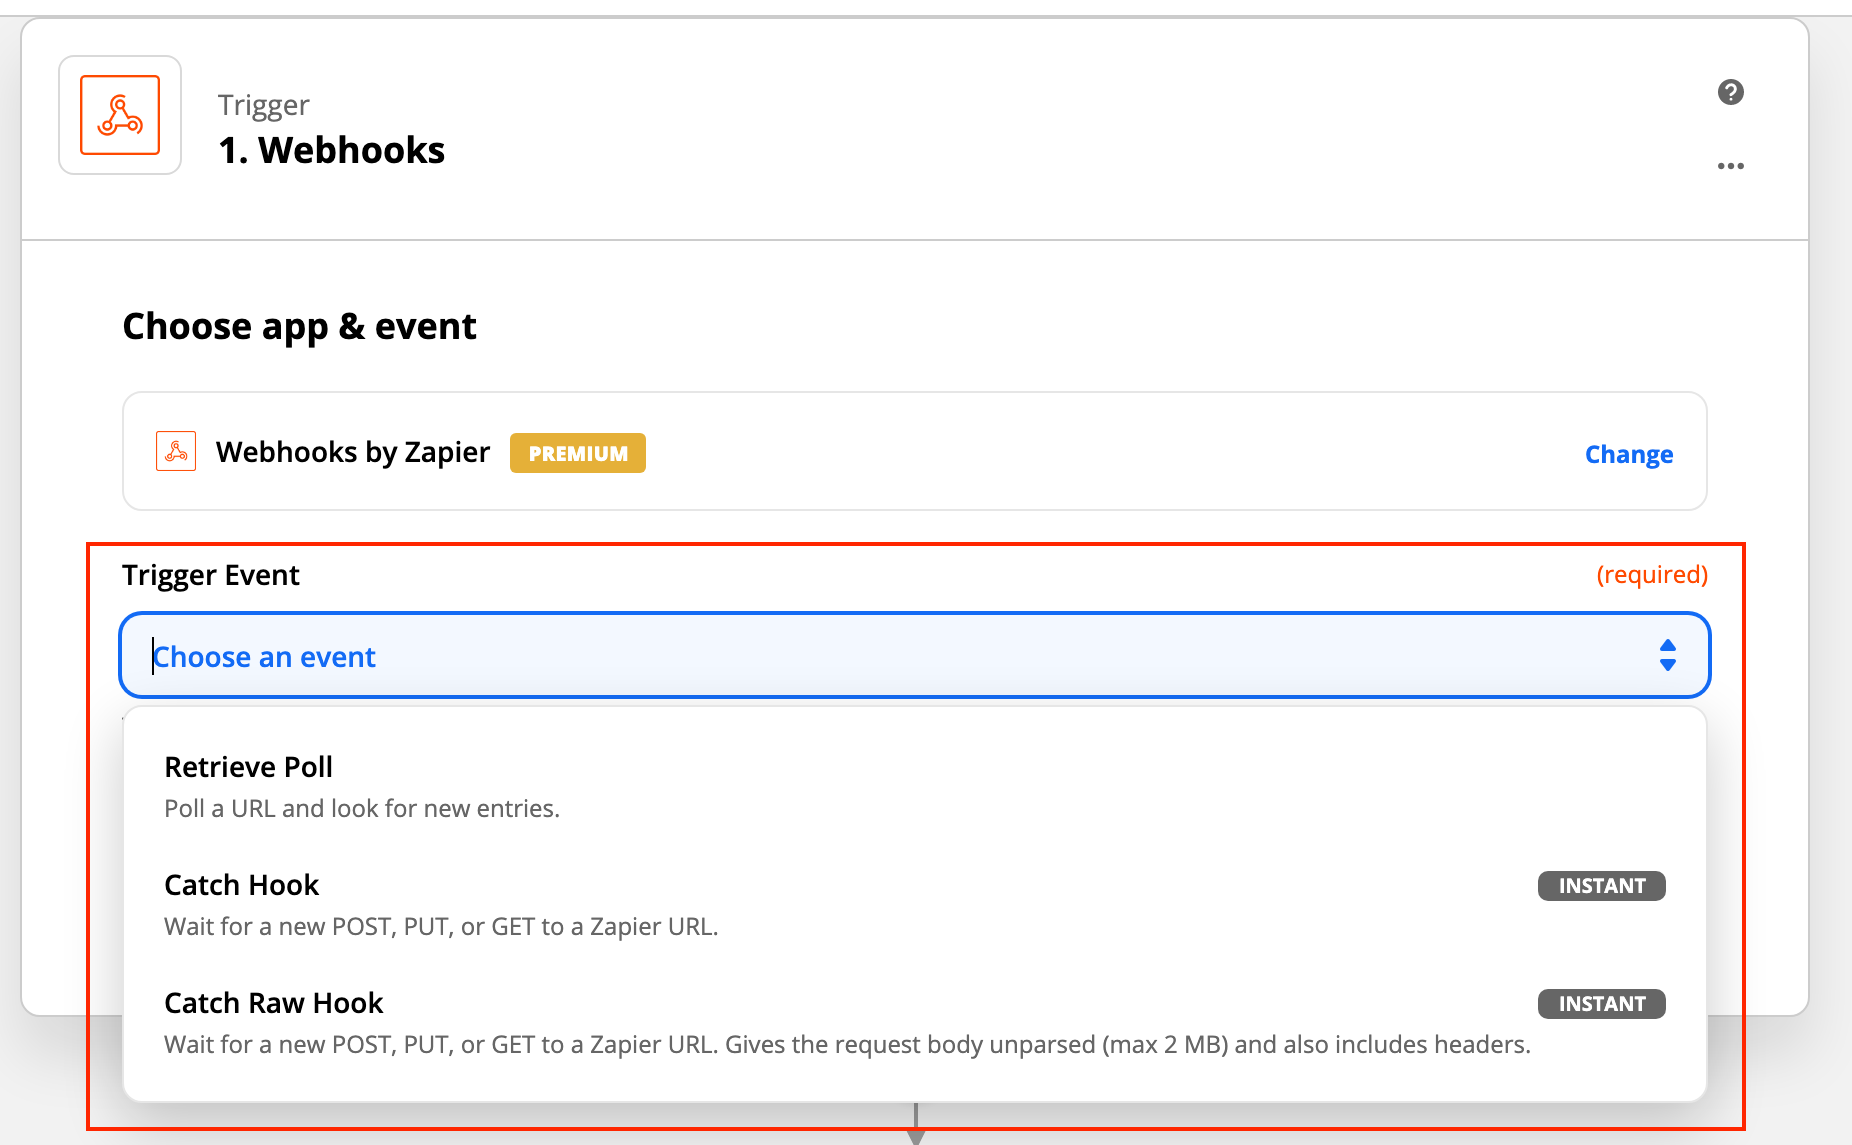
Oh my gosh… Look at all of these crazy Trigger Events!
- ◦ Retrieve Poll
- ◦ Catch Hook
- ◦ Catch Raw Hook!?
To be fair, they dooooo have descriptions for each of them…
- ◦ Poll a URL and look for new entries
- ◦ Wait for a new POST, PUT, or GET to a Zapier URL.
- ◦ Gives the request body unparsed and also includes headers.
I mean… that makes it clear, right 😡
"I just can't seem to grasp the concept behind Zapier Webhooks"
How can anyone grasp the concept behind Zapier Webhooks with that gobbledygook!
Understanding Zapier Trigger Events
I am going to walk you through each of those trigger events right now. I’m going to recommend the one you should most ALWAYS use. But if you have a special case, you’ll know exactly which of the others you should be using instead after this walk through.
Retrieve Poll
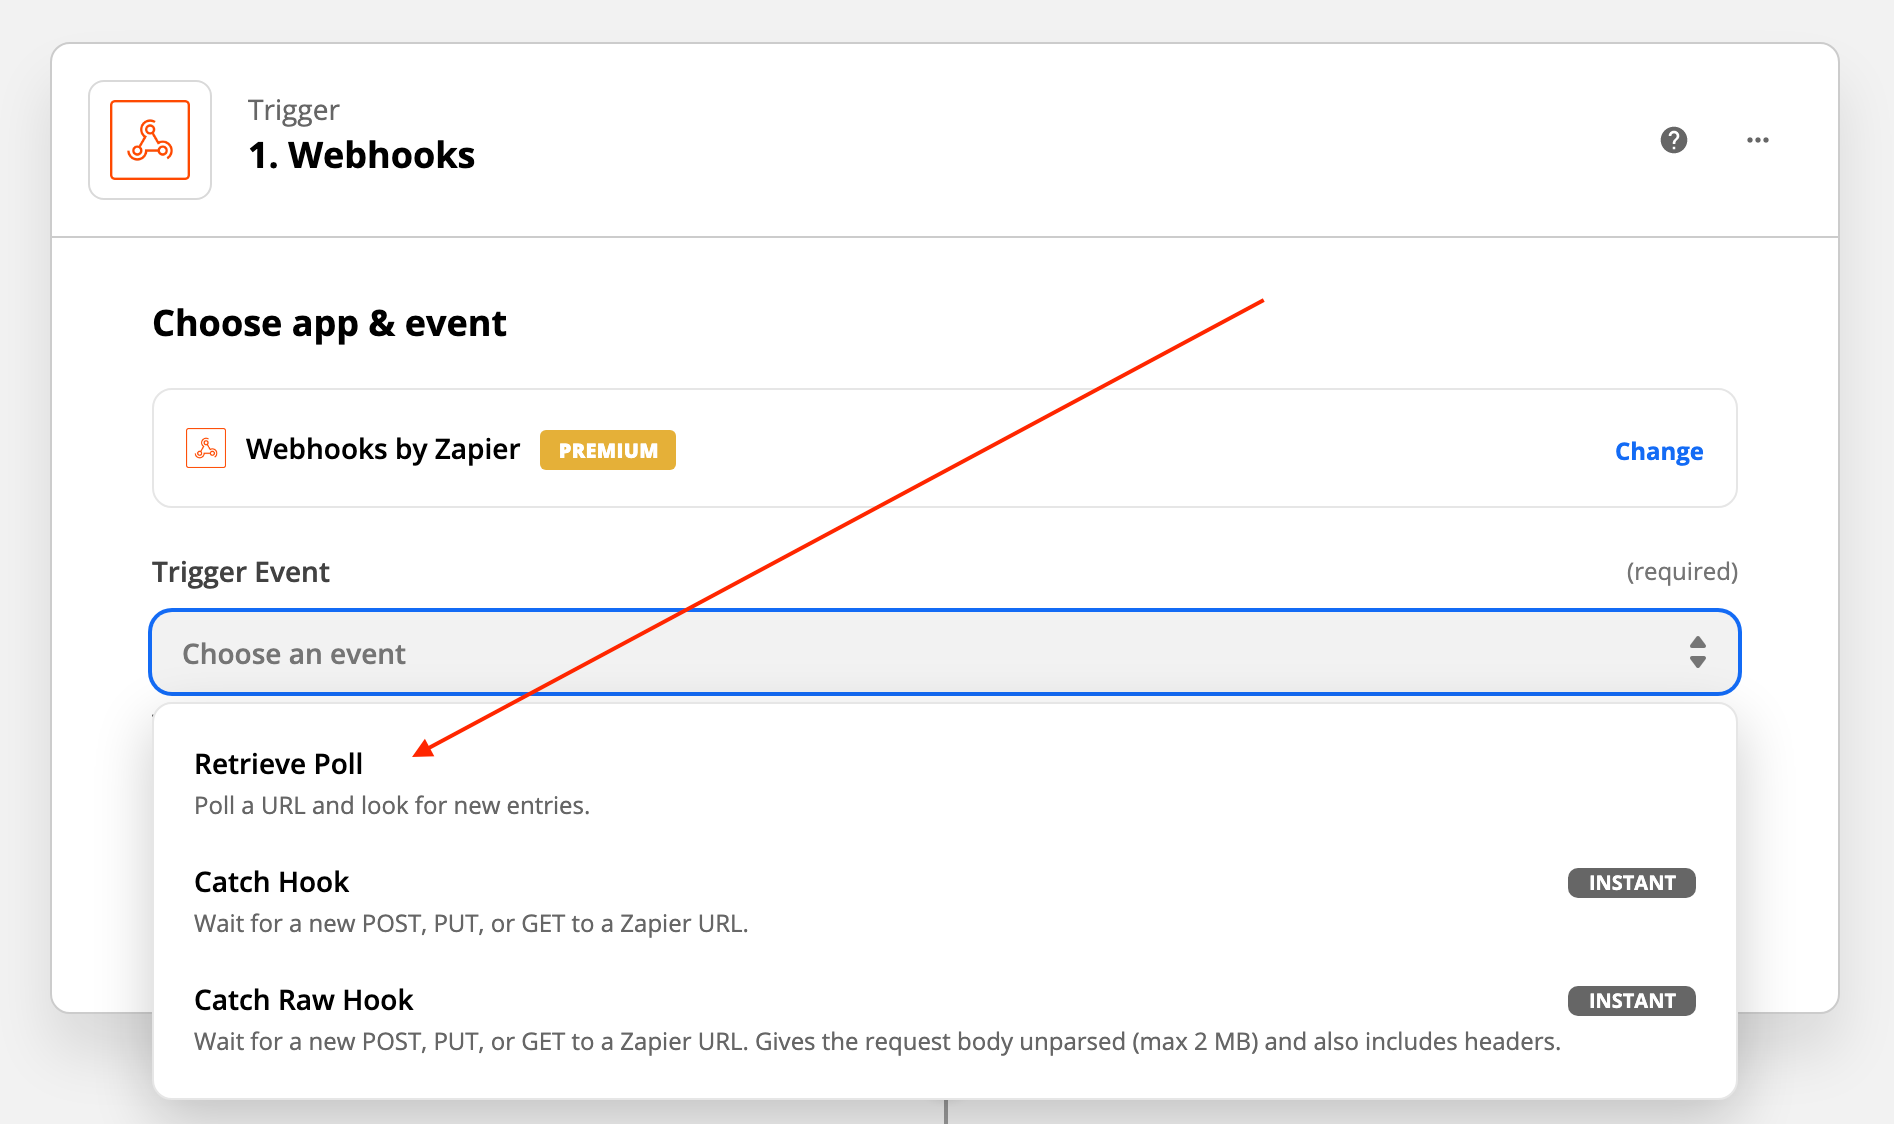
This one should be ignored 🙂
This will send a request out to a url, that you add, every 1, 5, or 15 minutes depending upon which pricing tier you’ve signed up to with Zapier.
What’s a request?
When you type the url NoCodeQuest.com into your web browser, you are “requesting” that web page. In other words… you are asking (requesting) the web browser to go get that web page for you and return it. That’s what a request is.
In the case of Zapier with the “Retrieve Poll” trigger event, you’ll give Zapier a url and Zapier will request that web page for you just like a web browser does.
Polling
The act of “Polling” is bad practice and should only ever be used as a last resort. Typically, when a service on another platform doesn’t offer Webhooks but does have an API, you can “poll” the API. Meaning request info from the API URL every few minutes to see if something has changed.
This is horribly cumbersome.
Use-Case
When a 3rd party platform does not offer Webhooks but they do have an API – You’re forced to retrieve the info from that API by polling for it every 1, 5, or 15 minutes.
Because it only polls the API every 1, 5, or 15 minutes is why Zapier isn’t displaying that little “instant” label next to this option. You have to wait that amount of time before Zapier makes a request.
Yuck!
Catch Hook
This is the one I recommend you use almost exclusively 😎
This option will give you a url. You’ll add that url to your Webflow Webhook, and when a Webflow event is triggered, Zapier will receive that message.
Here’s the important part…
What this trigger event also does is parse the message for you. What that means is if you are sending a JSON message that looks like this:
{
 "id" : "123456789",
 "email" : "thomas.anderson@metacortex.com"
}
Zapier will parse that for you and give you the results in a format that you can use more easily to run your automation within Zapier.
For example you can now just select “id” for a field within your Zapier automation and it will know to insert the value “123456789” like this…
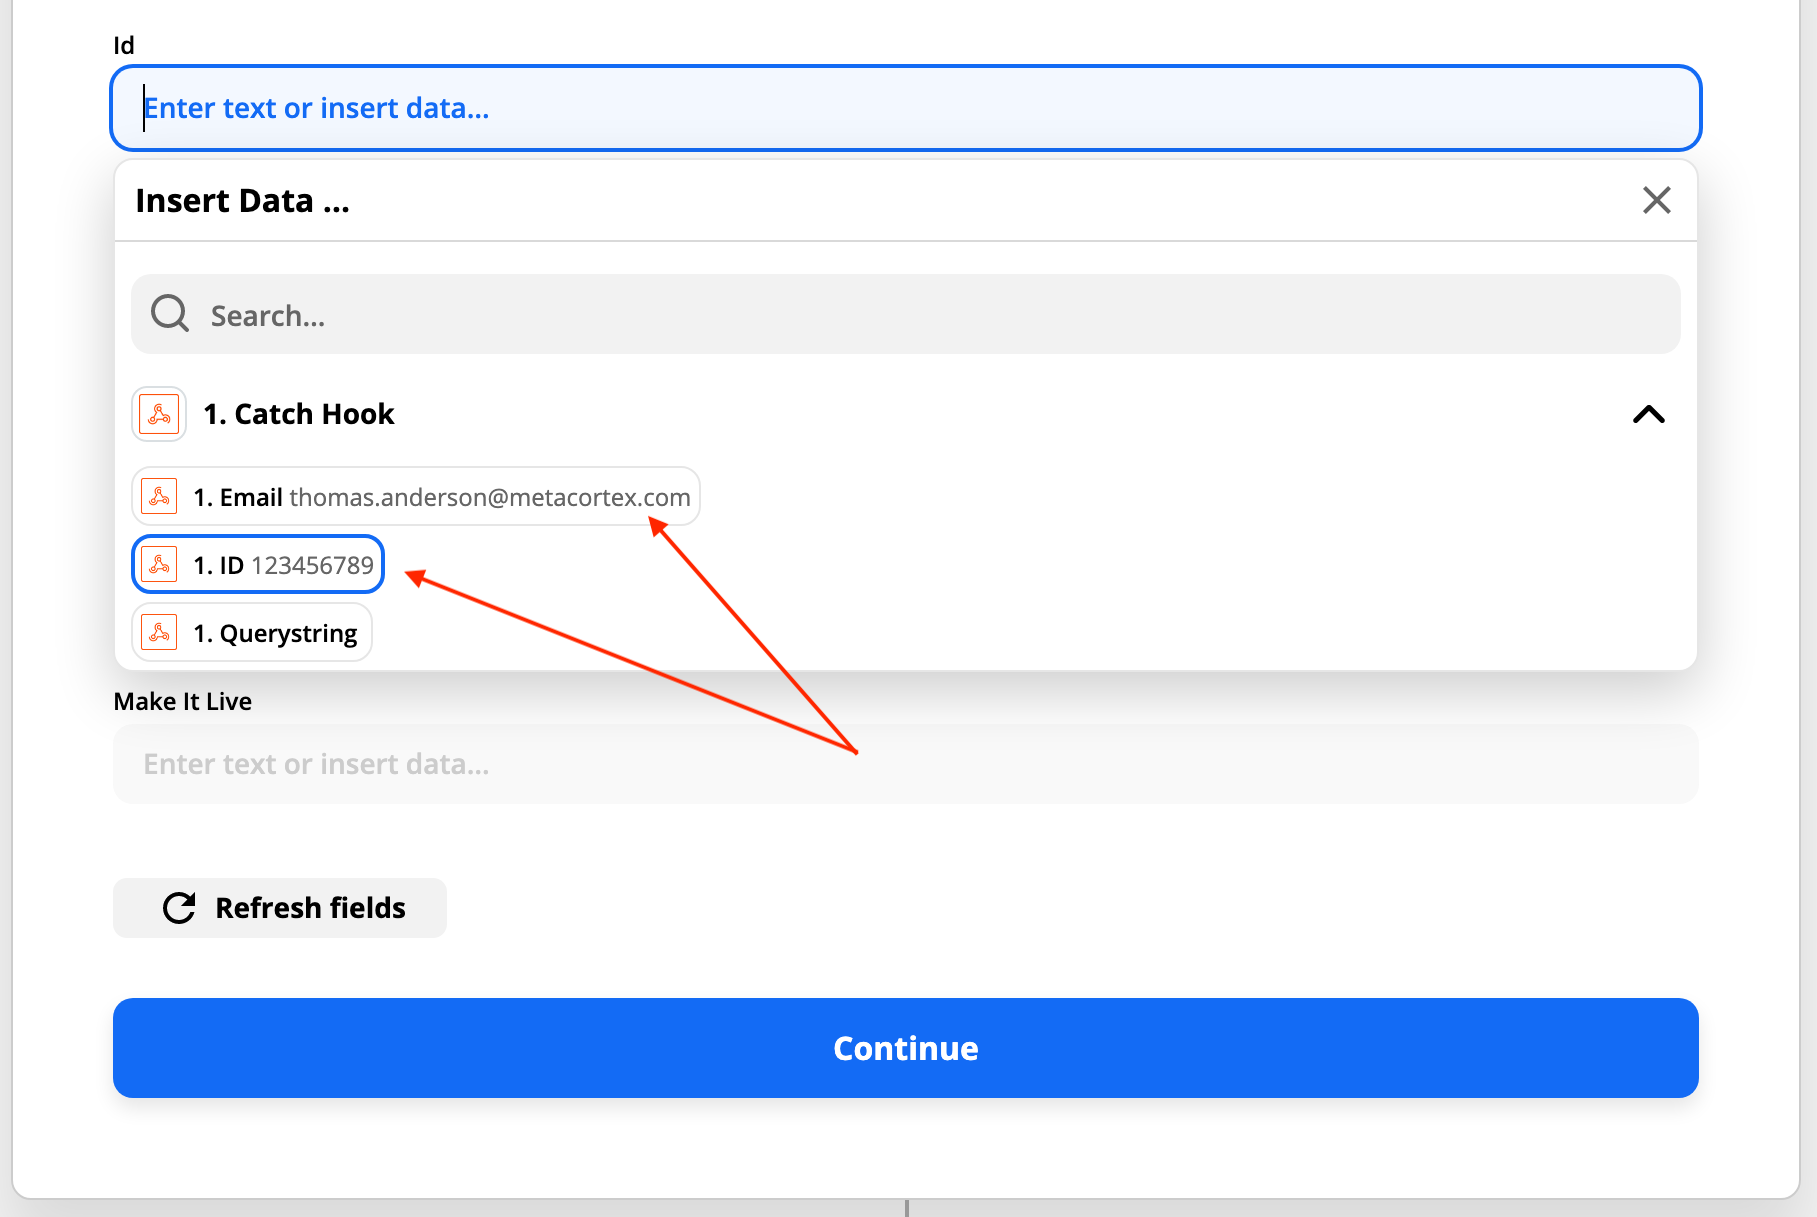
You’ll also notice that the “instant” label is applied to this event.
Why?
When you finish setting up this up, Zapier will give you a url. You’ll add that url into some other platforms service.
Let’s take Webflow. Webflow will send a message with the contents of any newly added CMS item (as one example) to the url you give them. In this case, it would be the Zapier url. So Webflow will send Zapier any new CMS items added to a Collection, as they happen – in real time.
Zapier isn’t polling the Webflow CMS for newly added items every 1, 5, or 15 minutes. Nope. Webflow is sending it to Zapier at the moment it’s added to the CMS.
…and ANY service that allows you to do this (there are many) will send messages from it, to Zapier, in real time.
This is pure gold 🤯
Catch Raw Hook

I recommend avoiding this if you don’t have a very specific need.
Why?
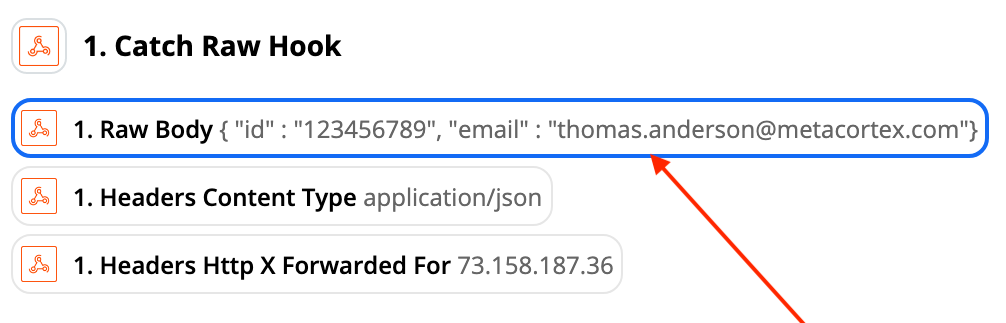
The “Catch Hook” event trigger parses the message sent to it for you. With this one, the “Raw” in “Catch Raw Hook” means that it isn’t parsed for you.
If you had the same JSON sent in a message:
{
 "id" : "123456789",
 "email" : "thomas.anderson@metacortex.com"
}
Zapier will not parse that for you and instead it will look like this when accessing it in an automation:
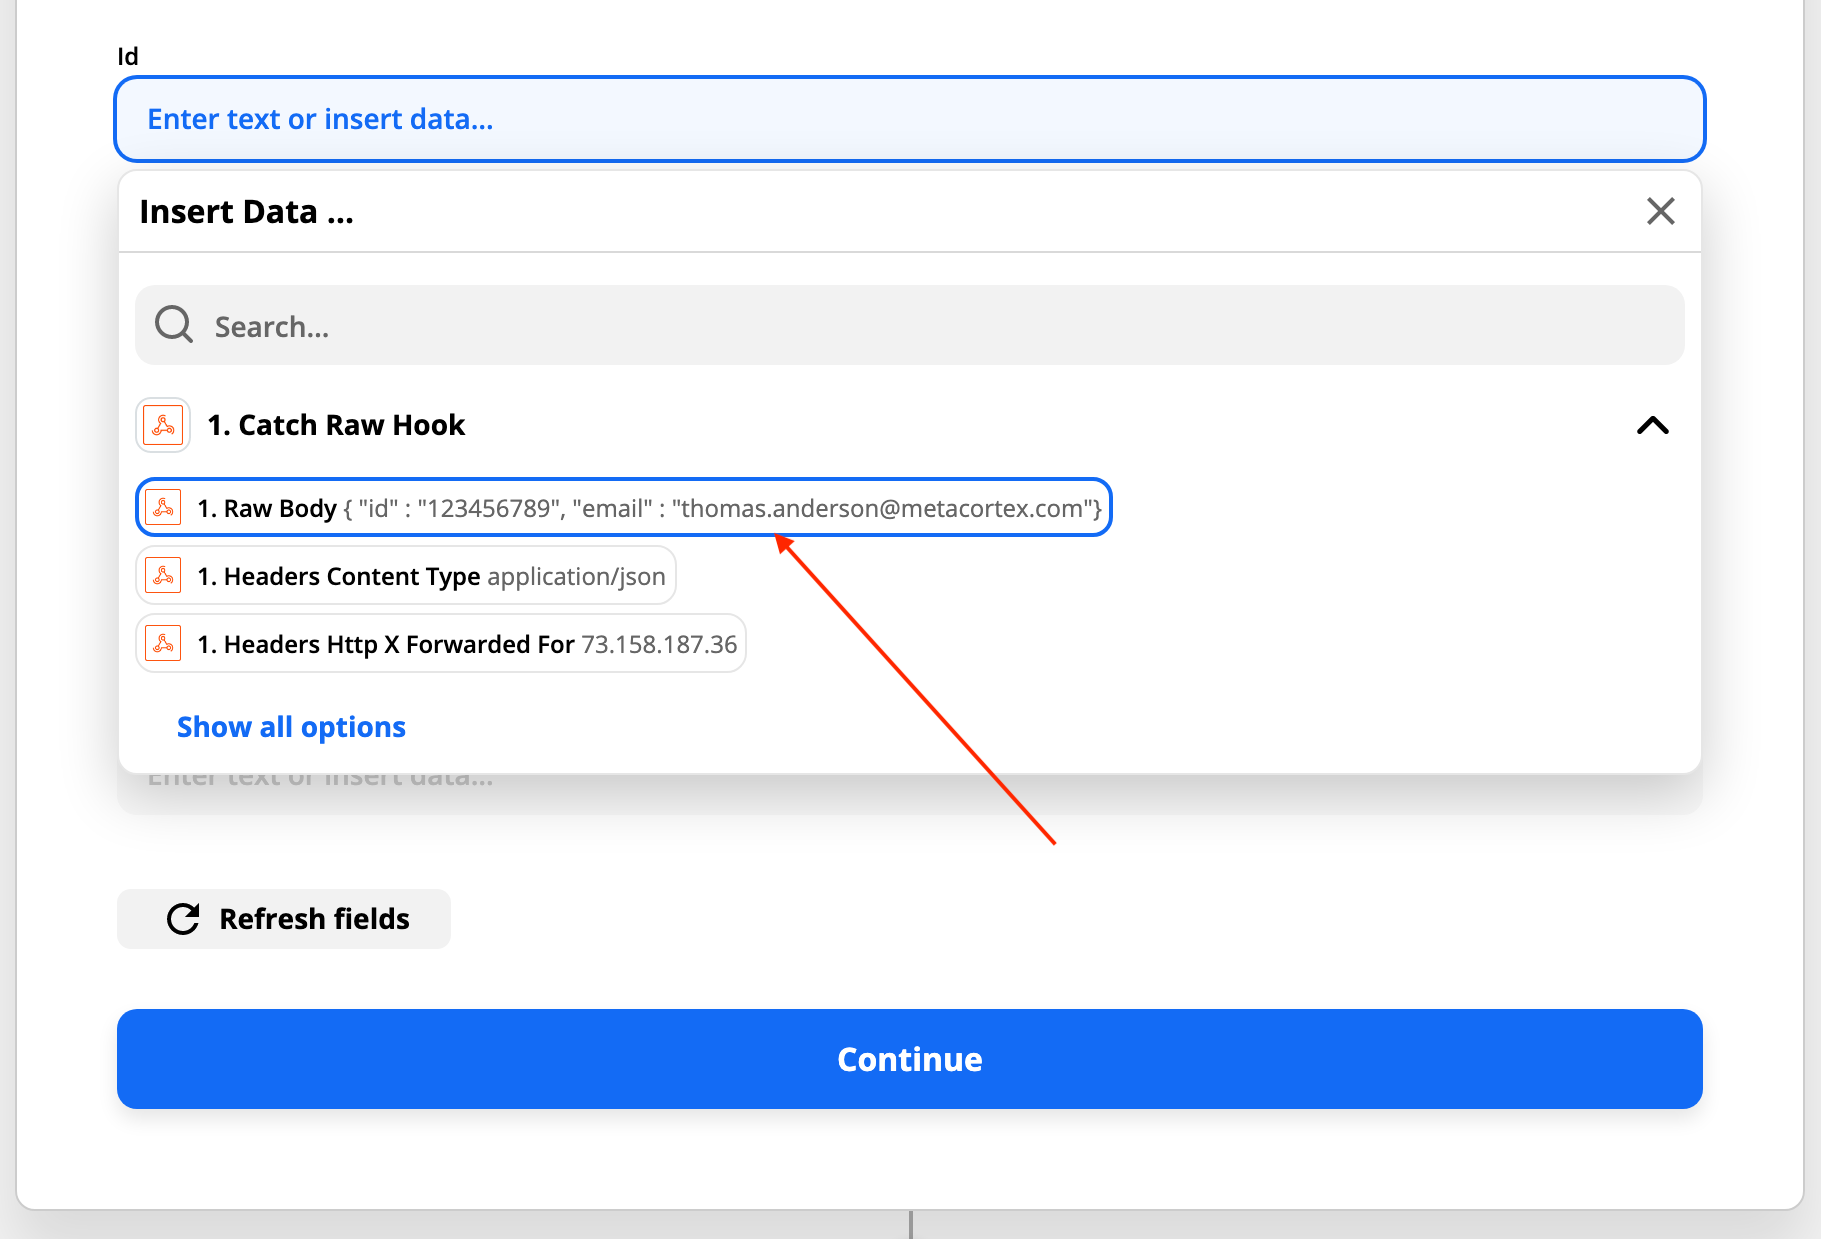
Notice the id and email fields are in their raw form. The same format they were sent from the Webhook. They are still in a JSON format. But, you’d have to figure out how to parse that JSON yourself.
This…

Versus this…
Catch Raw Hook is a great option if you are just passing this message along to another platform and that platform needs it in raw JSON.
But if you are going to do something with this message, via an automation (which is exactly what you’re going to be doing), then you’ll want to parse it and Zapier will do that automatically if you select the “Catch Hook” trigger event instead of using the “Raw” version.
Silent Mode & Pick Off A Child Key
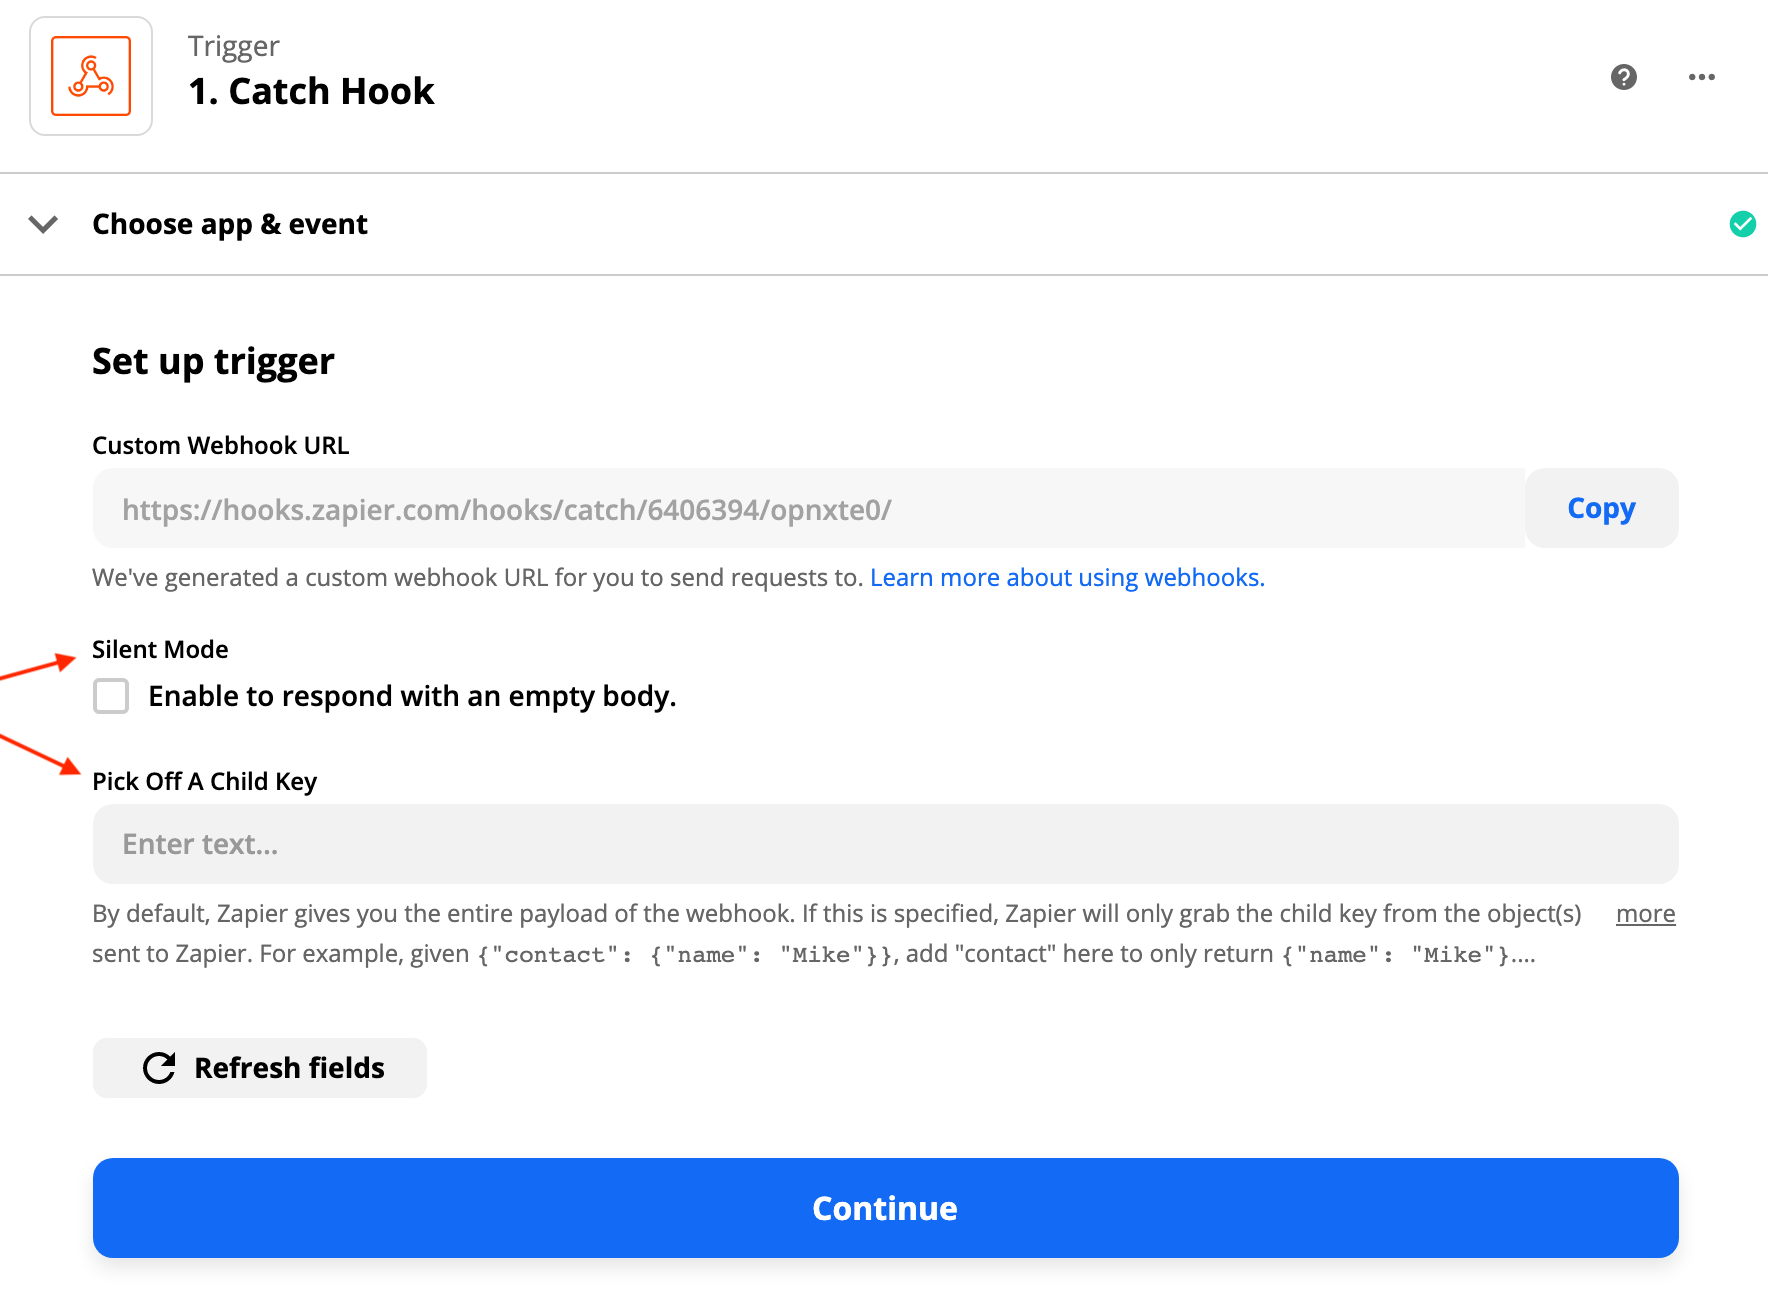
When your Zapier Webhook url gets sent a message, it’ll reply with a “success” message to whomever called it. Some platforms don’t like this and if you’d like to stop that from happening then check the “Silent Mode” checkbox. In our case, with Webflow, it’s fine to leave it unchecked.
For the “Pick Off A Child Key” section you can most likely just leave empty. You’ll typically not need to use it.
But what does it do?
If you have a message that sends JSON and looks like this:
{
 "person":
  {
   "name": "Chris"
  }
}
…and you add “person” to the “Pick Off A Child Key” field, Zapier will return:
{
 "name": "Chris"
}
…so Zapier is doing a little parsing of the JSON for you.
Use the Zapier Webhook
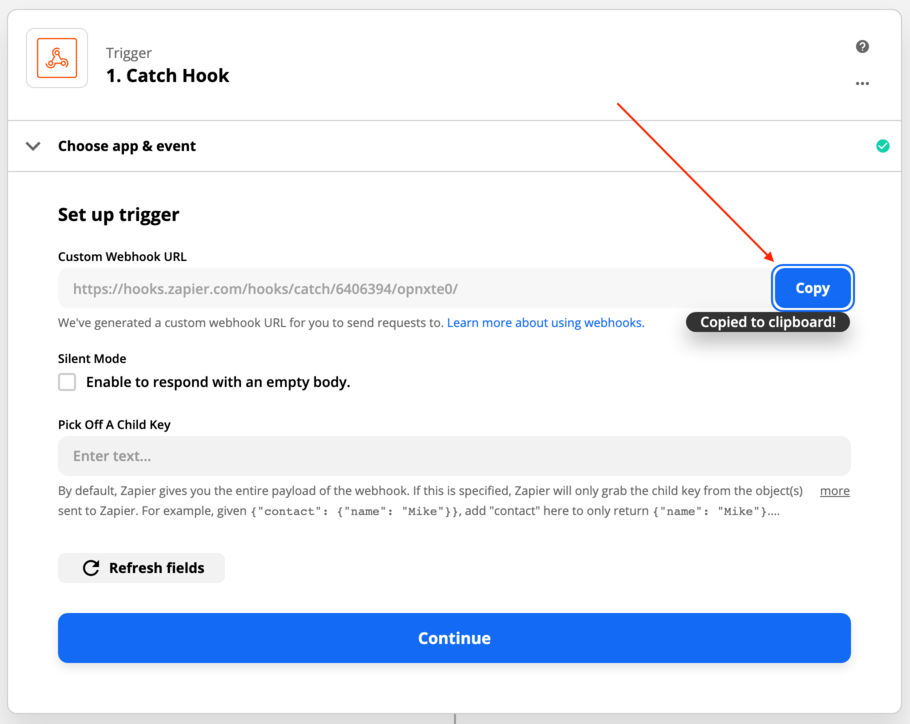
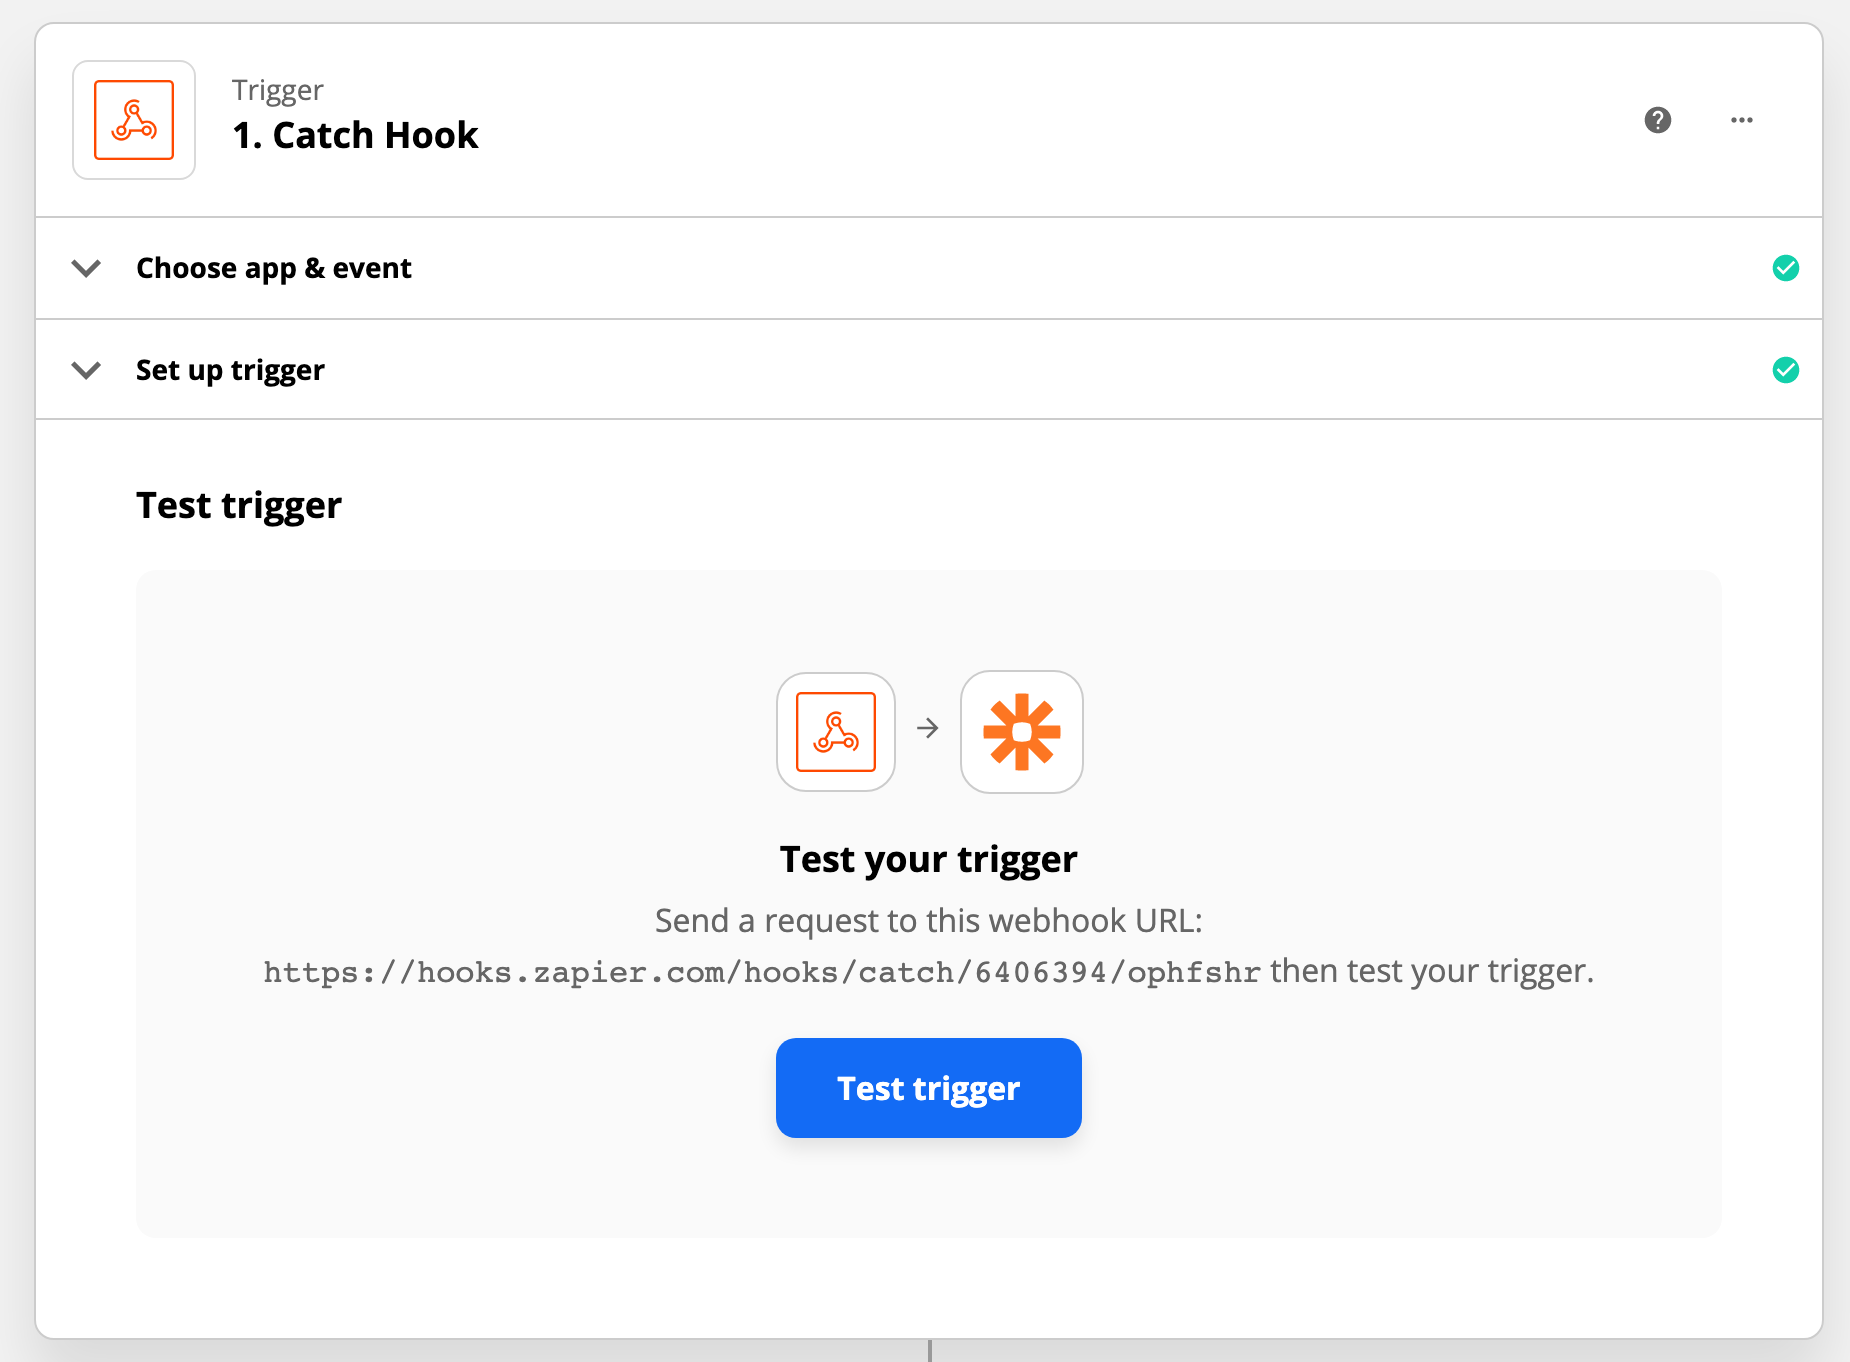
Copy your new Zapier Webhook URL into your clipboard. Continue to the test screen and stop here.
Take that URL copied to your clipboard and paste it into something like Insomnia:
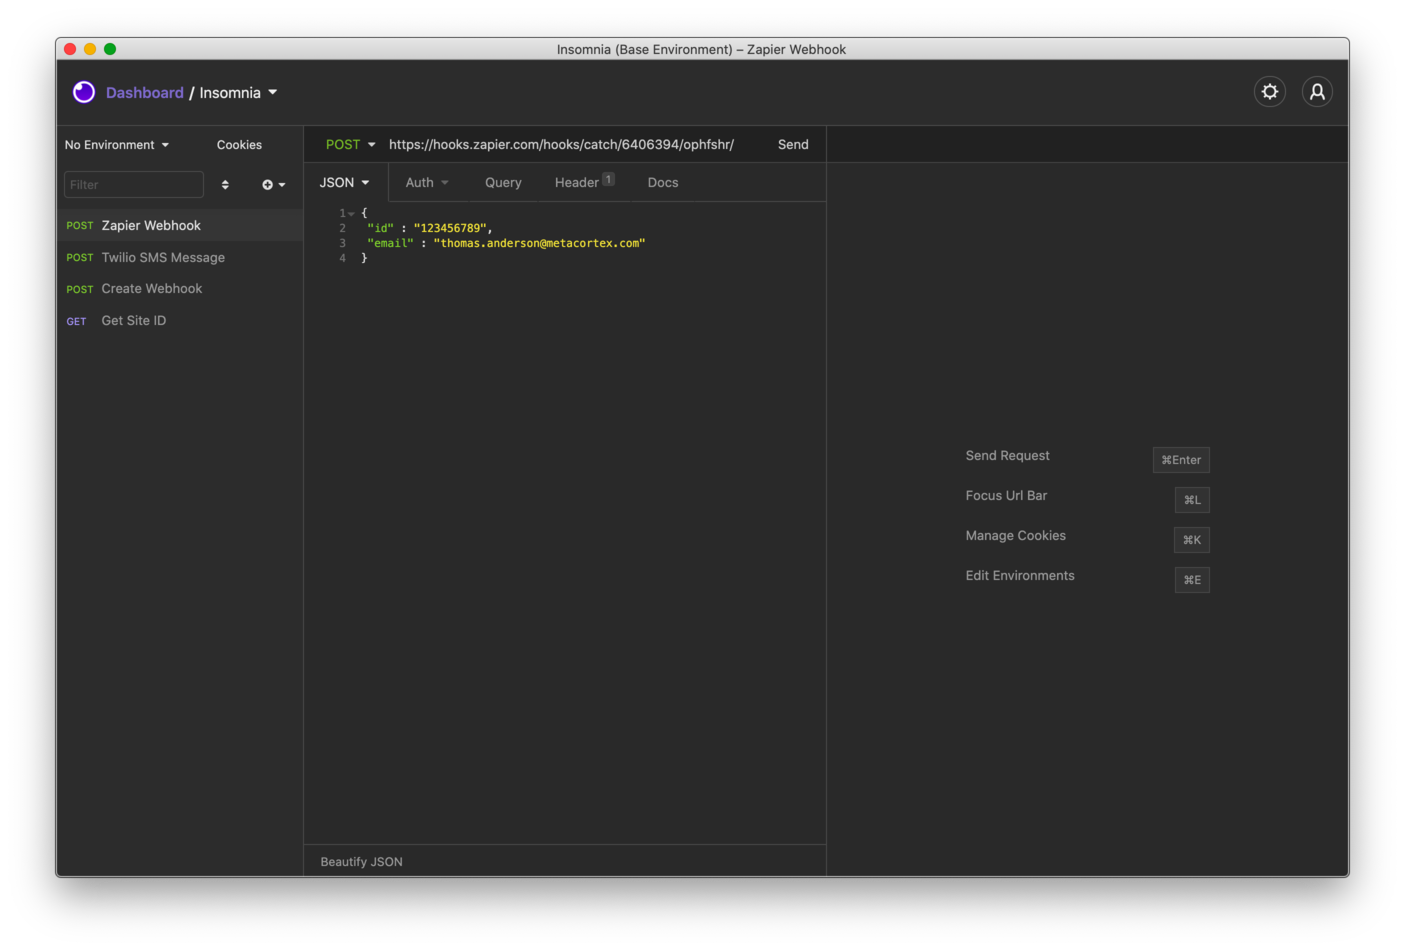
…add the json:
{
 "id" : "123456789",
 "email" : "thomas.anderson@metacortex.com"
}
…and click the “Send” button!
Click the “Test” button in Zapier and boom 💥 You just received a Webhook with a message into Zapier 🙂

The true power of this is hooking up something like the Webflow CMS to send CMS items every time the are created or updated. Use Zapier for the automation and do something creative with it!