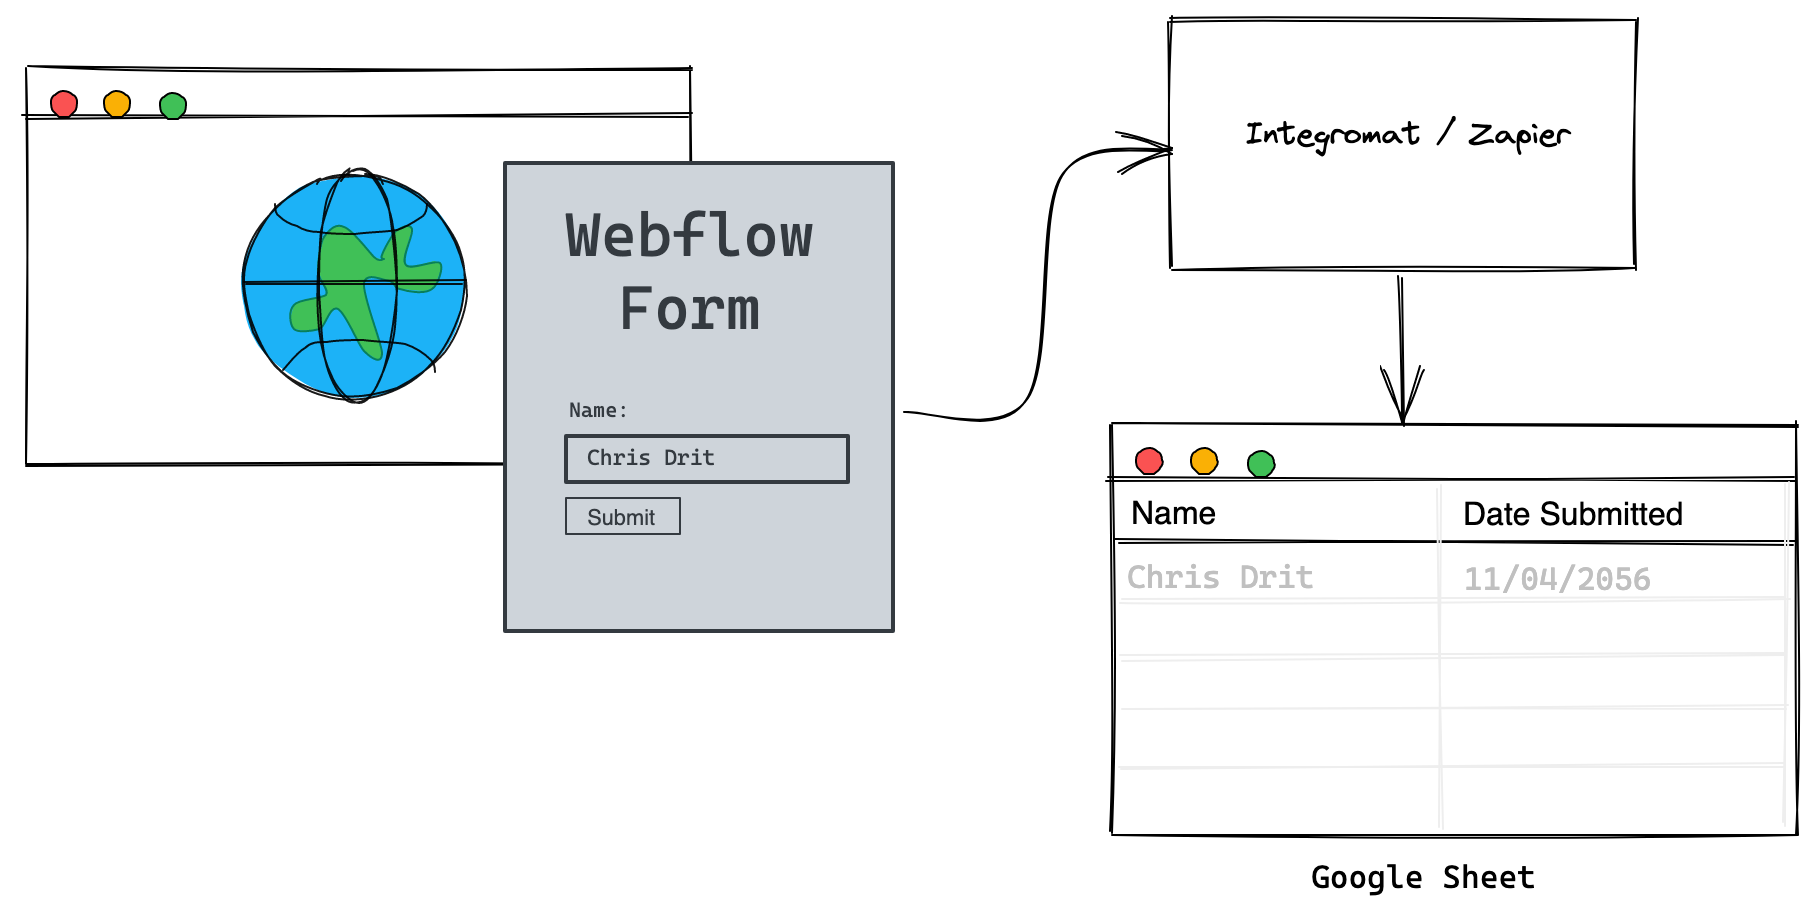
"I am trying to find an easy solution that every time a Webflow form is submitted, I get a new line in a Google Sheet."
😎 This is a straightforward build and the awesome sauce of this is you can swap out Google Sheets for Airtable or any other service.
Here’s what you’ll need:
- ✅ A Google Account (for tier)
- ✅ A Webflow Account (free tier)
- ✅ Integromat Account (free tier)
Let’s build it right now!
Webflow
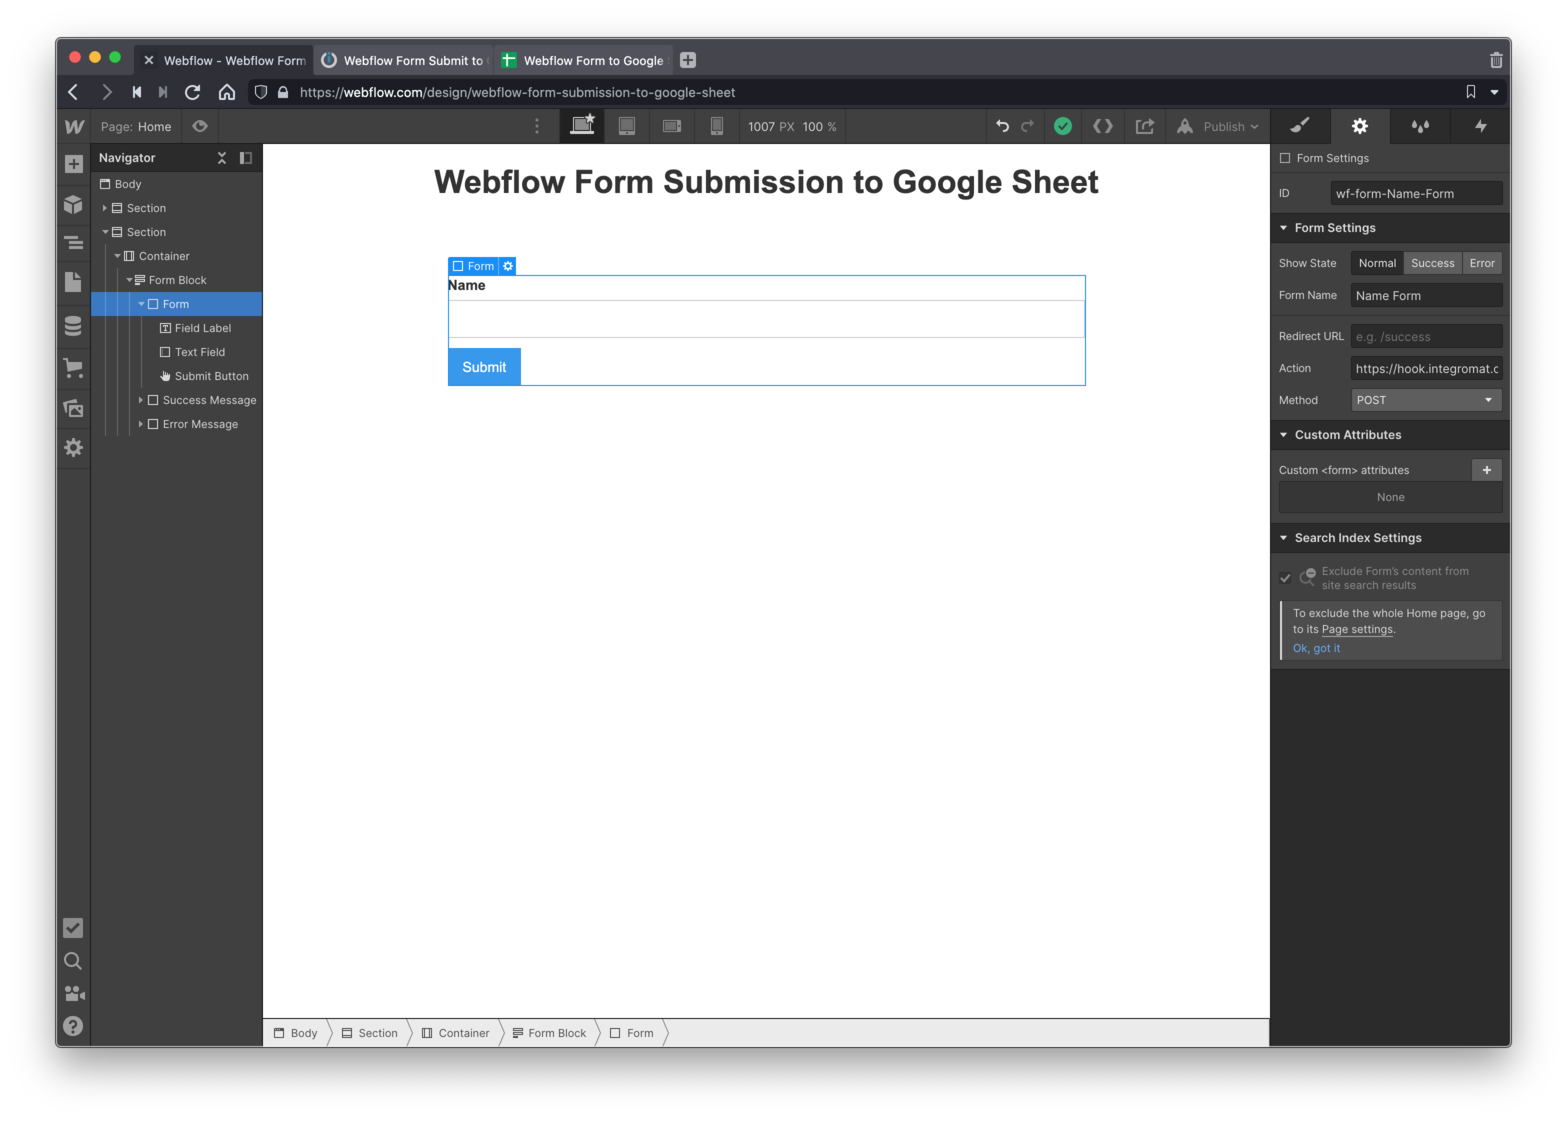
This is straightforward, just create a form on the home page of a new Webflow project. Nothing fancy, just something to use as a quick test.
You’ll be returning to the form settings after you set up Integromat. For now, this is good enough.
Success Page
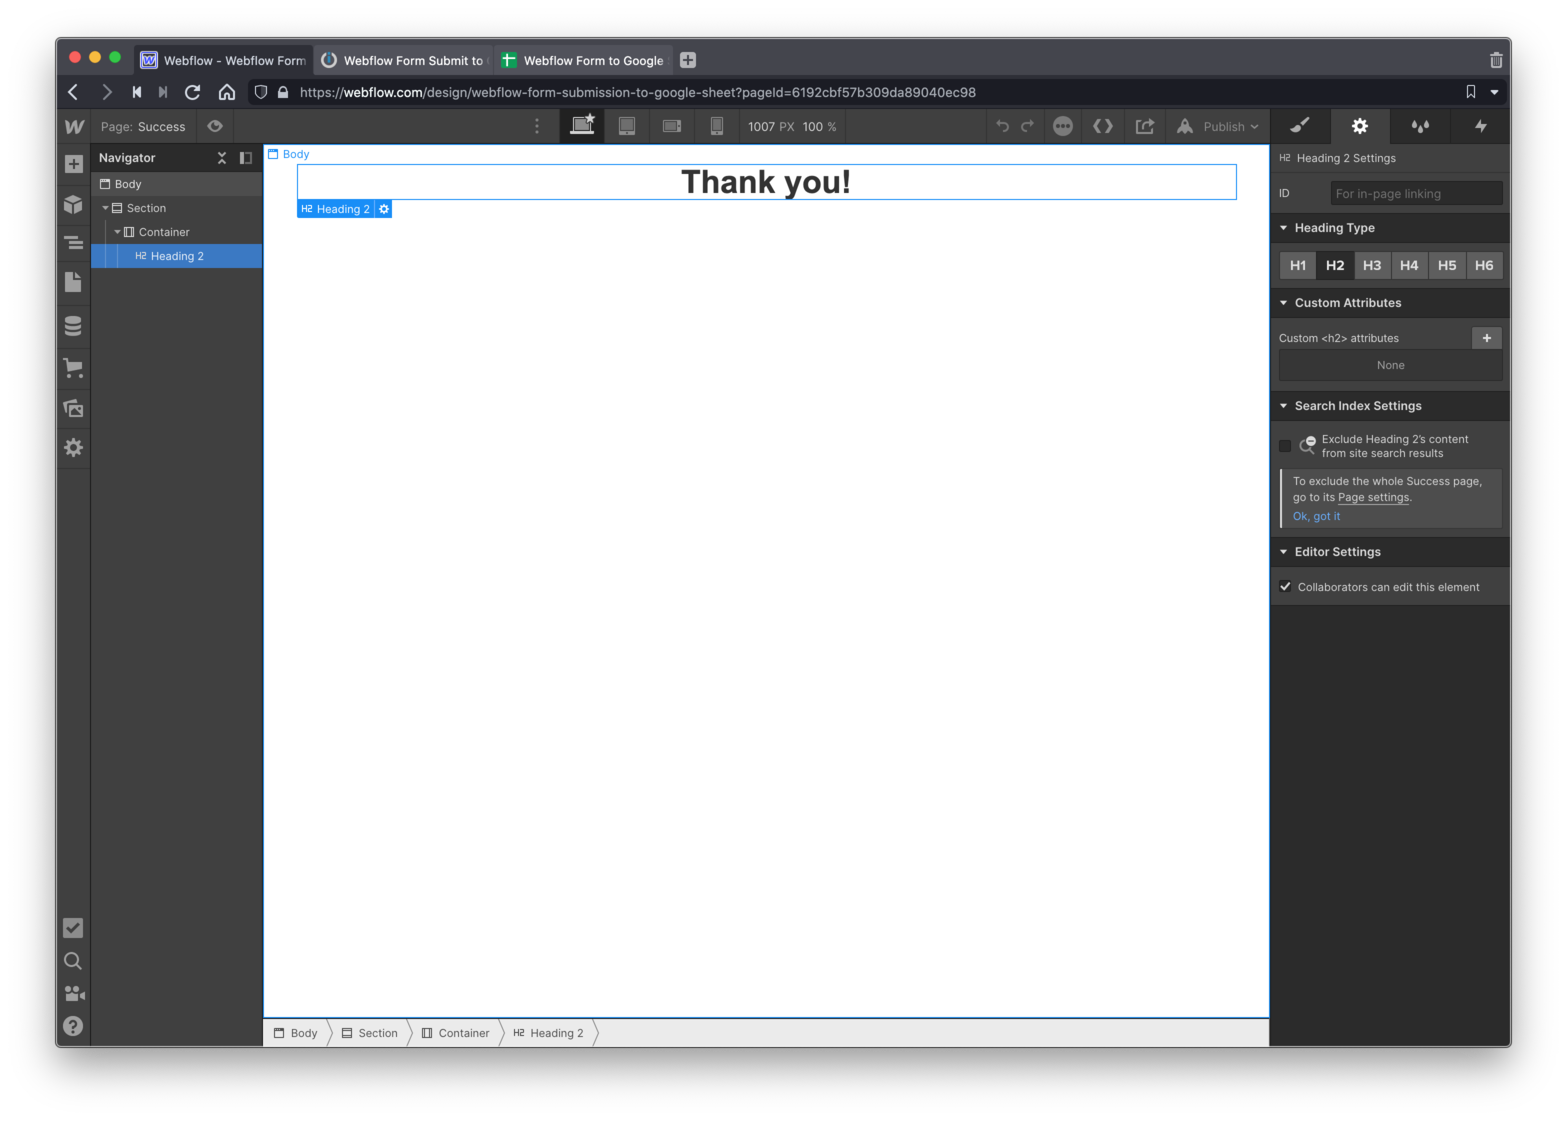
Once your user submits the form, you need to redirect them to a new page. In this case, it’ll just be a simple “success” page. Go ahead and create a new static page, mine is literally named “success” you do what you like 🙂
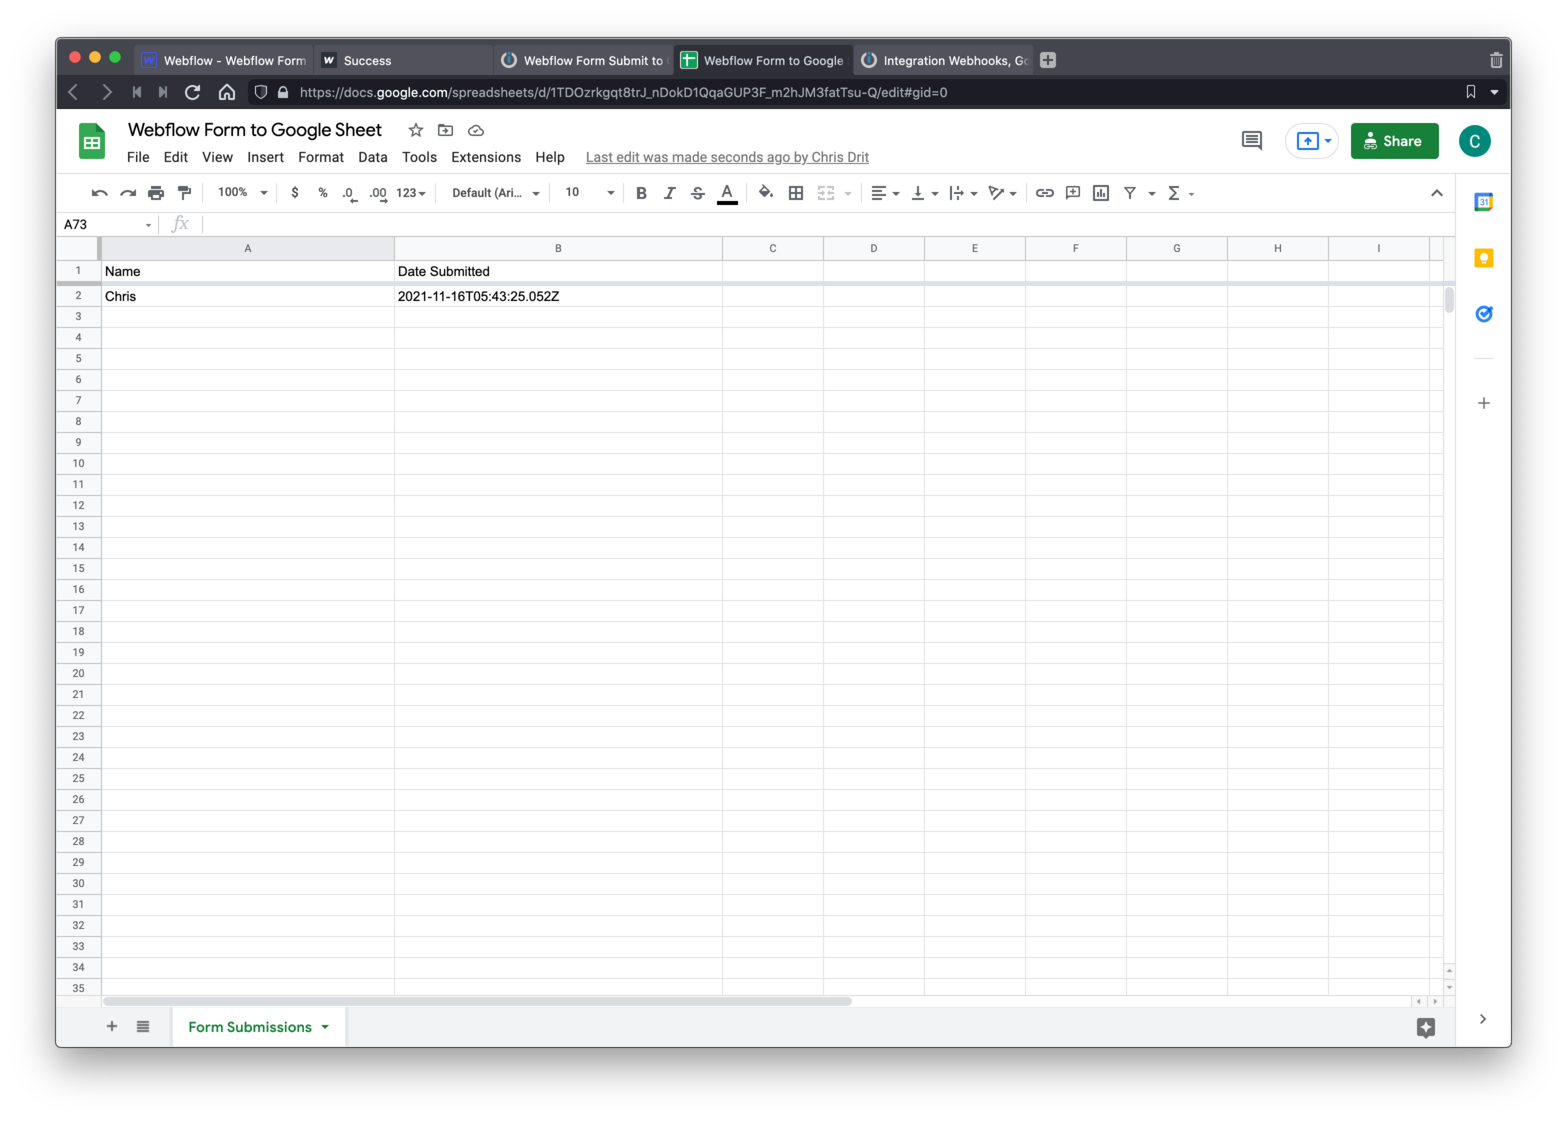
Google Sheet

Create a new Google Sheet and add the two columns you see in the screenshot above. Done 😎
Integromat
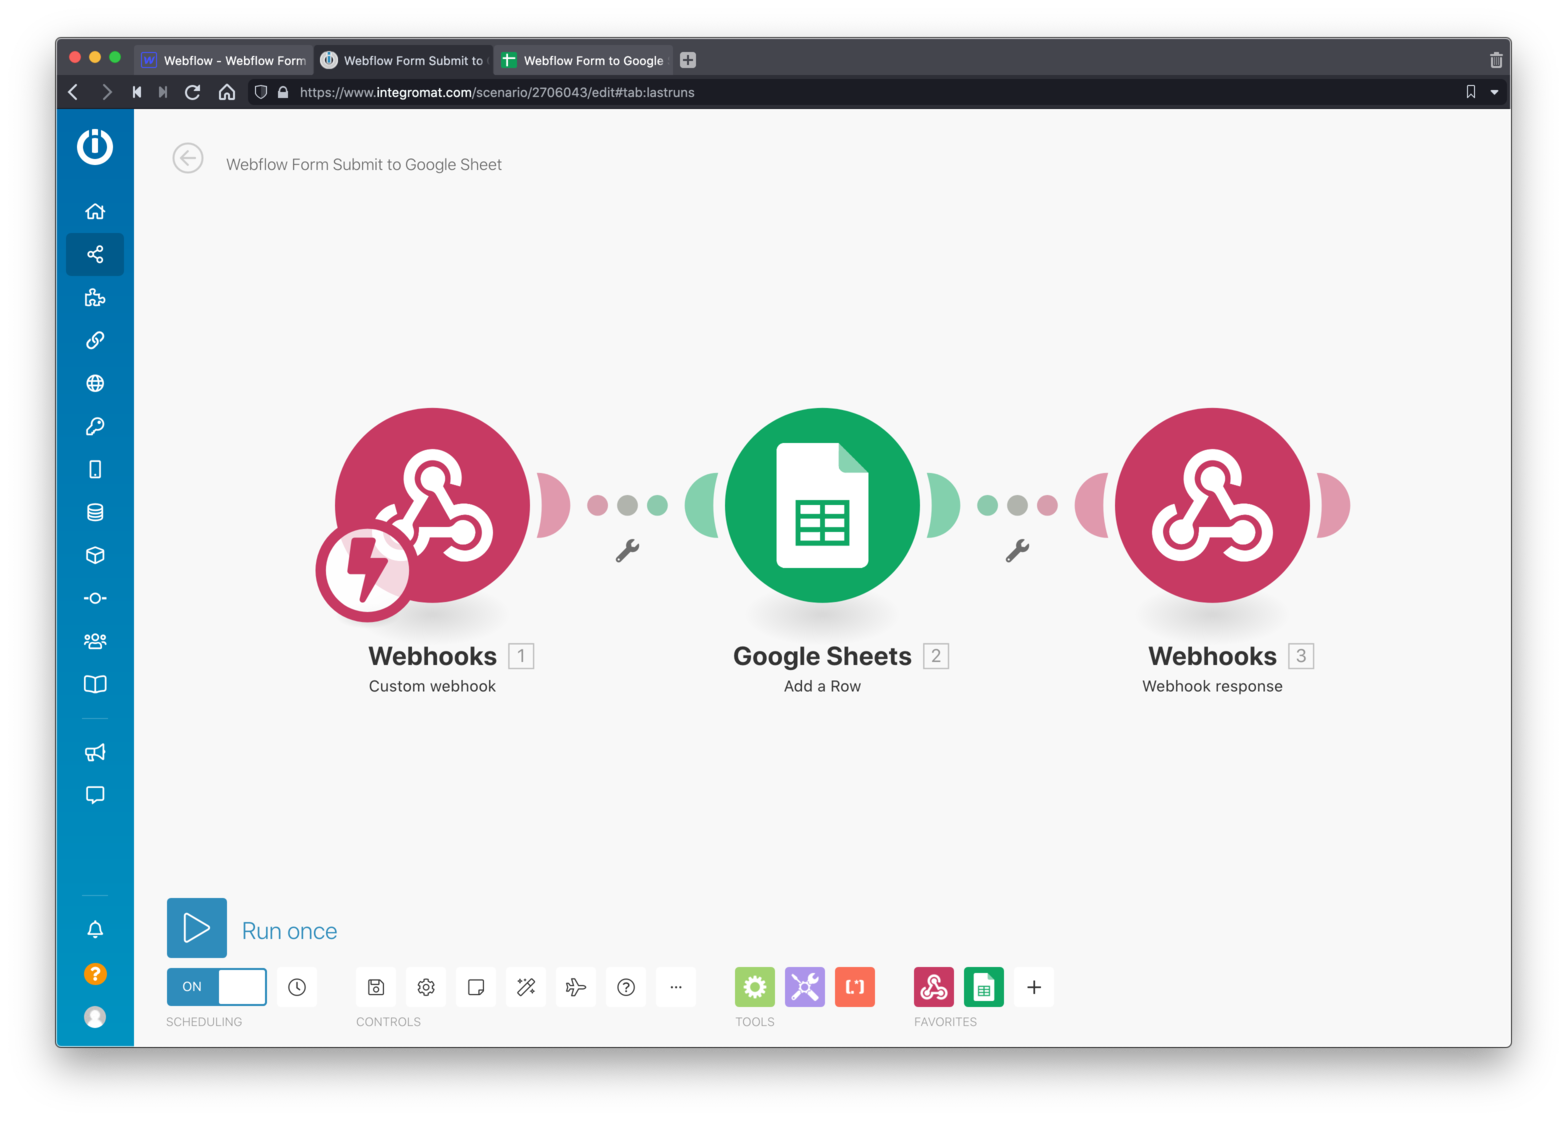
Create a new Integromat Scenario.
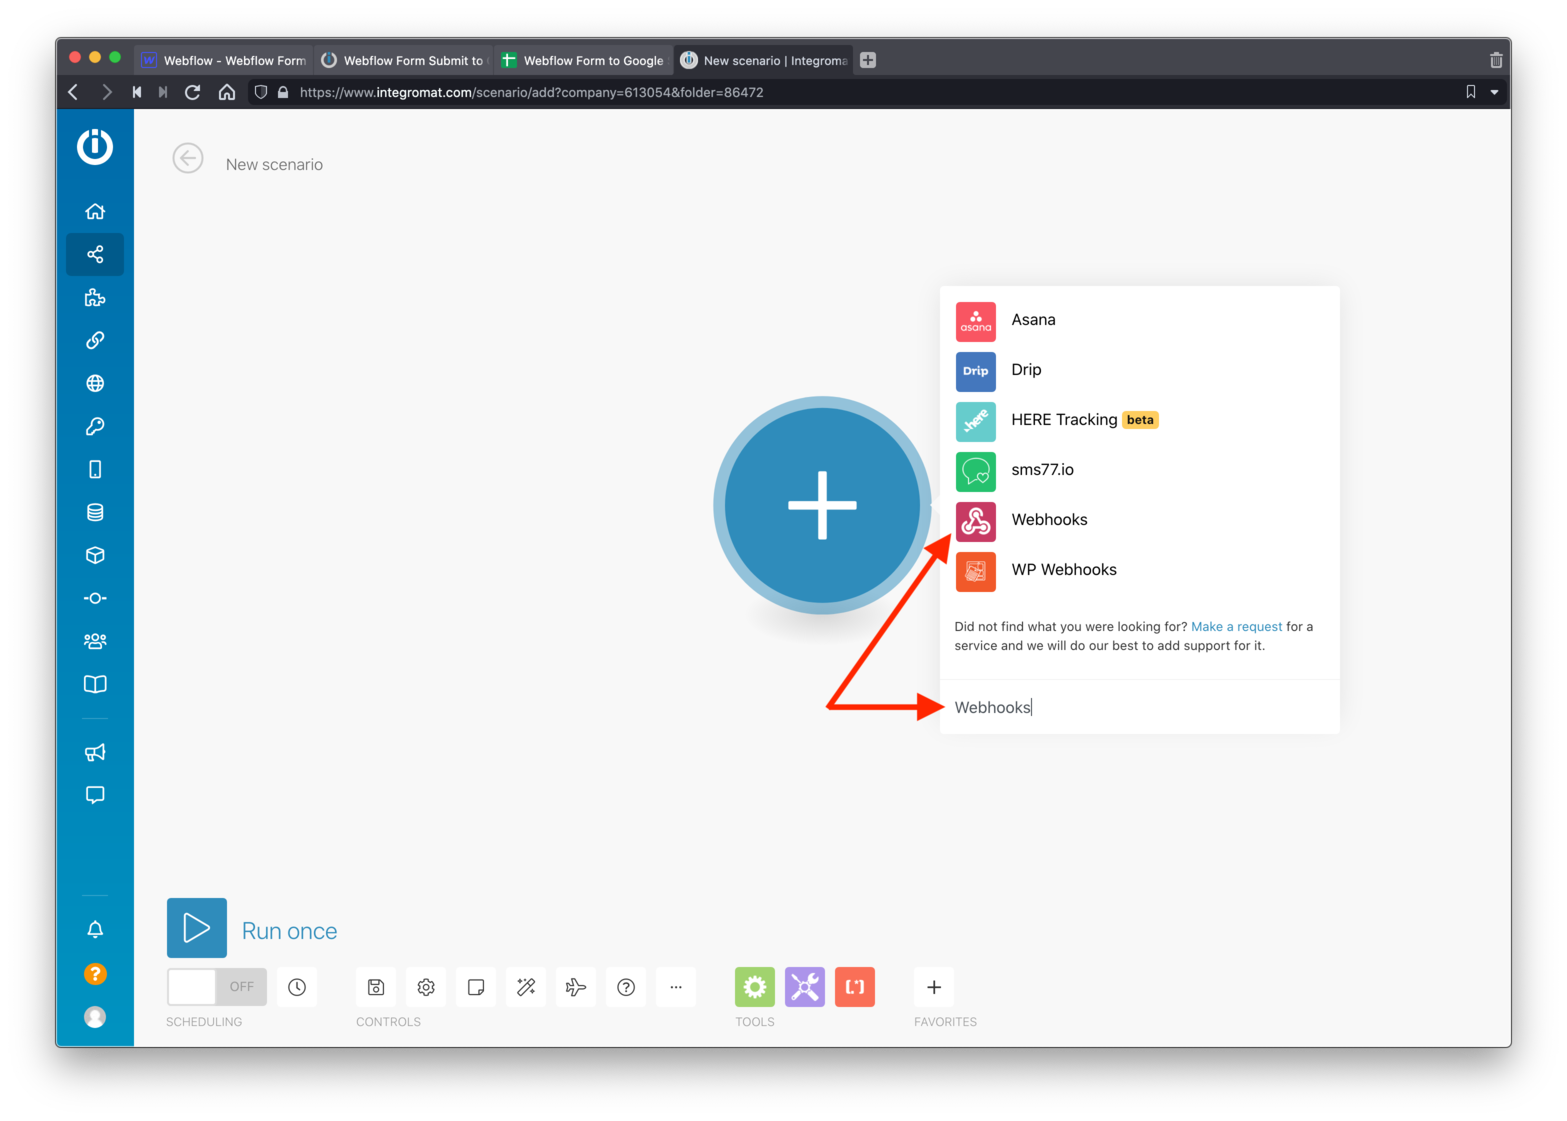
Search for and select “Webhooks” as shown in the screenshot above.
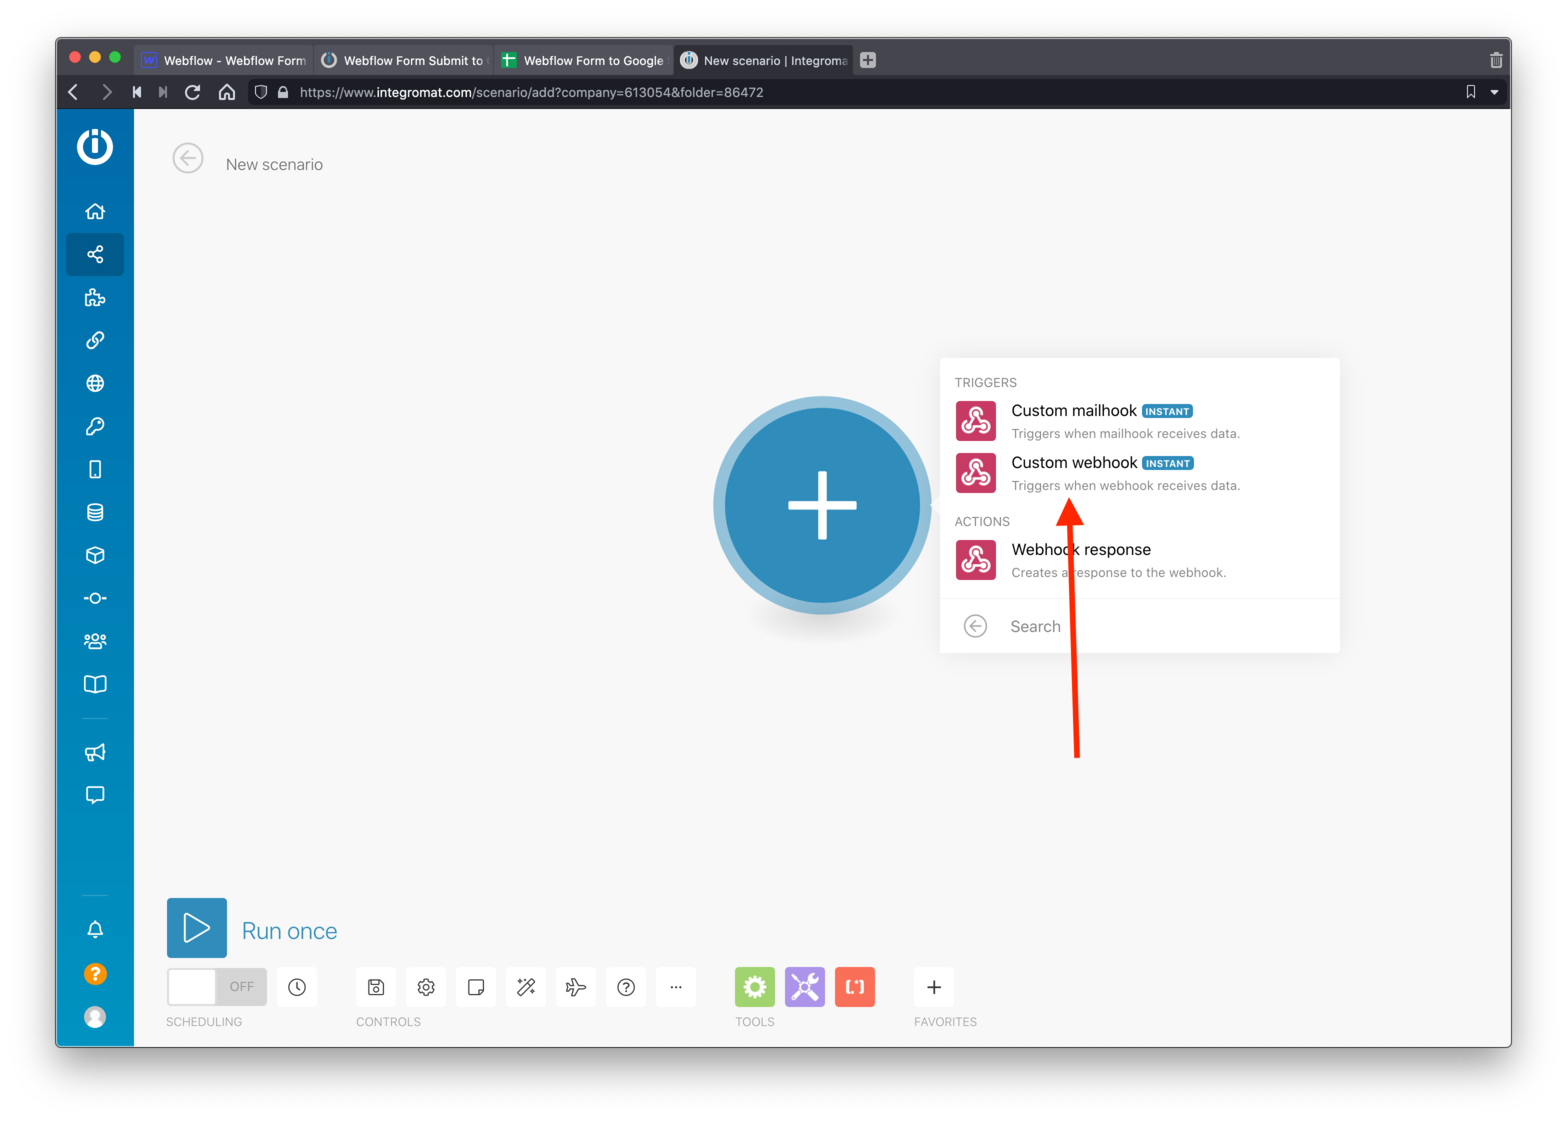
Next, select “Custom webhook” as shown above.
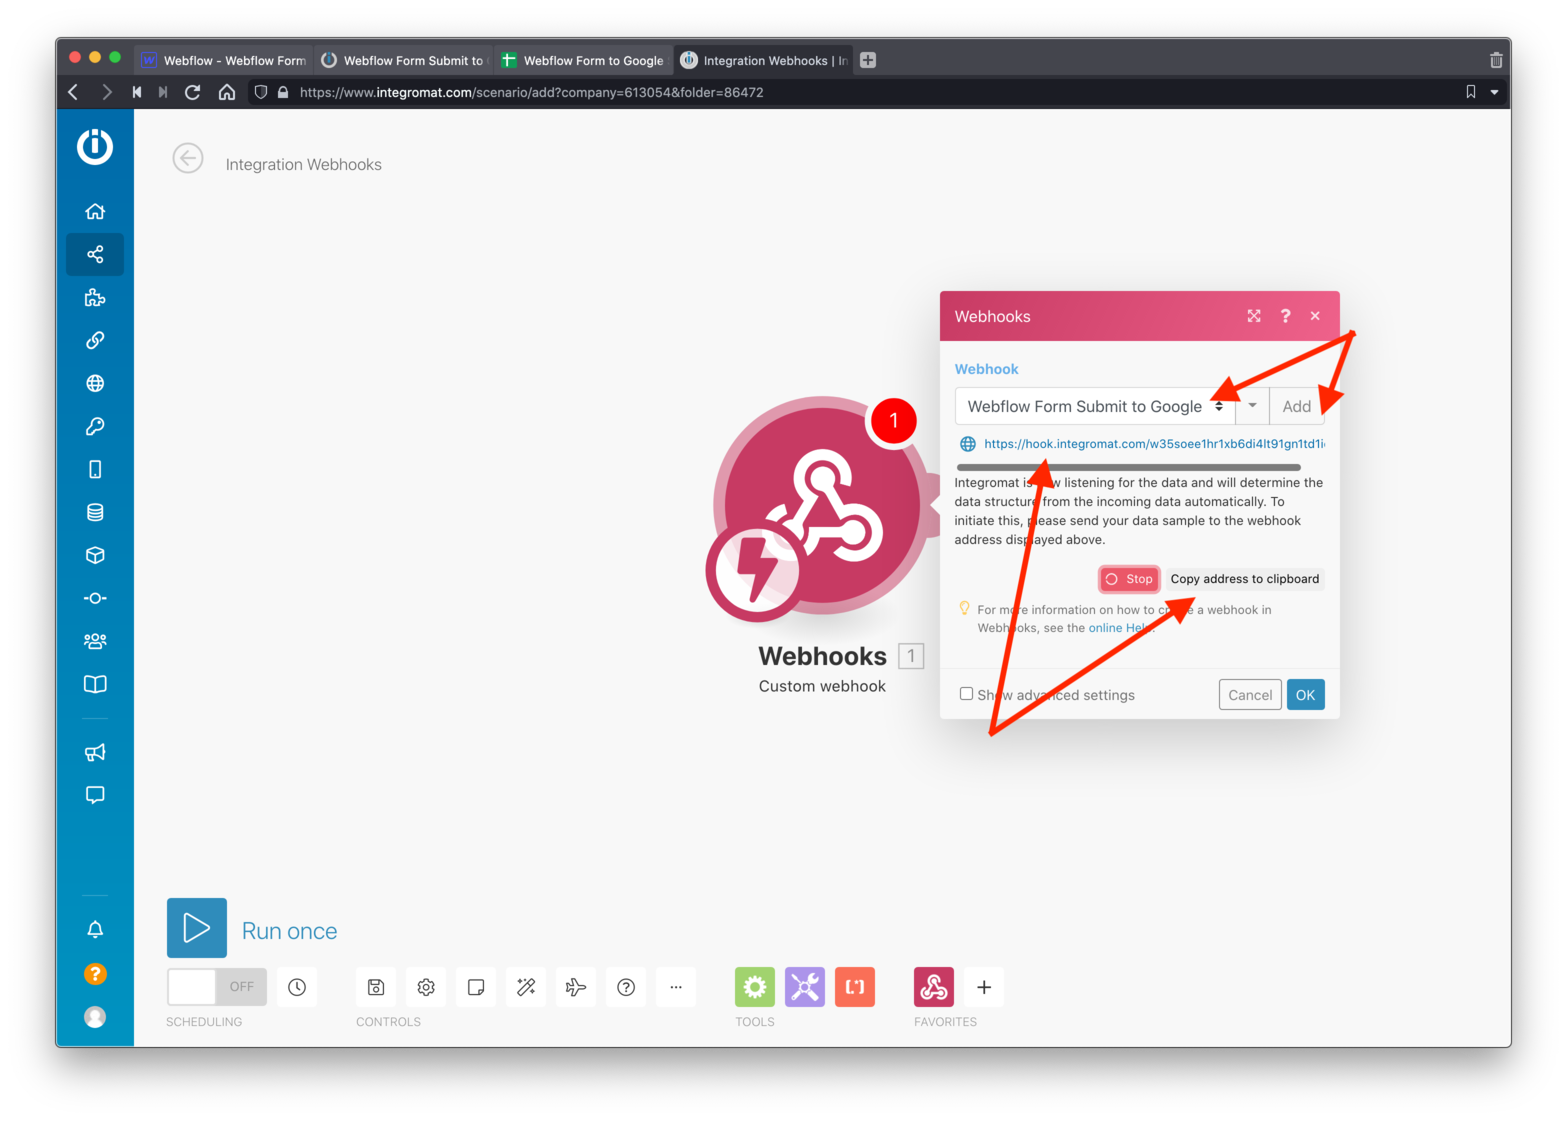
Tap the “Add” button and give your Integromat Module a descriptive name.
Once done, notice the new url created. This is your Webhook endpoint url. In a moment, you’ll add this to your Webflow forms action so that when a user of your site submits the form, it’ll submit what the user filled out on the form, here 😎
Tap the “Copy address to clipboard” button.
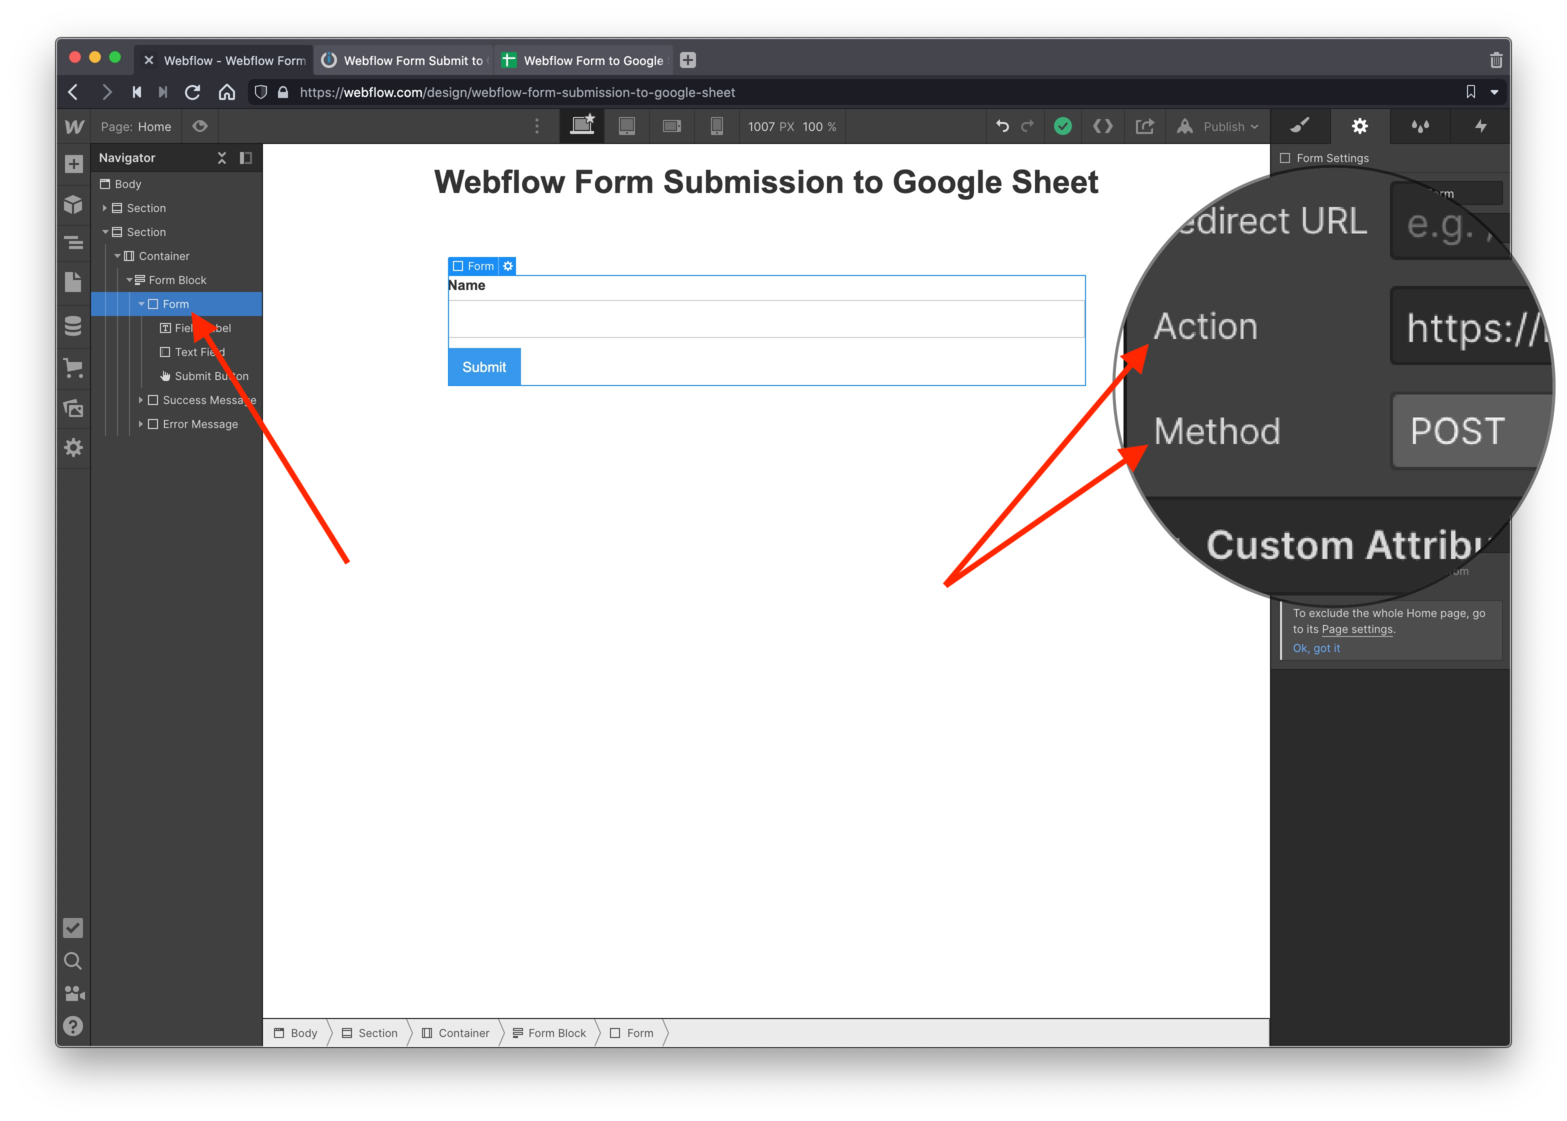
Next, make sure to select your “Form” in the left side bar Navigator. Then select the “Form Settings” tab (gear icon) in the ride side bar.
You’ll see the “Action” and “Method” fields for the form.
Select “POST” for the Method field.
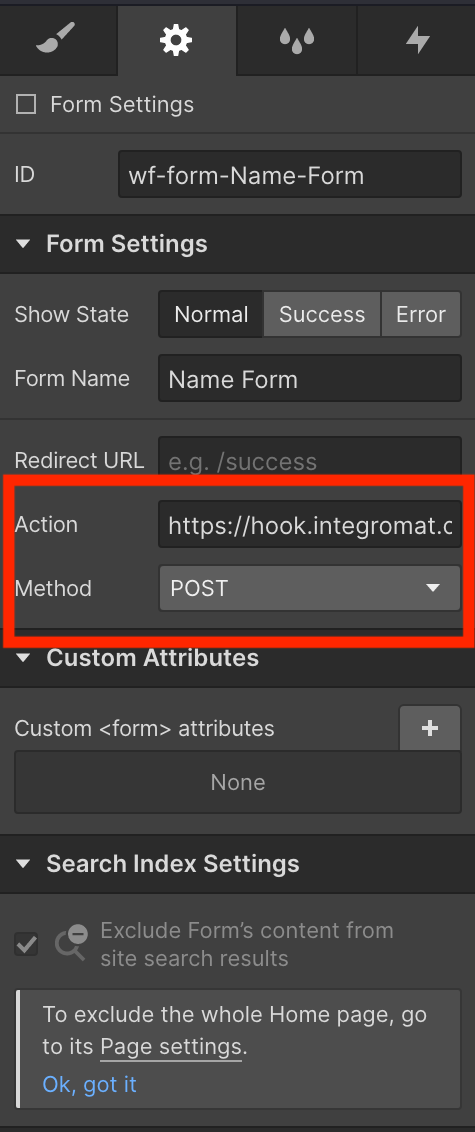
Paste into the Action field your Integromat endpoint url that should be still saved within your clipboard.
Now, when your user submits the form, everything they filled out will be posted to your Integromat Webhook Module 😃
Test it!
Publish your Webflow project and open up the live site.
Fill out the form and submit it.
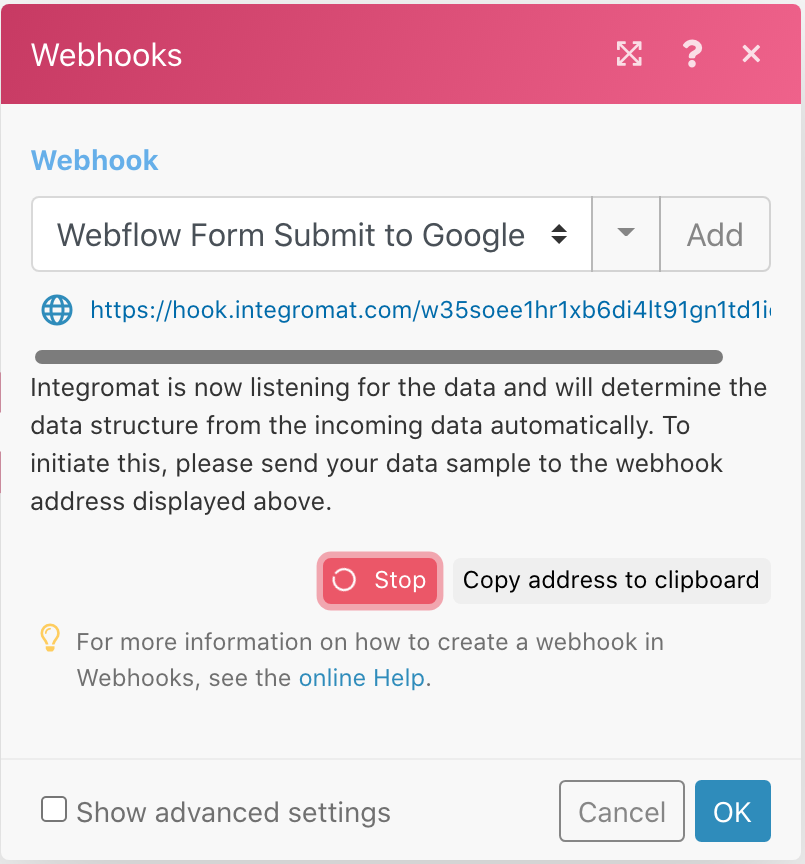
Your Integromat Module should go from the red “stop” button shown above with, to…
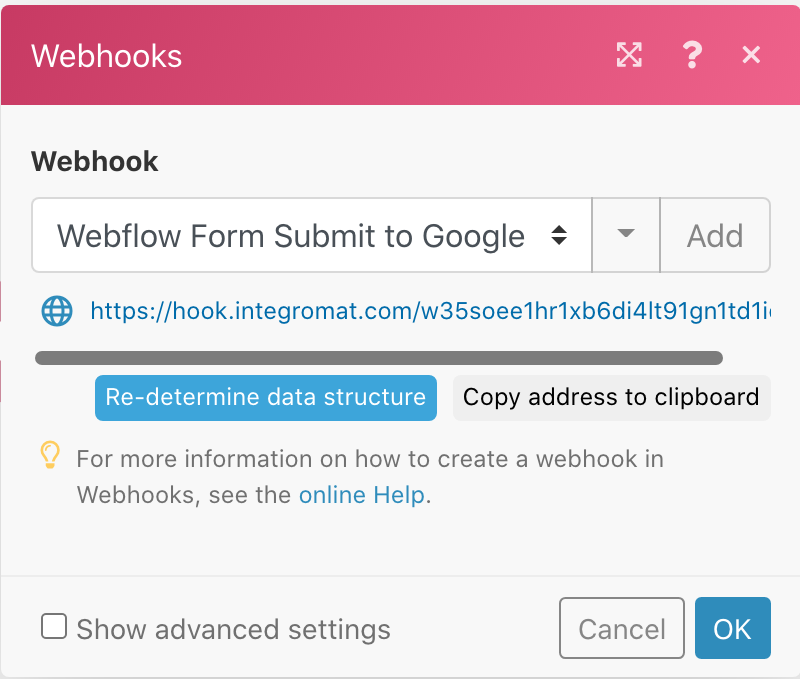
…the blue “Re-determine data structure” button shown above.
This means the Integromat Webhook successfully received your form submission 😎
Google Sheet Module
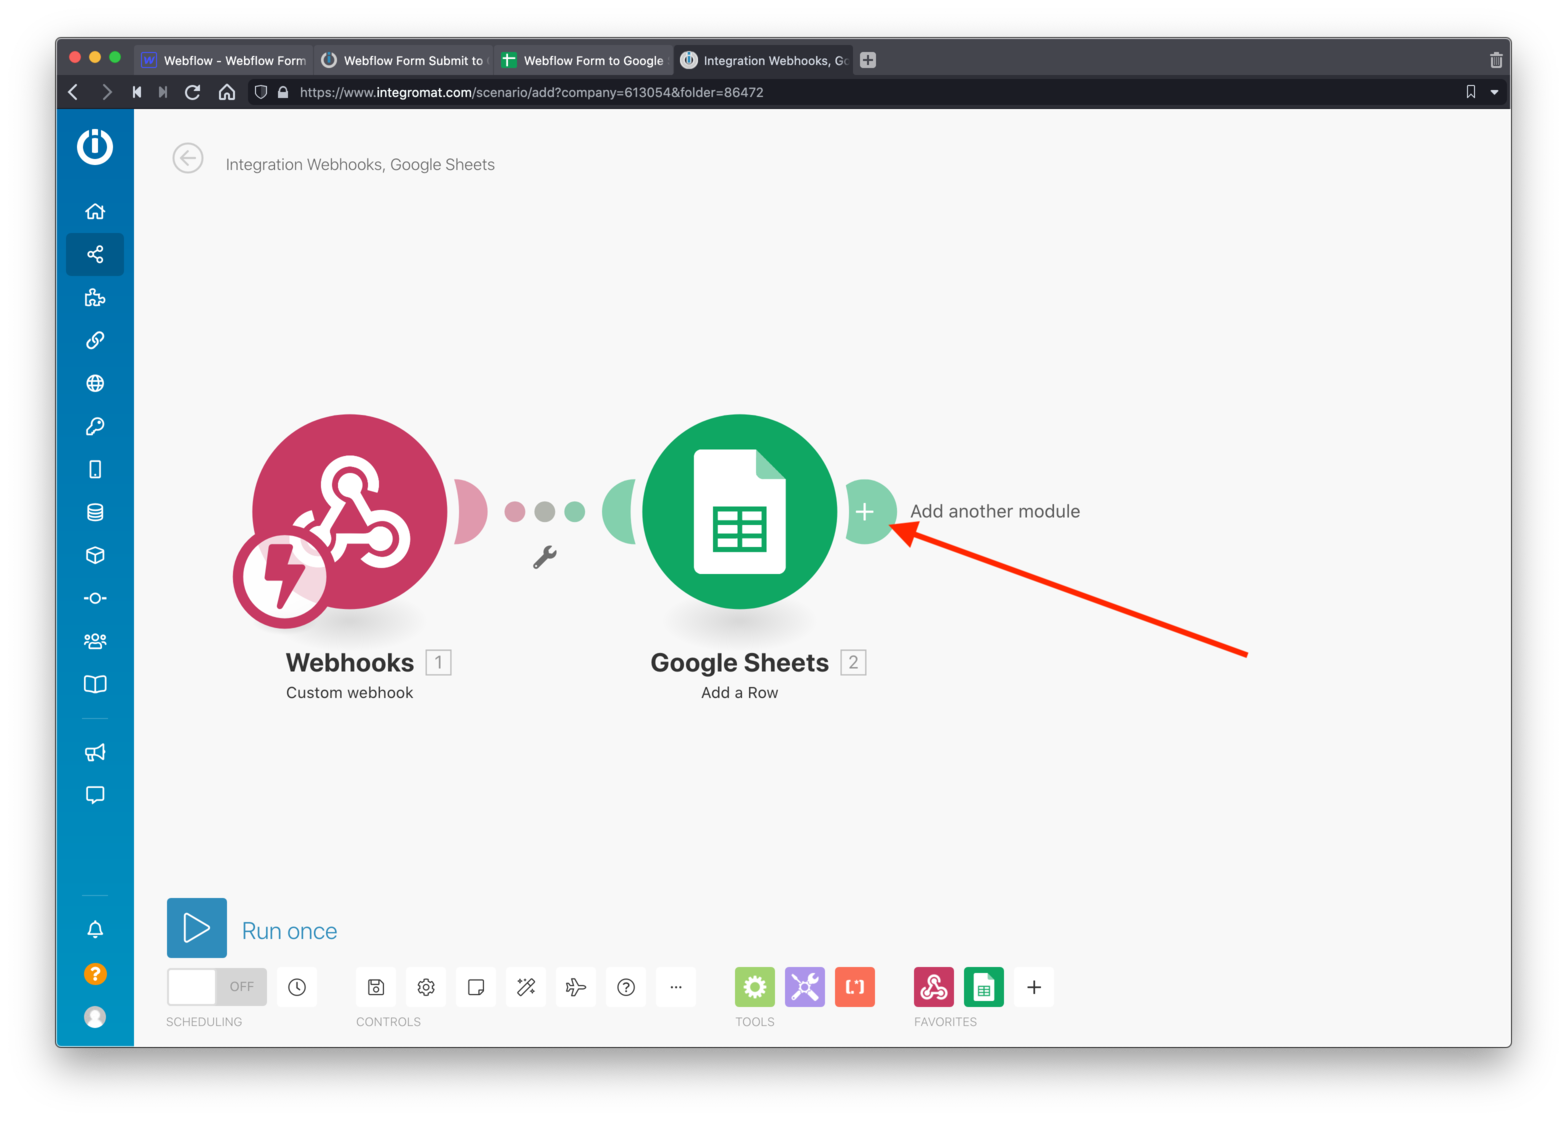
You need to add two more modules. The first will be the Google Sheets Module. The second will be a Webhook Response Module that tells the web browser what page the user redirects to.
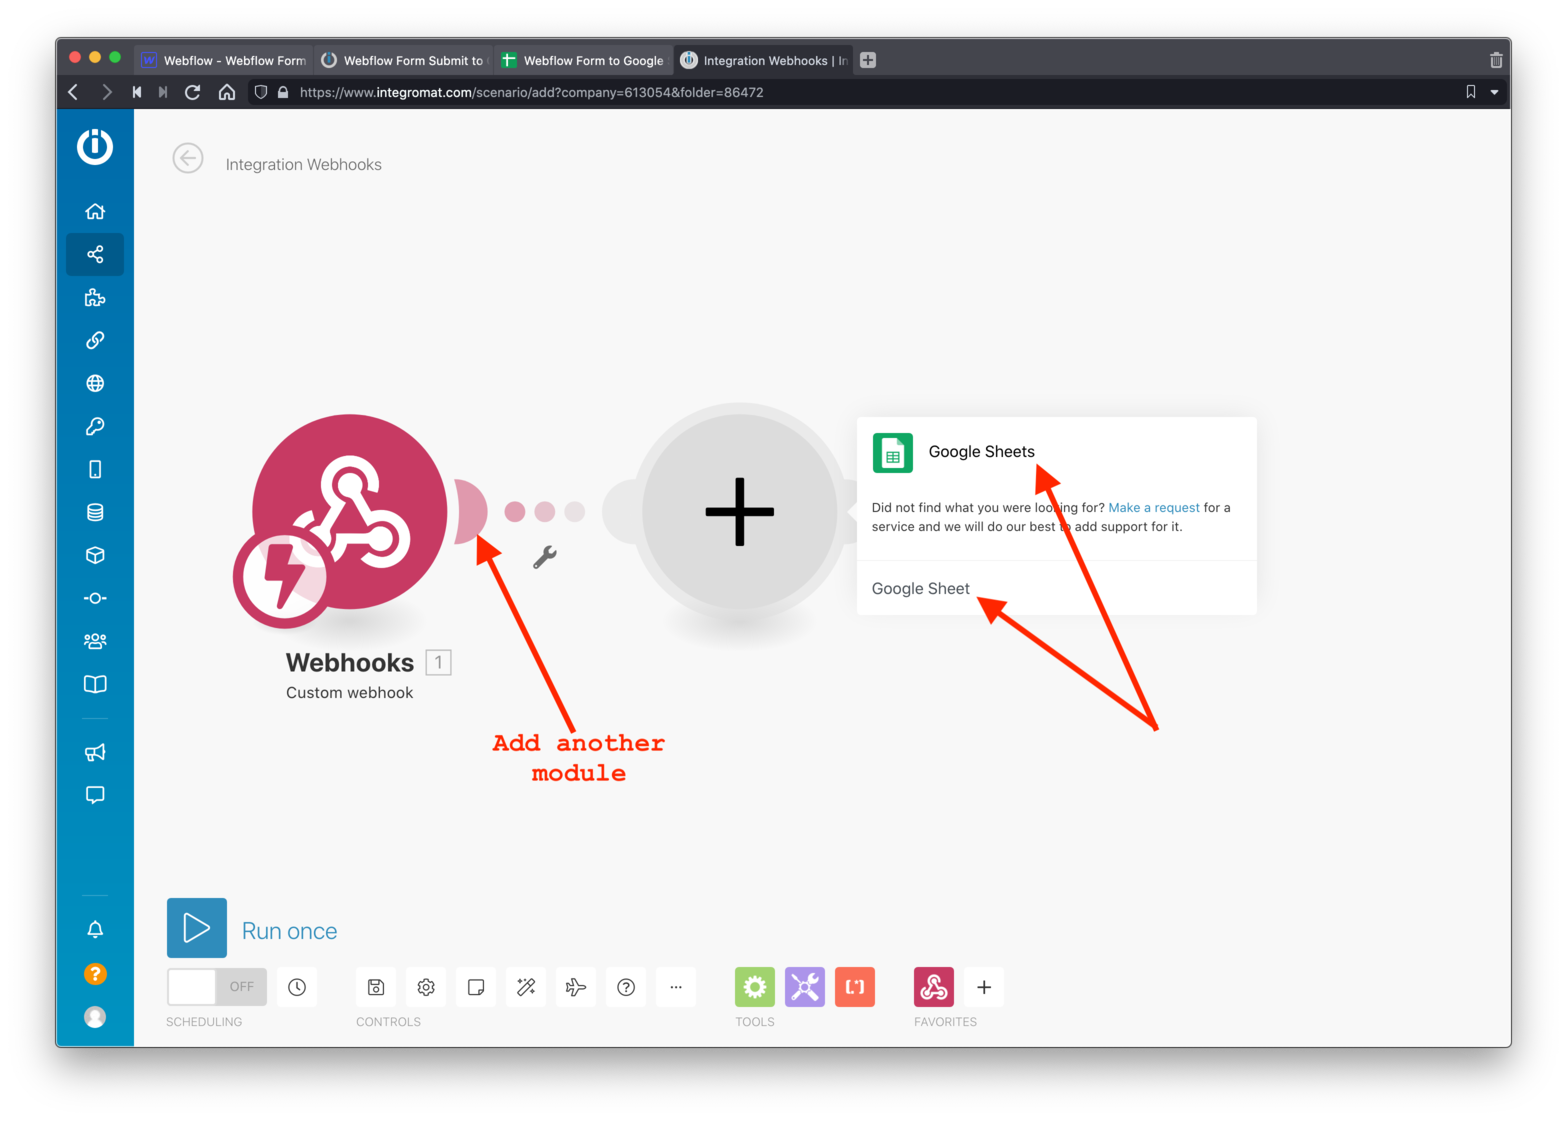
Tap the “Add another module” button as shown in the screenshot above.
Next, search for and select “Google Sheets” for this new Module.
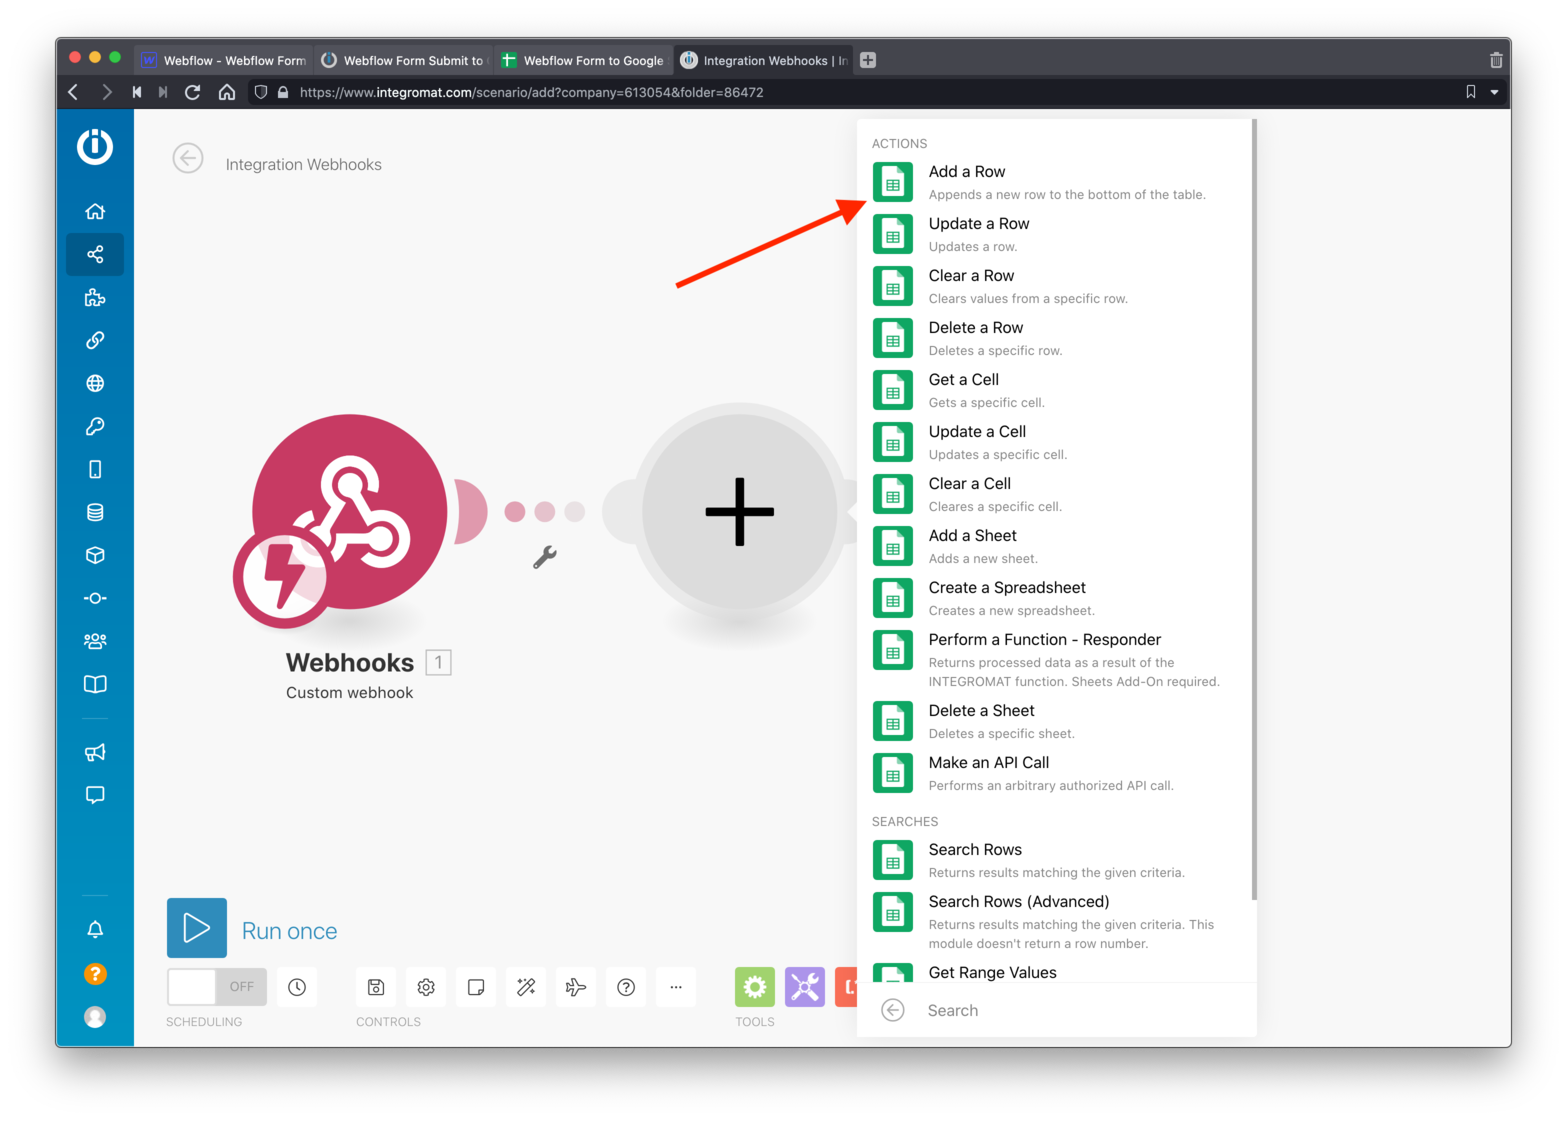
Select the “Add a Row” option.
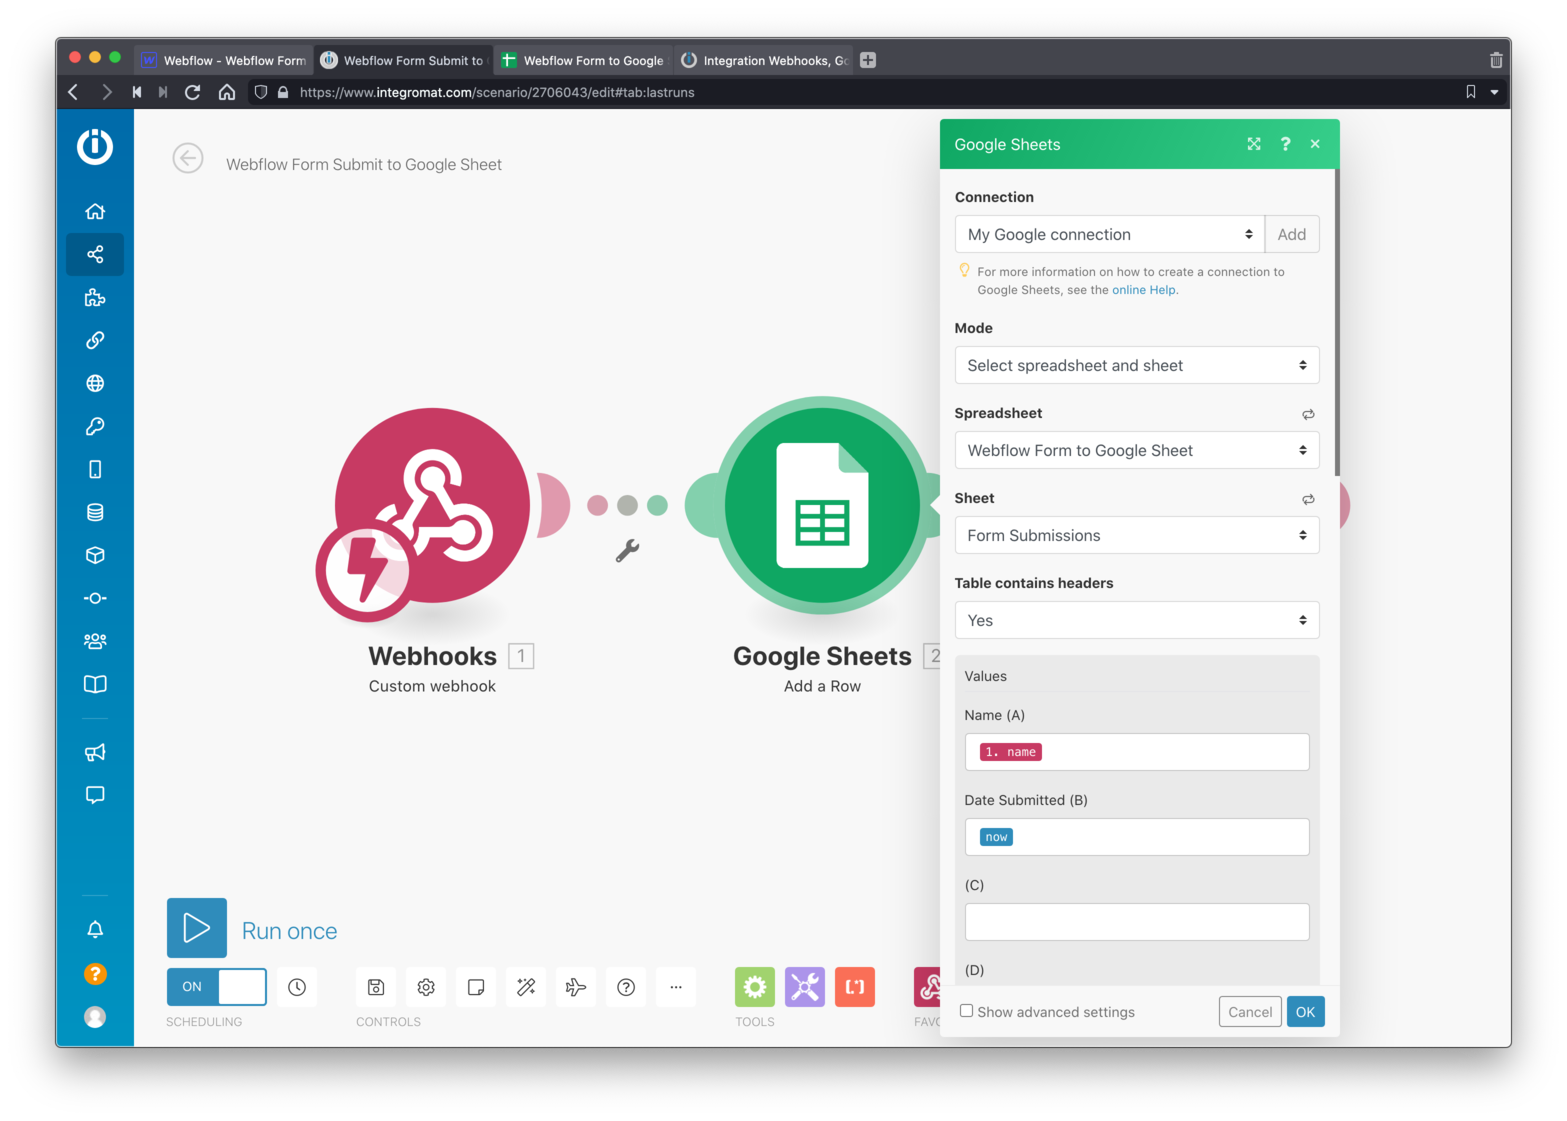
Now you can tap on the “Add” button under the “Connection” section and connect to your Google account. Do this now.
Once done, you can select your Spreadsheet, listed under the “Spreadsheet” section, next the “Sheet”, and then select “Yes” if your table has headers (my example does). This last option will just tell Integromat to skip that header row.
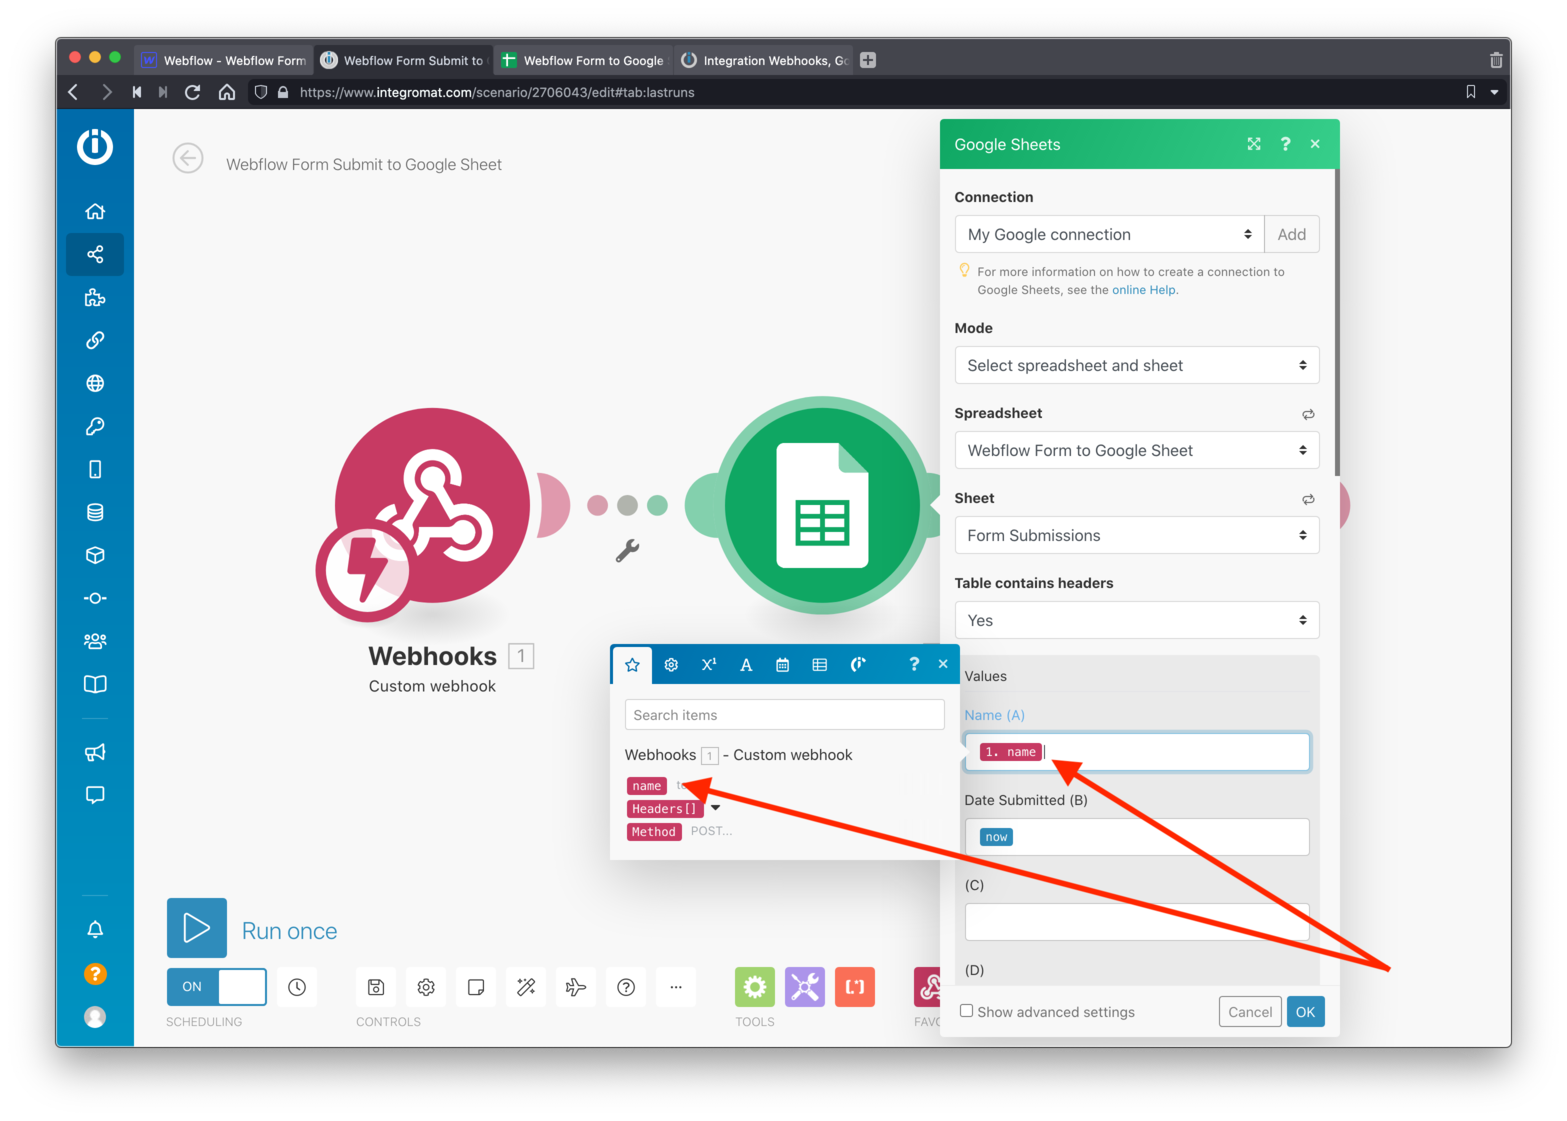
Tap your mouse into the “Name” field, under the “Values” section and select the name submitted in the Webflow Form.
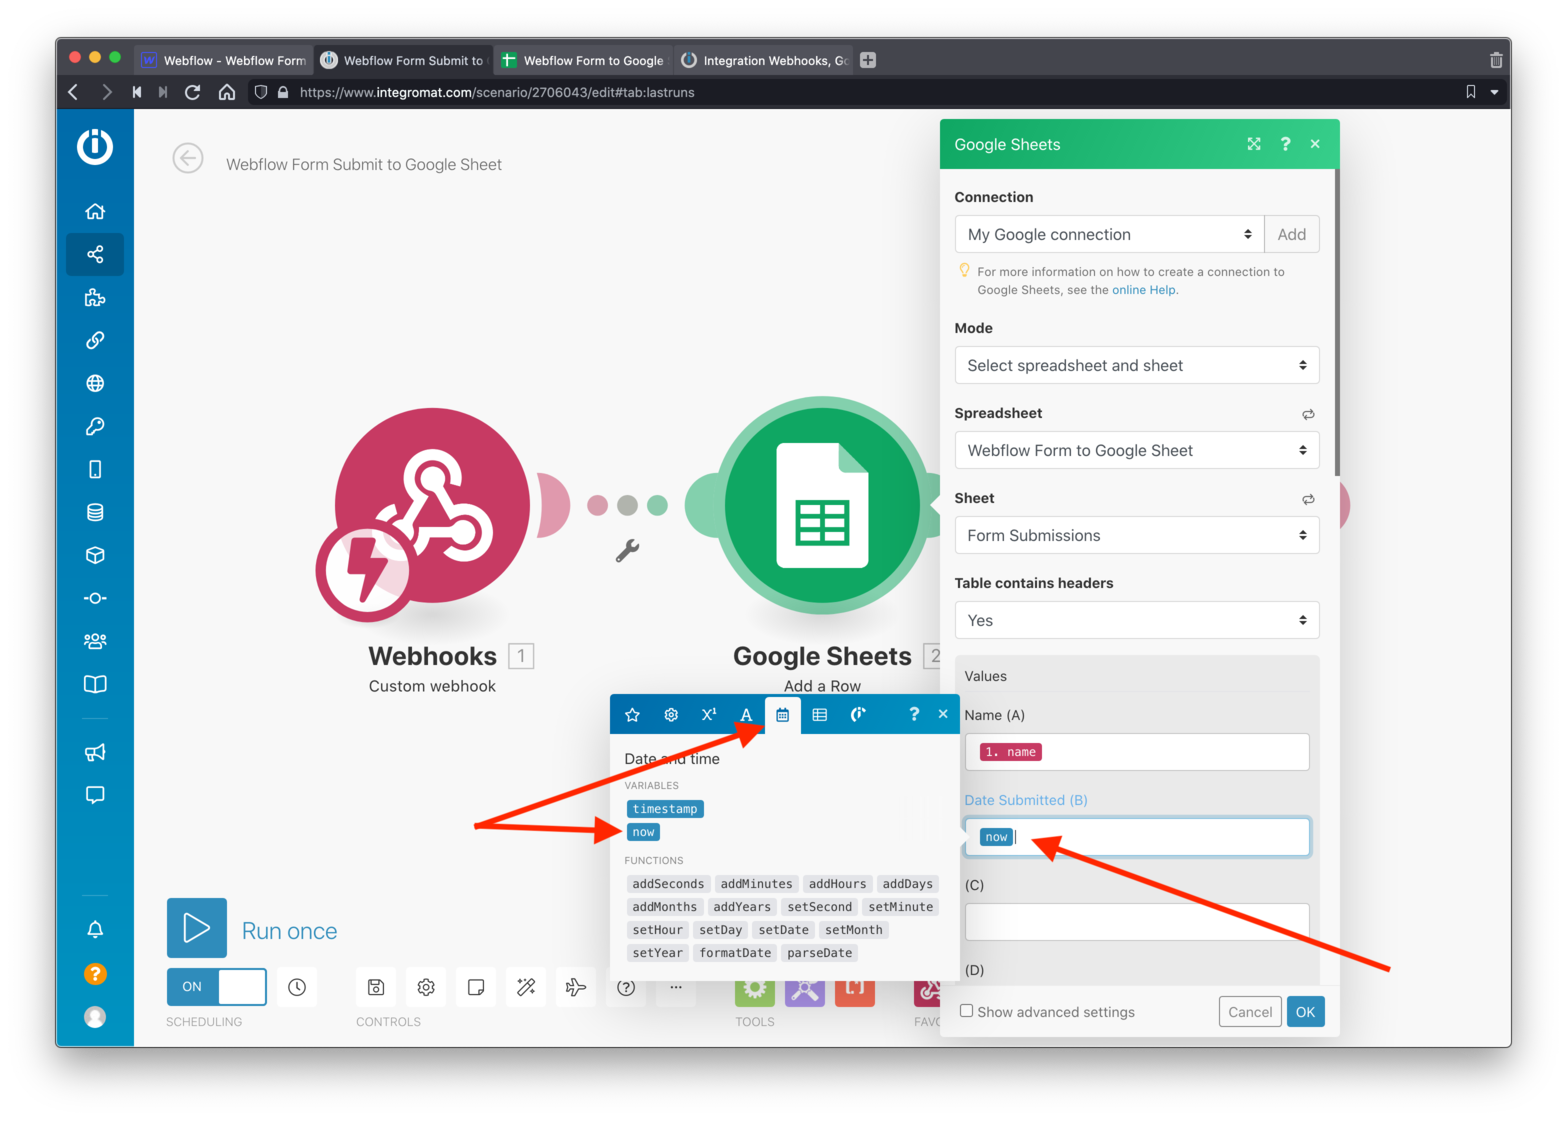
Next, tap your mouse into the “Date Submitted” field, select the “Date and Time” tab in the popup, and choose the “now” option shown in the screenshot above.
Once you’re done, tap the “OK” button for this Modules popup.
Tap “Add another module” off of the Google Sheet Module.
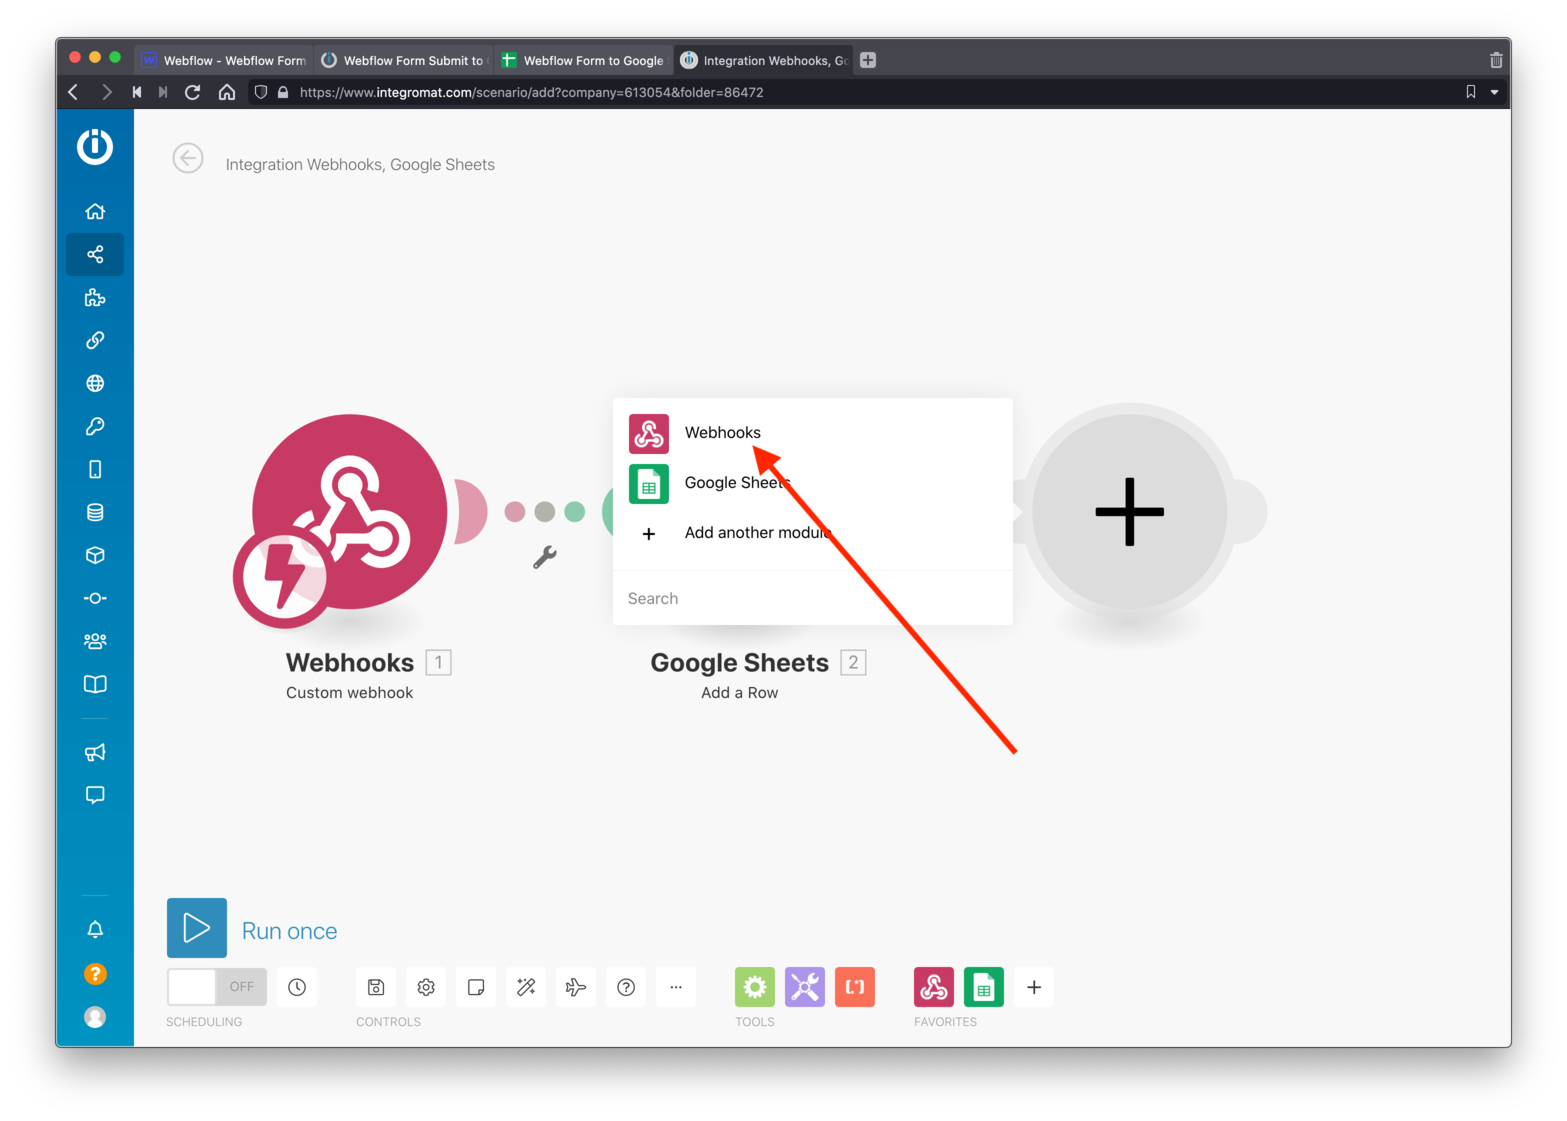
Choose “Webhooks” again.
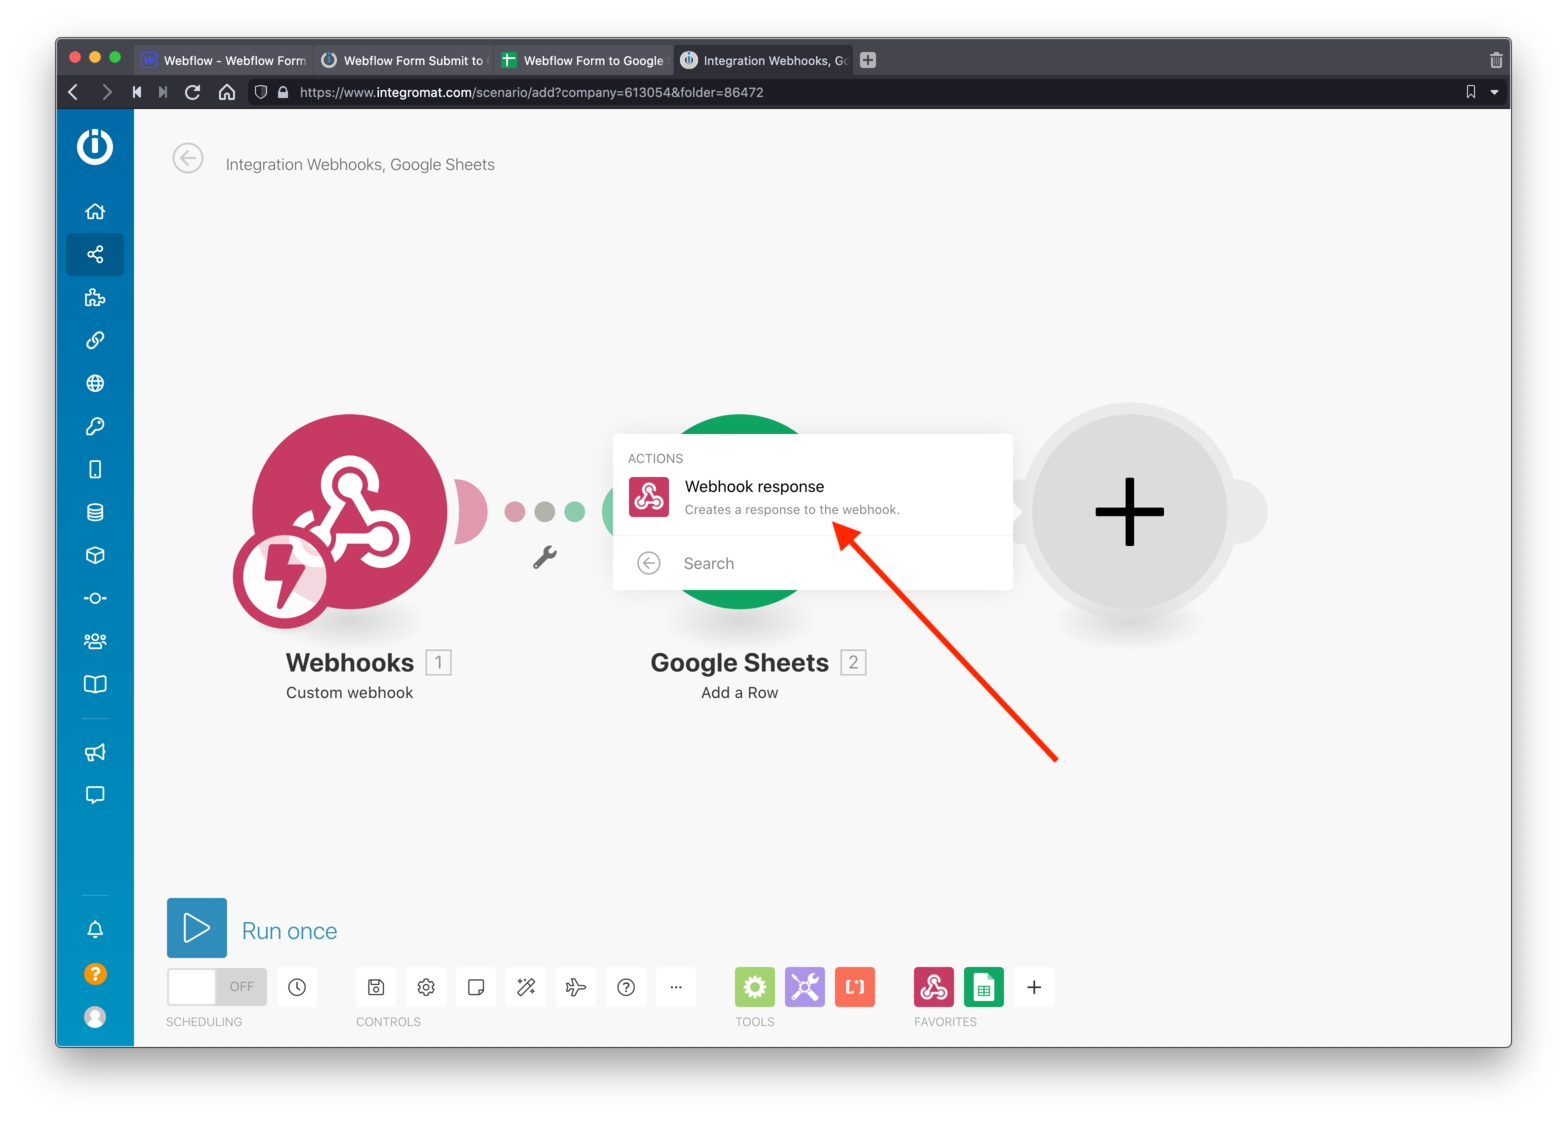
This time you only have the “Webhook response” option, select that.
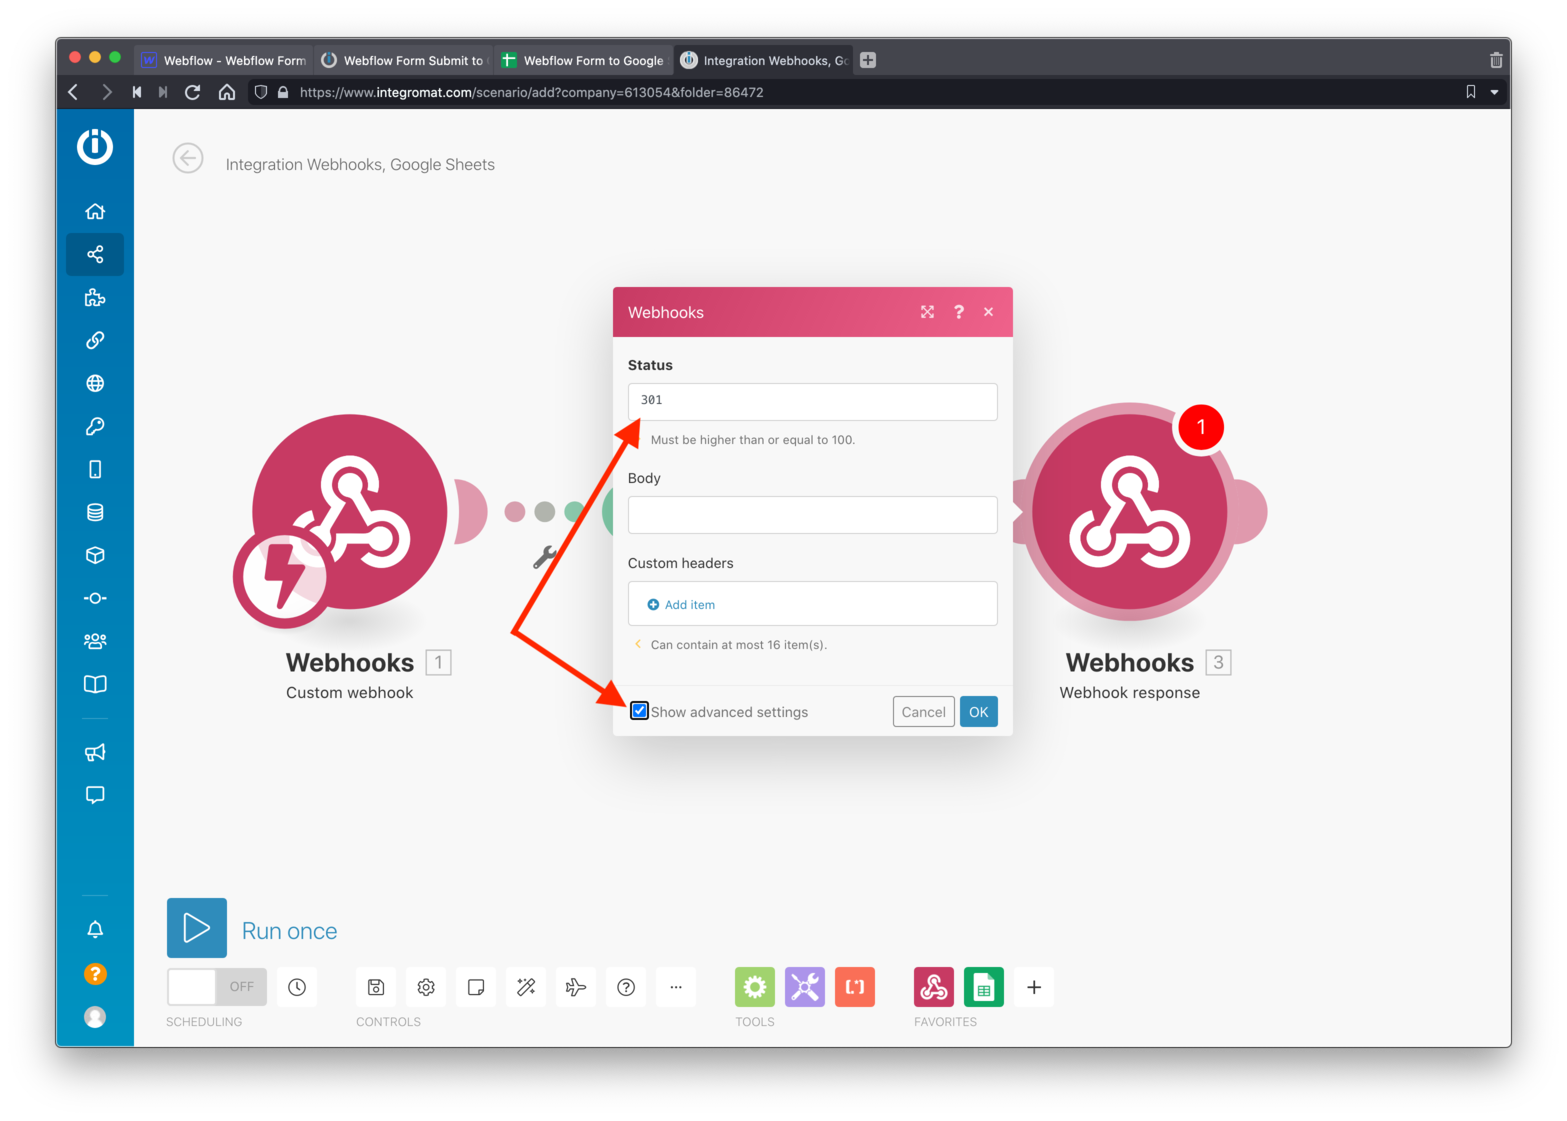
Within the new popup, show above, change the 200 in the “Status” field to a 301.
Why?
These are called “HTTP Status Codes” and they are a response from a web server, back to a browser, and they tell the web browser what to do.
A Status code of 200 in the servers response means everything is okay, the web browser doesn’t need to do anything else.
A Status code of 301 in the servers response tells the web browser that it needs to redirect to a new url. That’s what you want.
Next…make sure to check the “Show advanced settings” checkbox at the bottom of the popup.
You’ll now see a “Custom headers” section.
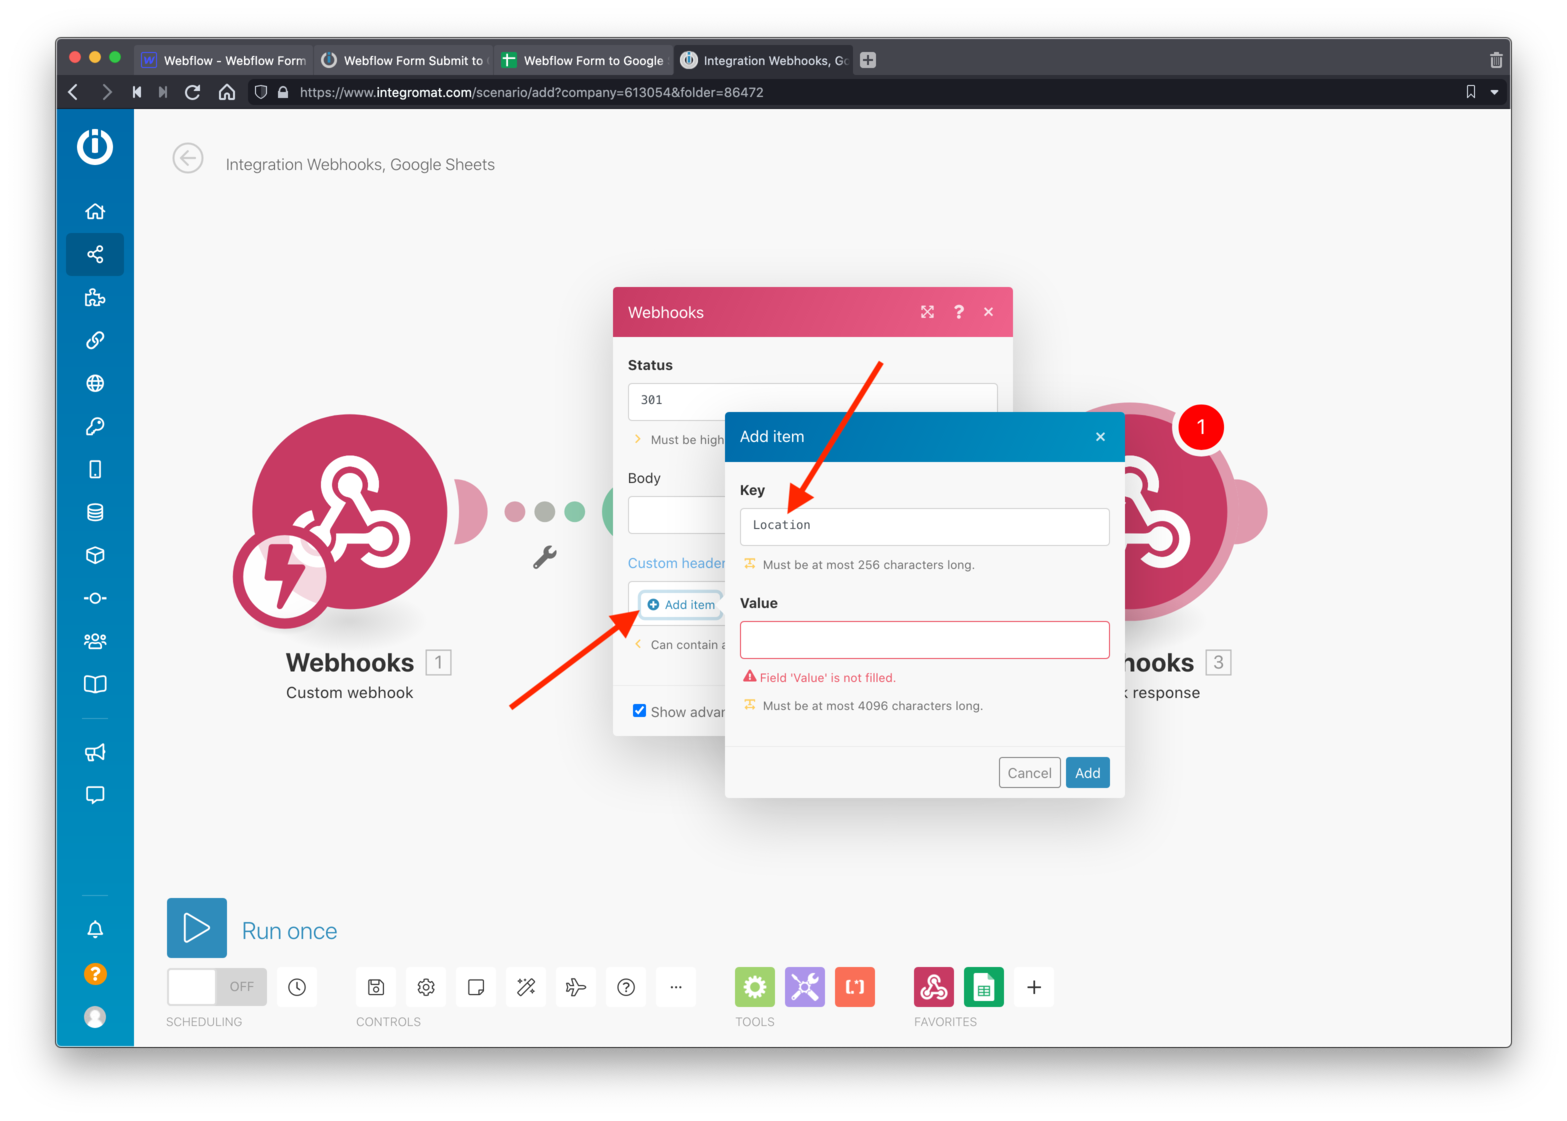
Tap on the “Add item” link and that’ll open up a new popup.
Under the Key field, add the word “Location” (spelled with a capital “L”).
These header settings will tell the web browser where to redirect the user. But to complete this, you need to add the url that the web browser should redirect to, and that’ll be added in the “Value” field.
To get that, go back to the Webflow Designer and…
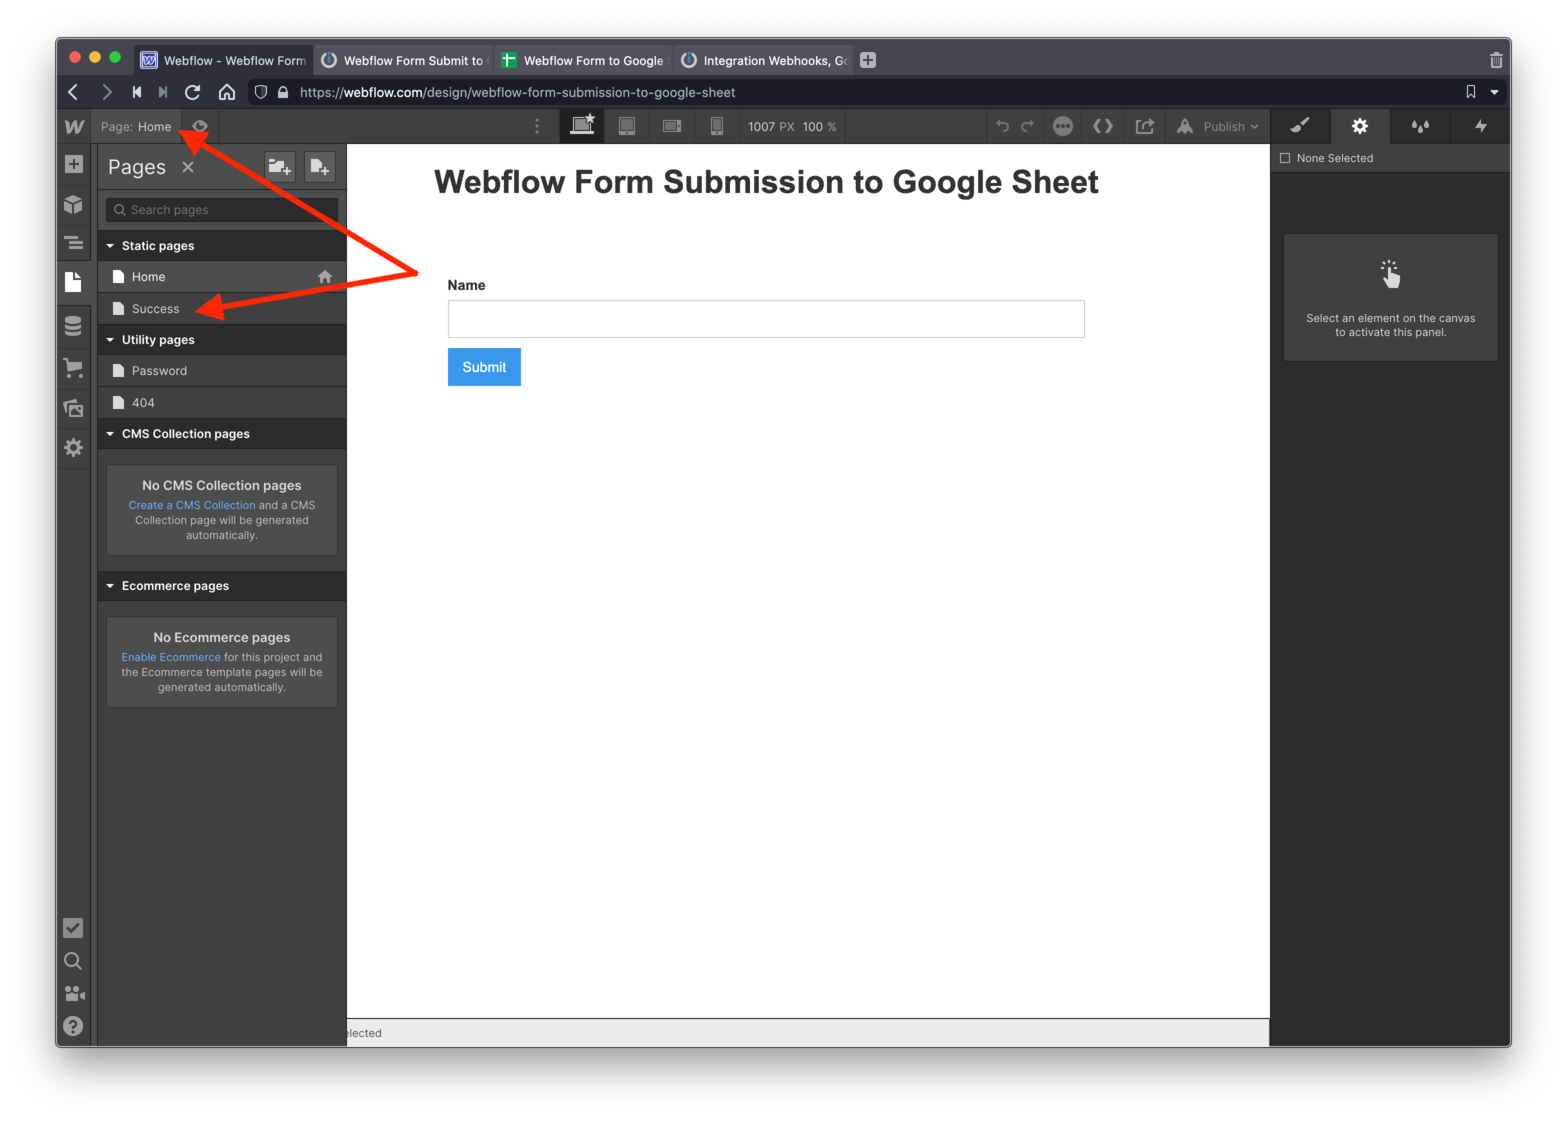
Tap on the “Home” page dropdown shown in the screenshot above.
Then select the “Success” page. Remember, this is the page you want to the user to be redirected to after they submit your form.
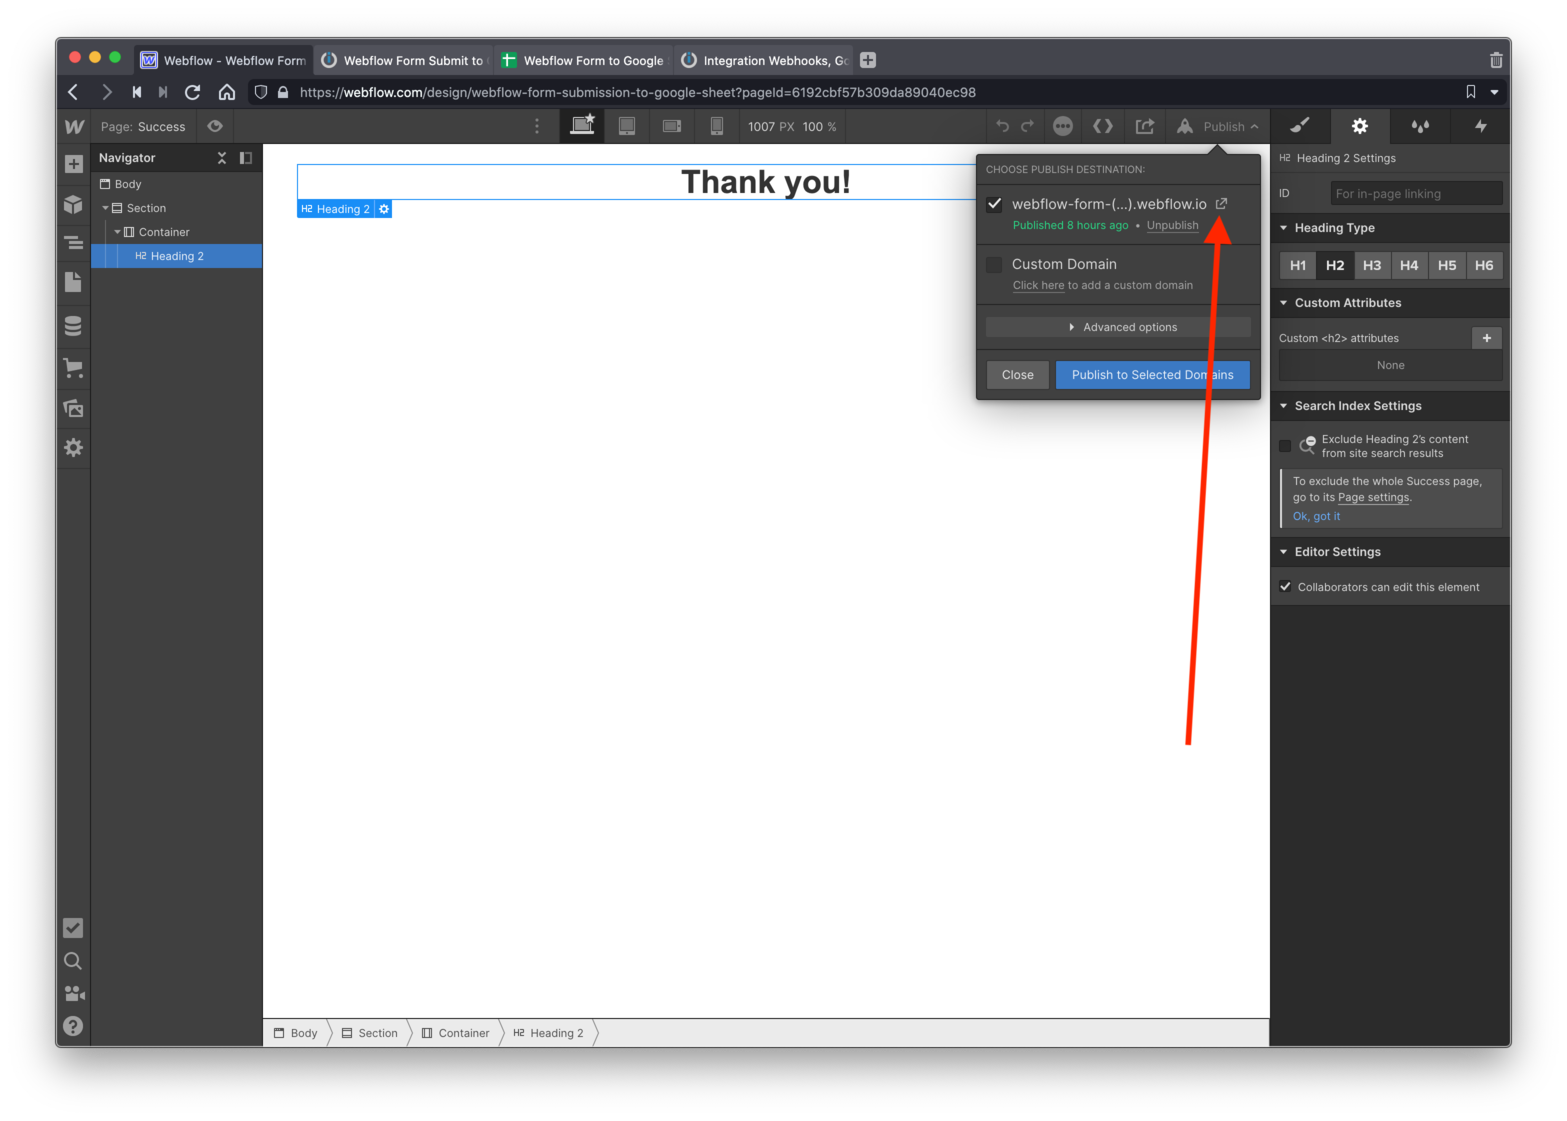
Tap the “Publish” button for the success page and open up the live success page.
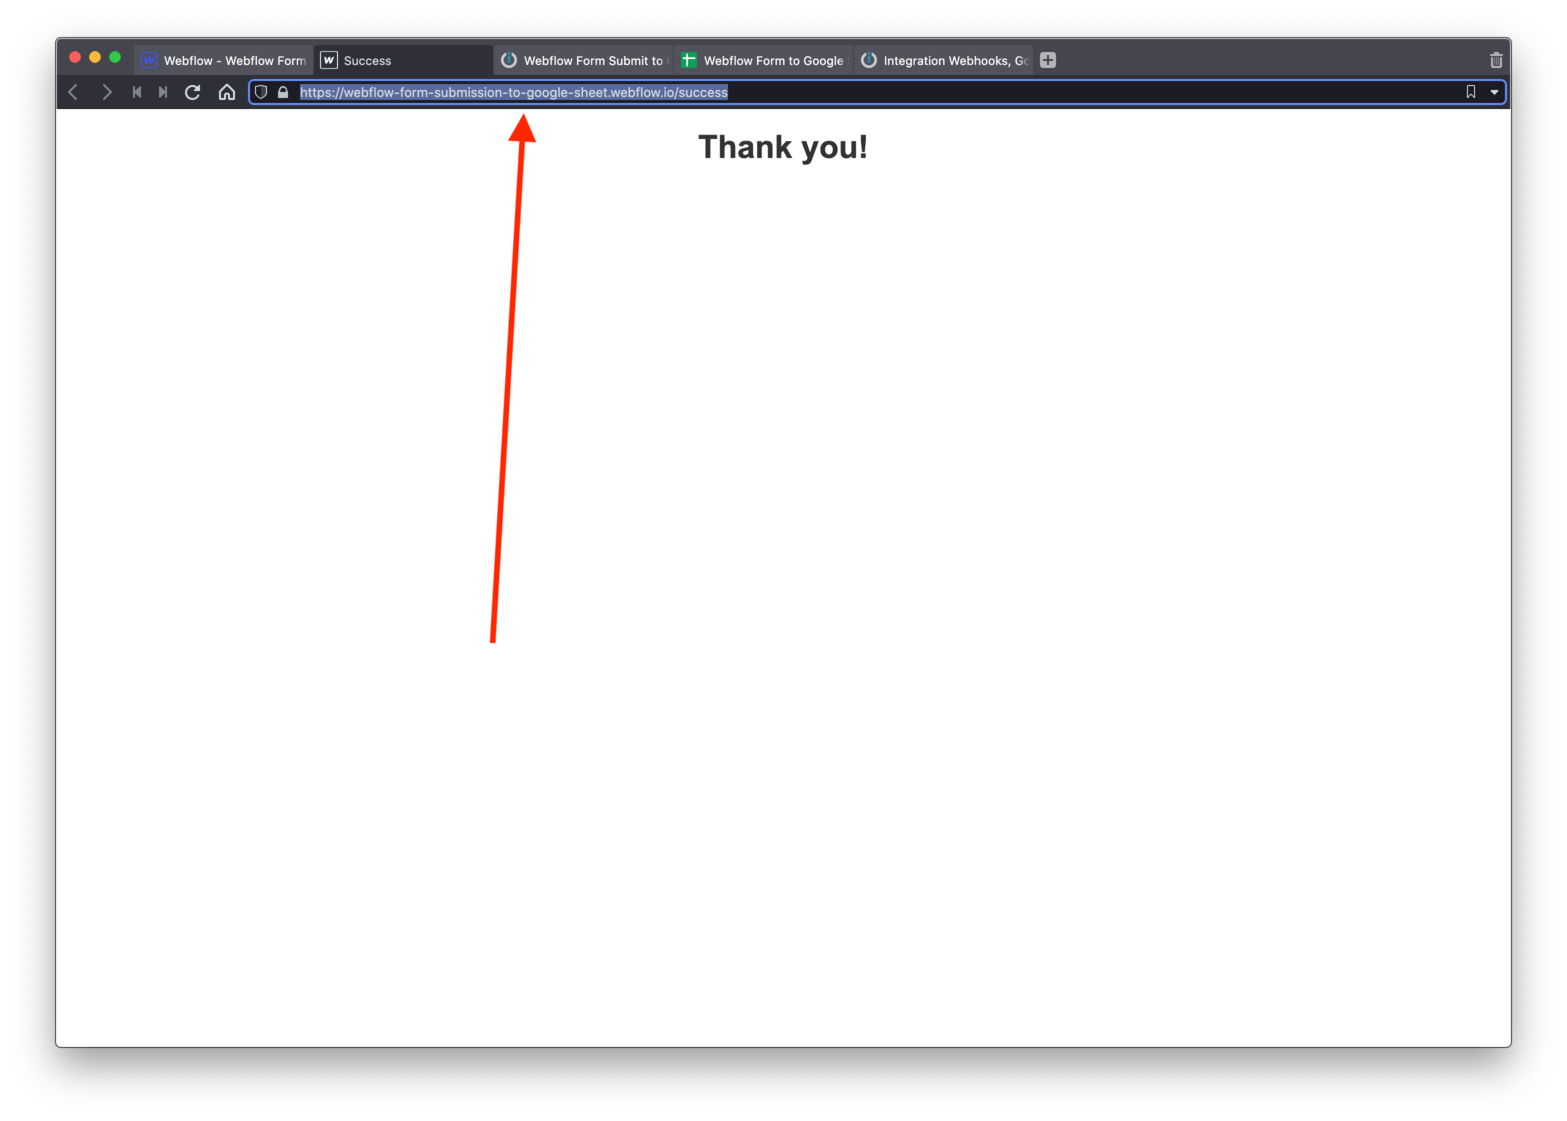
Copy the URL for this page.
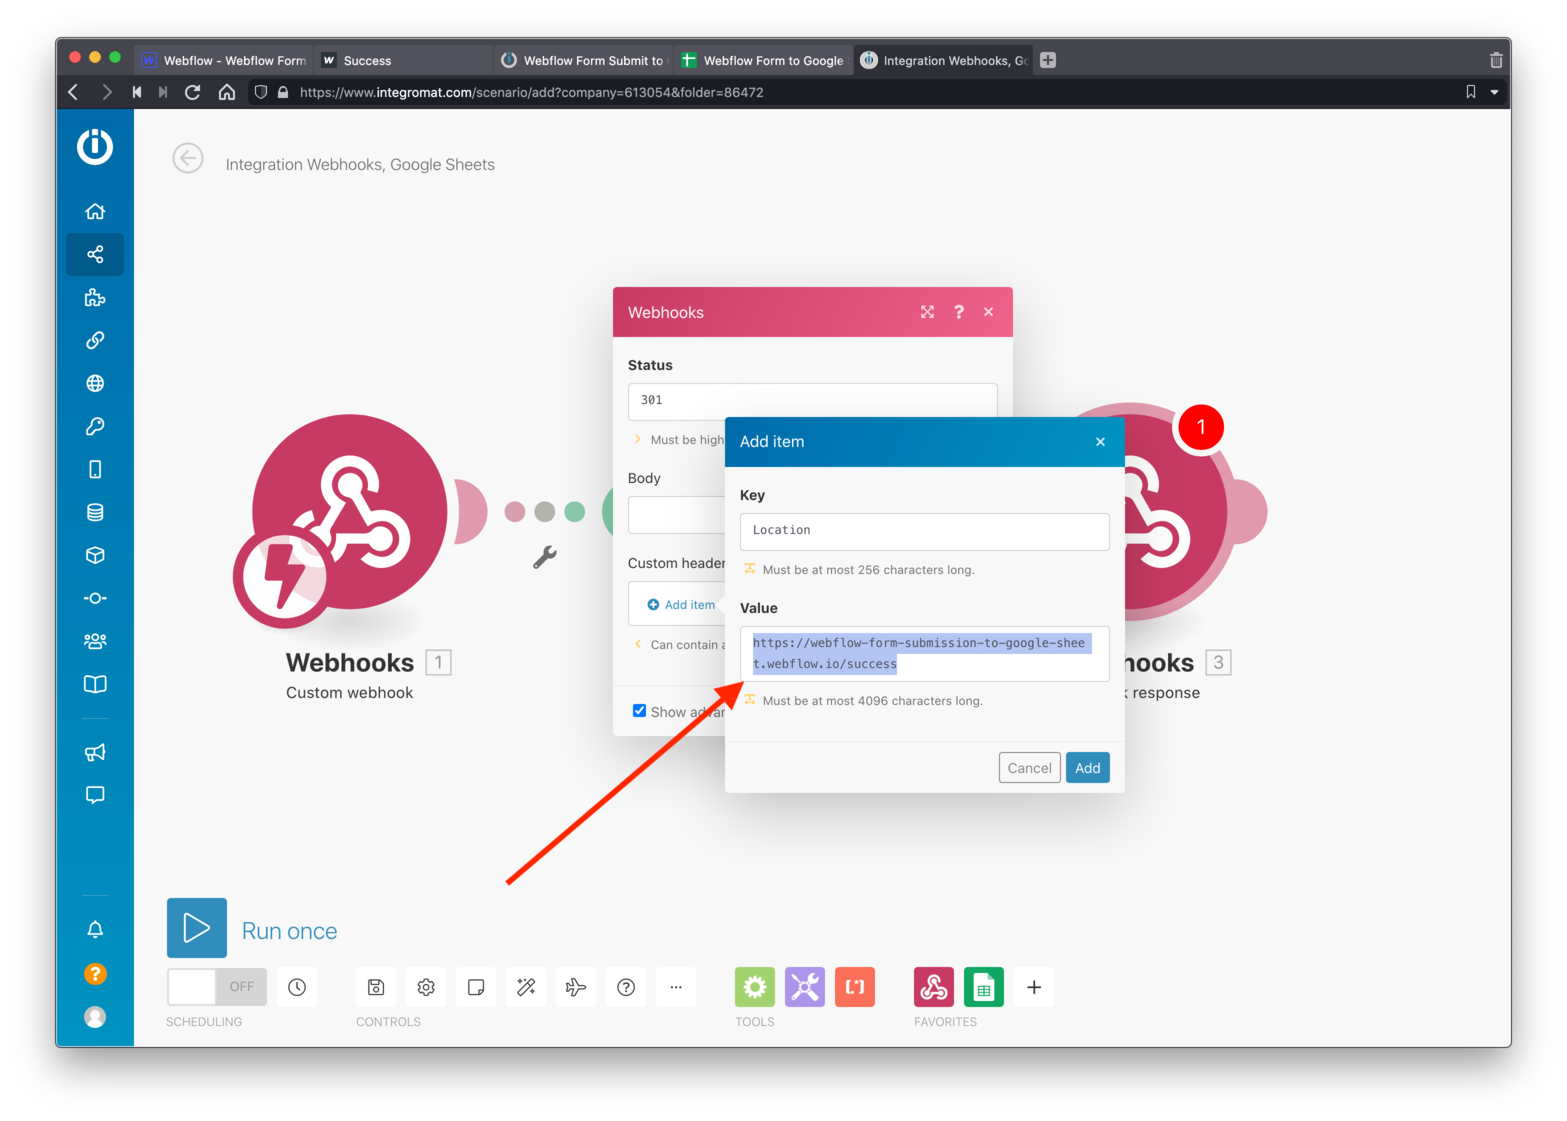
Paste that url into the “Value” field back on your Integromat Module.
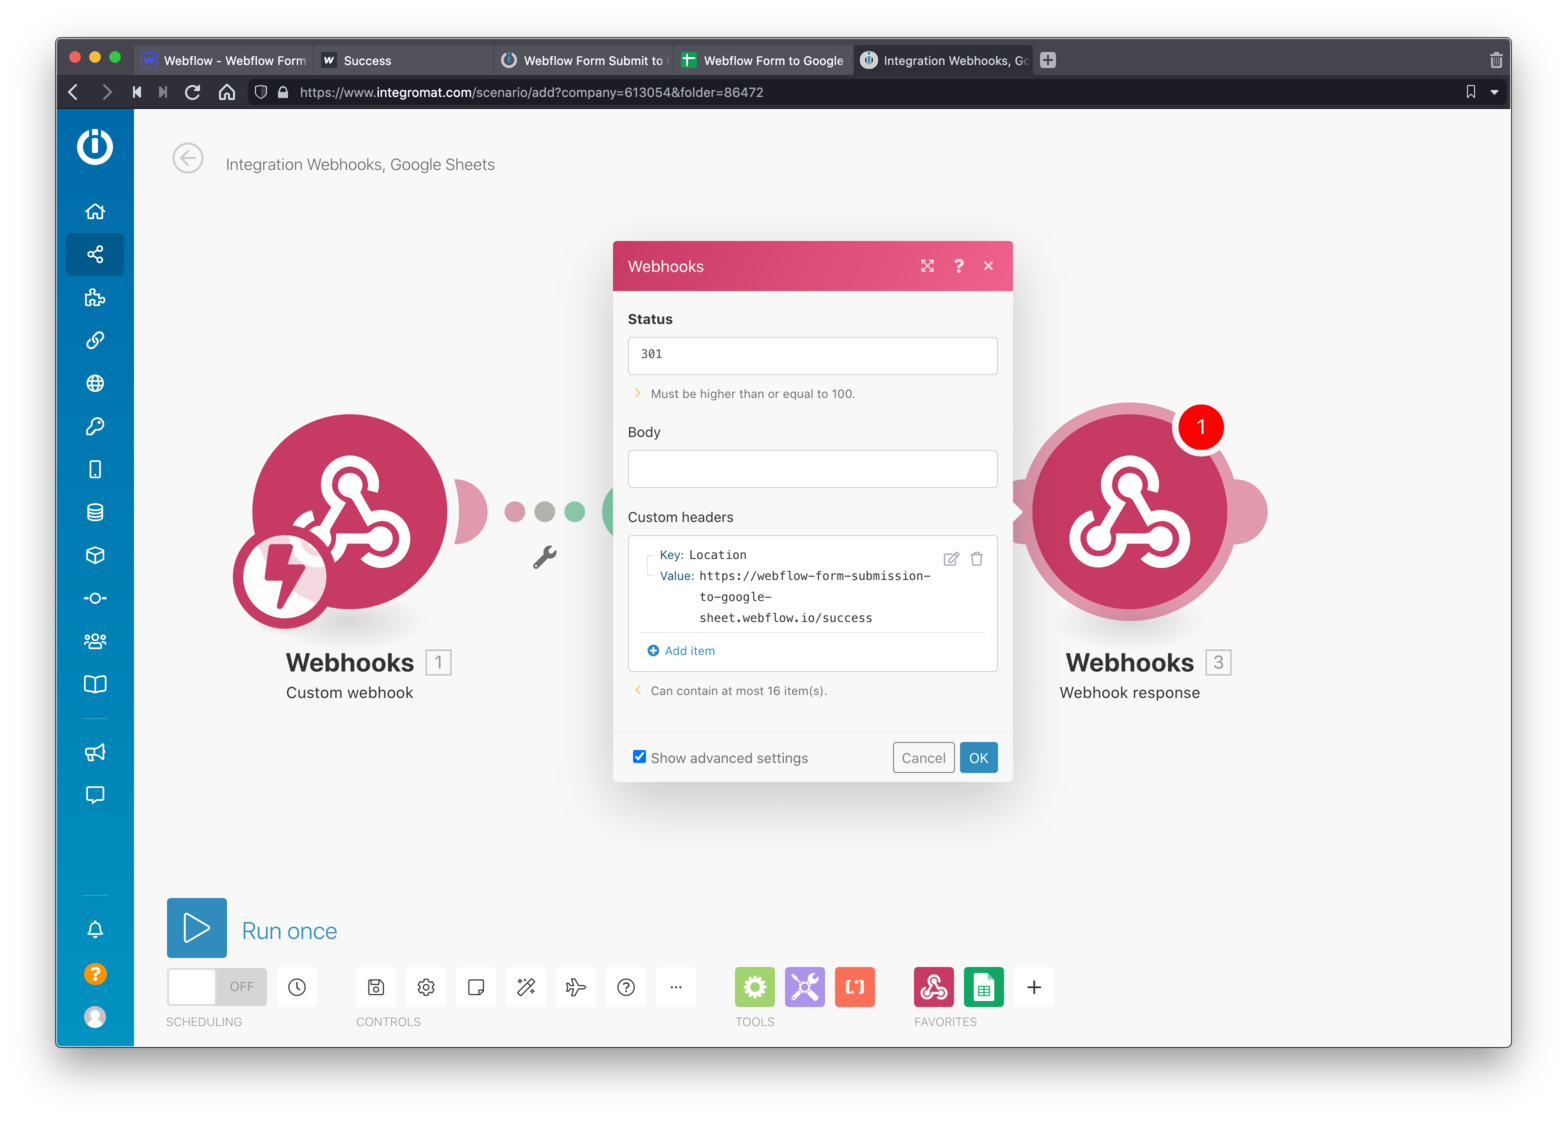
Tap the “Add” button and your setup should look like the above screenshot.
Tap the “OK” button and you’re done!
Give it a try!
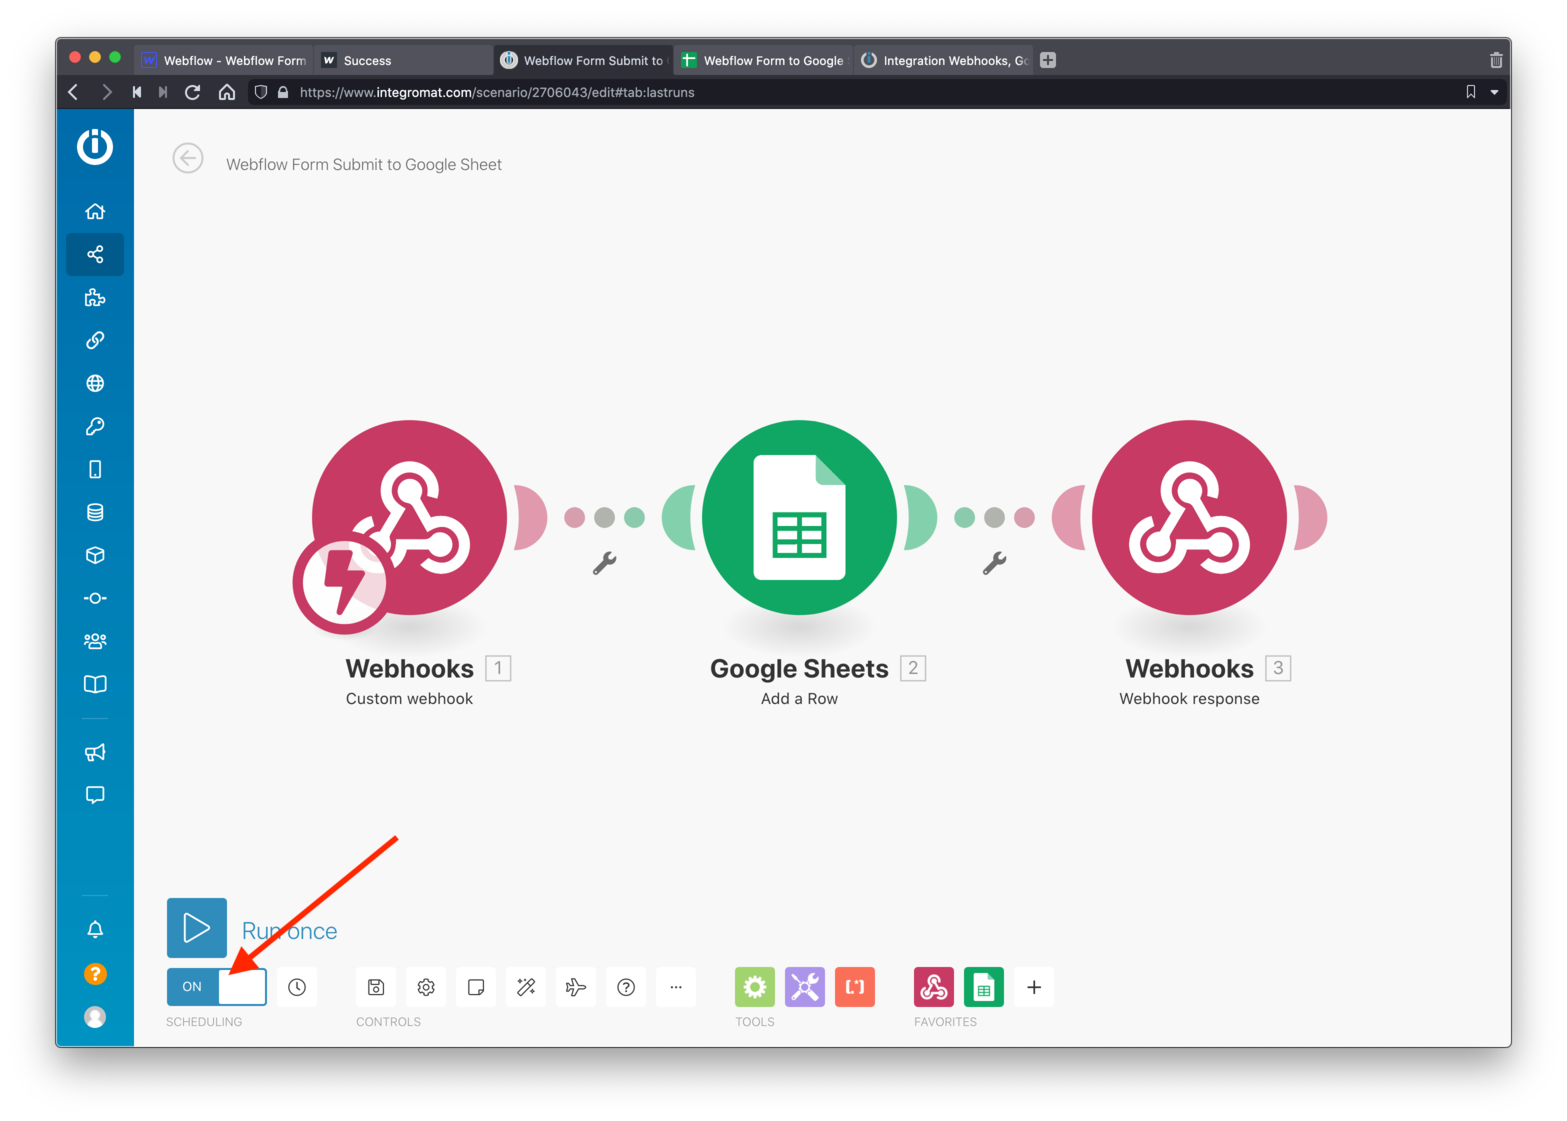
Turn on your new Integromat Scenario.
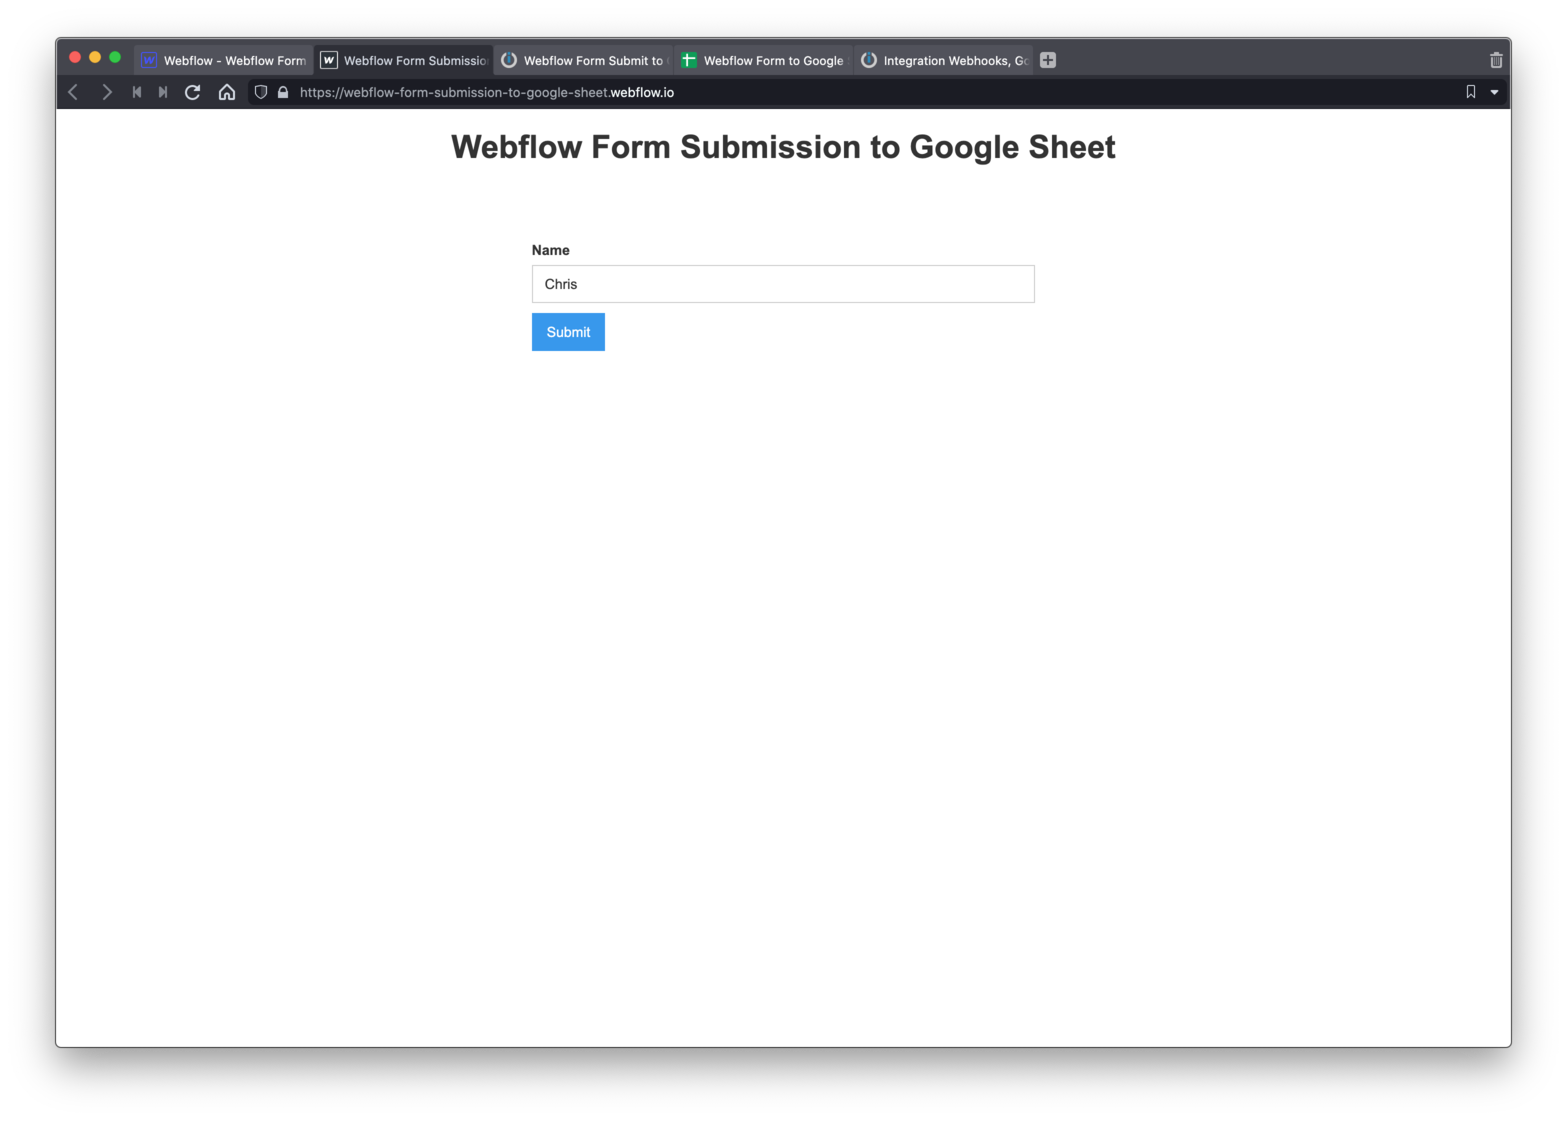
Open your live sites homepage with the form on it. Fill out the form and tap submit.

You should get your success page.
Go back to your Google Sheet and find your new form submission 🤯
Make Life Easy, Grab the Download...
- ⚙️ This Integromat Scenario ready to import into your own project.
- 🔗 This read-only Webflow project link, see how I set it all up.
- 🧩 This shared Google Sheet ready for you to copy.