If you don’t already have access to the Beta, go fill out this form to get access. Once you do, Logic is available on EVERY project within your Webflow Dashboard.
It’s finally here, and it’s awesome 😍
…some features that I’m sure you’ll want now, you’ll have to wait for.
I know it’s not what you want to hear after waiting for so long, but it’s reality.
I’ve been part of the Beta program for a bit now, and I’ve seem them first-hand take our feedback and add the features we’ve asked for 🙌
So a little patience will go a long way with this new feature. More is coming!
With that said…
This tutorial will walk through one of the two current “Triggers”, form submissions.
Form Submissions
That’s right!
You’ve always needed to do more with your native Webflow form submissions but the only way to do this is by glueing it together with Make (Integromat) or Zapier.
No more!
Now…
You can setup Logic to trigger on your native Webflow form submissions and do something with it.
In this example, you’ll create a new CMS item.
The old way:

The new way:

Life is good 😃
Let’s build Logic Form Submissions
Opening up a new project and you’ll find the new Logic item.
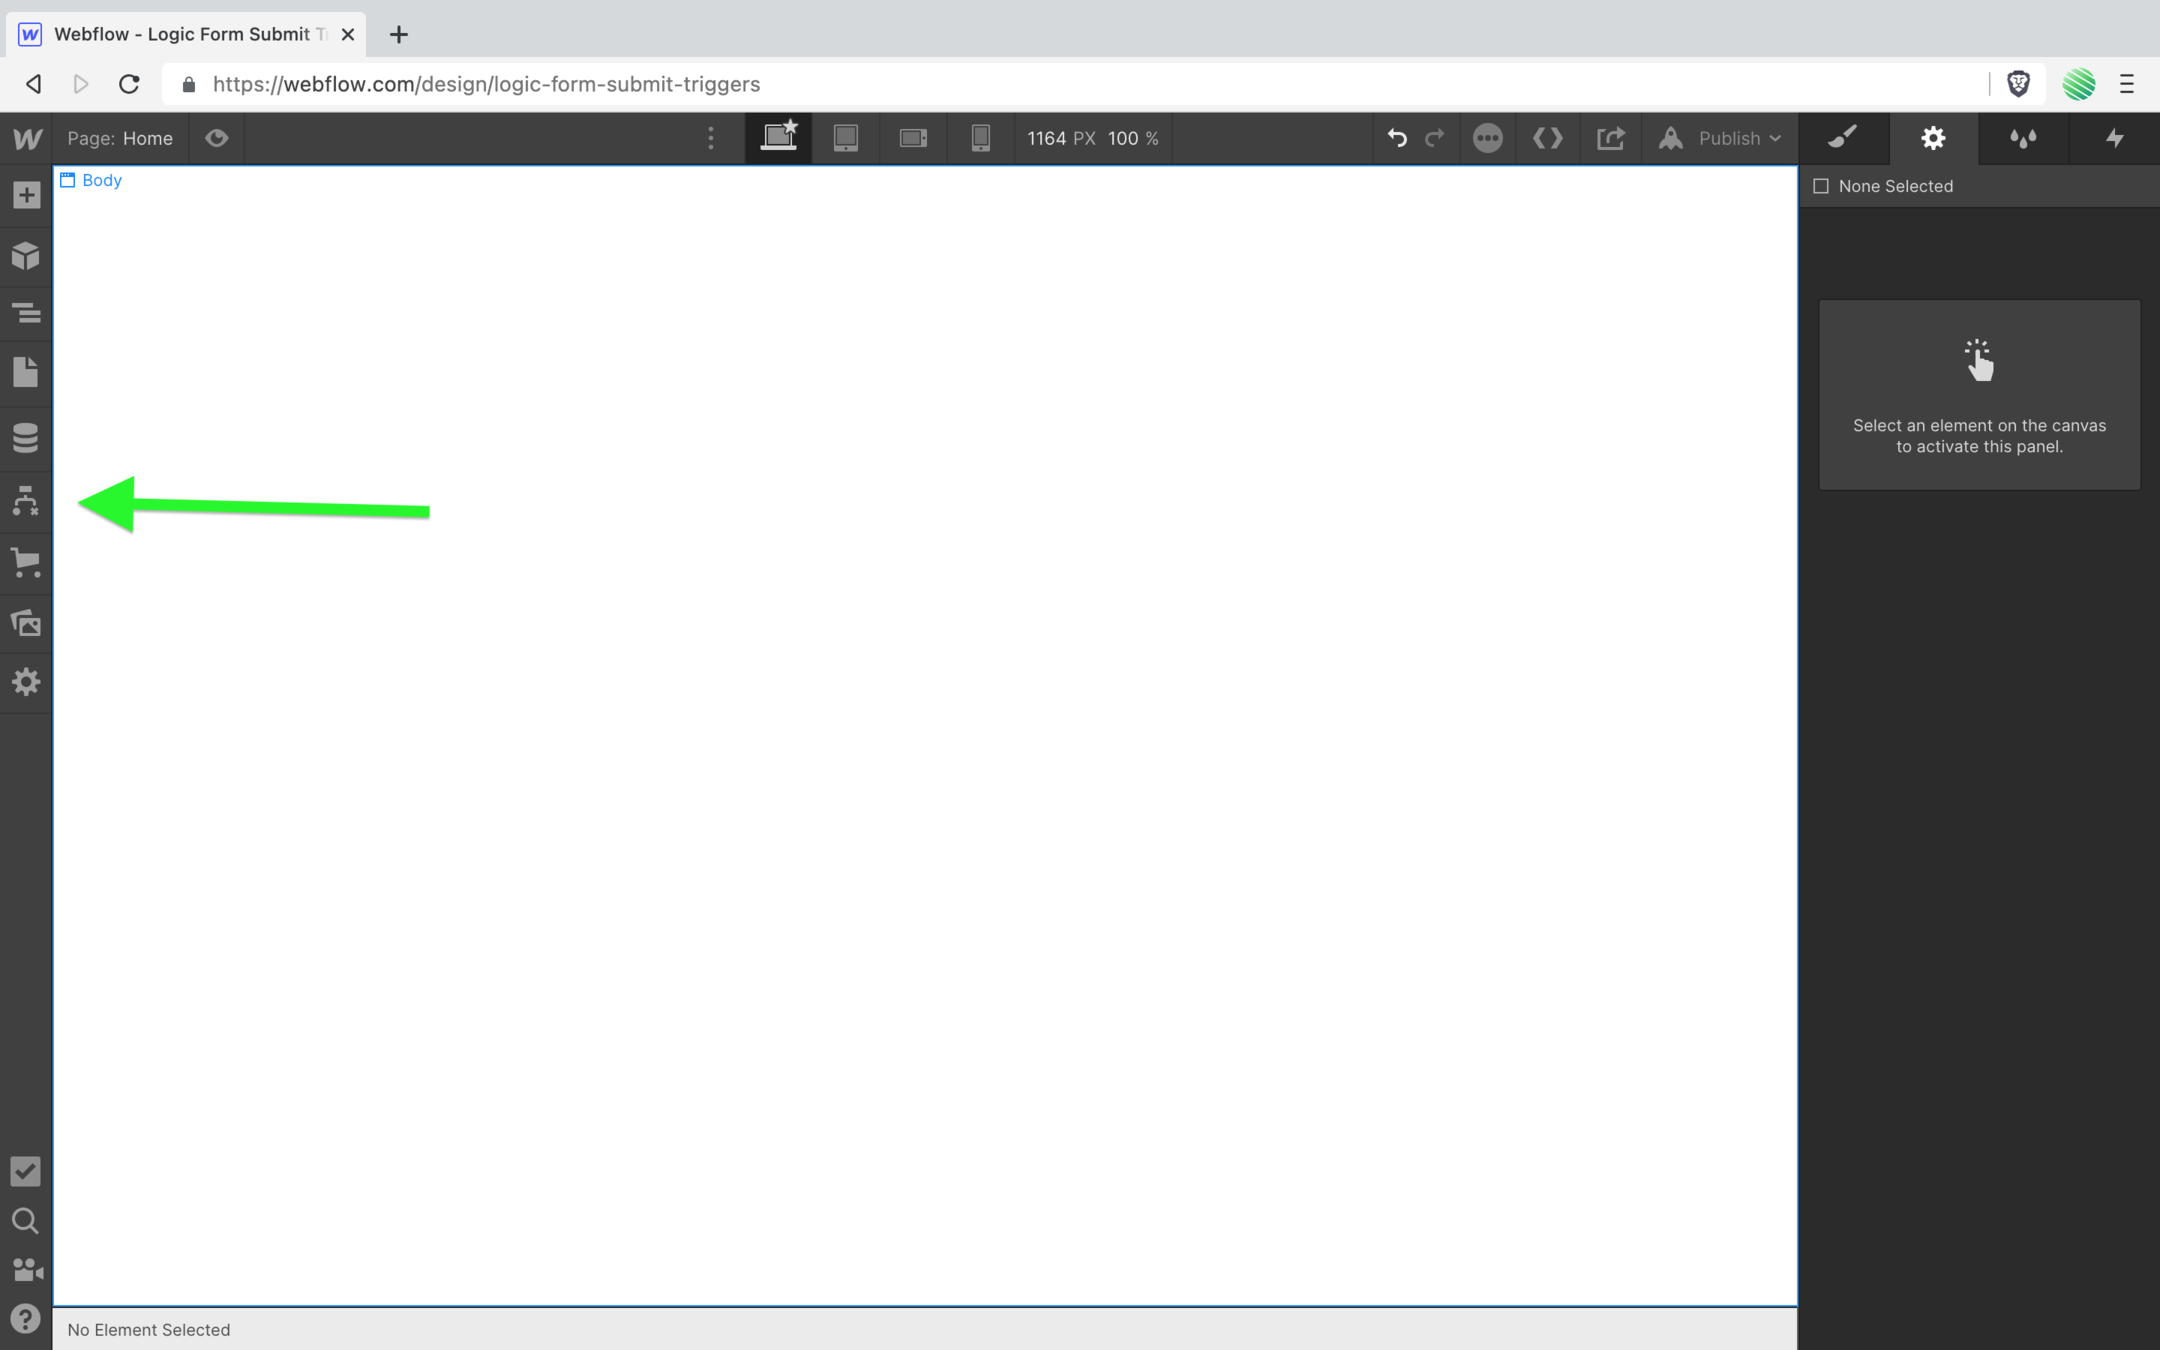
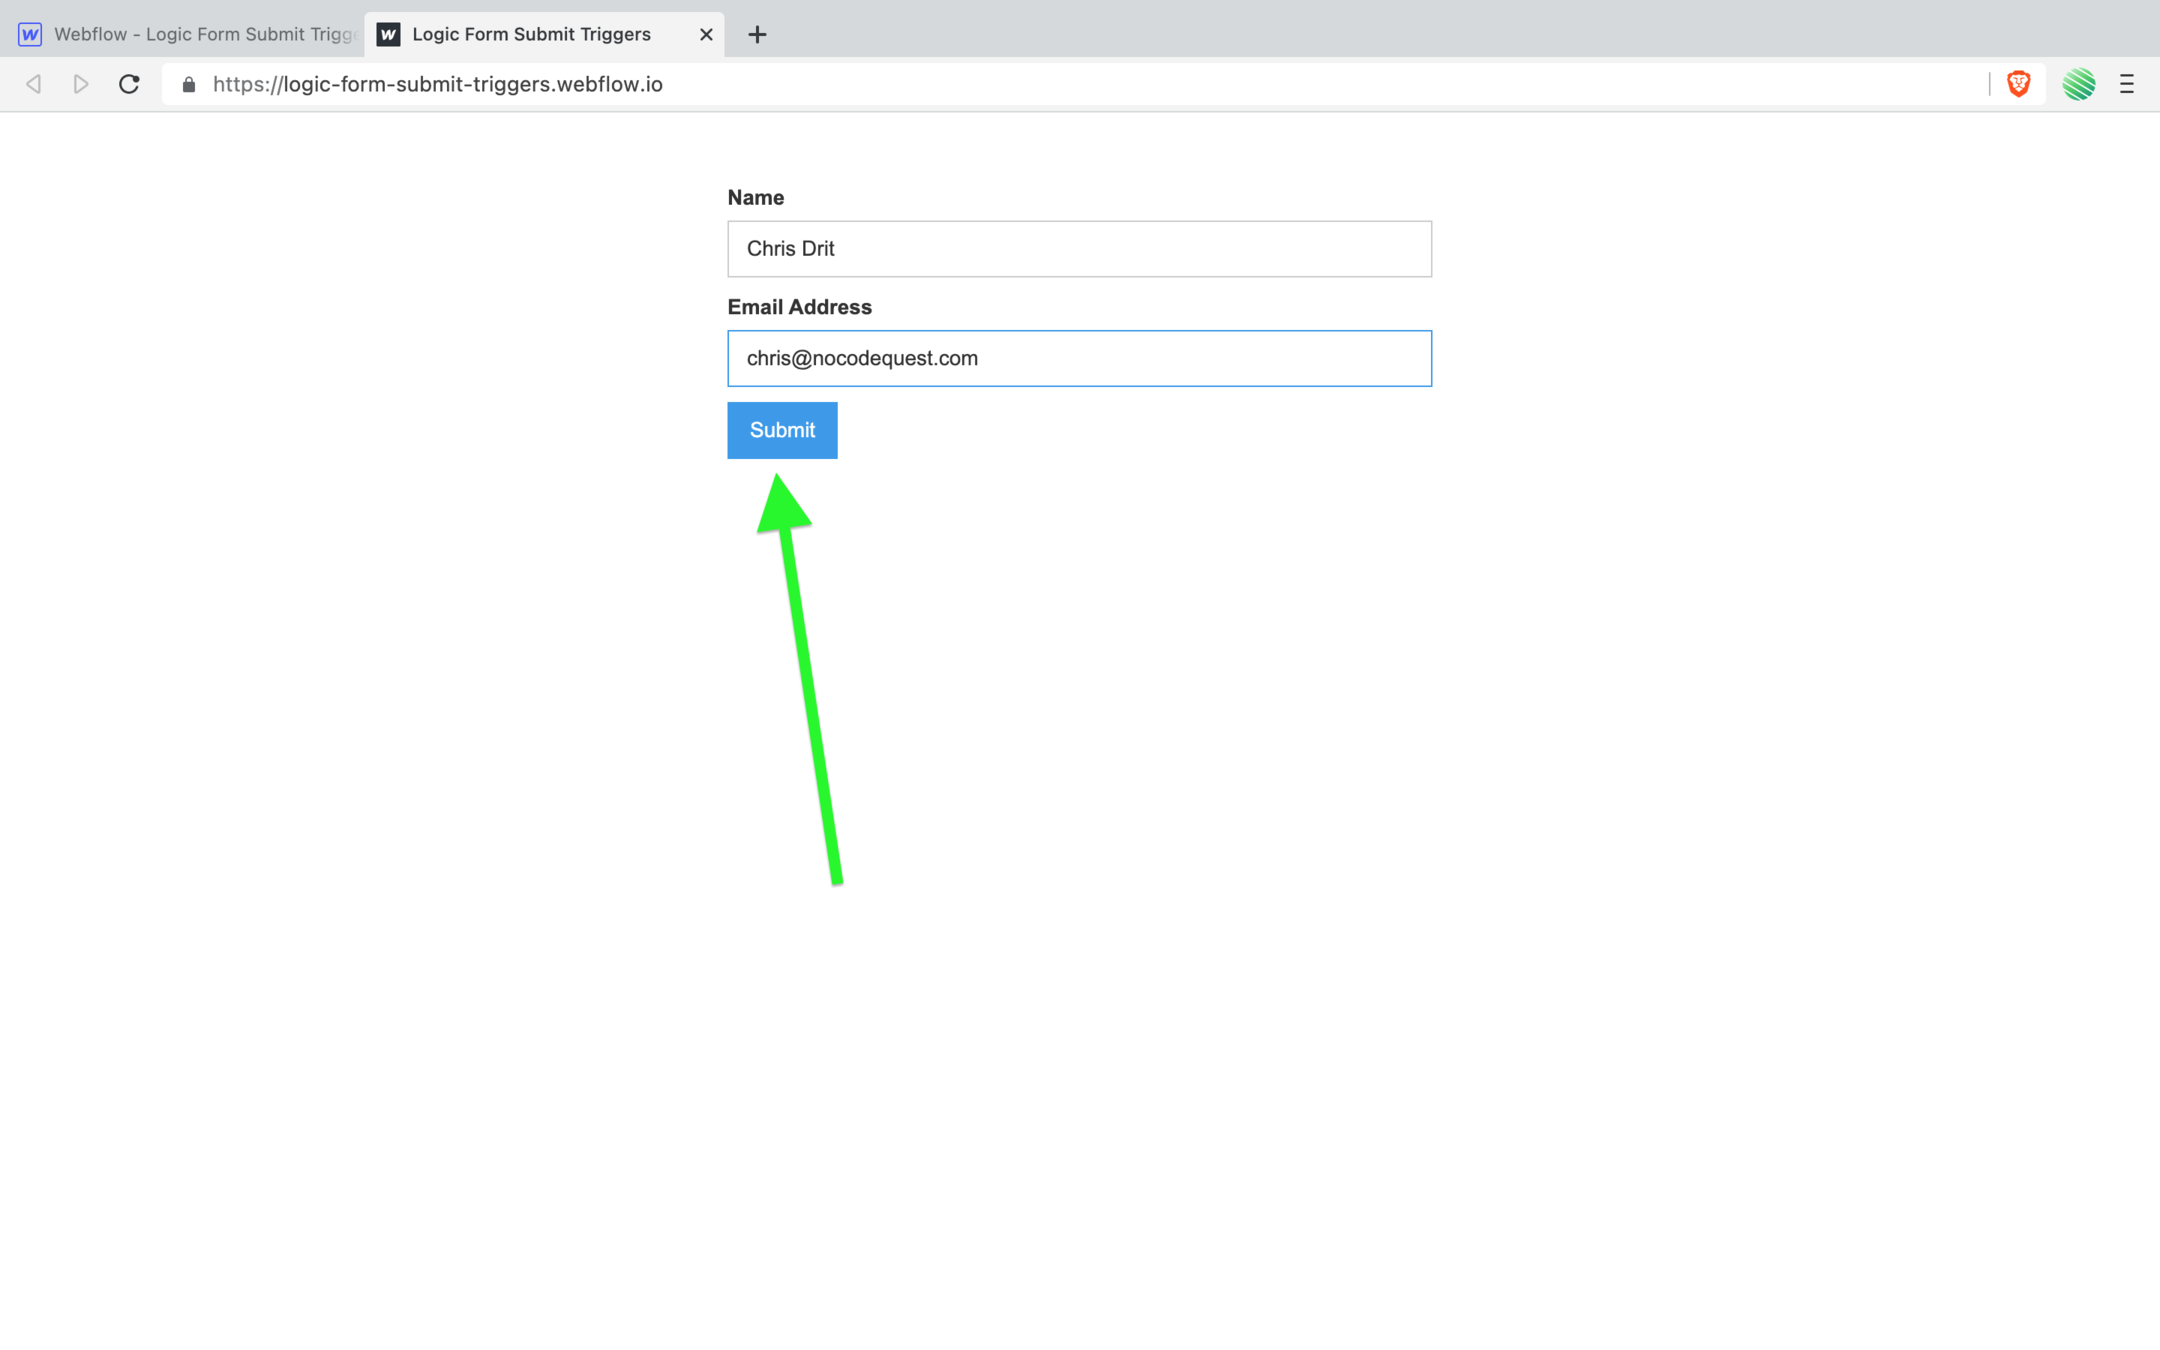
Before you get started building out a Logic flow, let’s create our form that’ll be trigger this new flow.
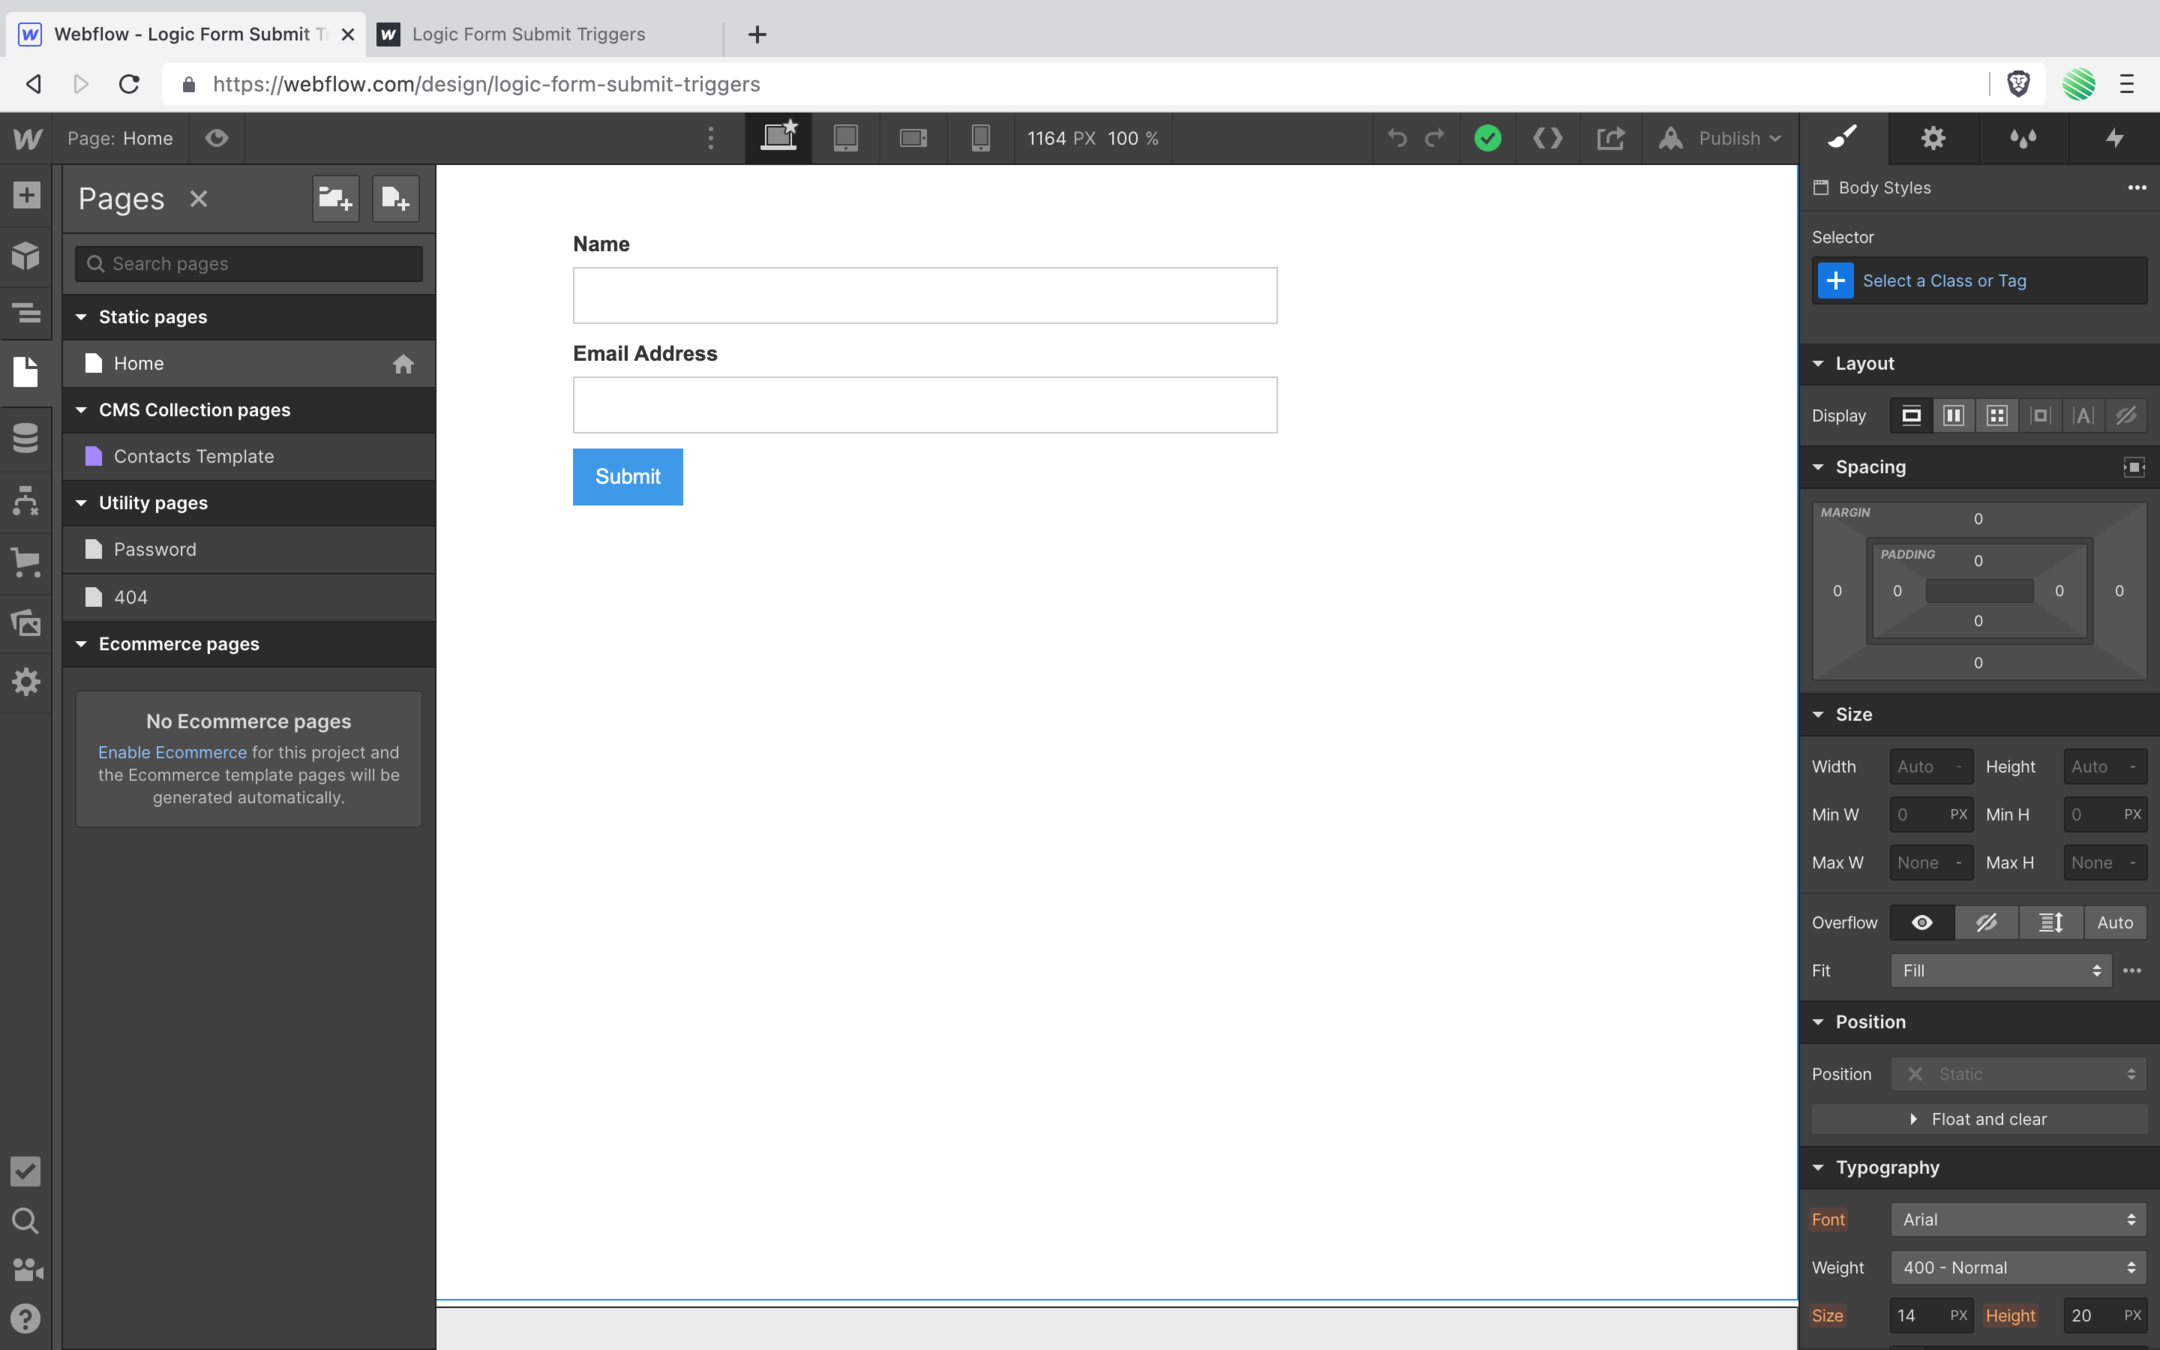
Create a generic form, nothing special here.
The only to note is that I changed the form name from “Email Form” to “Contacts Form” as you’ll be adding new contacts to your Webflow CMS 👍
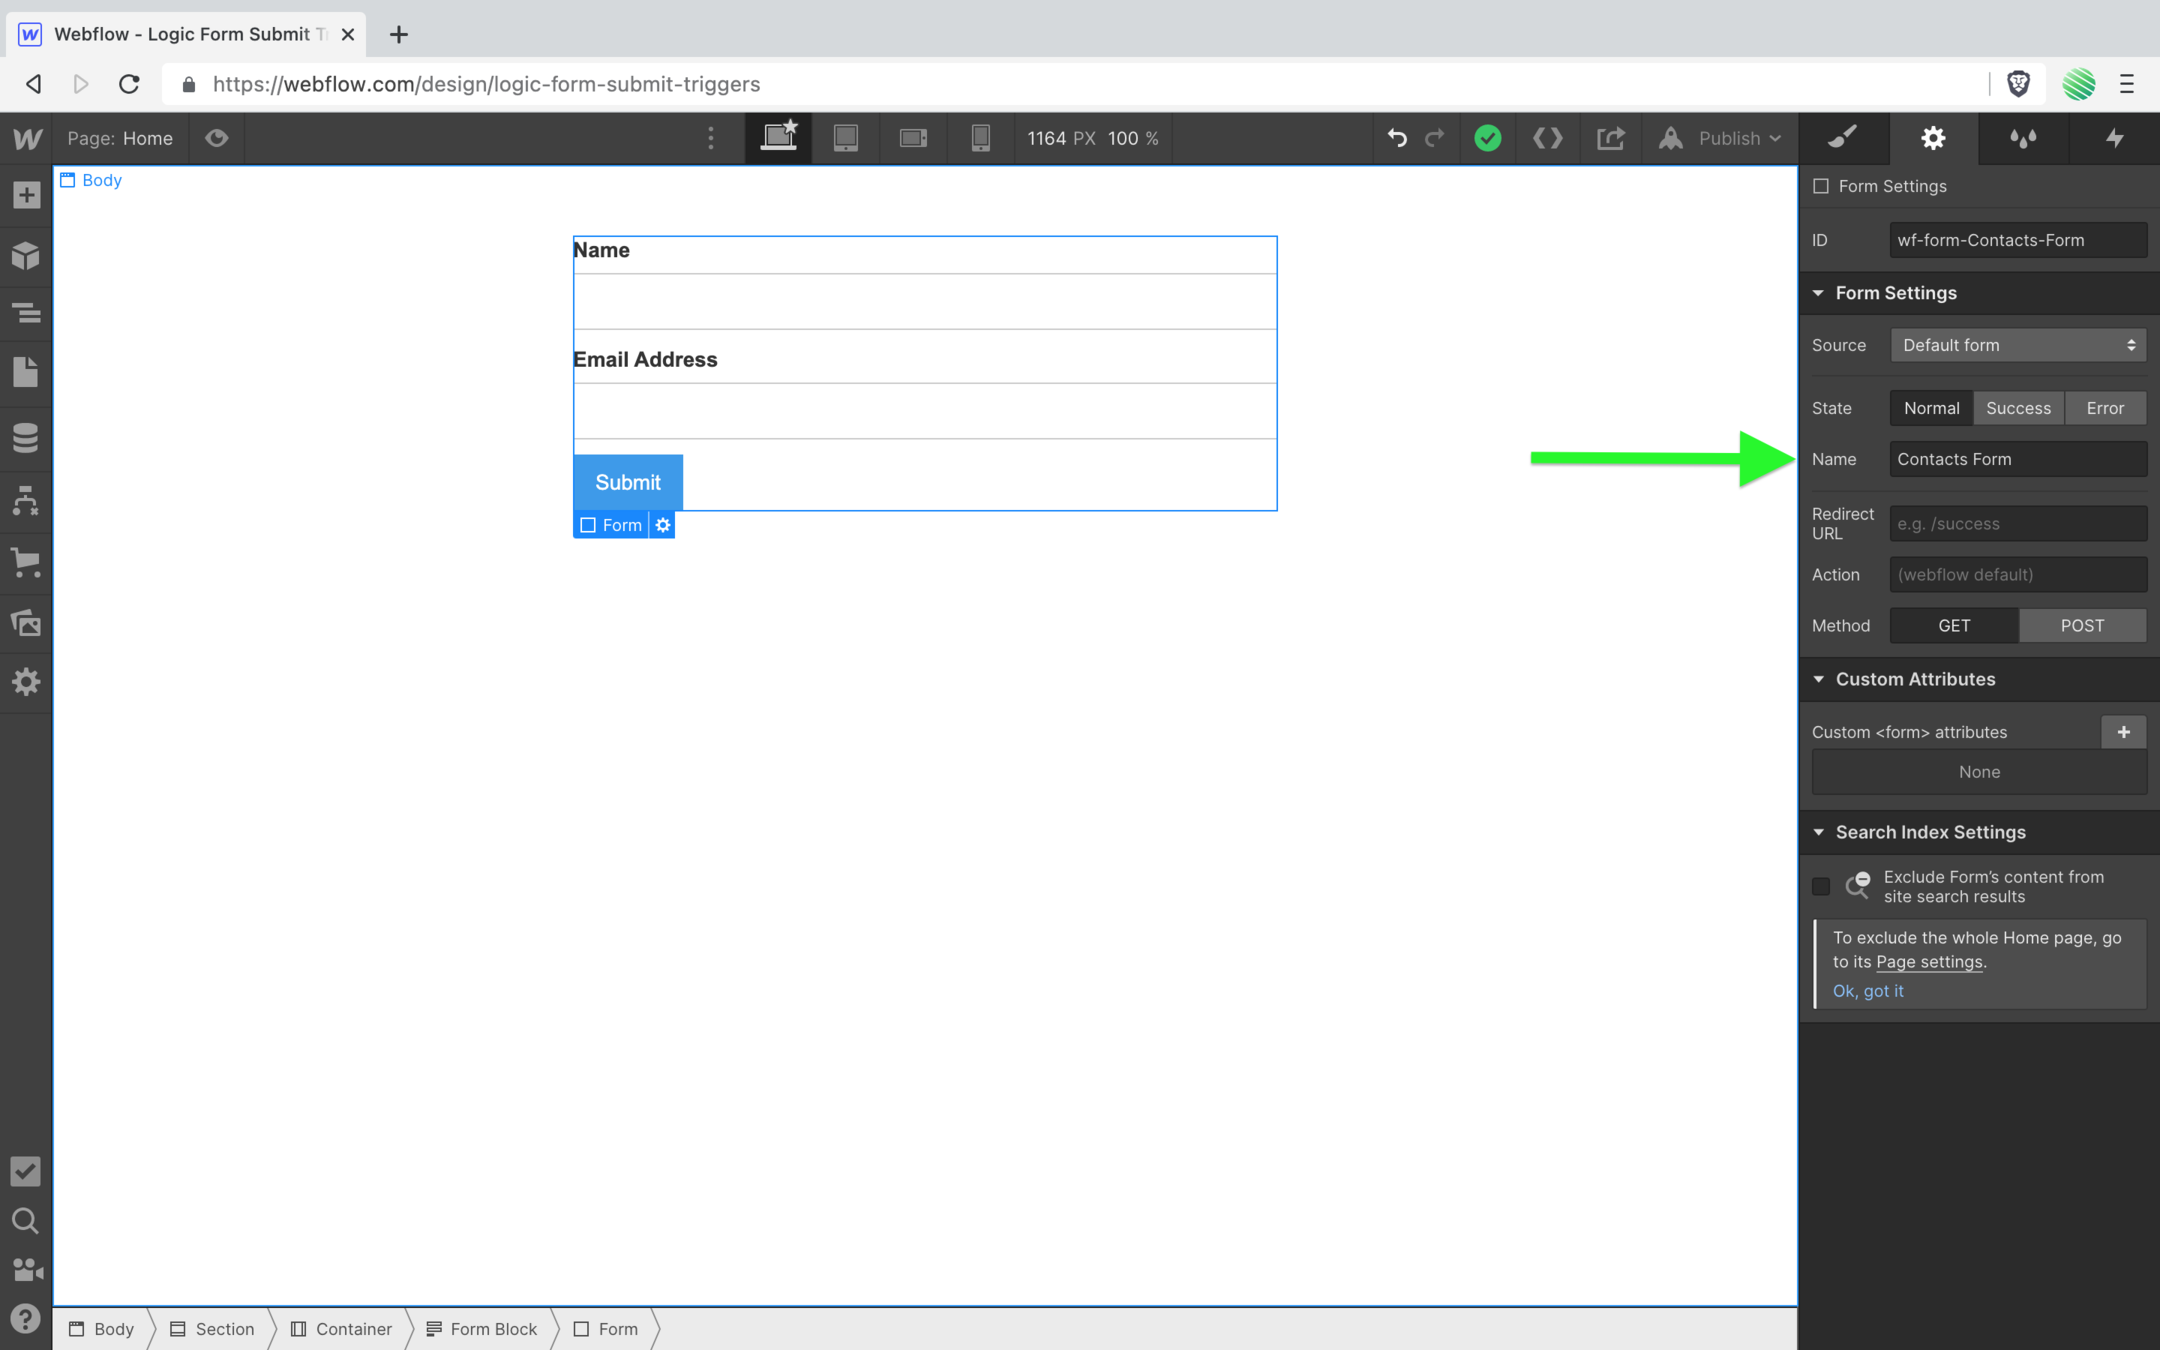
Okay, done.
Now open up Logic and create a flow.
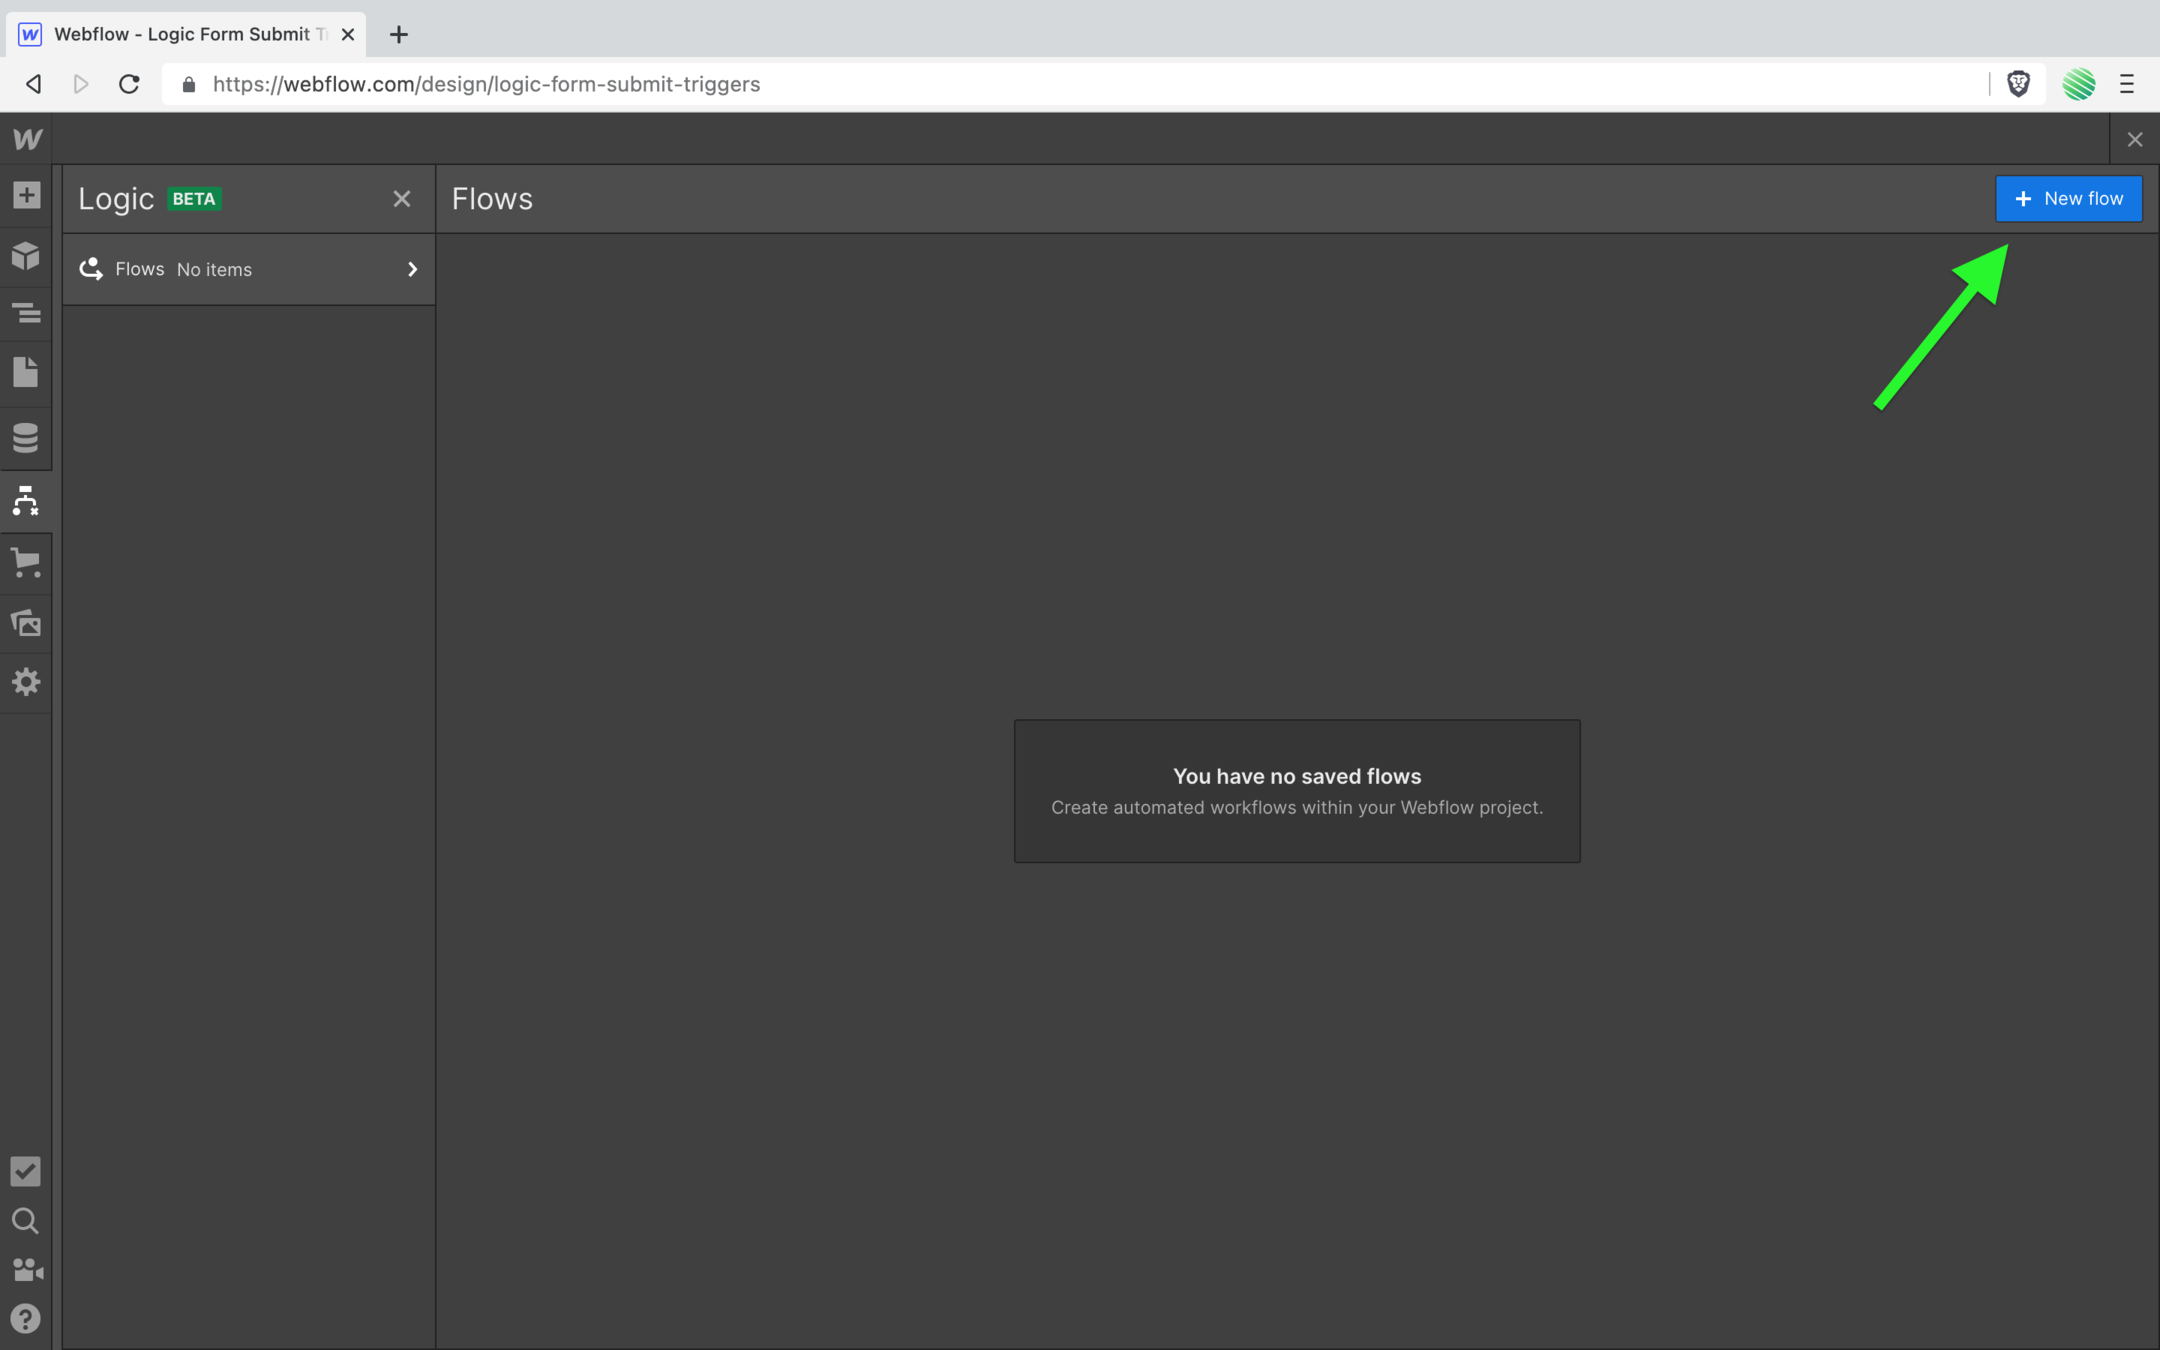
💥 Boom!
The new Logic flow editor.
Loads of fun stuff to play with in here 😃
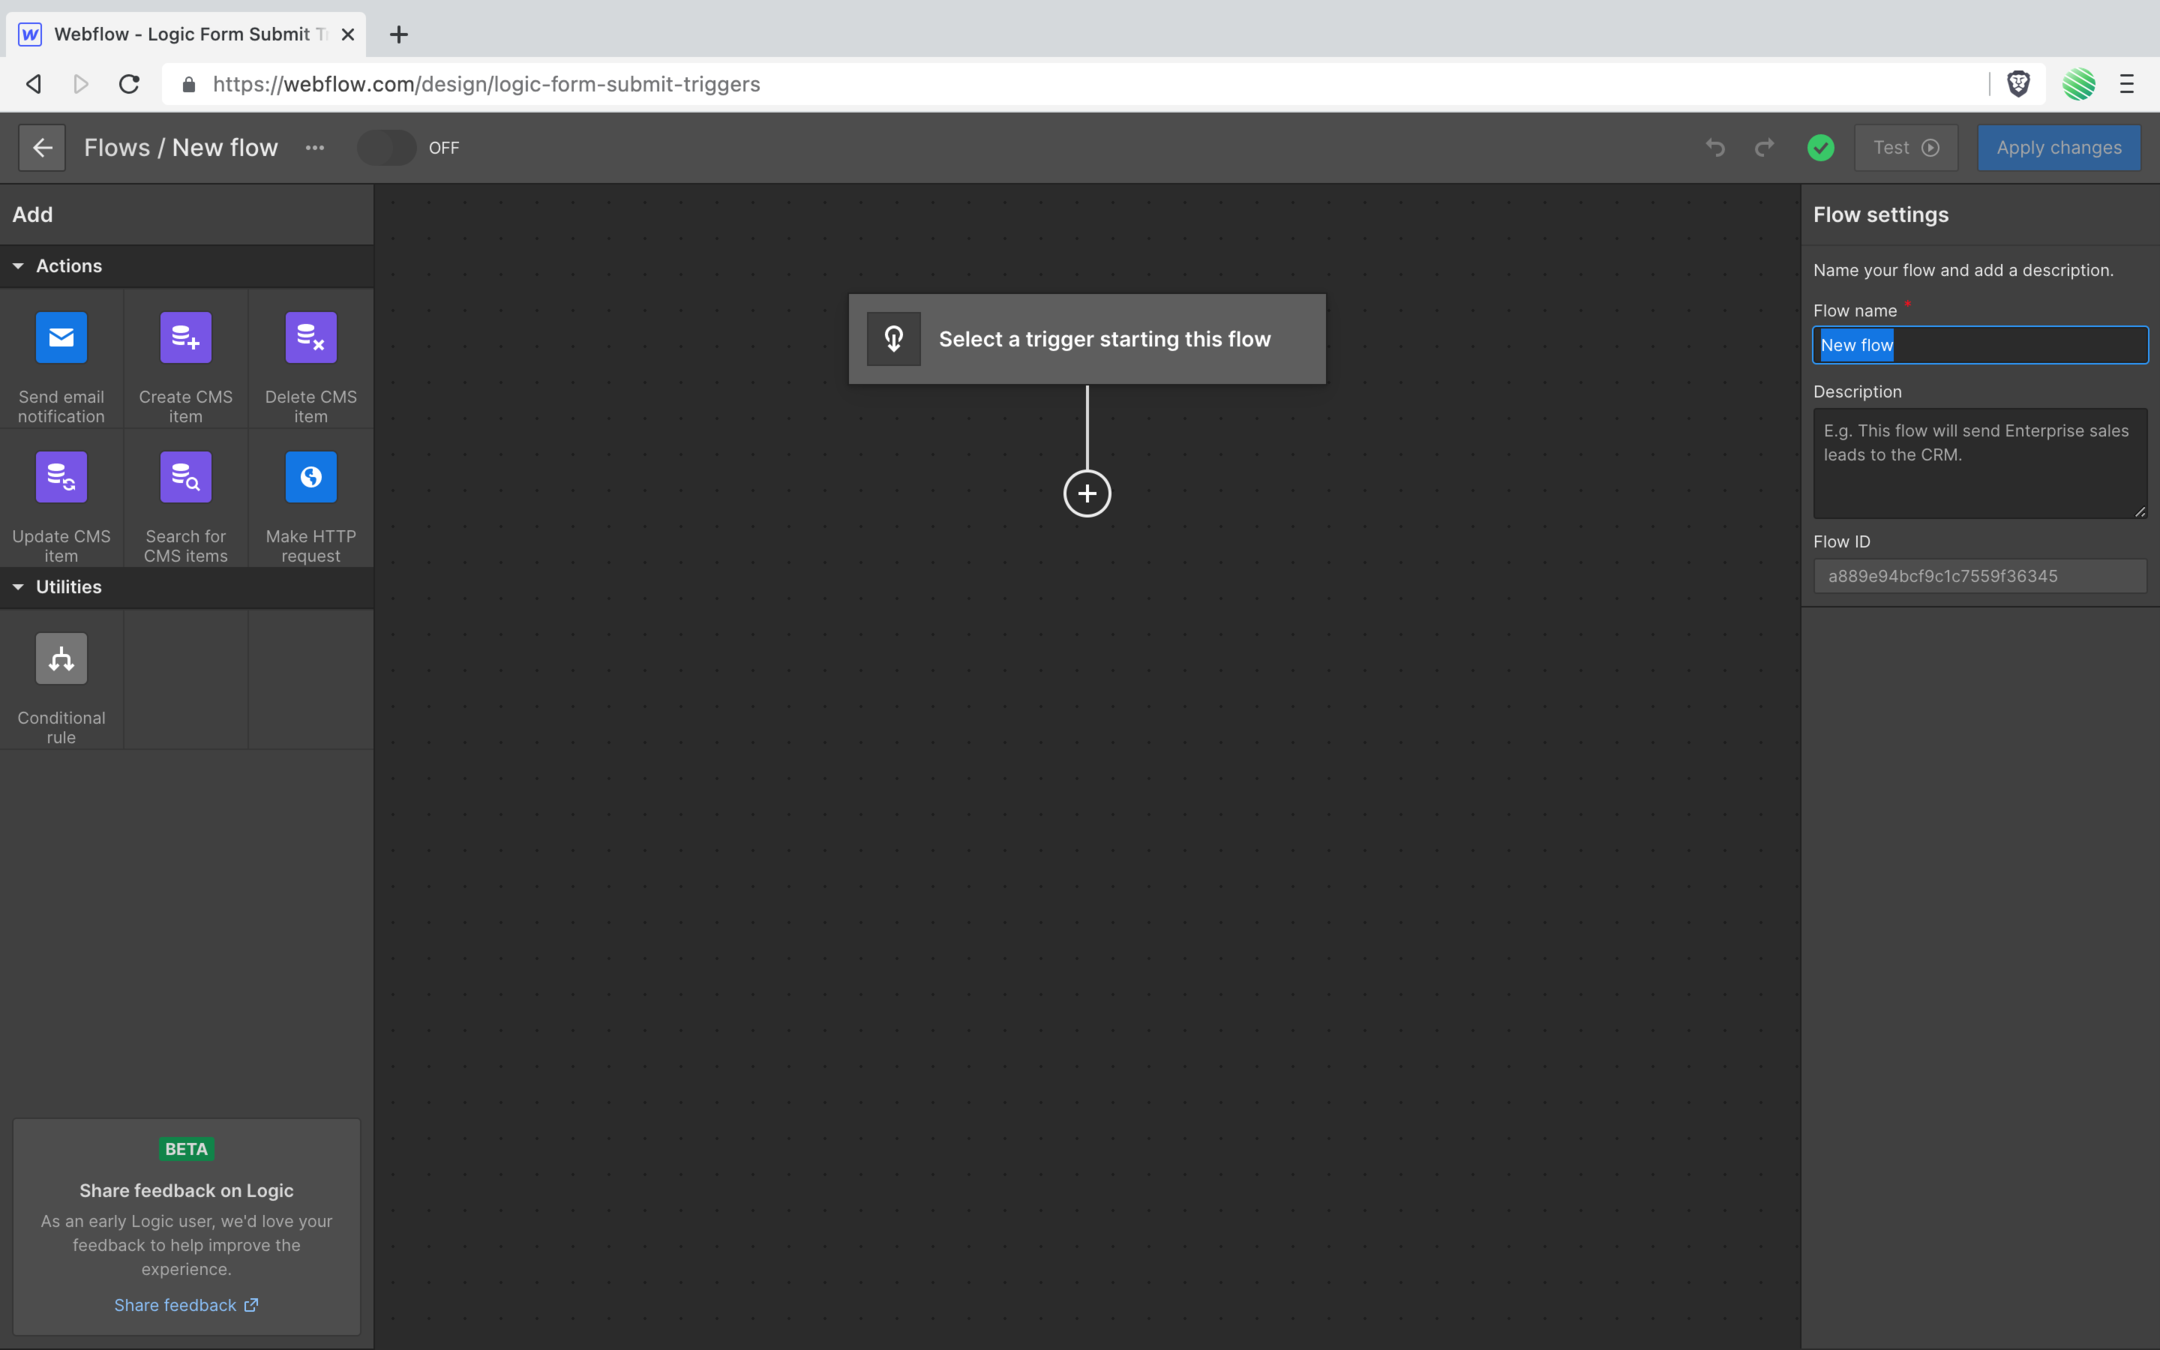
But stay focused with the task at hand 😅
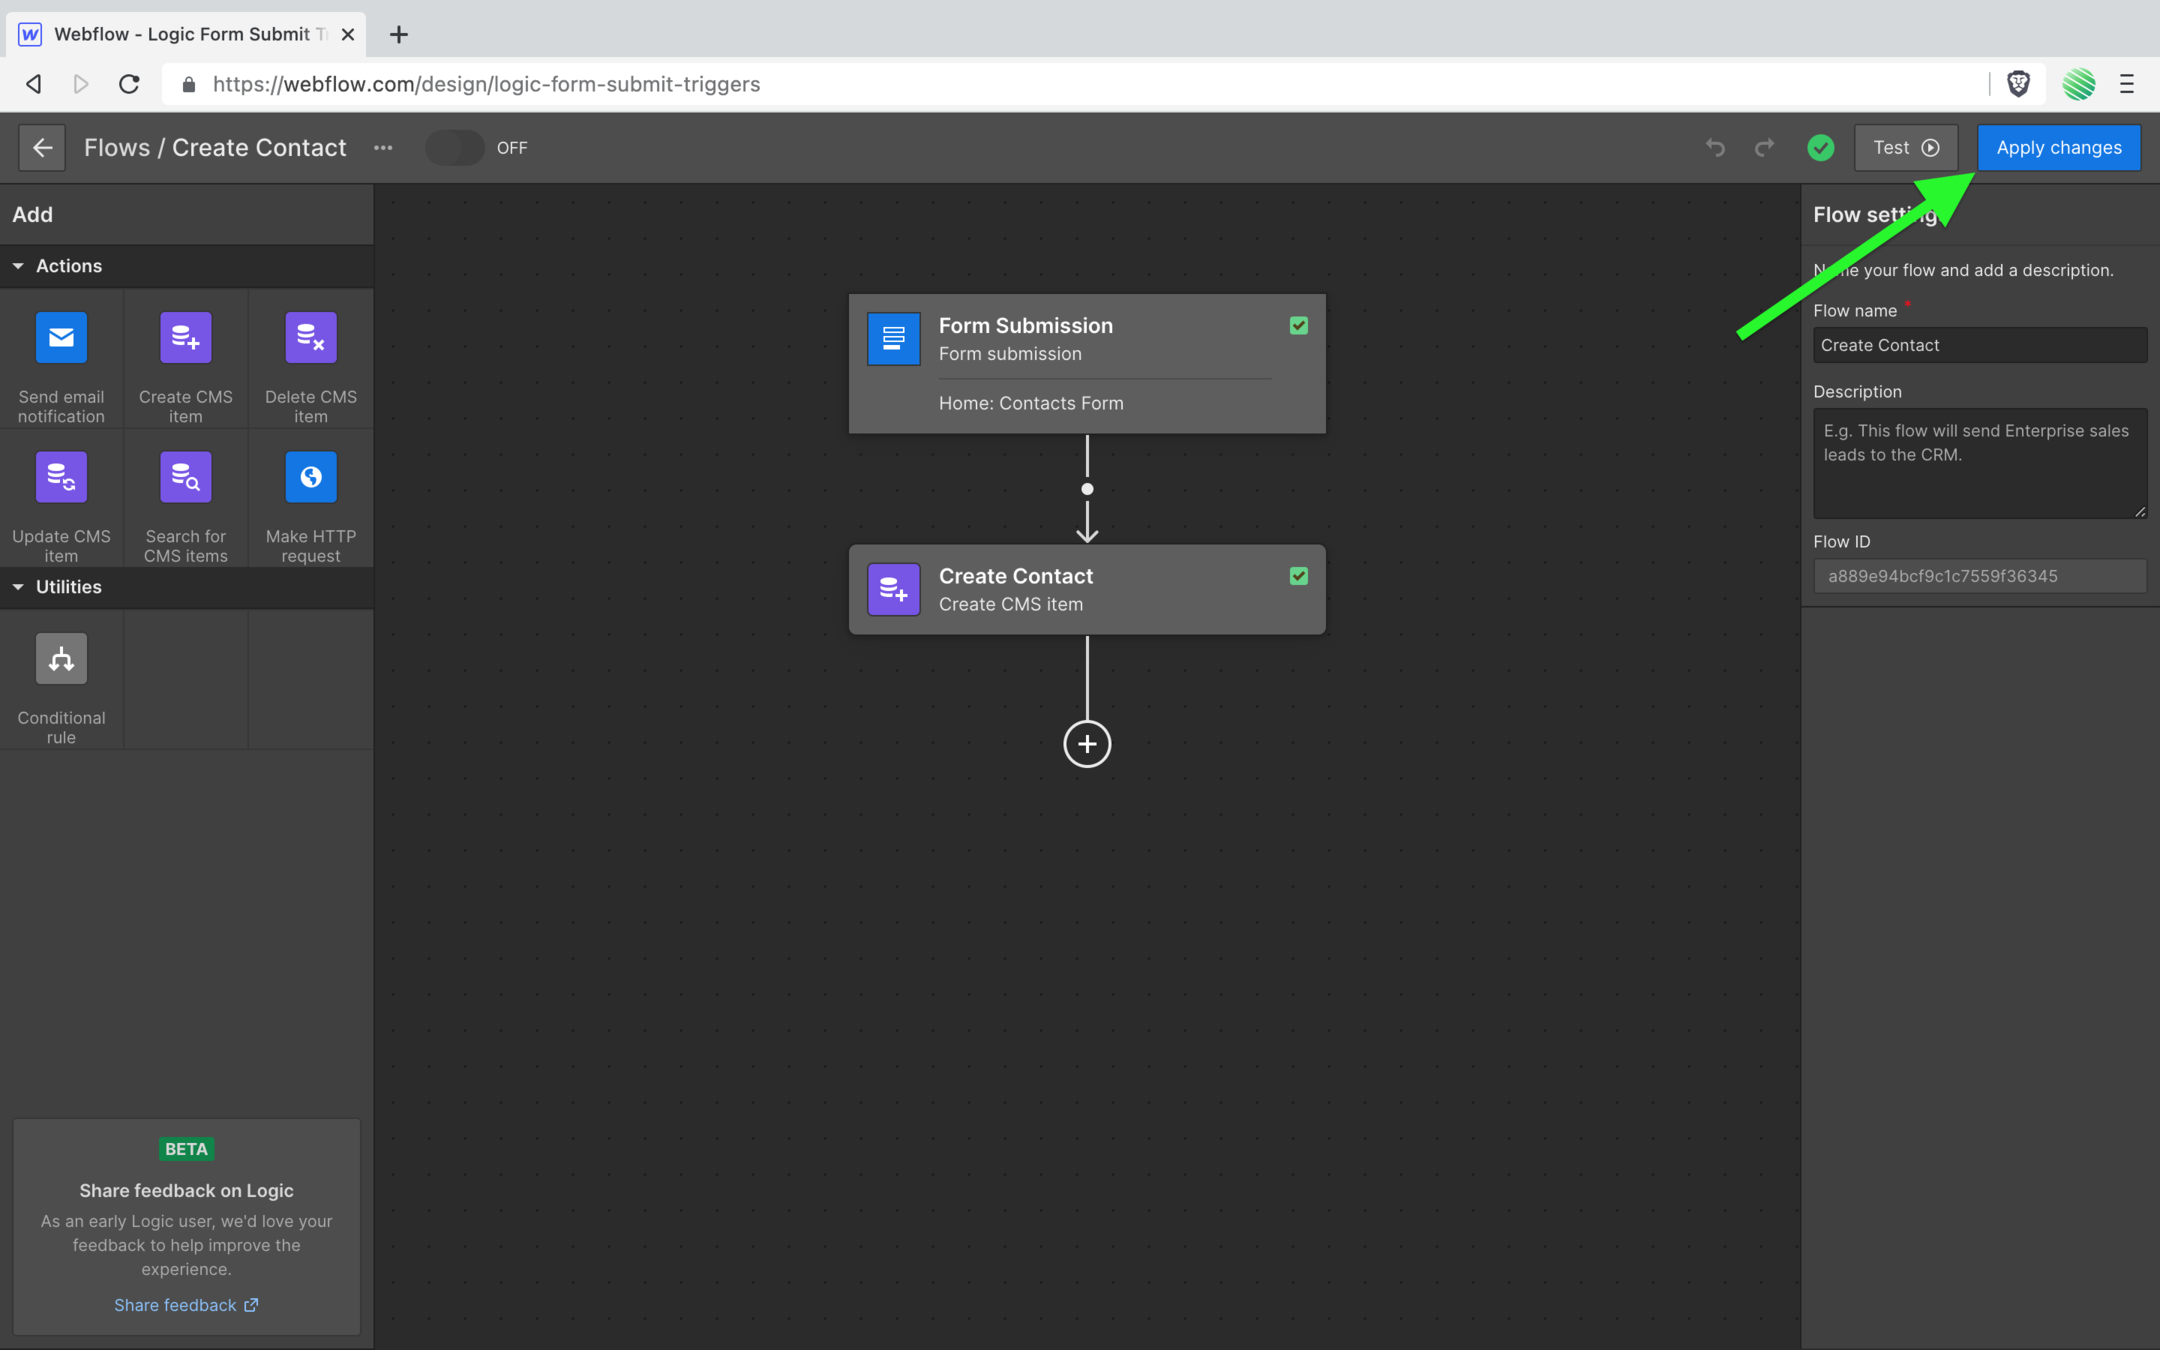
Go ahead and name your new flow.
Tap on the trigger item and find two triggers available (as of this writing).
- Form submissions
- Incoming webhook
The latter is a VERY interesting one which I’ll cover in another tutorial.
For now, select the former.
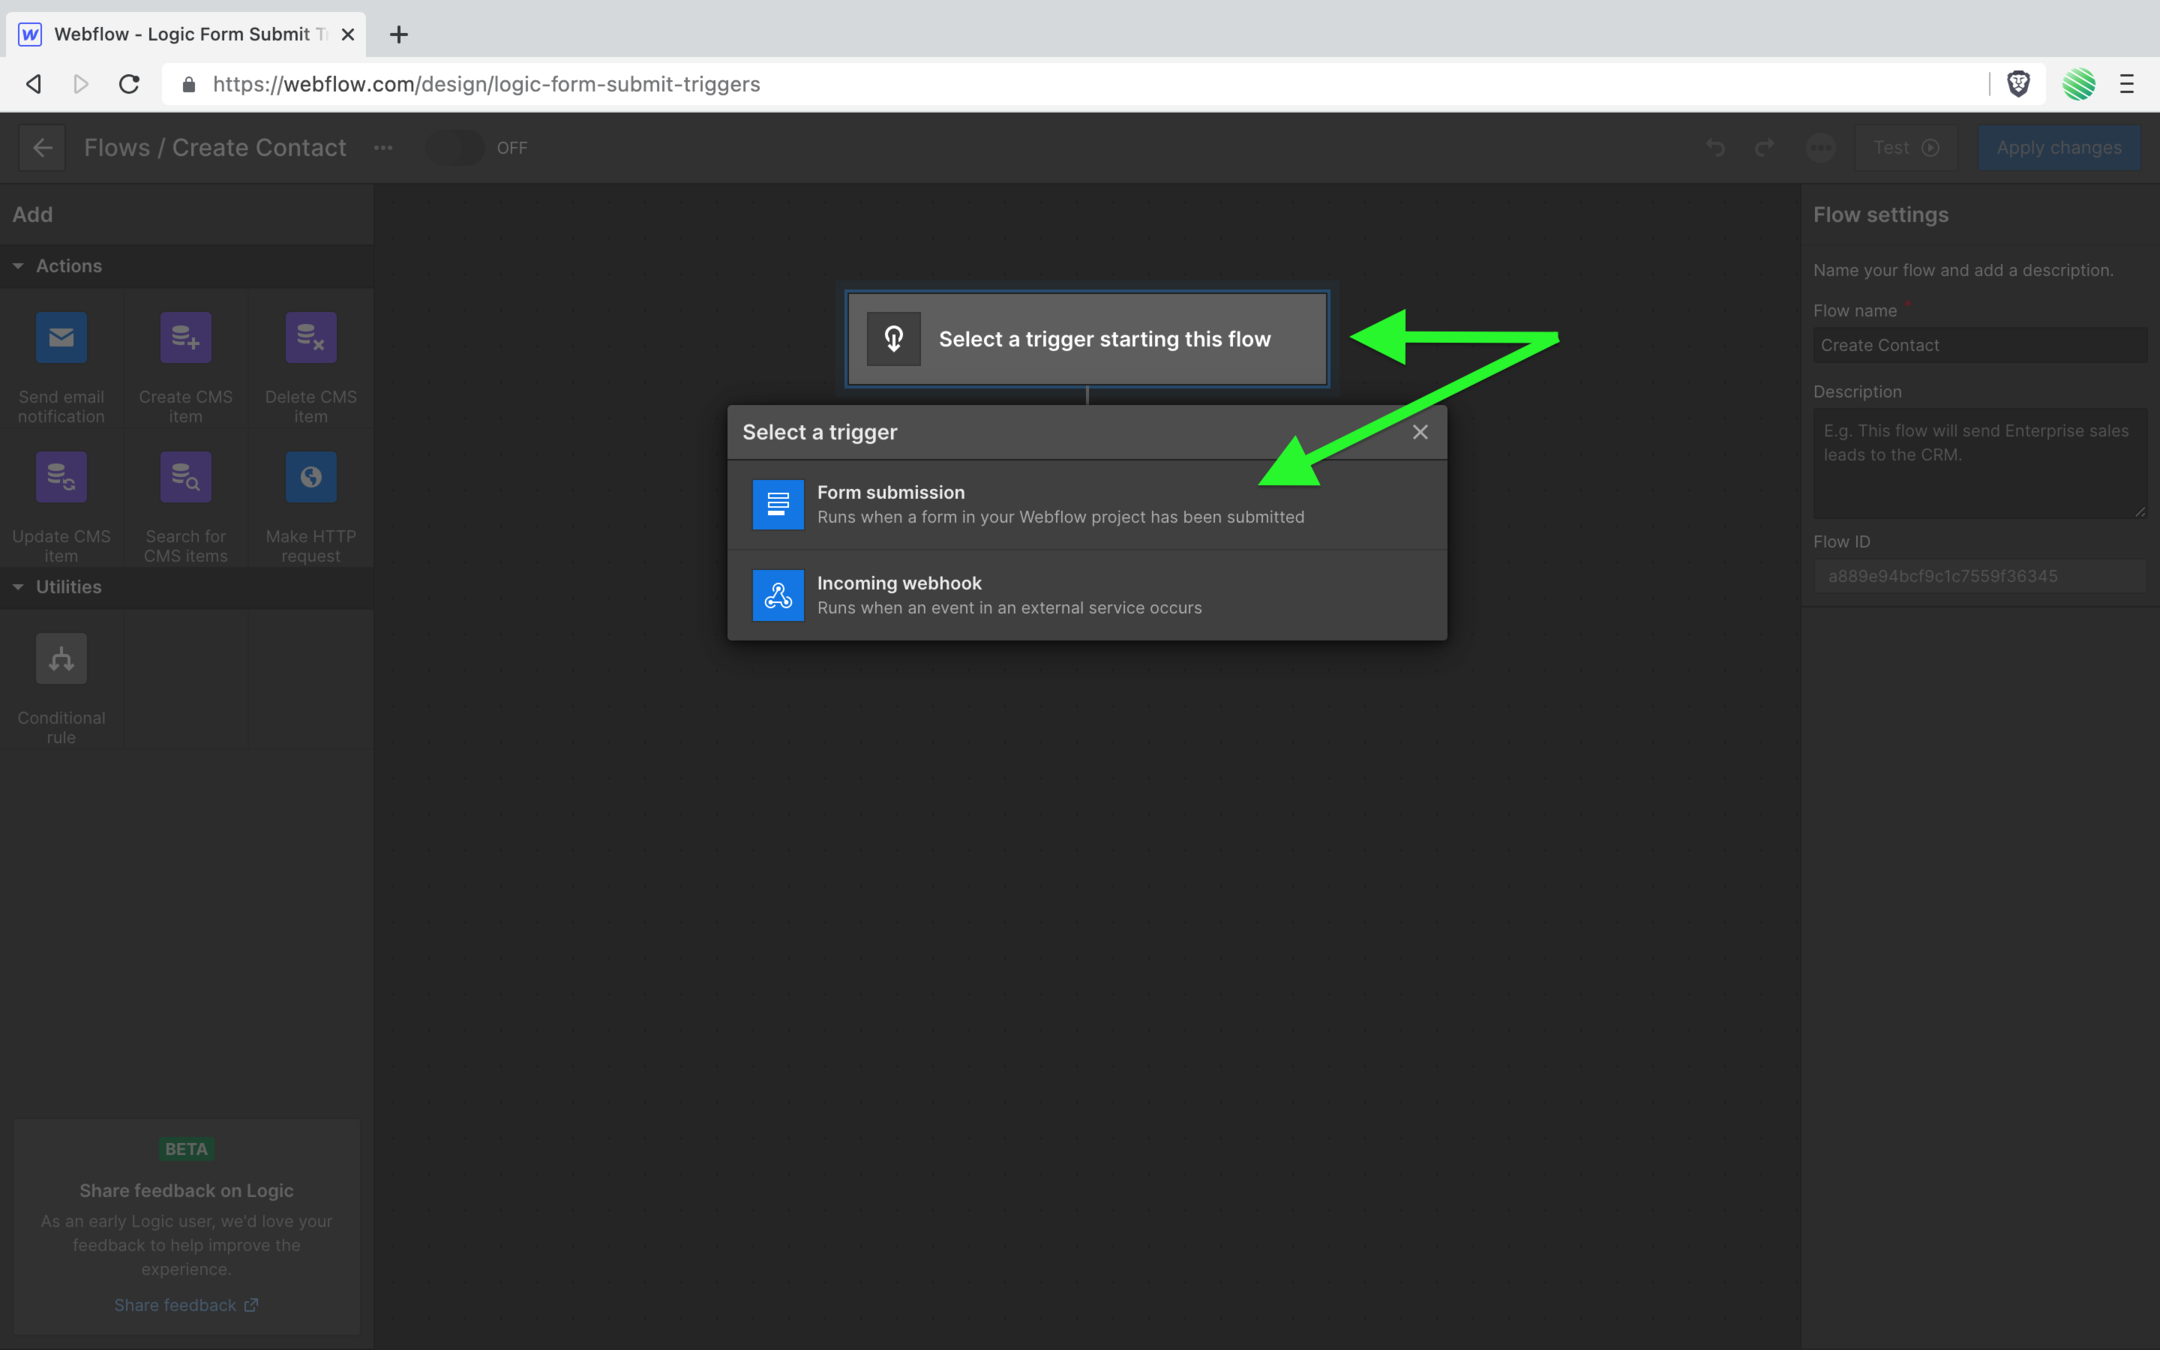
Give it a good name.
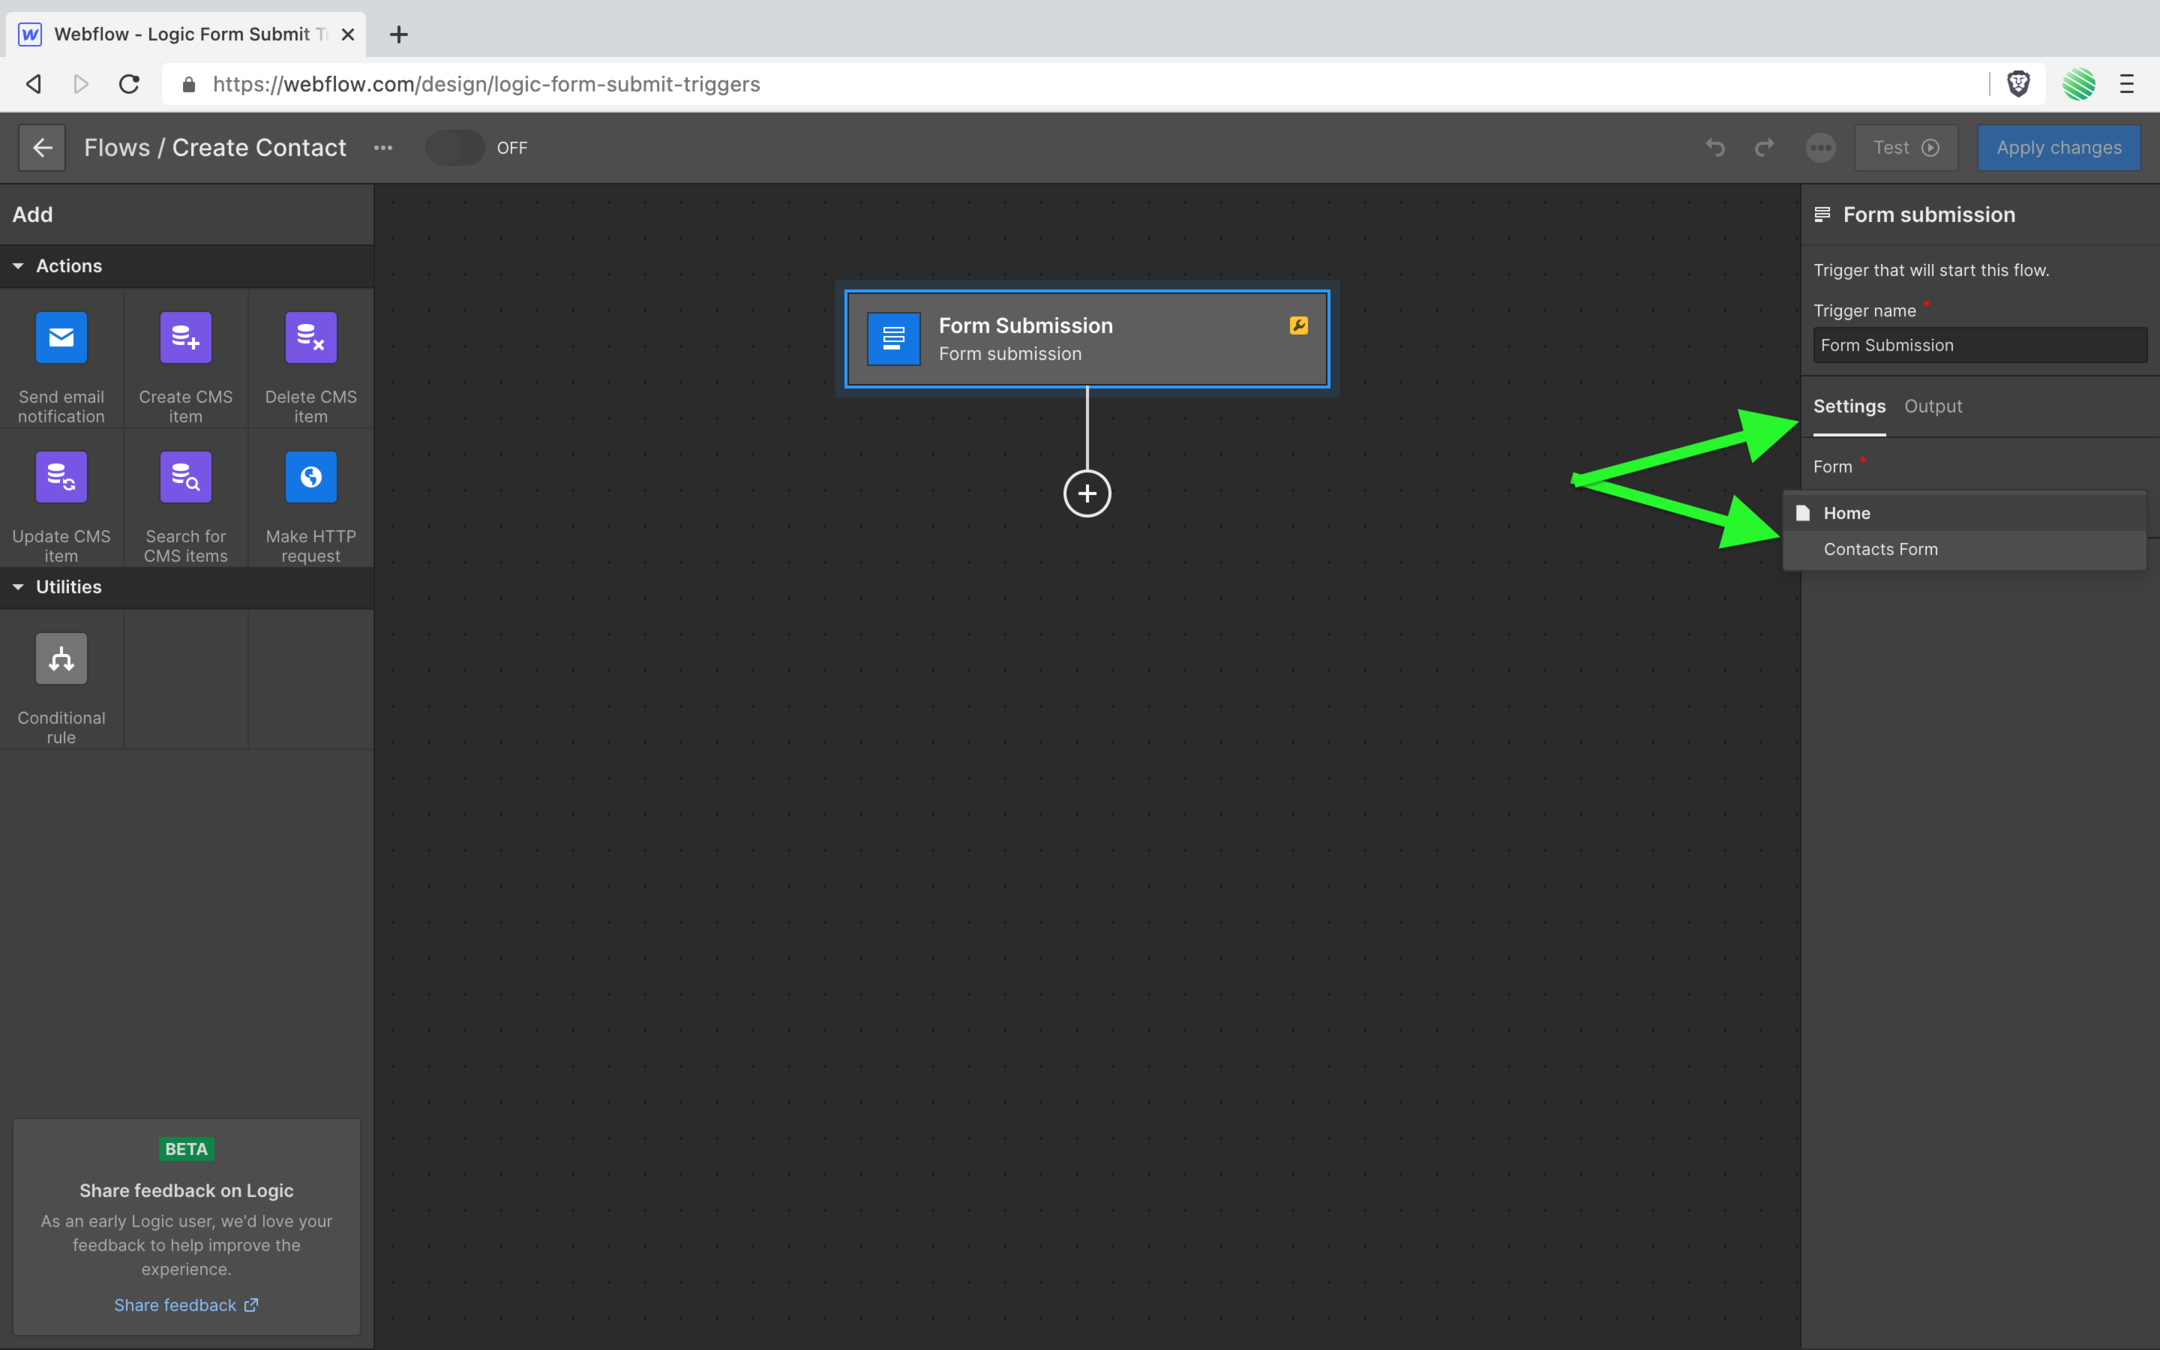
Now checkout the settings section.
This is where you link this flow to a specific form.
This is amazing 😃
If you’re familiar with doing this in Zapier or Make (Integromat) you’ll remember that those glue services were really good at capturing ALL forum submissions across your entire site.
Now you get to be specific!
Tap the dropdown and find the form you created earlier.
Select it.
Okay, done!
That was easy.
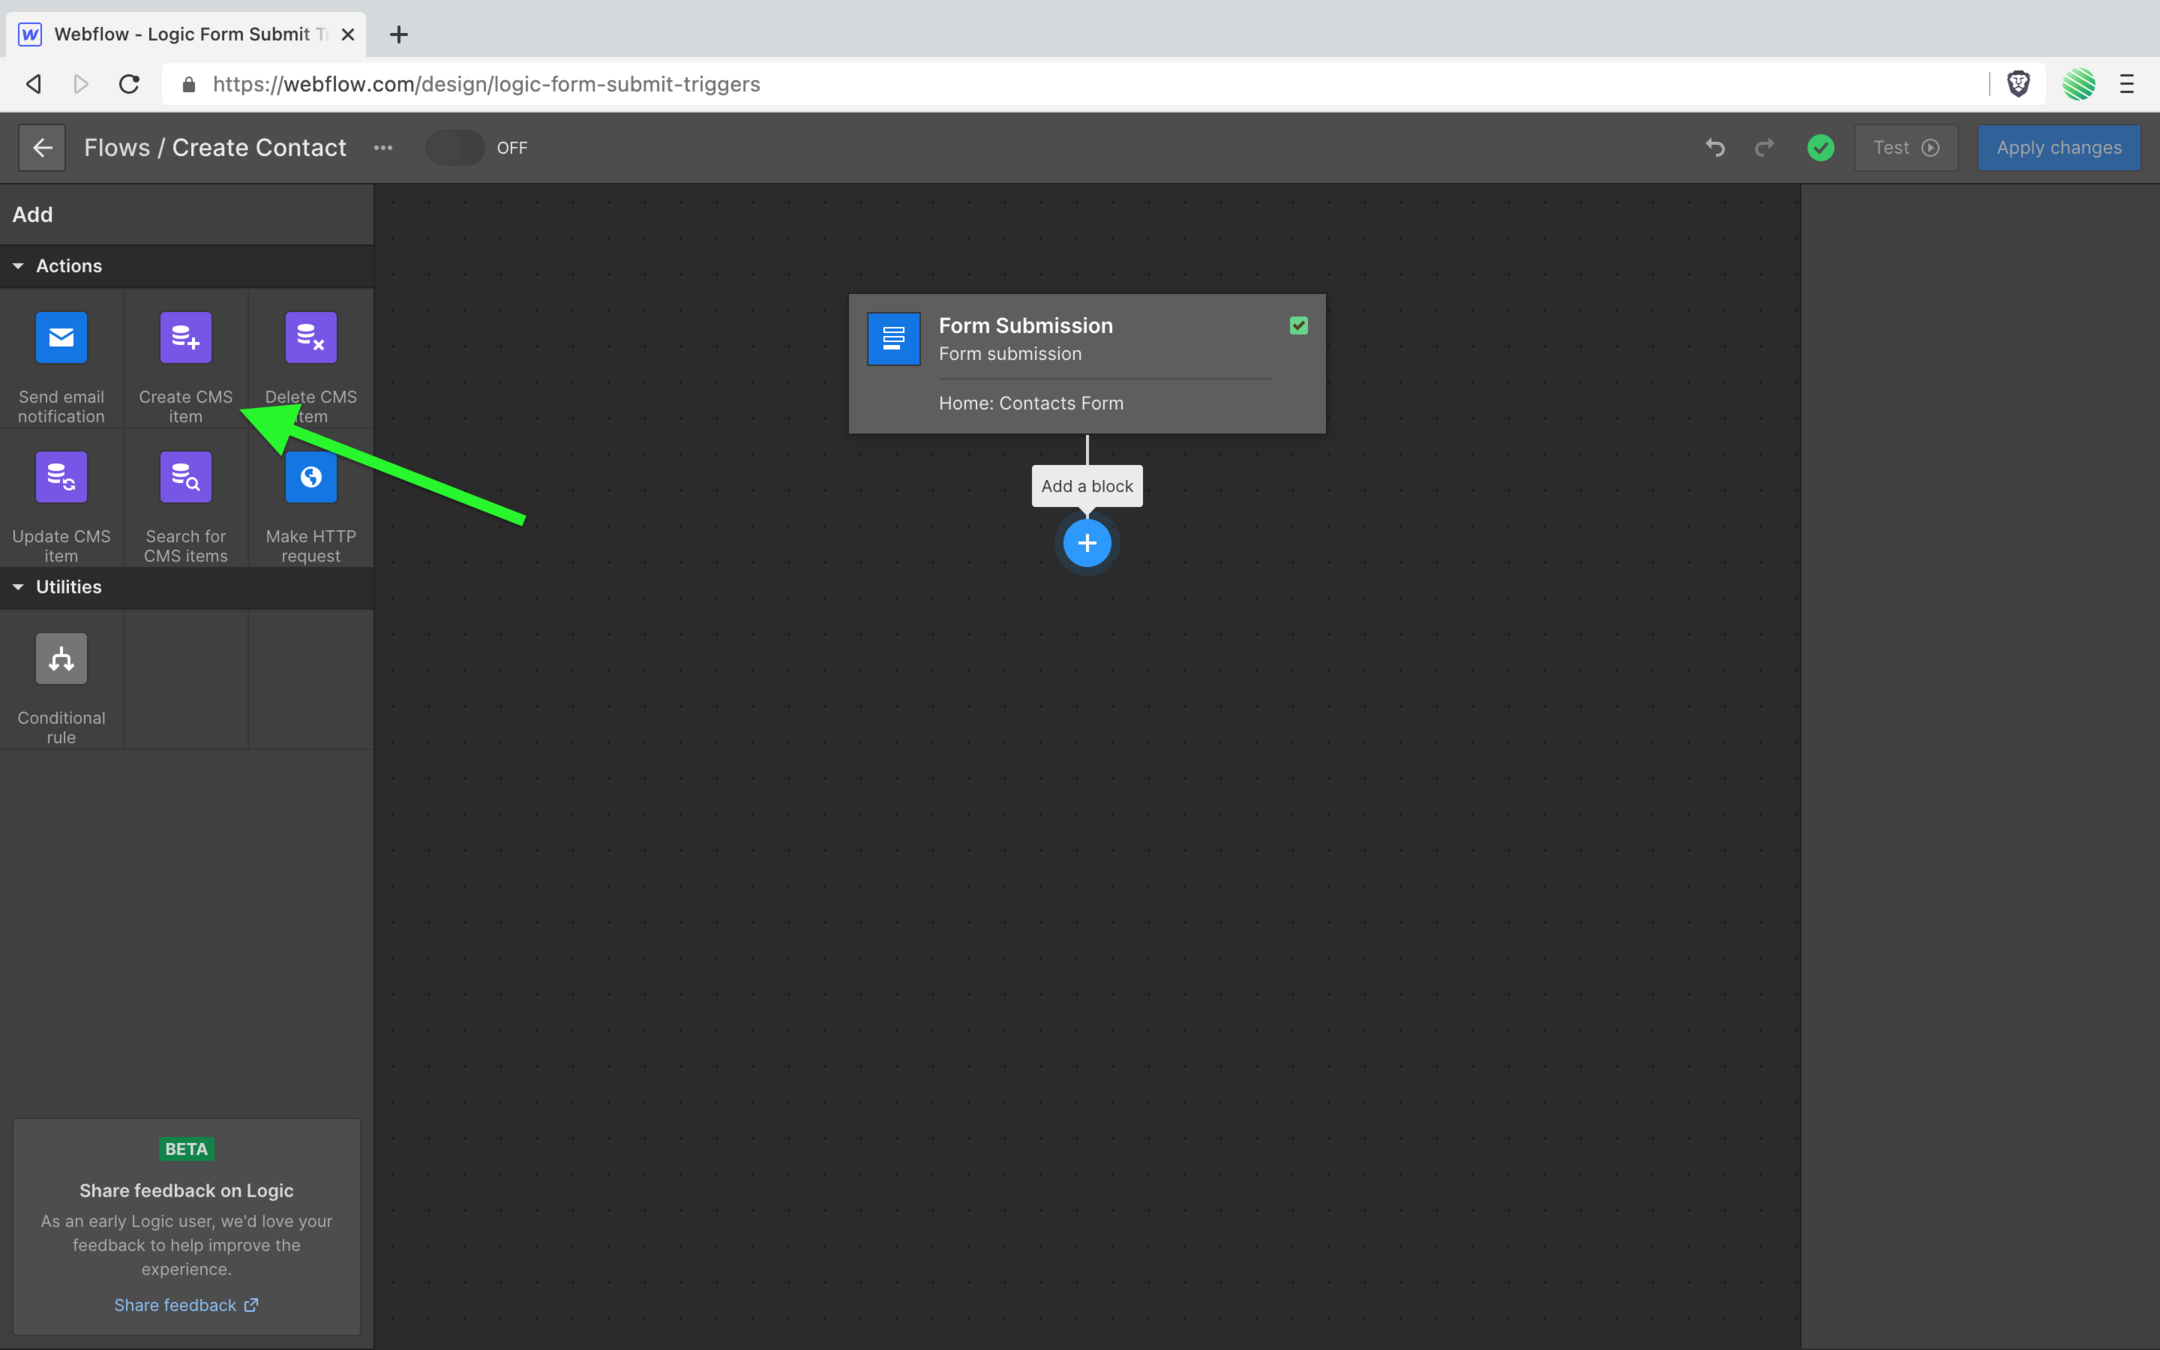
Now any time someone submits that form, it triggers this flow.
Let’s take some action on that trigger.
Tap the “add a block” button (little “+” sign below your trigger).
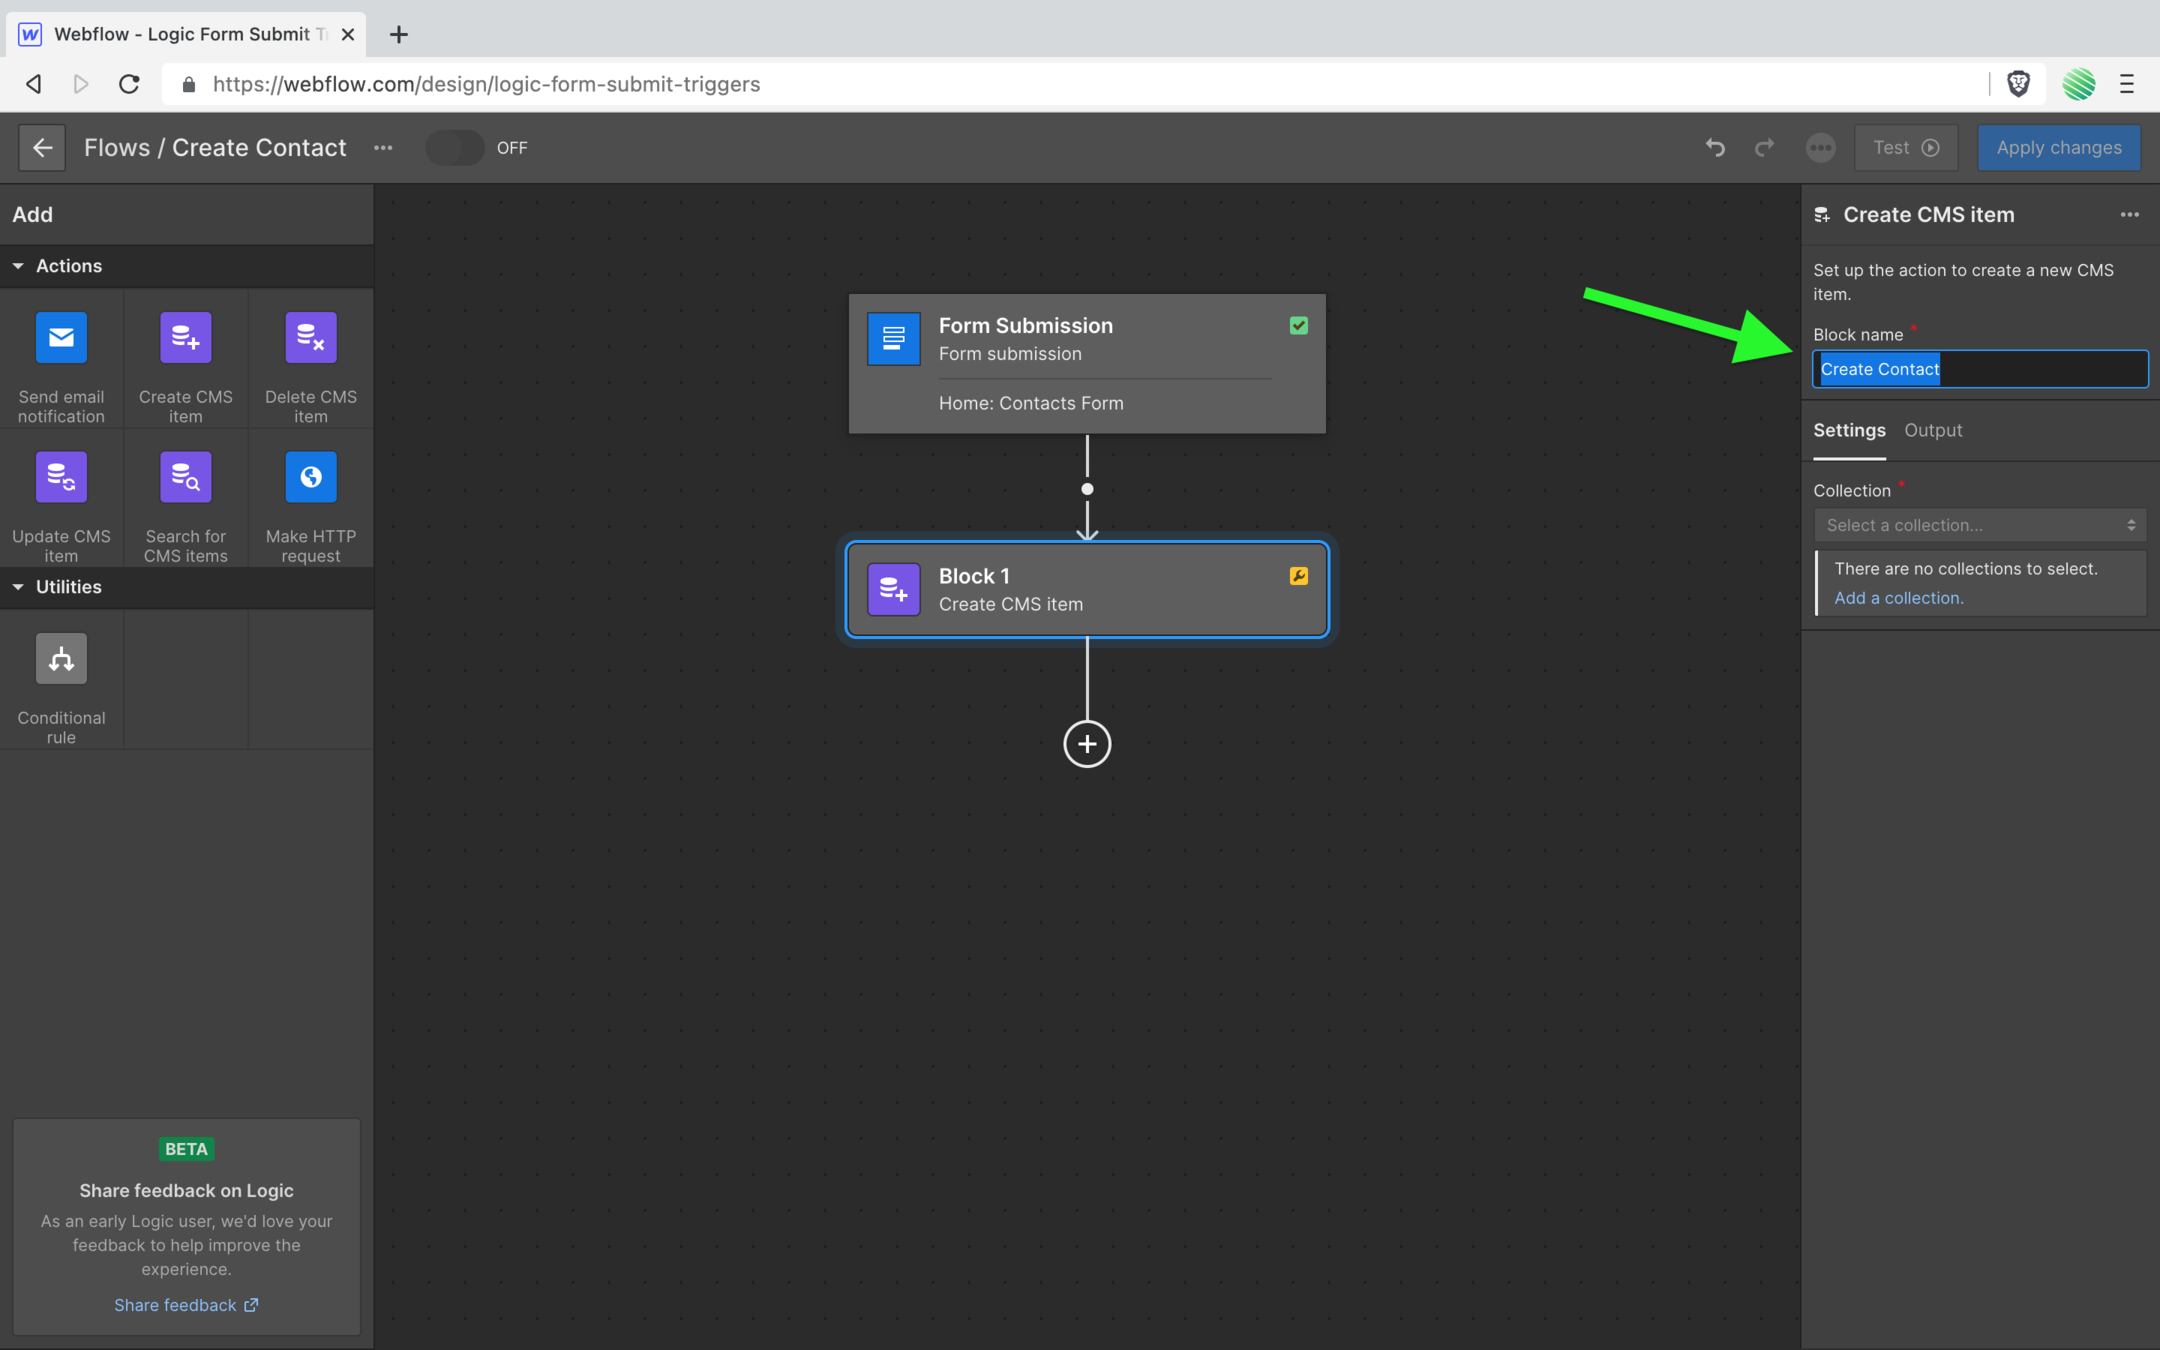
Find the “Create CMS item” action and tap it.
Now it’s added to your flow.
A visitor to your site fills out and submits your form, it triggers this Logic flow, and hits the action that’ll create a new CMS item form you.
Give a good descriptive name. I’ve found doing things like this saves you head pains in the future as your flows grow.
Now bind this action to your Webflow CMS.
Wait, you haven’t created a CMS Collection yet, so there is nothing to bind to!
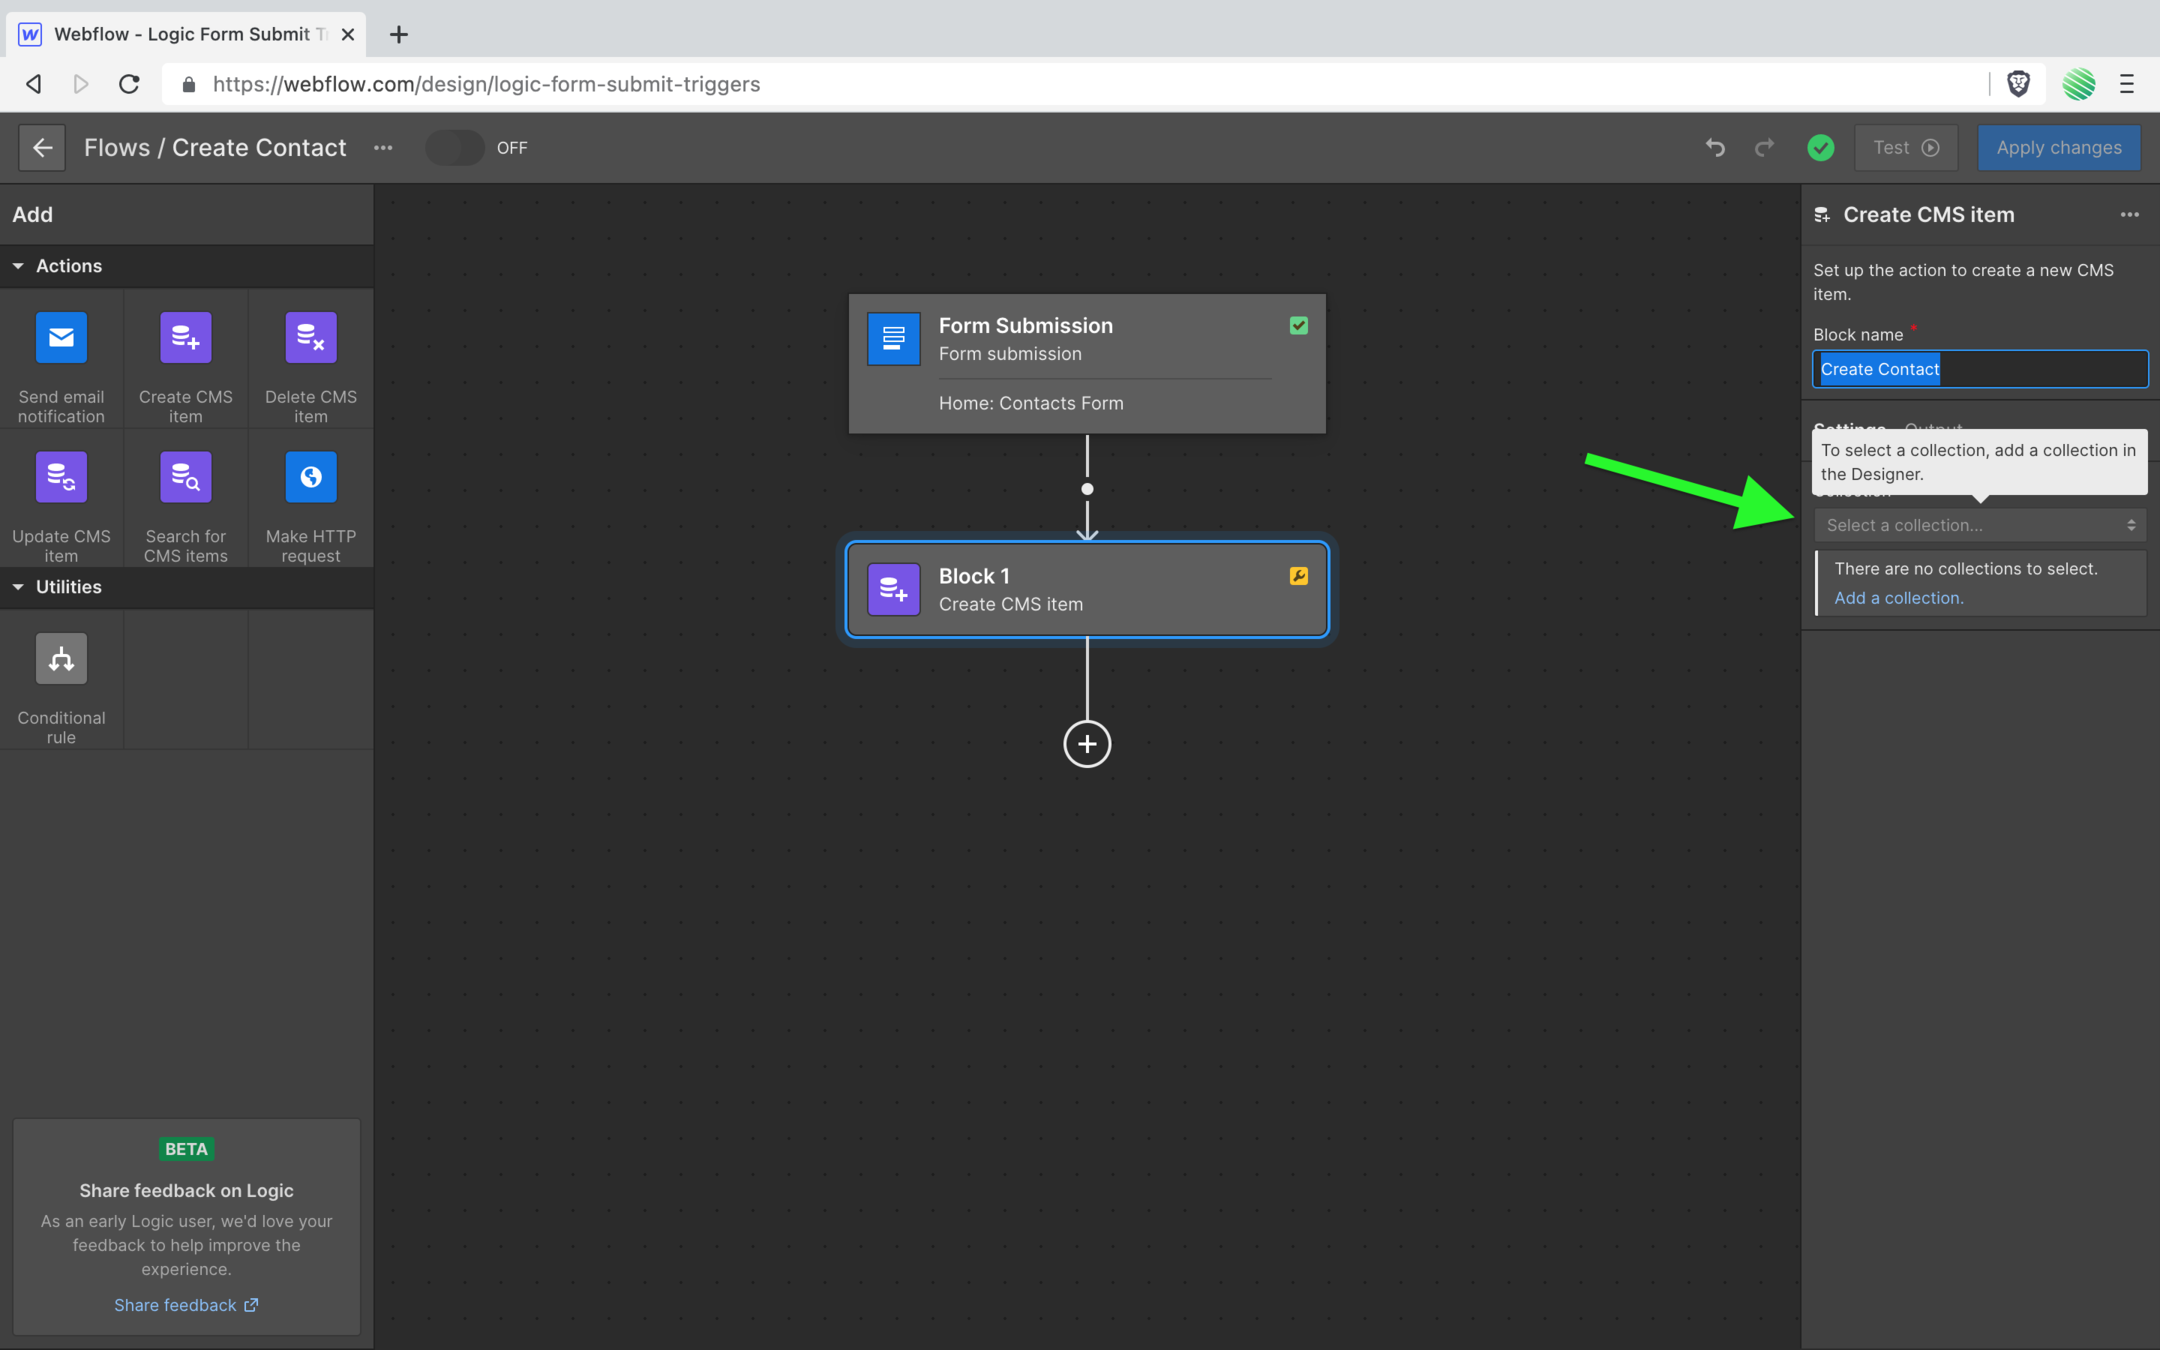
No worries.
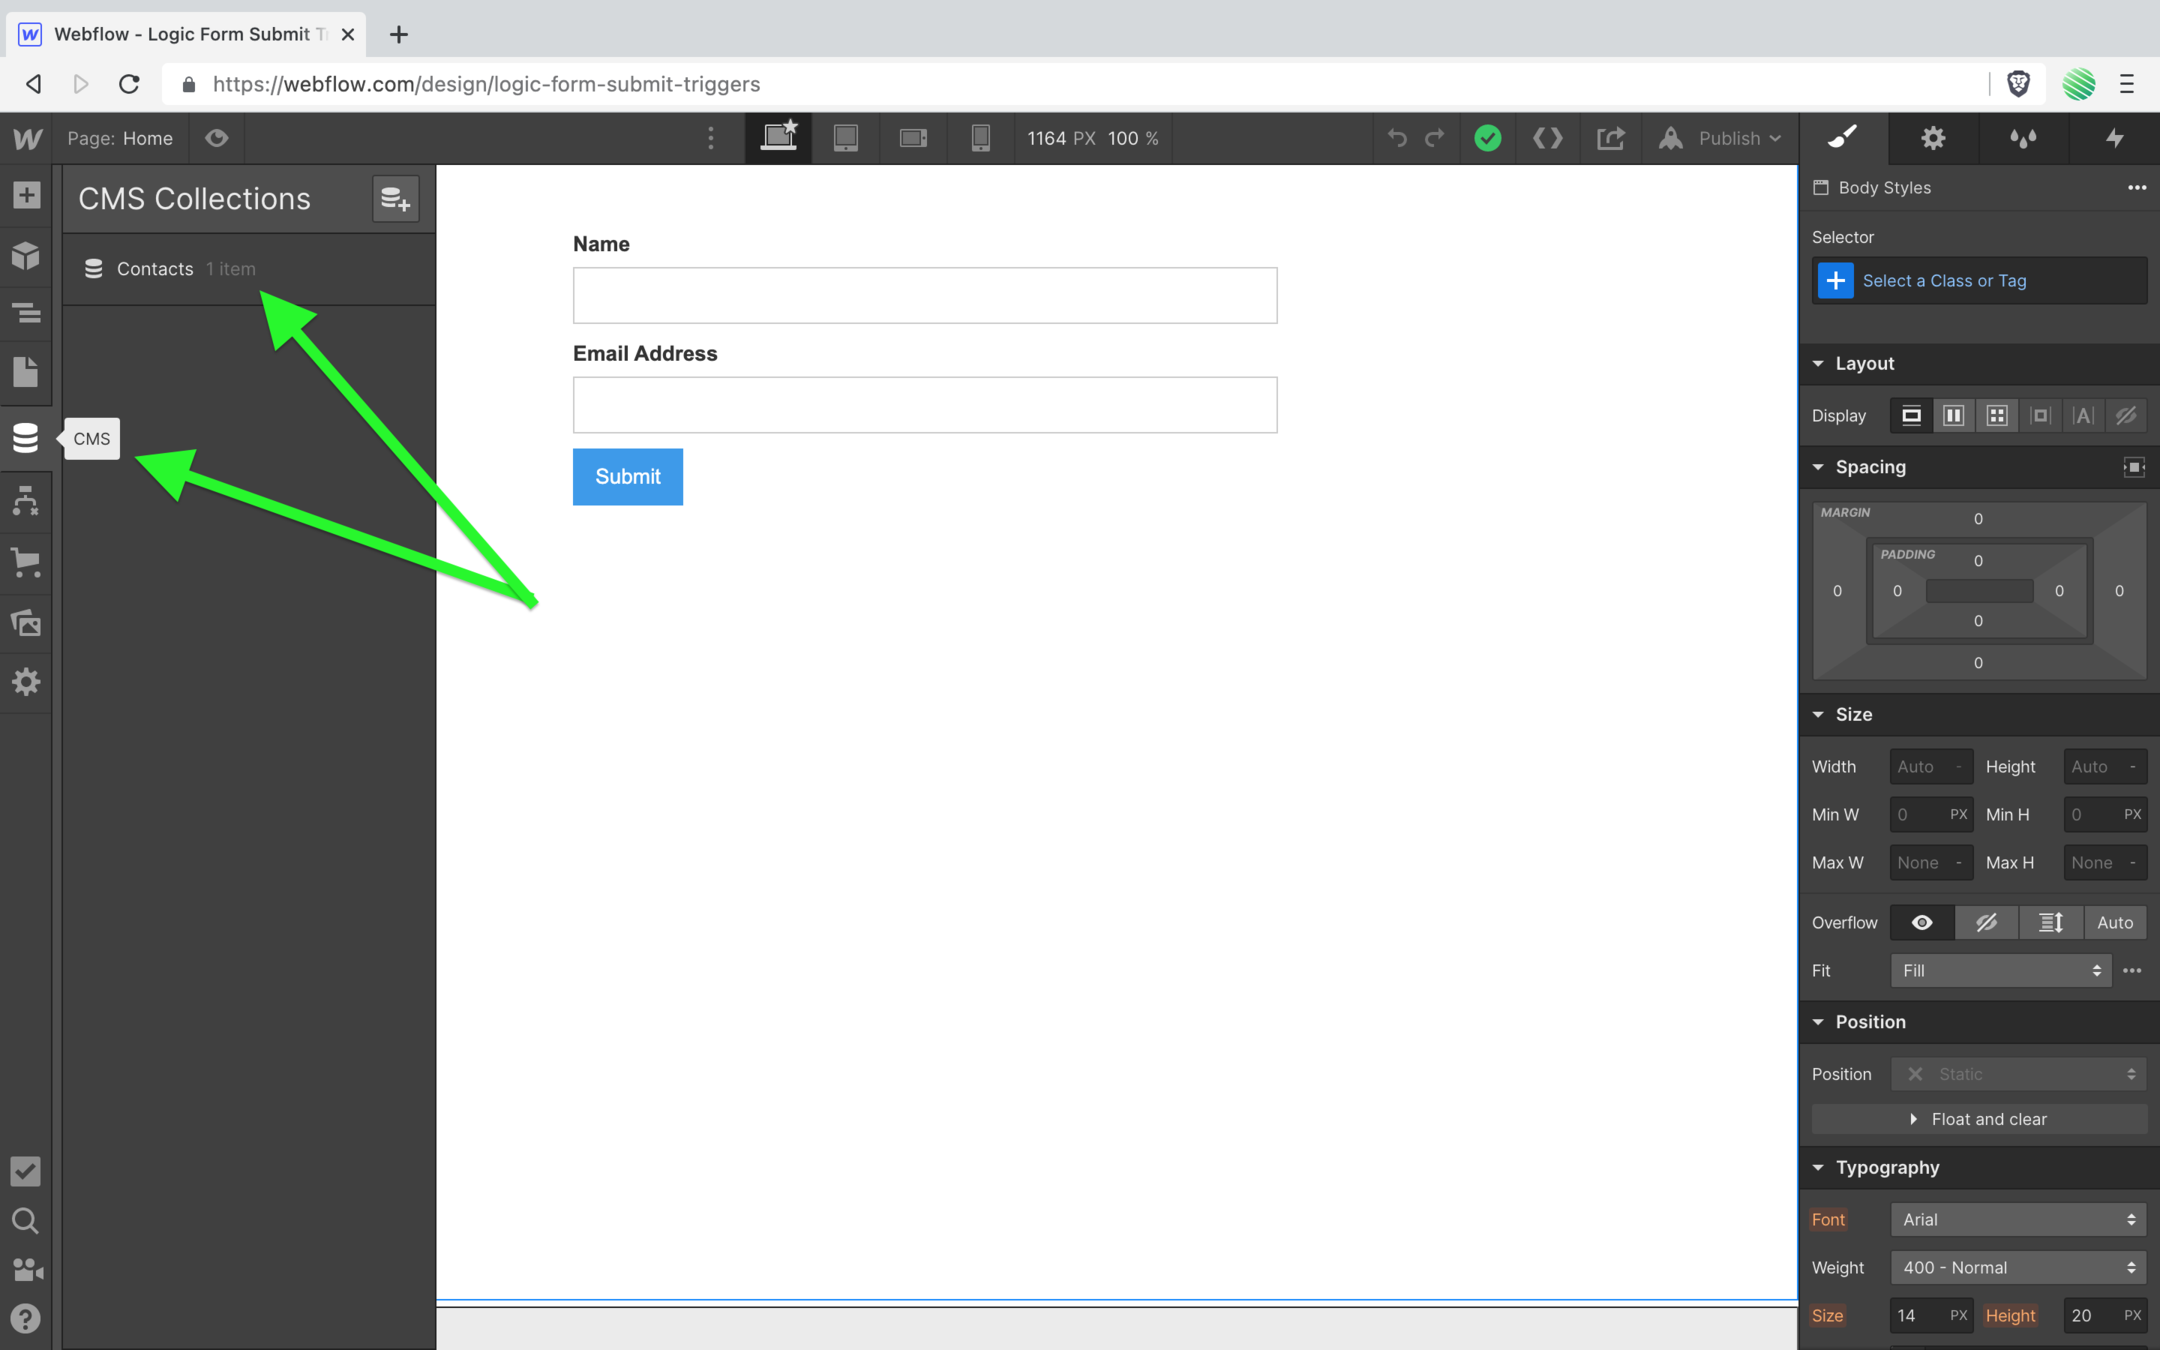
Hop out of the Logic flow and over to your CMS editor.
Create a new Collected named “Contacts”.
Add a new field.
You’re going to add an email field.
Recall, your form had a name and email field.
Name comes for free with every new Collection, but you need to add the email.
Something to note here…
Logic is still in Beta and as of this writing I hit a bit of bug. When I selected a field type of “Email” I was getting all sorts of odd errors.
When I doubled back and instead used a simple “Plain Text” field, all was good with the world.
Something that’ll be fixed in the future I’m sure.
For now, choose the plain text field type.
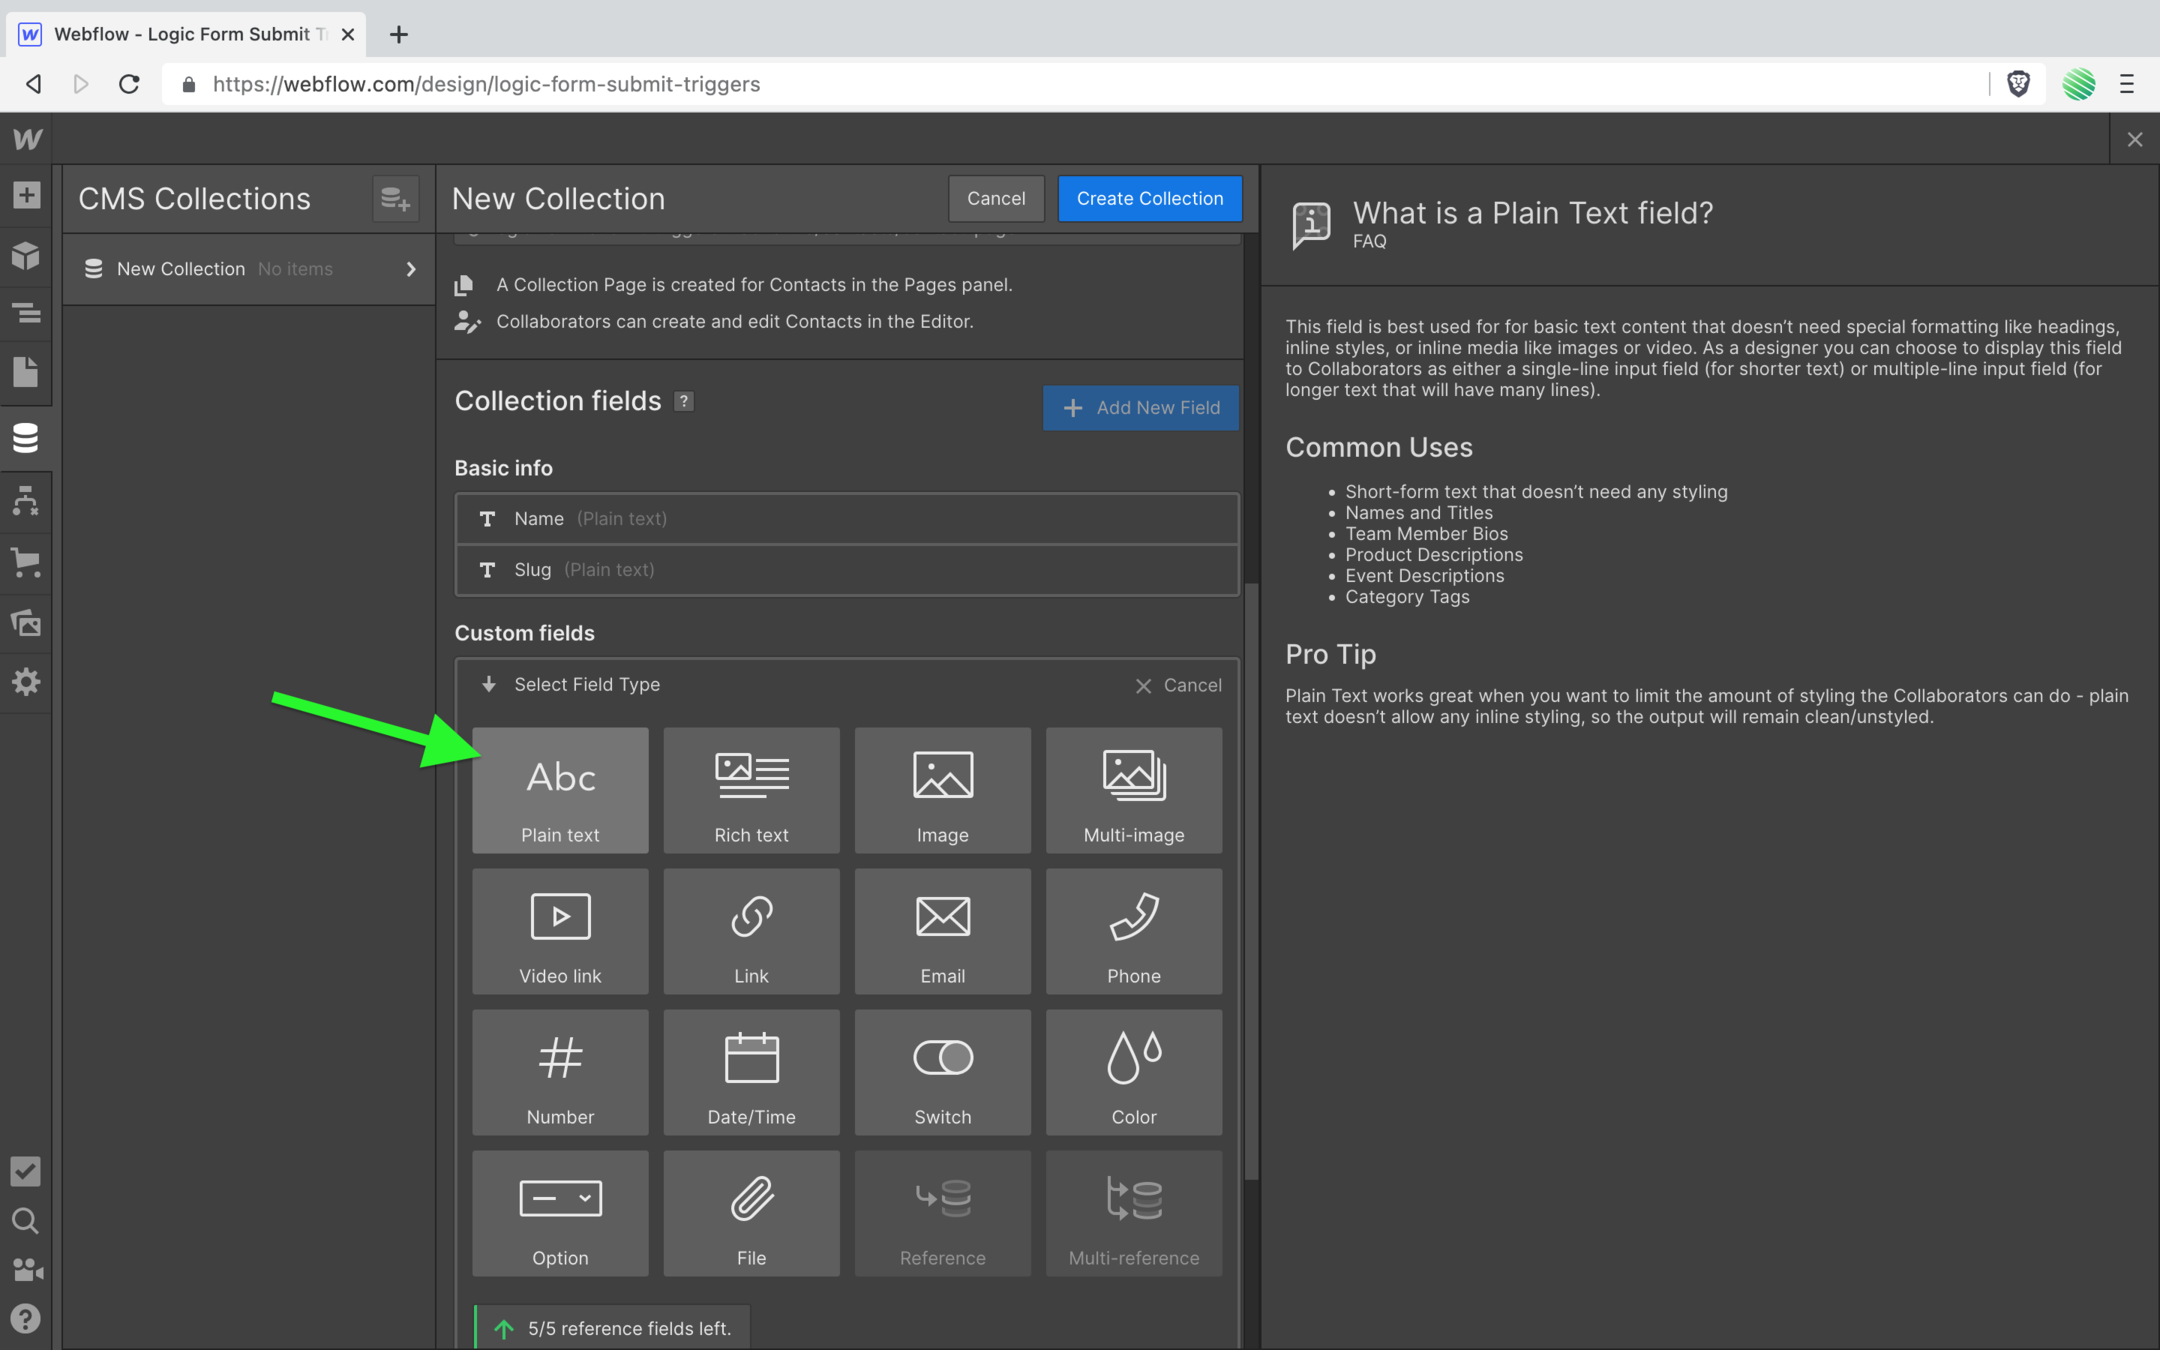
Add a label of “Email”.
Save the new field.
Create the Collection.
Boom, done!
Another thing to note. When working with the CMS you always want to publish any new changes.
Things can get out of sync, new changes may not show up where you want them to, etc…
Save yourself some pain and get into the habit of publishing new changes to your CMS 👍
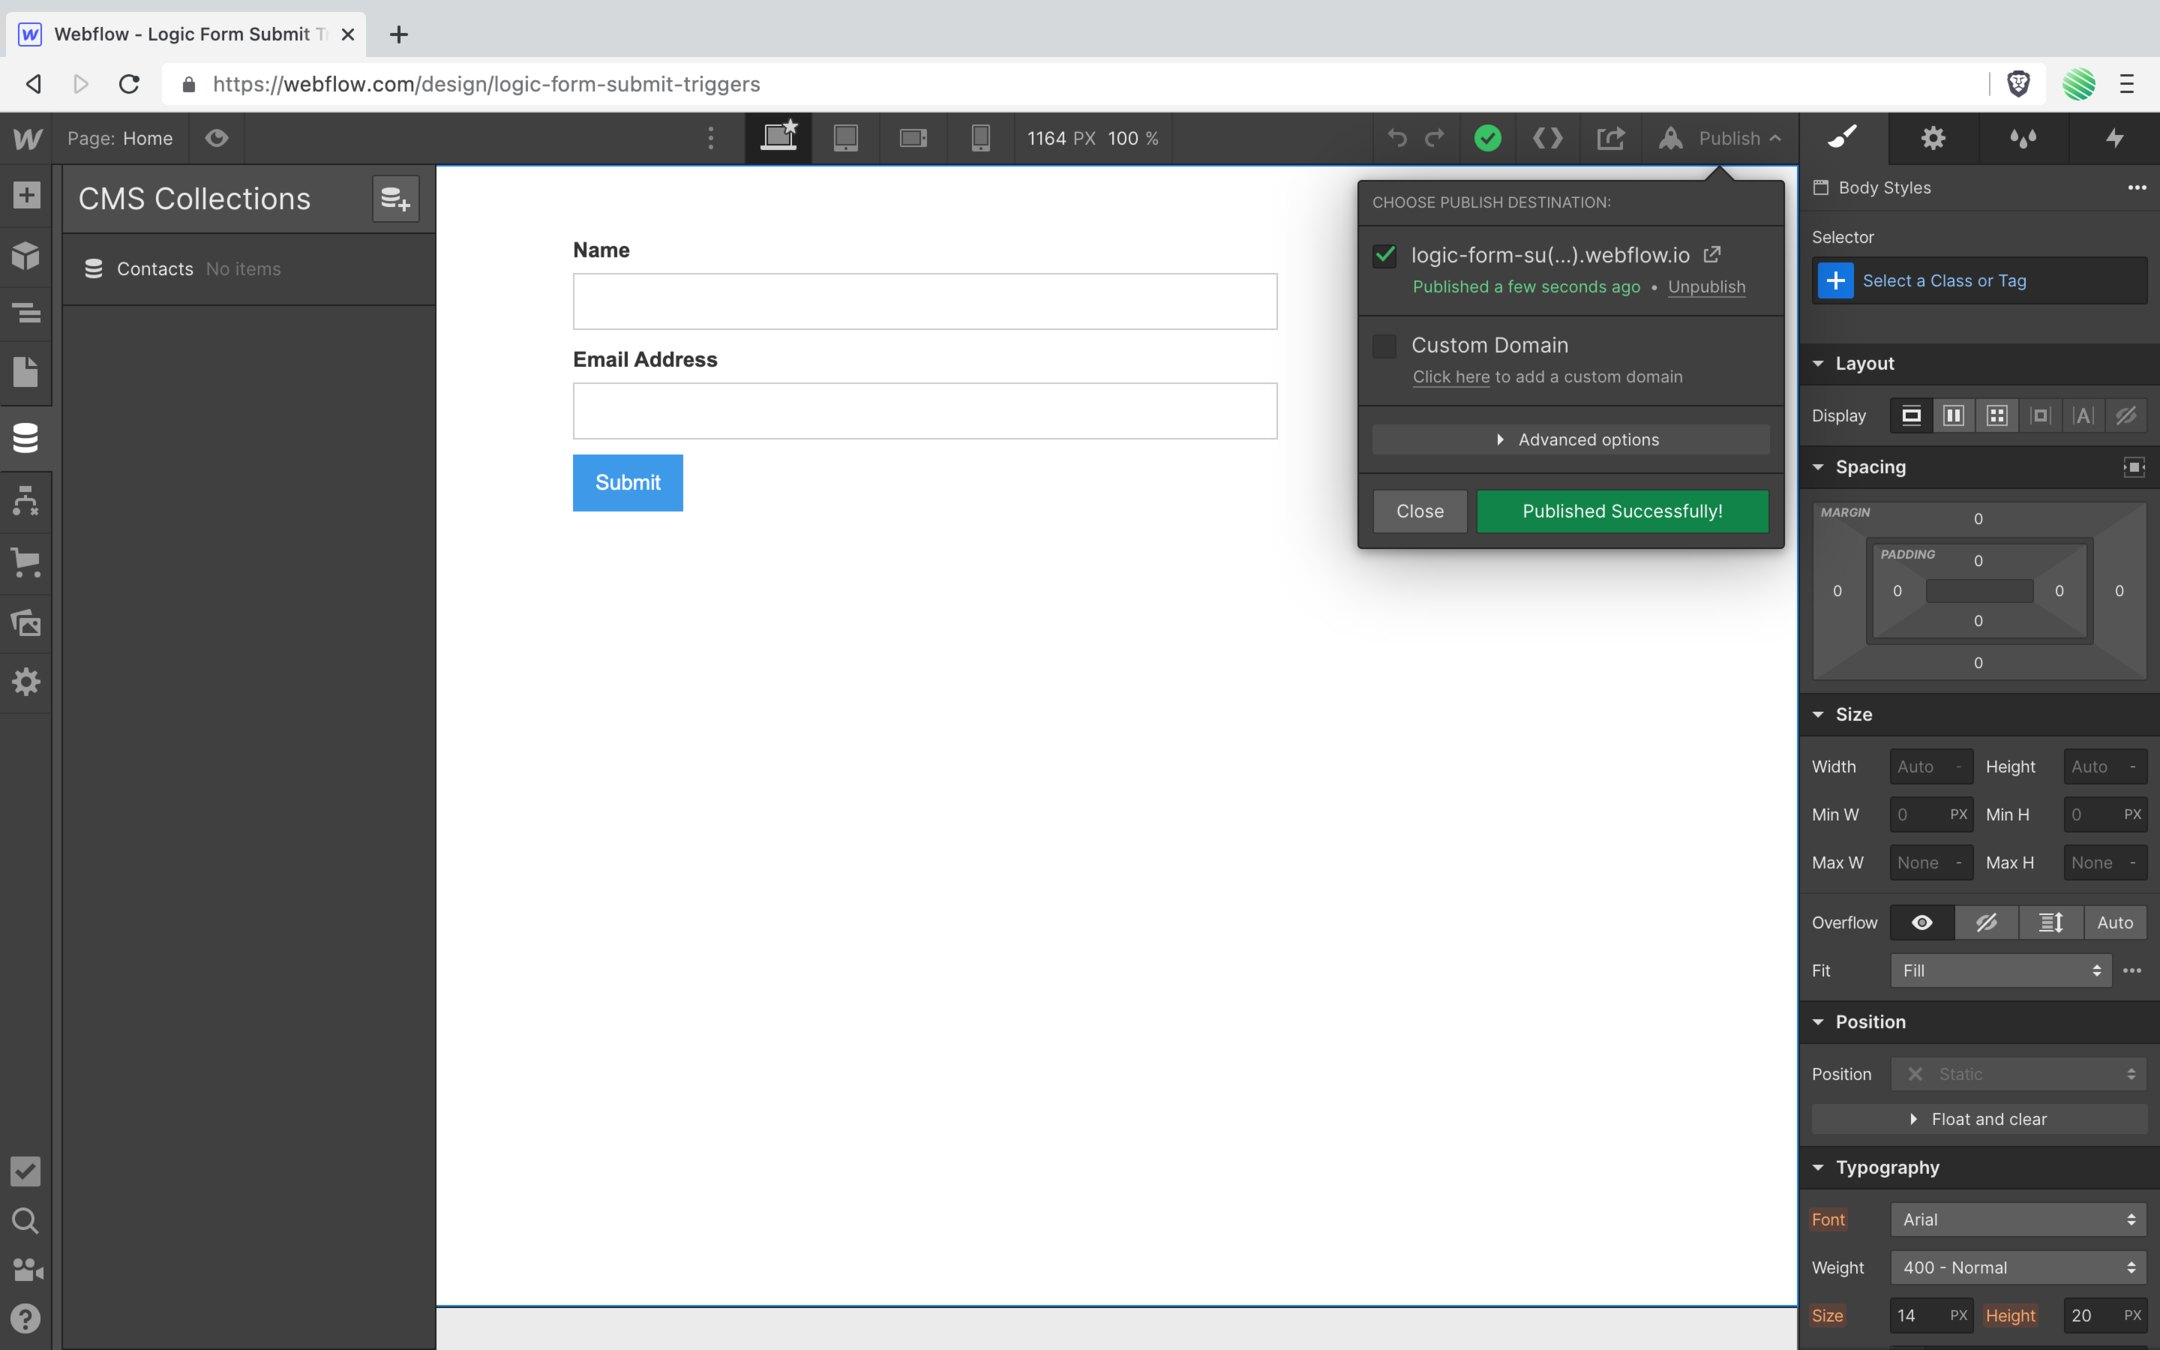
Done, great.
Go back to your Logic flow.
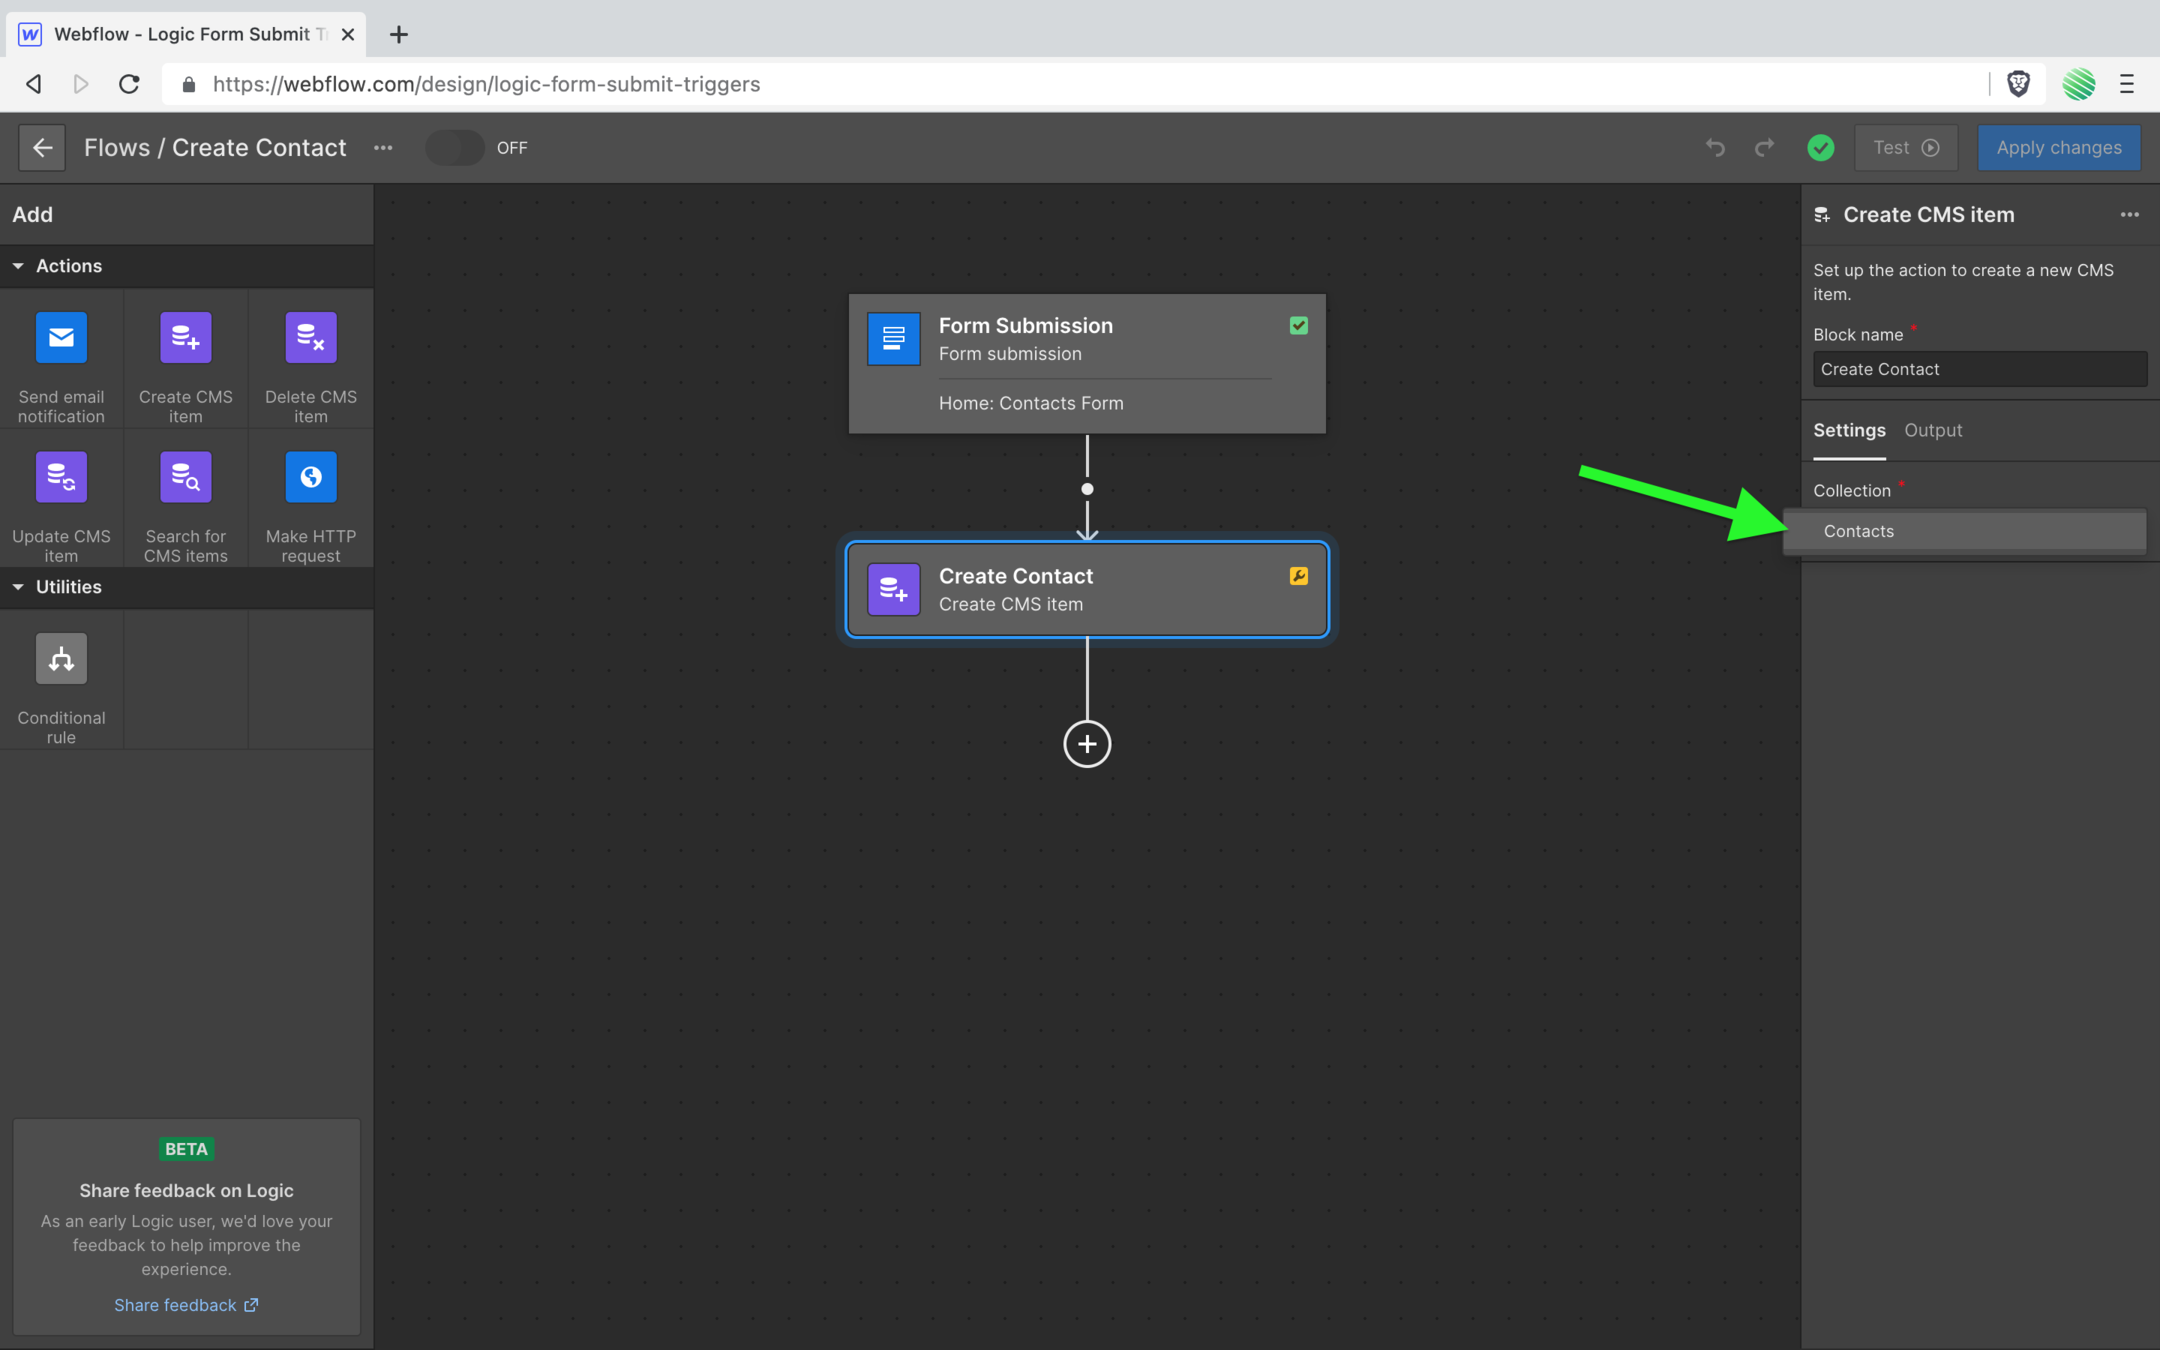
Open the action blocks “Collection” dropdown again..
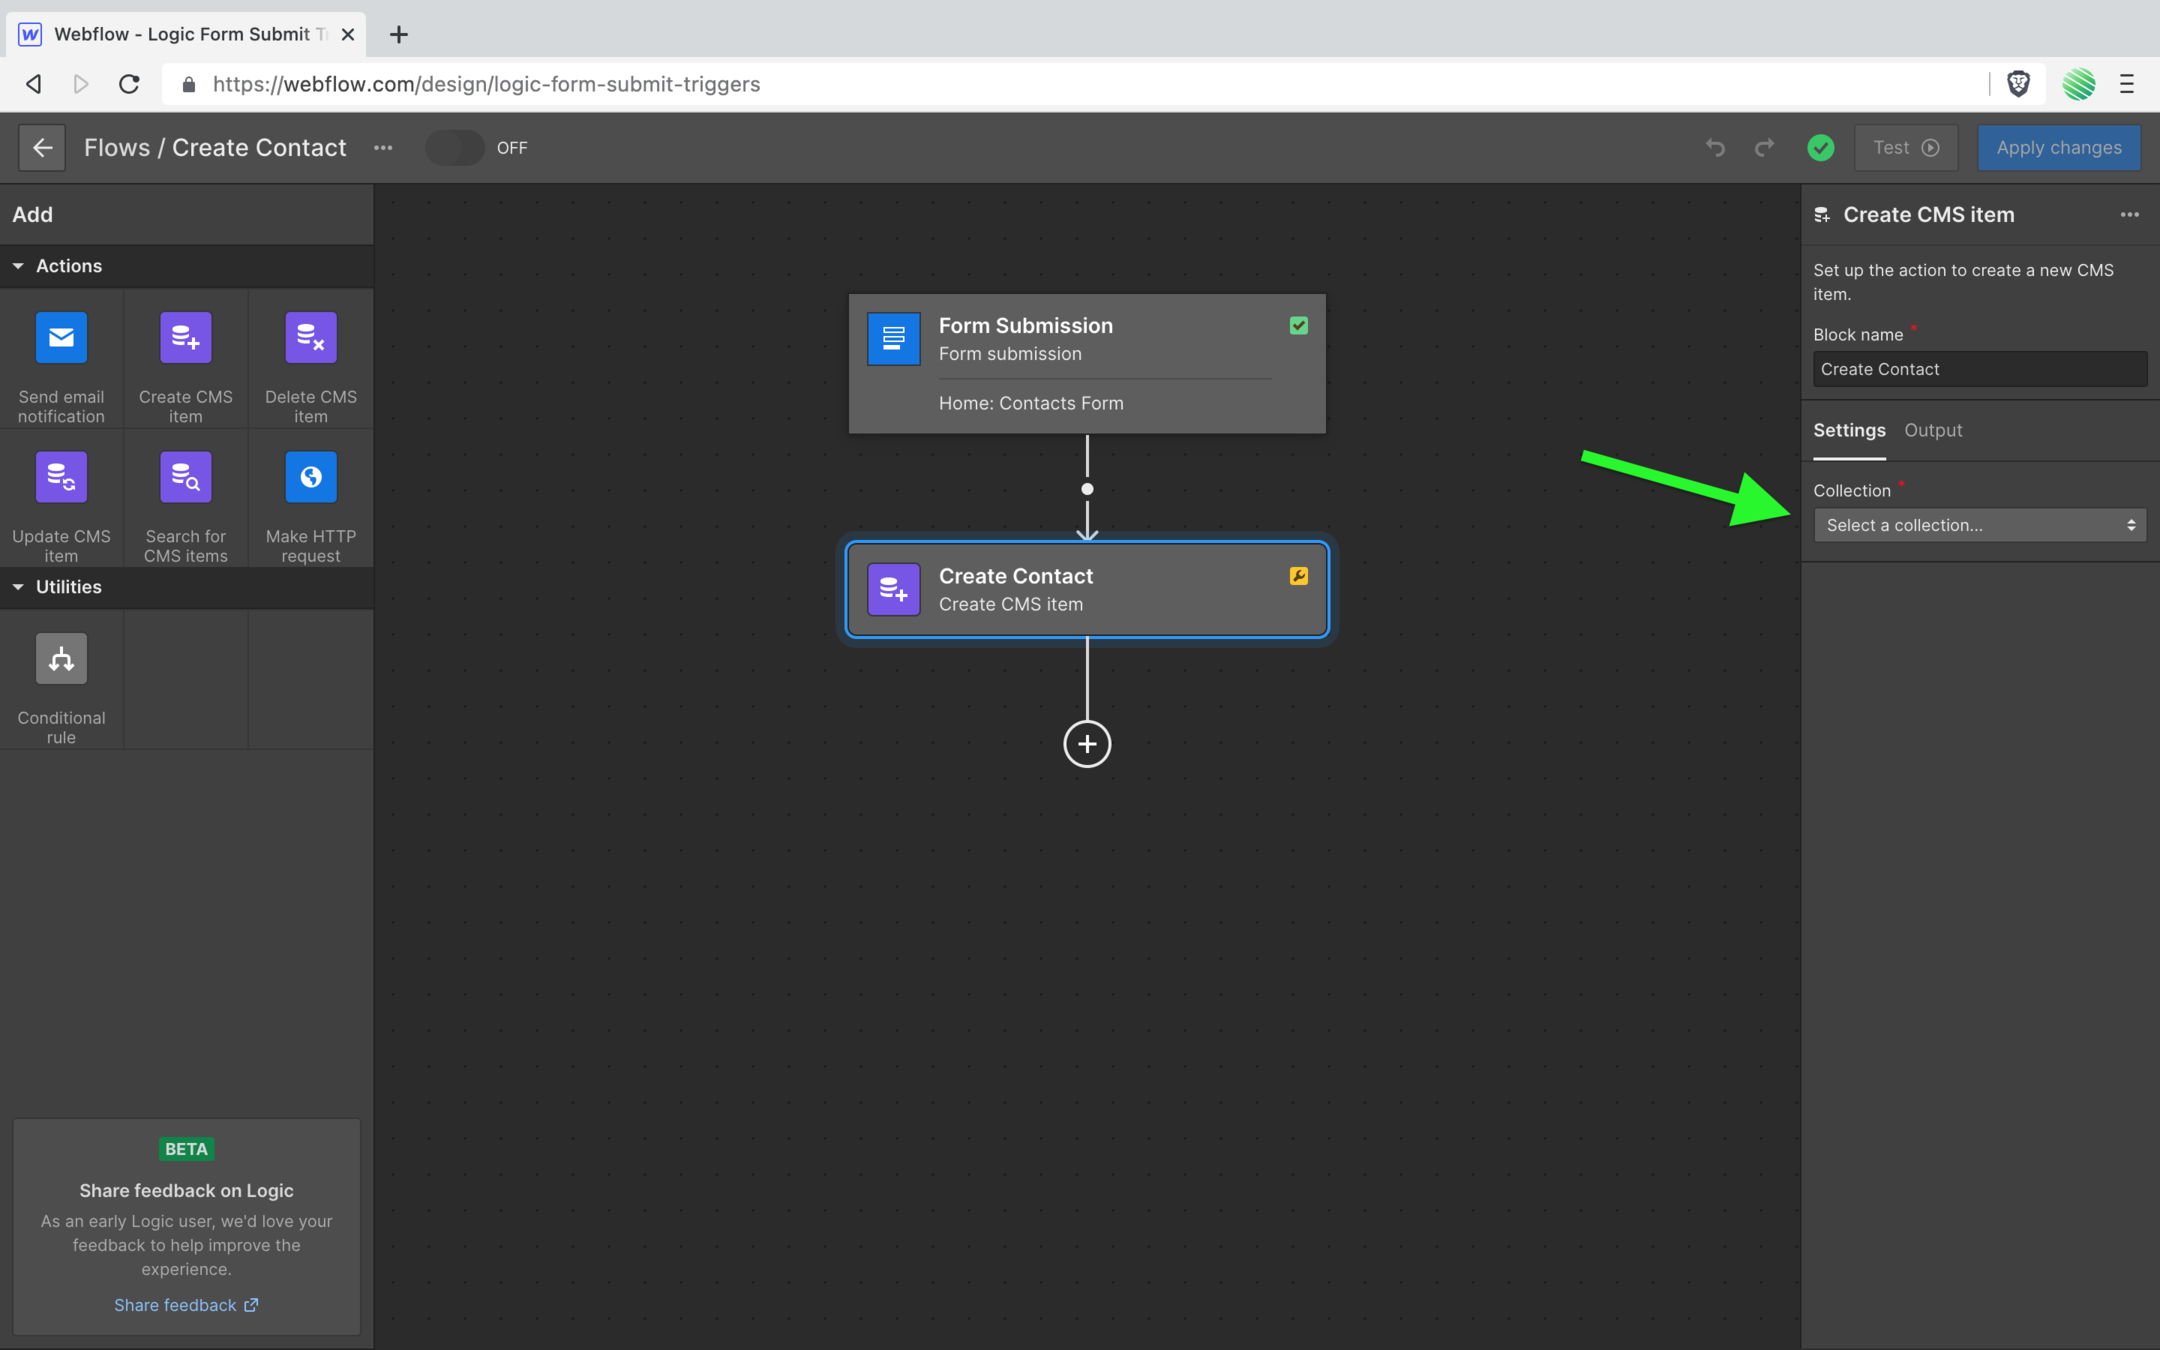
…and there’s your new CMS Collection. Nice!
Select it.
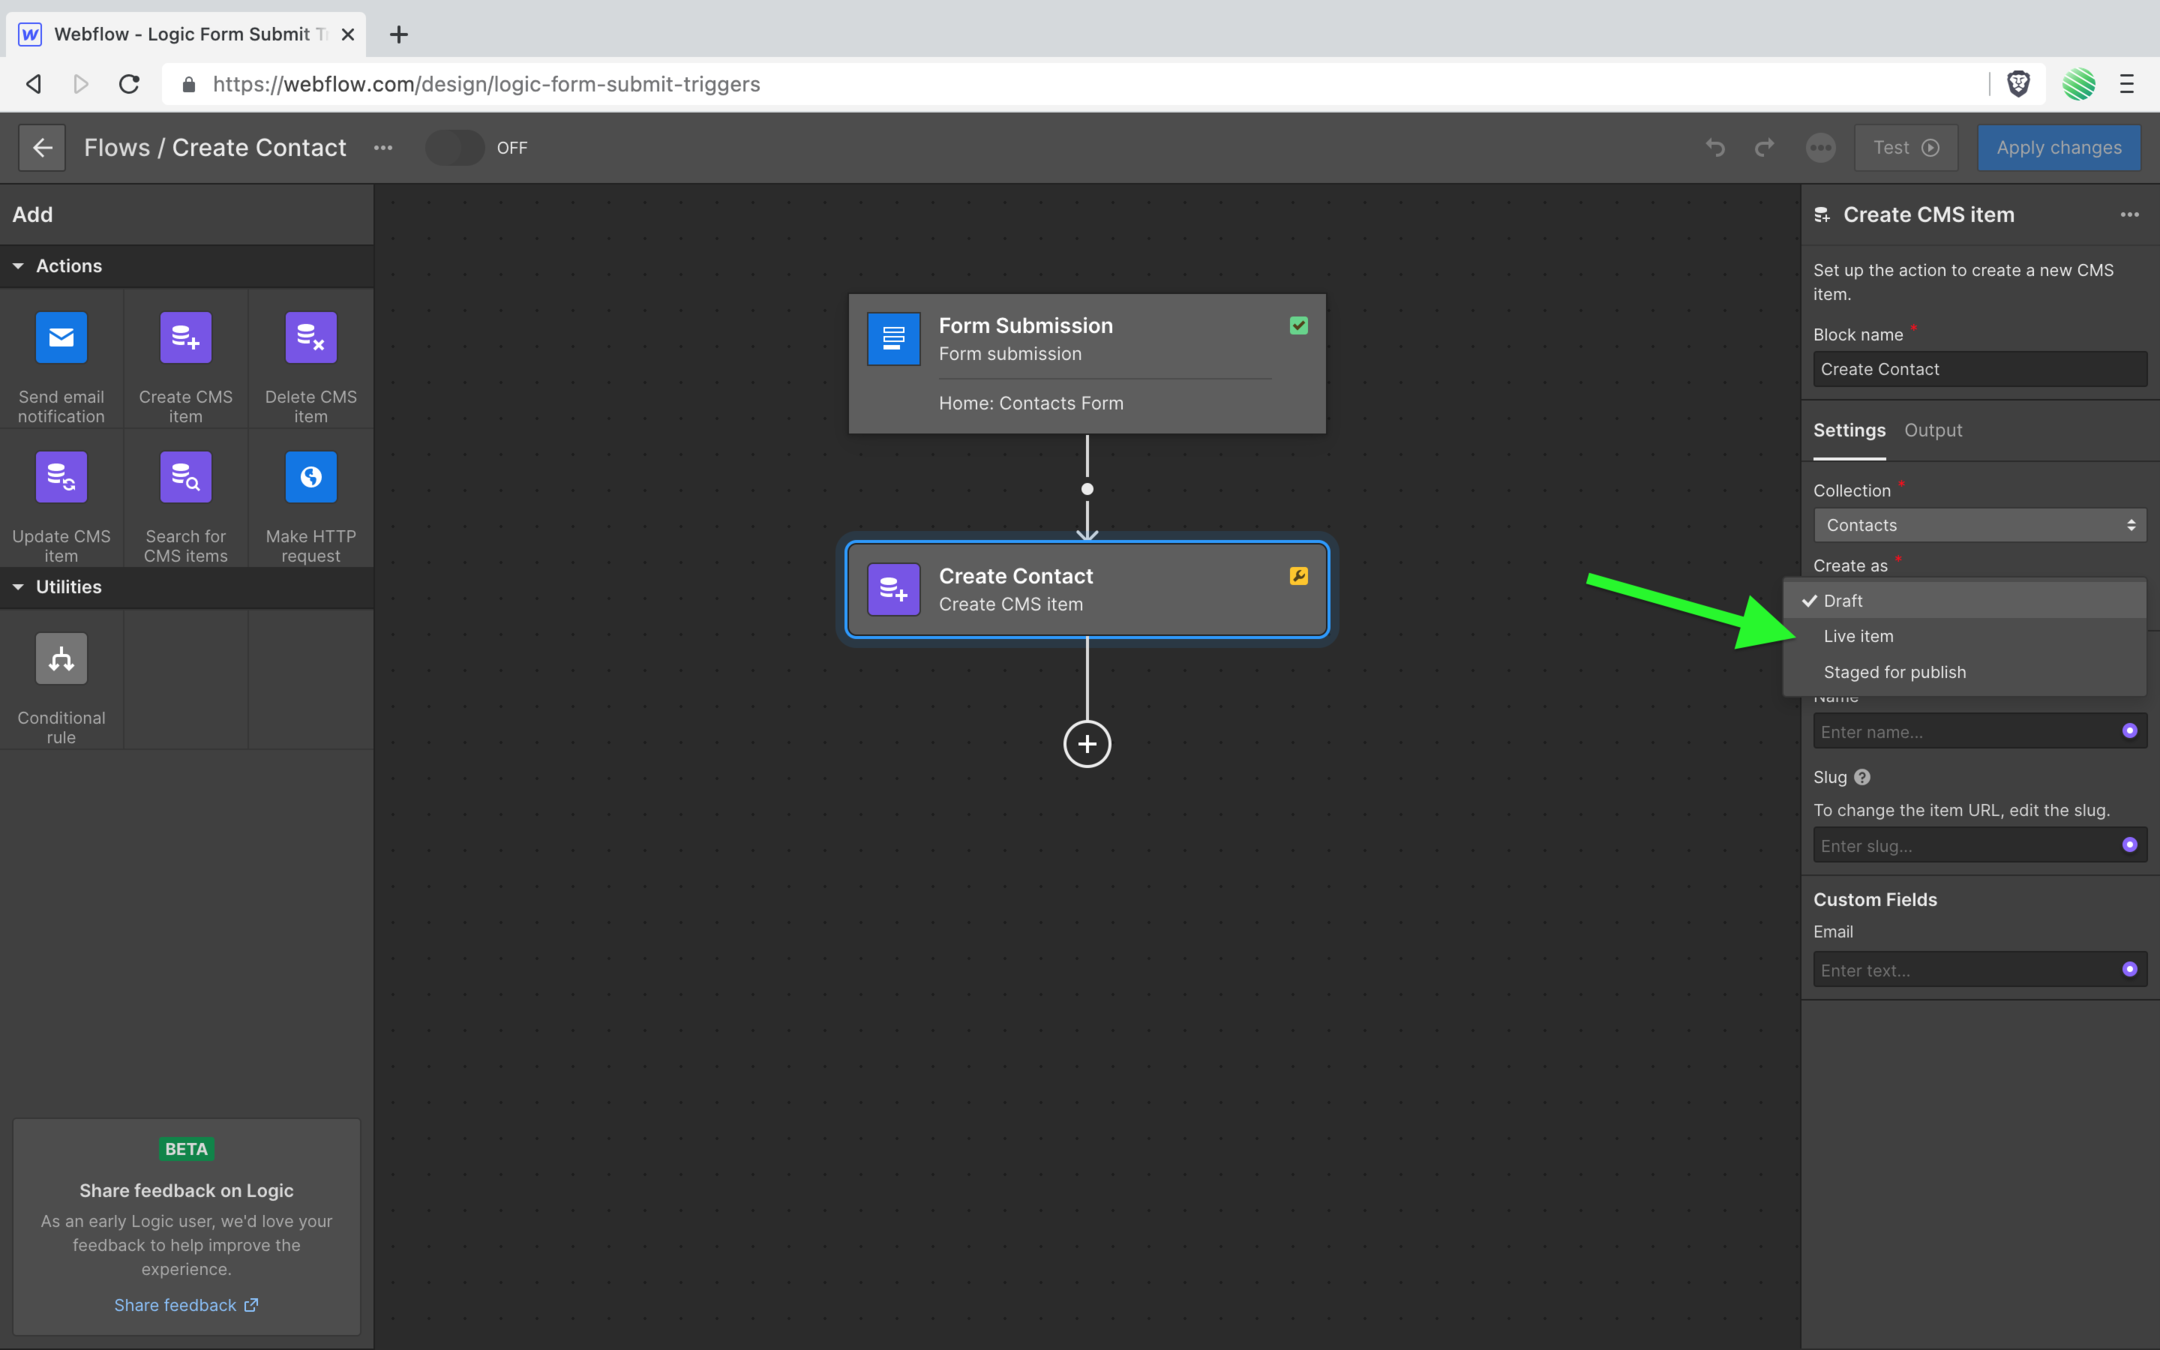
Here’s more awesome sauce.
You can choose how you want this item to be created.
For this walk through you want to create a “Live item” so choose that option.
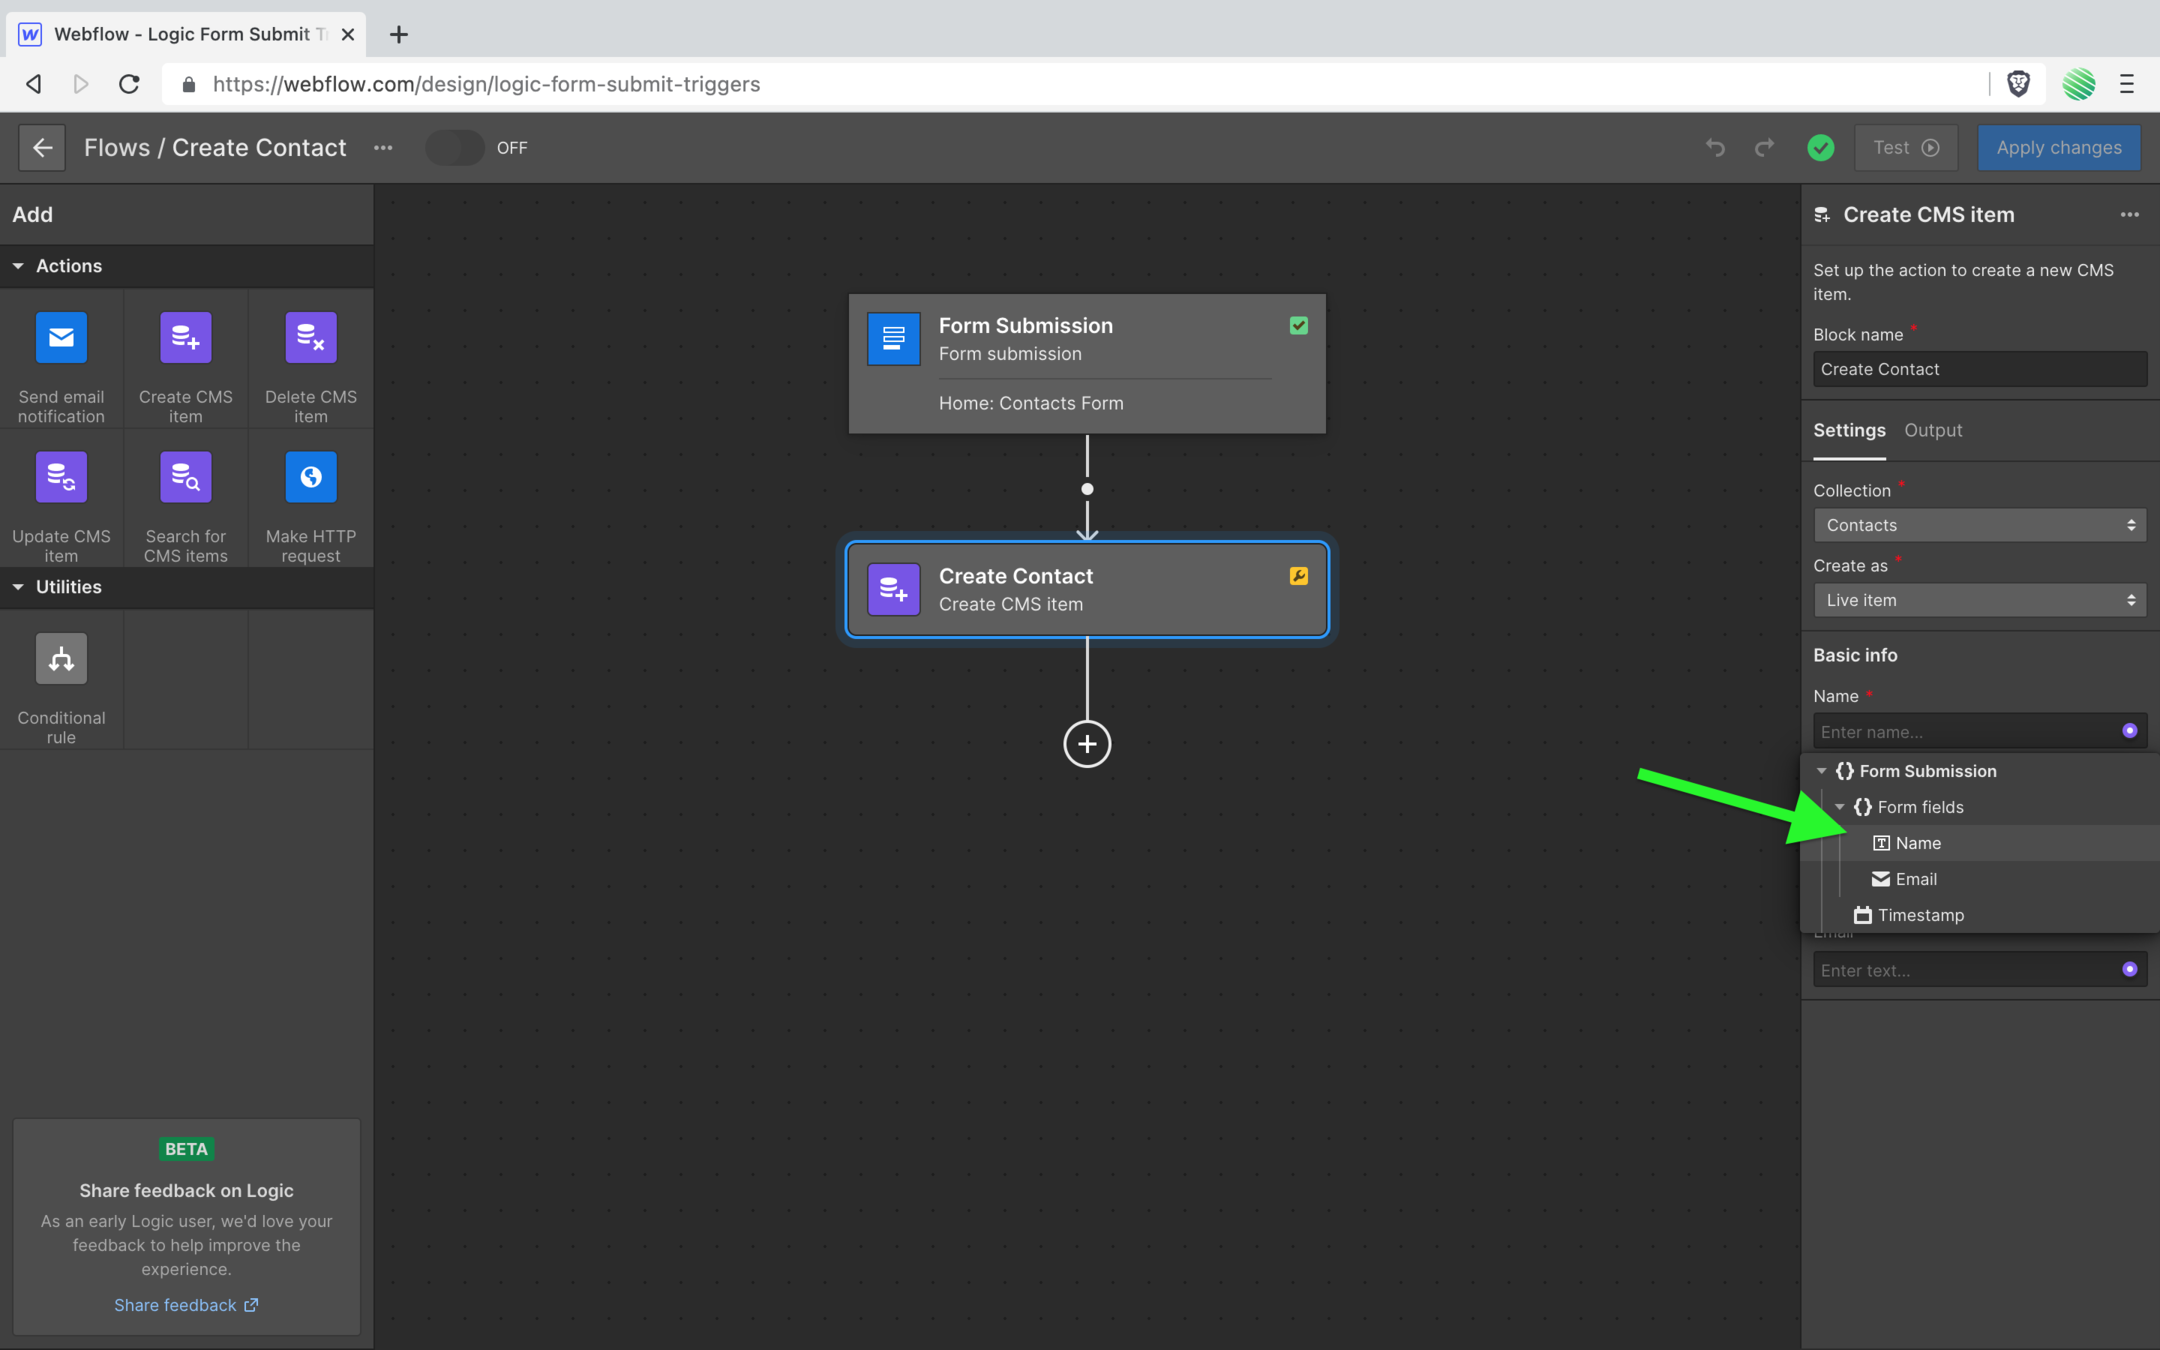
Here’s where the fun starts!
You can map the fields a user filled out to specific fields within your new CMS item 🤯
Yup. It’s that good 🤩
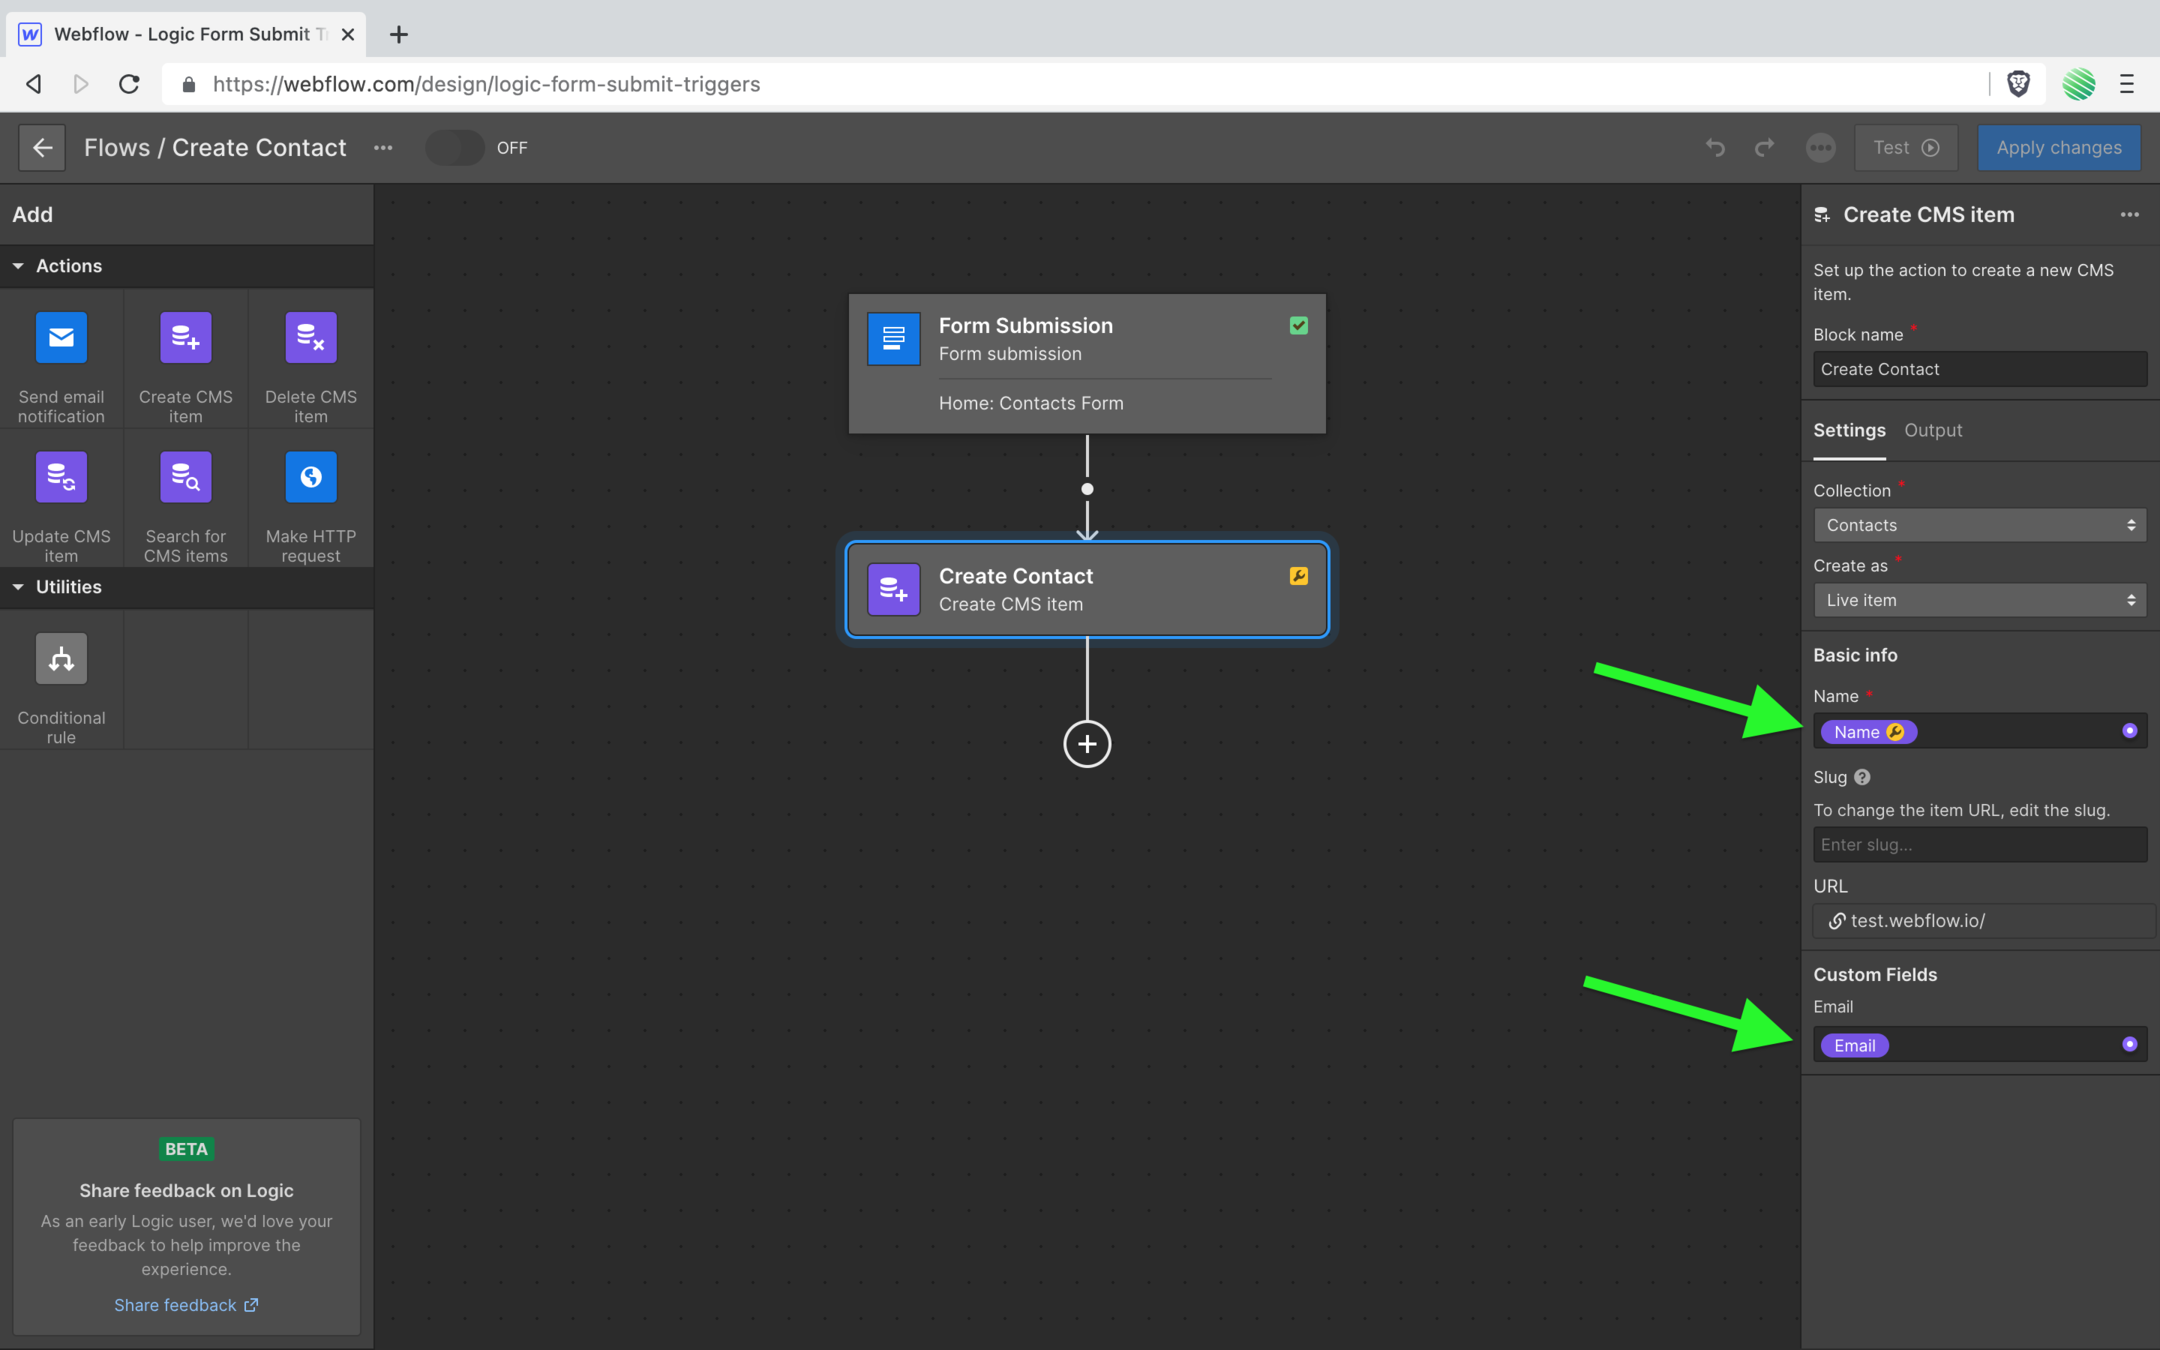
For the CMS field, choose the correct form field.
Do the same thing for your email field.
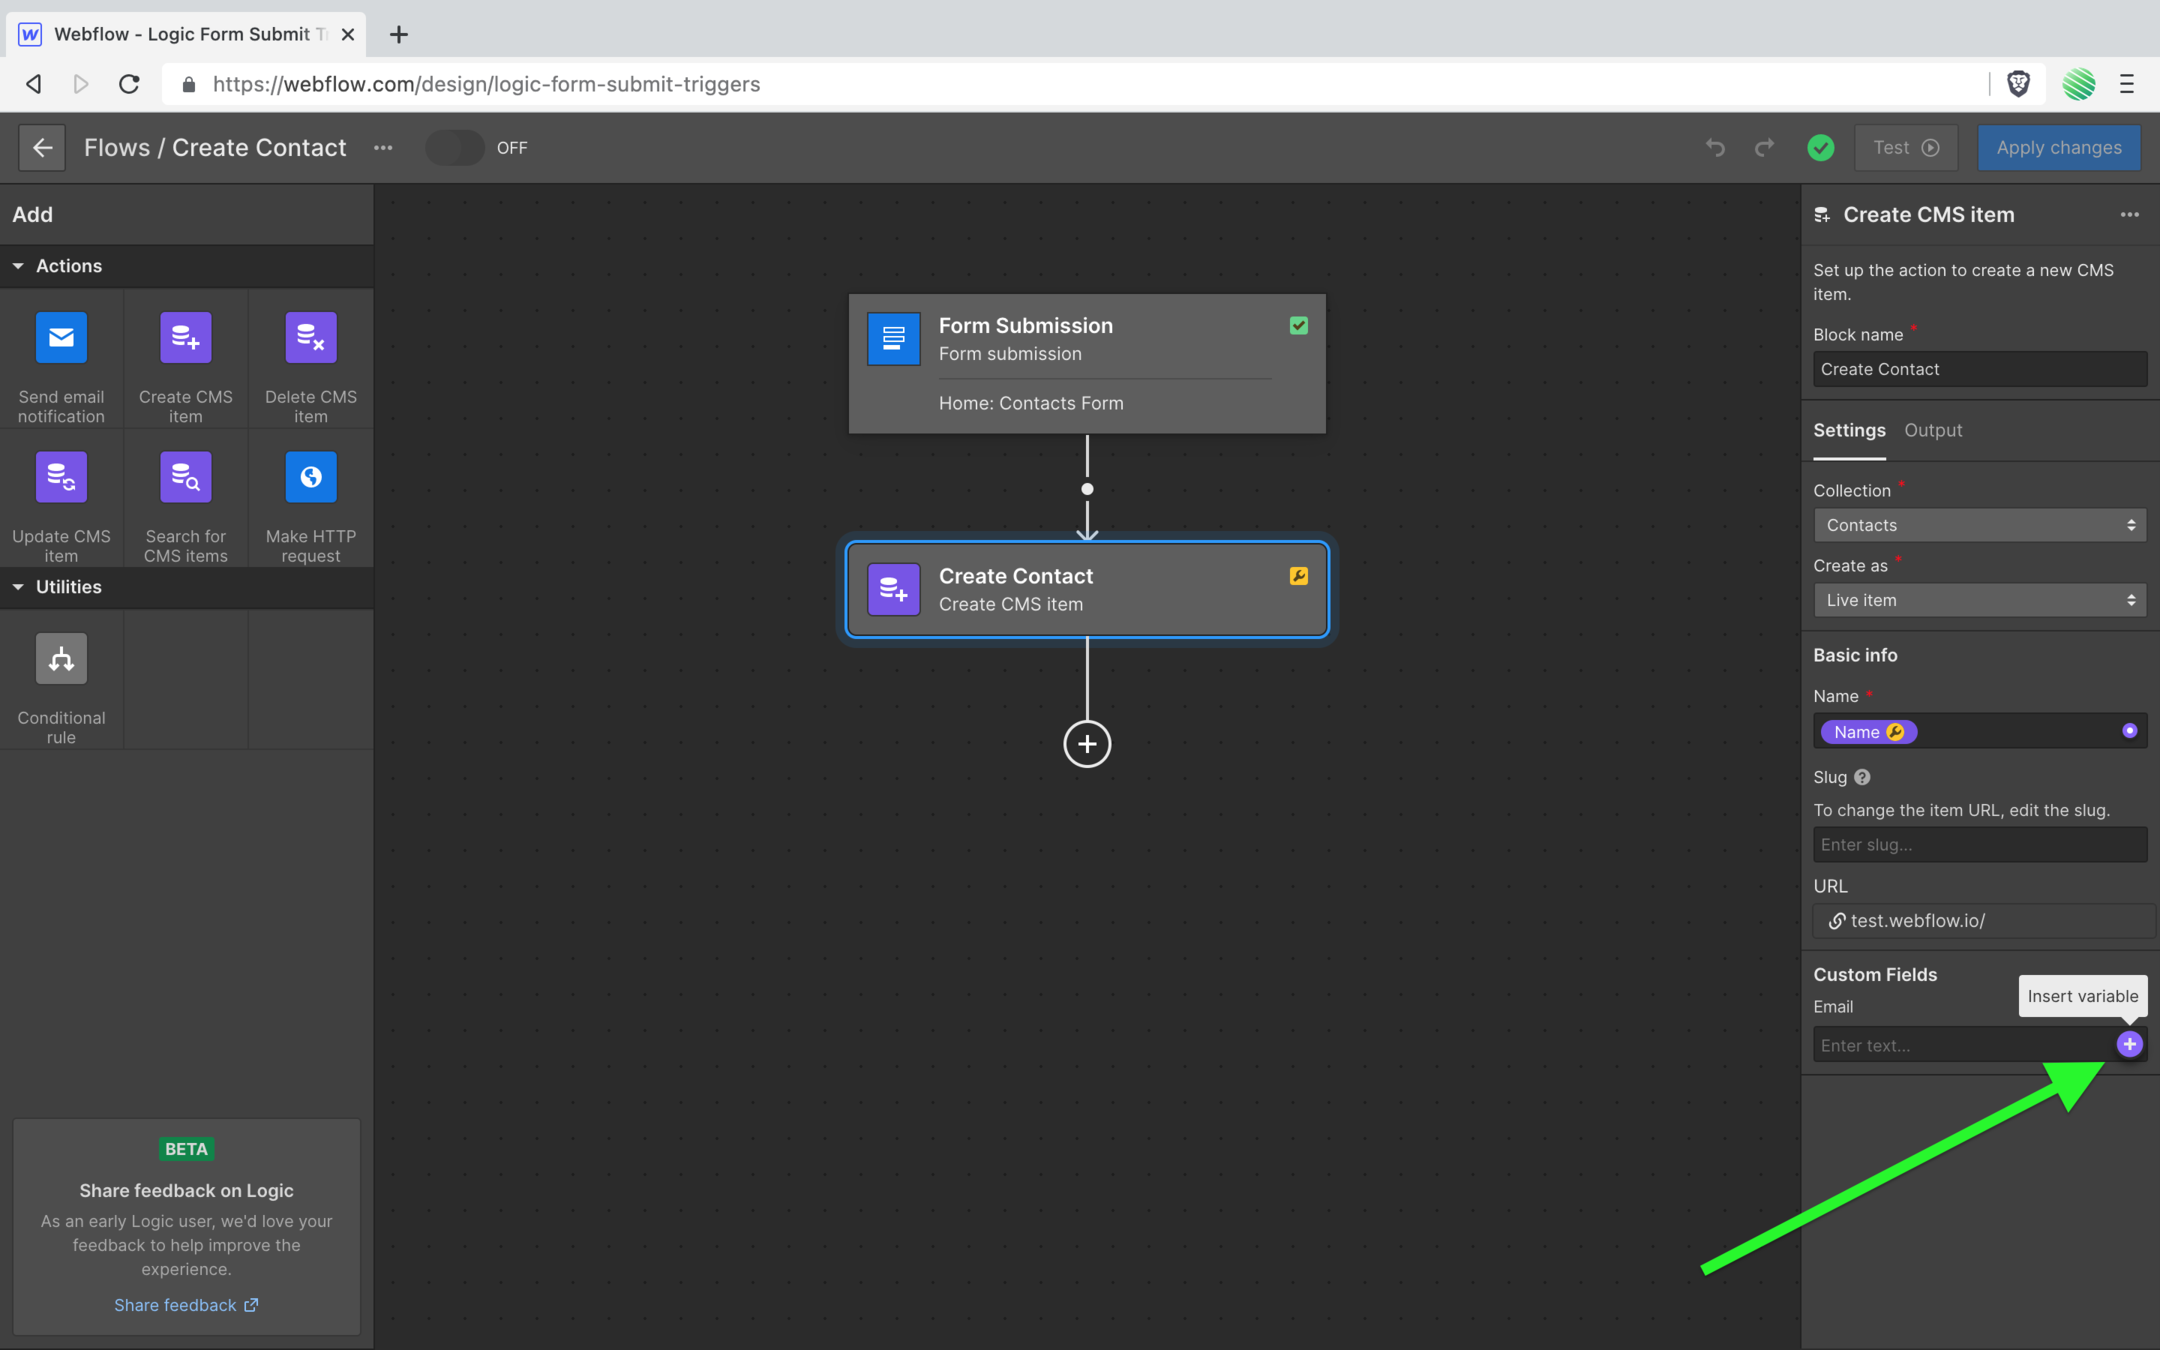
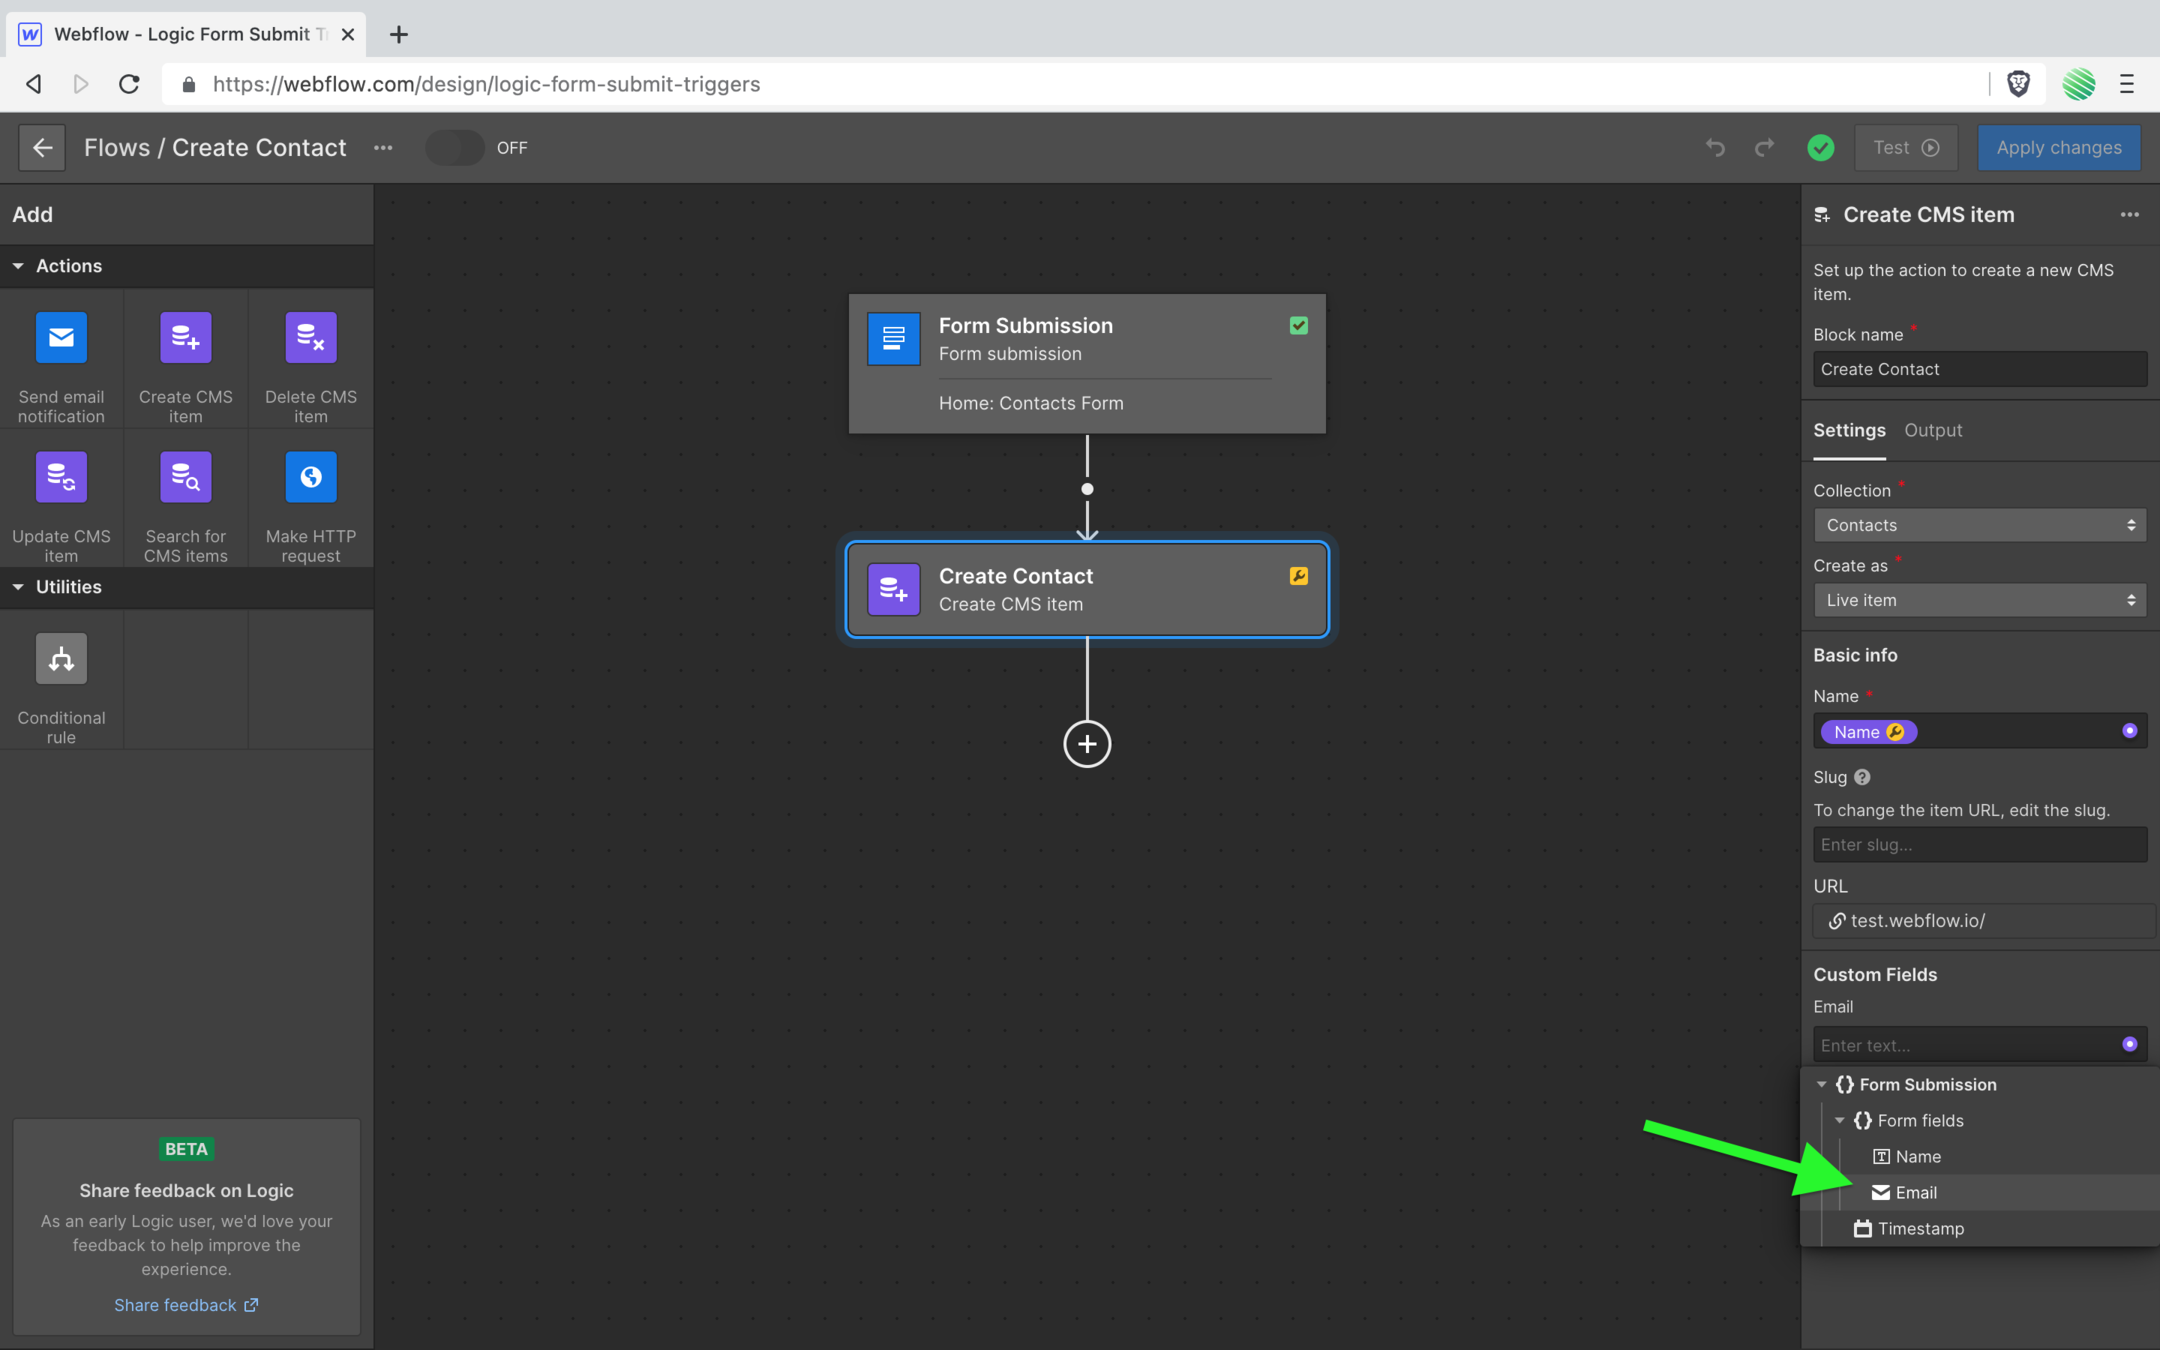
So simple, yet so powerful.
Alright. So here’s a little gotcha.
Notice the wrench icon on your action block?
This setup is not complete.
Also notice the same wrench icon within your name field.
That’s Webflow saying to complete this setup, you need to do something more with that name field.
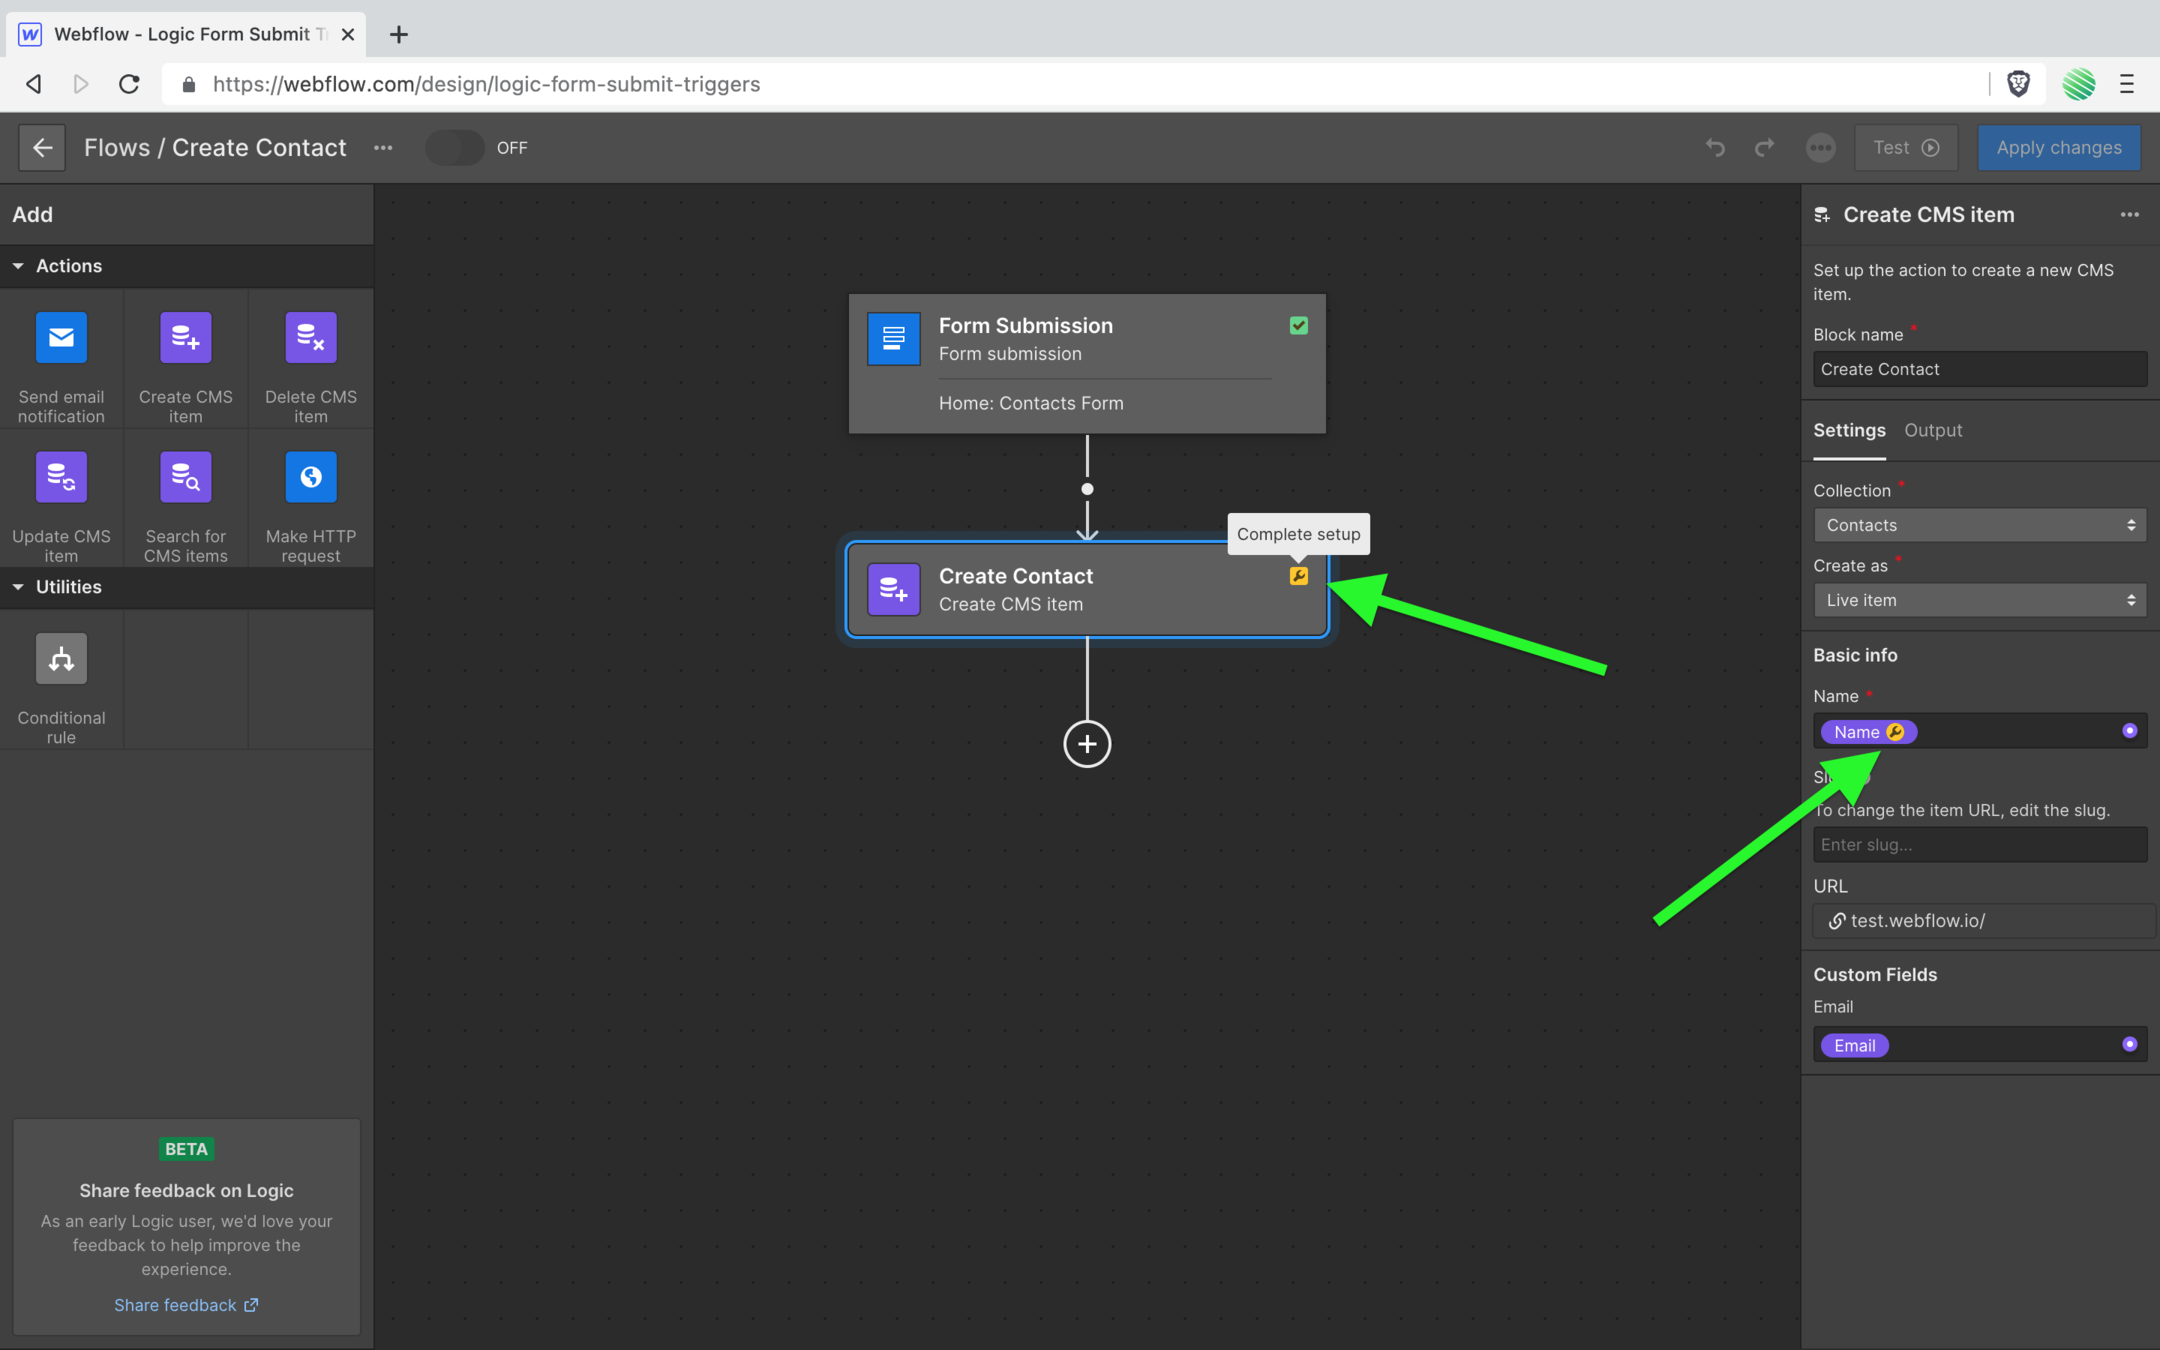
Tap on the wrench icon with the name field to find out what you need to do.
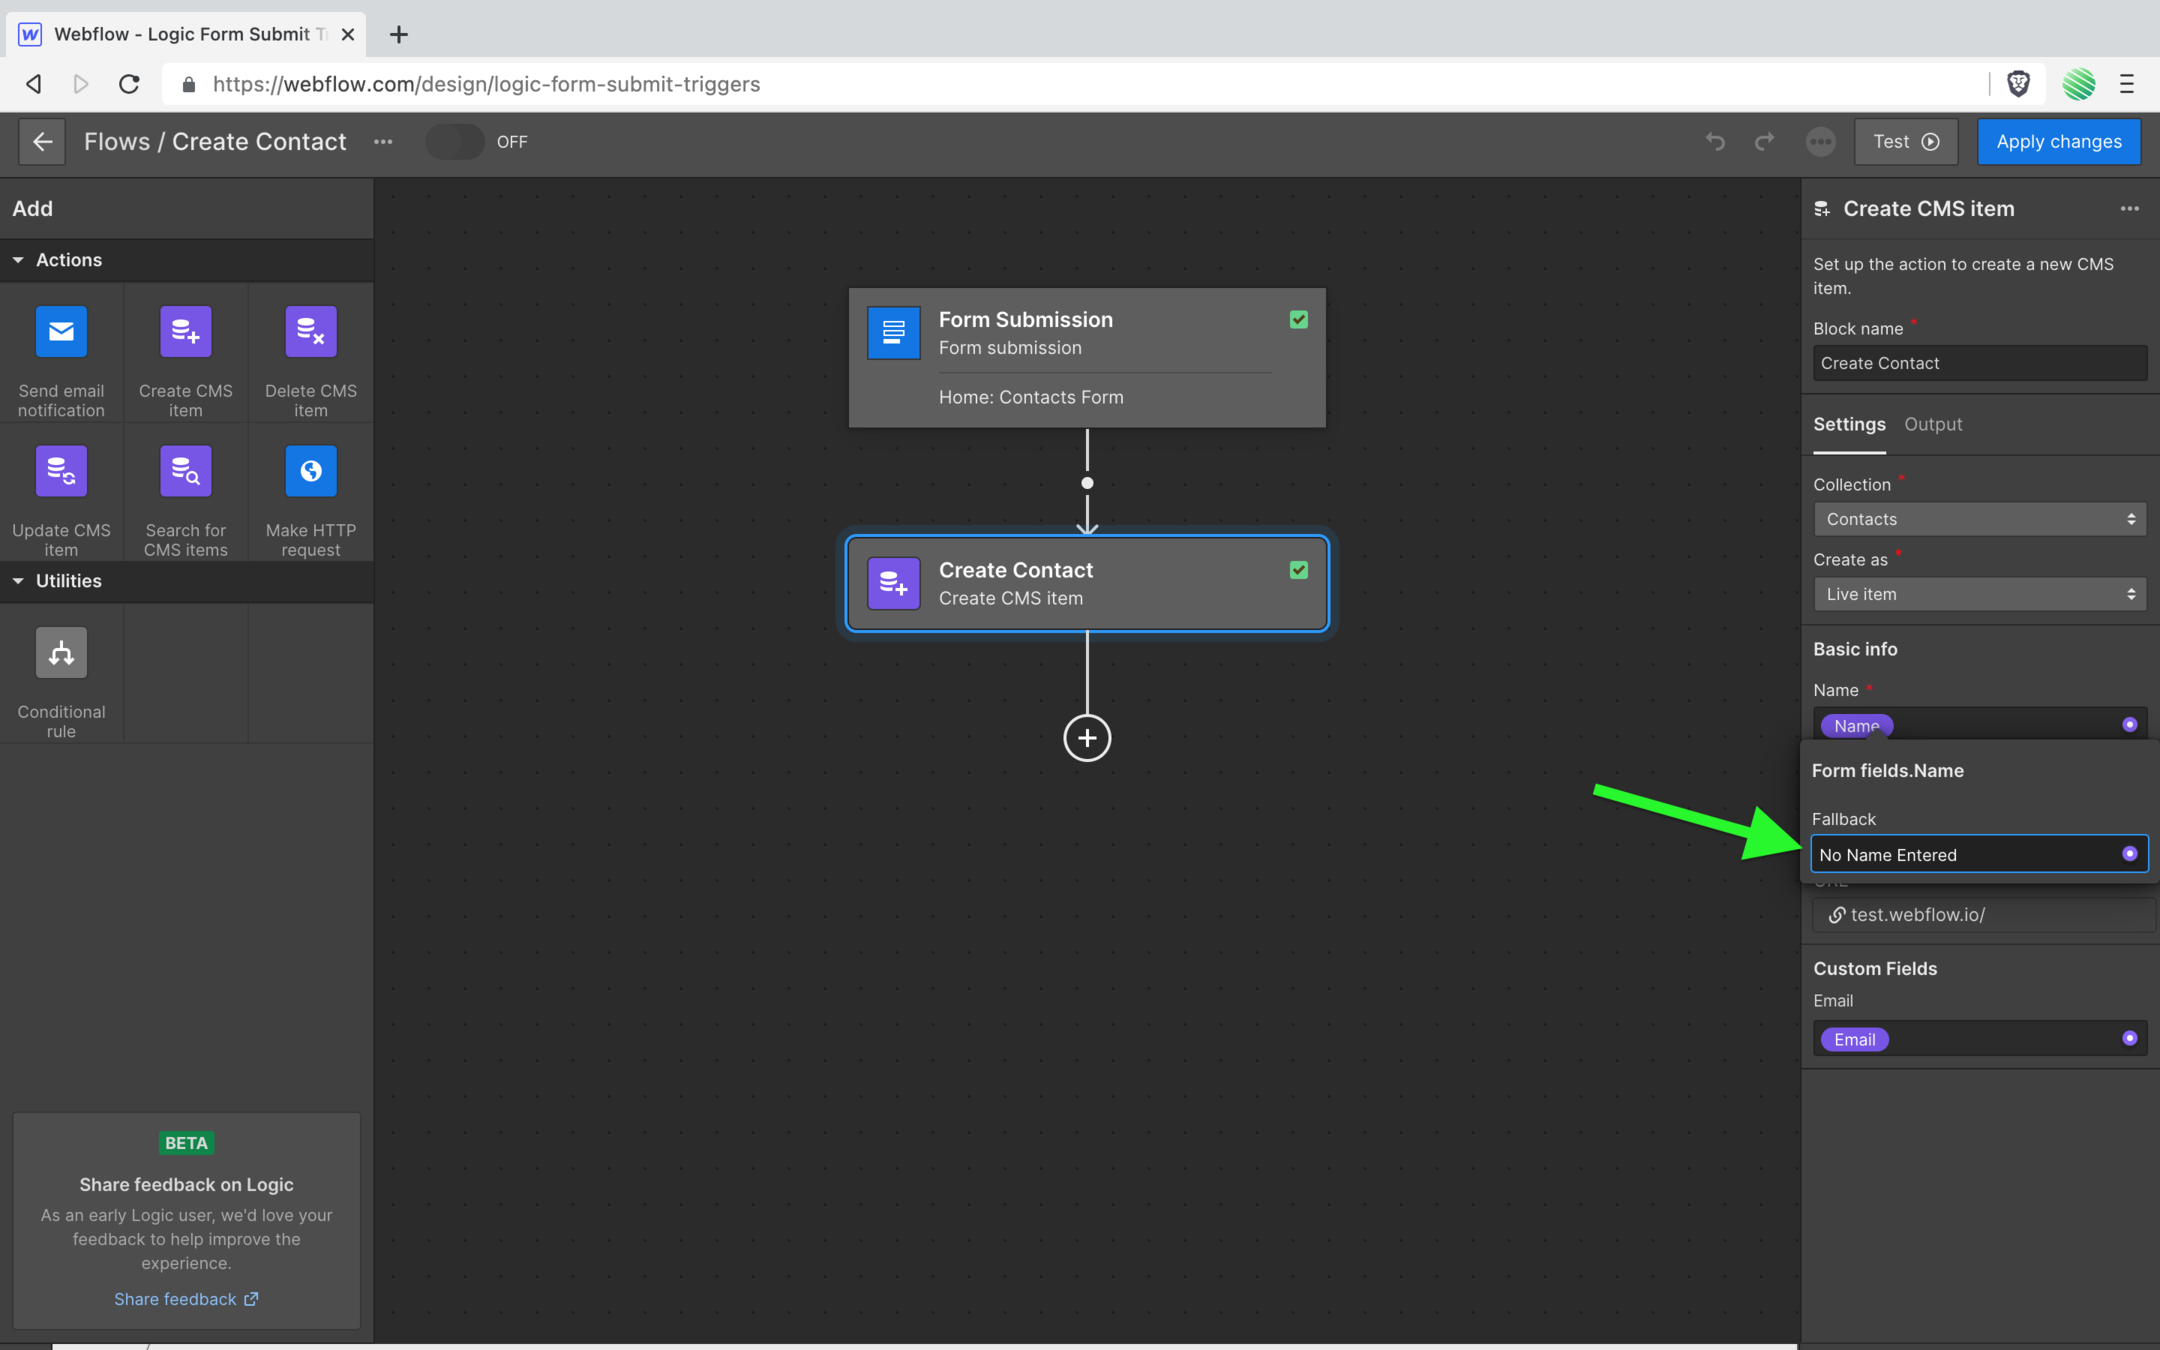
They want you to add a fallback name. This name field within the Webflow CMS is “special”.
Remember, that exists by default for every CMS Collection that you create.
And it’s required to exist.
If your form doesn’t pass this through (maybe you didn’t set the form field to “required”) then this flow will use whatever name you add here.
For now, just fill in something.
I added “No Name Entered”.
Okay, done.
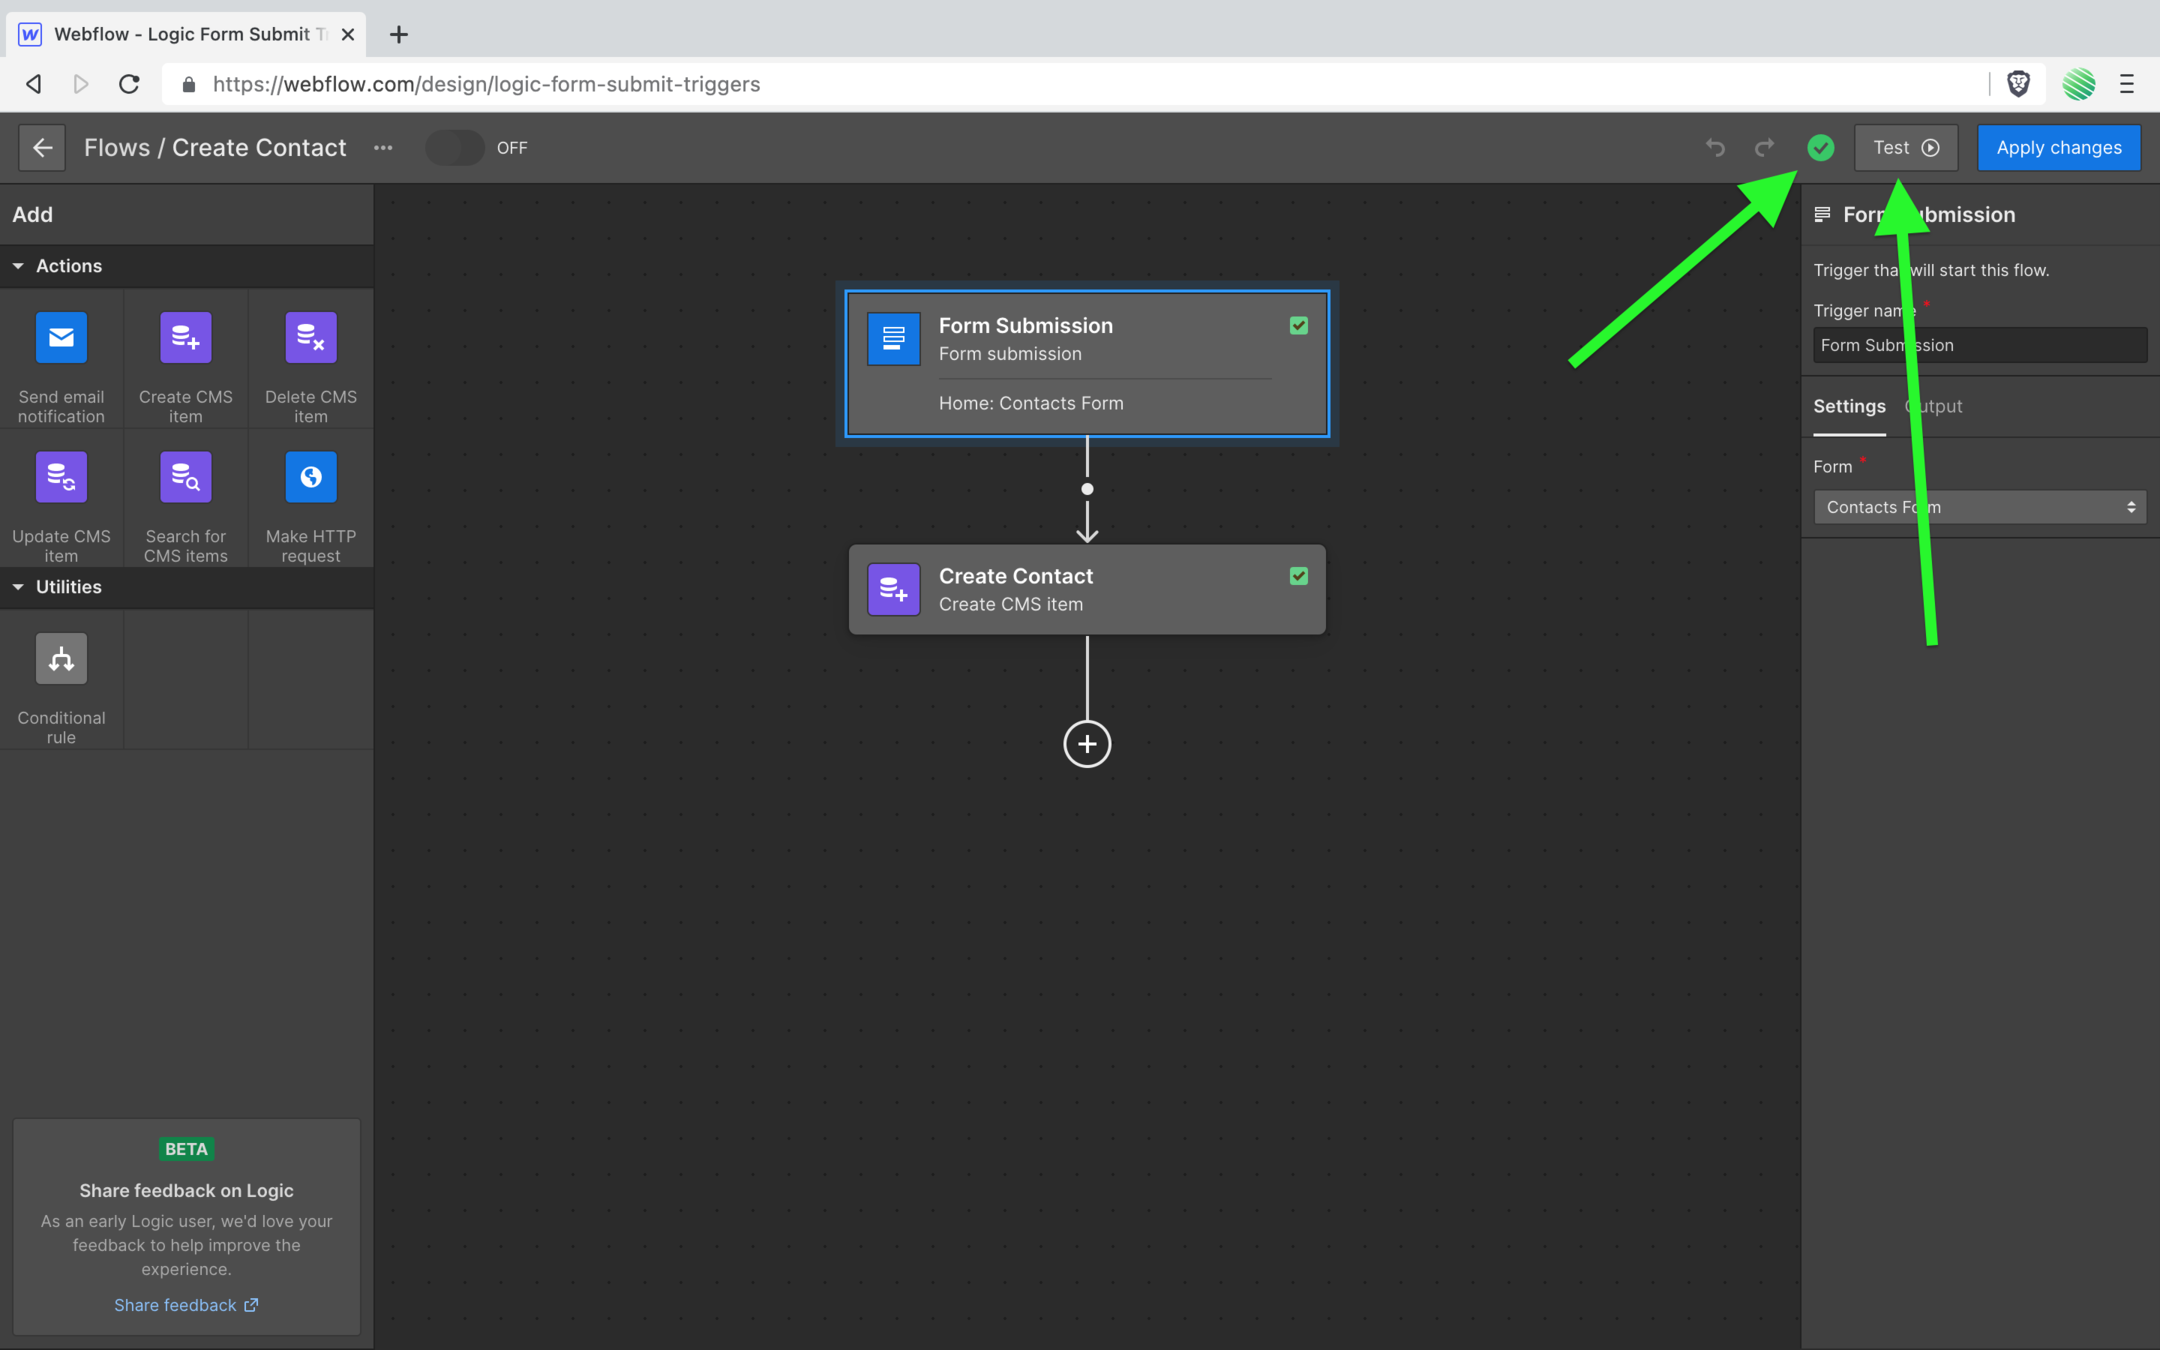
Notice the wrench icon is replace with a green check mark.
Also notice green checkmark has appeared at the top of the flow editor.
Let’s give this a test!
Tap the test button…
If you’re familiar with Zapier or Make, doing things like this was difficult.
With Zapier if you didn’t first submit your form into your new Zap, it wouldn’t work!
I’ve read too many times in the forum where people missing that step - which makes sense, it’s not intuitive at all - and spend hours (if not days) trying to figure out why their Zap won’t work.
That’s not an issue with Webflow Logic 🤩
…and even better.
Instead publishing your project, opening the live site, submitting the form, and testing the flow to see if works, now you can just test it in the flow editor!
Life is good 🍻
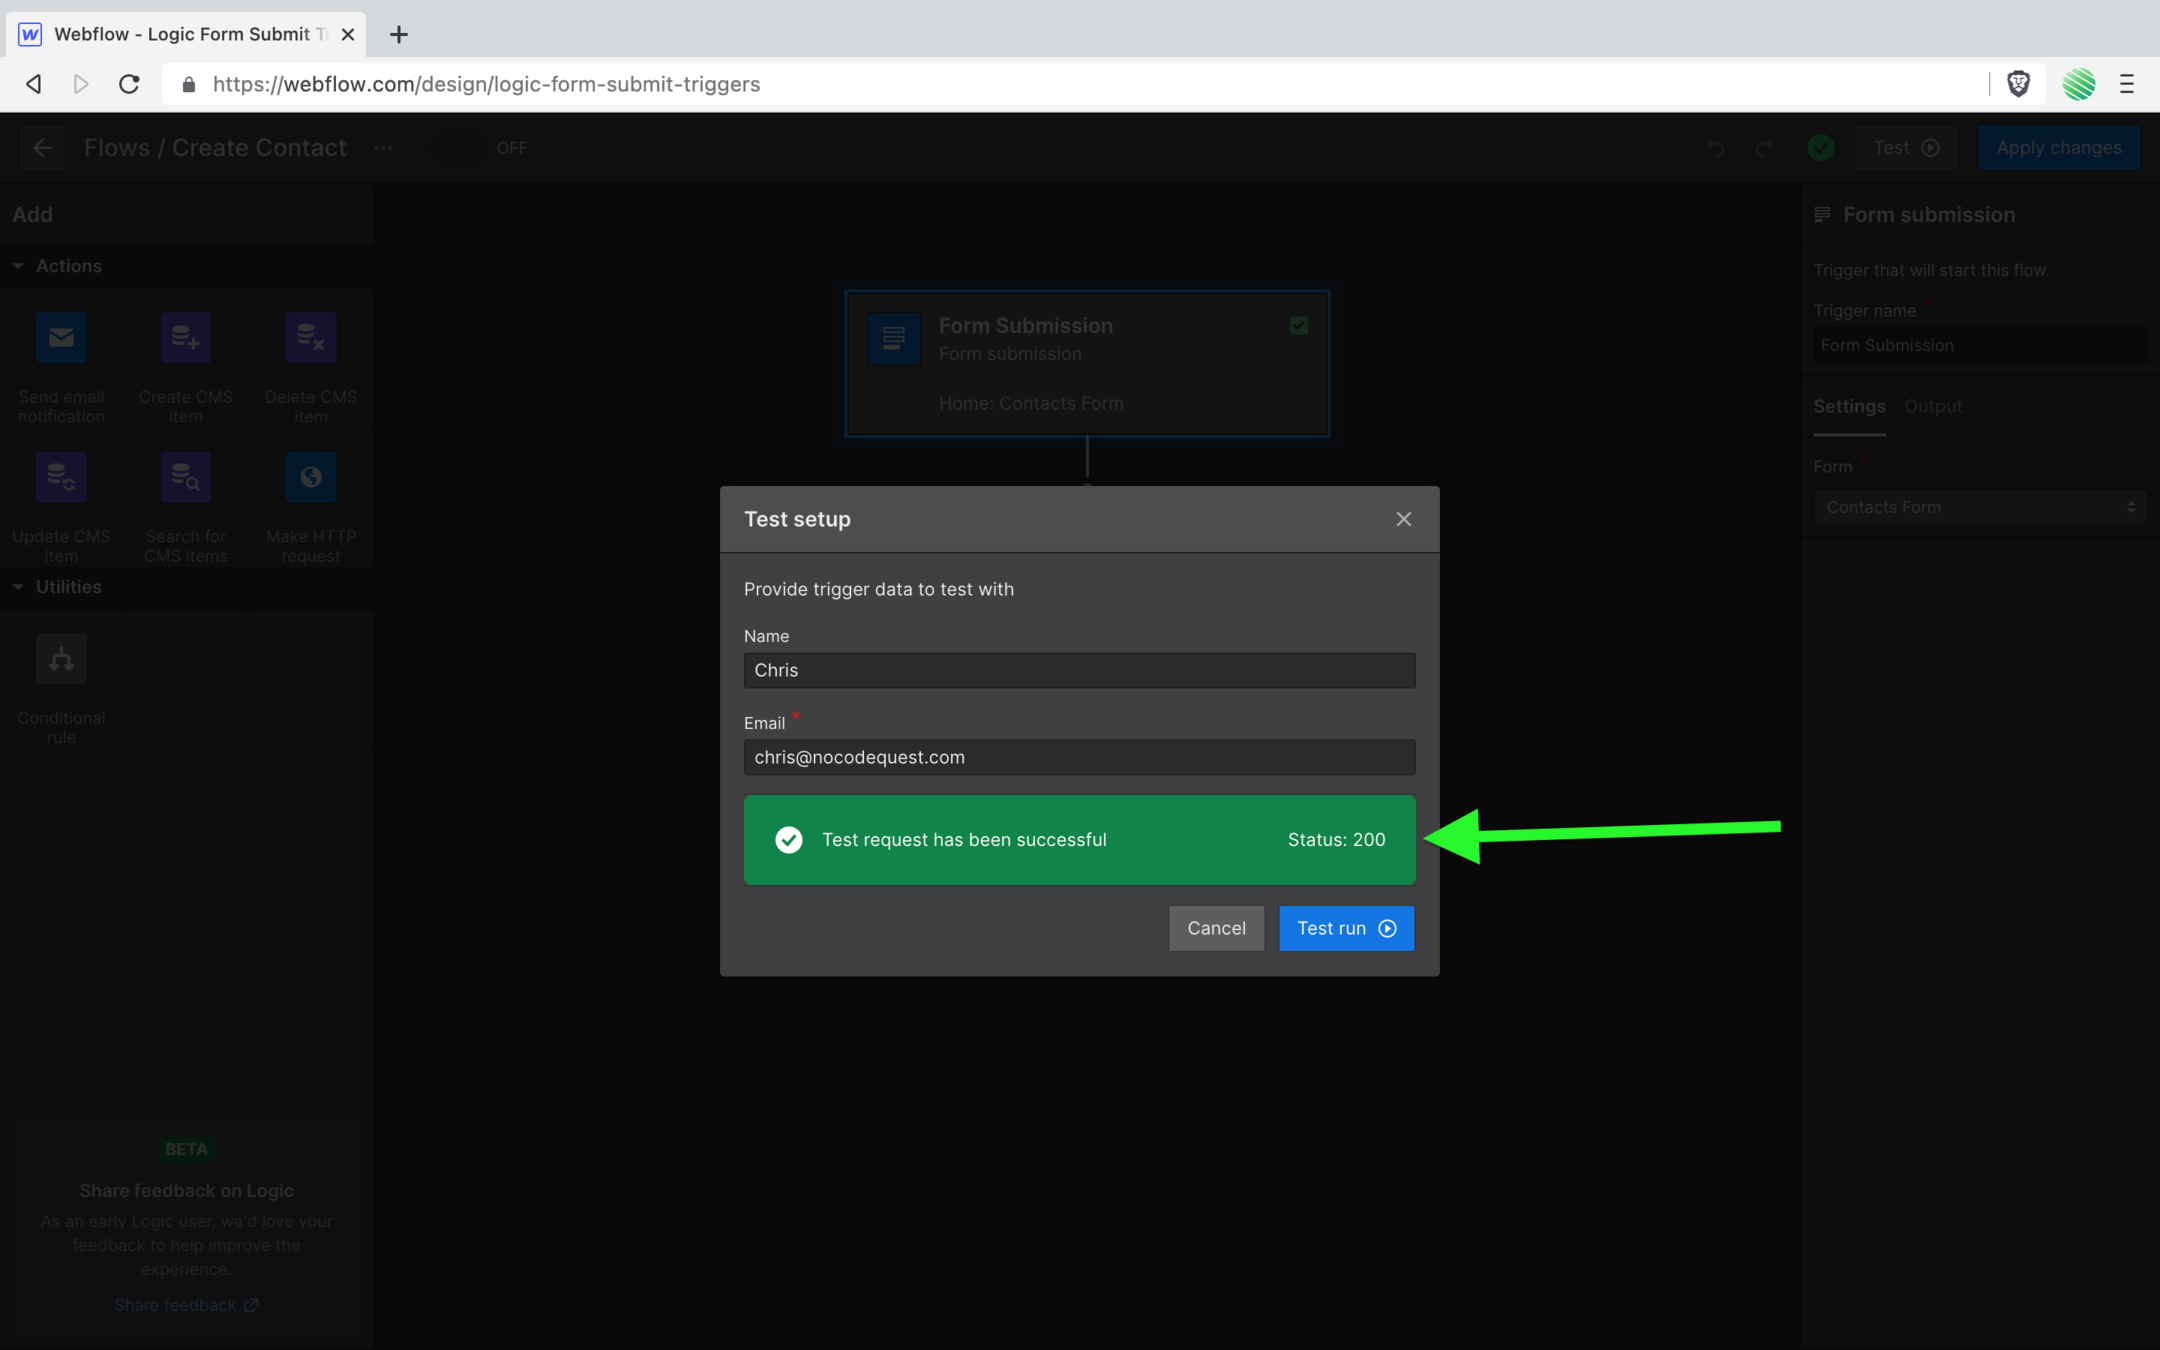
Go ahead and fill out some info, you can use a fake email address it won’t matter.
Submit the test.
All is good.
..but let’s confirm all is good before we continue.
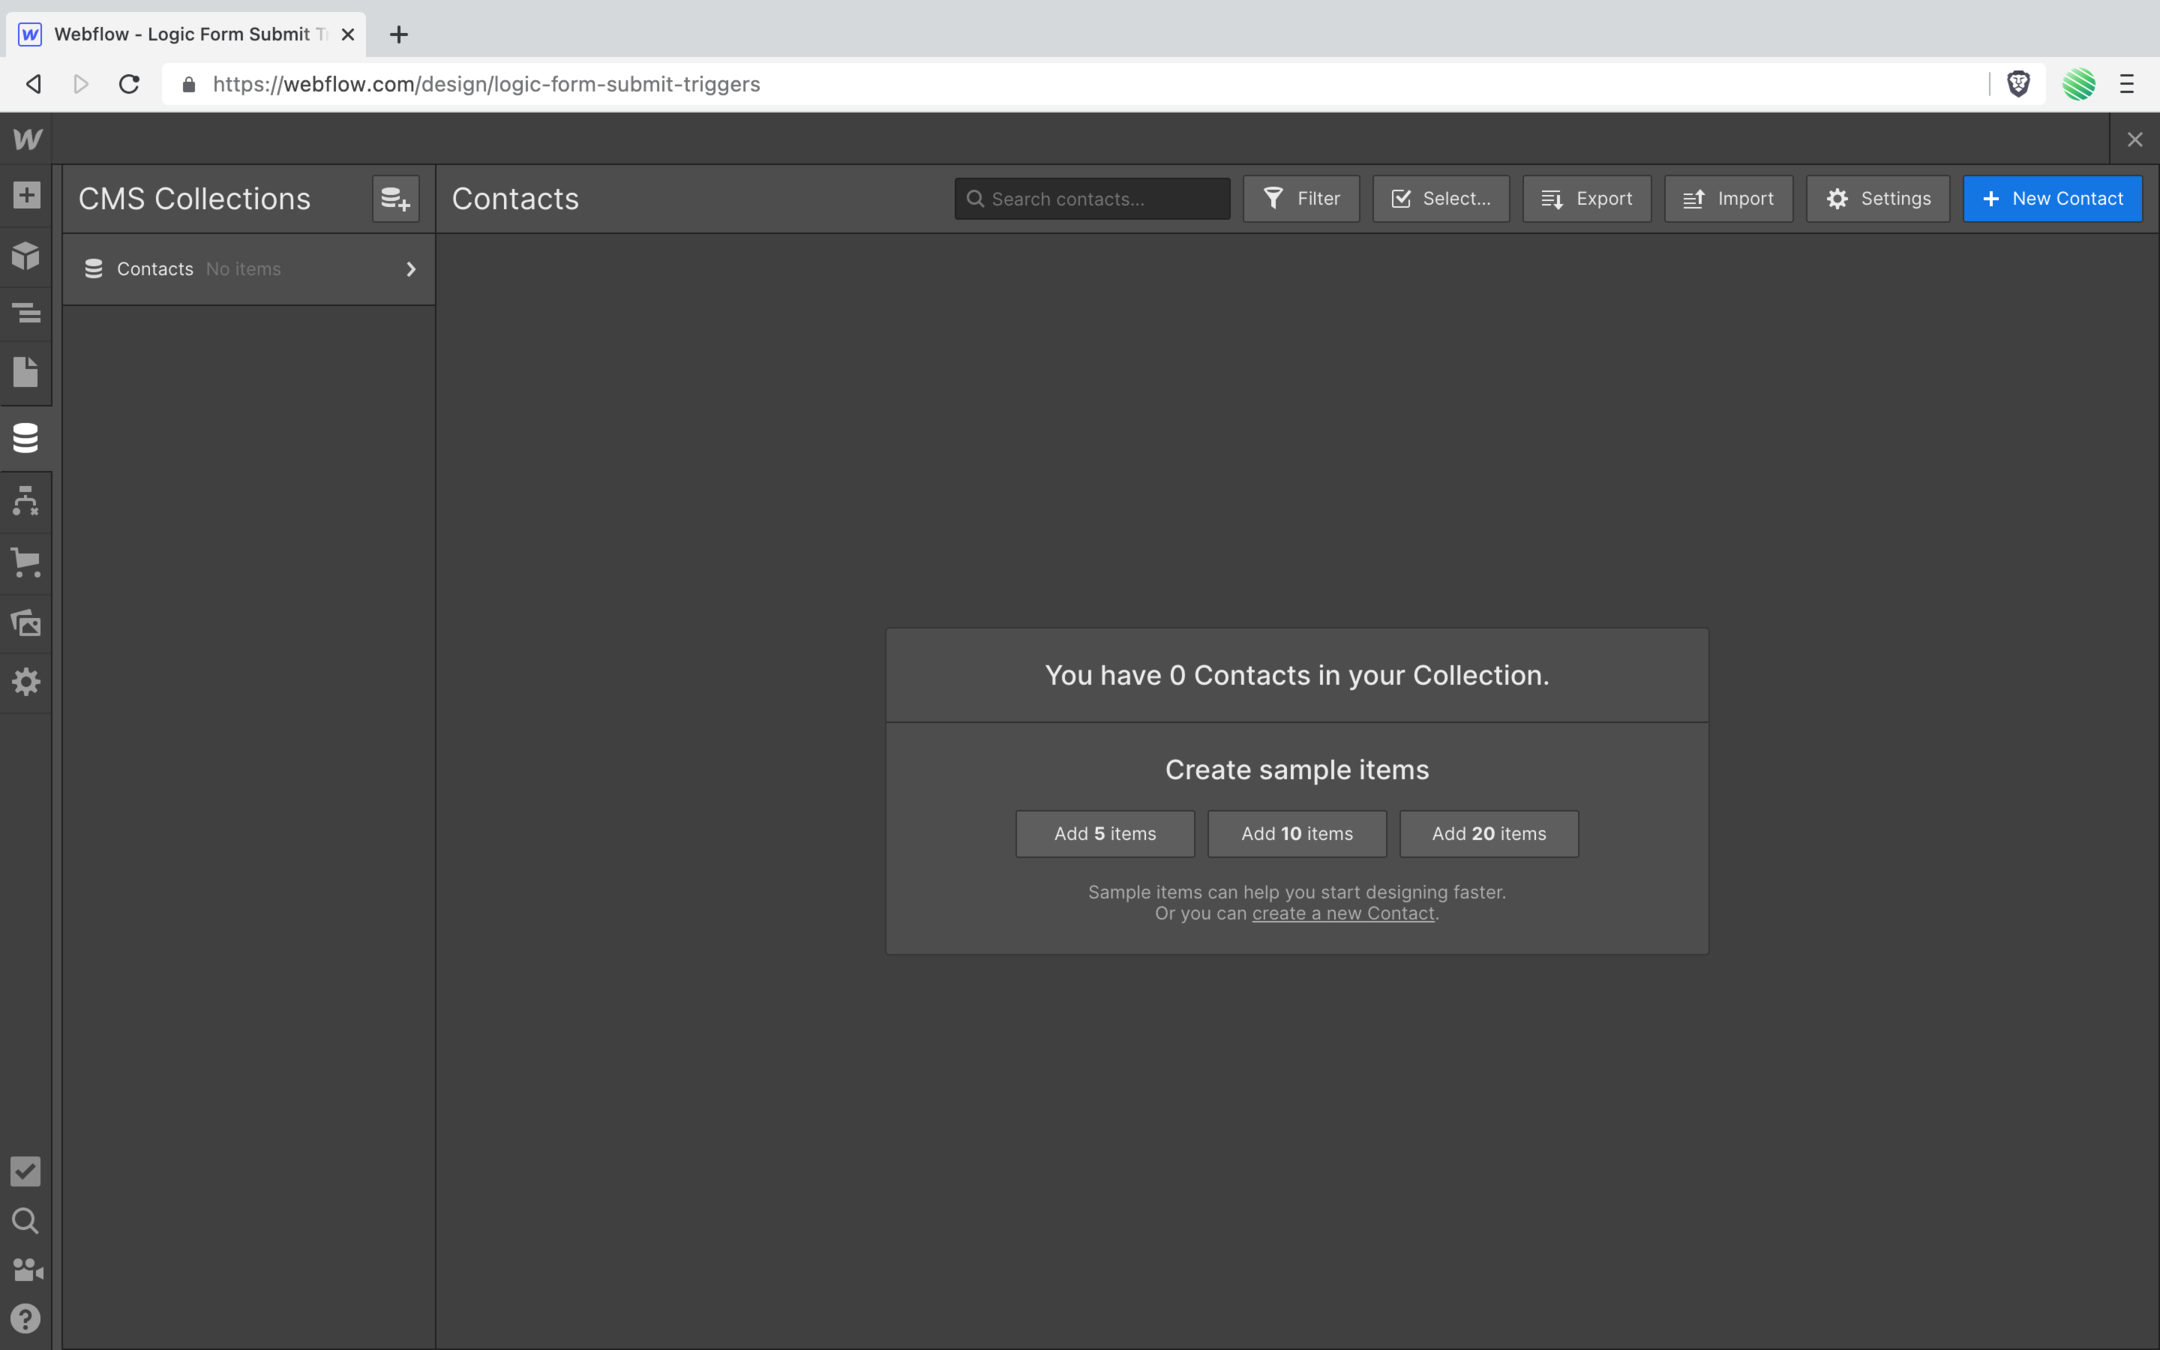
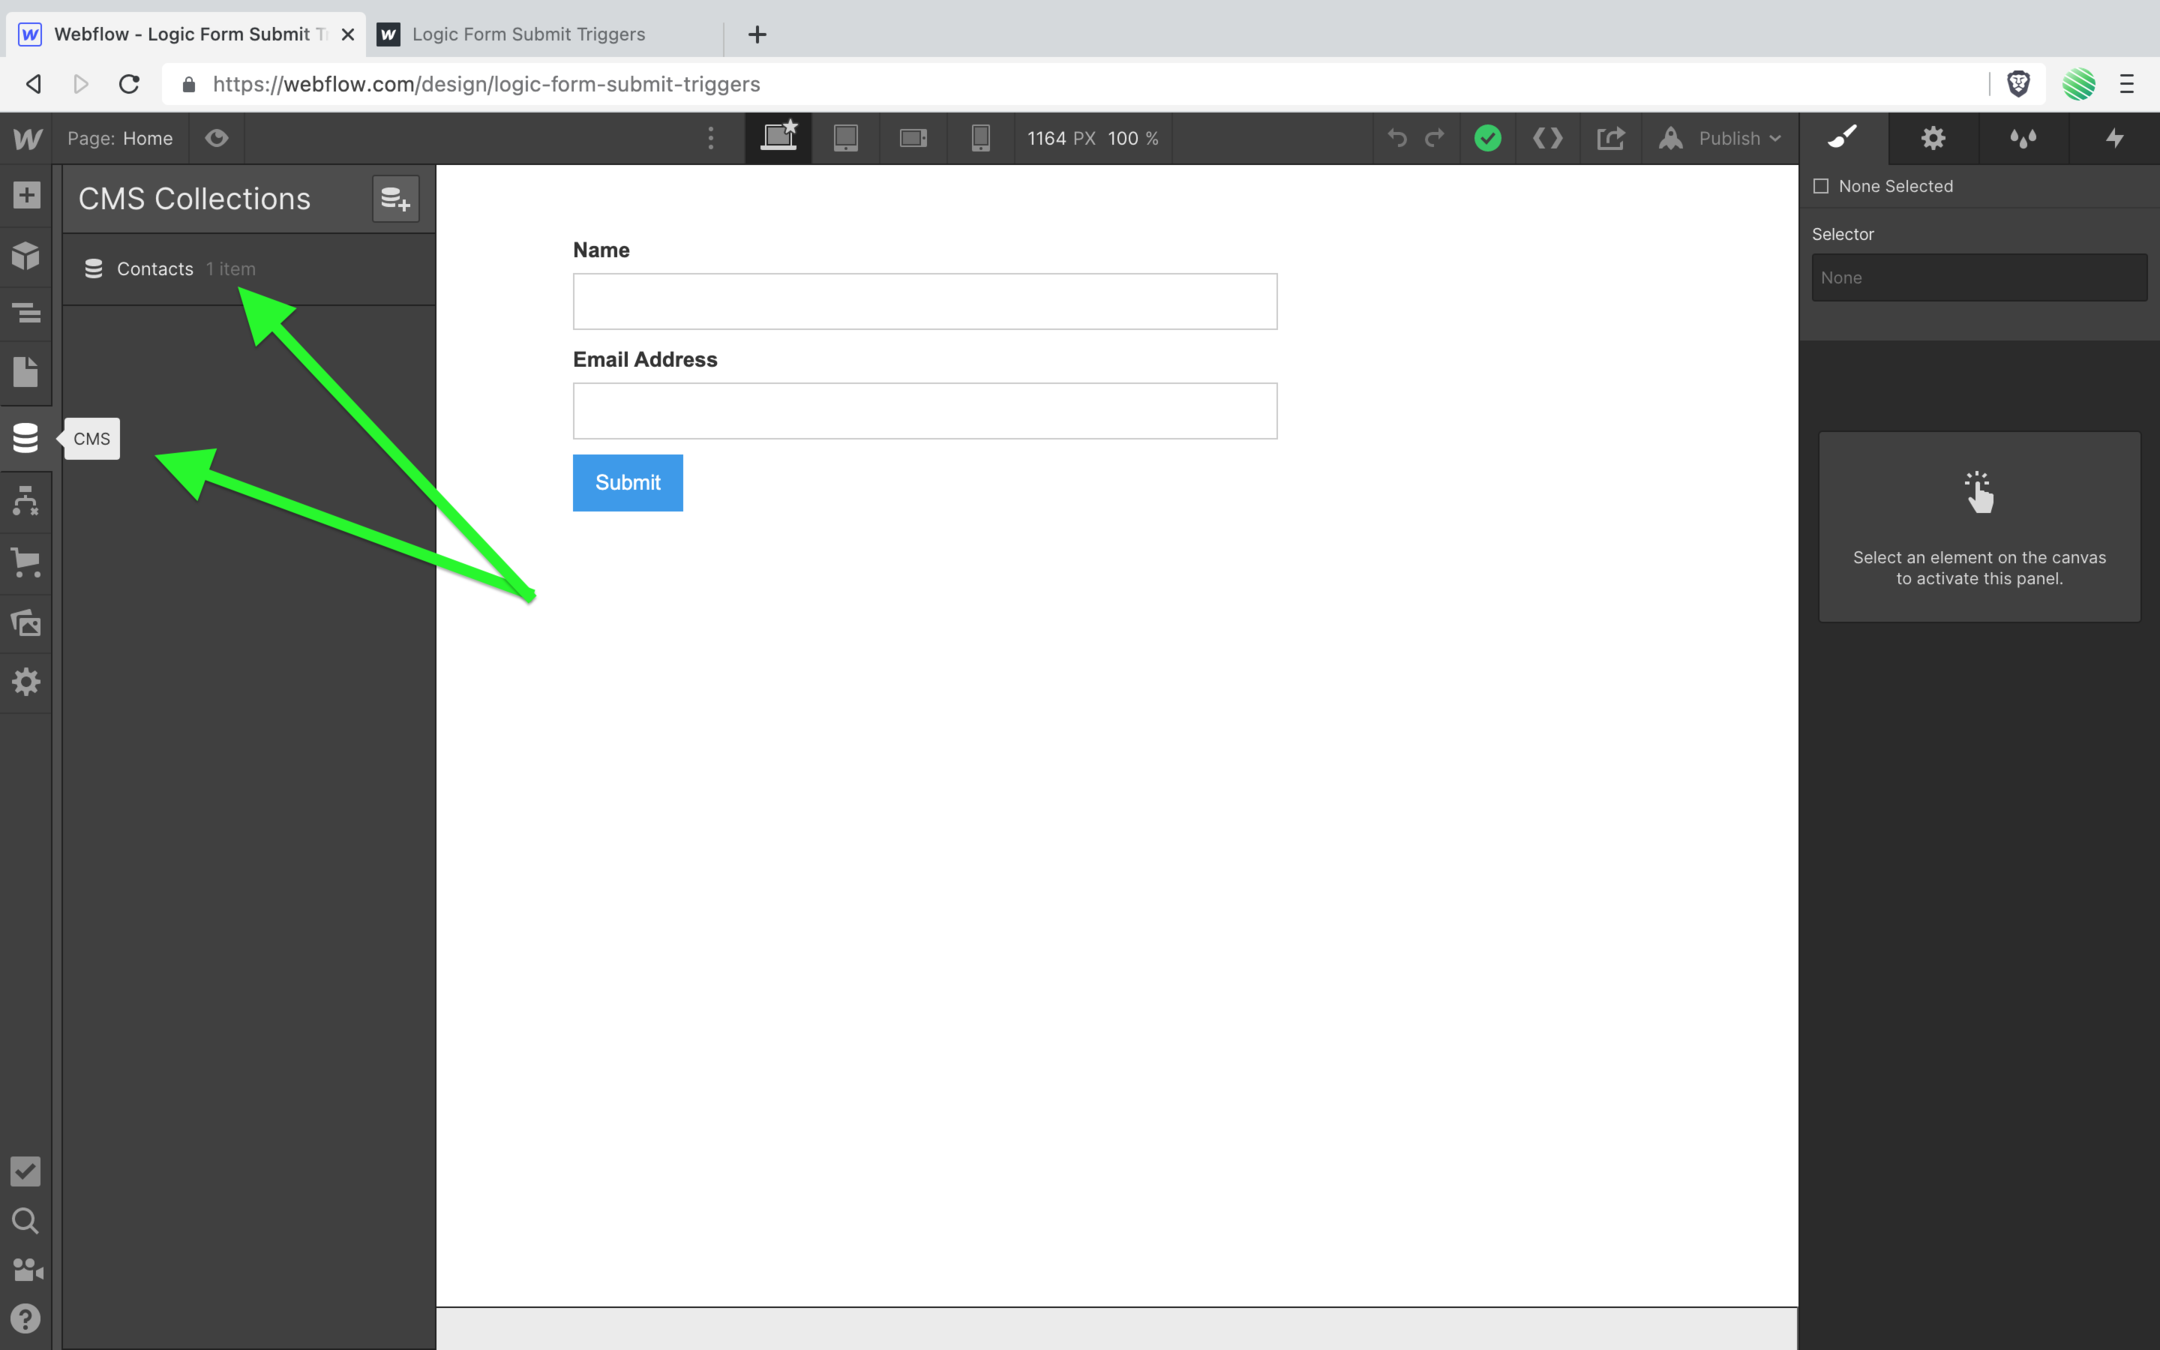
Open up your CMS editor.
Notice you have 1 new item?
Also, if you’re at all familiar working with the CMS editor you’ll know the pain of always having to reload the ENTIRE browser tab, and Webflow Designer (which it’s the fasting page to reload) before you get to see updates make from Zapier/Make in your CMS.
…I didn’t do that here.
Webflow updated that for me and I did not reload the browser tab 🤩
Thank you Webflow 🙏
Alright, you can see your new CMS item.
The test worked. Good.
Now delete this test CMS item because you’ll be adding a new item from your live site in a moment.

Back to your Logic editor.
Tap on the Apply changes button.
Here, you have the option to turn this flow on making it live (see the checkbox on the popup).
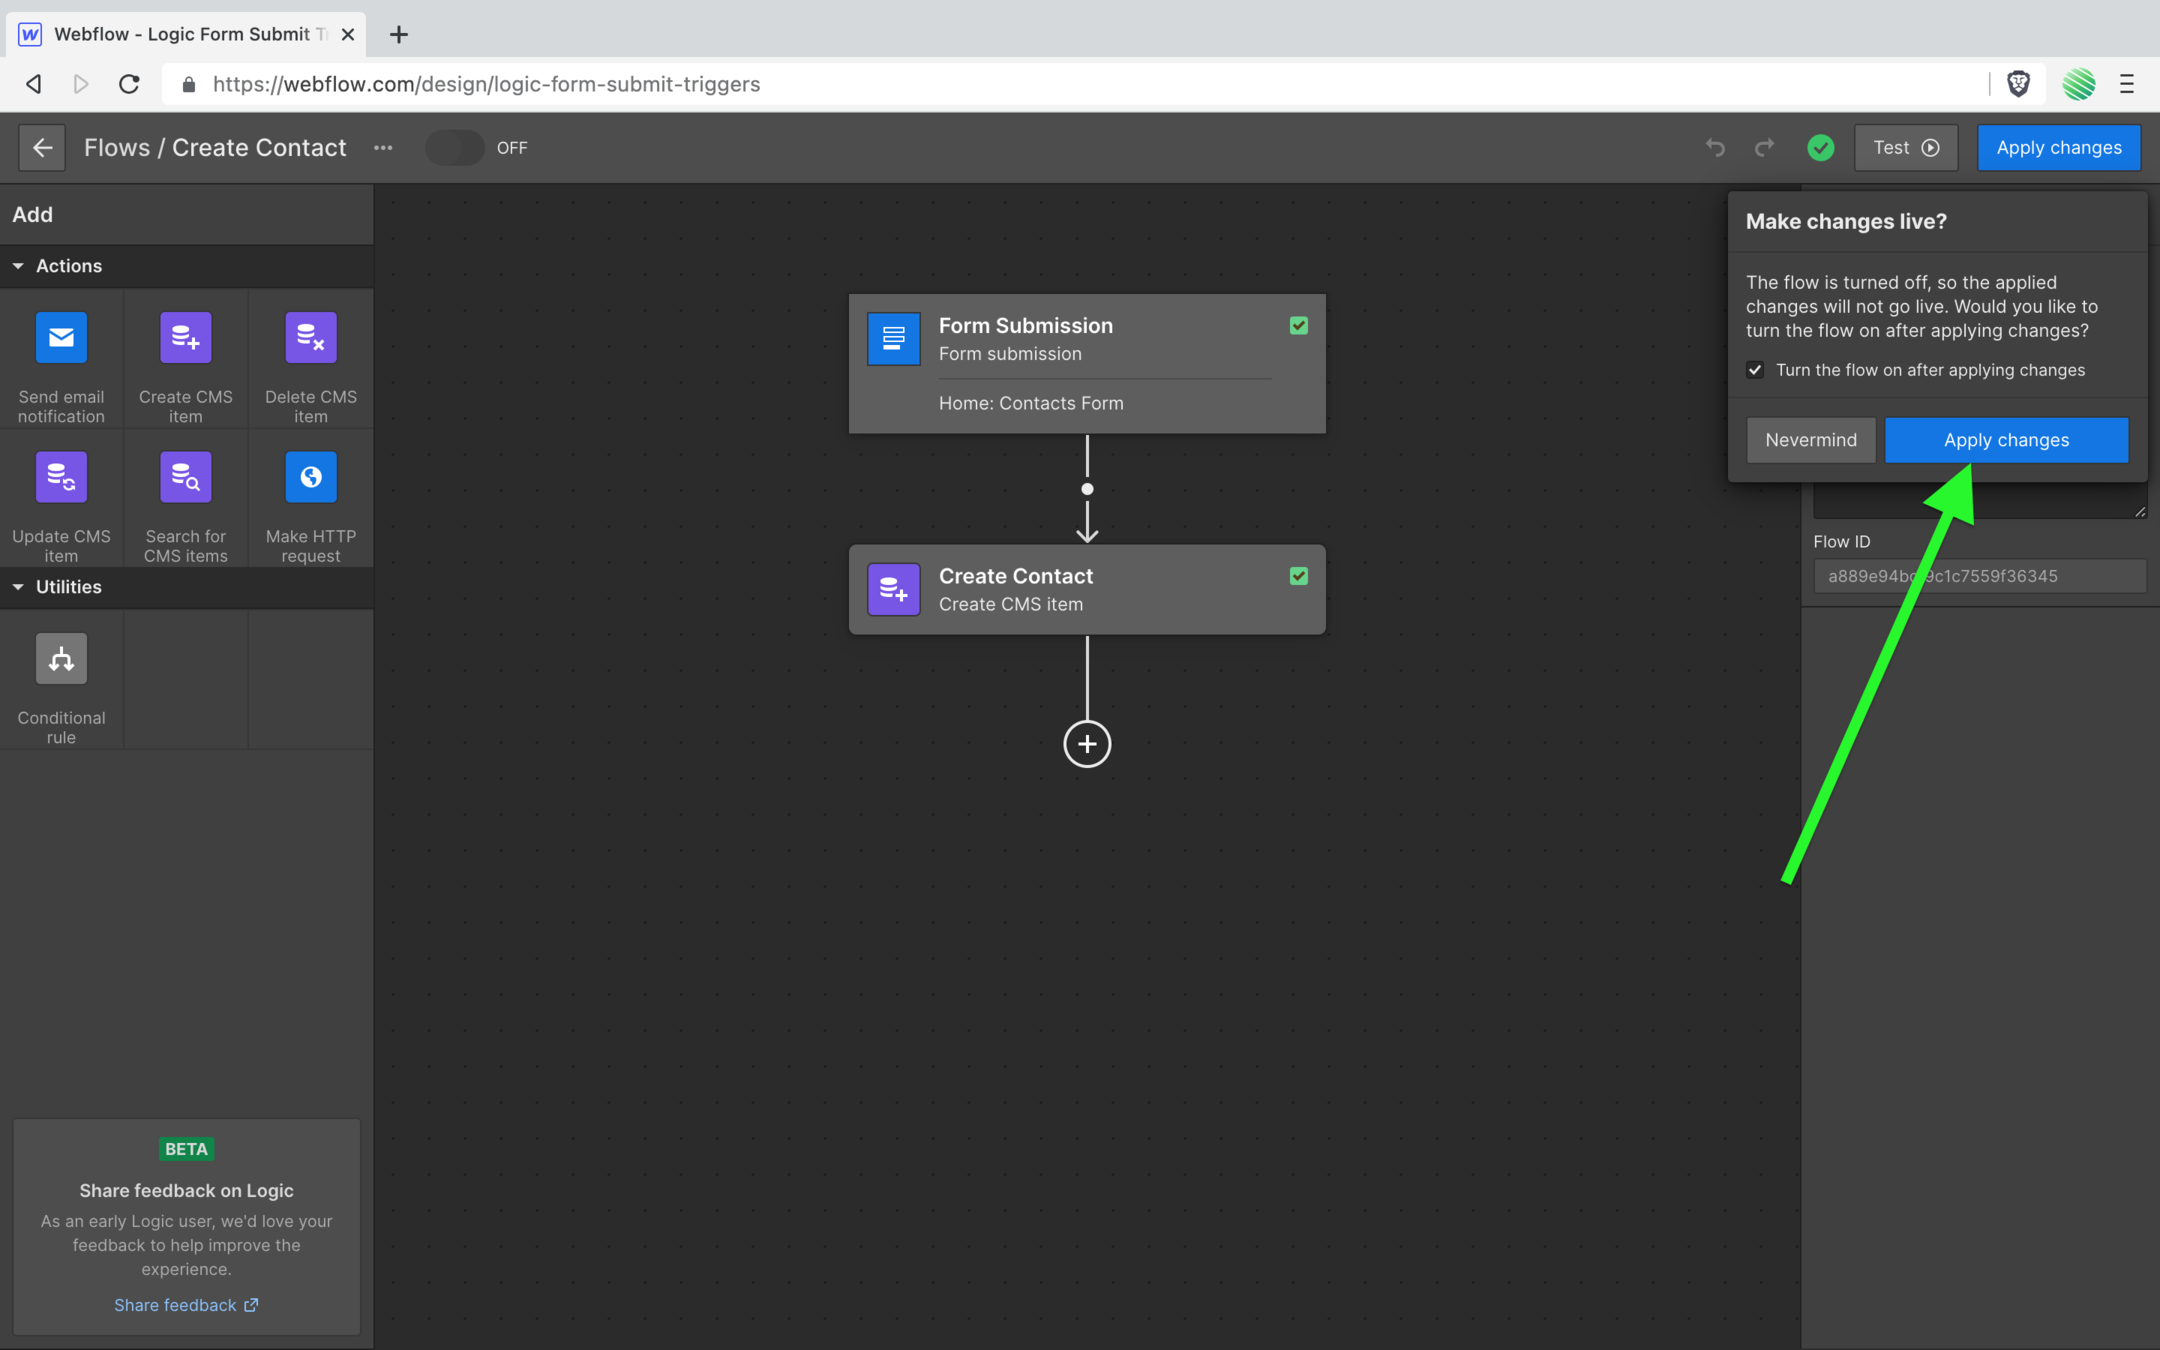
If you left that checkbox checked, you’ll see that your new flow is live.
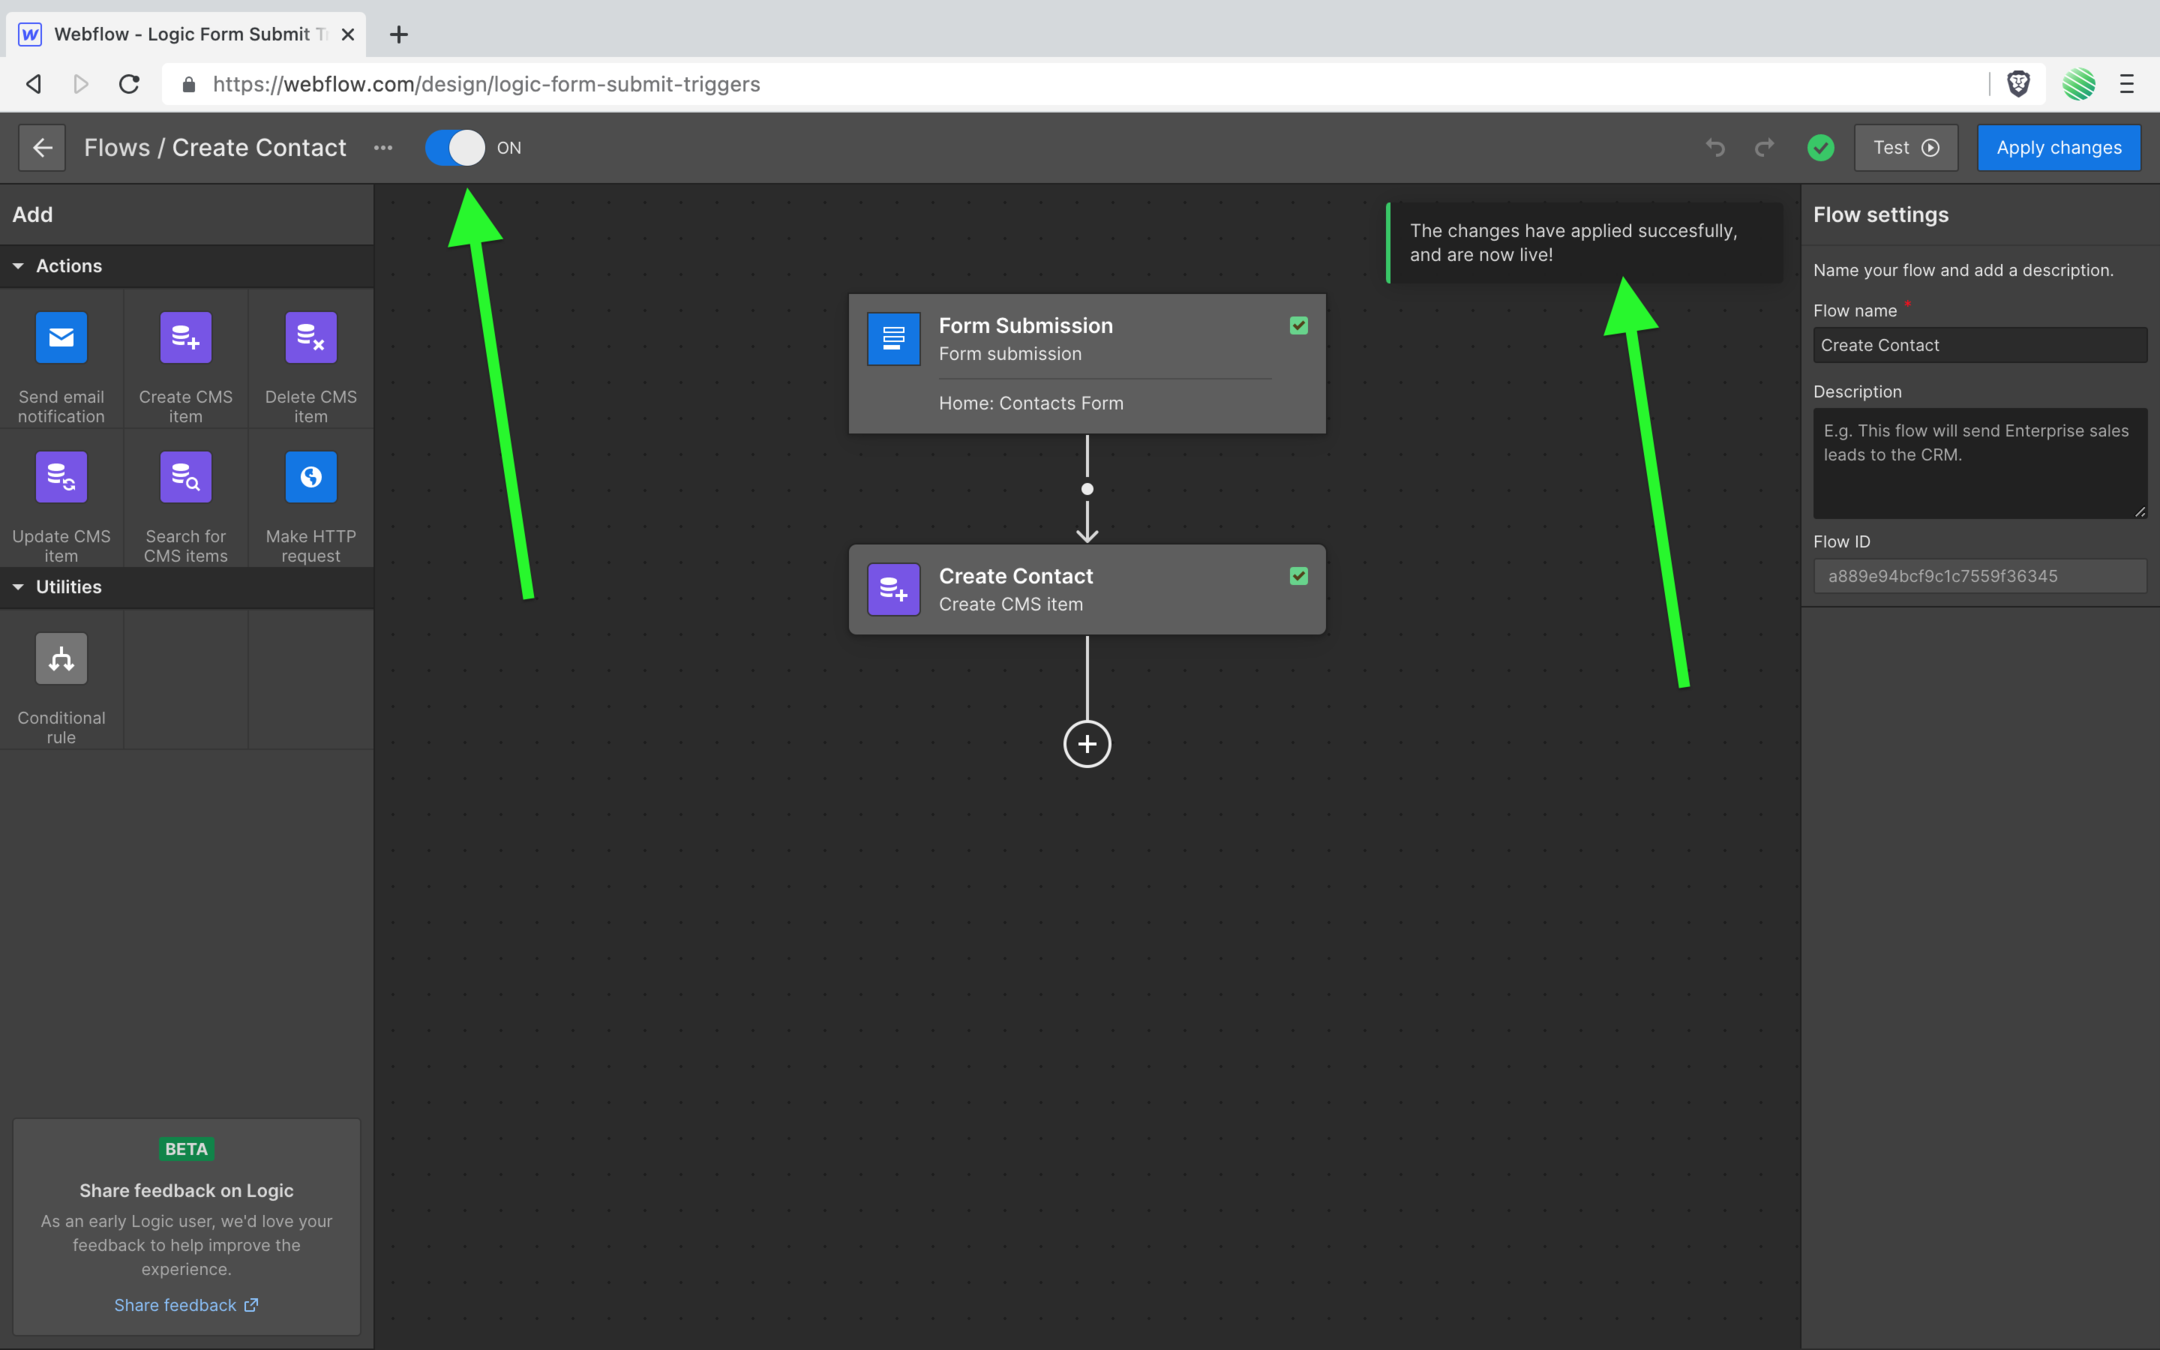
Awesome!
Time to test it.
Open up your live site.

Fill out your form.
Submit it.
Flip back to your Webflow Designer.
Reload the browser tab.
Yea, I know.
Reloading the Webflow Designer sucks.
But it’s required to see updates within your CMS.
What Webflow needs to do is hook up a Websocket so when there is a change to your CMS, they can update your Designer just like they did earlier with the Logic example.
Are you listening Webflow? 🙏
💥 Bam!
You see the new item.
Remember, you deleted your test item so you didn’t have any in your CMS.
Opening it up…
Wow!

🤯 You just add your form submission directly into the Webflow CMS without using a Glue Service (Zapier / Make / Integromat)
Once you’ve added your email…
➡️ Checkout my guide on native Webflow Memberships a step-by-step walk through setting up native user logins & memberships within Webflow.
➡️ Run through a fantastic build using Native Airtable Webhooks to submit Webflow forms directly into your Airtable base (no 3rd party services required).