You can do all sorts of amazing things with Webhooks (when a platform supports them) and you get your head wrapped around using them.
…and now, Airtable released support for their own Webhooks.
 Yep!
Yep!
Now, you can setup a Webhook directly within Airtable. No more going through Make, Integromat, or Zapier.
That said, those glue services still have a place in these workflows, they’re just not required to use now.
Let’s run through a quick build.
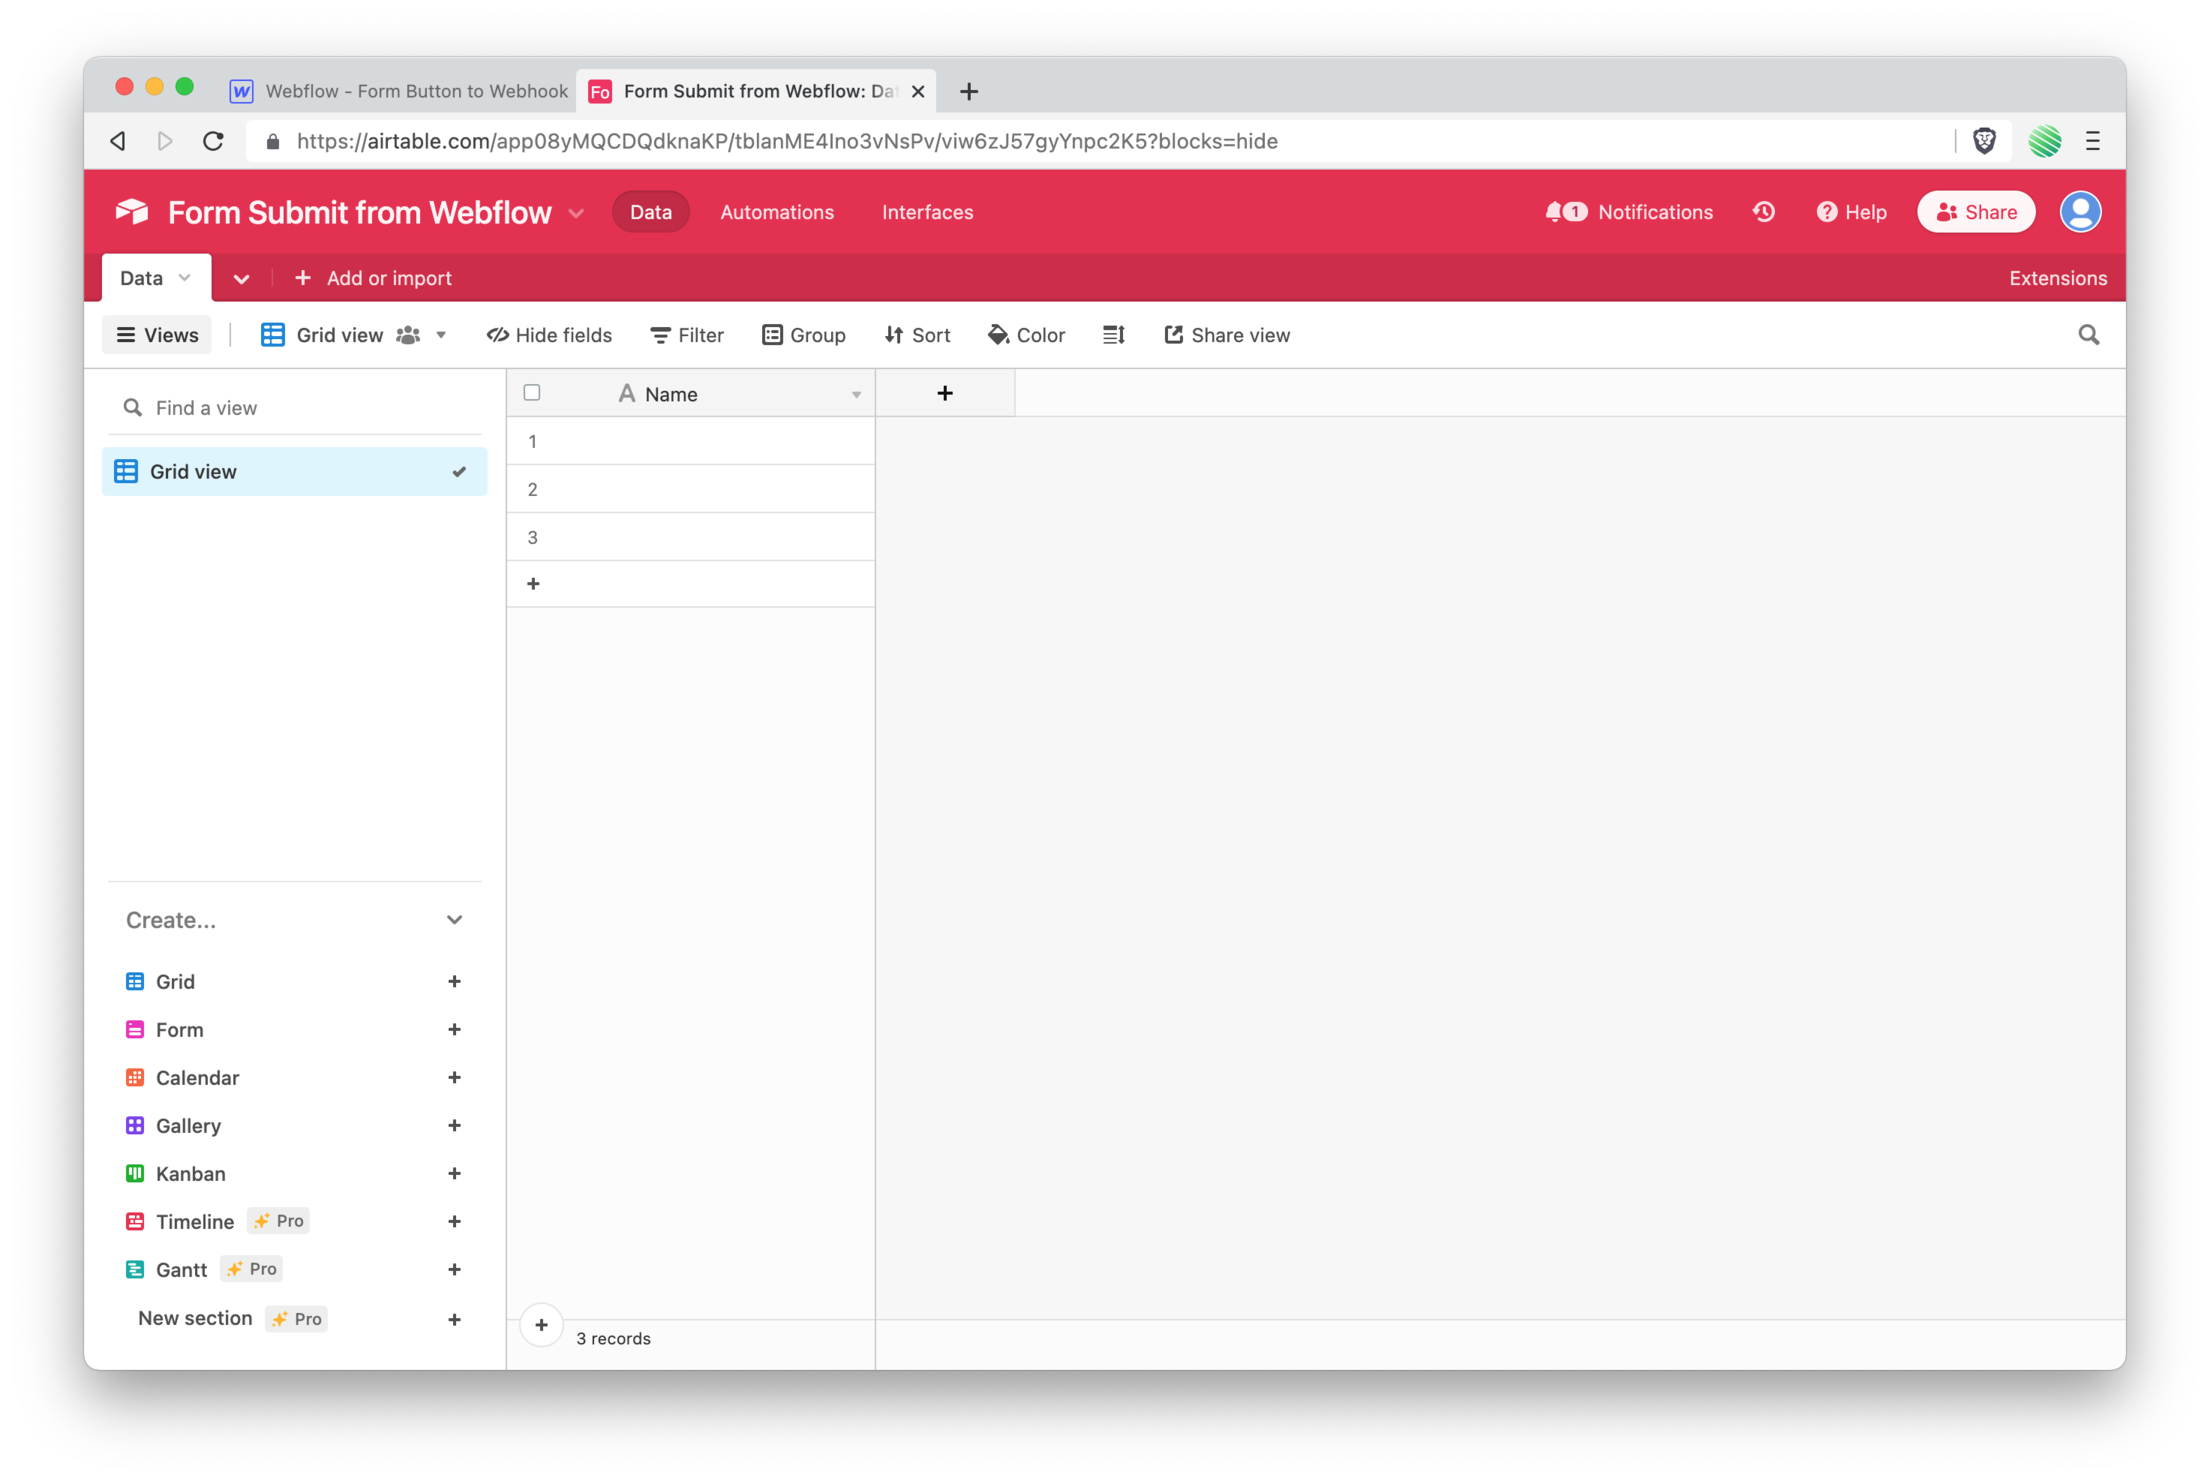
Setup an Airtable Base
Standard stuff here. Open Airtable, create a new Base, name your Table. For this simple walk through just a “Name” field. Easy peasy.
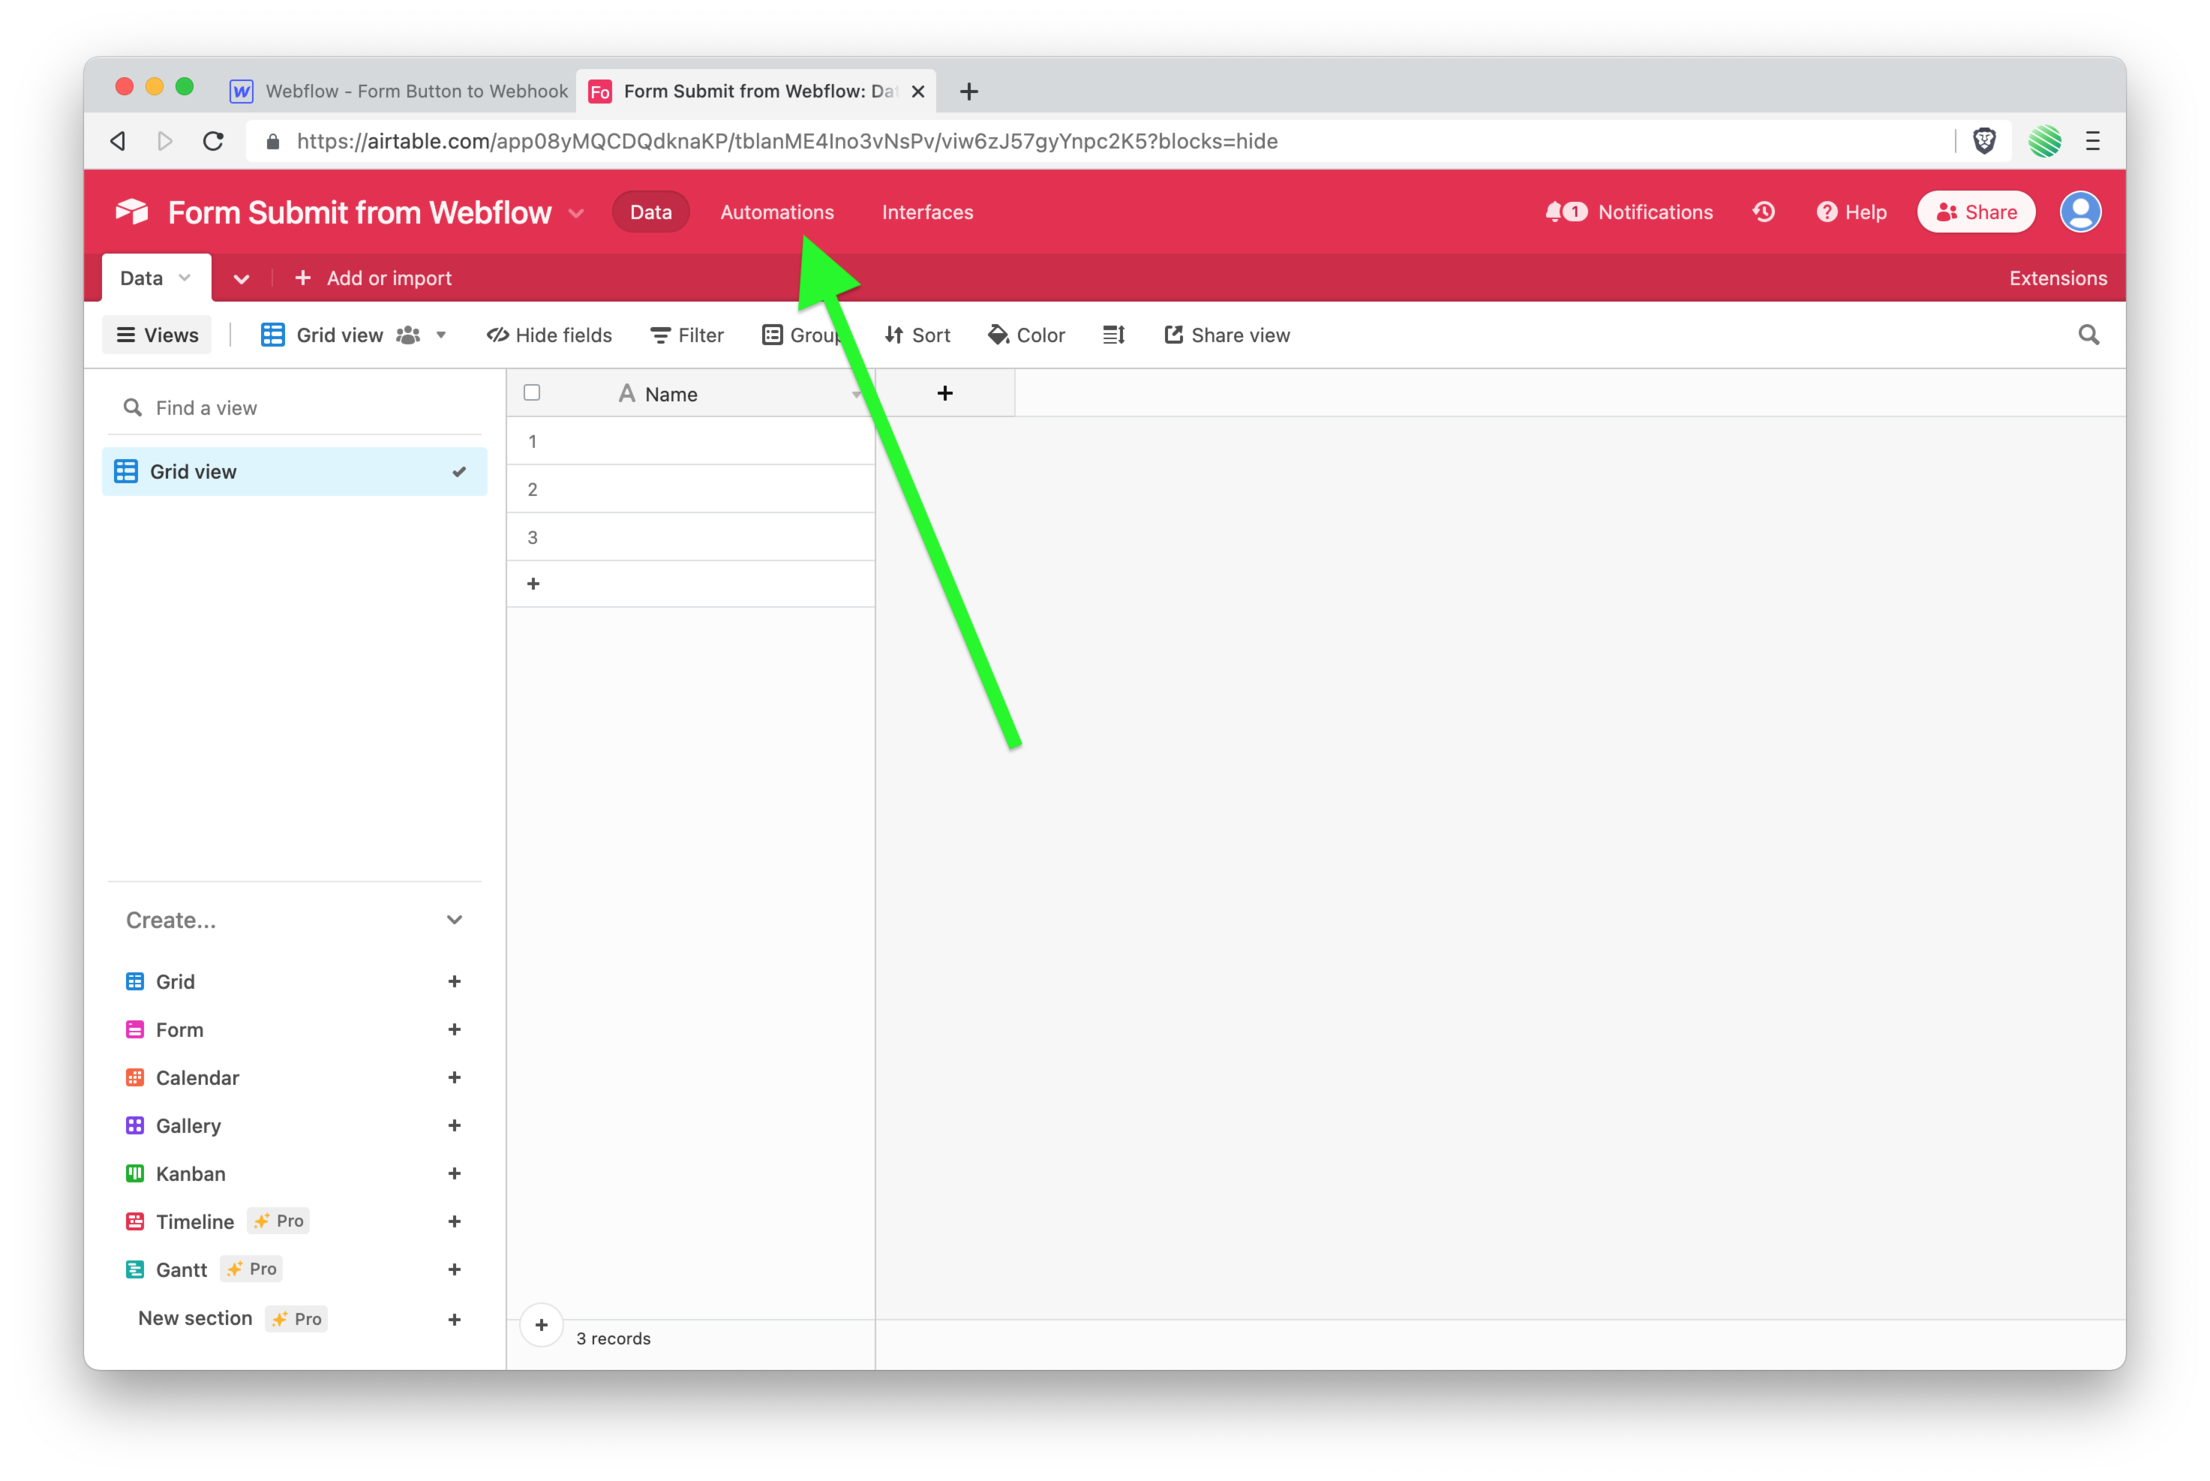
 Tap on the Automations tab.
 Tap on the "Add Trigger" button.
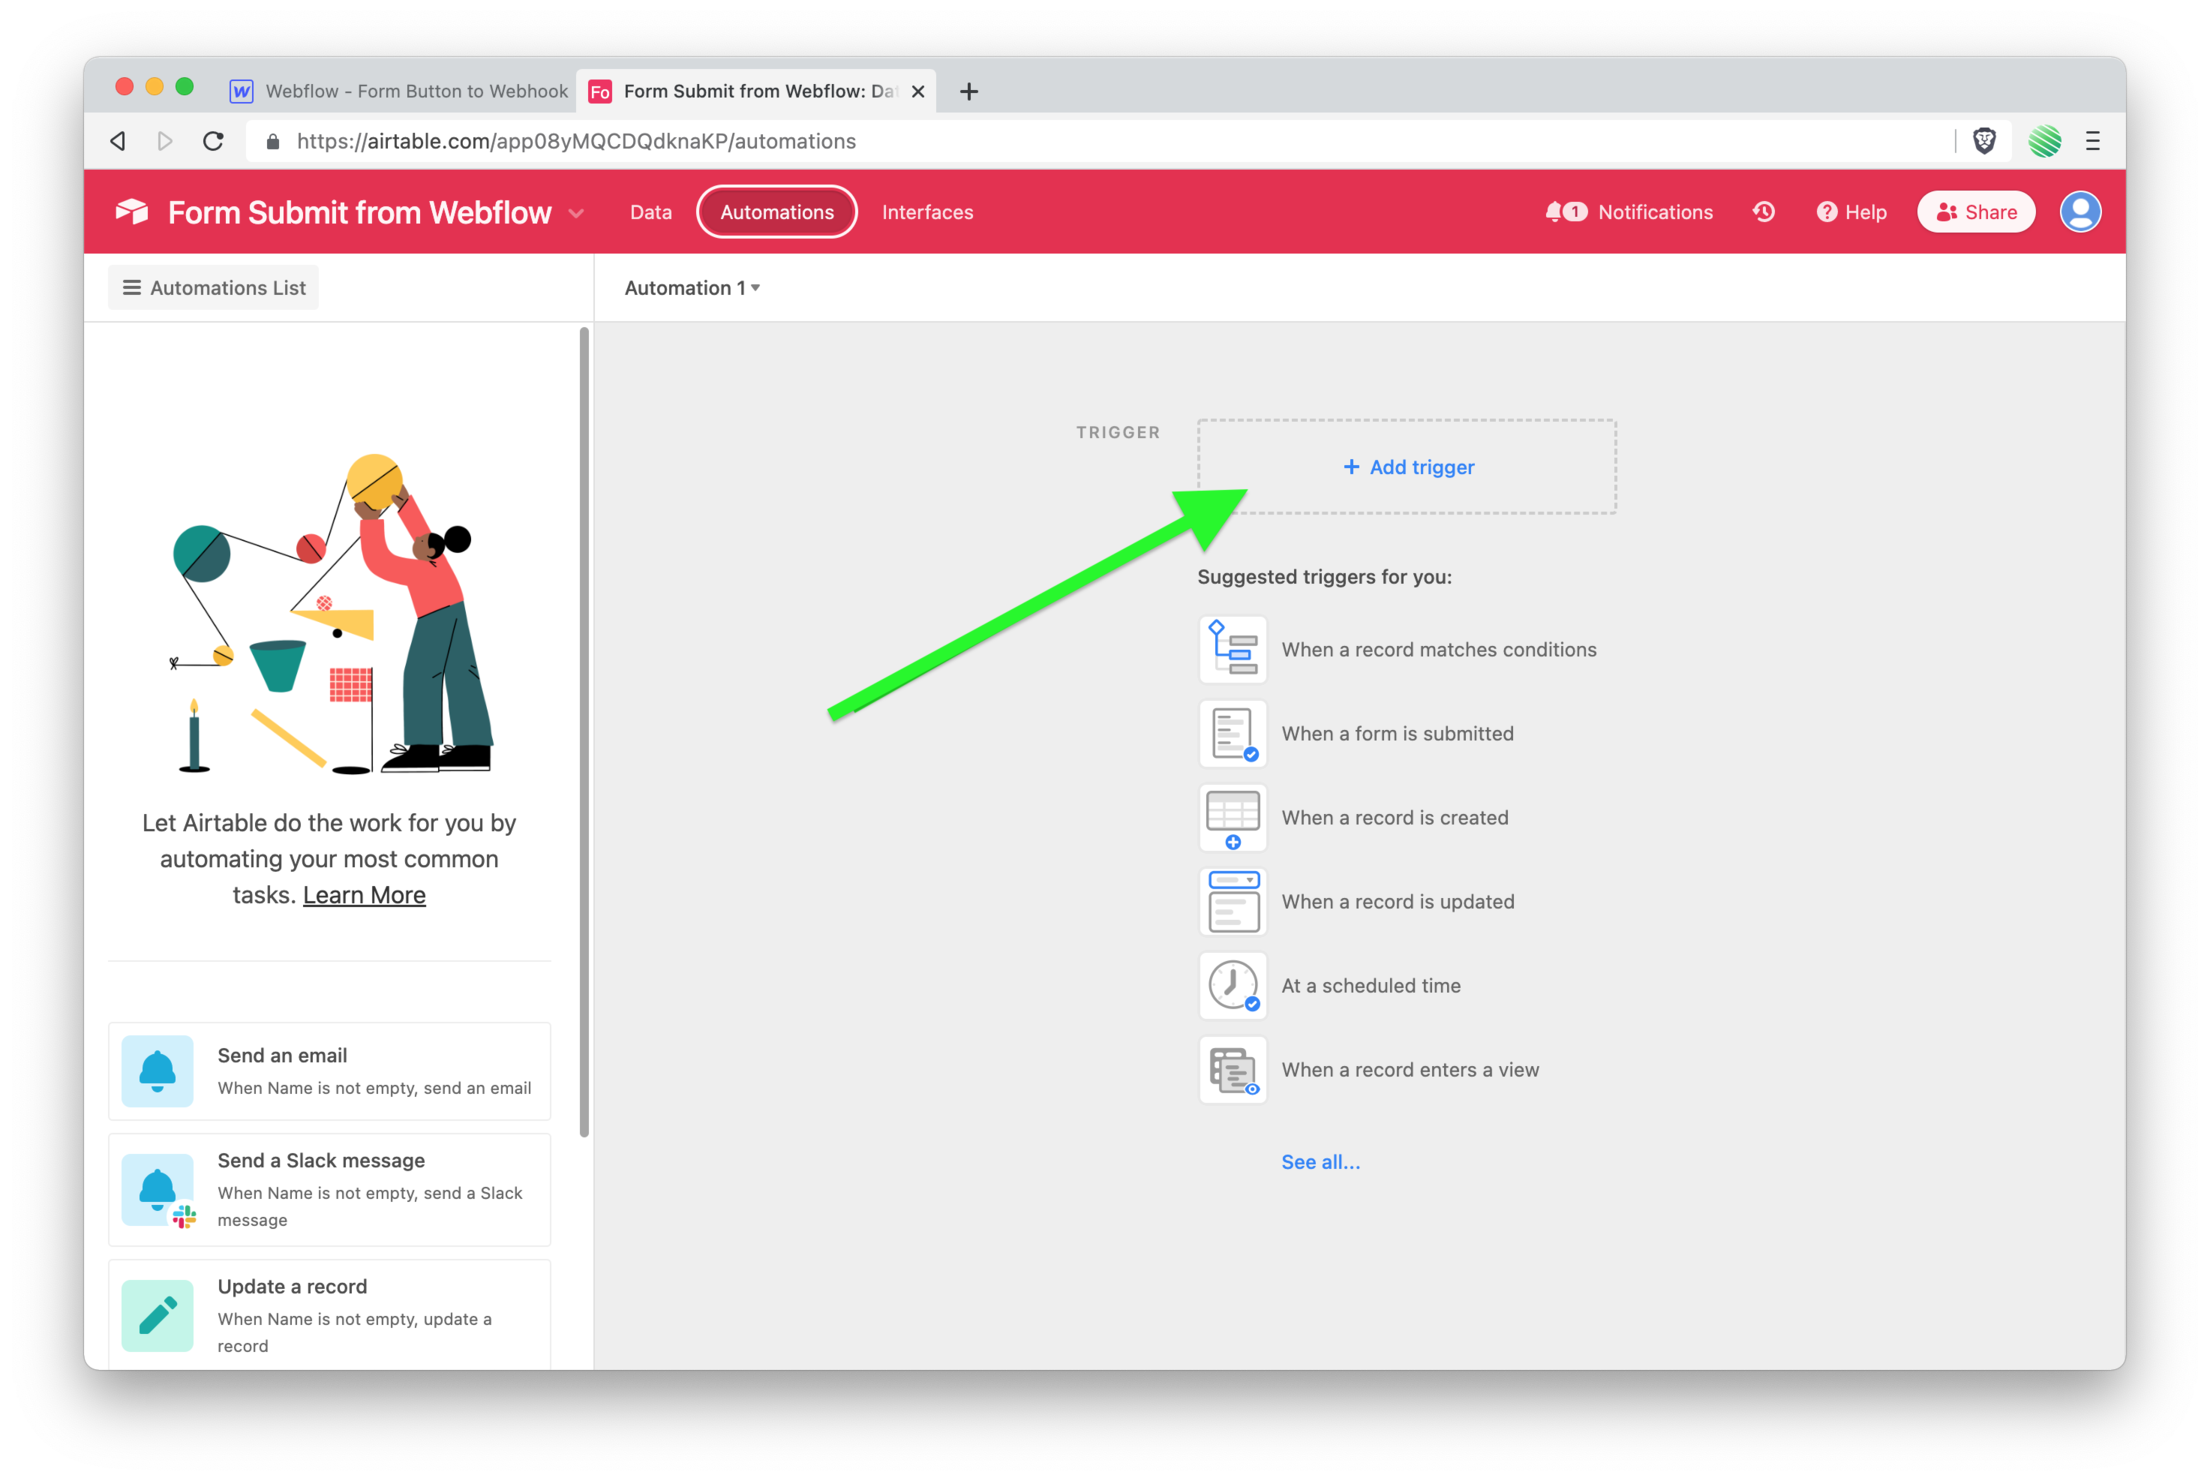
Checkout out the new trigger!
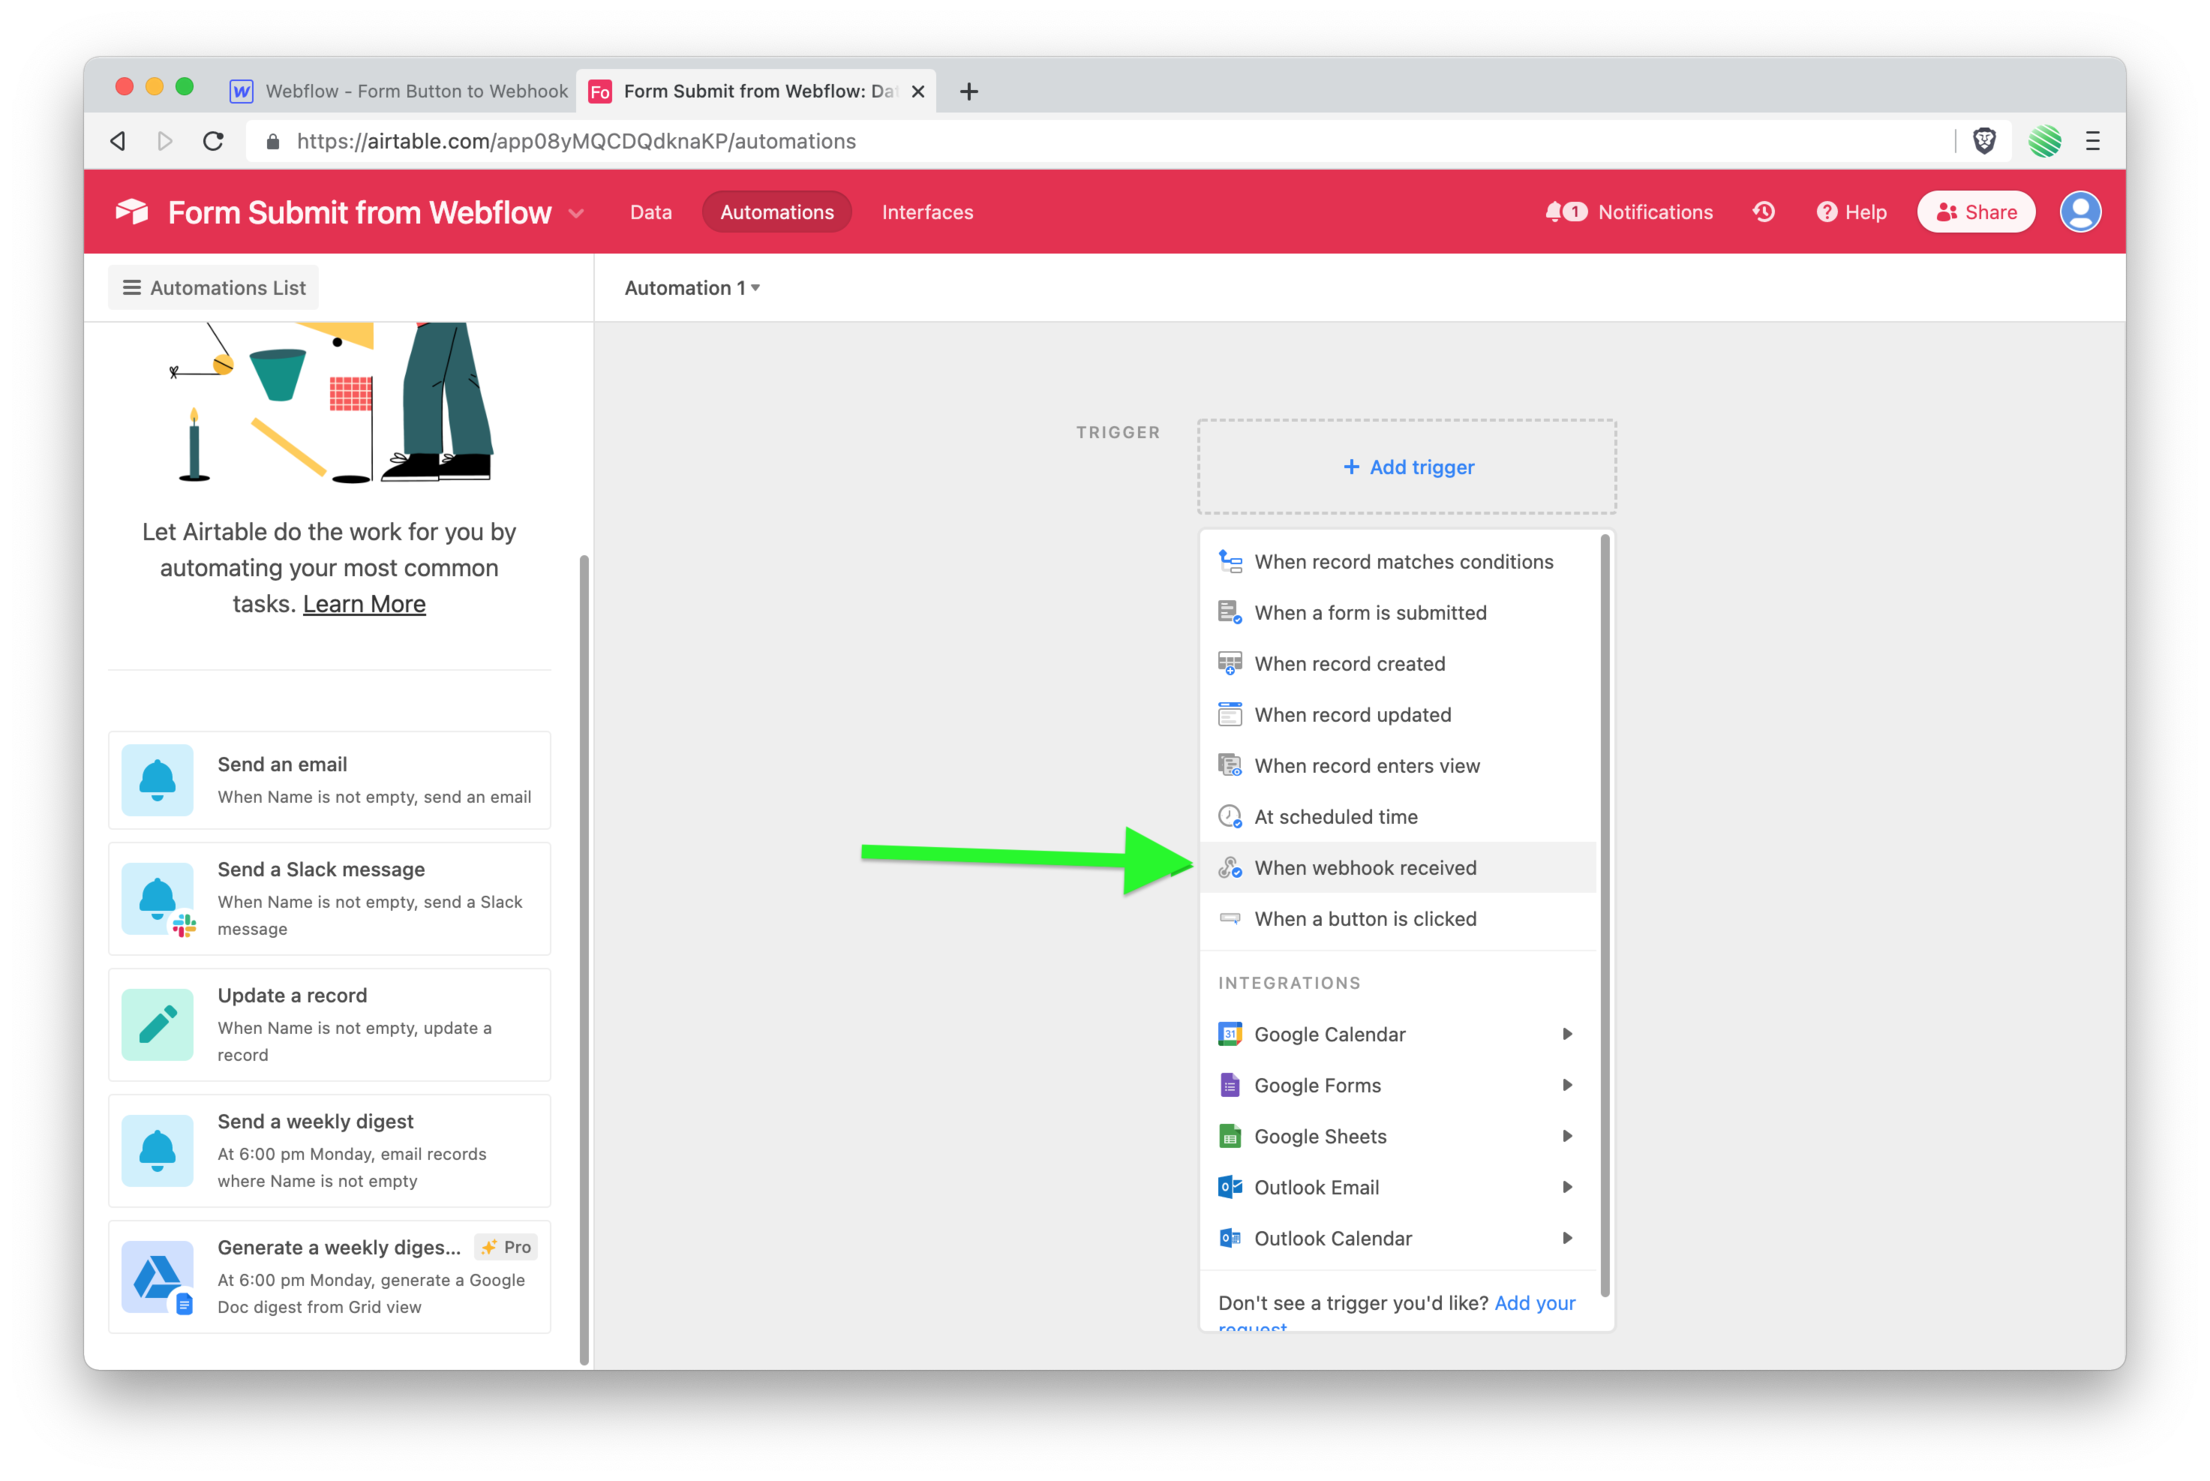
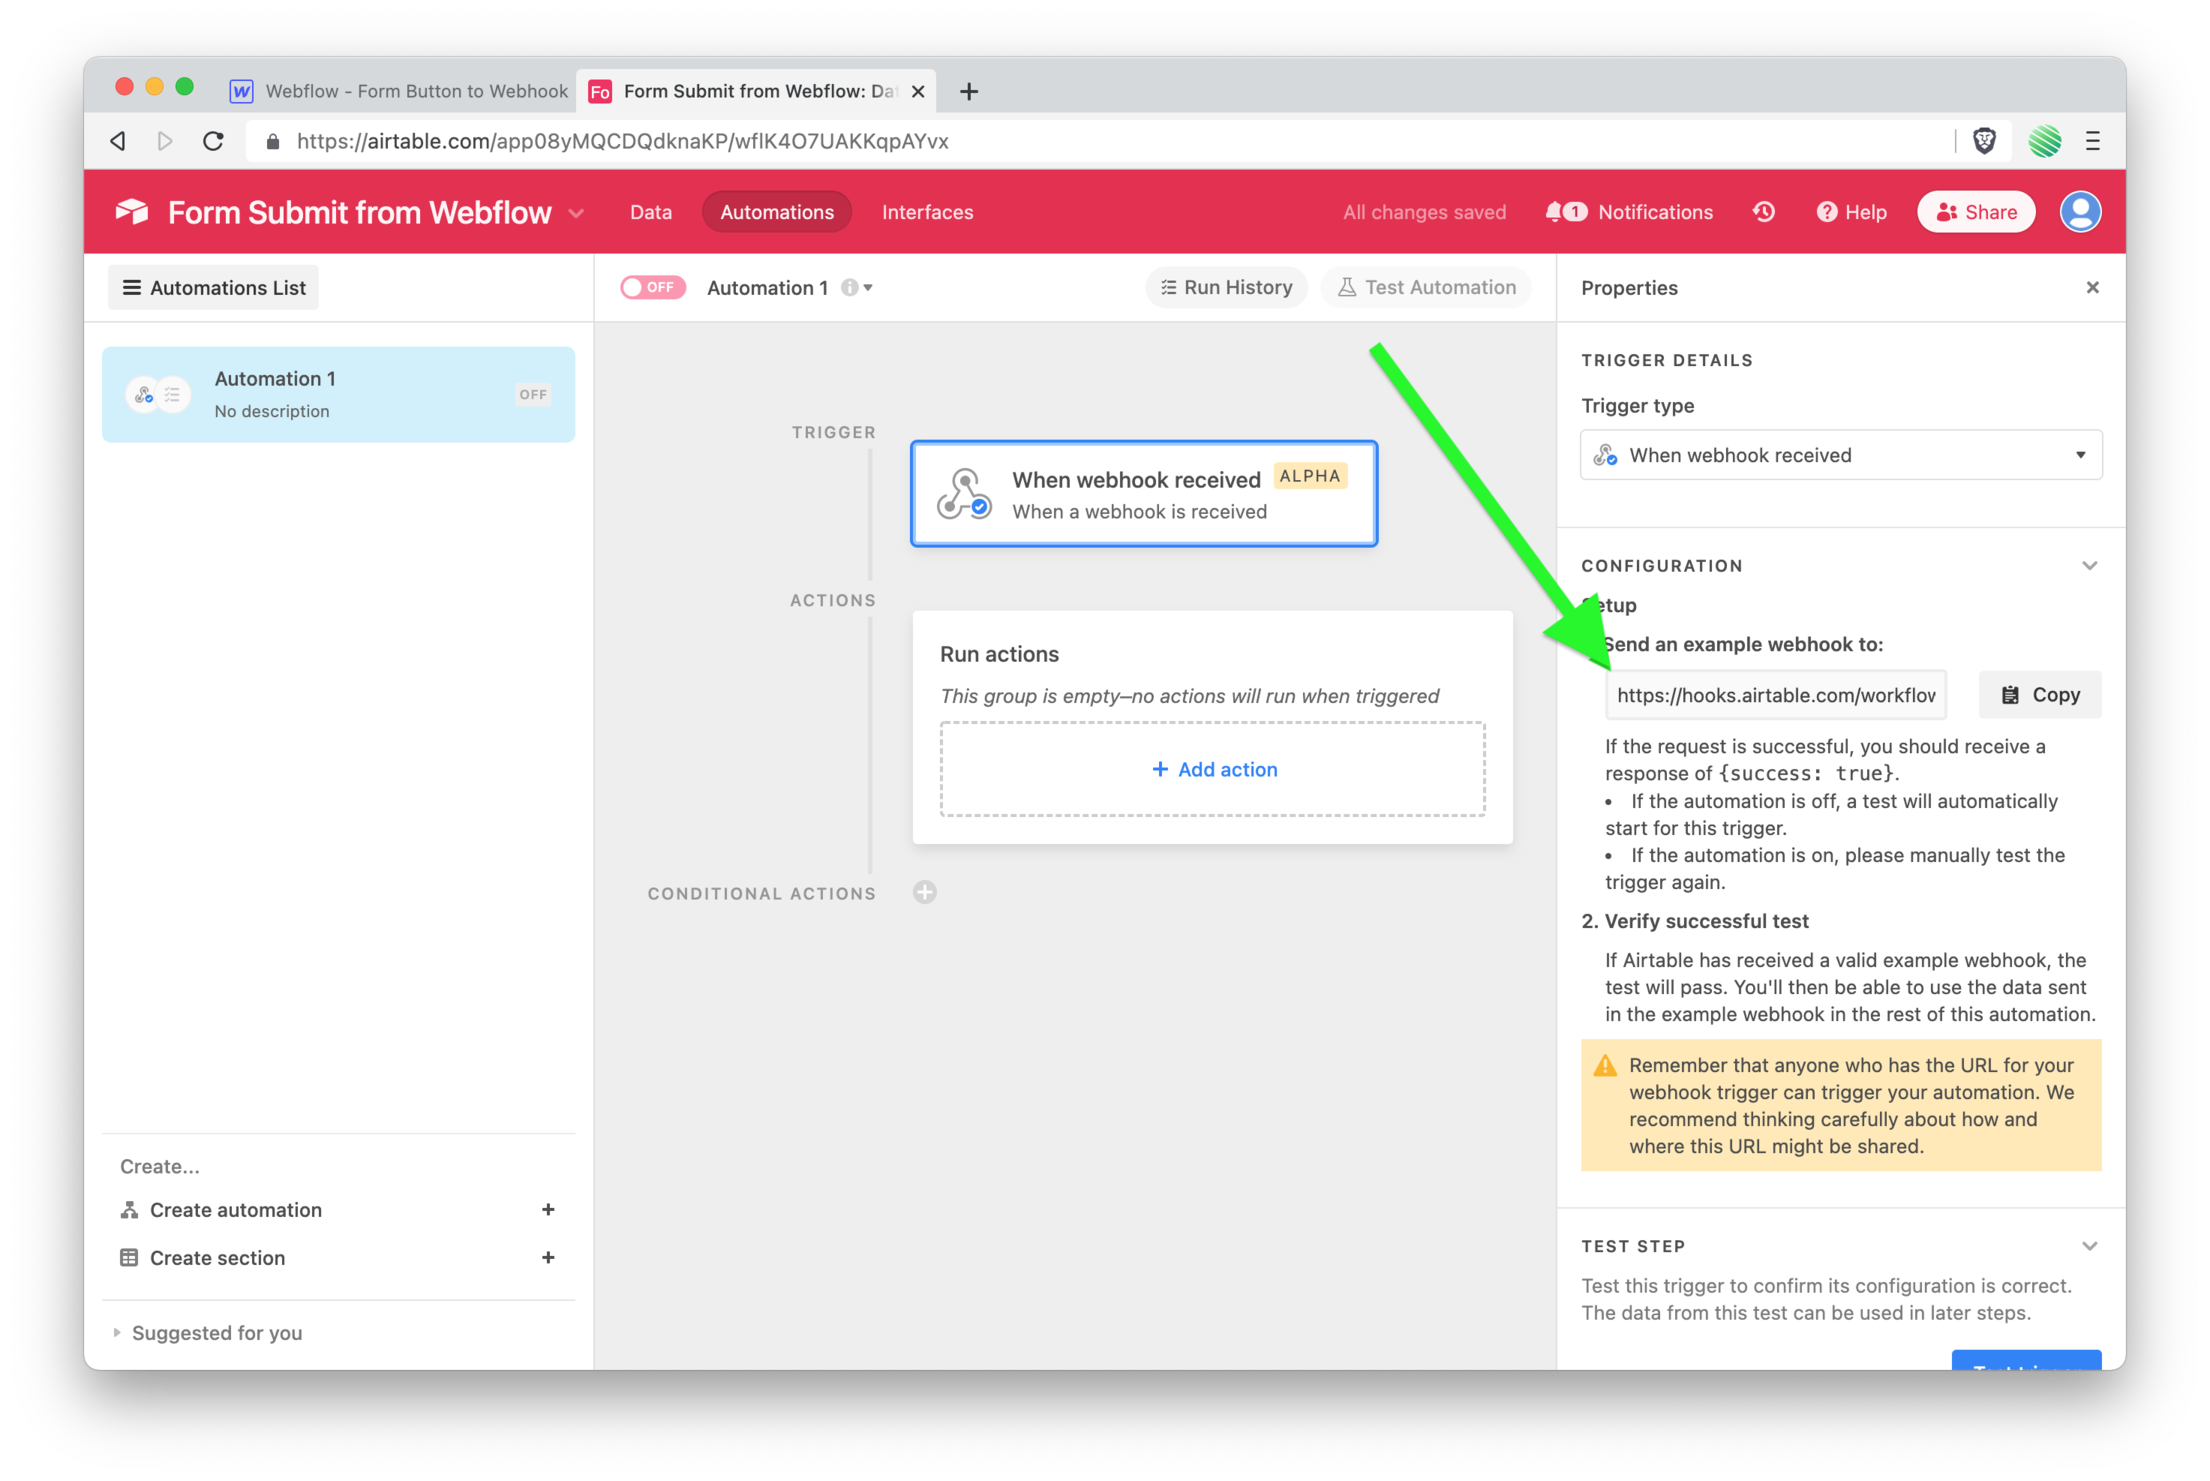
Select “When webhook received”. This is awesome and does exactly what it says. They’ll give you a URL and when you send something to that URL, this automation will be triggered 🤩
 Find your unique Webhook URL generated within the Properties pane.
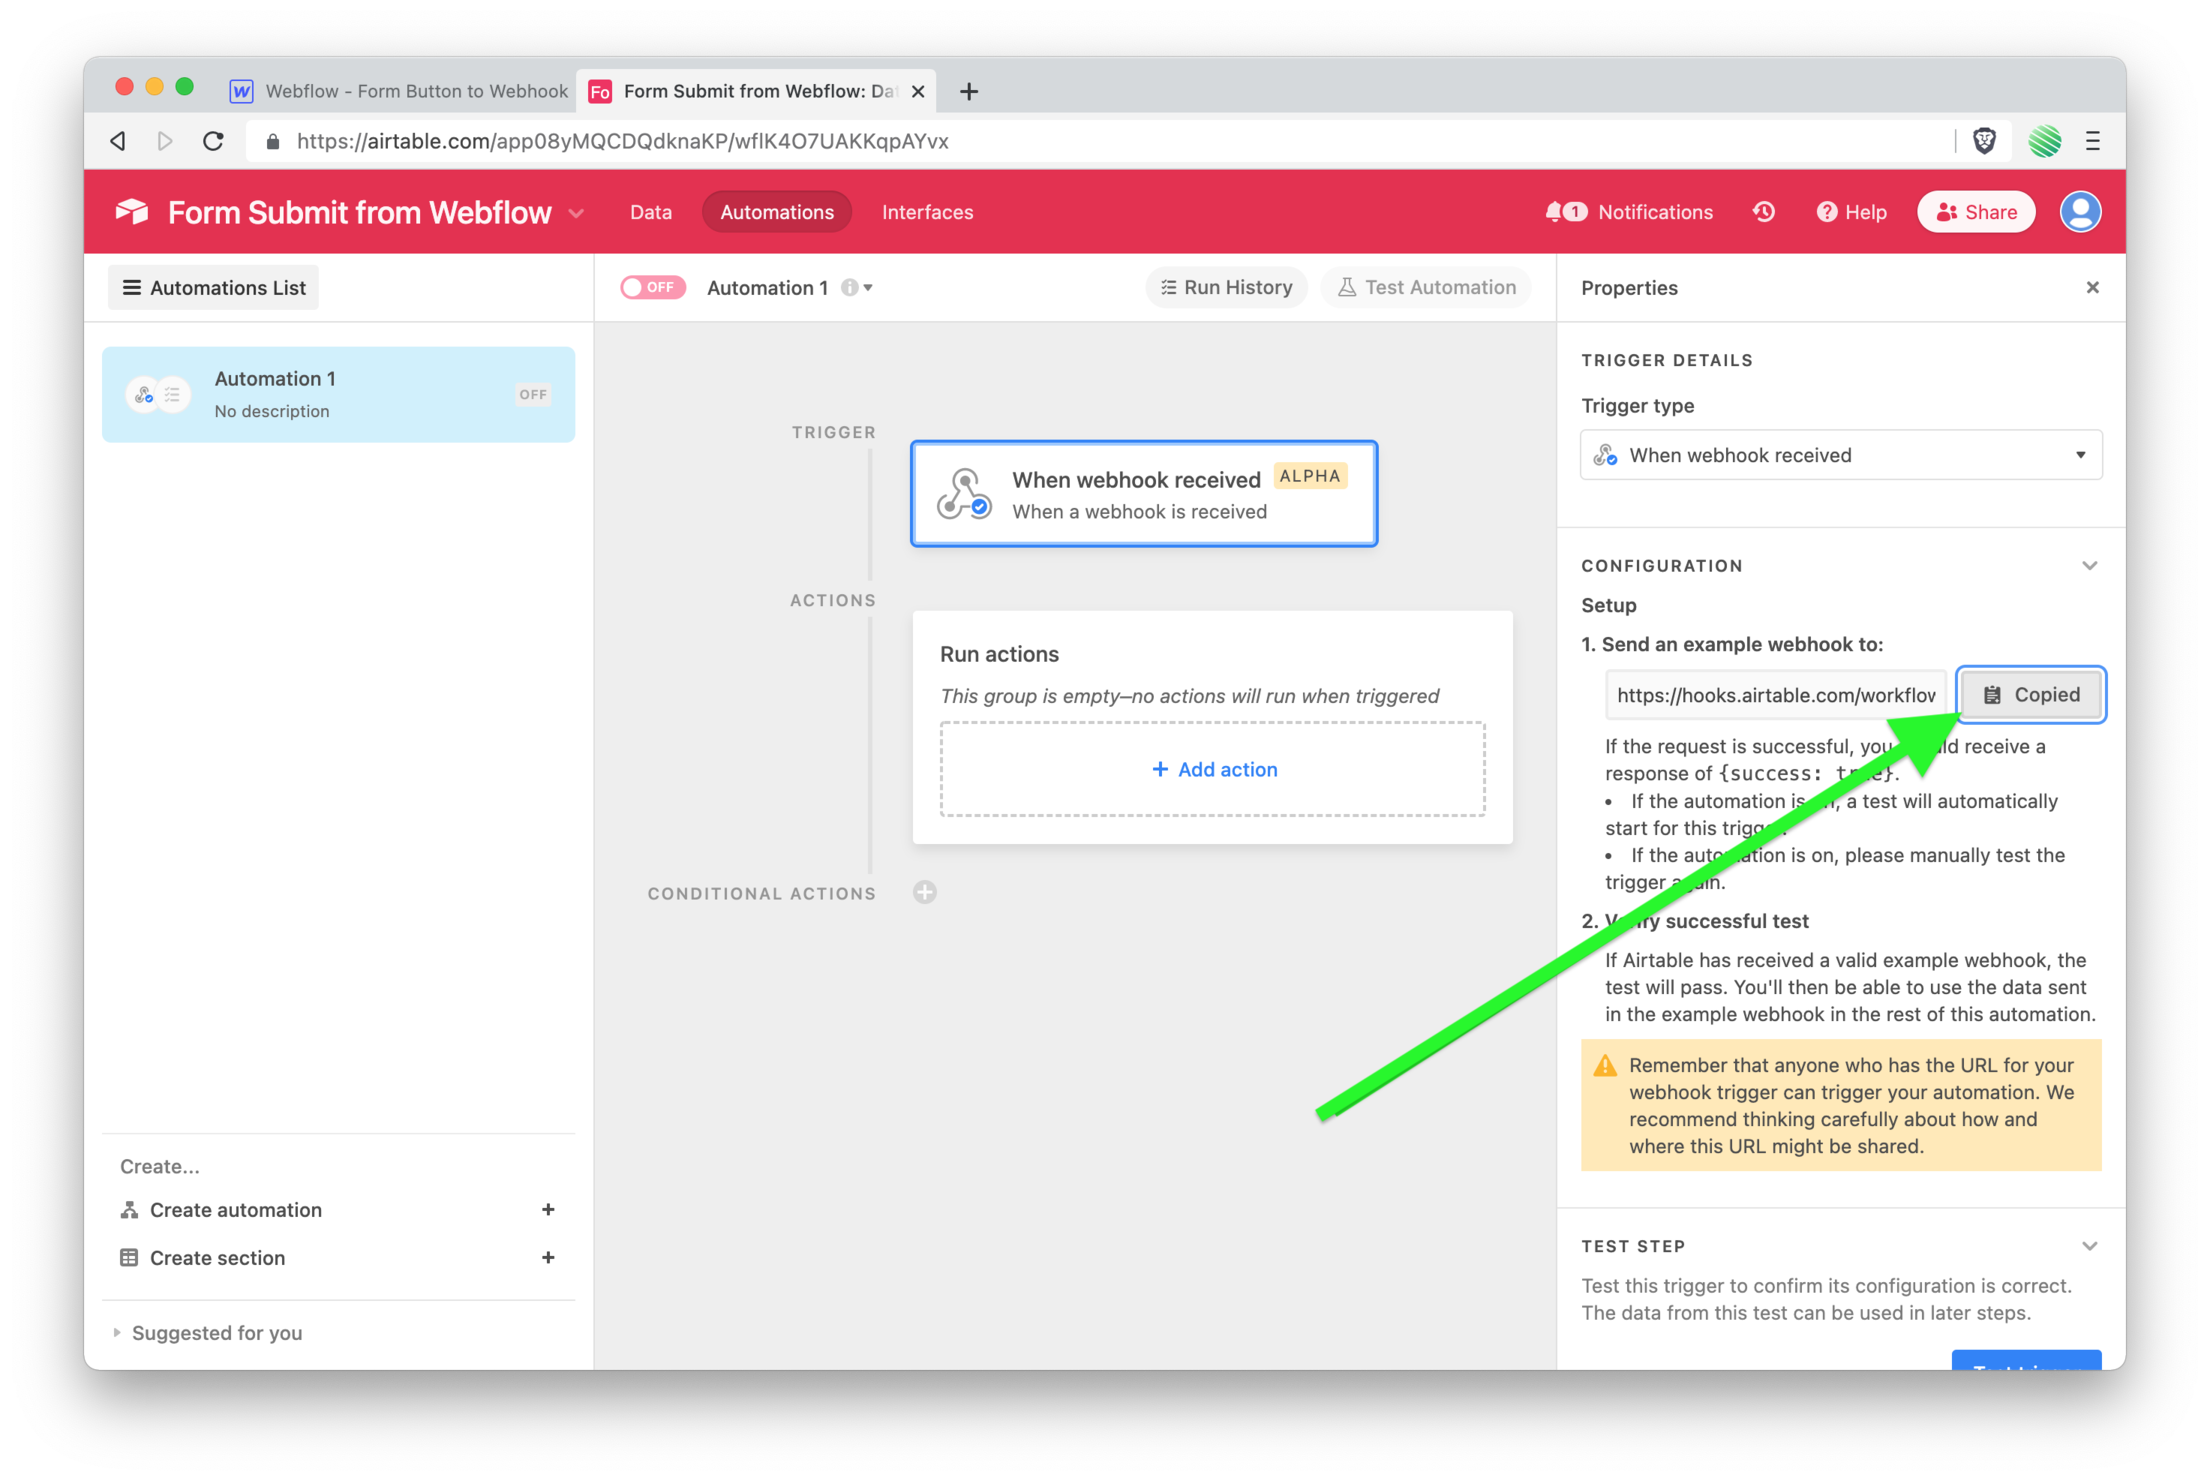
Copy the Webhook URL to your clipboard.
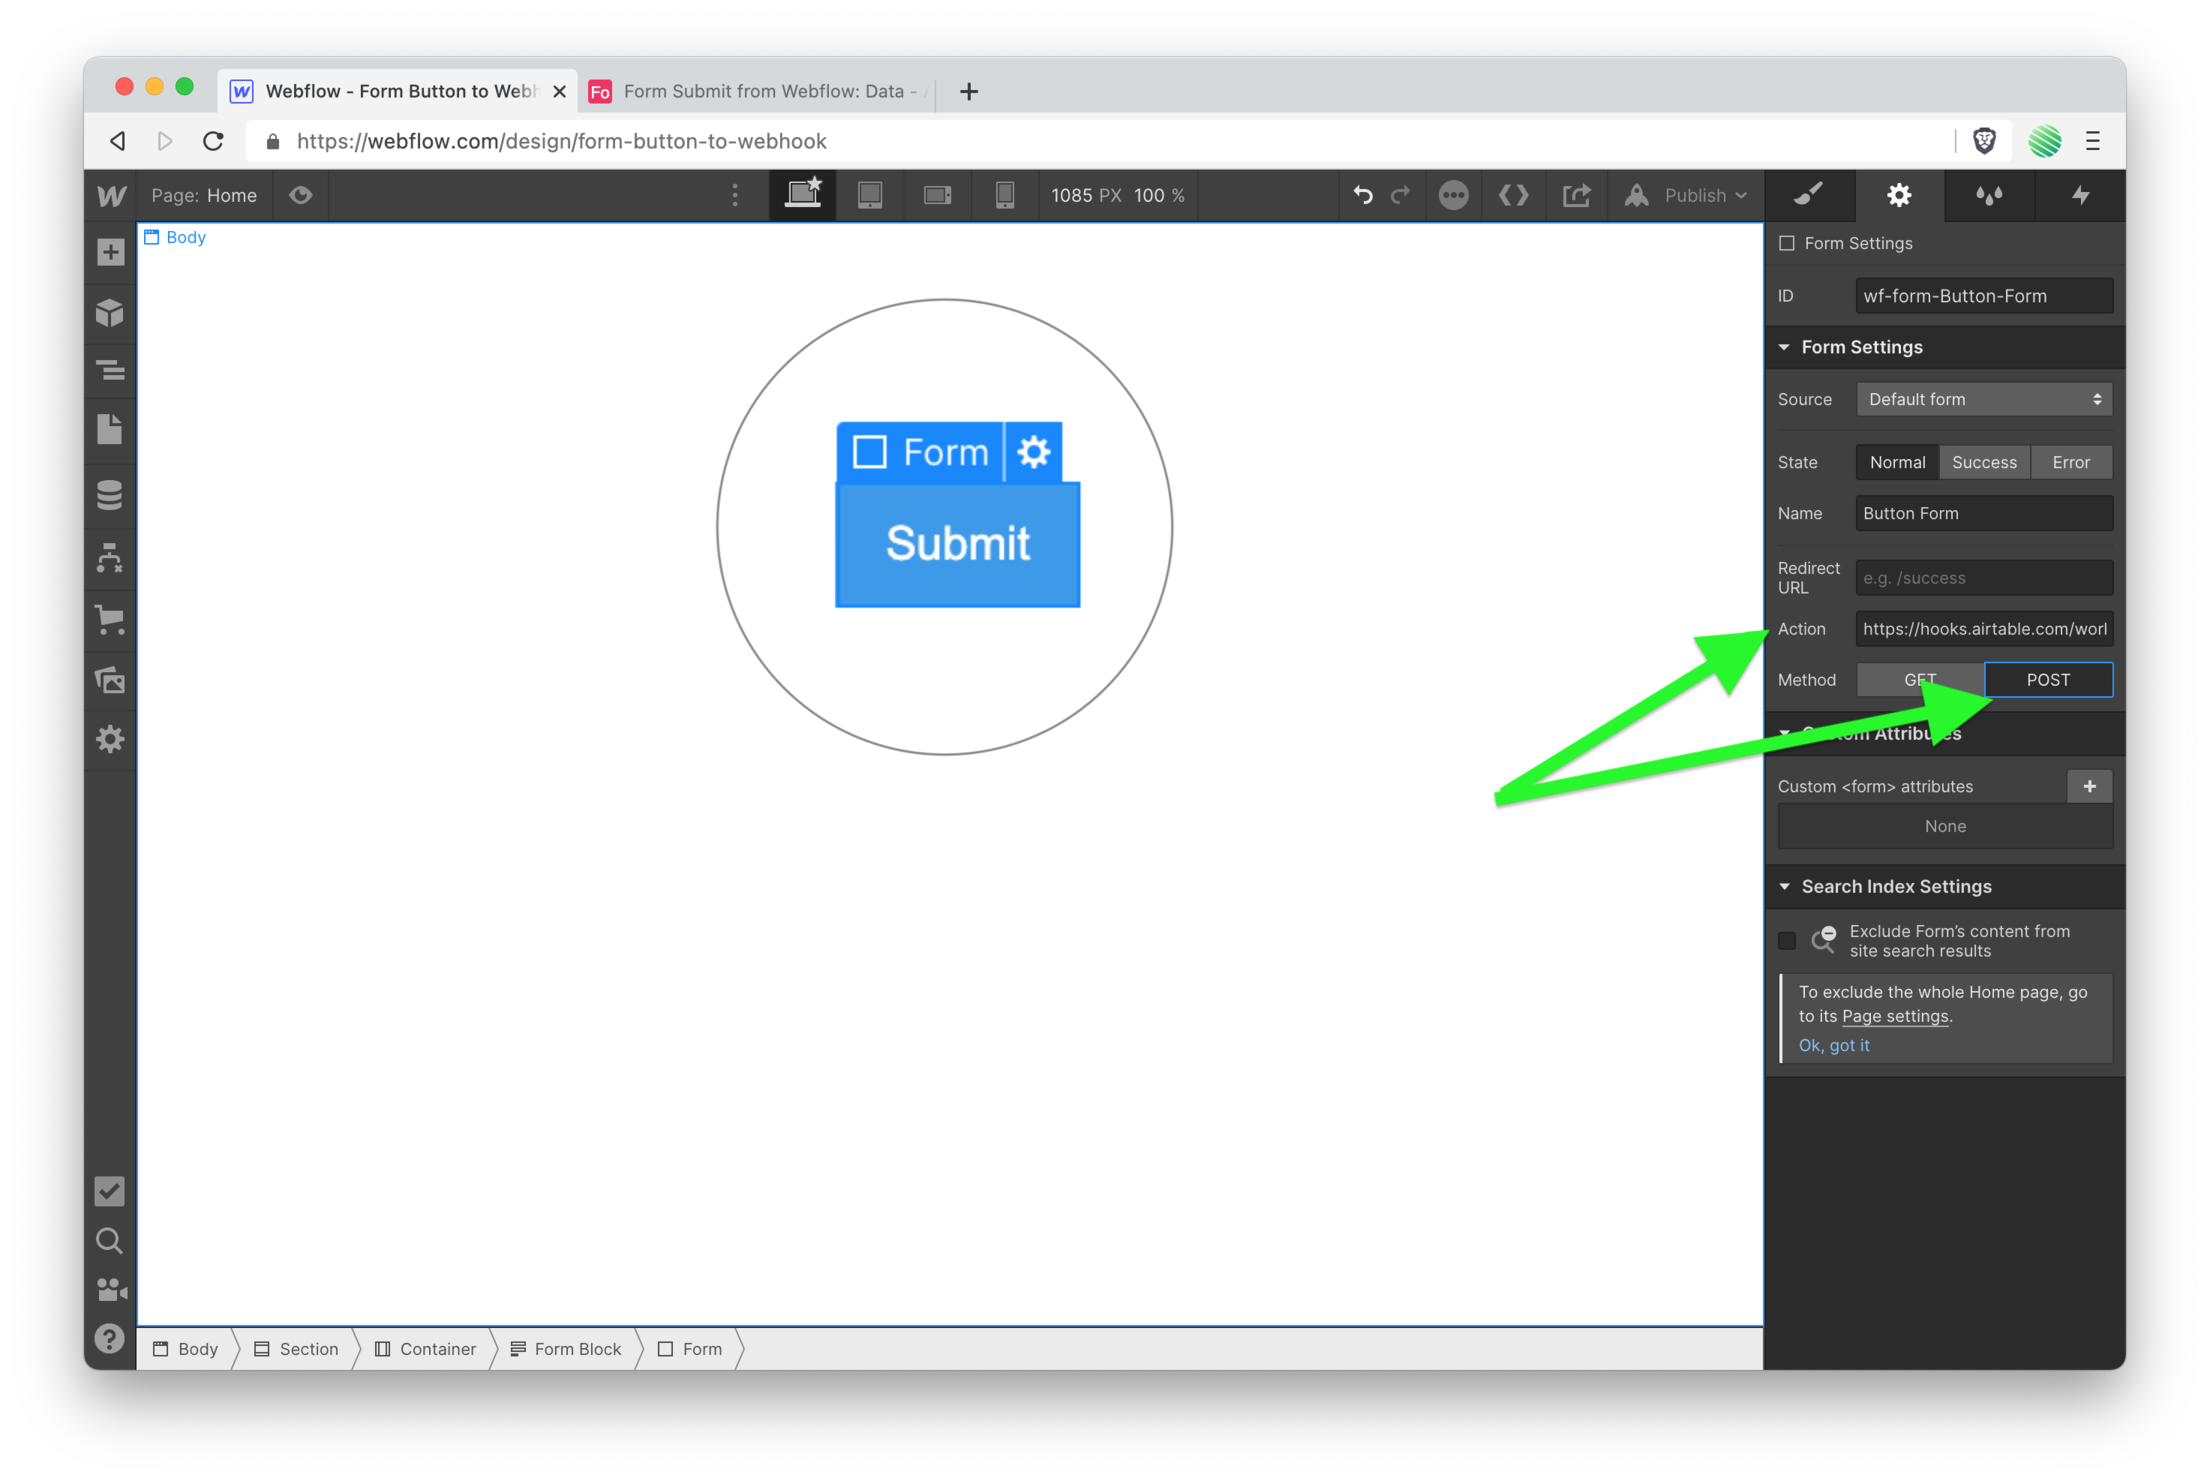
Open up a new Webflow project.
Add a form block and remove the default fields and labels. Only leave the form button.
Change the form “Method” to “POST” paste your Airtable Webhook URL into the “Action” field.
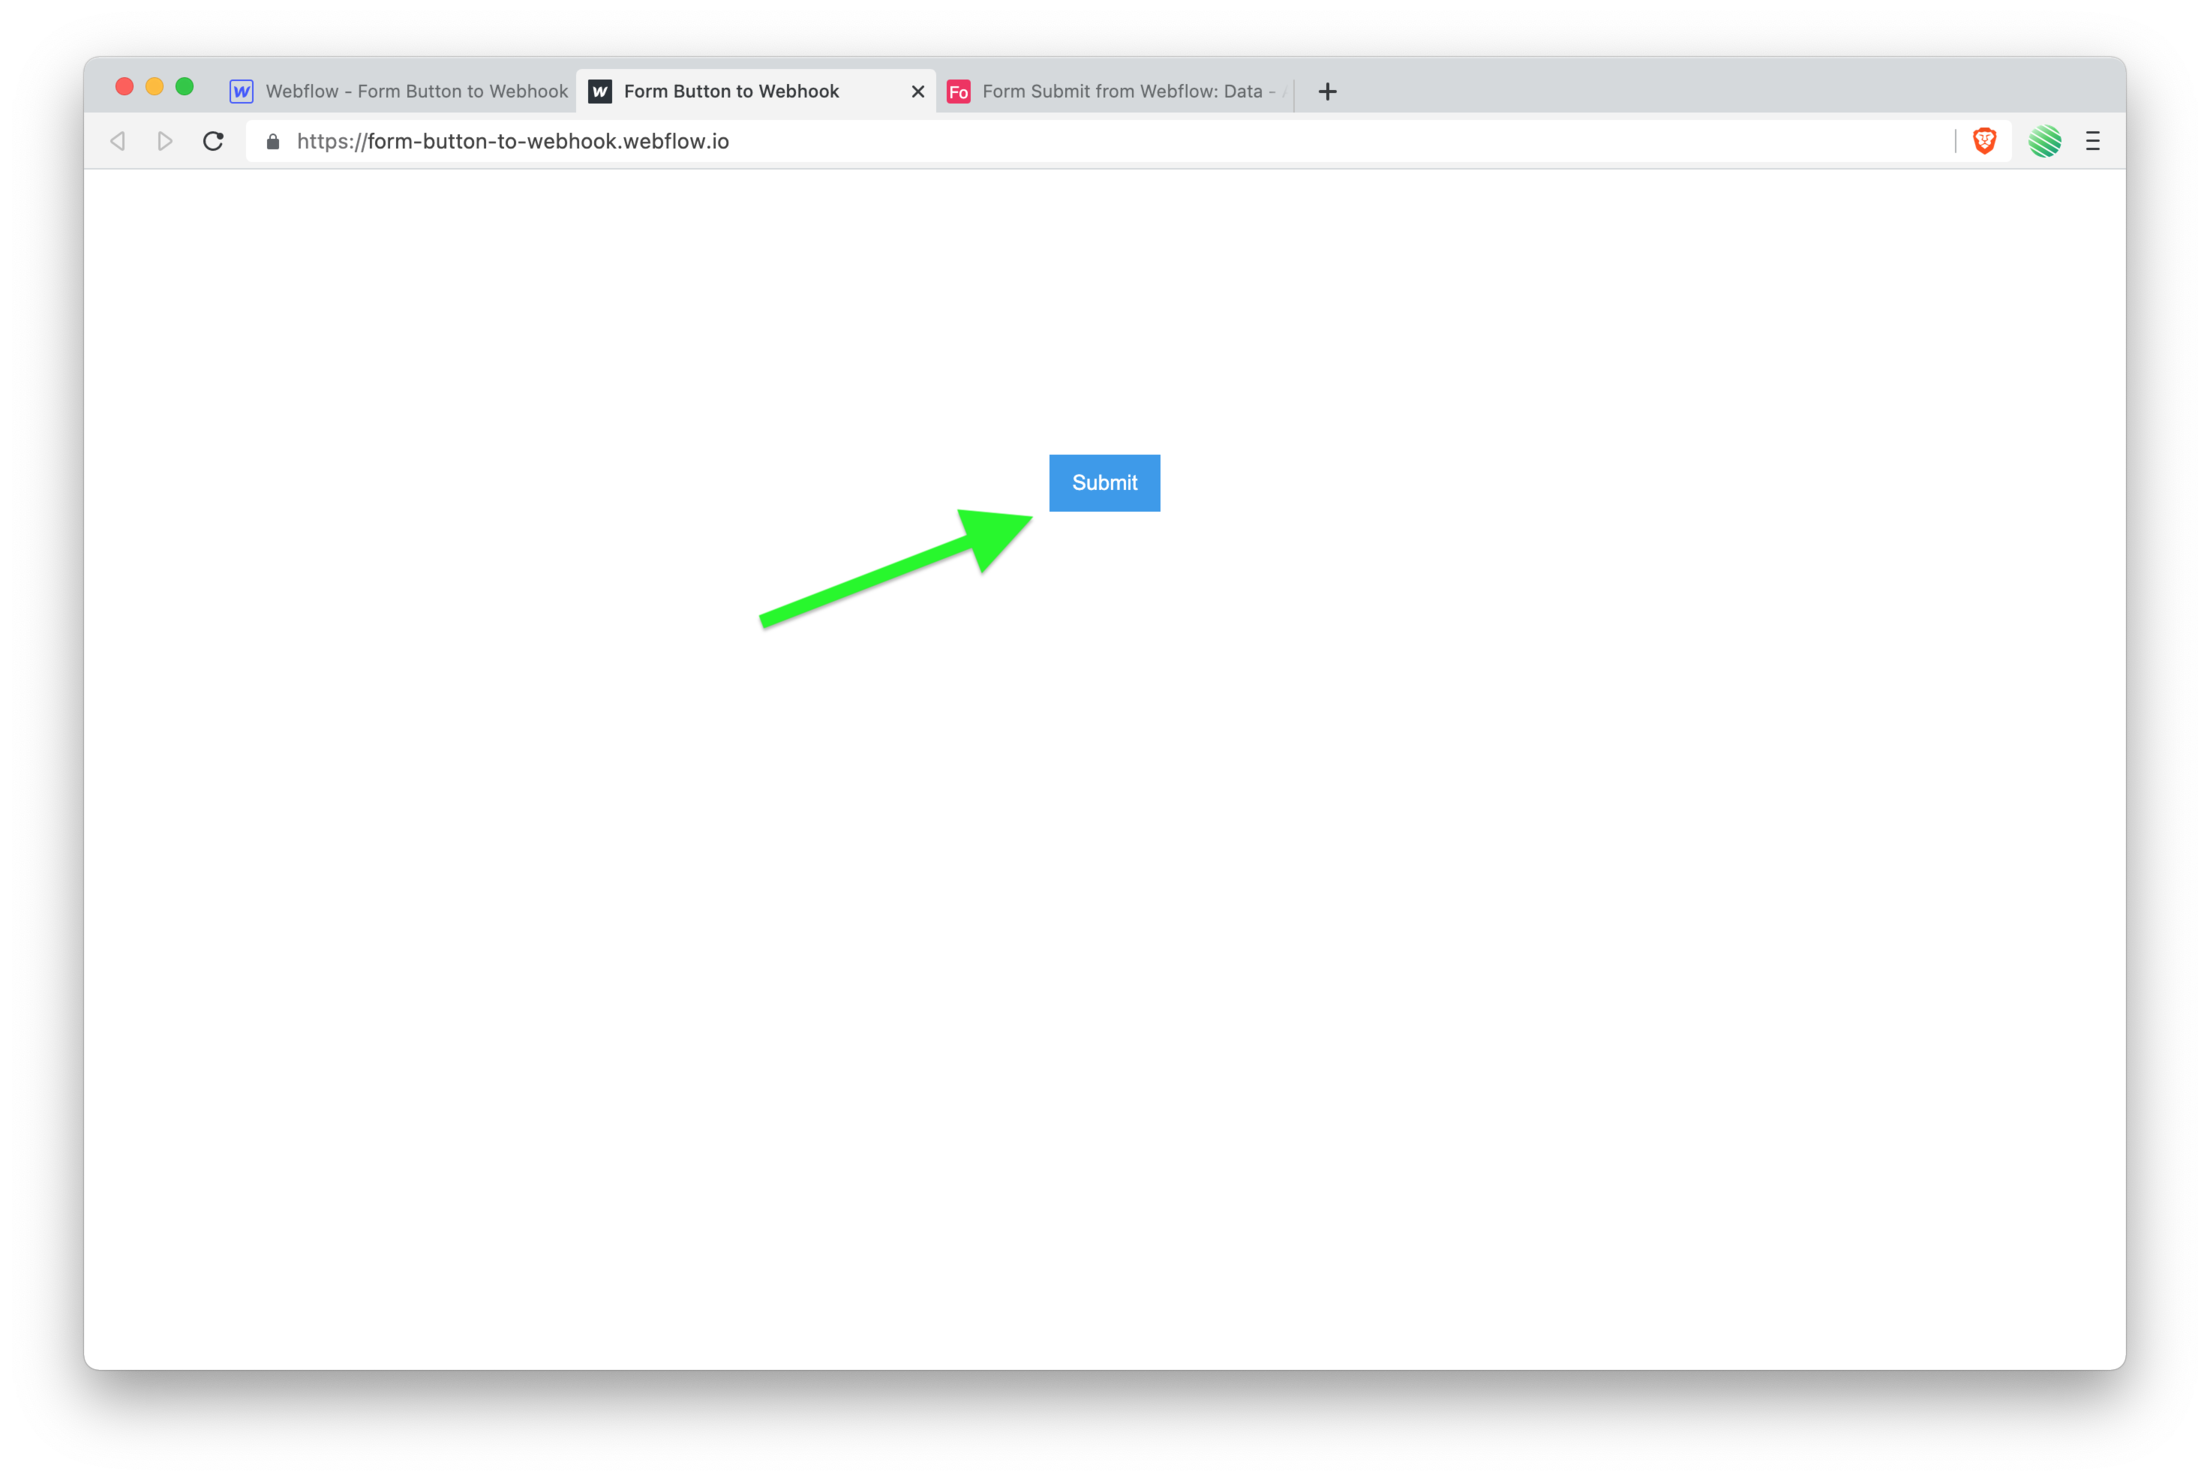
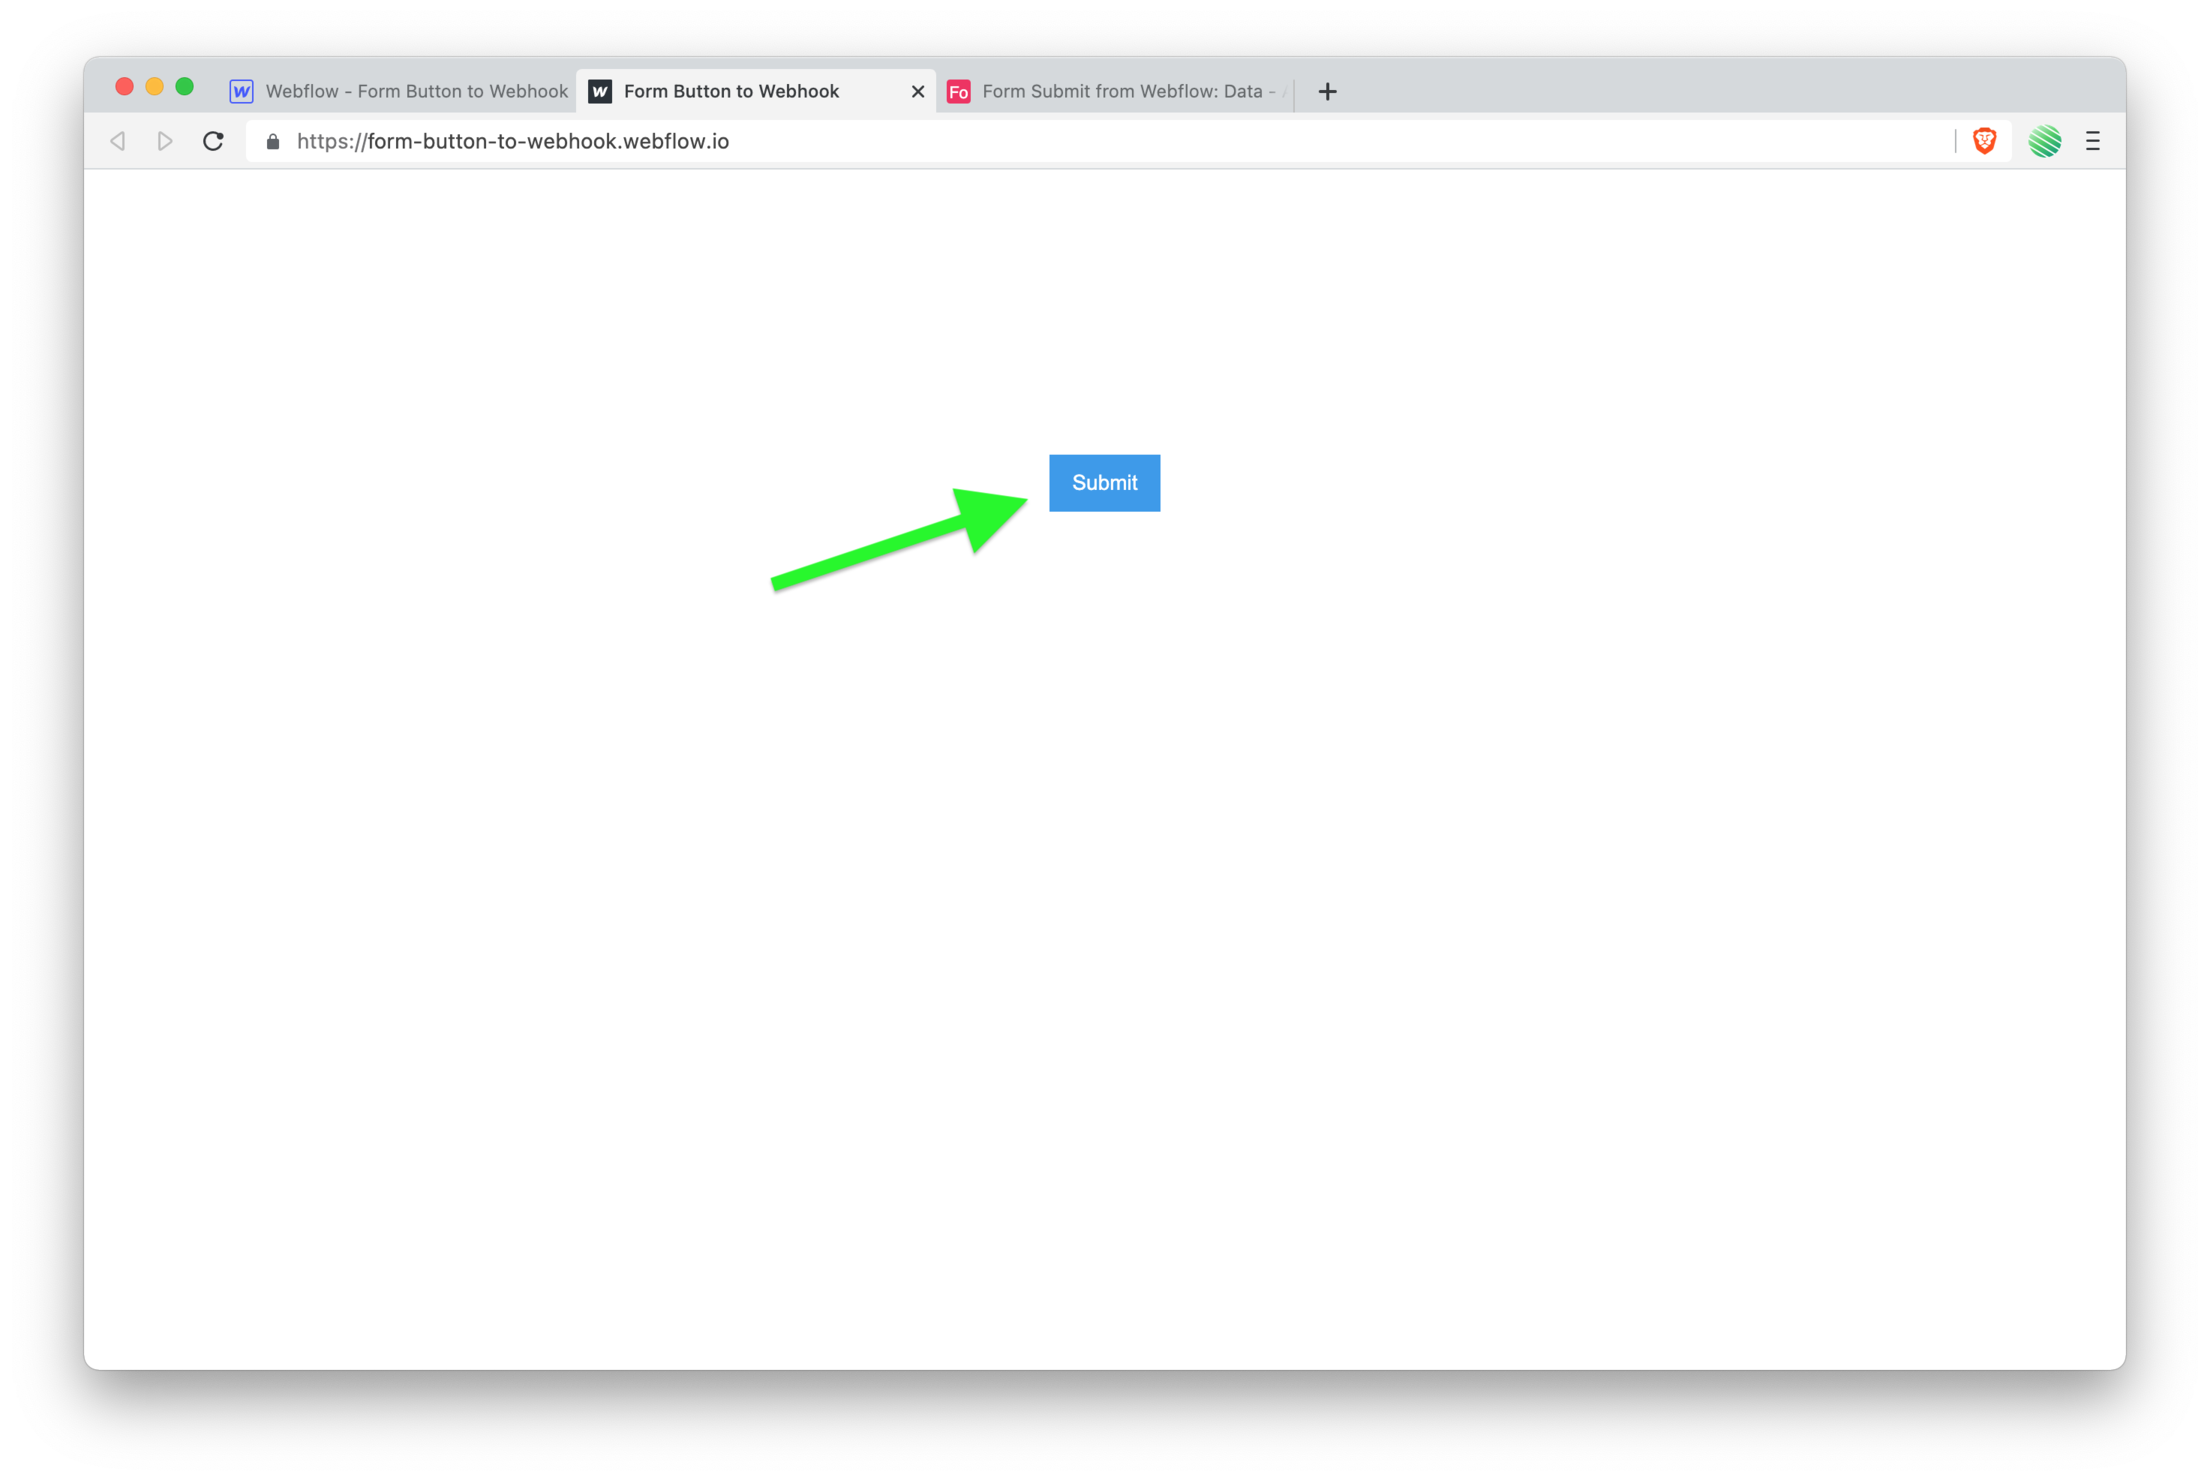
 Publish your Webflow project, open the live site, and tap on your fancy new form submit button.
 Go back to Airtable and check to see if your Webhook was received by tapping the "Test Trigger" button.
It should have worked, and you’ll know it did with the “Step successful” message.
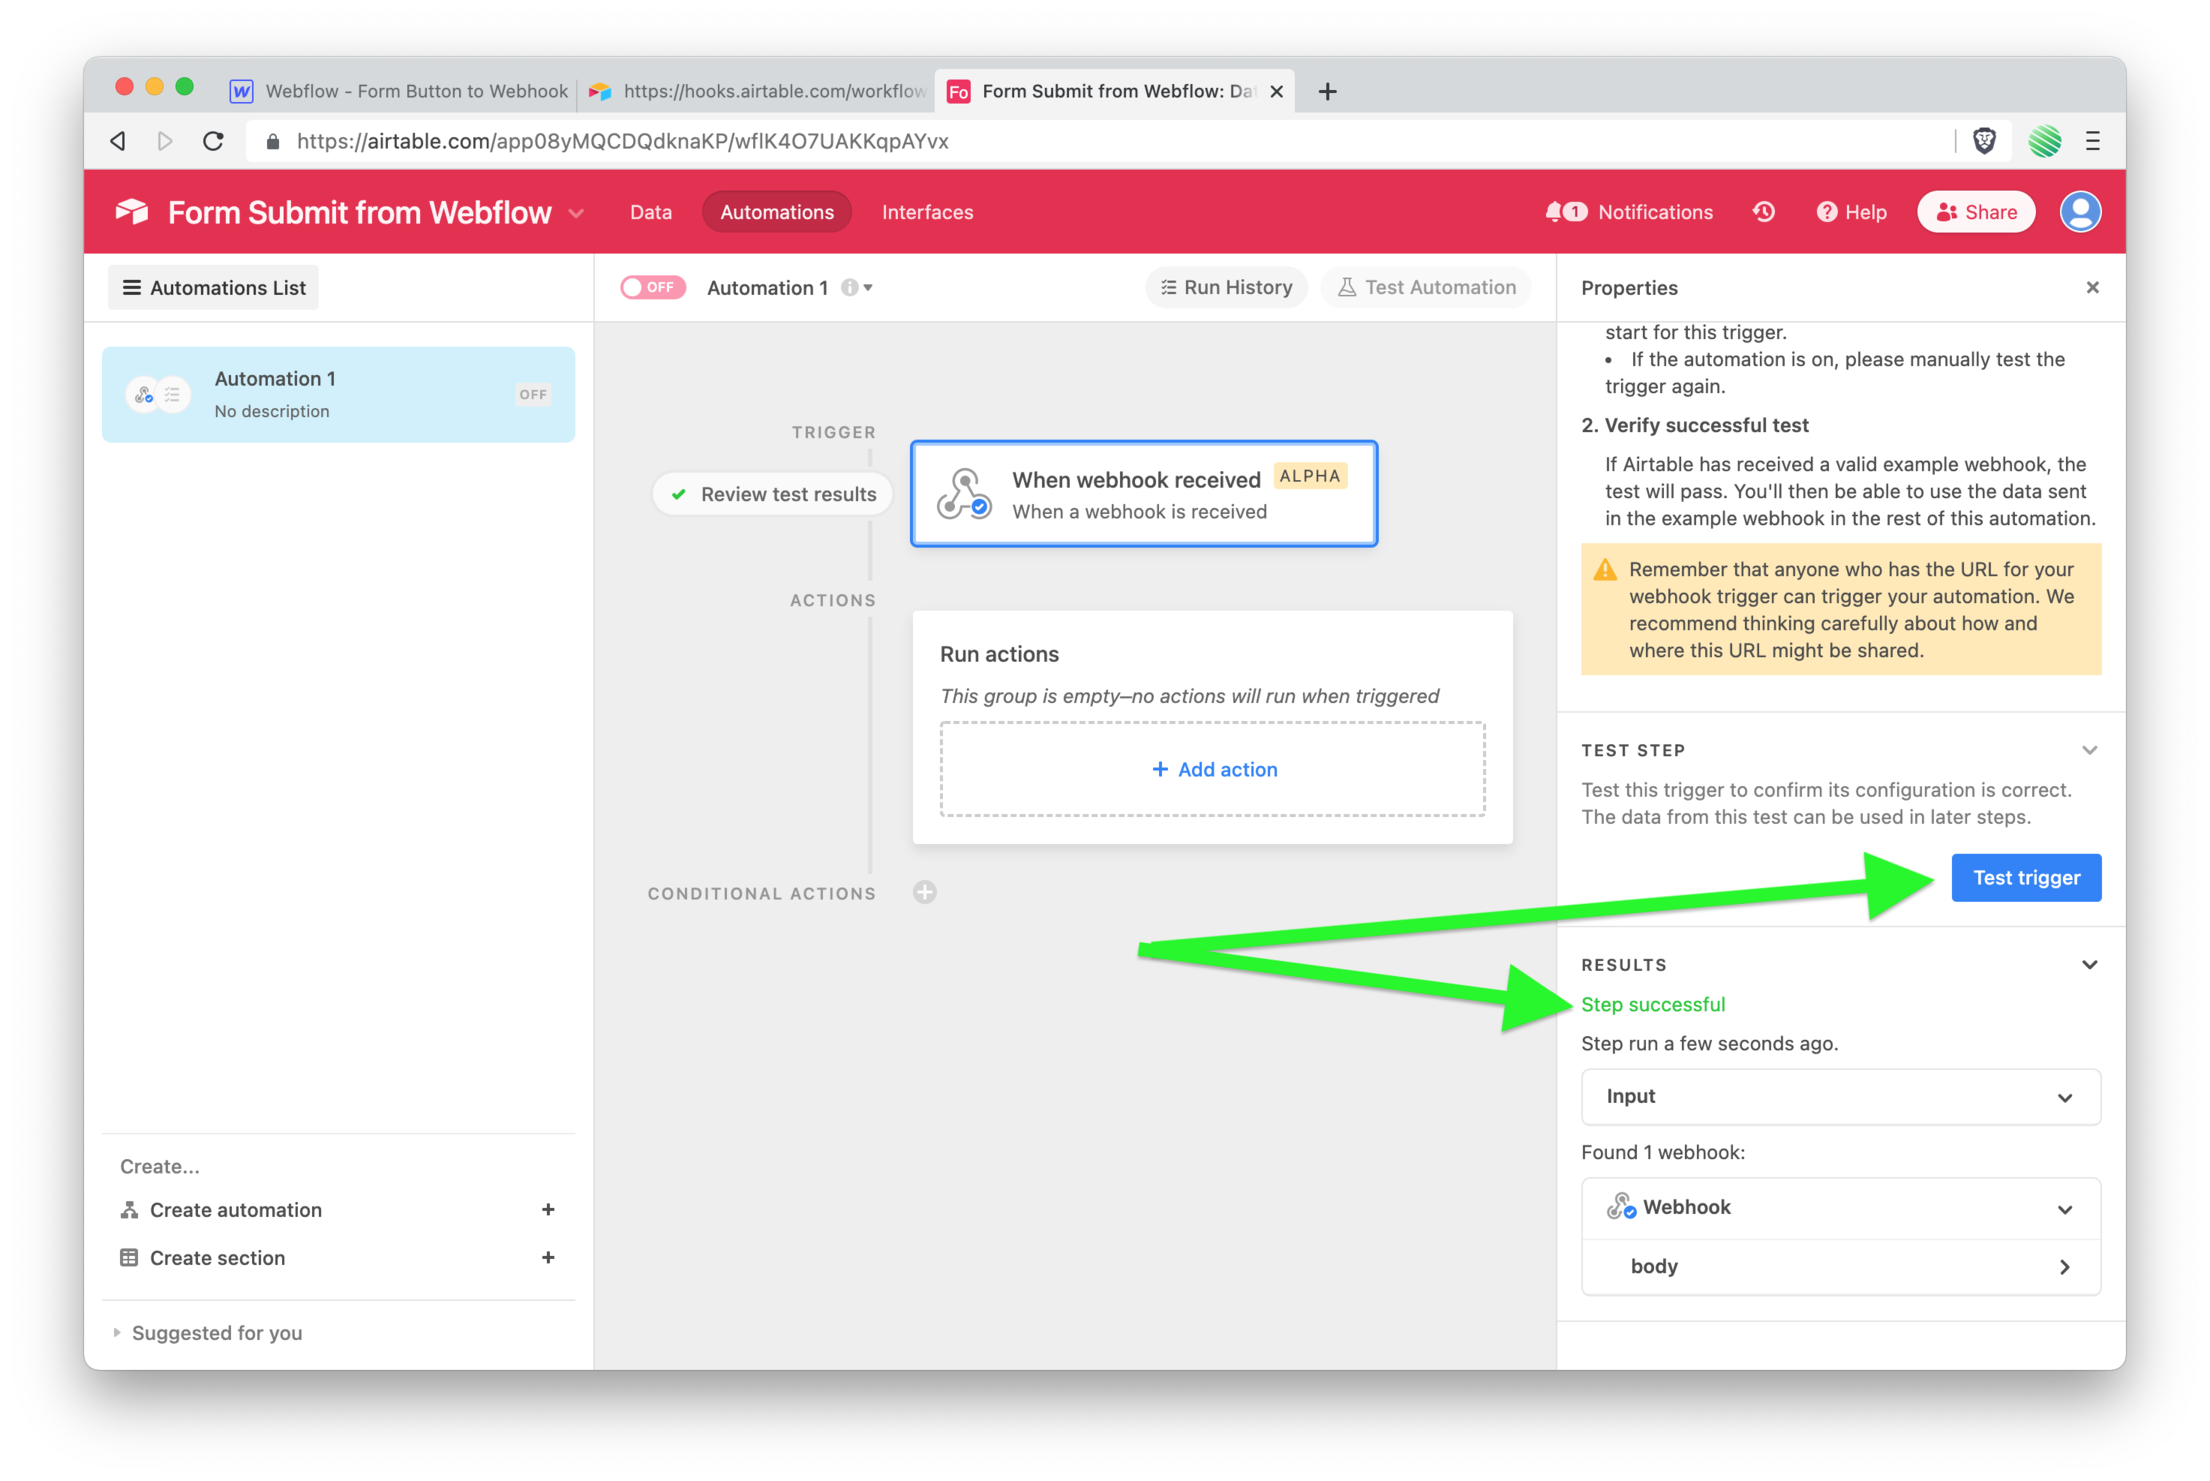 Great!
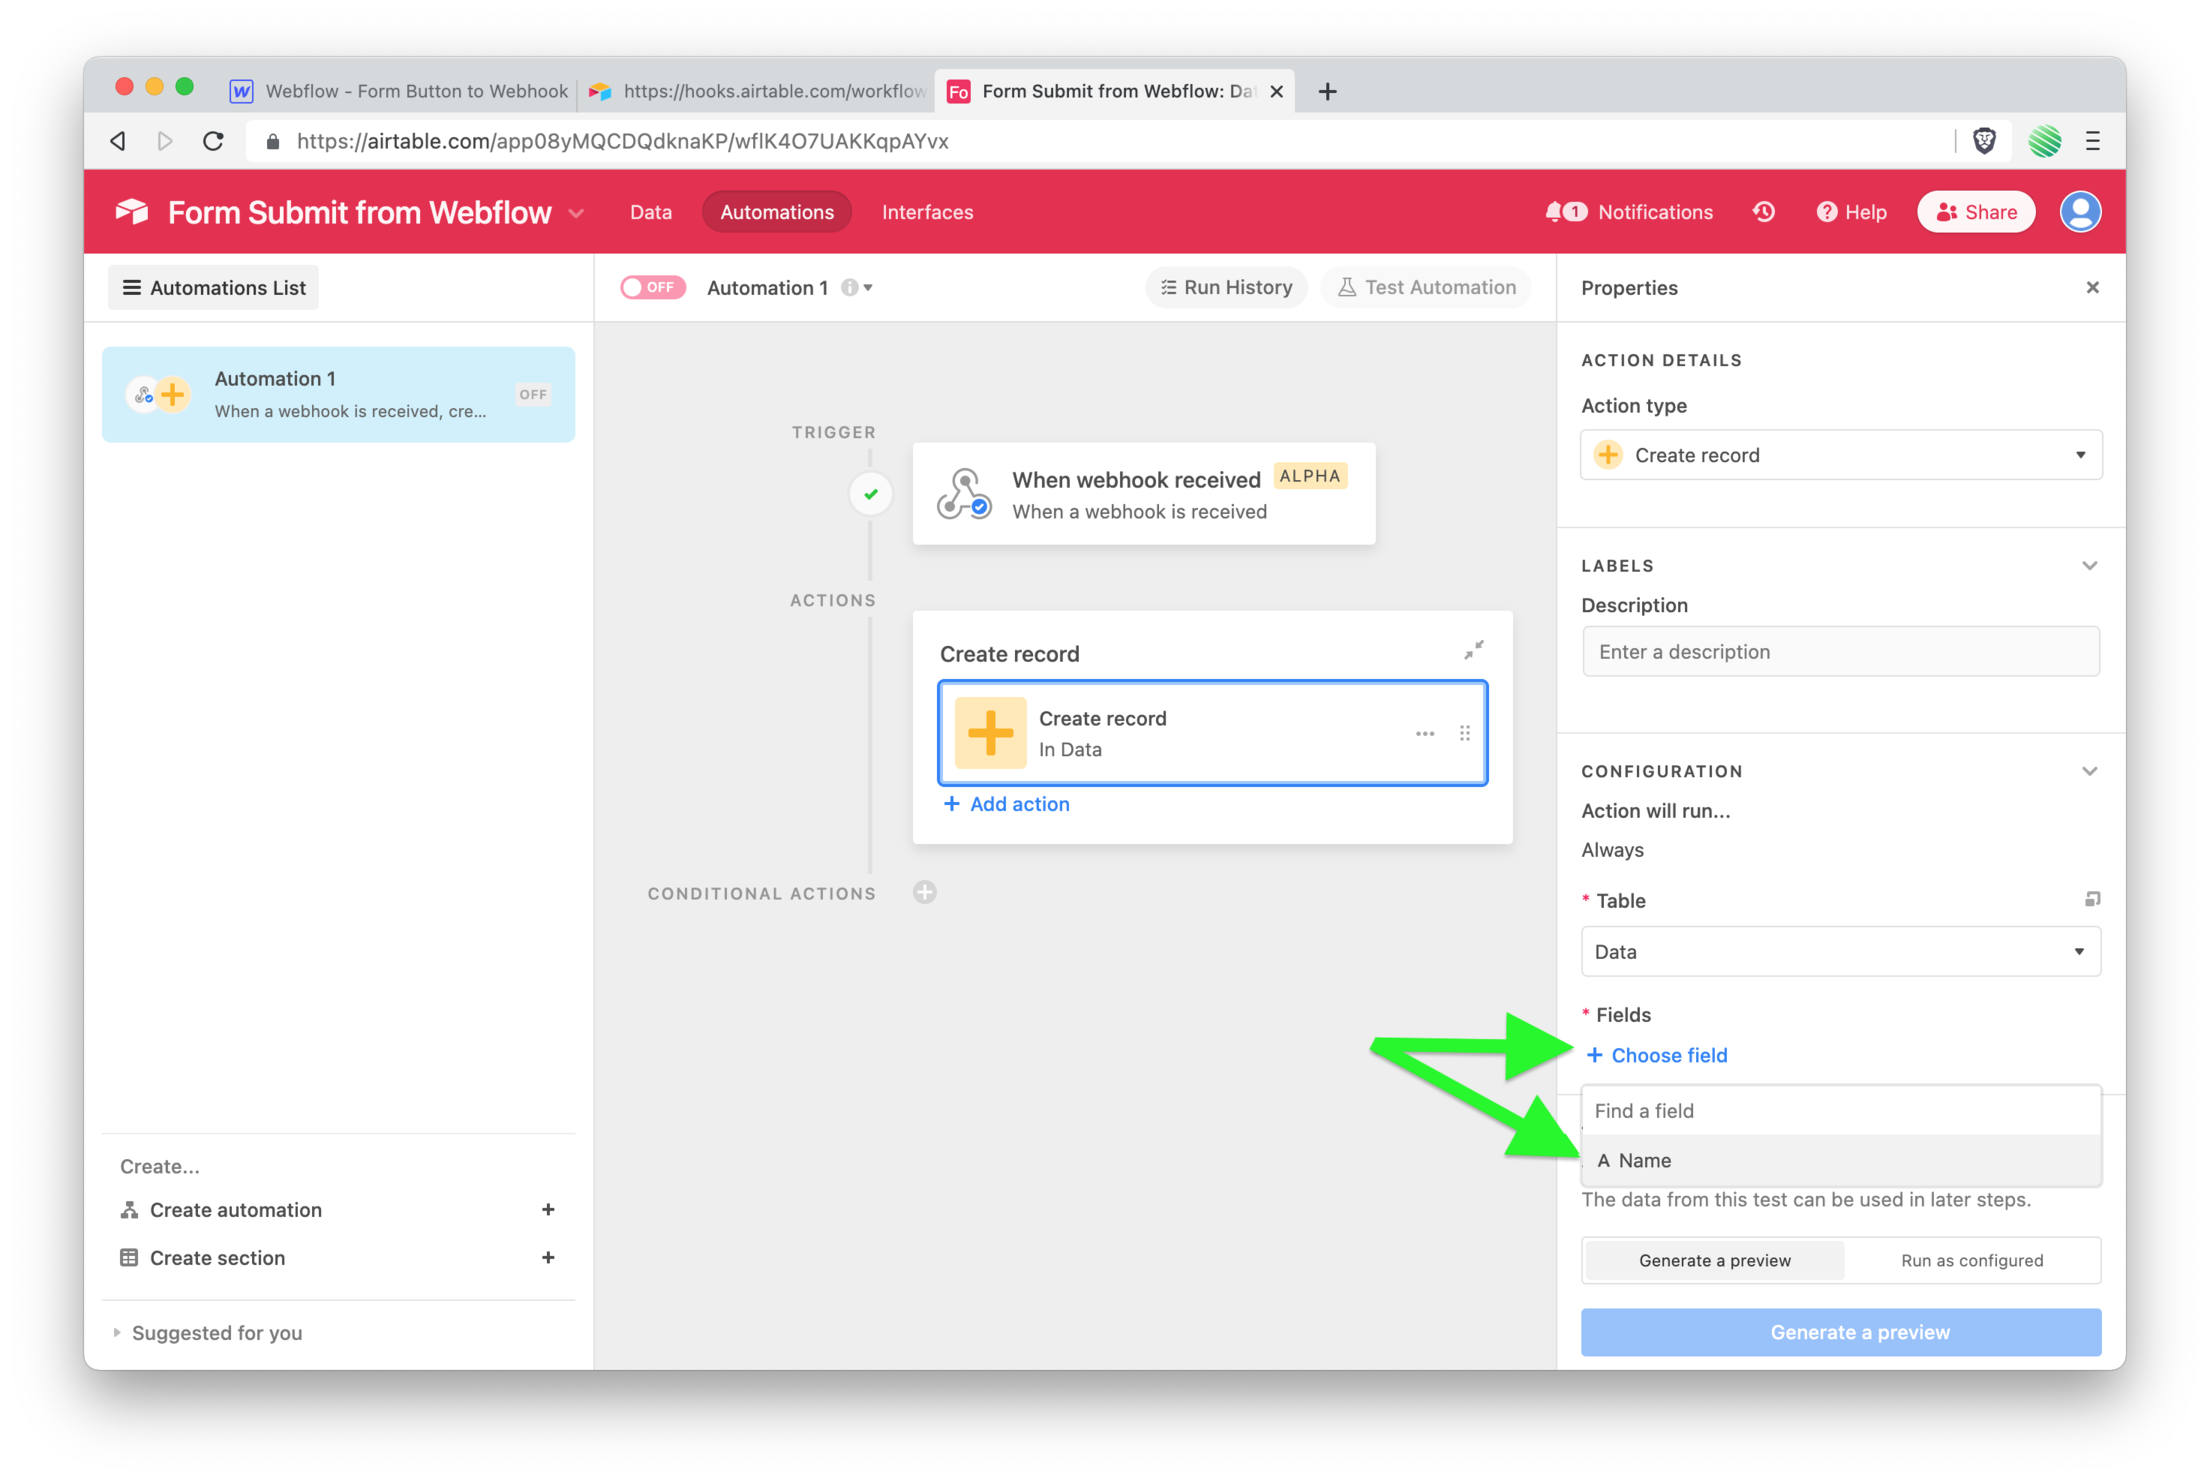
You’re good to go. Next you’ll add an action once this Airtable Webhook is triggered.
In your case, you’ll choose “create record” from the list of options.

Choose your table.

Choose the field.
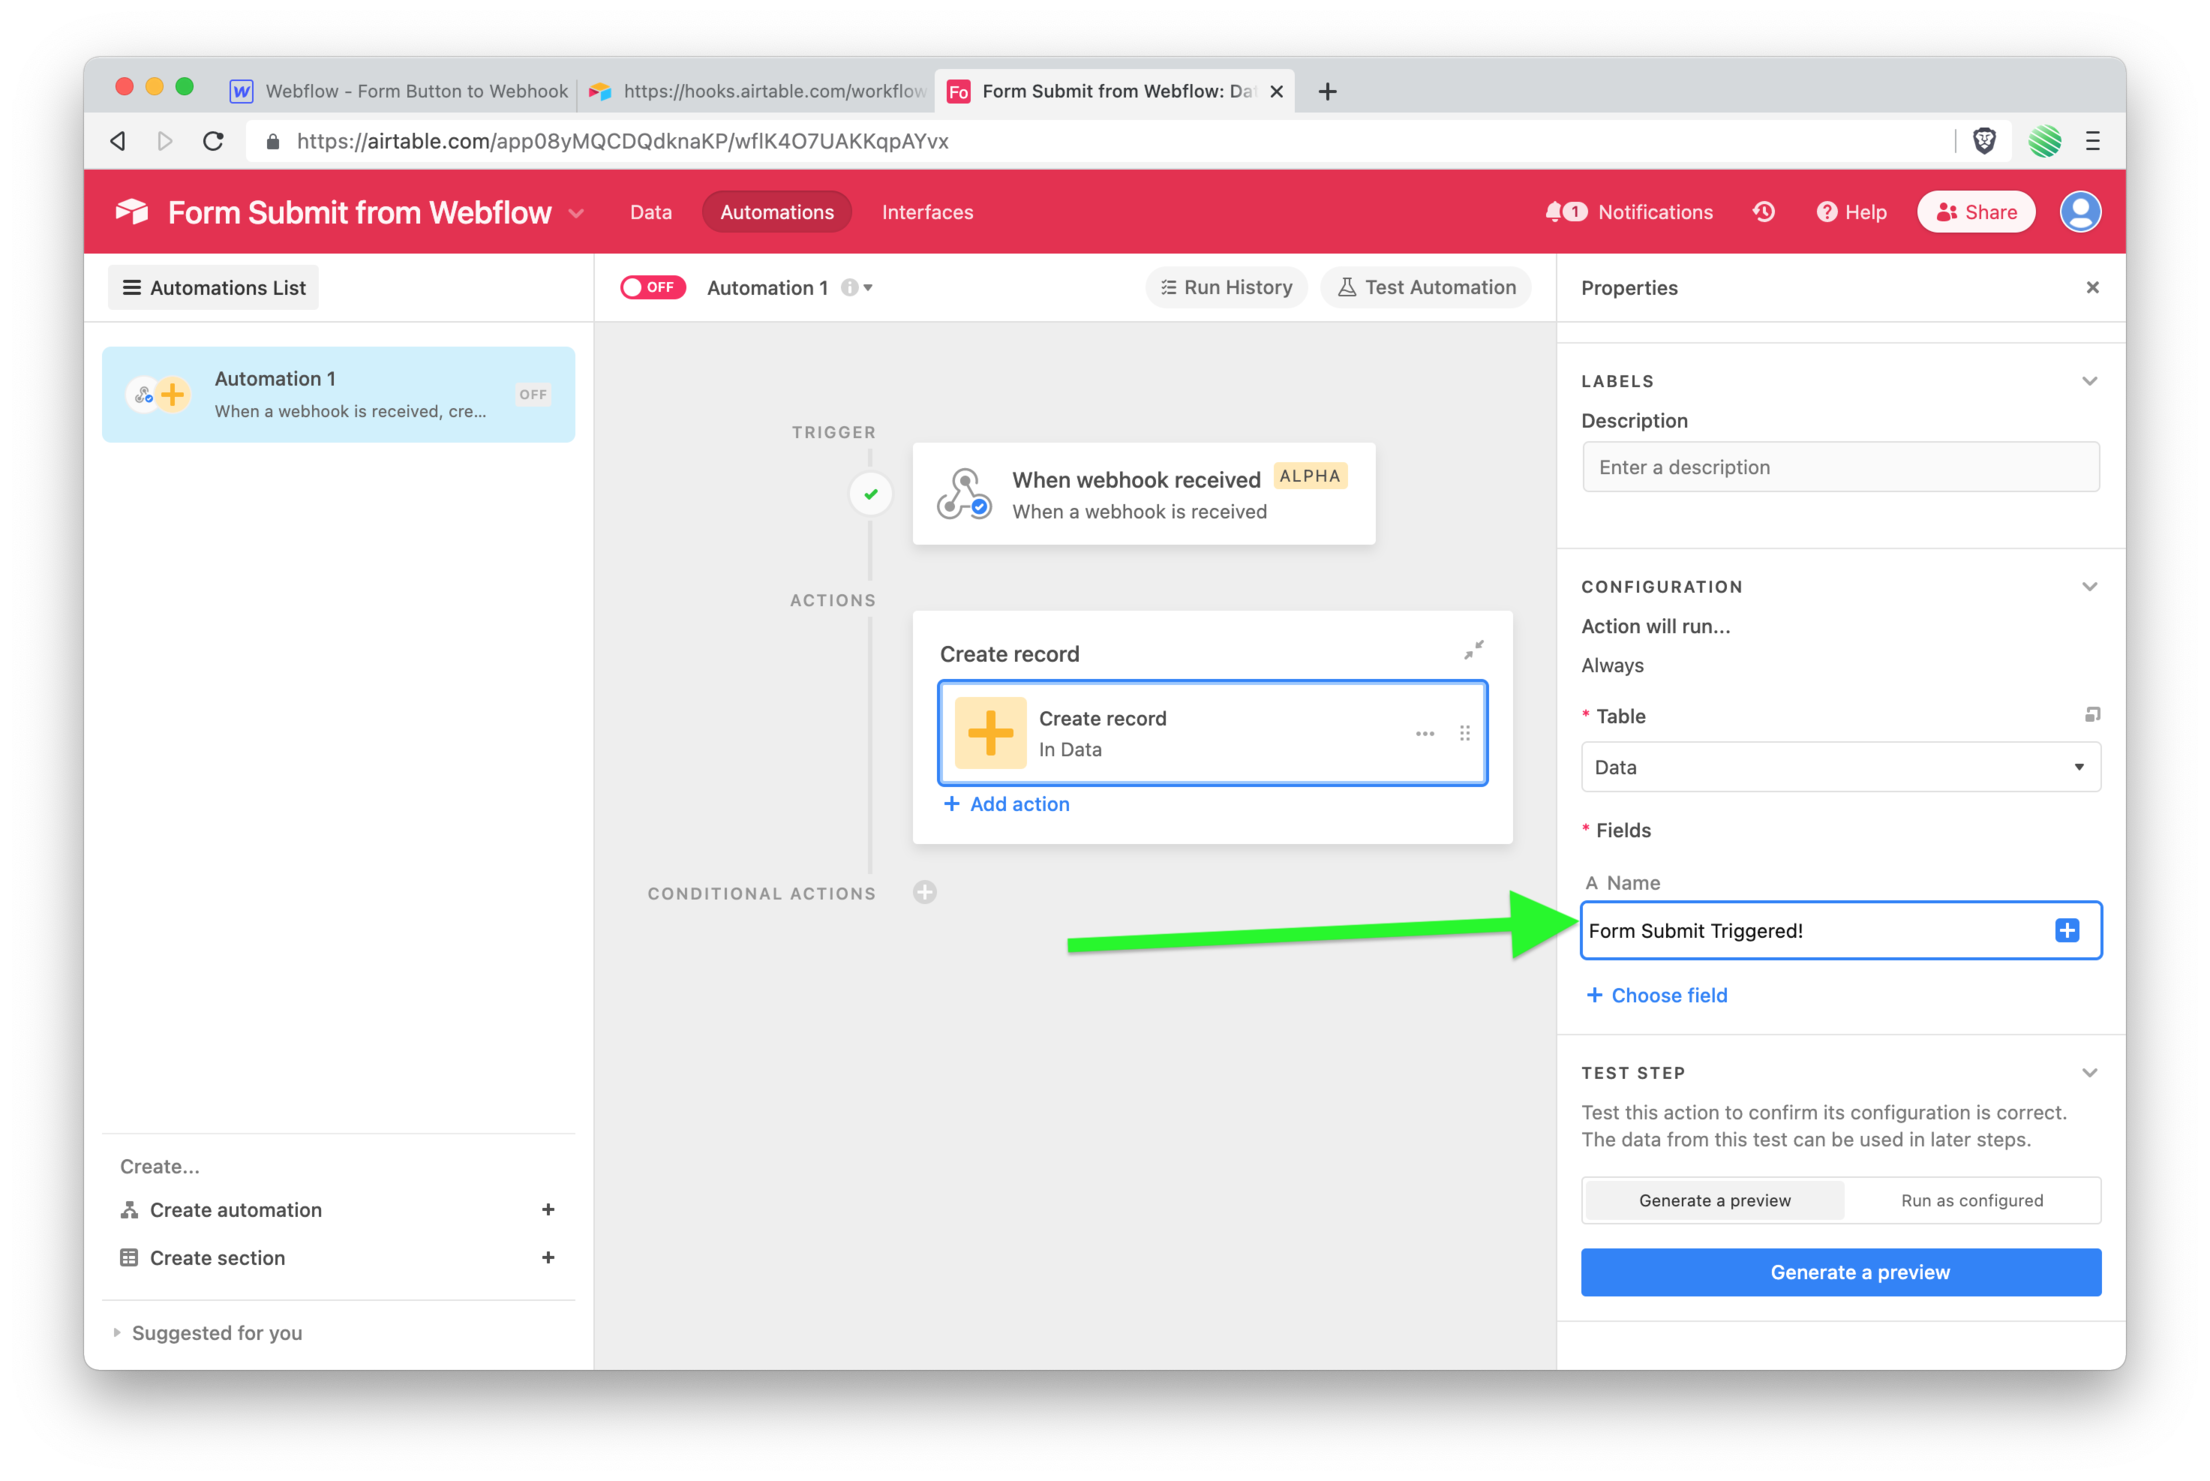
 For this quick walk through, add a simple message for this field when this action is triggered.
In the future, you’d want to add whatever the user submitted from your Webflow form.
 Turn on the Automation.
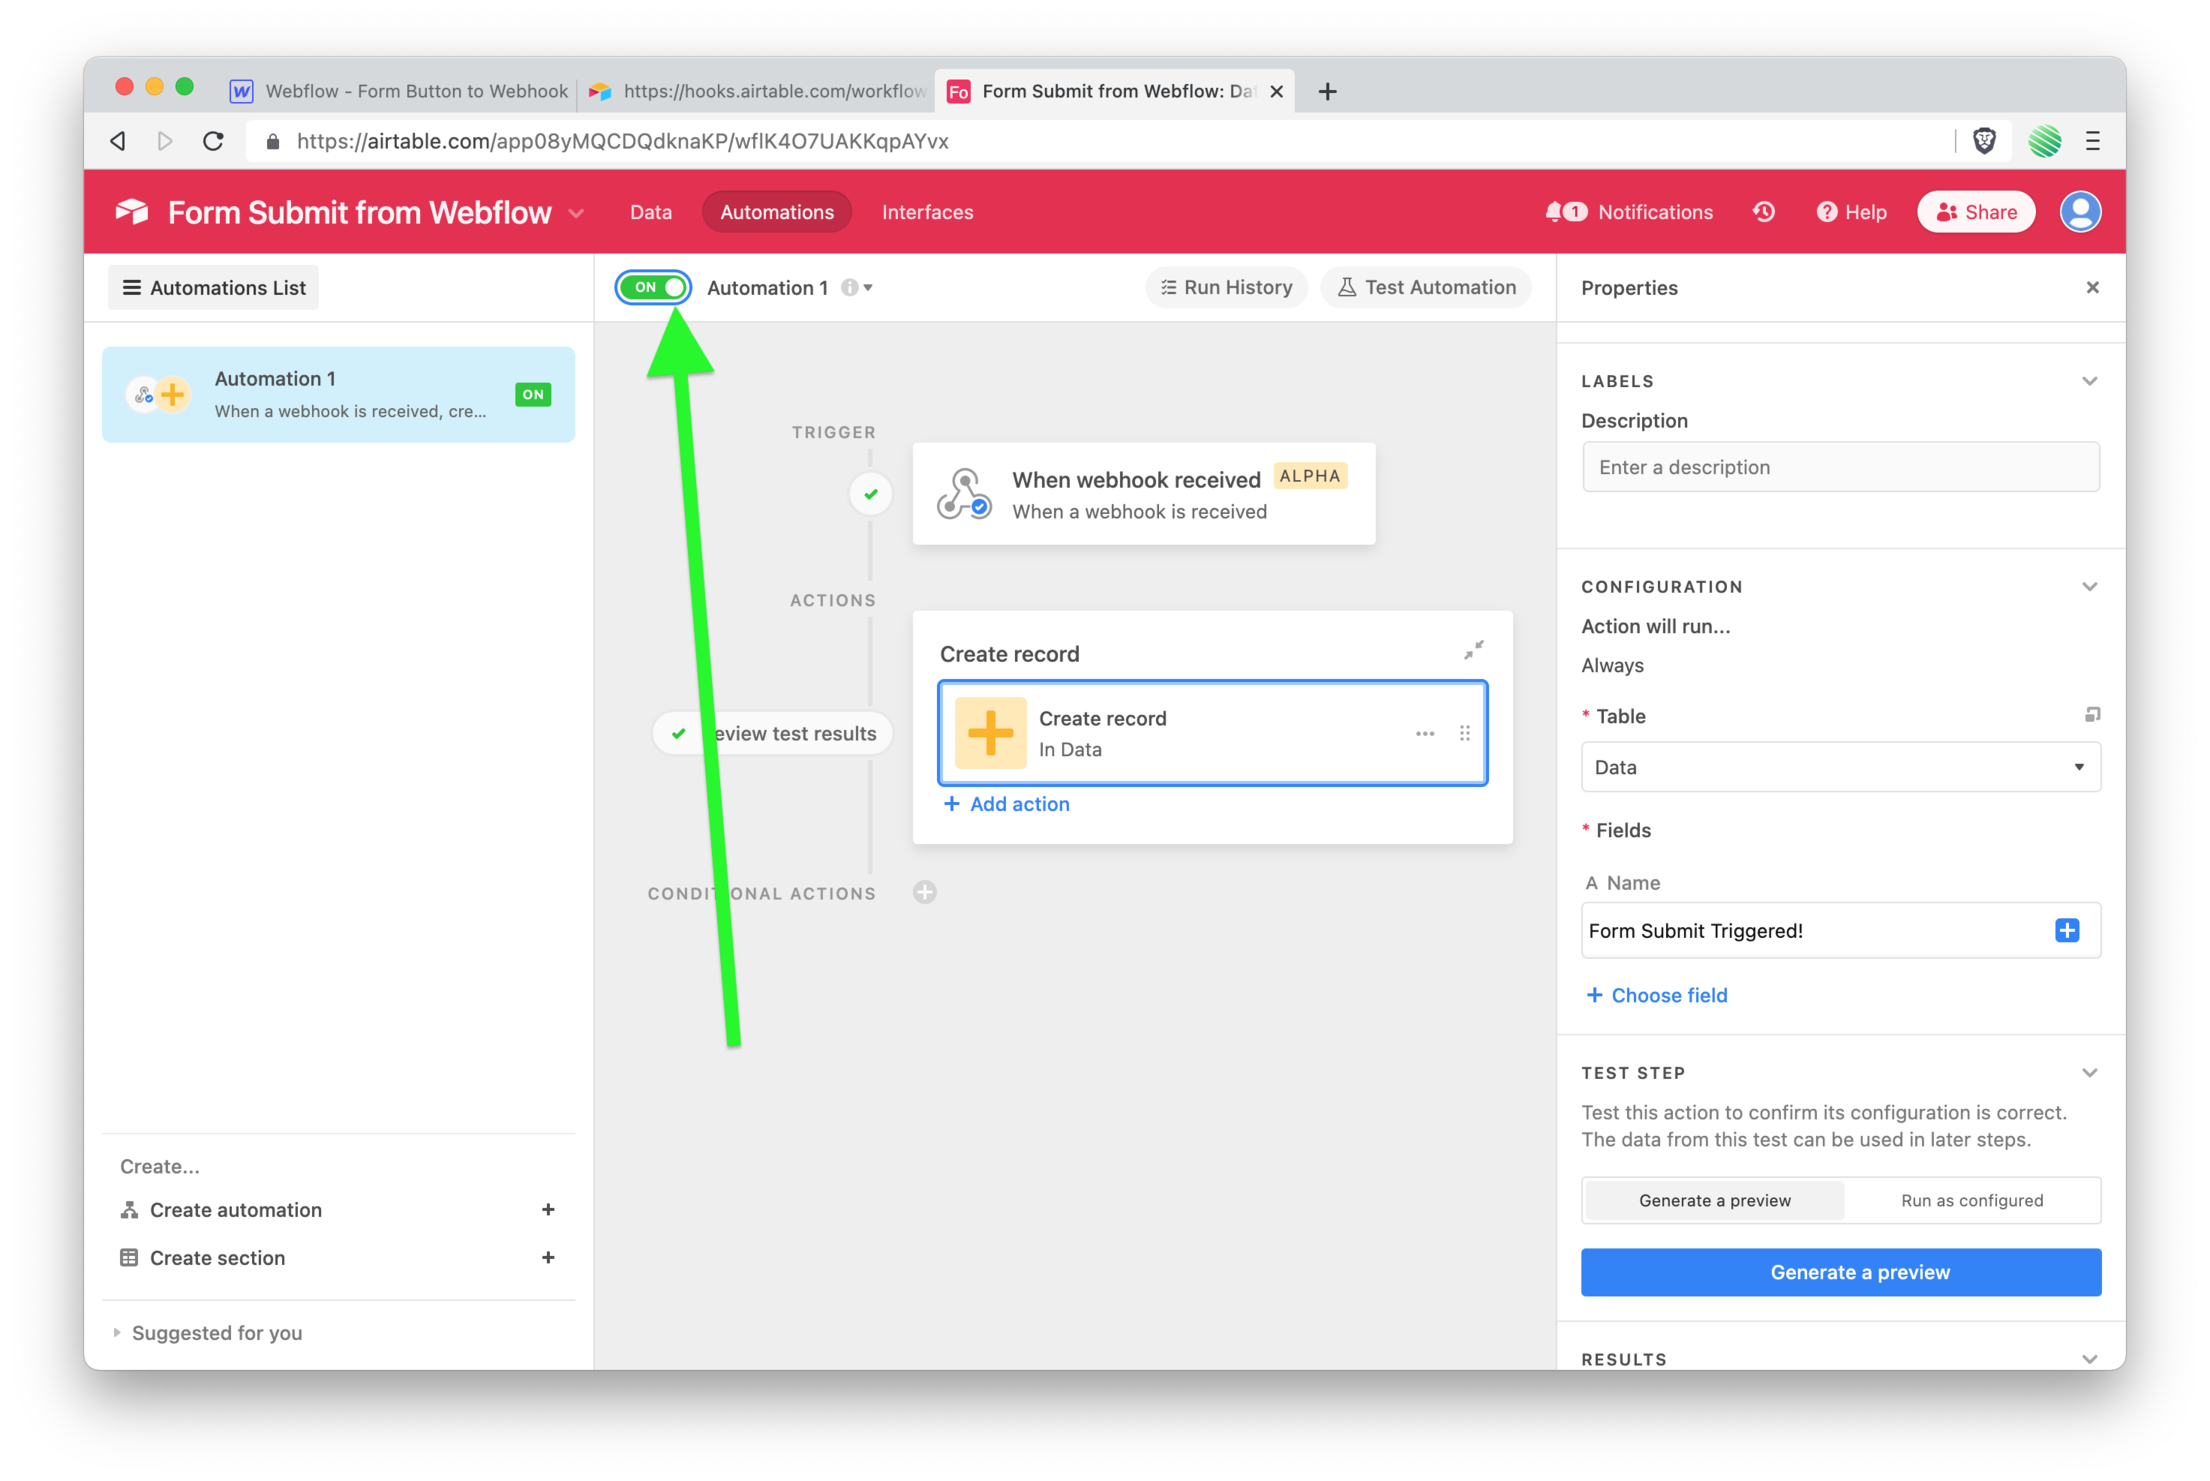 Go back to your Webflow's live site. Tap the form submit button once again.
💥 Boom!
You just submitted a native Webflow form directly into your Airtable base, using Webhooks, without Make, Integromat, or Zapier.
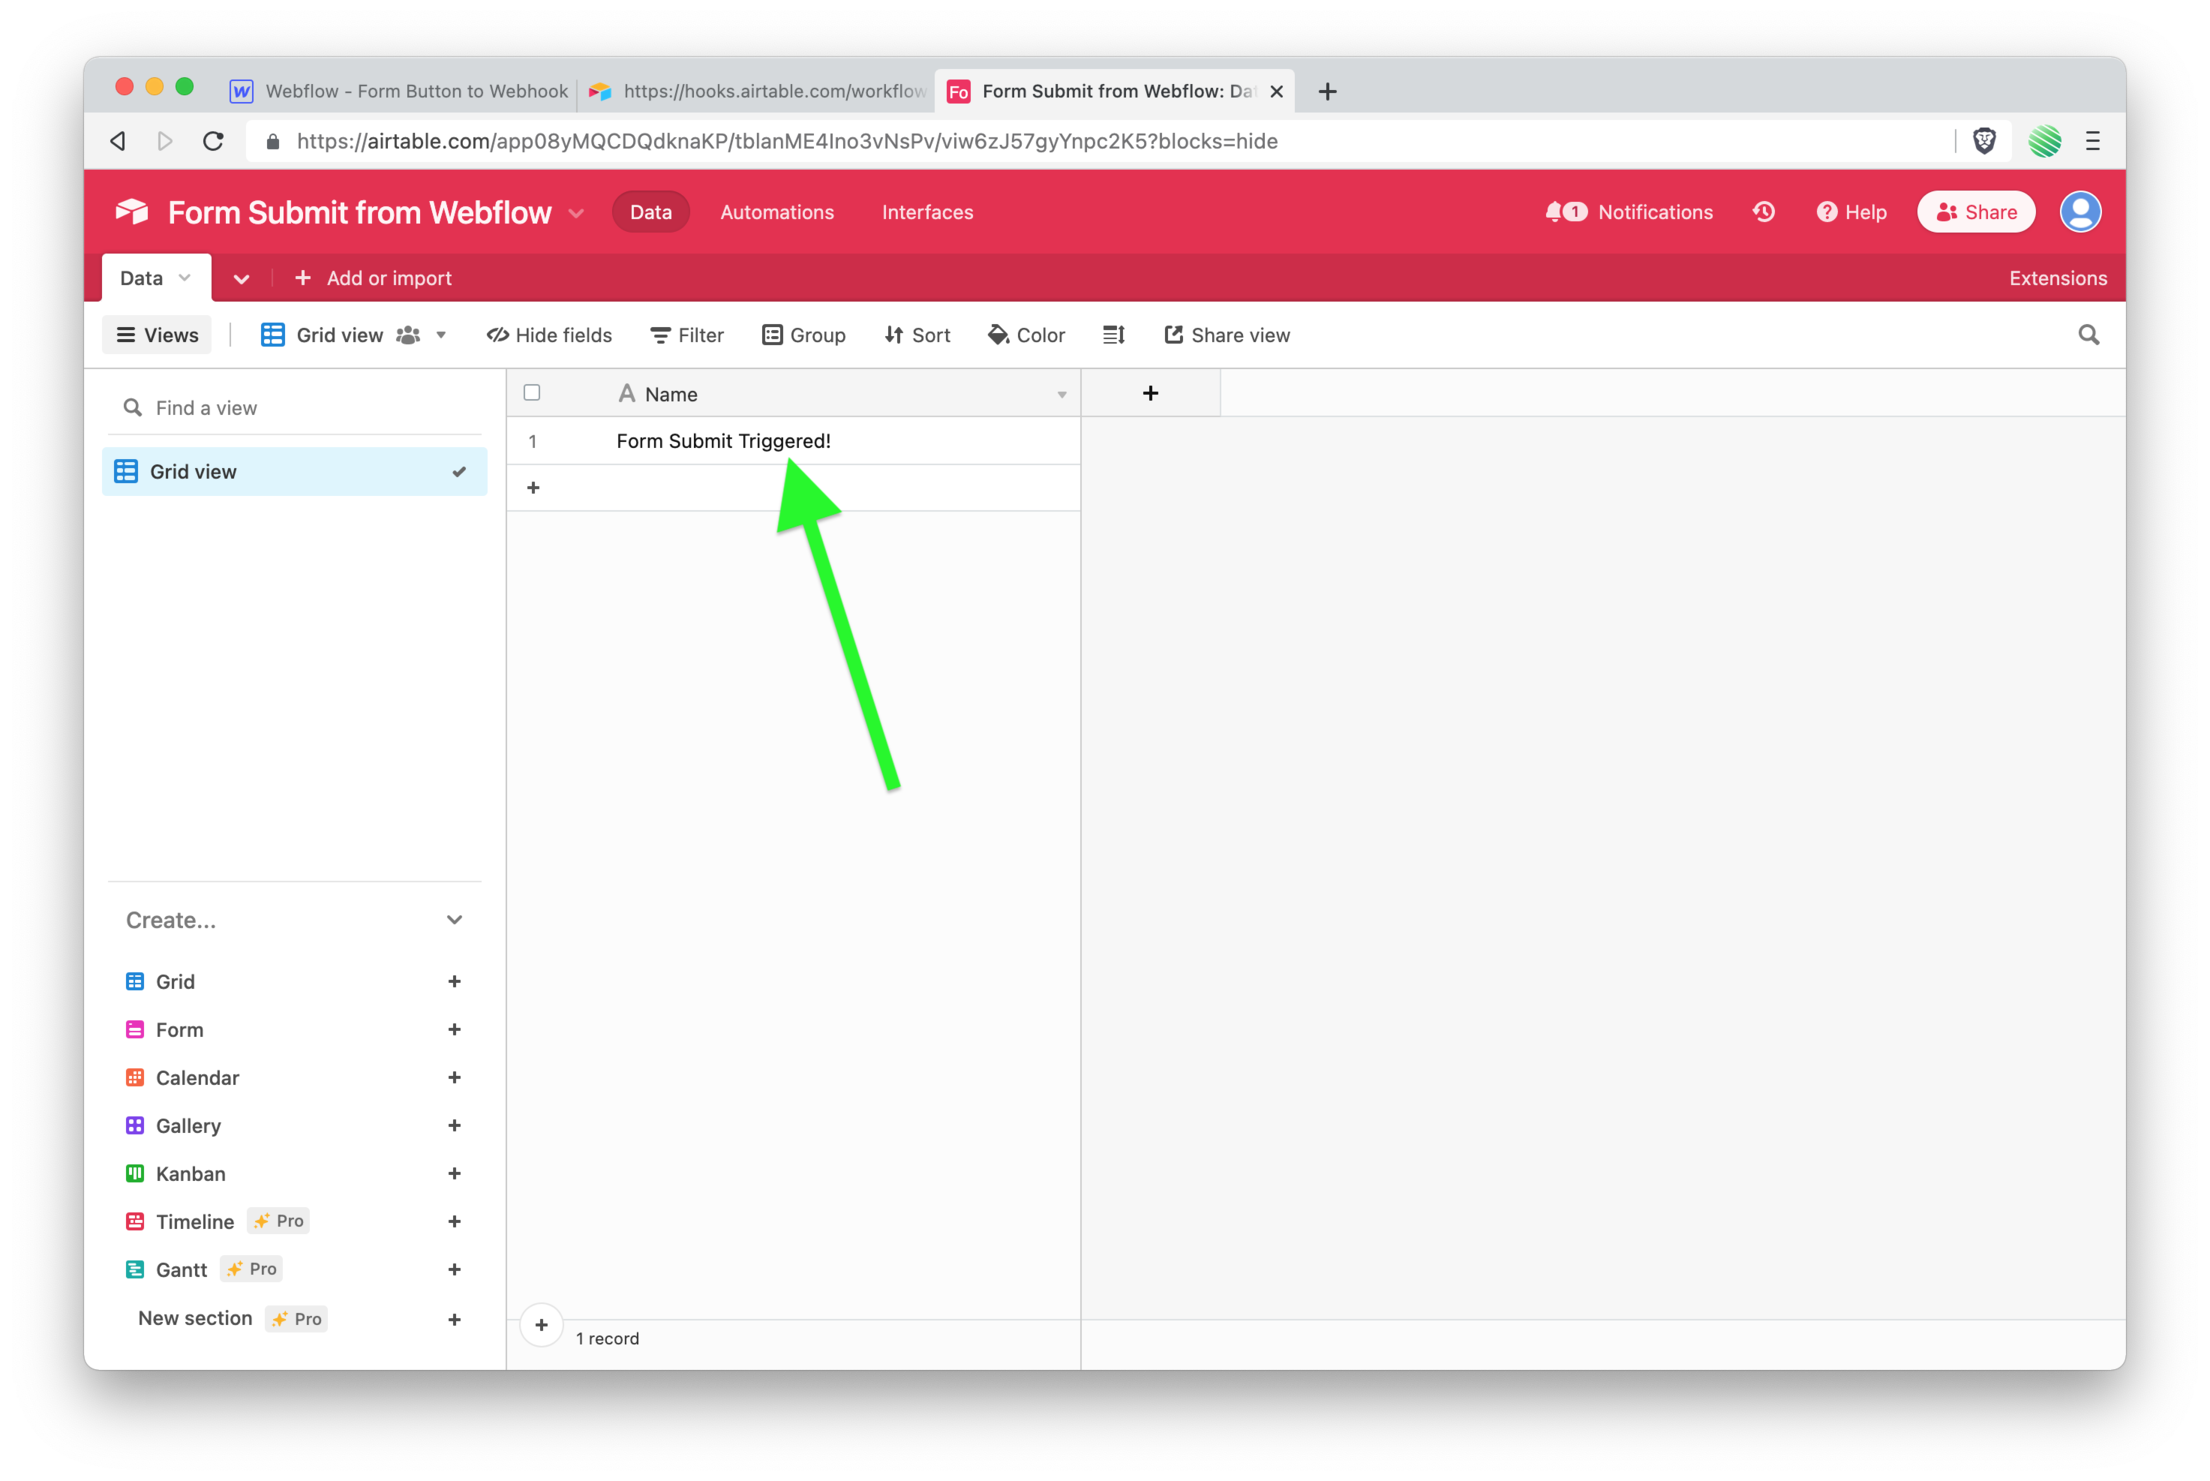
🤯 Amazing.
When should I use Make, Integromat, or Zapier?
When you need to do some automation, or setup a workflow between your form submit and saving it.
Maybe you need to add the user to a Webflow Memberships. Ping an API. Whatever your ( or your clients ) bespoke needs may be can be done with the glue service.
If instead you just need to collect form submissions, this may be a great choice!
Once you’ve added your email…
➡️ Run through my build using Webflow Logic to submit Webflow forms directly into the CMS without a 3rd party service.
➡️ Checkout my guide on native Webflow Memberships a step-by-step walk through setting up native user logins & memberships within Webflow.