It’s the top Webflow Wishlist item with over 9,500 upvotes and has been asked for since 2016:
“Allow users to sign up on your websites with a username & password. Enable/disable access to content/pages for different user types."
…and it’s finally here 🤩
And it is amazing!
I’m going to walk you through, step-by-step exactly how to get up and running, quickly.
Don’t worry, it’ll be painless 😍
But first…
I’ve been part of the Beta program for awhile now and have had a front row seat watching the team take feedback, iterate, and implement new features.
 As of this writing it’s still in Beta, but it’s now in open Beta. It appears they are granting access to anyone who requests it.
Go here to get access for yourself: webflow.com/memberships.
Sign up now. It may take a few days.
 Gated Content
With what Webflow has built you’re no longer just “hiding” content on a page.
Nope.
You are blocking access from their backend.
This really is a “gated experience” with full blow user accounts and access controls.
Webflow has successfully married their best-in-class designer with native backend authentication.
That all said, it is in Beta.
And some features that I’m sure you’ll want now, you’ll have to wait for.
I know it’s not what you want to hear after waiting for so long, but it’s reality.
Iterative Development
They’re truly taking an iterative development approach.
“The basic idea behind this method is to develop a system through repeated cycles (iterative) and in smaller portions at a time (incremental), allowing software developers to take advantage of what was learned during development of earlier parts or versions of the system”
As someone who has been a software engineer for years, I can confidently say that this is the best known approach companies have when building large scale software that exactly meets the needs of customers.
Why?
Because it allows you to put out the feature with minimal functionality (MVP) and iterate building towards exactly what your community needs, by listening to your customers as they use it and quickly taking action with what you’ve learned.
And I have seen first hand the team listens to the community, takes their suggestions, and builds out those proposed features.
So with a little patience, and a huge new native feature, you’ll be able to take Webflow development for your web site customers ( and your clients ) to levels you’ve not natively been able to achieve with Webflow in the past.
Let’s Build a Native Webflow Membership Site!
Time to dive in and build your first native Webflow Membership site.
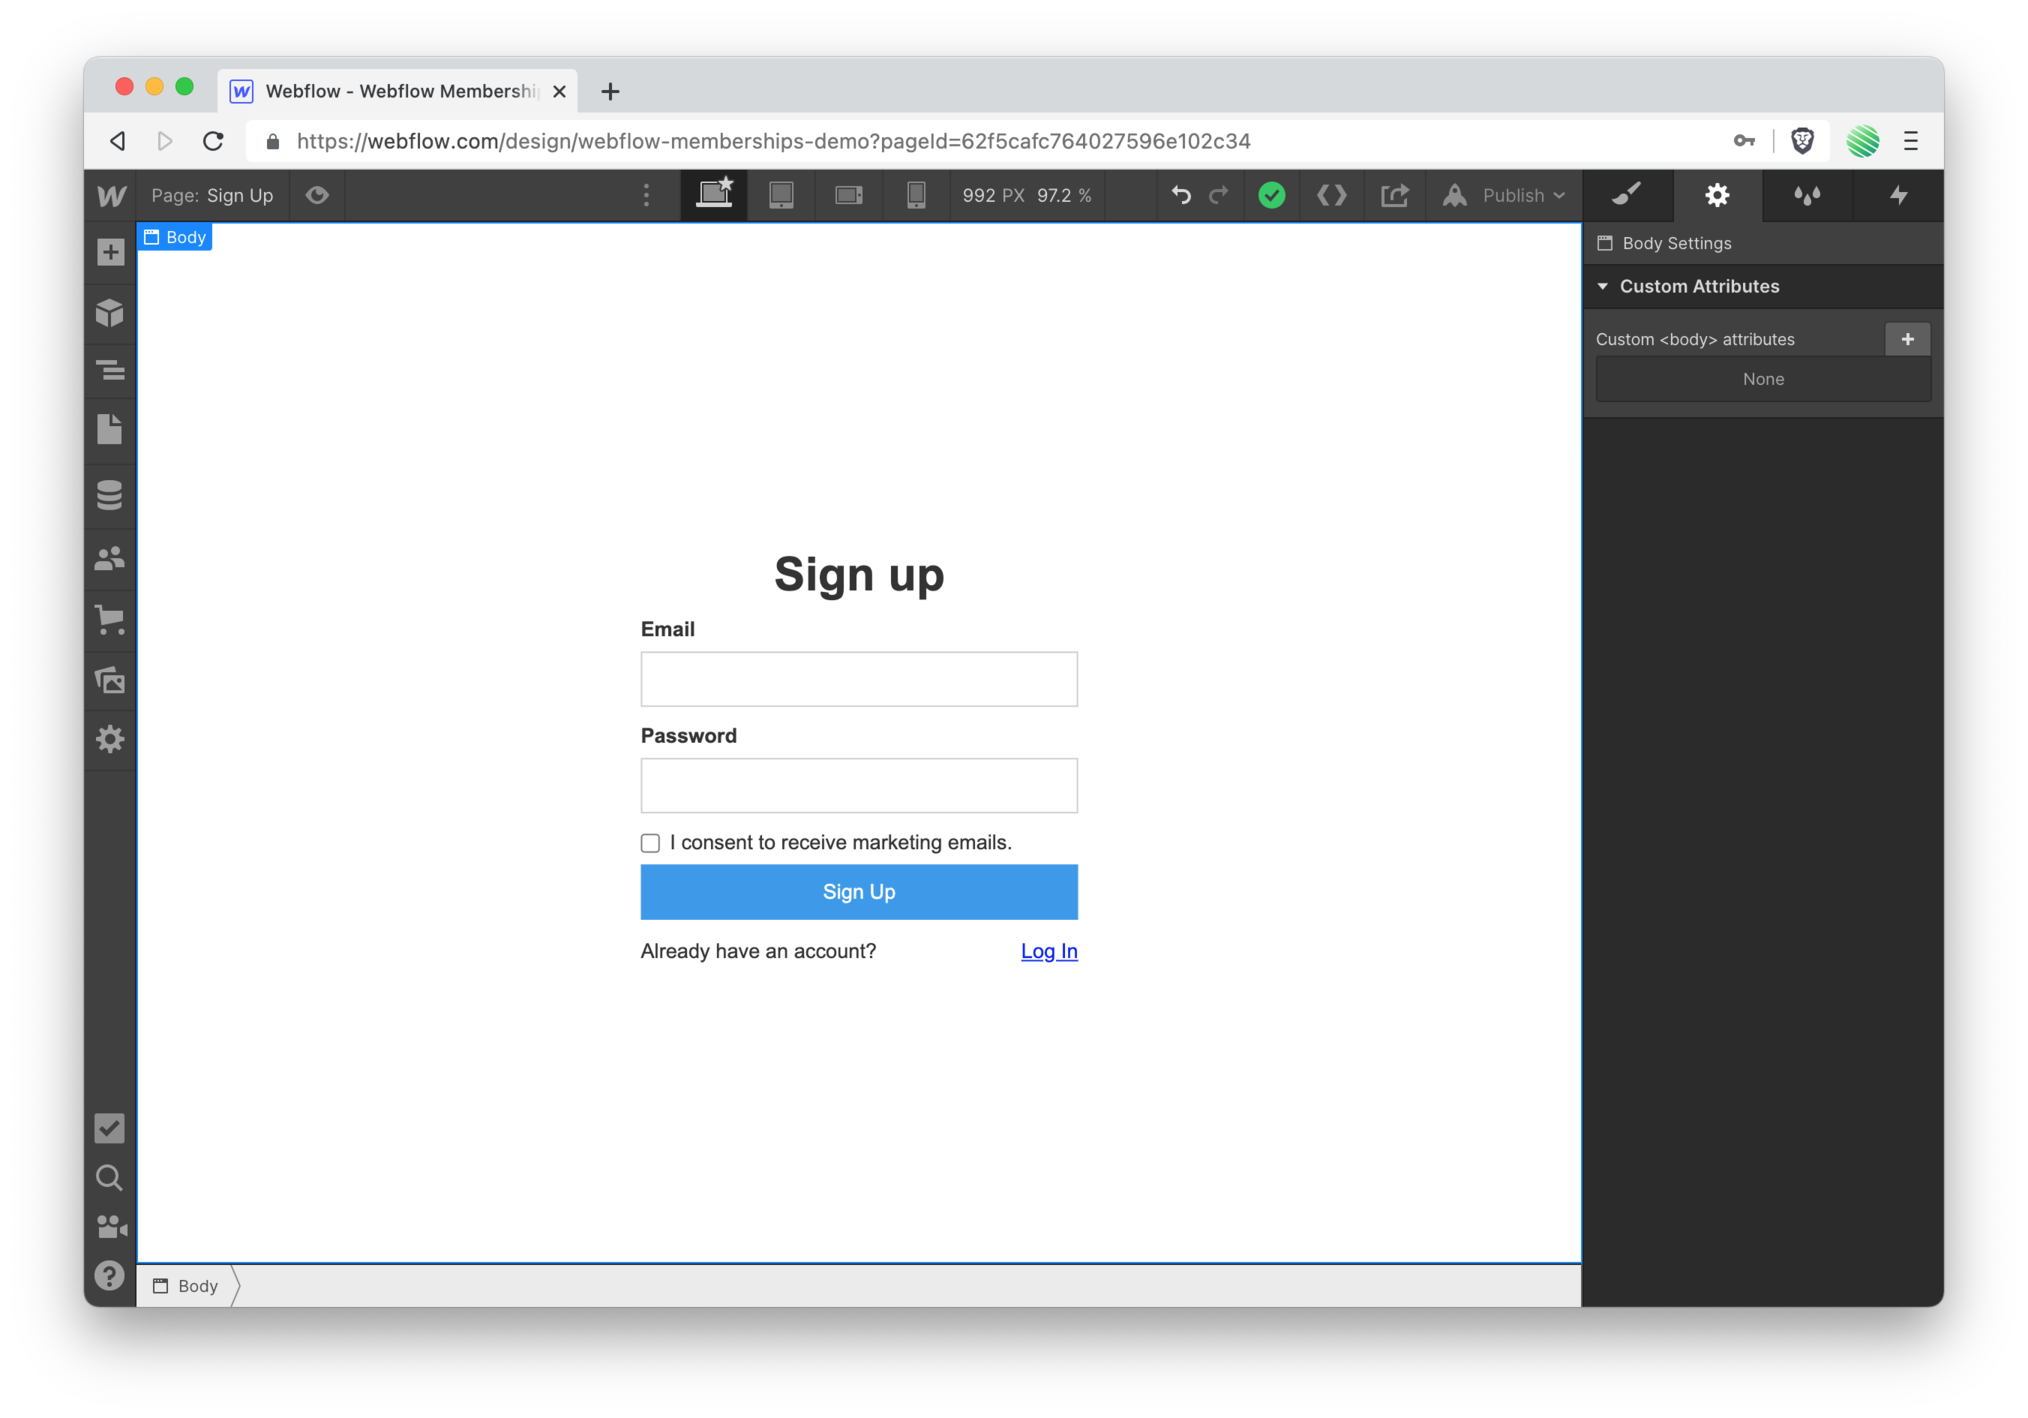
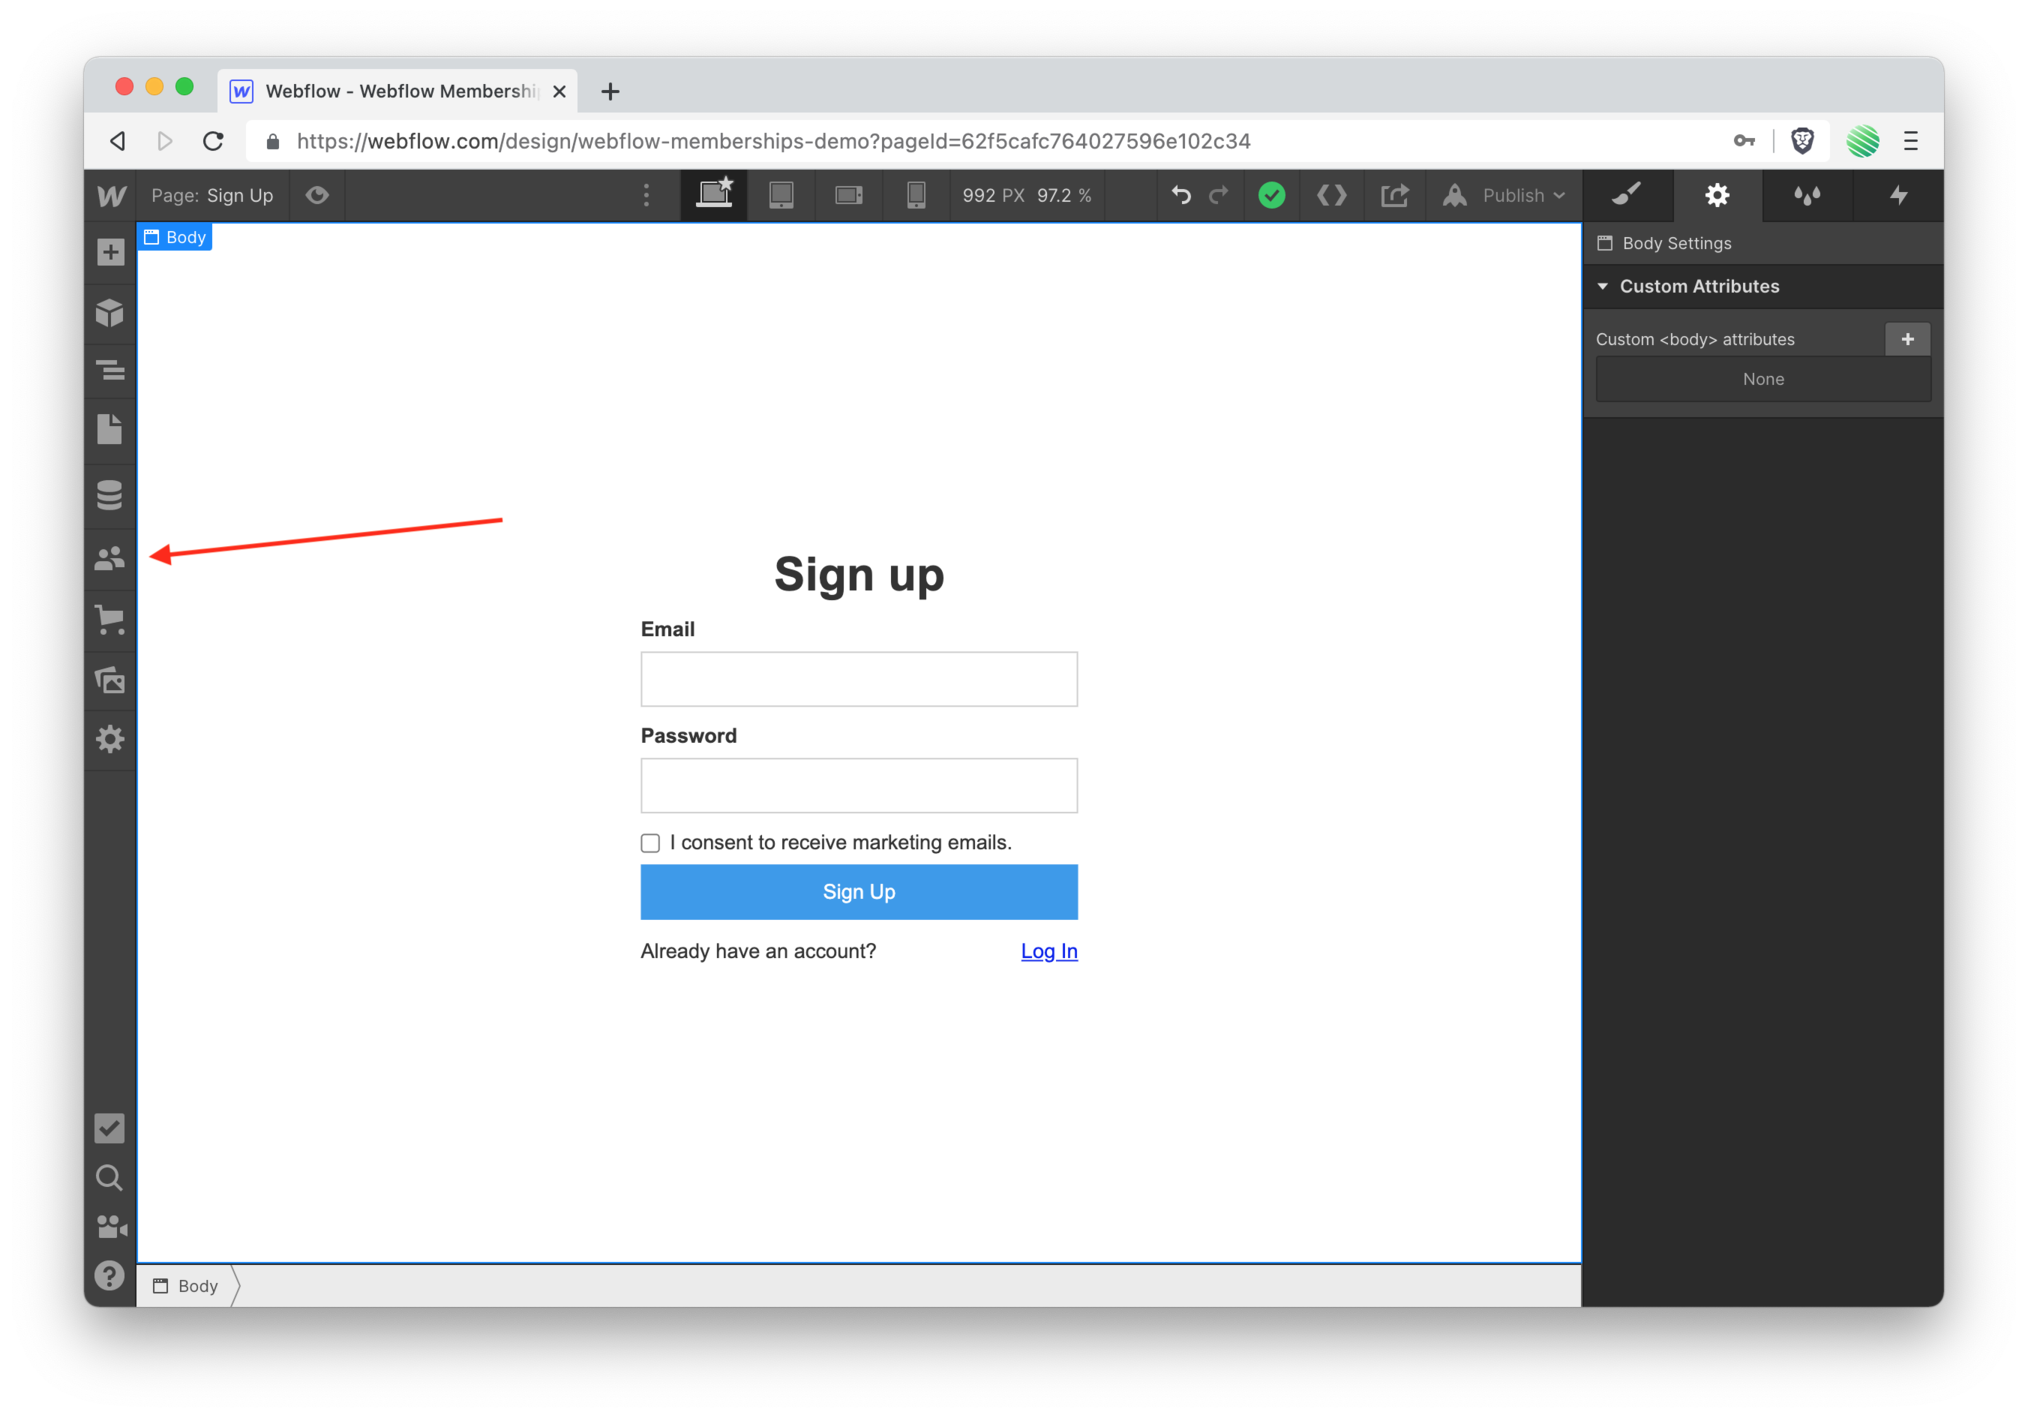
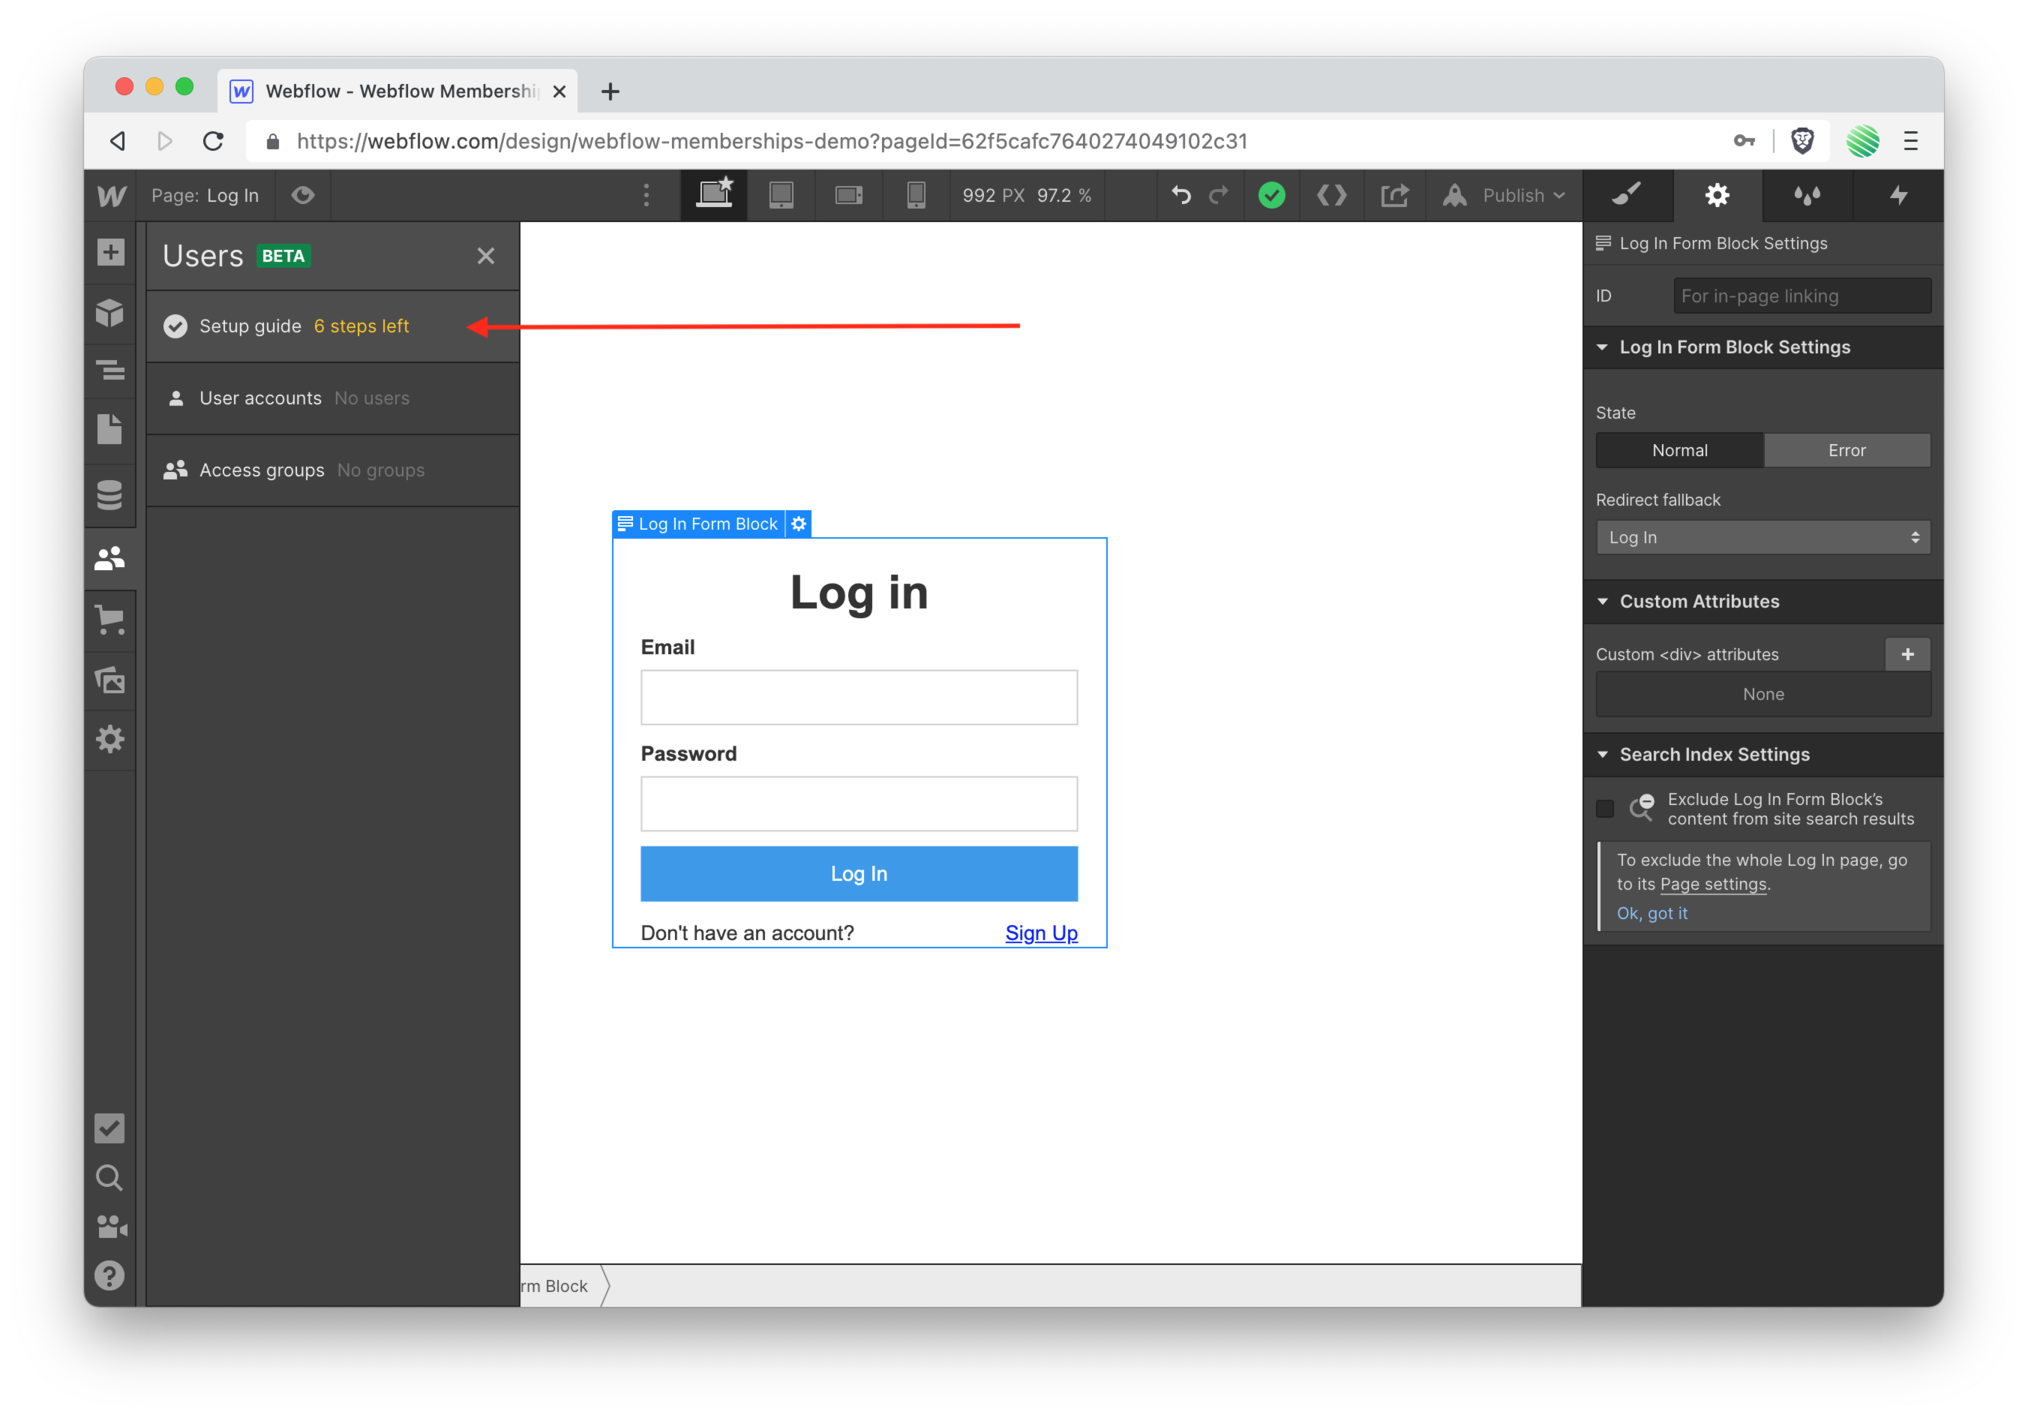
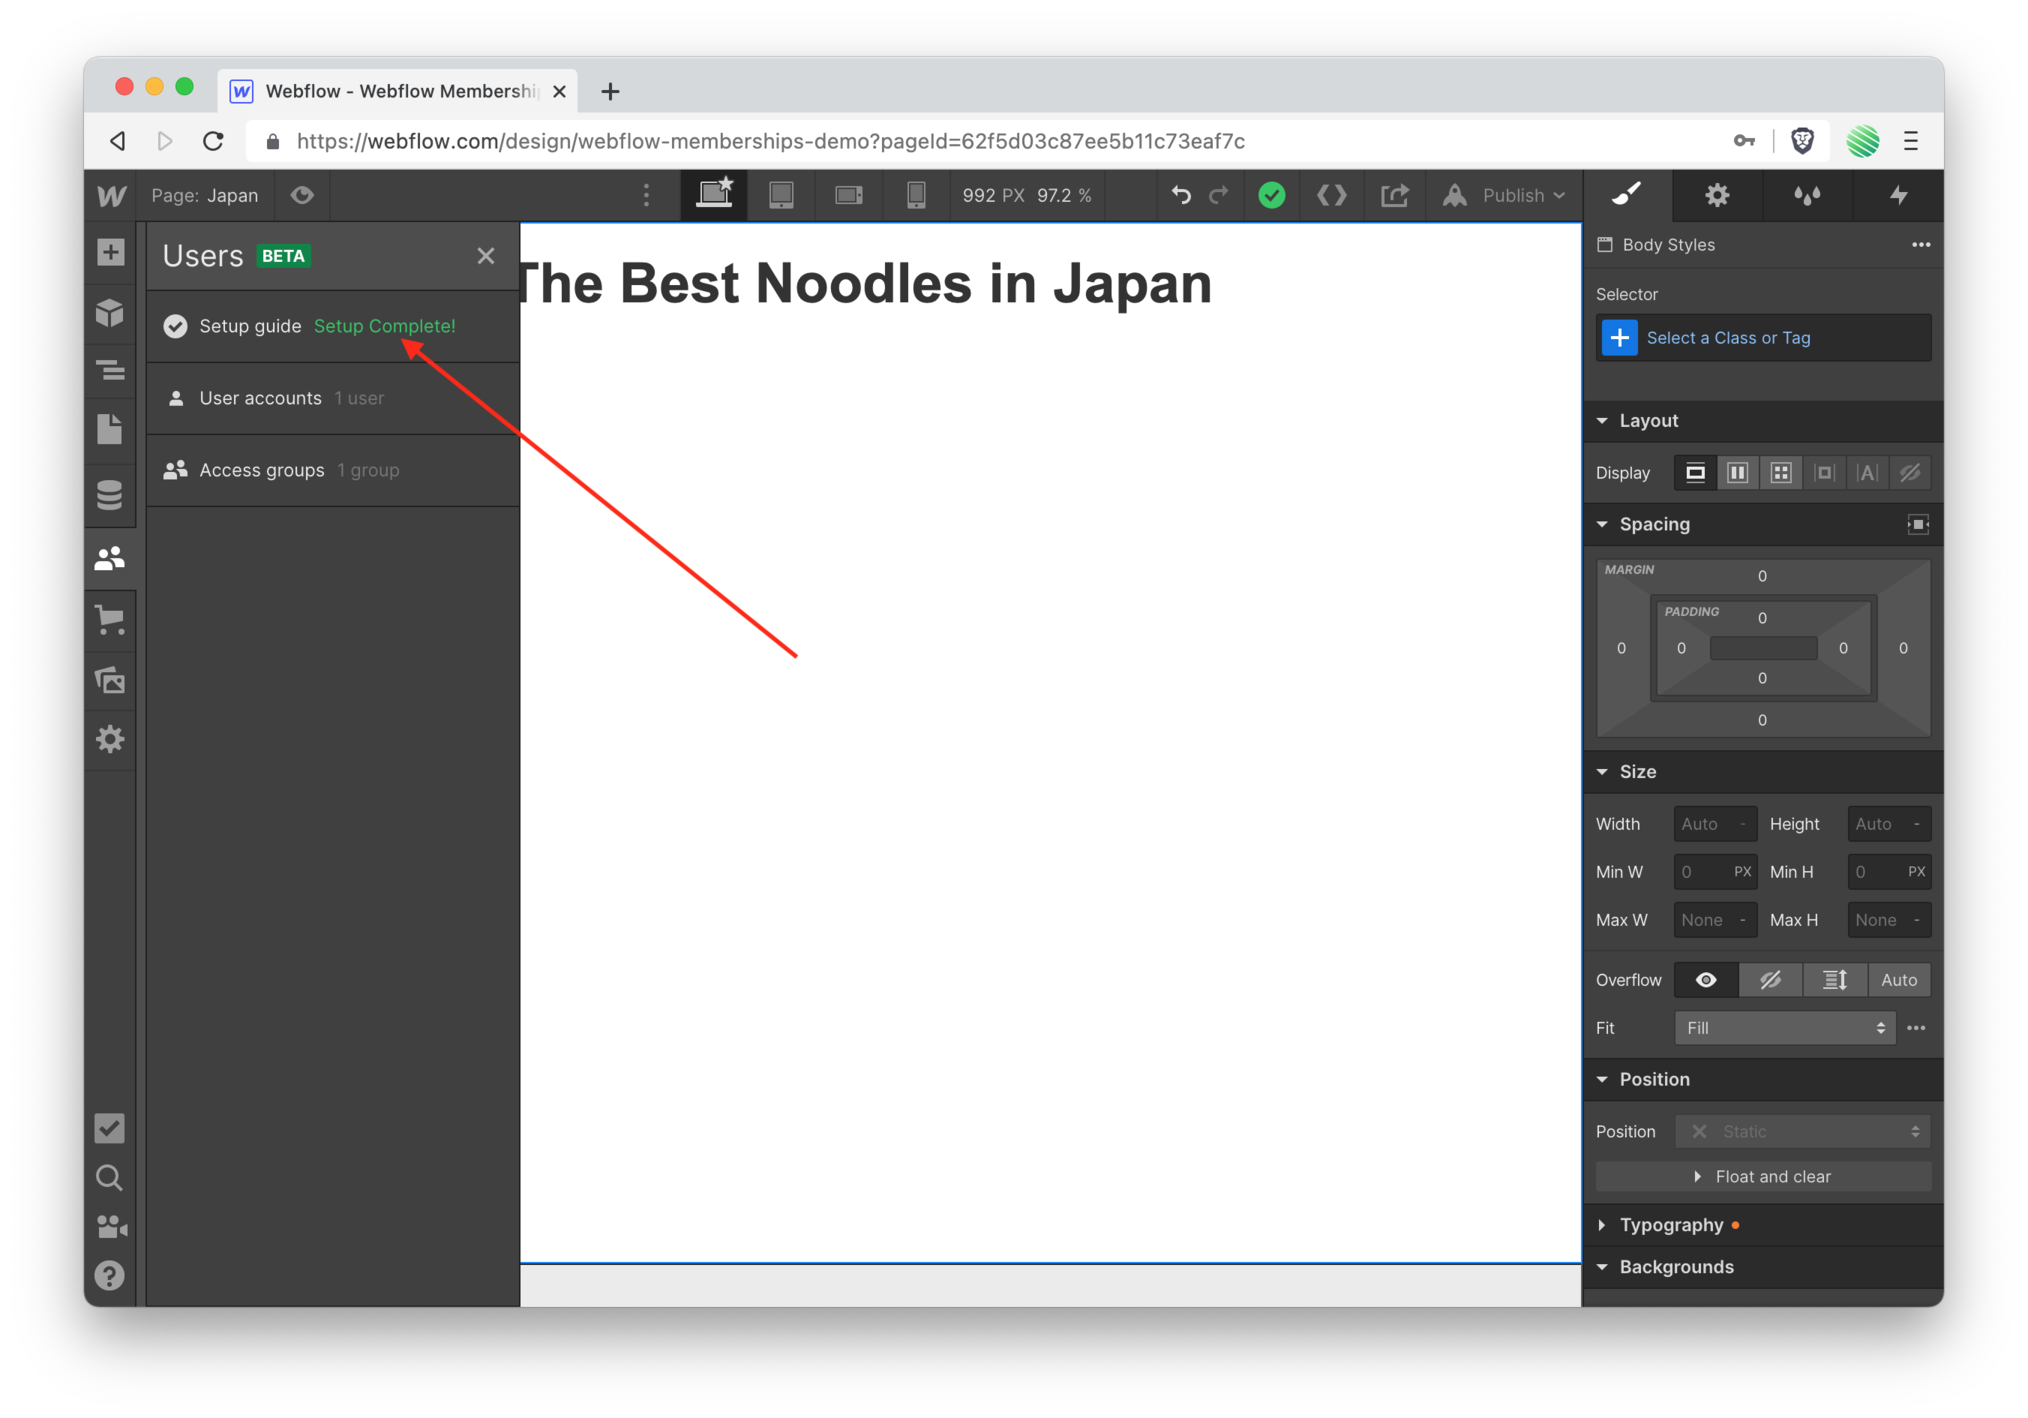
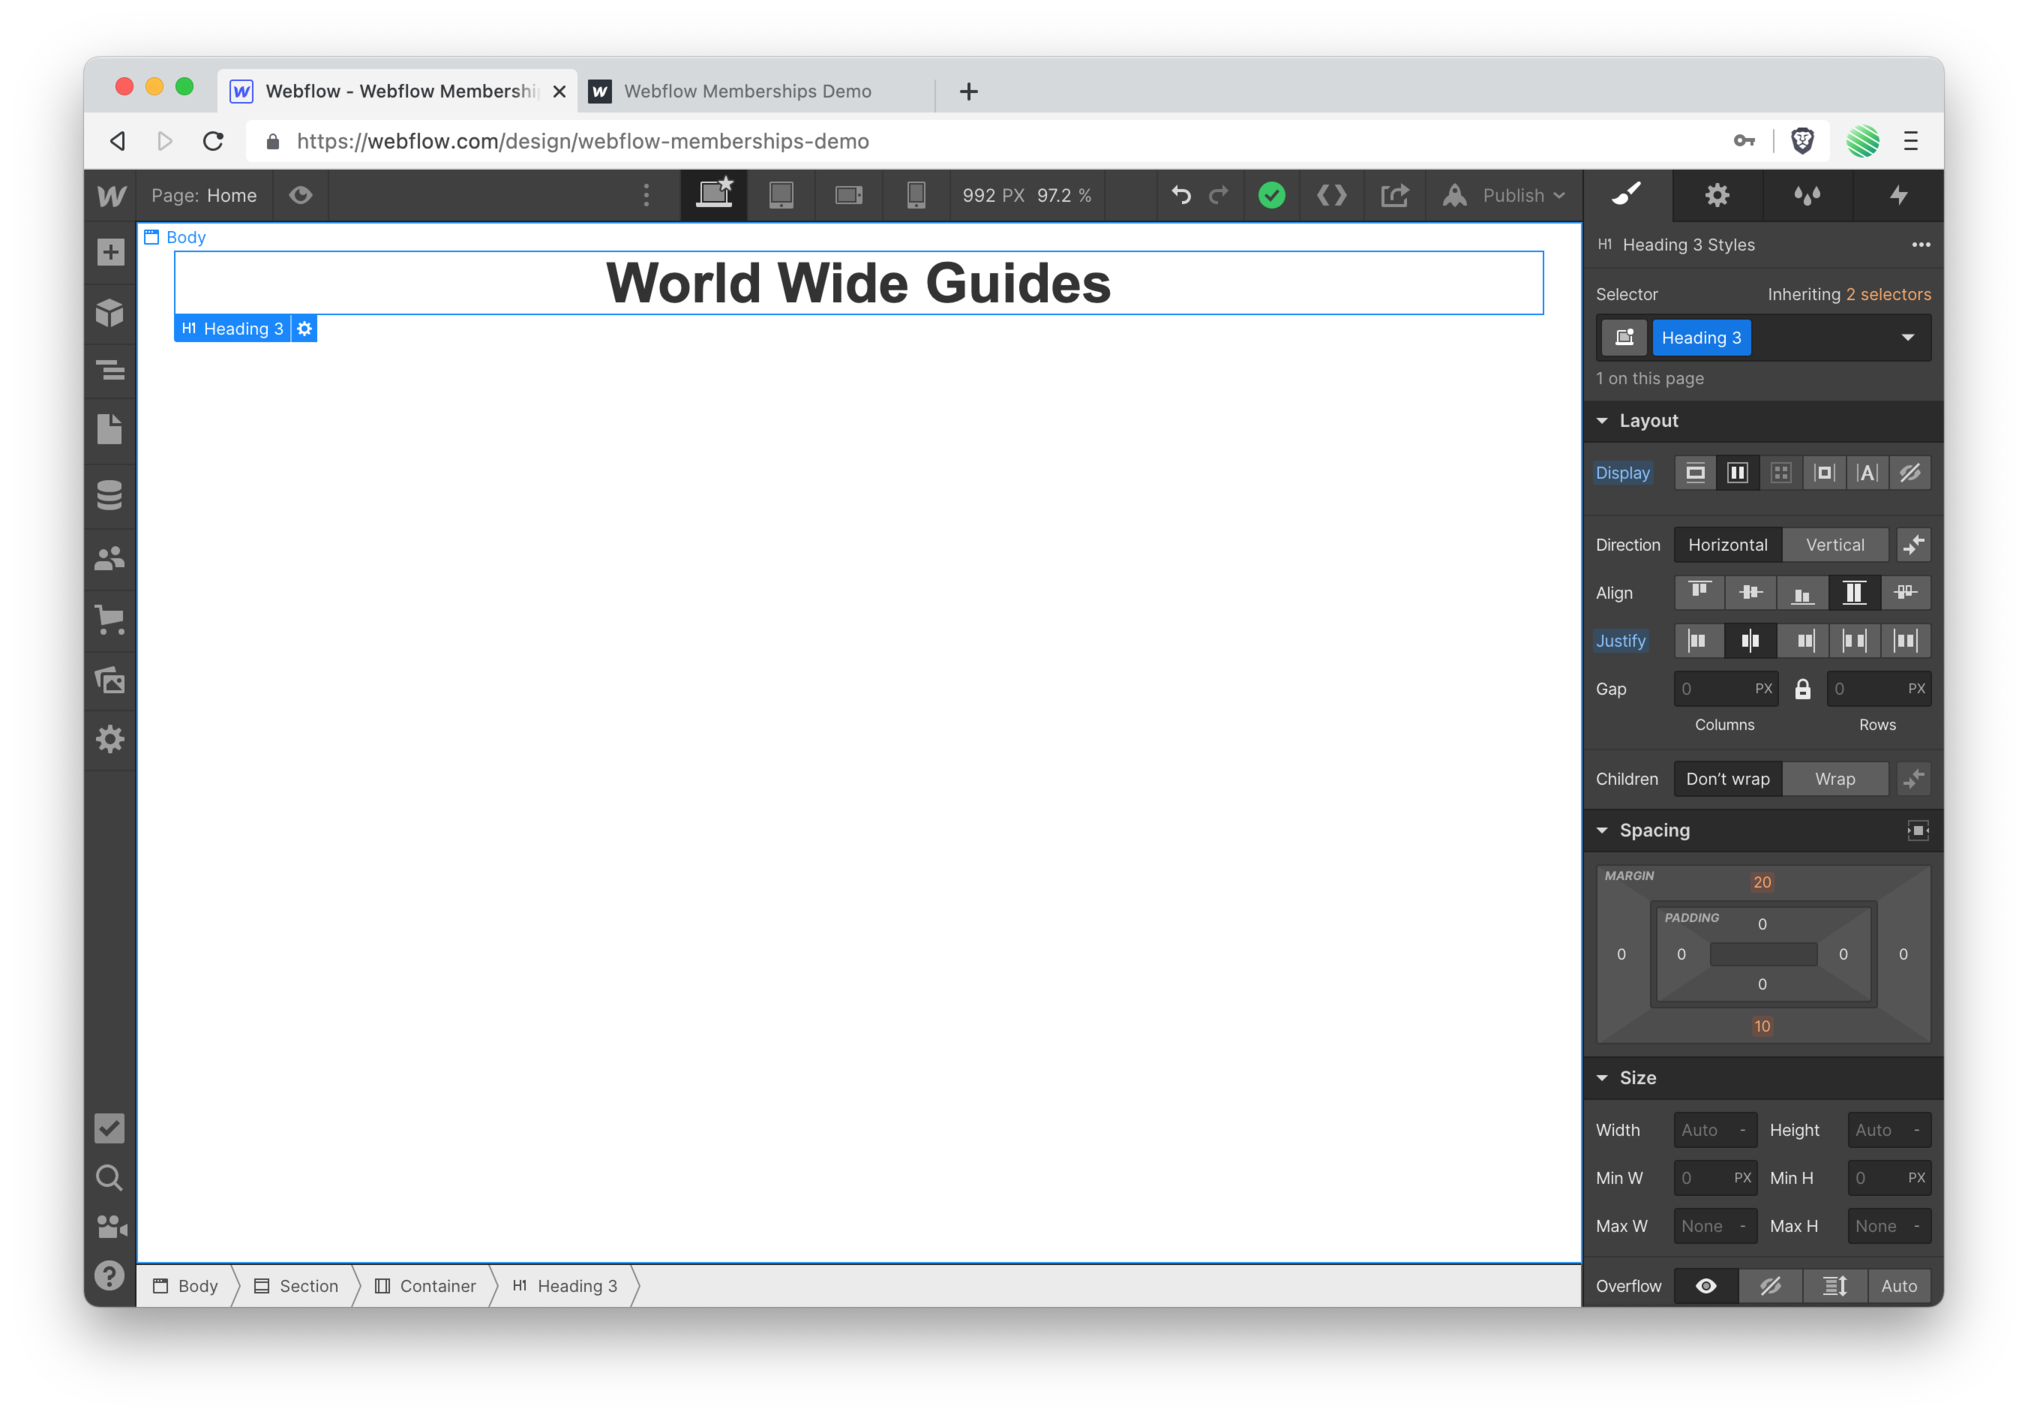
Once you’ve been granted access to the Beta feature, you’ll see the new Users icon in your menu bar (screenshot below).
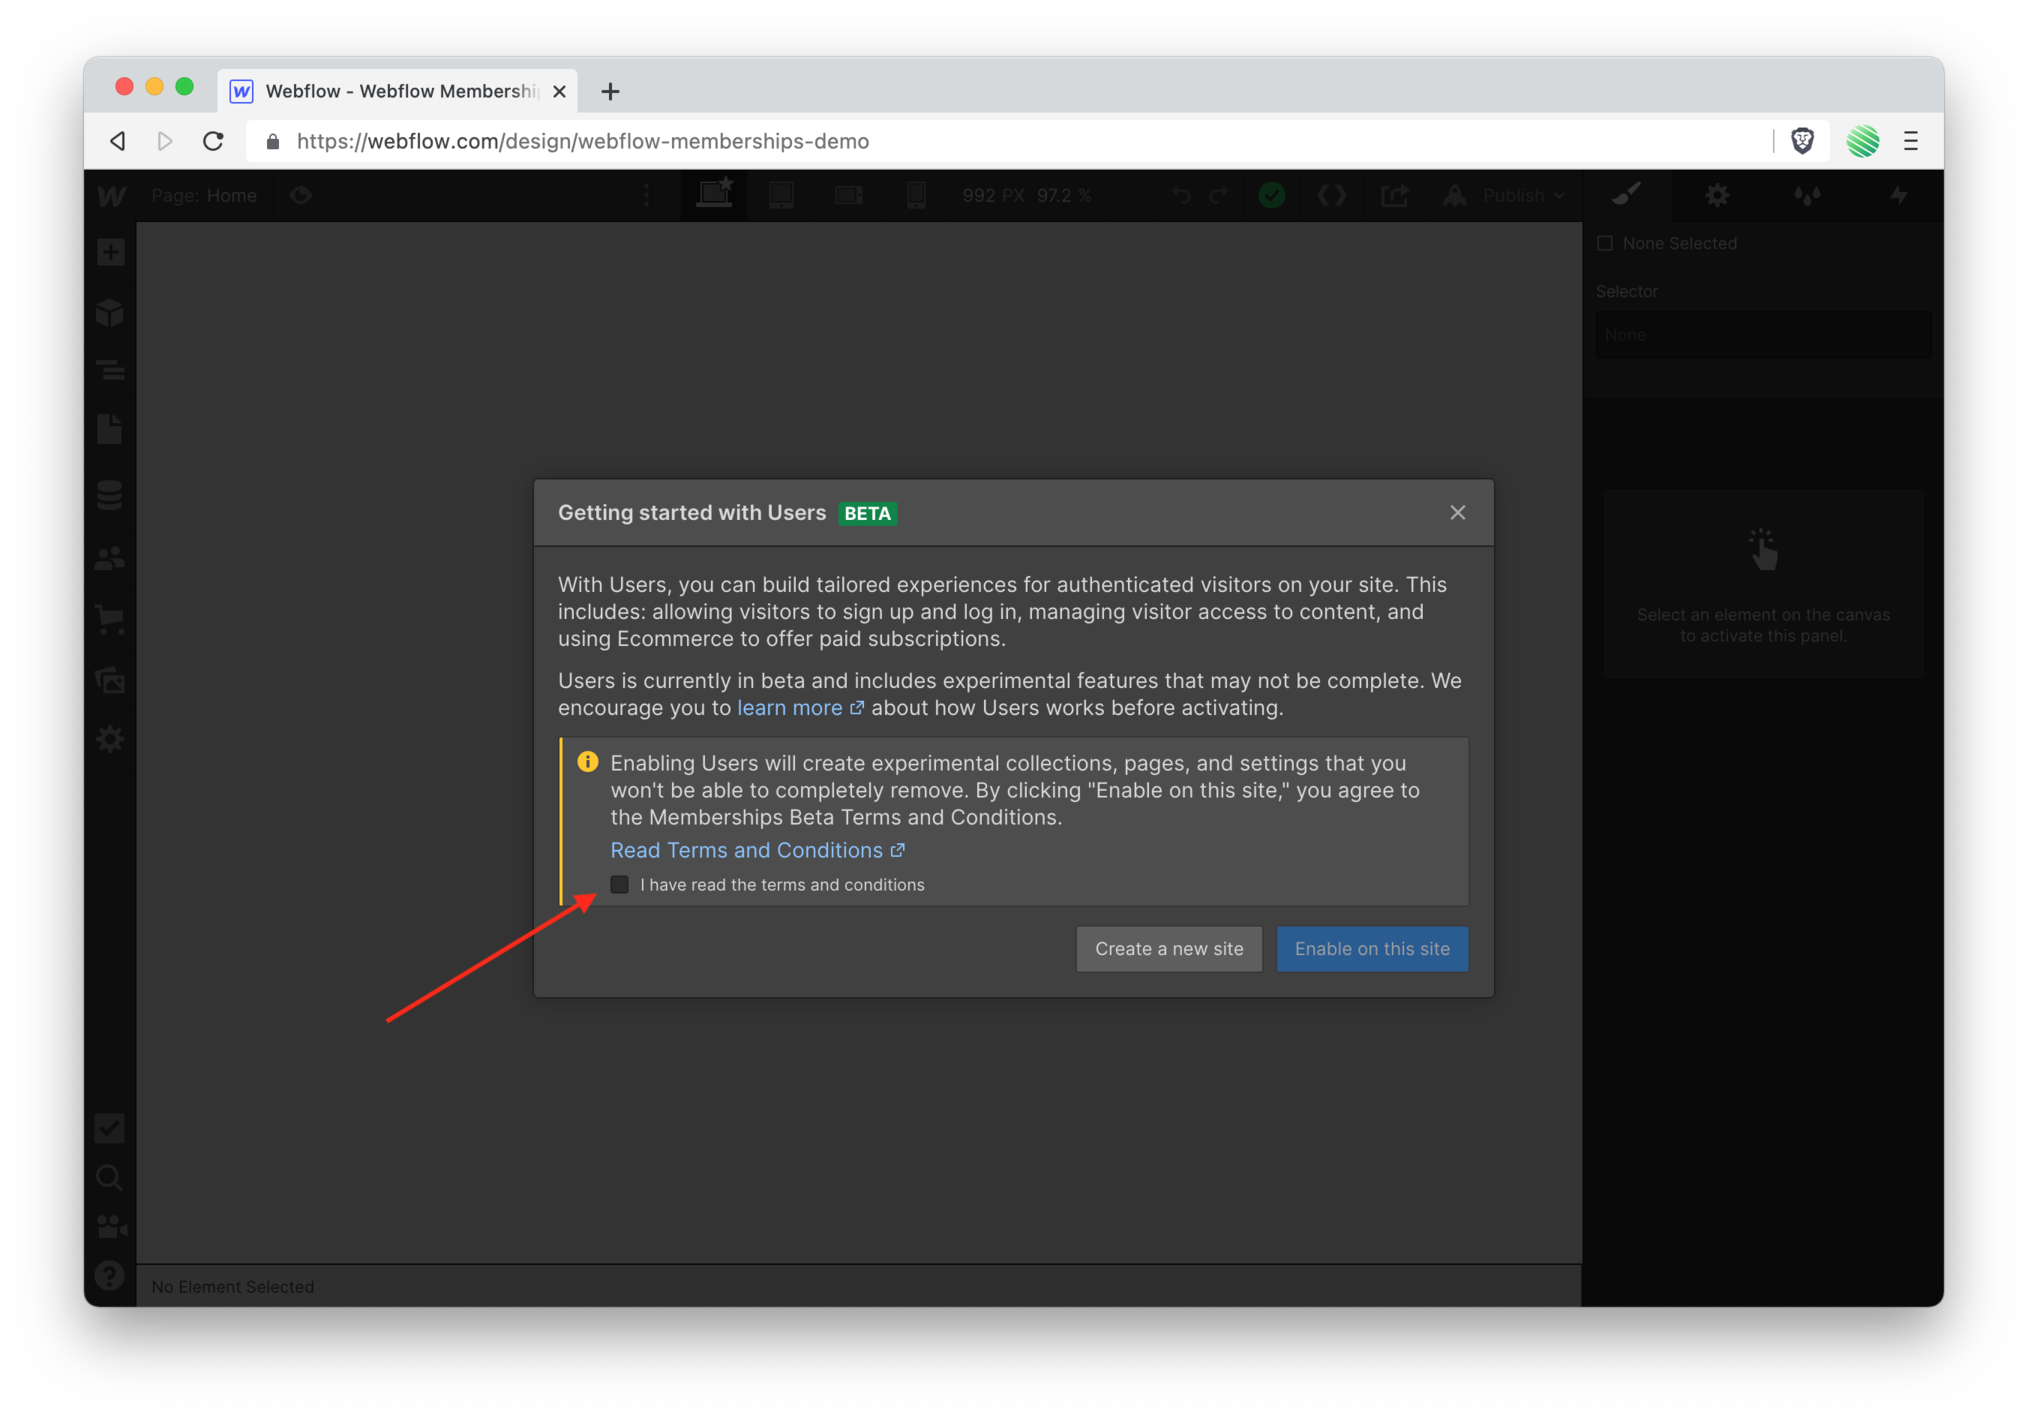
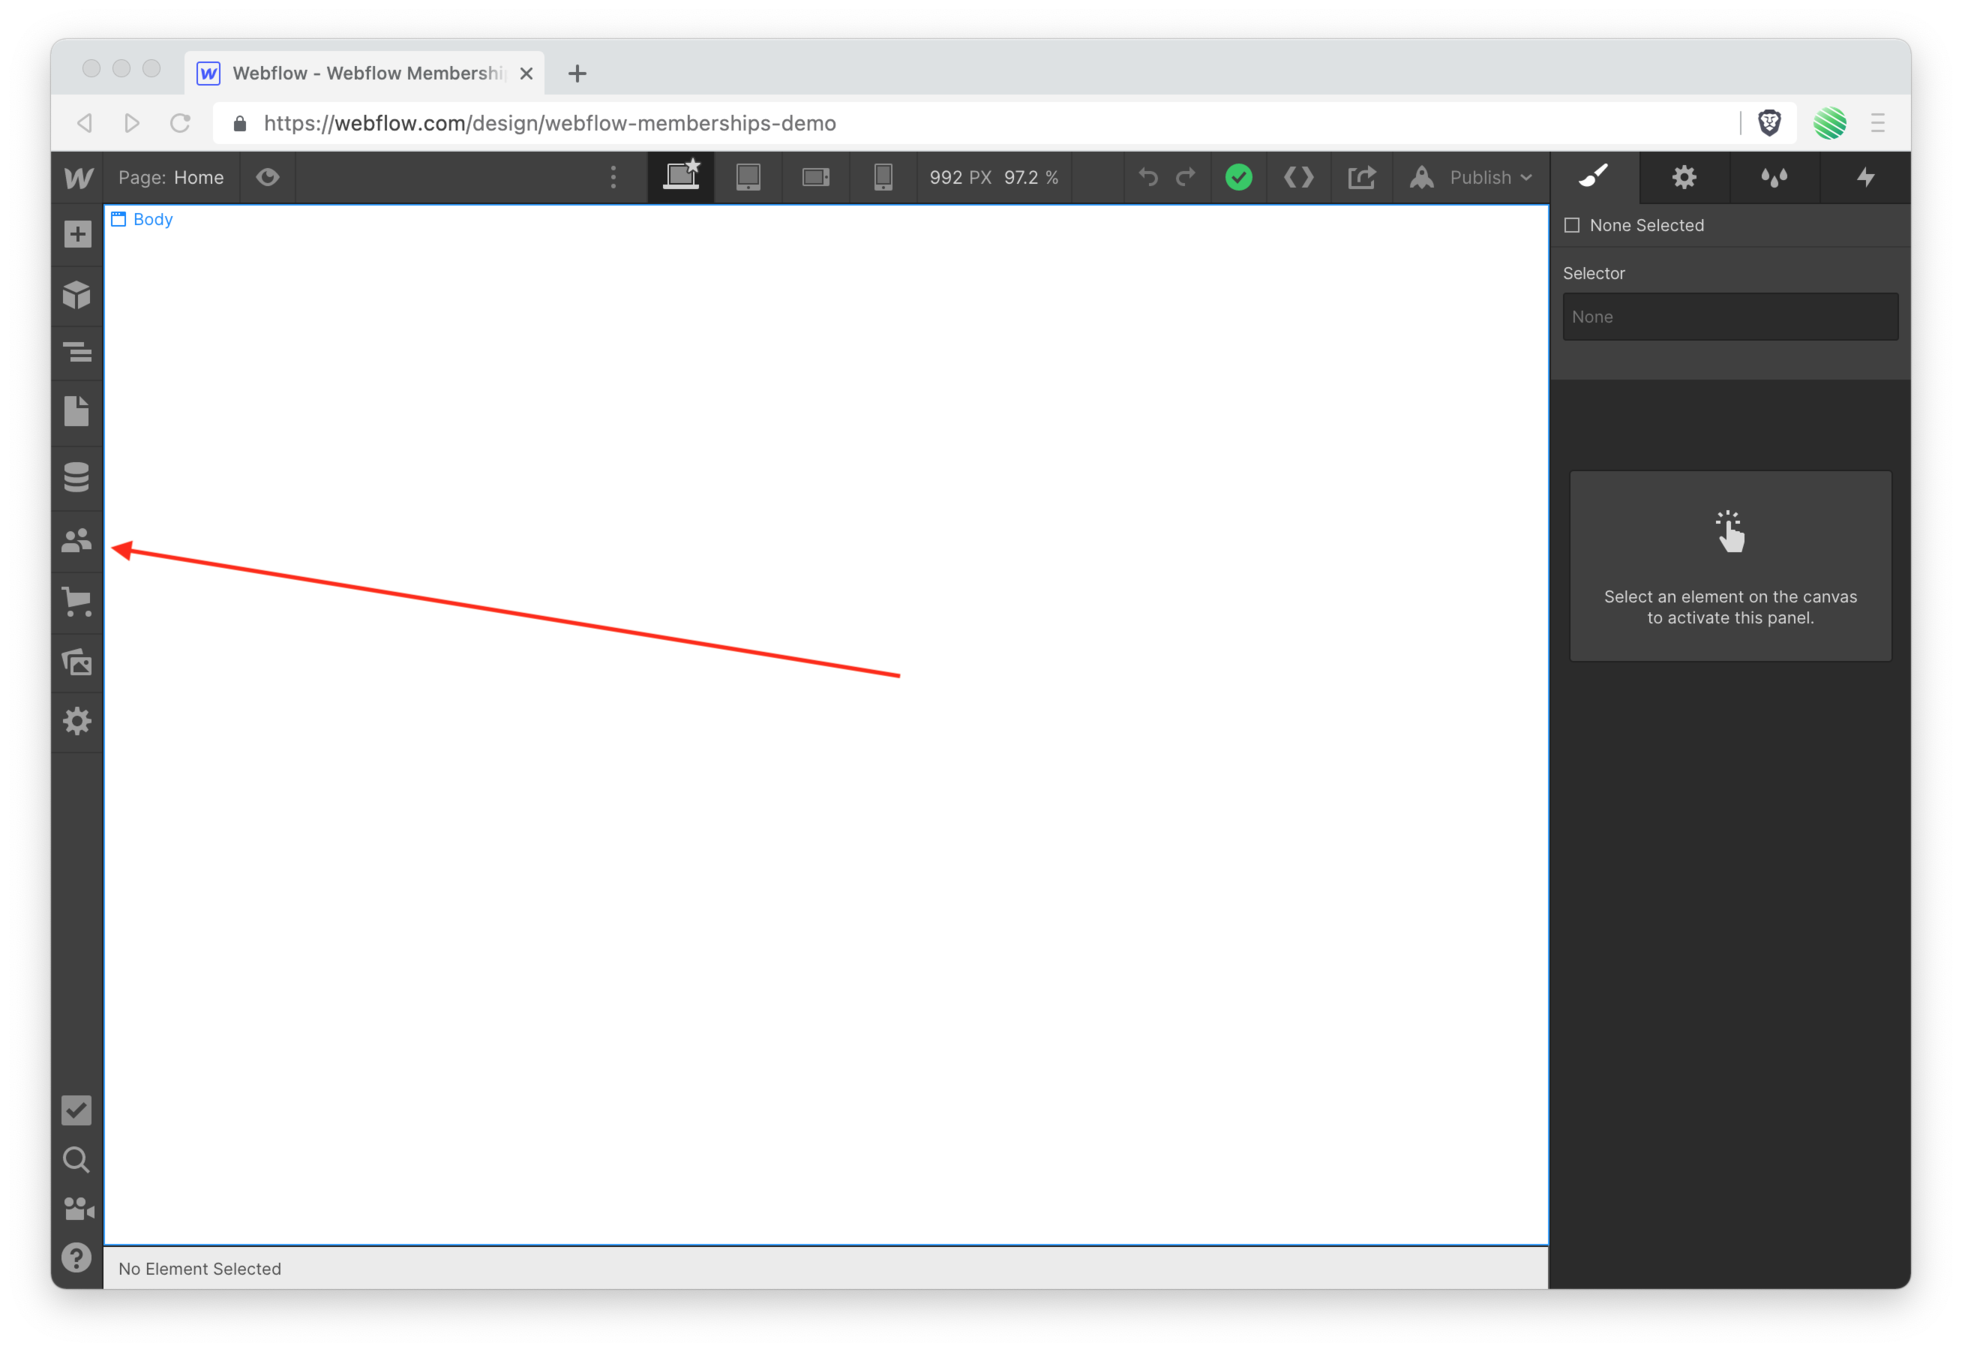 Tap it and you’ll be presented with some info about it and you’ll need to agree that you understand this is indeed a Beta feature and what that means for your Webflow project.
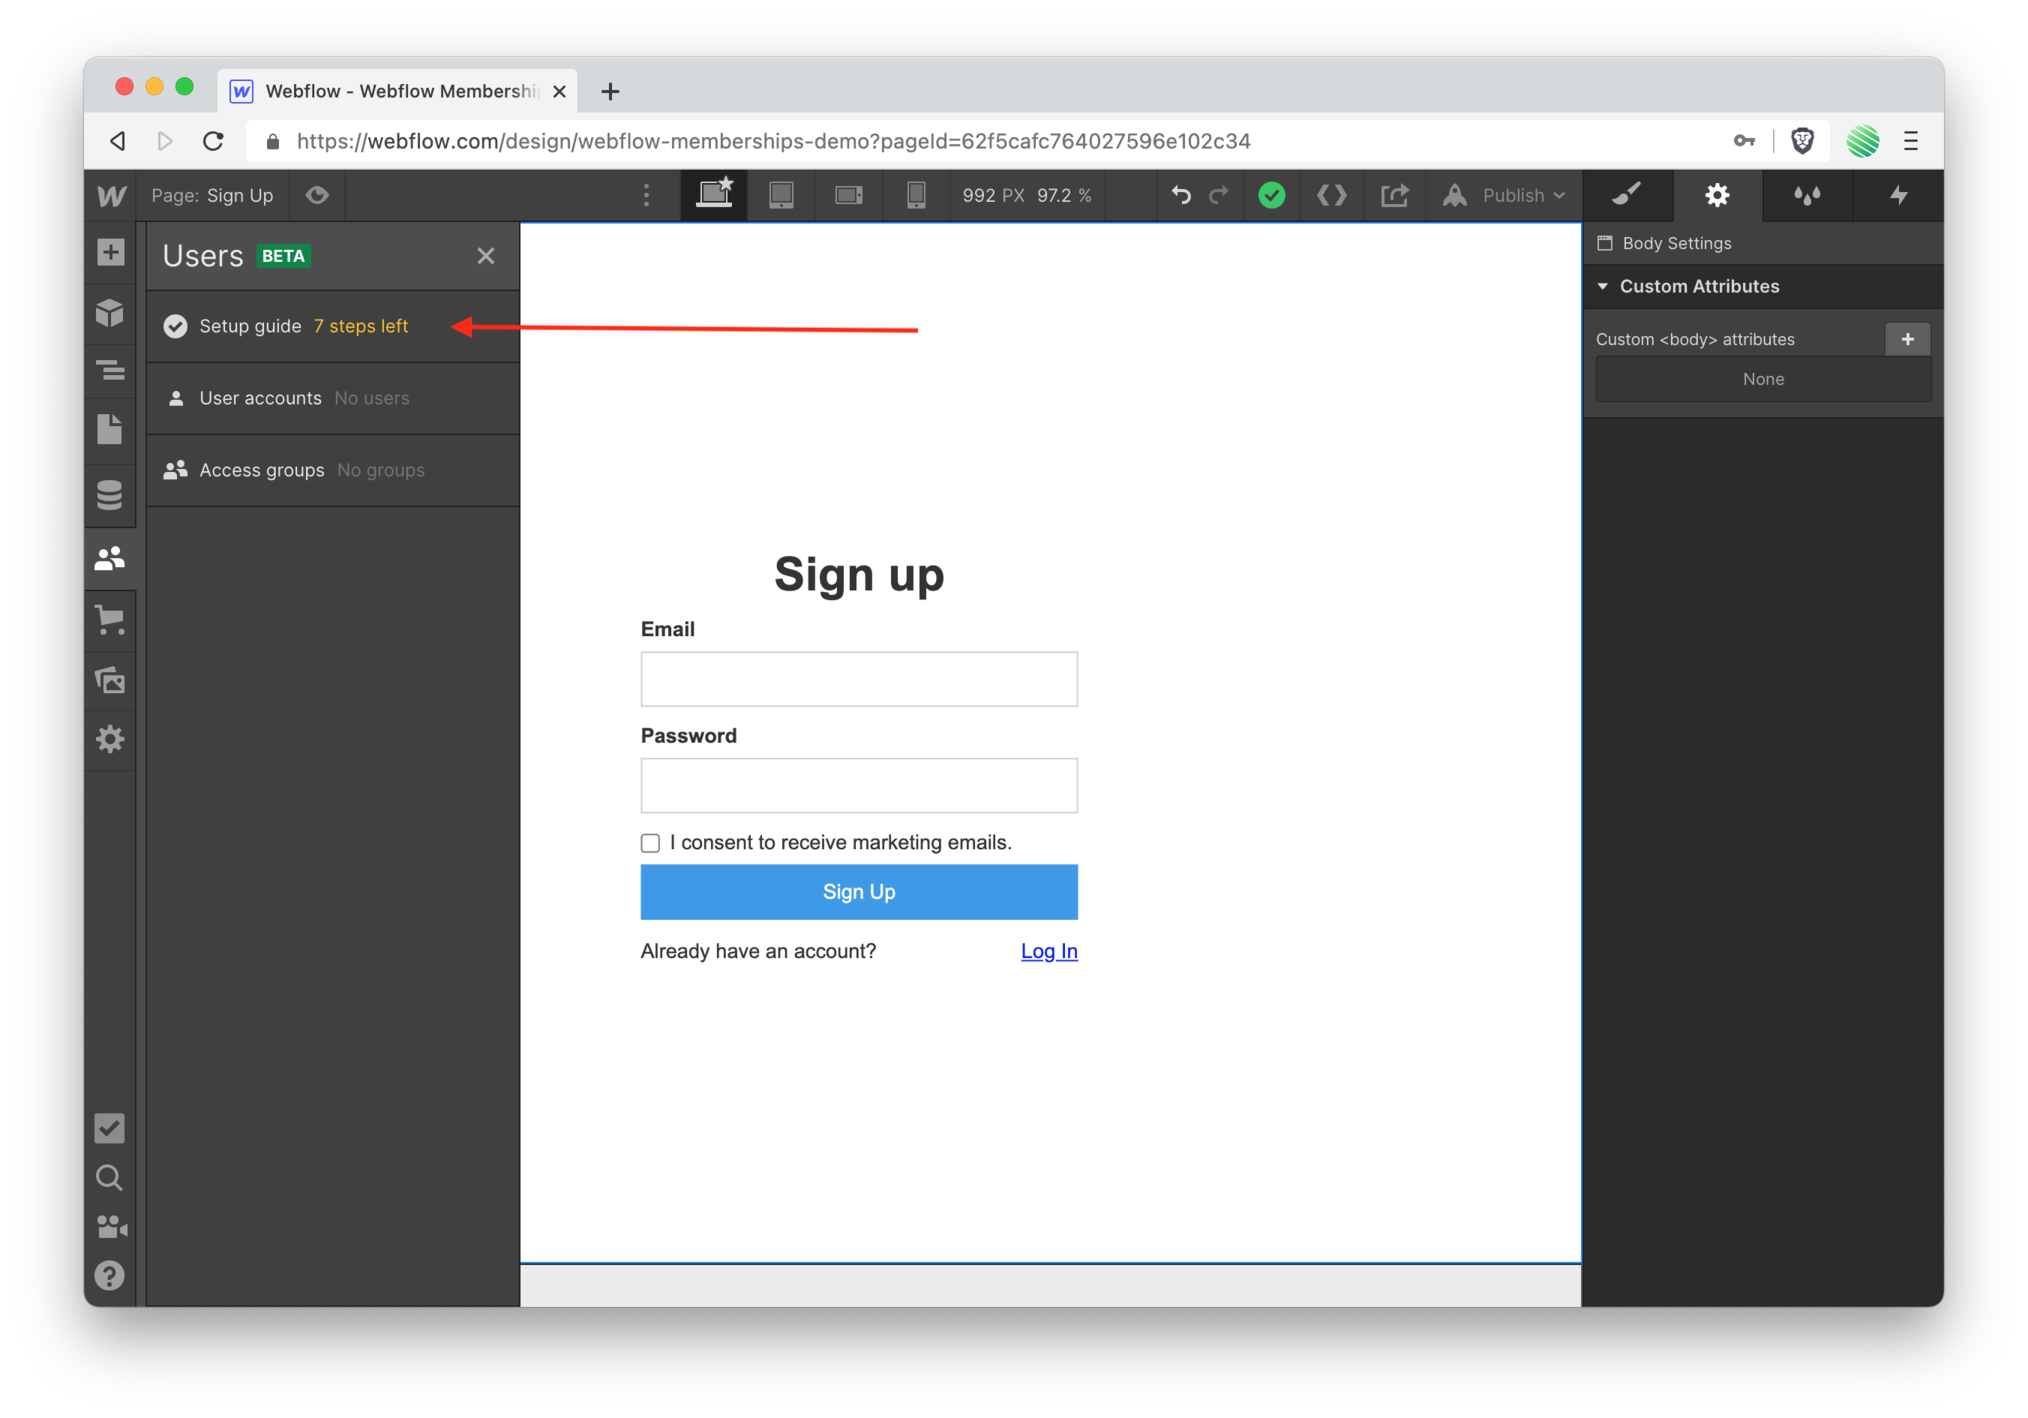
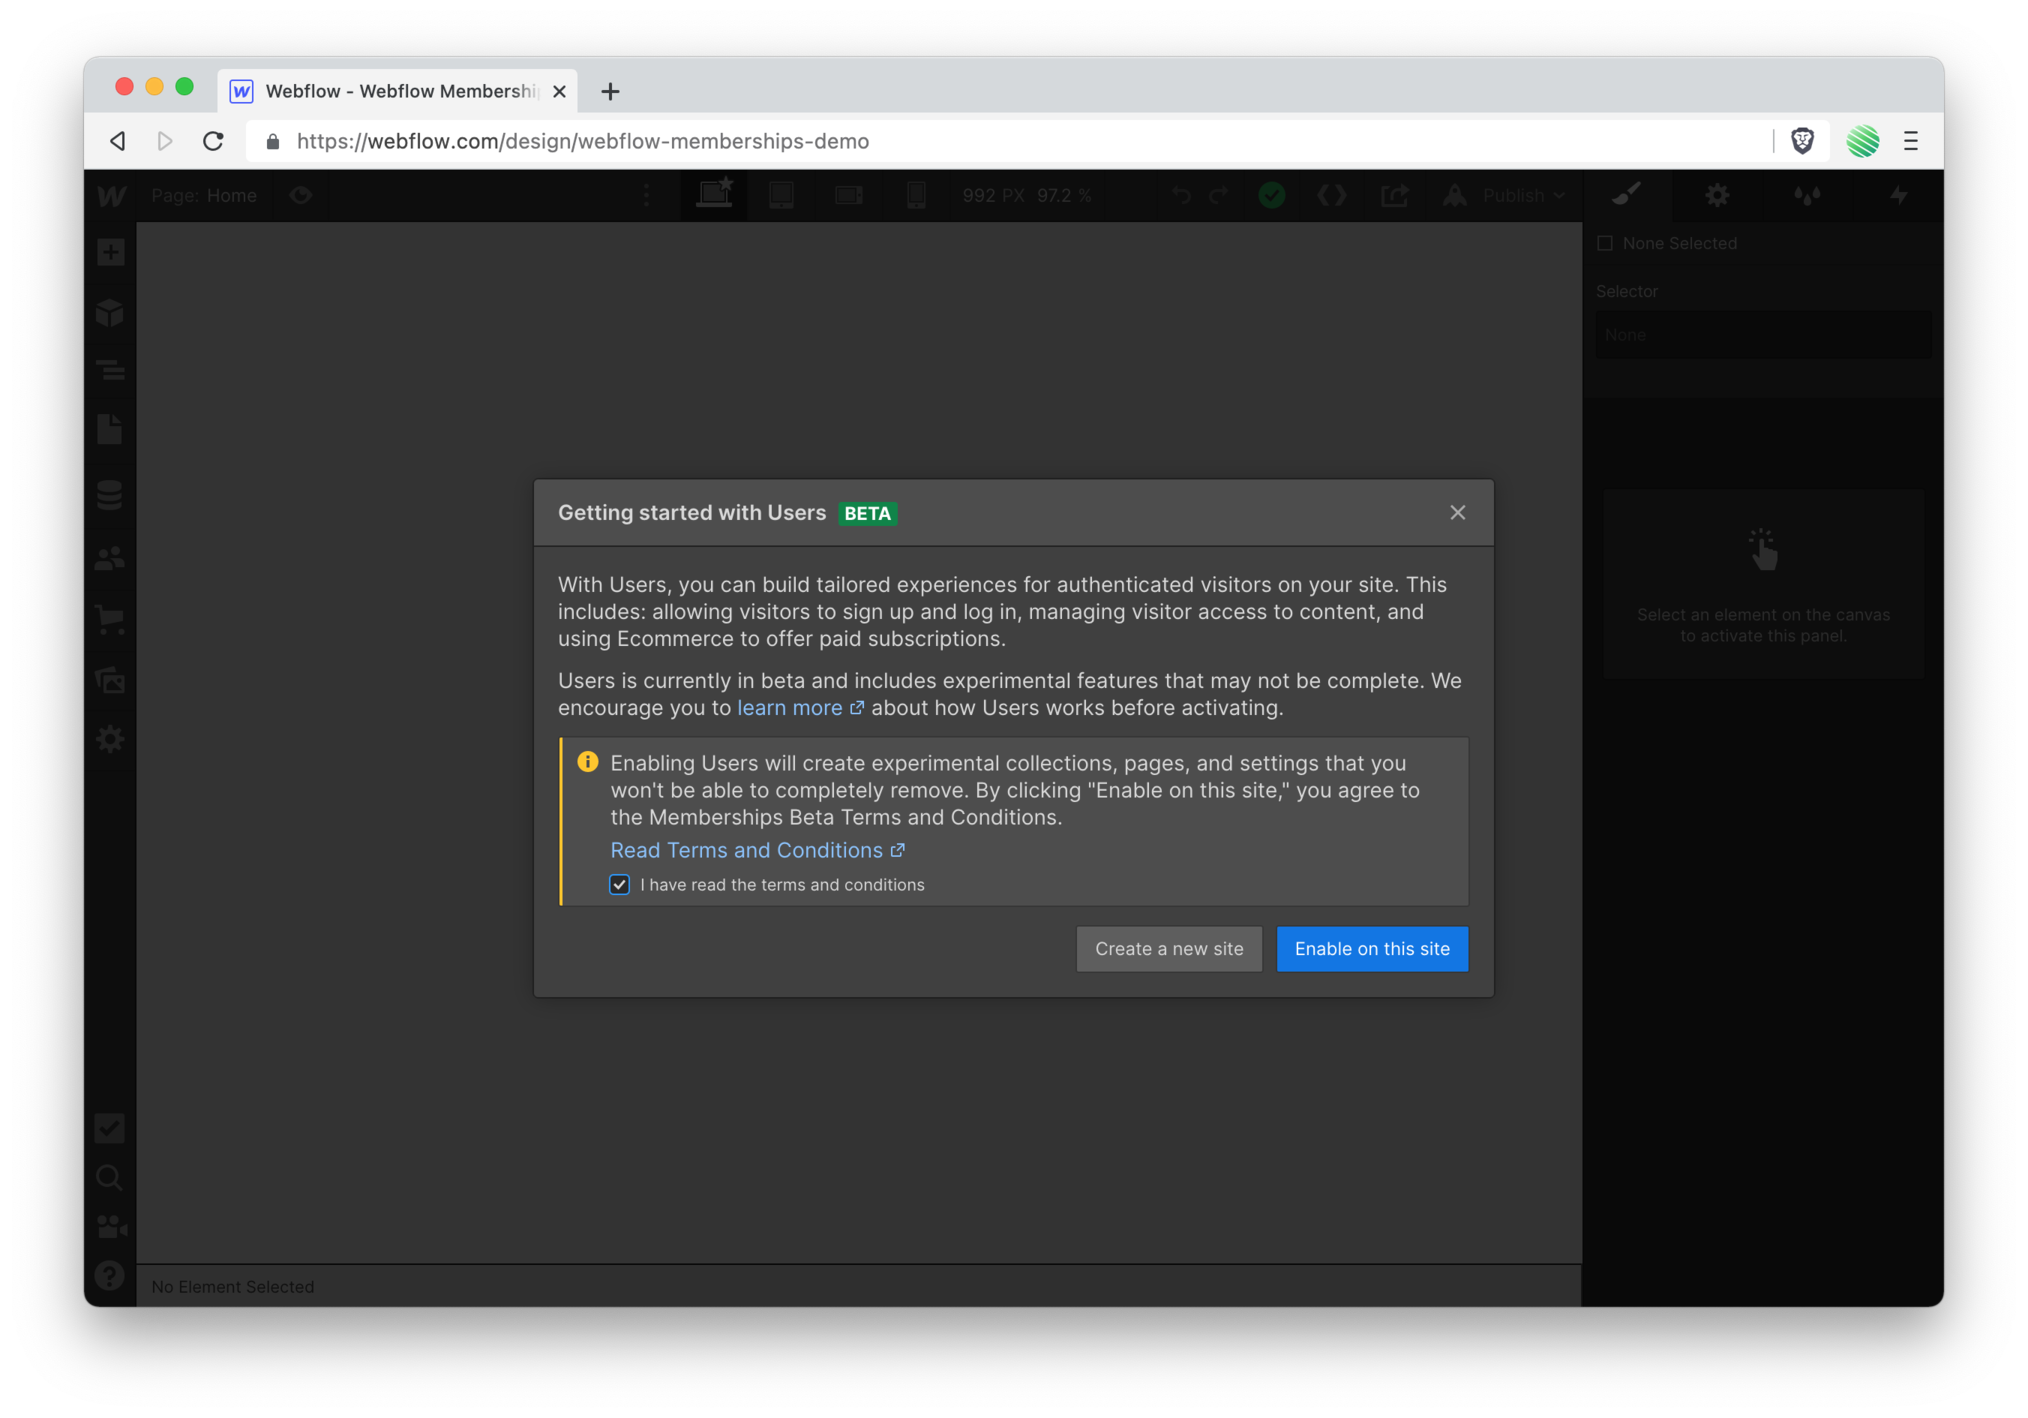 Once you’ve enabled Users on your site you are presented with User elements and a new management screen.
A few things you’ll immediately see:
- A Setup Guide ( which you’ll walk through in just a moment 🤩 ).
- Manage all of your User Accounts.
- Manage all of your Access Groups.
 Think of User Accounts & Access Groups as two new special CMS Collections.
They are separated from the CMS editor that you’re used to, but they function in similar ways.
User Accounts.
User Accounts is a Collection of all the Users on your site. Those could be full blown Users or Invited Users.
-
Users:
Those who have a valid account and may log into your Webflow site.
-
Invited Users:
Those who have been sent an email invitation allowing them to create an account that they may use to log into your Webflow site.
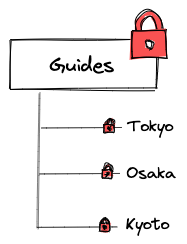
Access Groups.
Access Groups is a Collection of items that allows you to control which Users have access to various resources, or content ( that you define ) on your site.
This is important to understand.
YOU define the Collection item, what access it grants, and to which Users.
For example, you can ( and will in this walk through ) create a folder with static pages in it.

Then you’ll apply that folder to an Access Group ( that you define ) requiring someone to have a valid User account on your Webflow site to access any pages within it.
Each user can be applied to different Access Groups, which means they’ll have access to different folders & pages on your site.
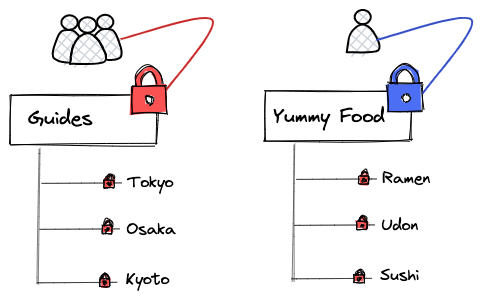
This is powerful.
Design the Sign Up page
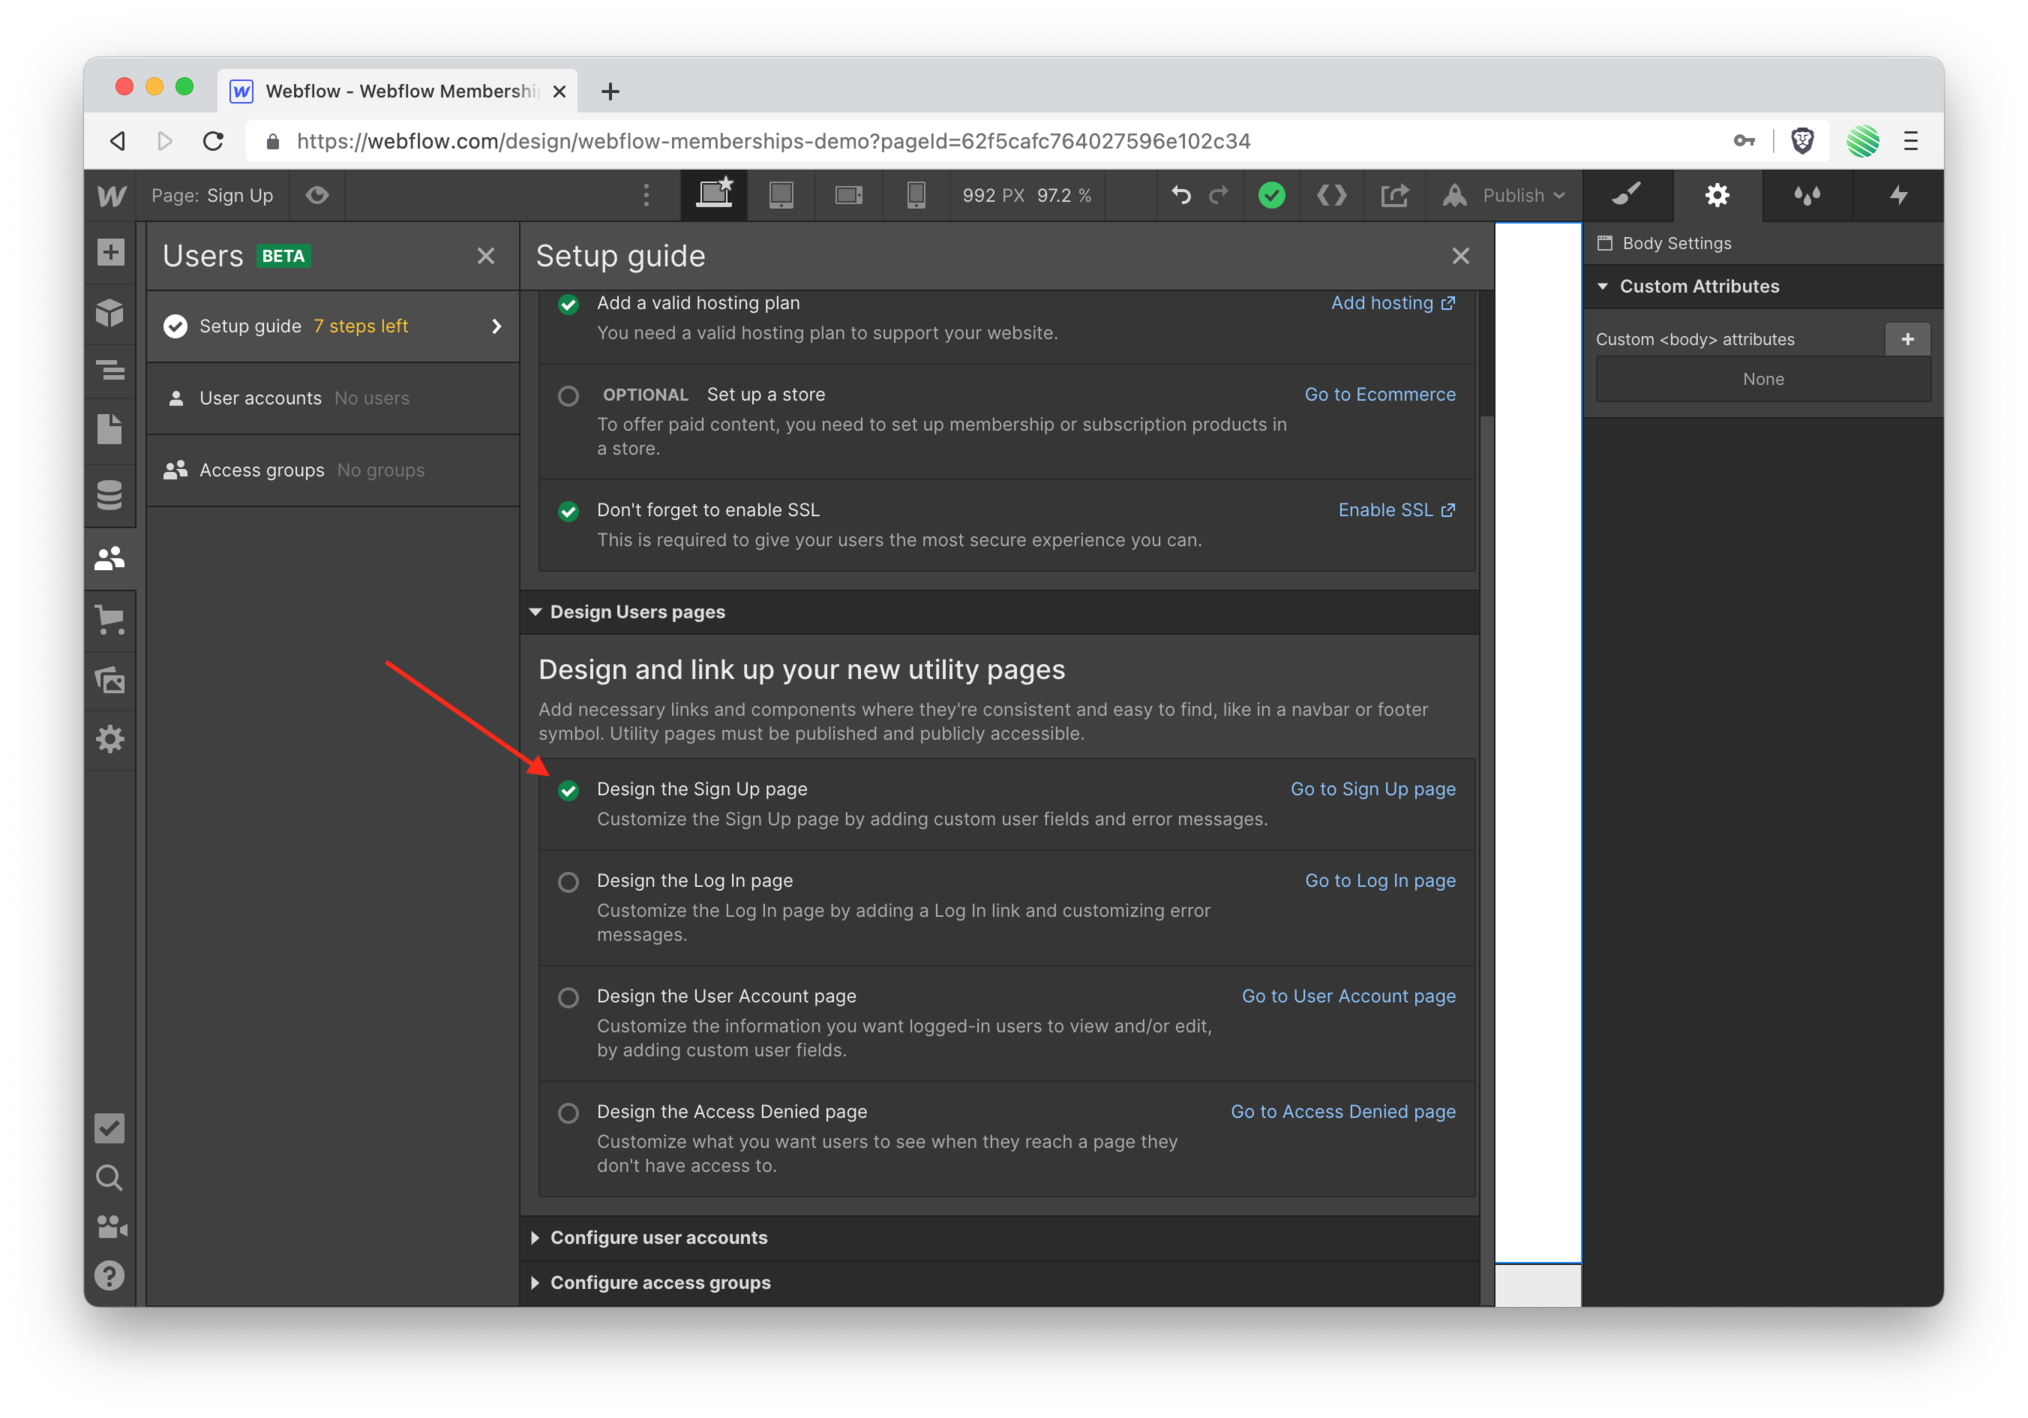
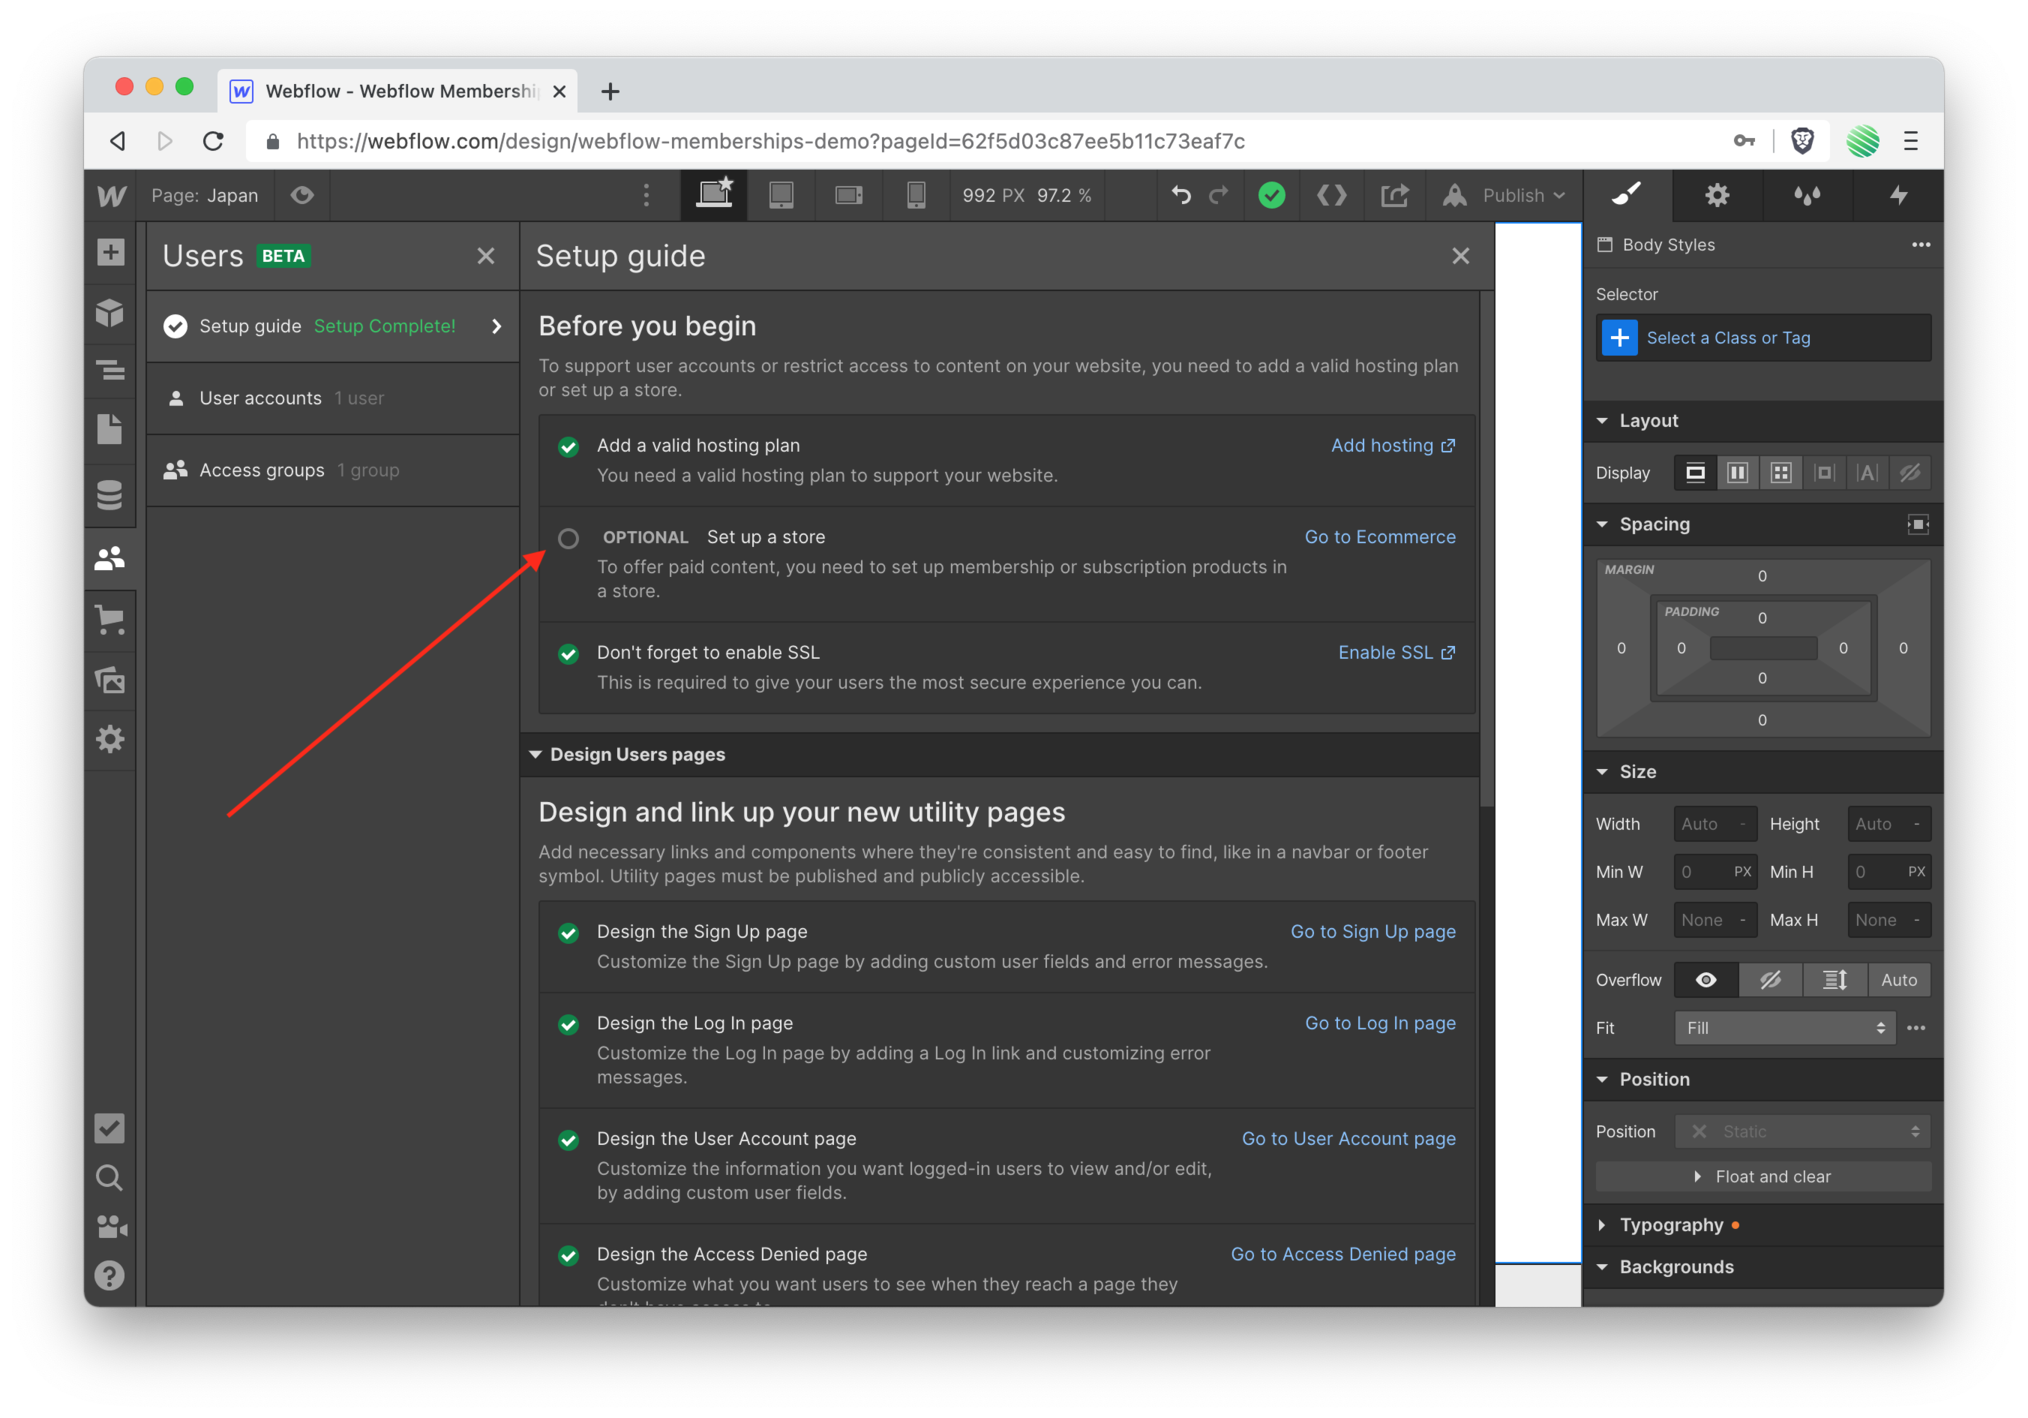
To get started, I’ll walk you through Webflow’s setup guide.
Within the setup guide menu, scroll down and tap on the “Go to Sign Up page” link ( screenshot above ).
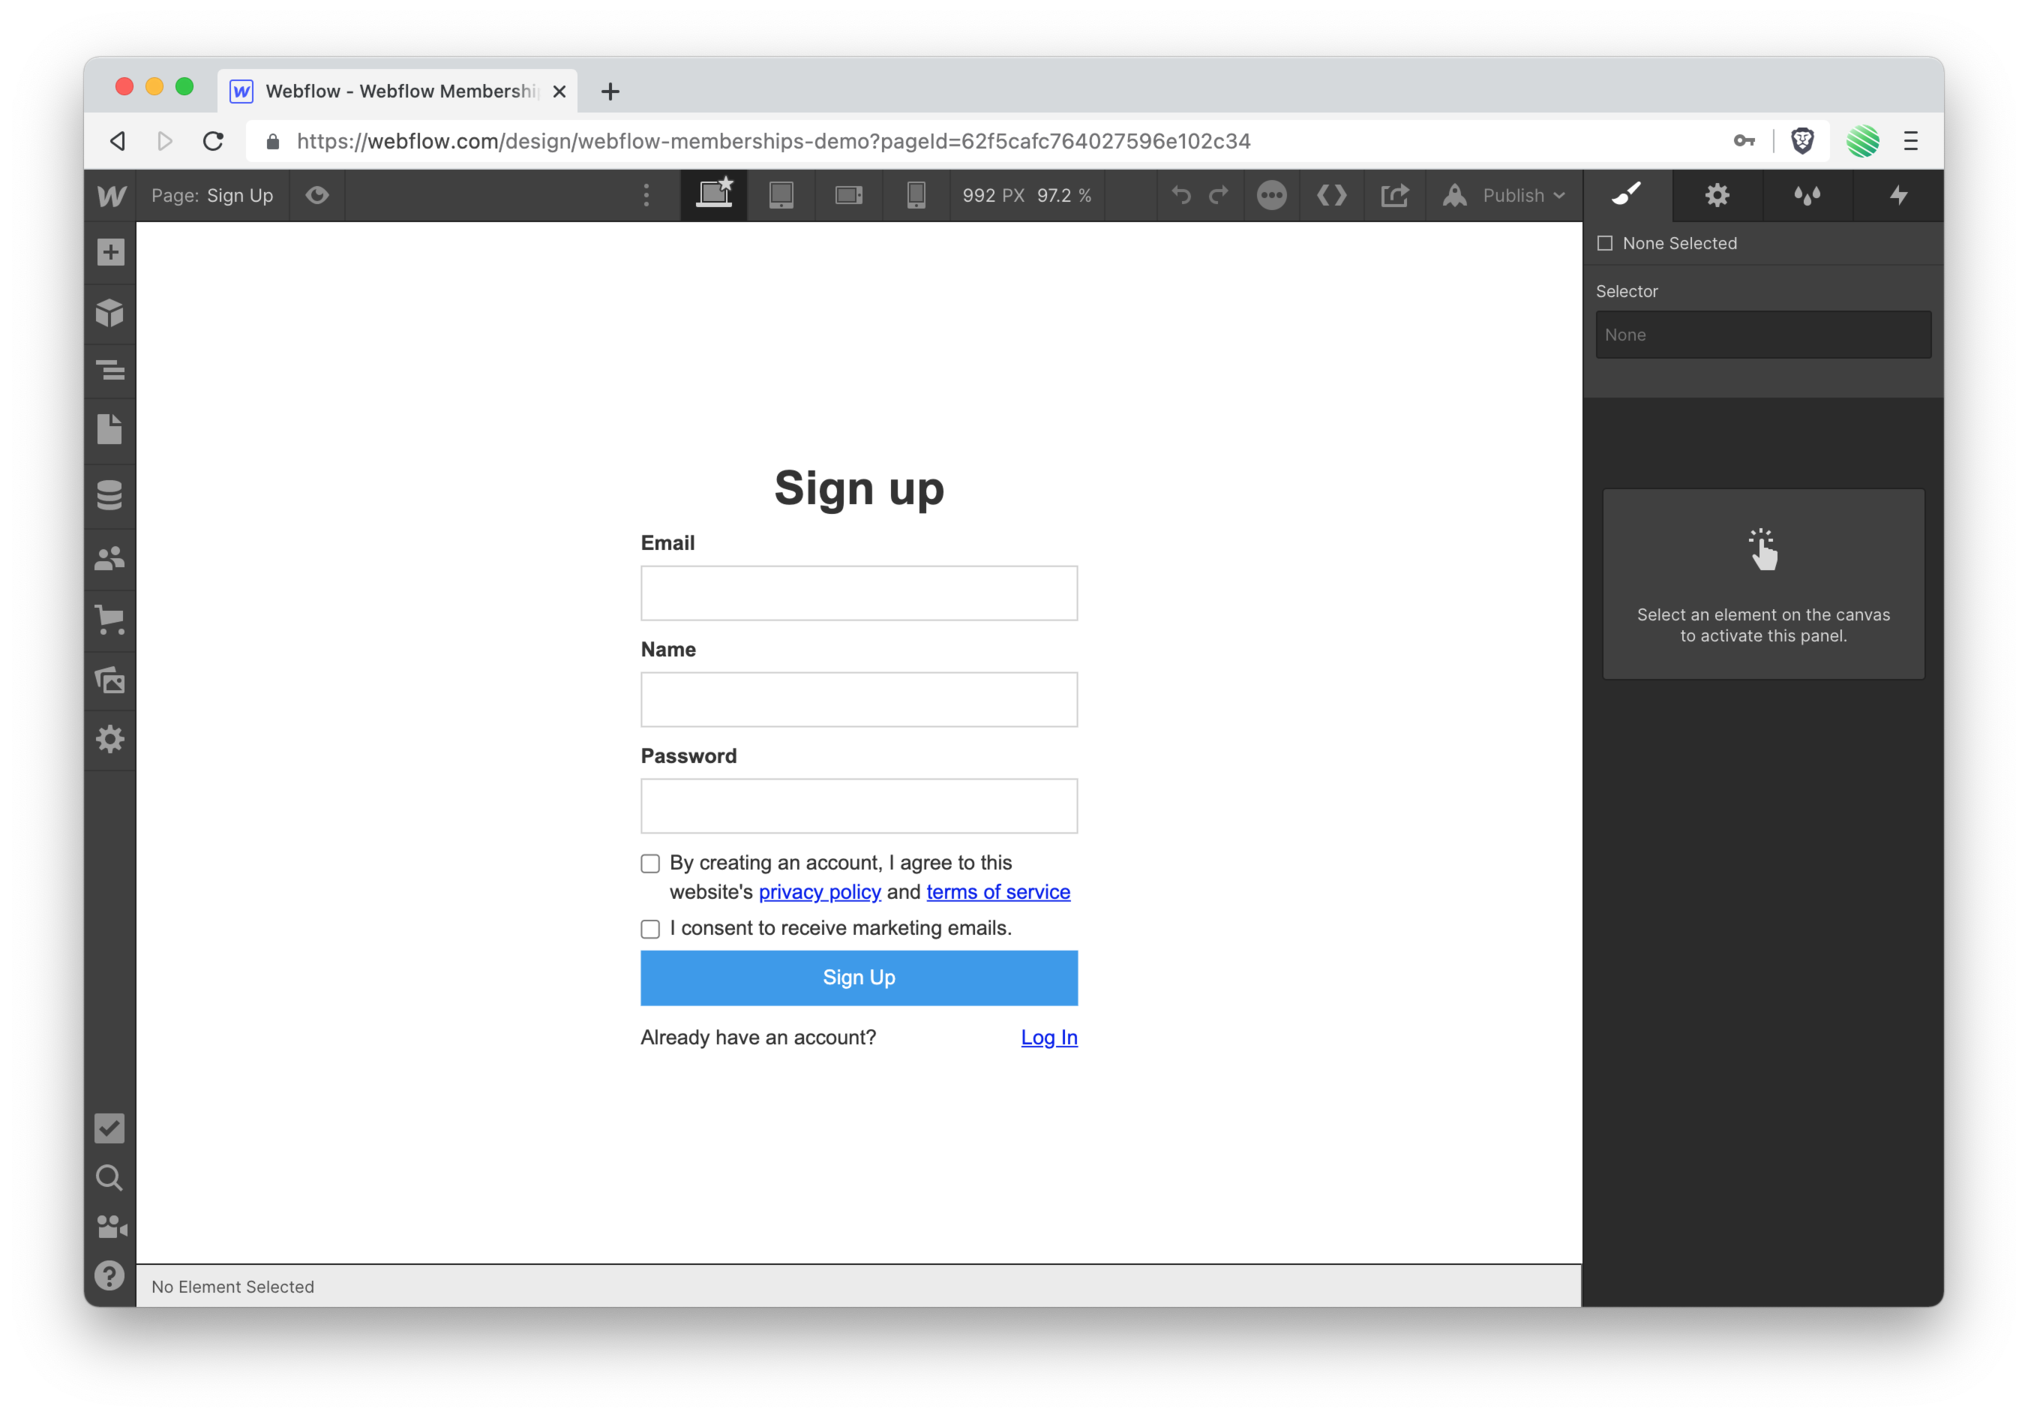 Presented to you is the default sign up page.
It’s more than good enough to leave untouched and use for your site.
But let’s walk through making a small tweak to it.
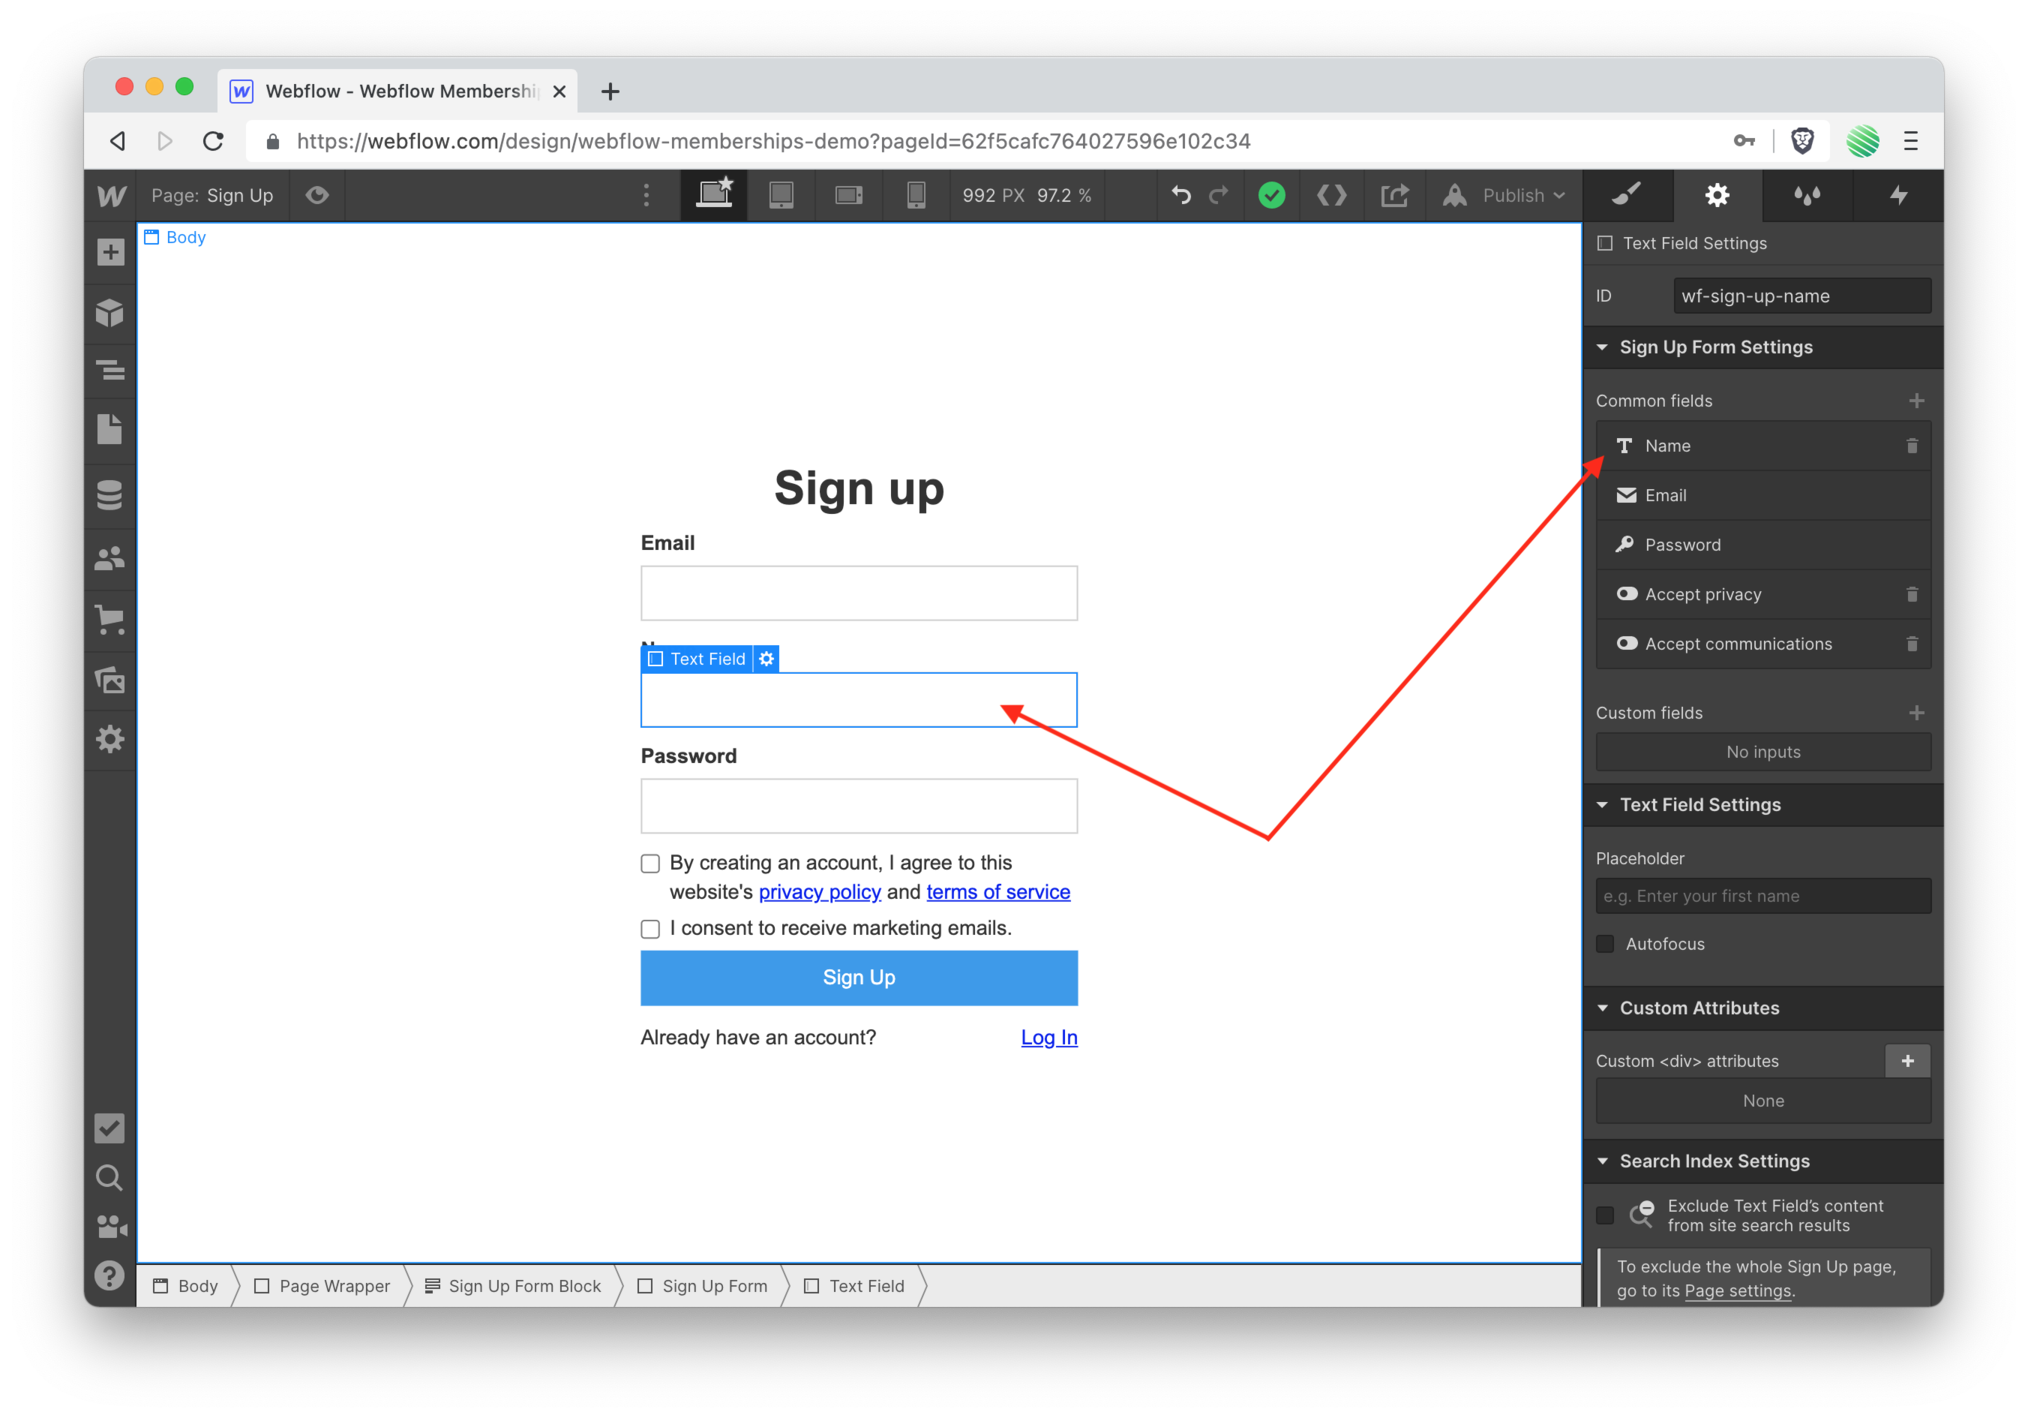 For this walk through, no need to collect a new users name. So go ahead and delete that field.
Notice once you’ve highlighted that field a new settings pane pops open and gives you access to all of the form fields.
Tap on the garbage can next to the Name field (screenshot above).
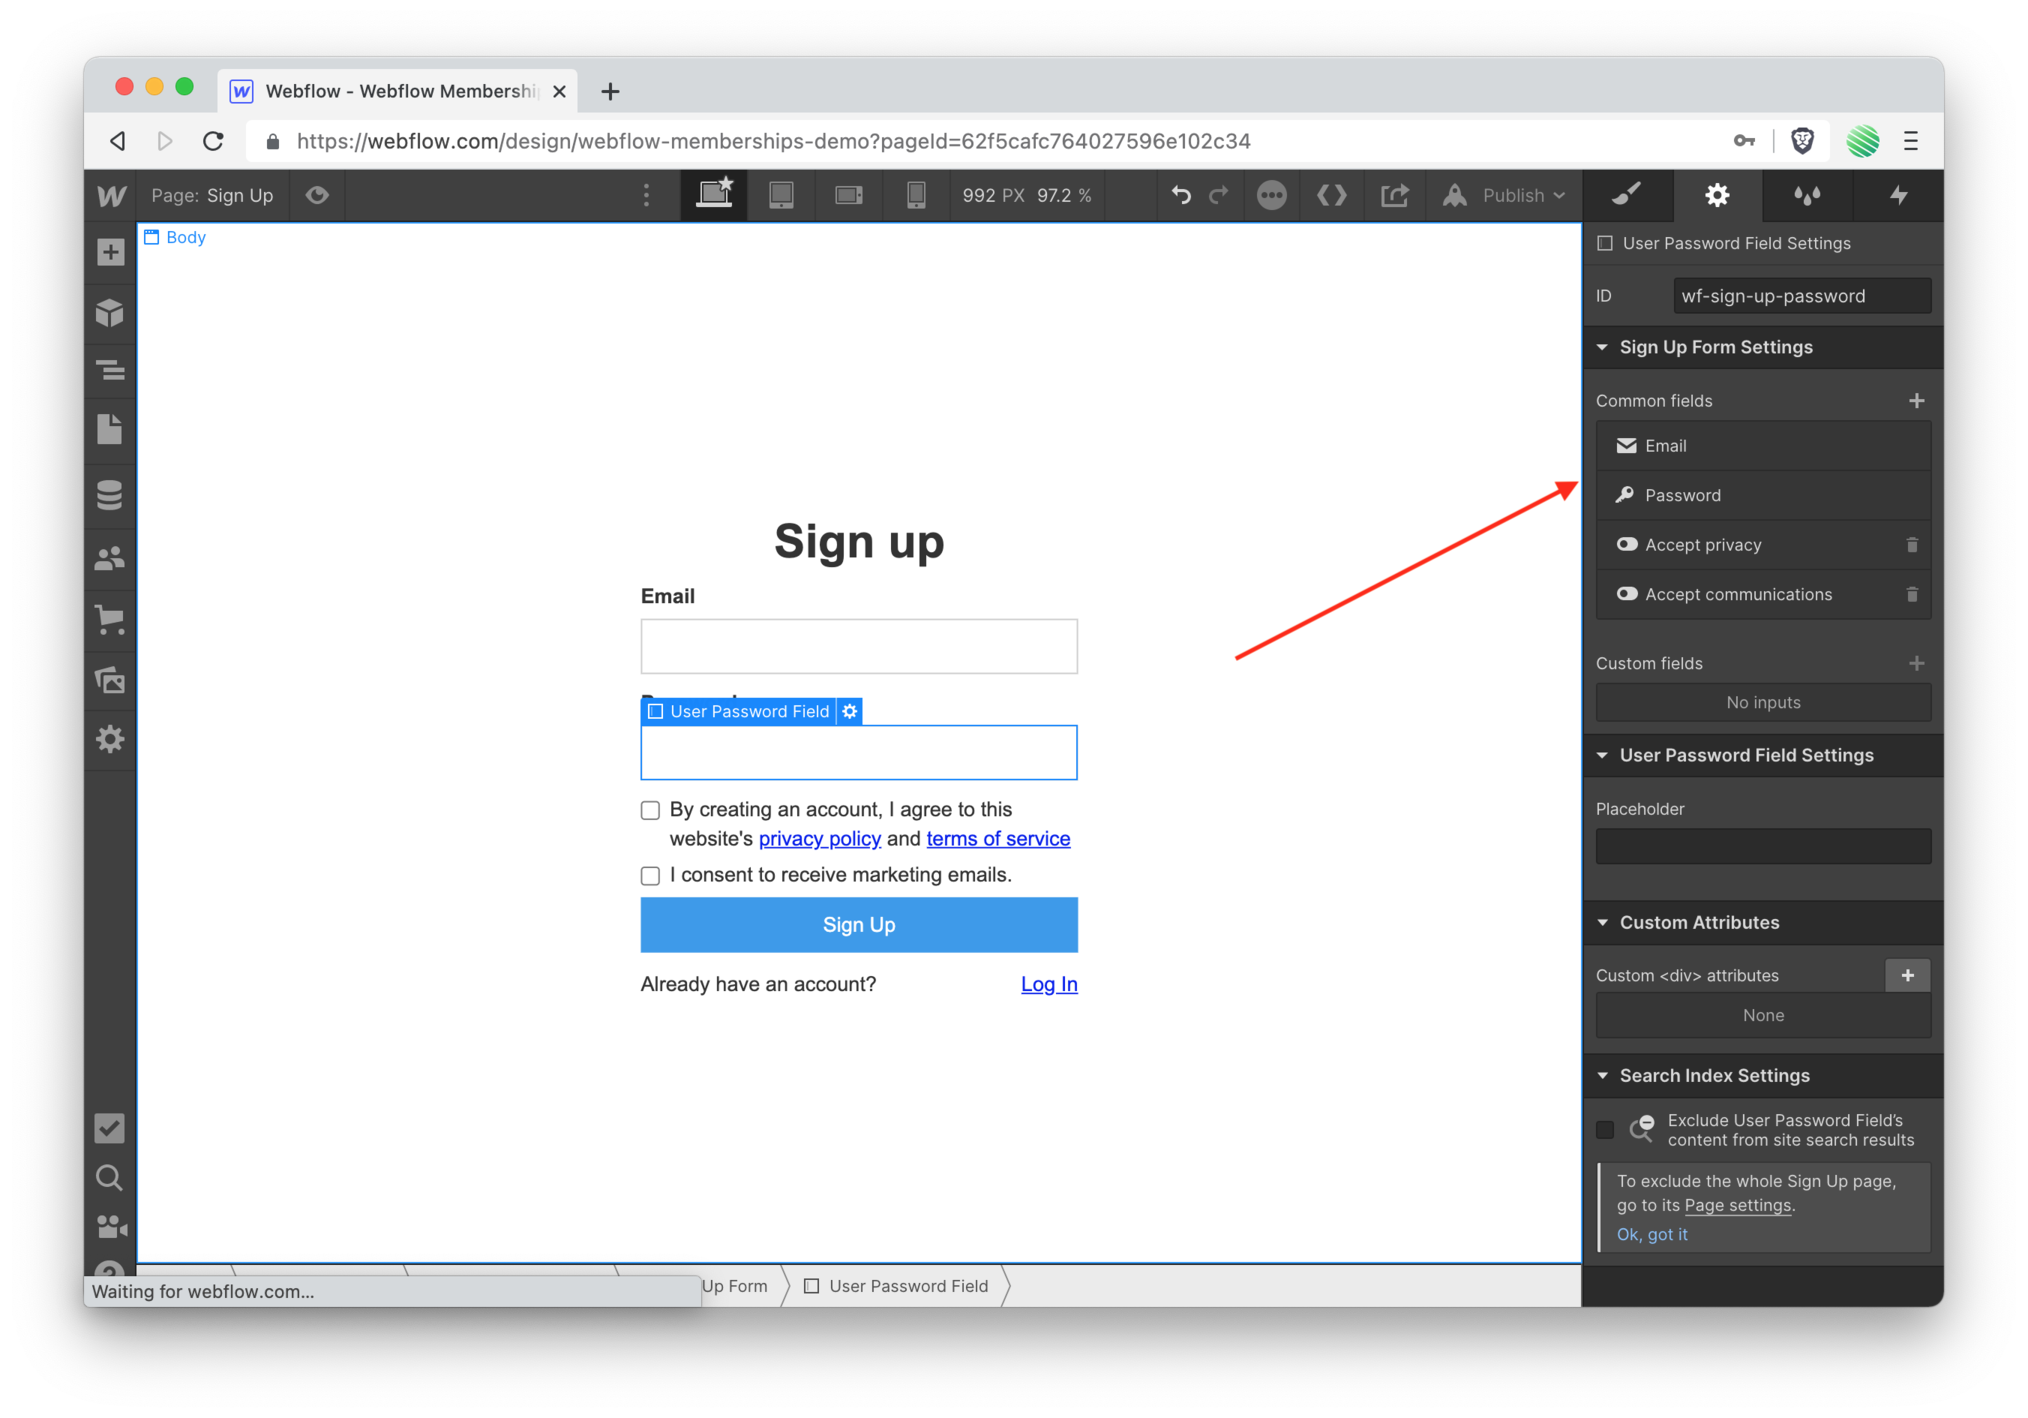 Notice the Email and Password fields do not have garbage cans. They cannot be deleted and are required for Webflow Memberships to work.
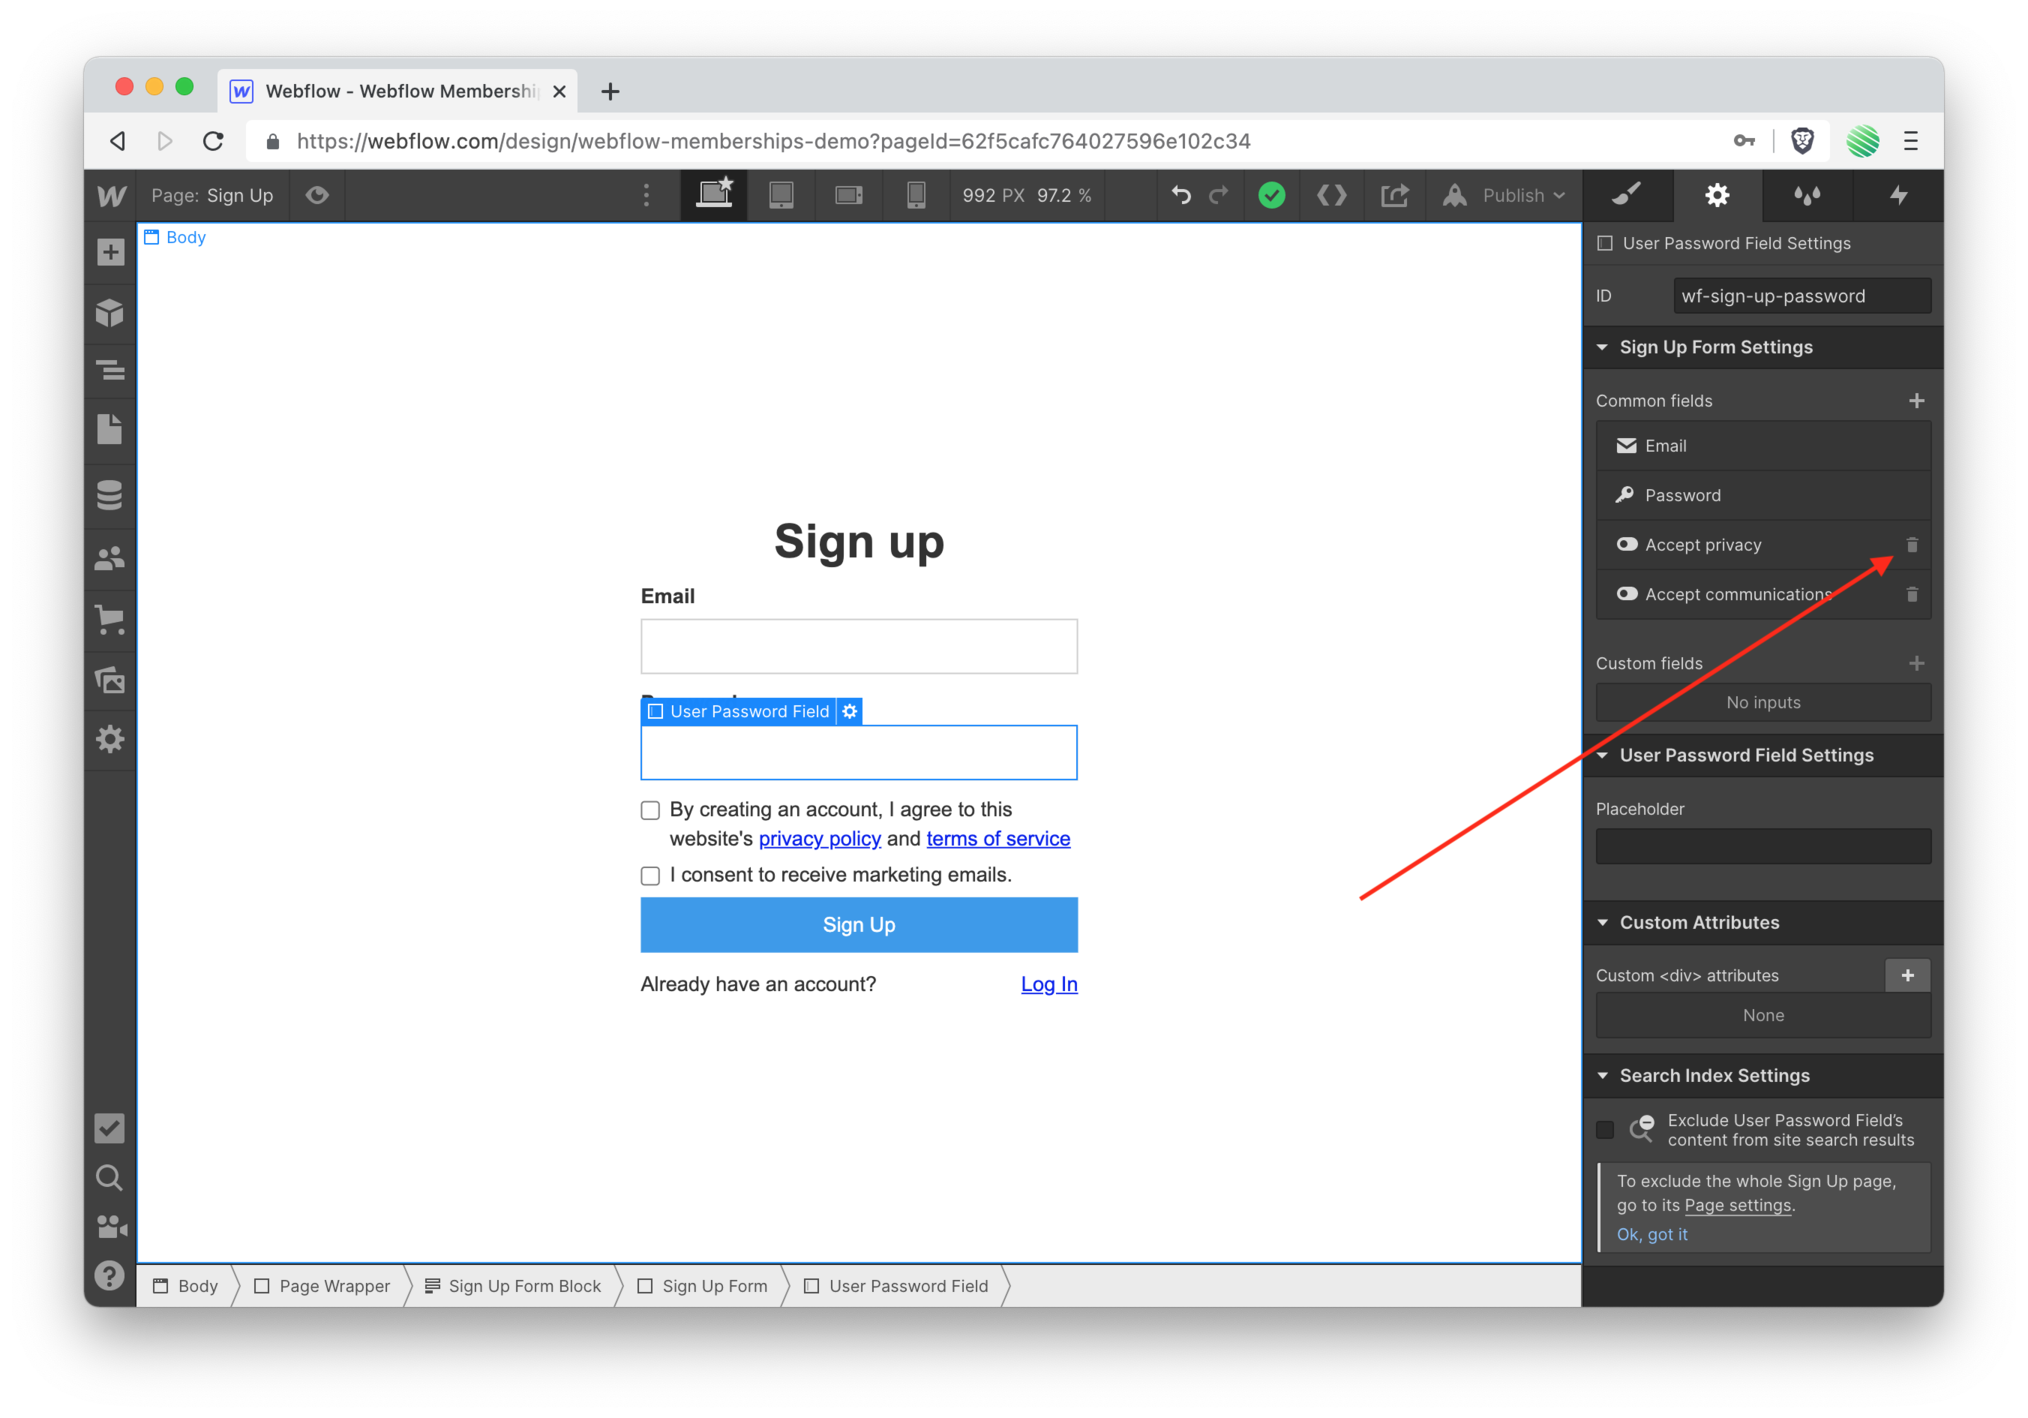 For this walk through also remove the Accept privacy policy field. It’s just as simple to remove as the Name field.
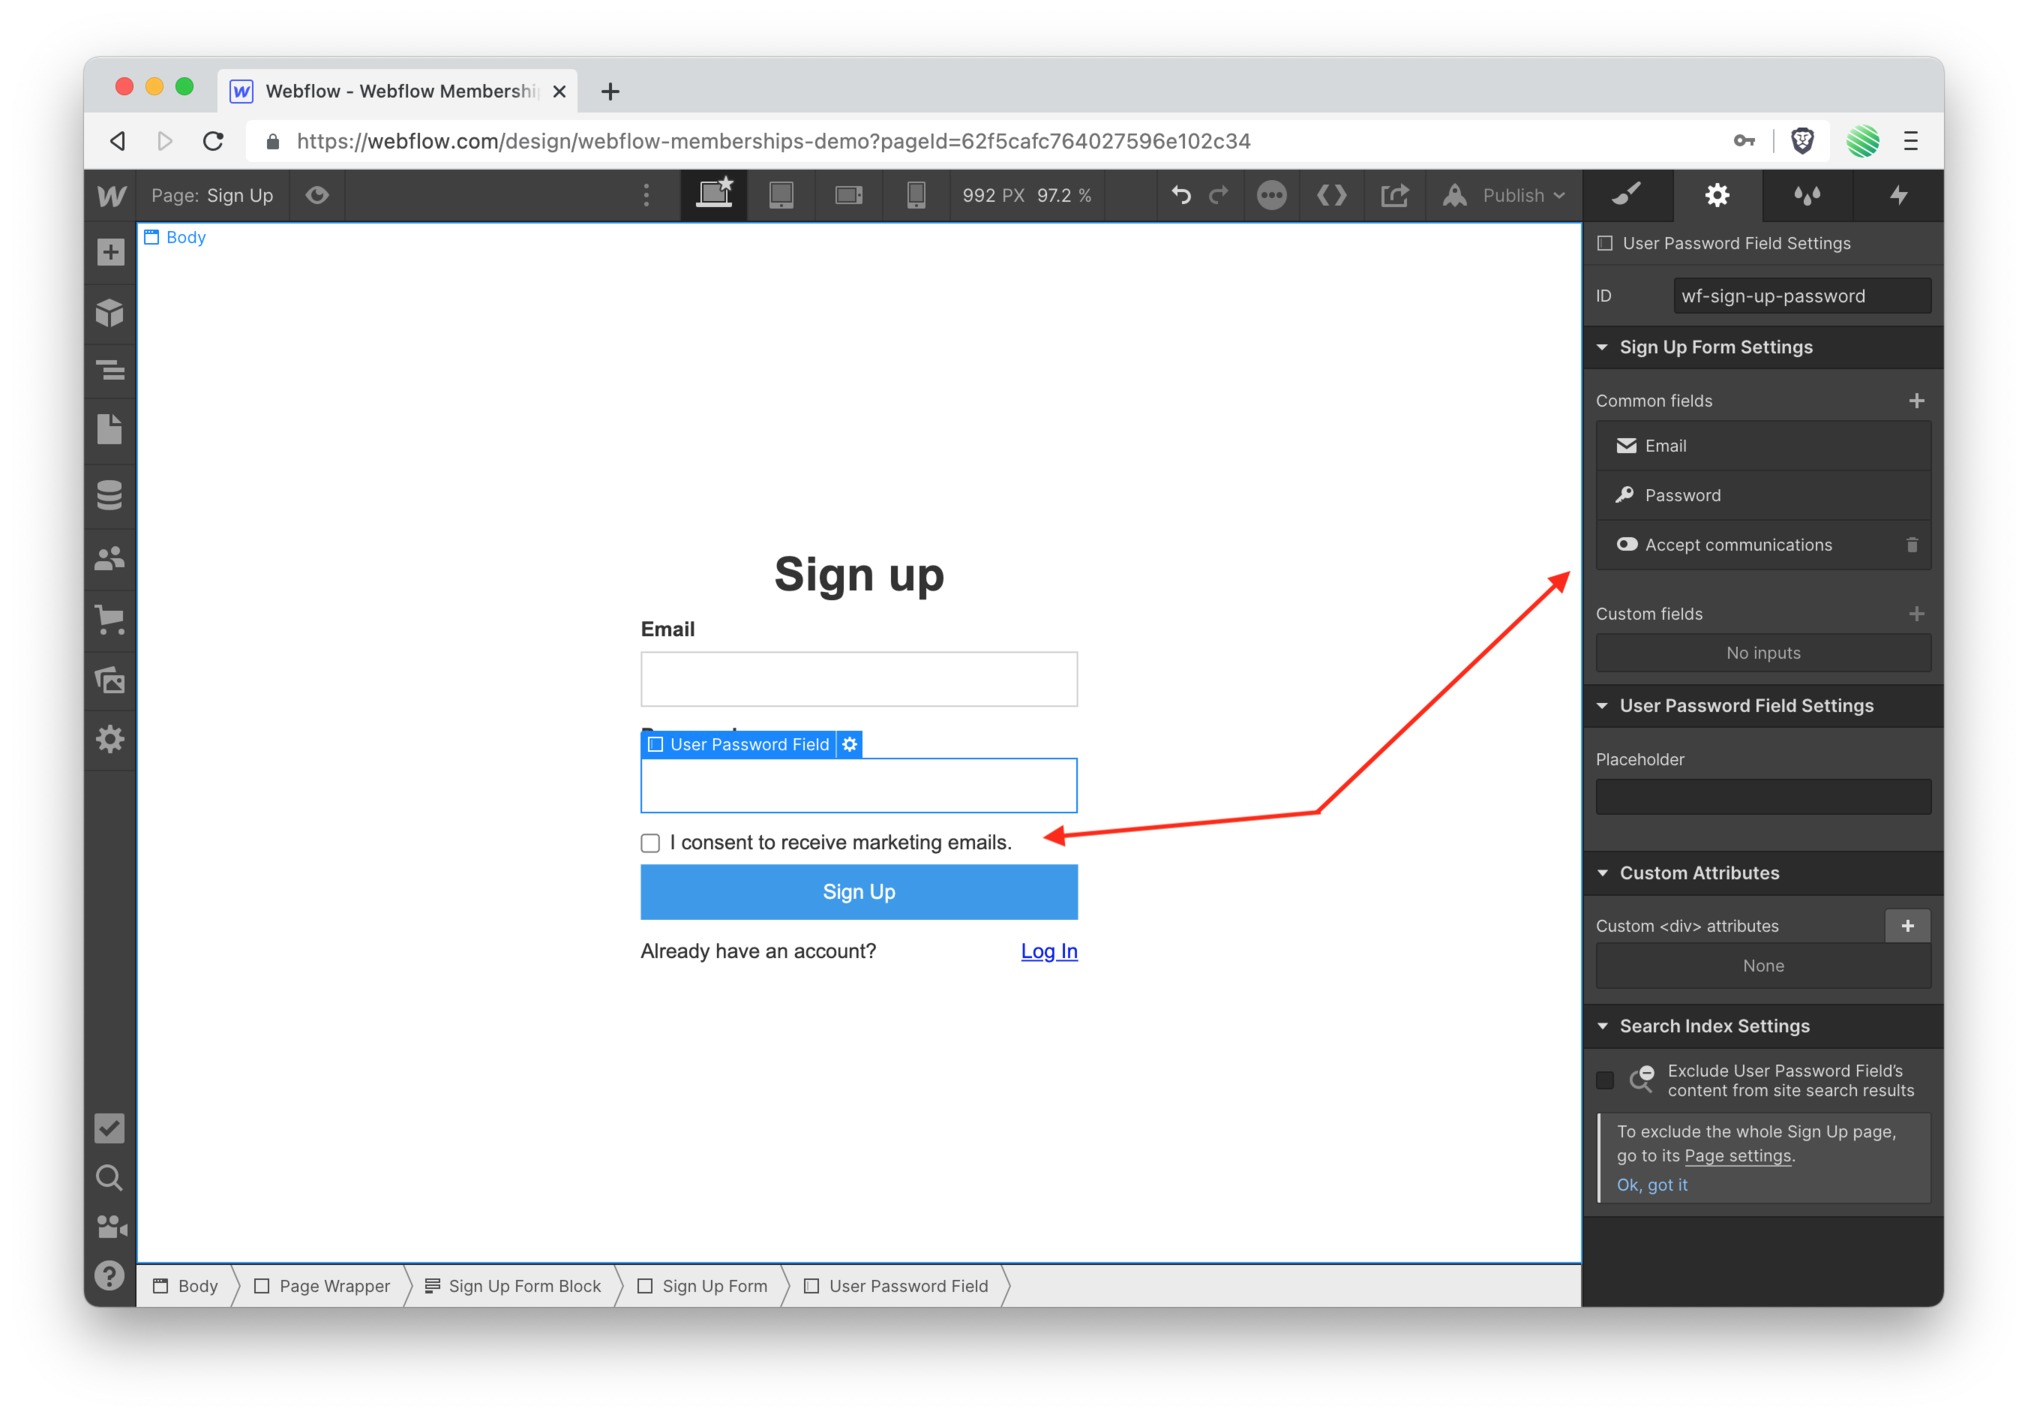 Looking good!
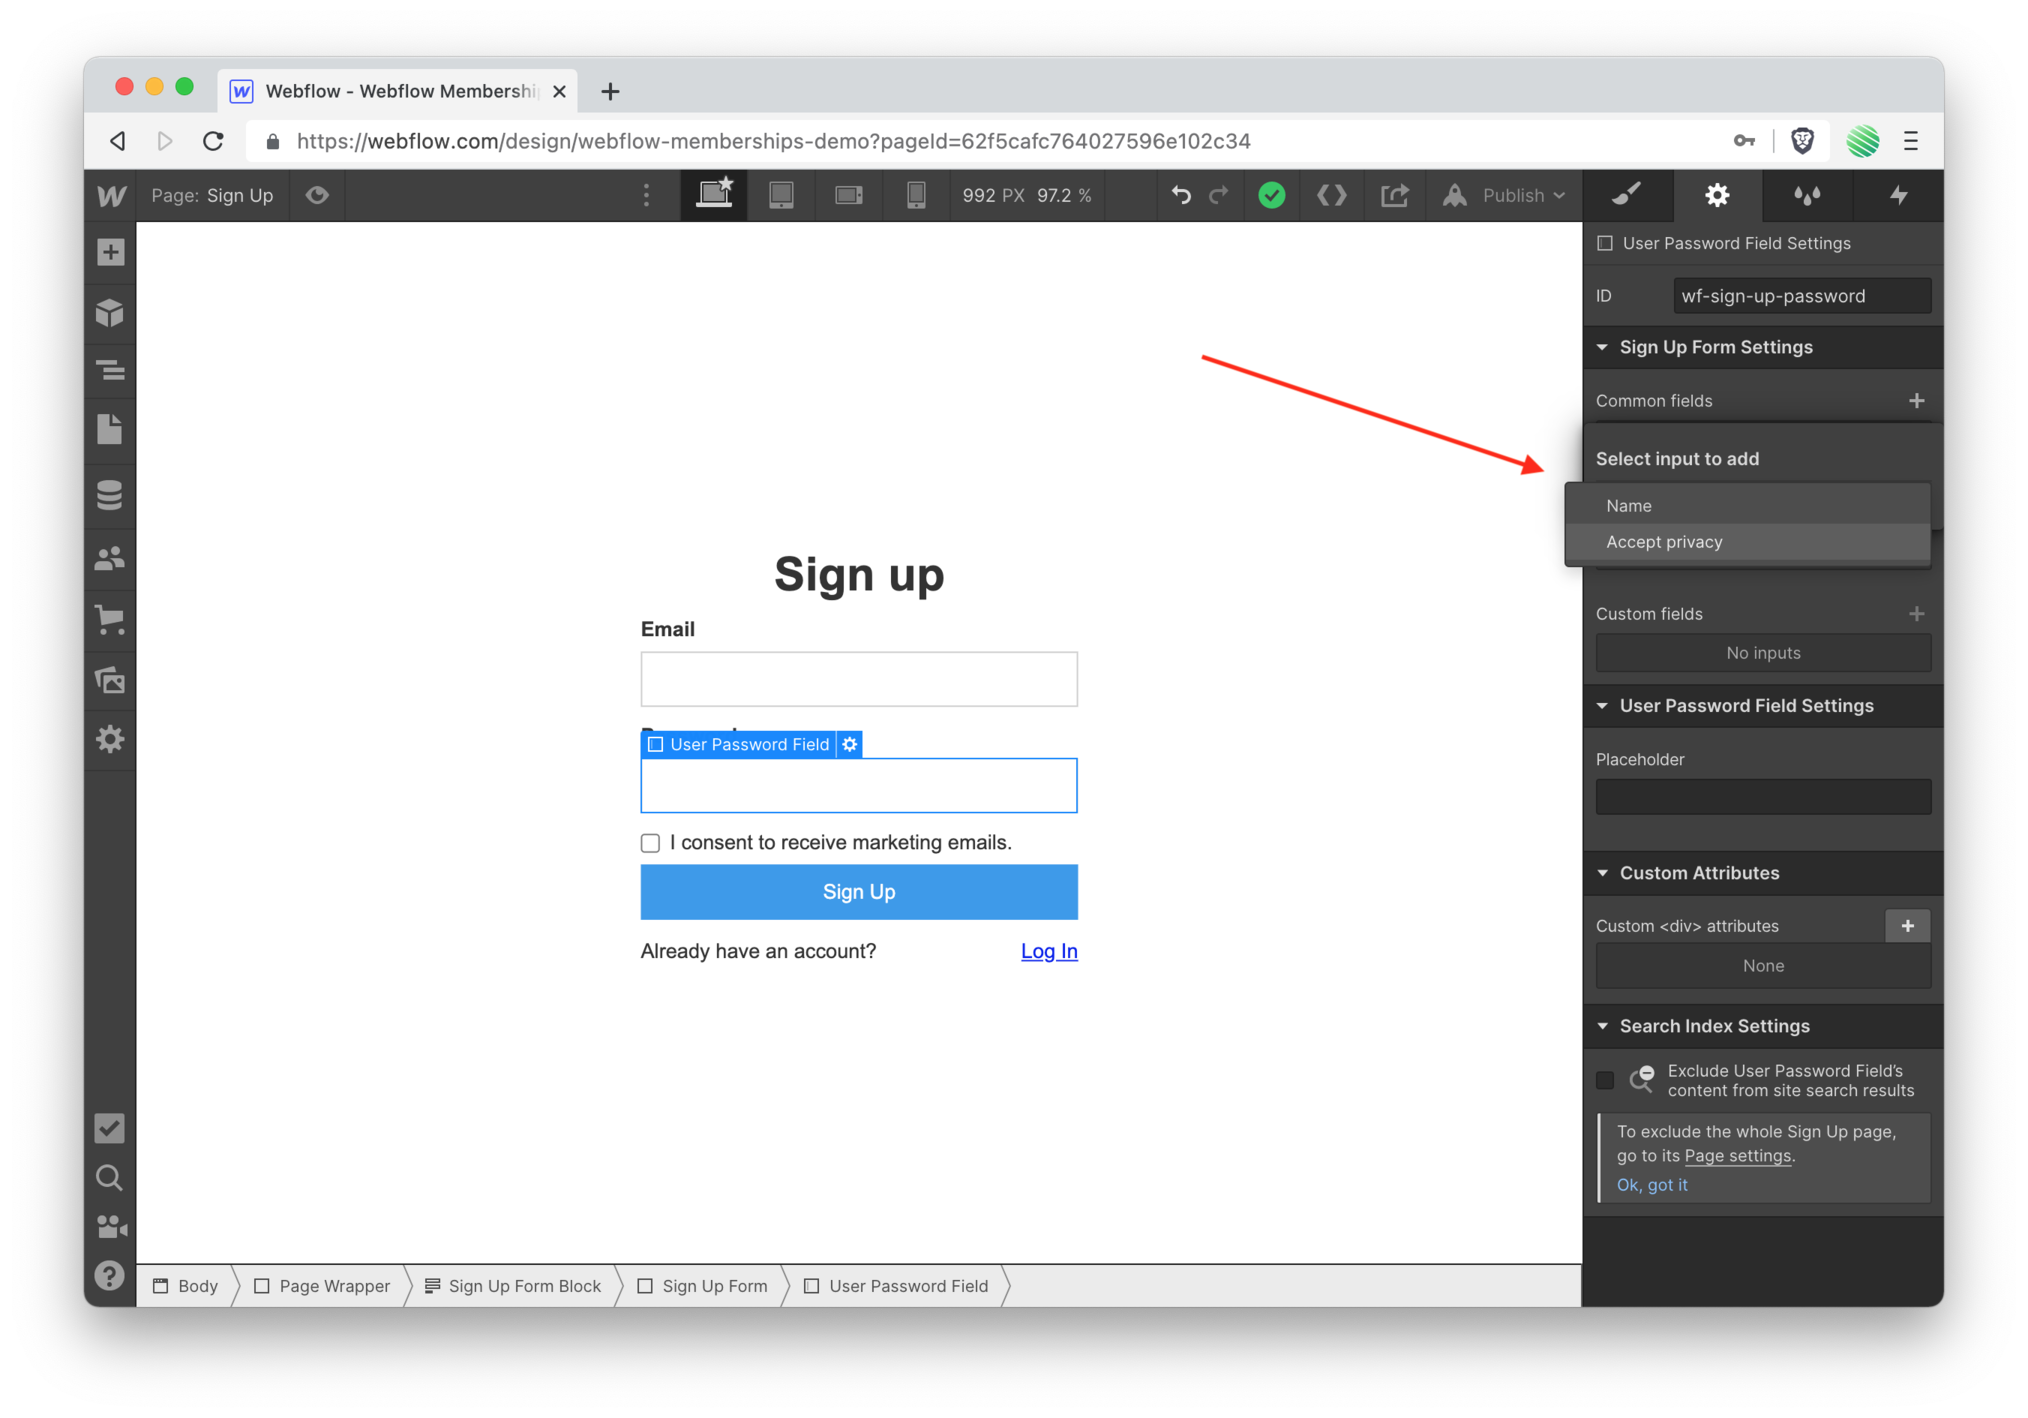 If you ever want to return any of these built-in fields to your sign up form, just tap the "select input to add" dropdown and you'll find everything you've removed.
 Okay, your new sign up form is looking great, and notice how little work that was 😎
 Open up Users from the left side panel again.
 You've now gone down from 8 steps to 7 remaining. Open the setup guide again.
Design the Log In page
Now you can move on to designing the log in page.
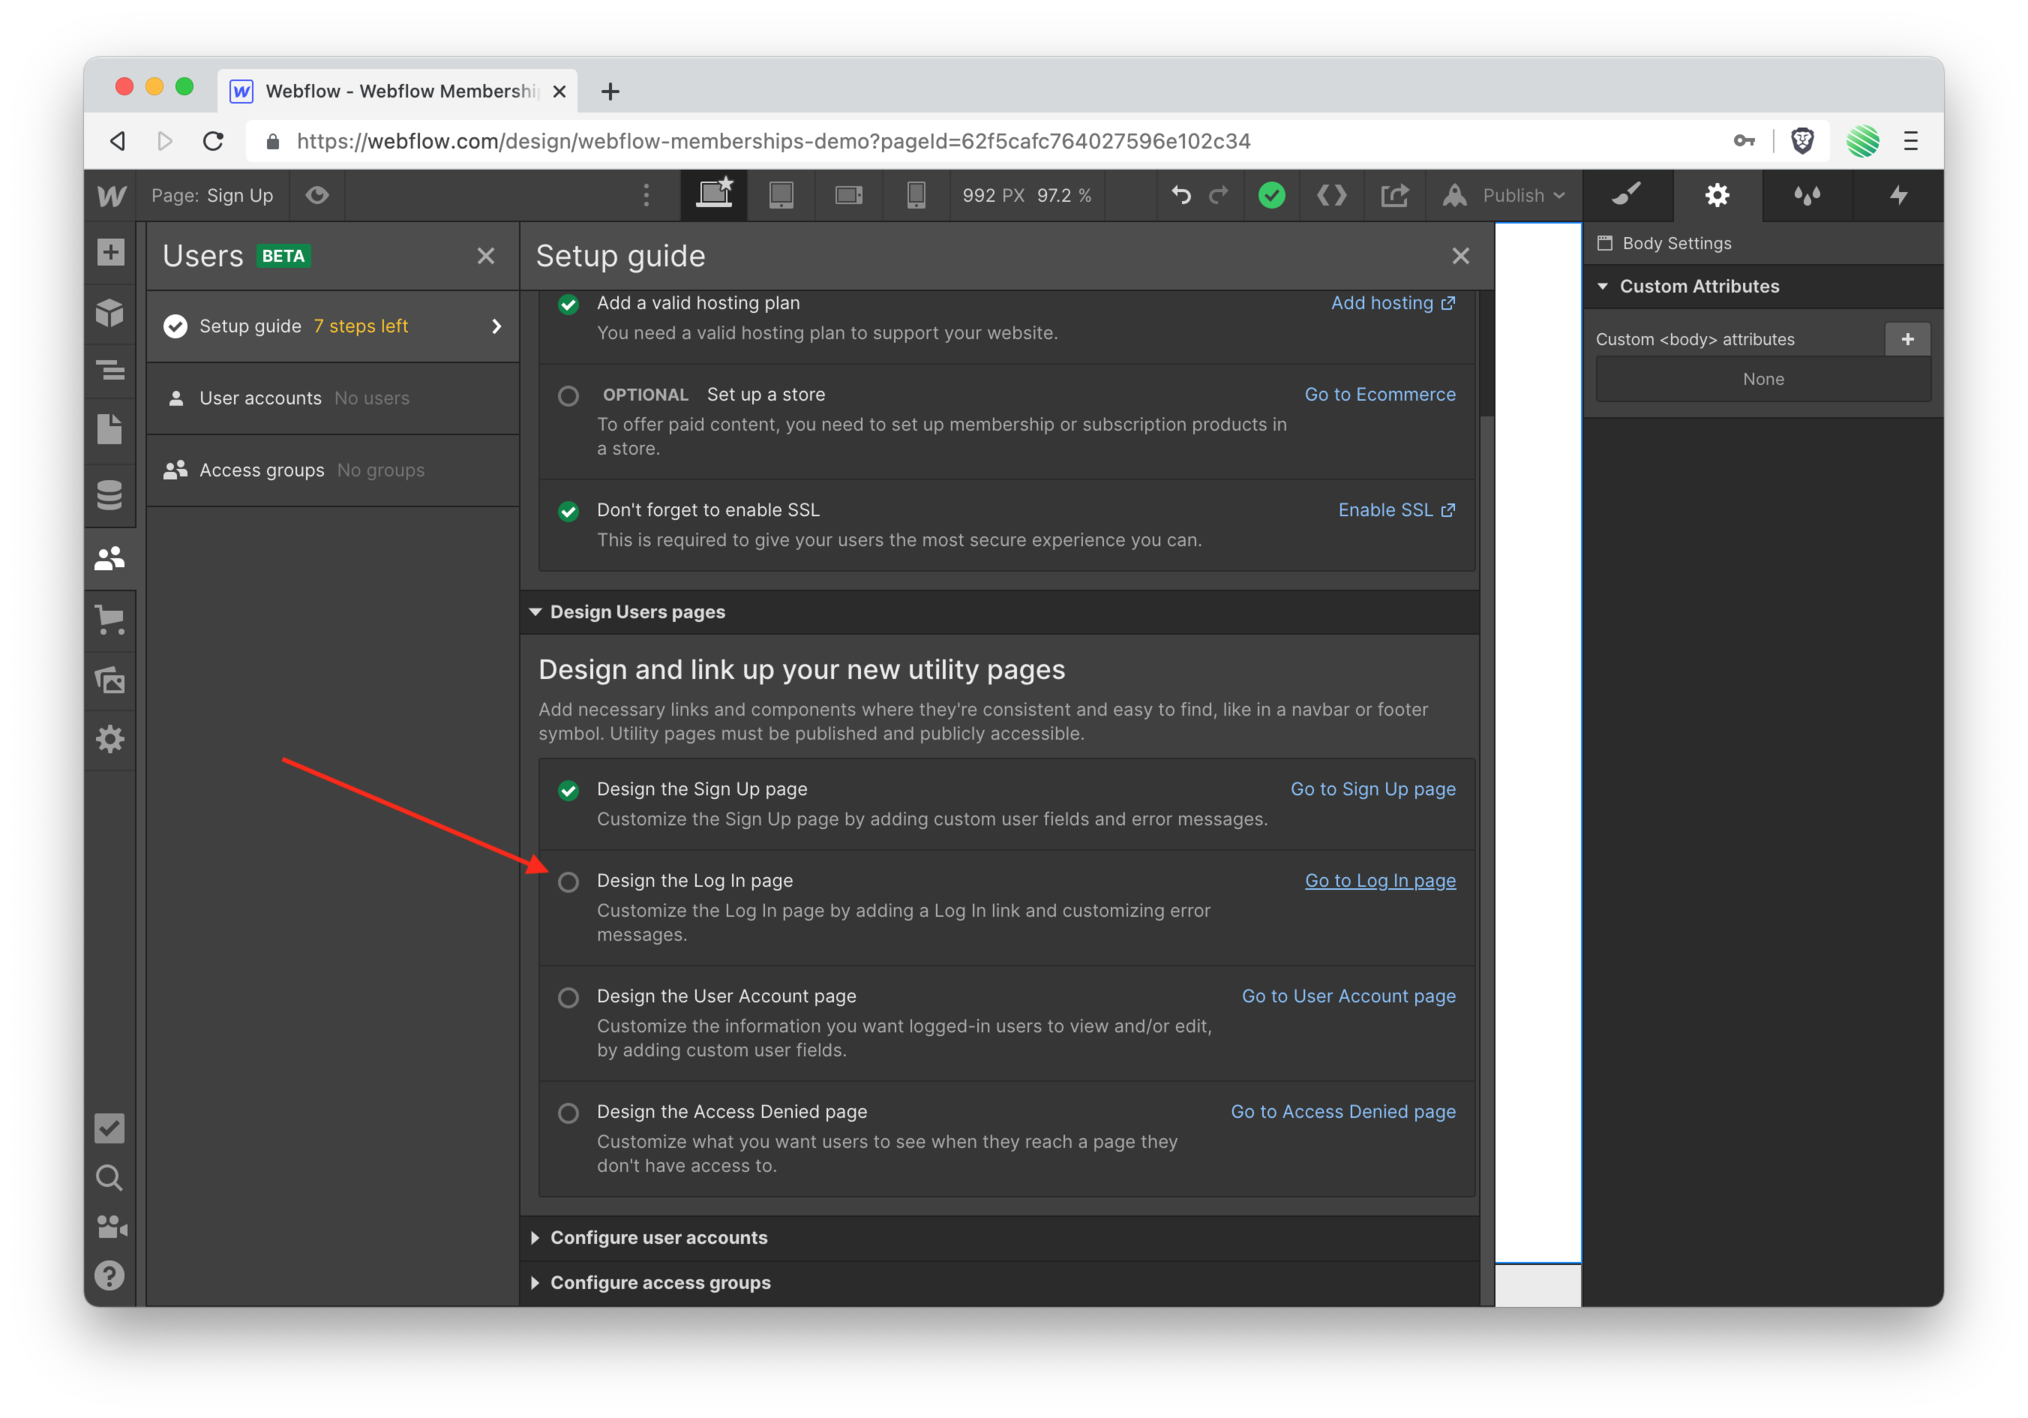 Tap the “go to log in page” link.
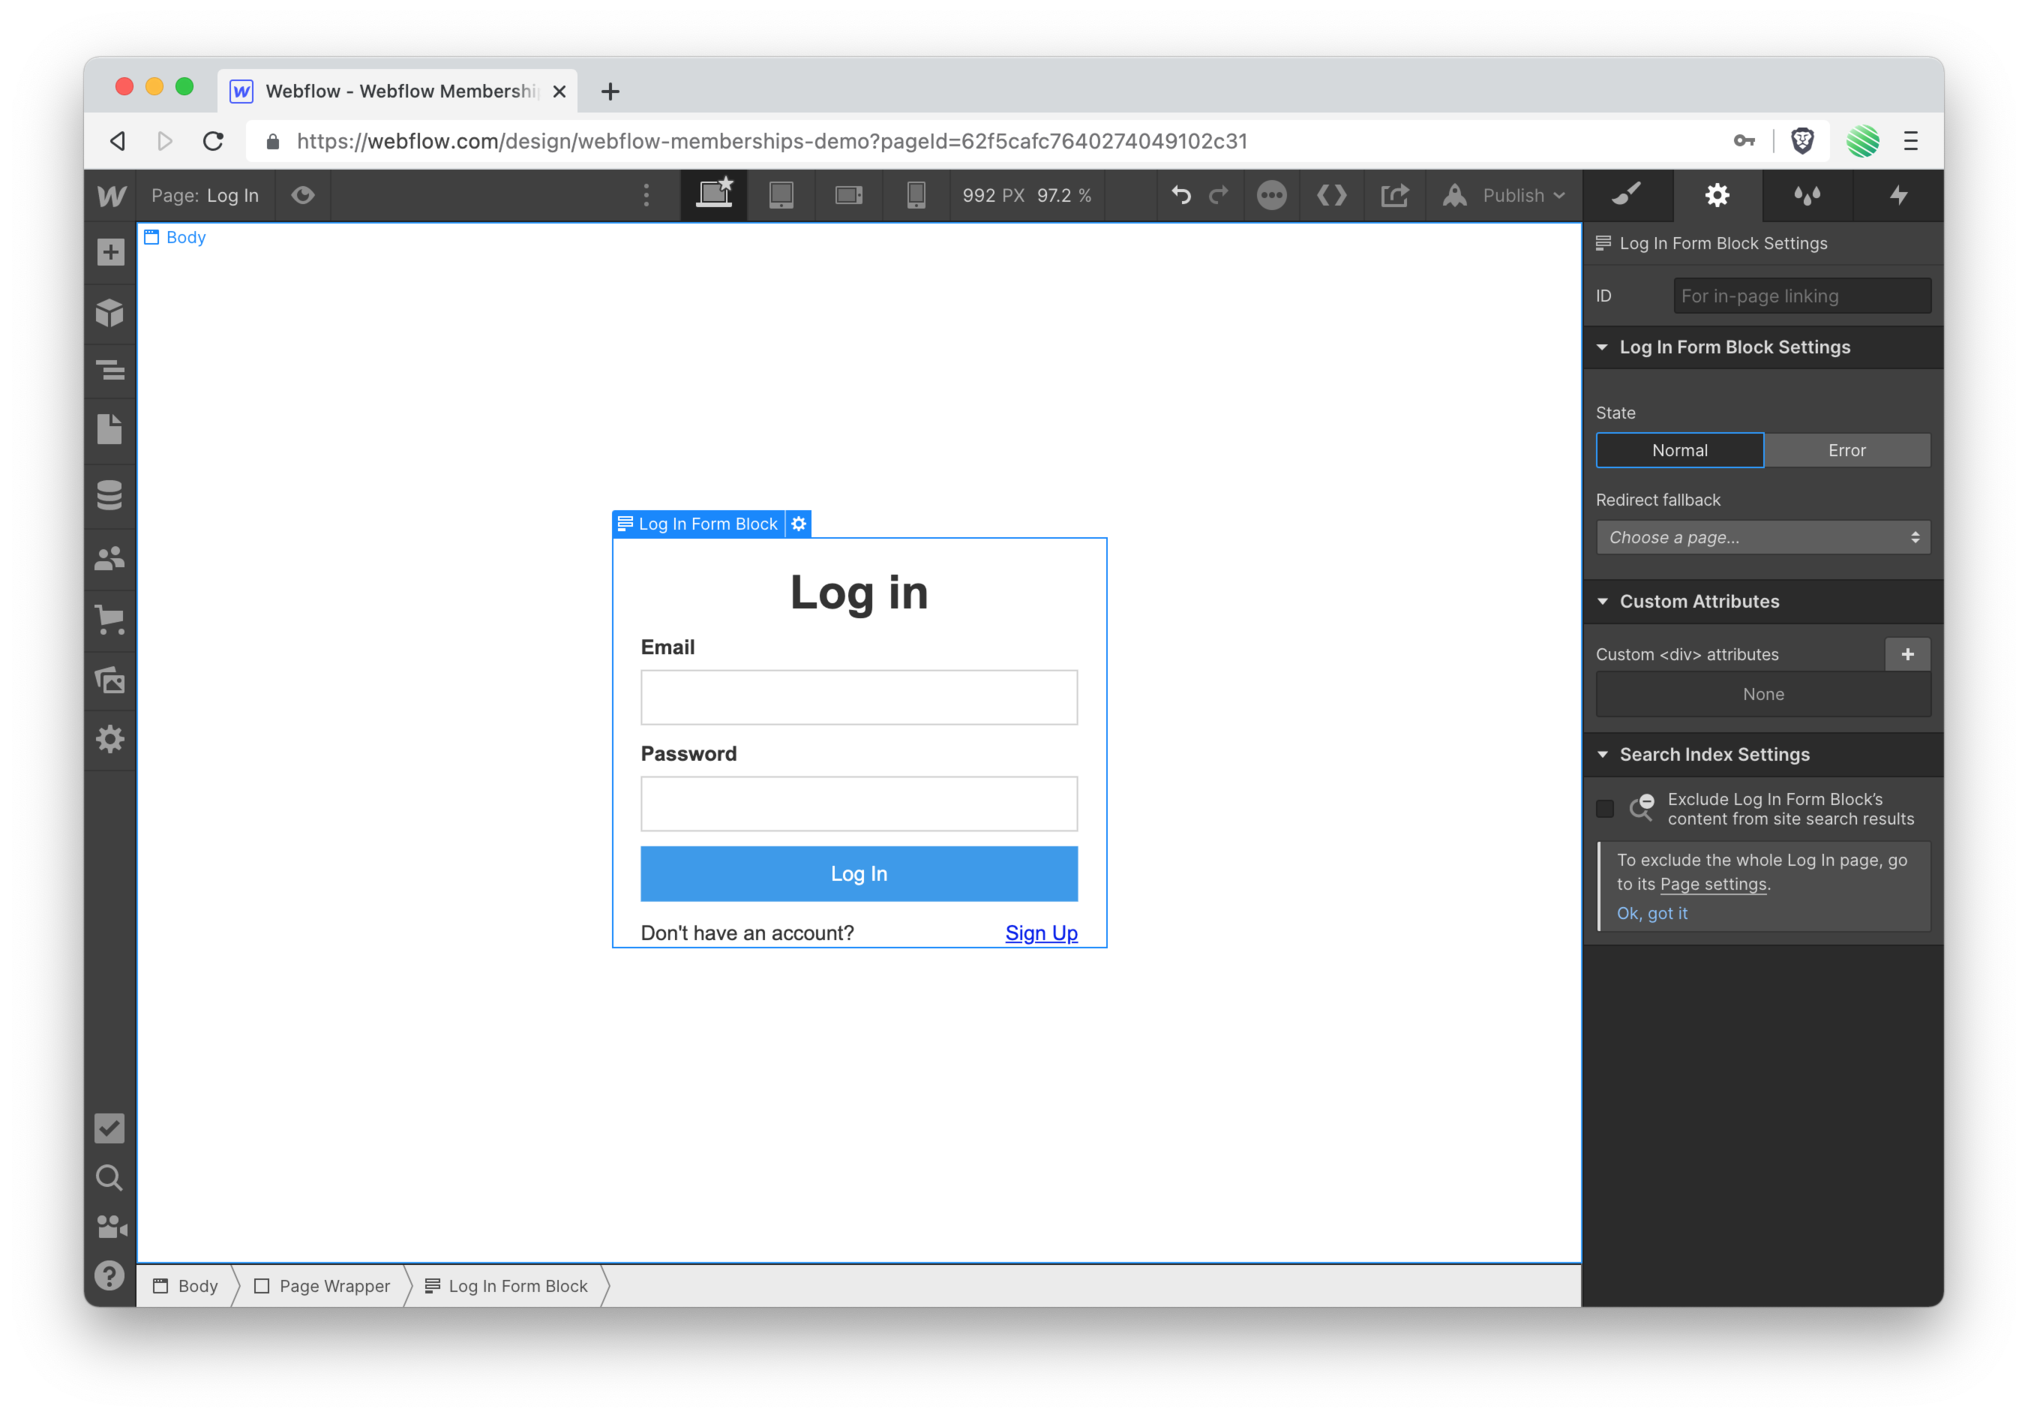 Again, by default this is looking great! If you highlight the login form block you’ll find a new settings page.
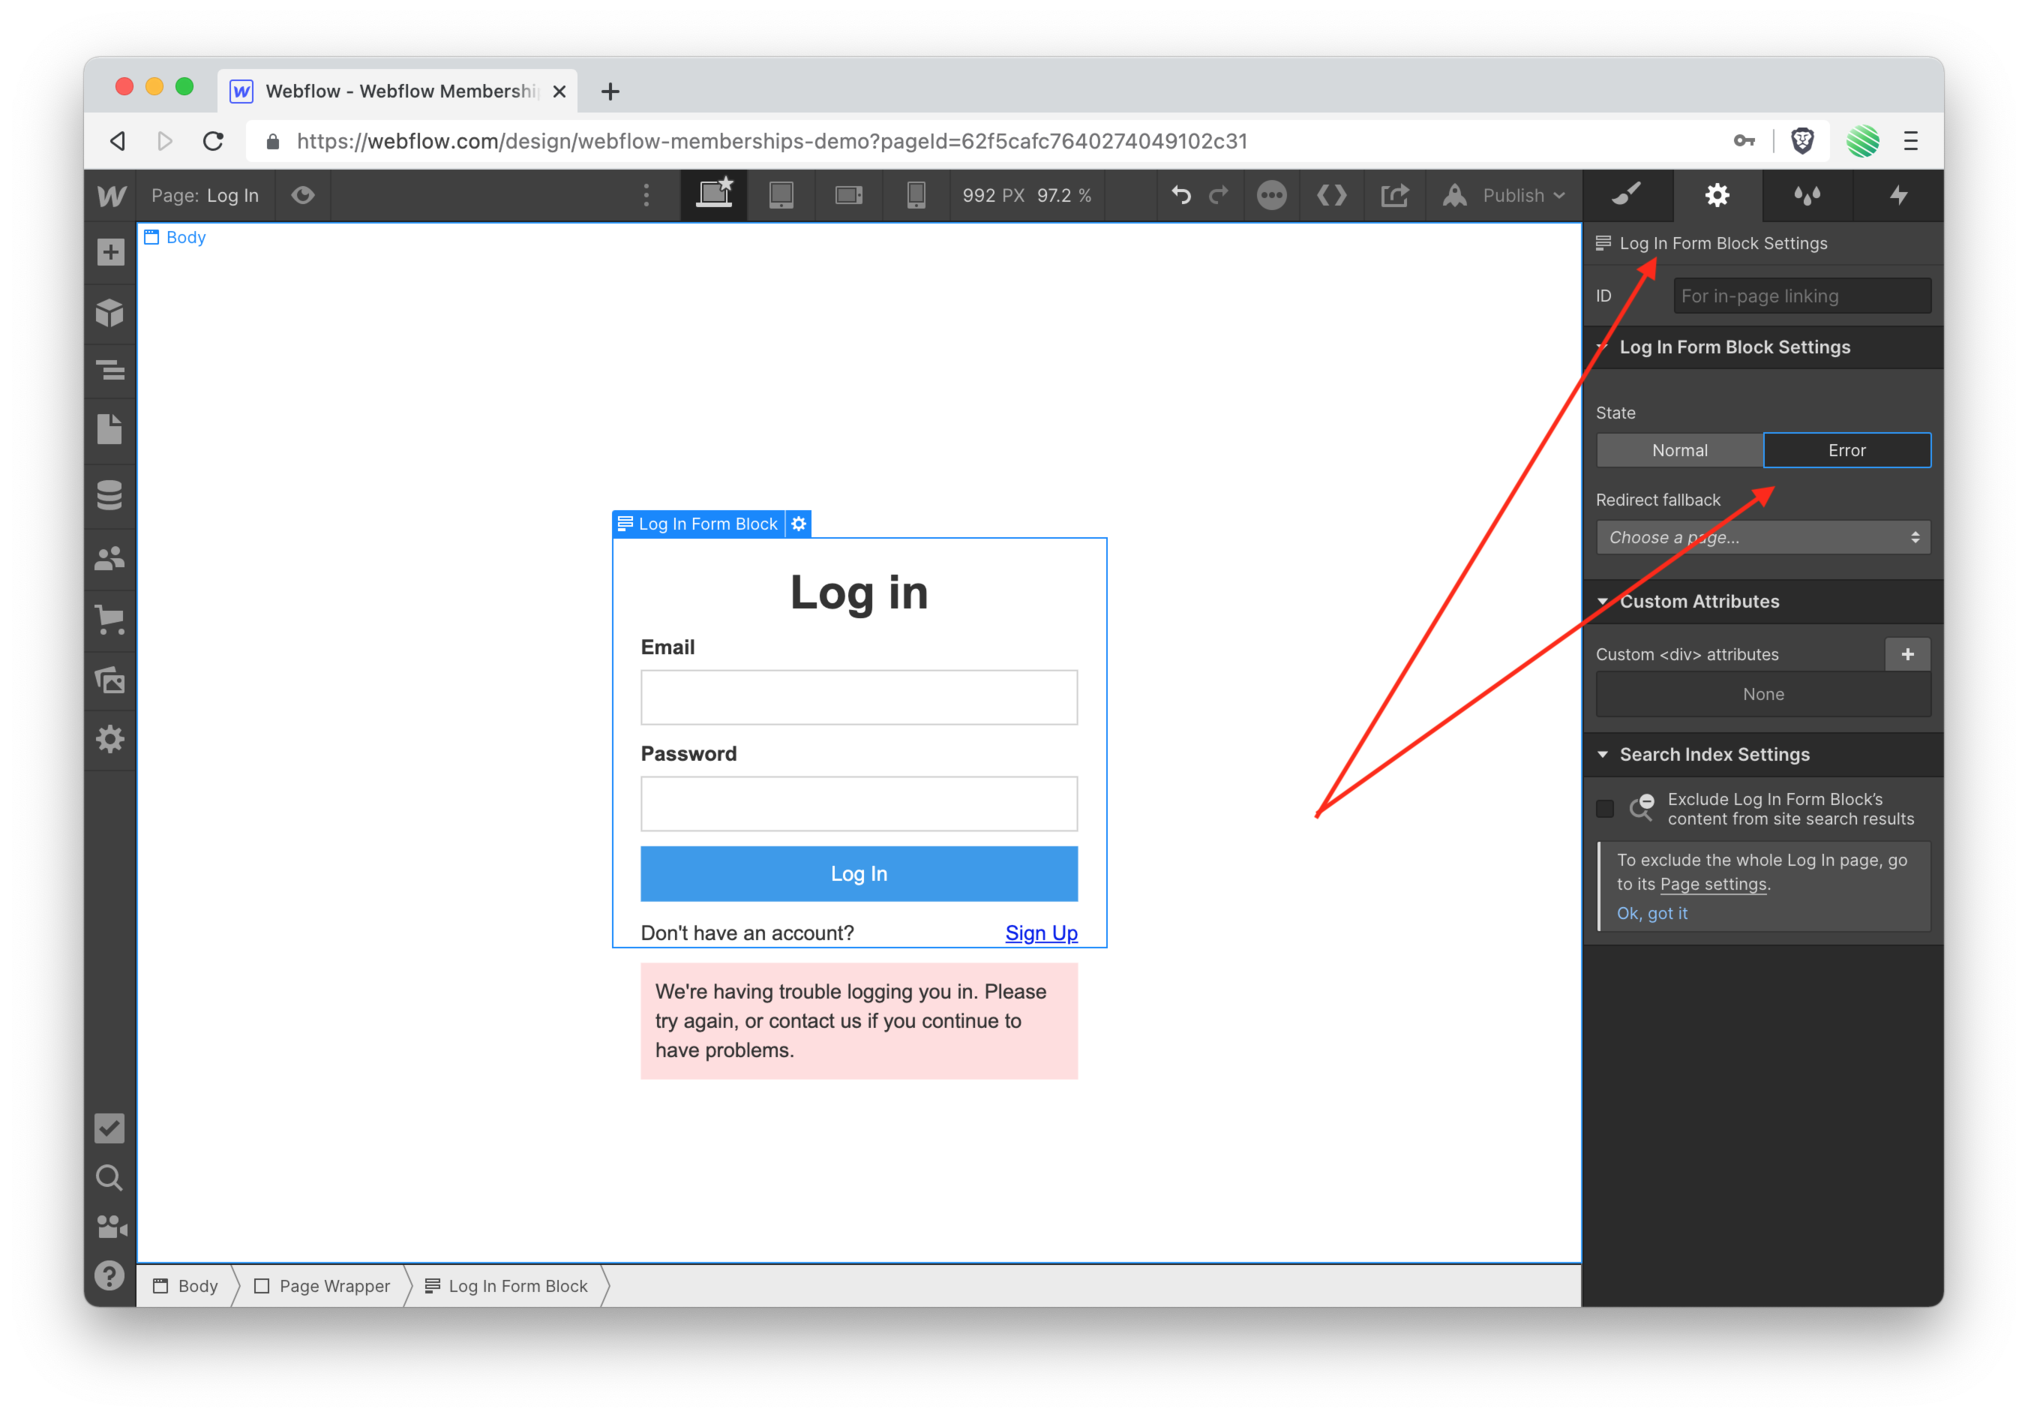 You can toggle between a normal and error state just like you’re used to with native Webflow forms.
 The default is more than good enough and you don’t need to remove anything for this walk through.
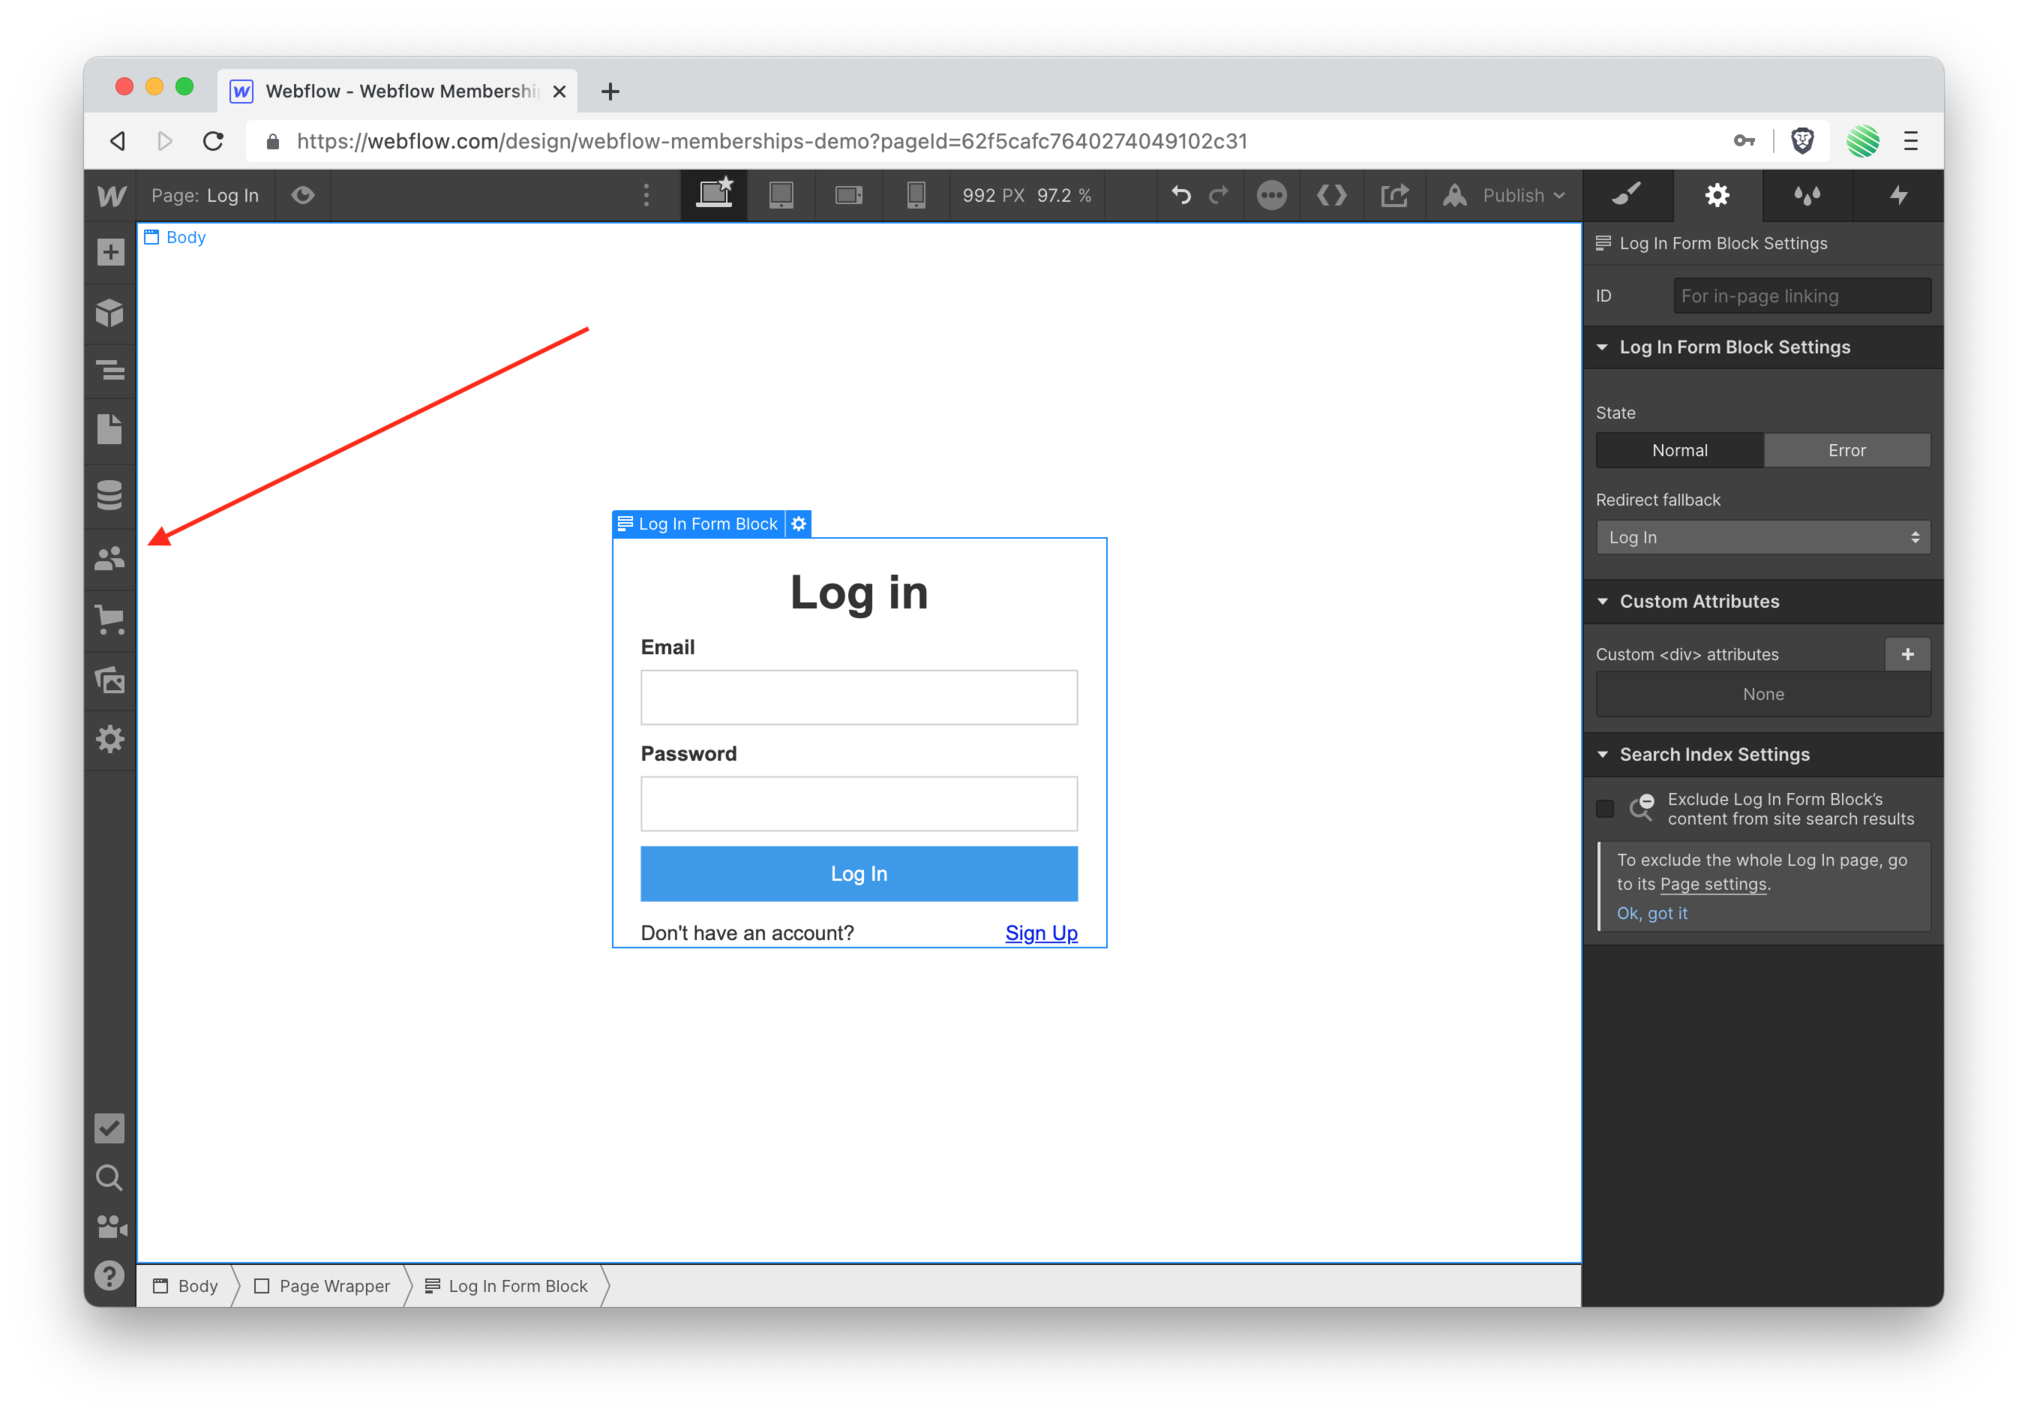
Tap on Users from the left side panel once again.
 Notice you’ve now gone down from 7 to 6 remaining setup steps.
Design the User Account page
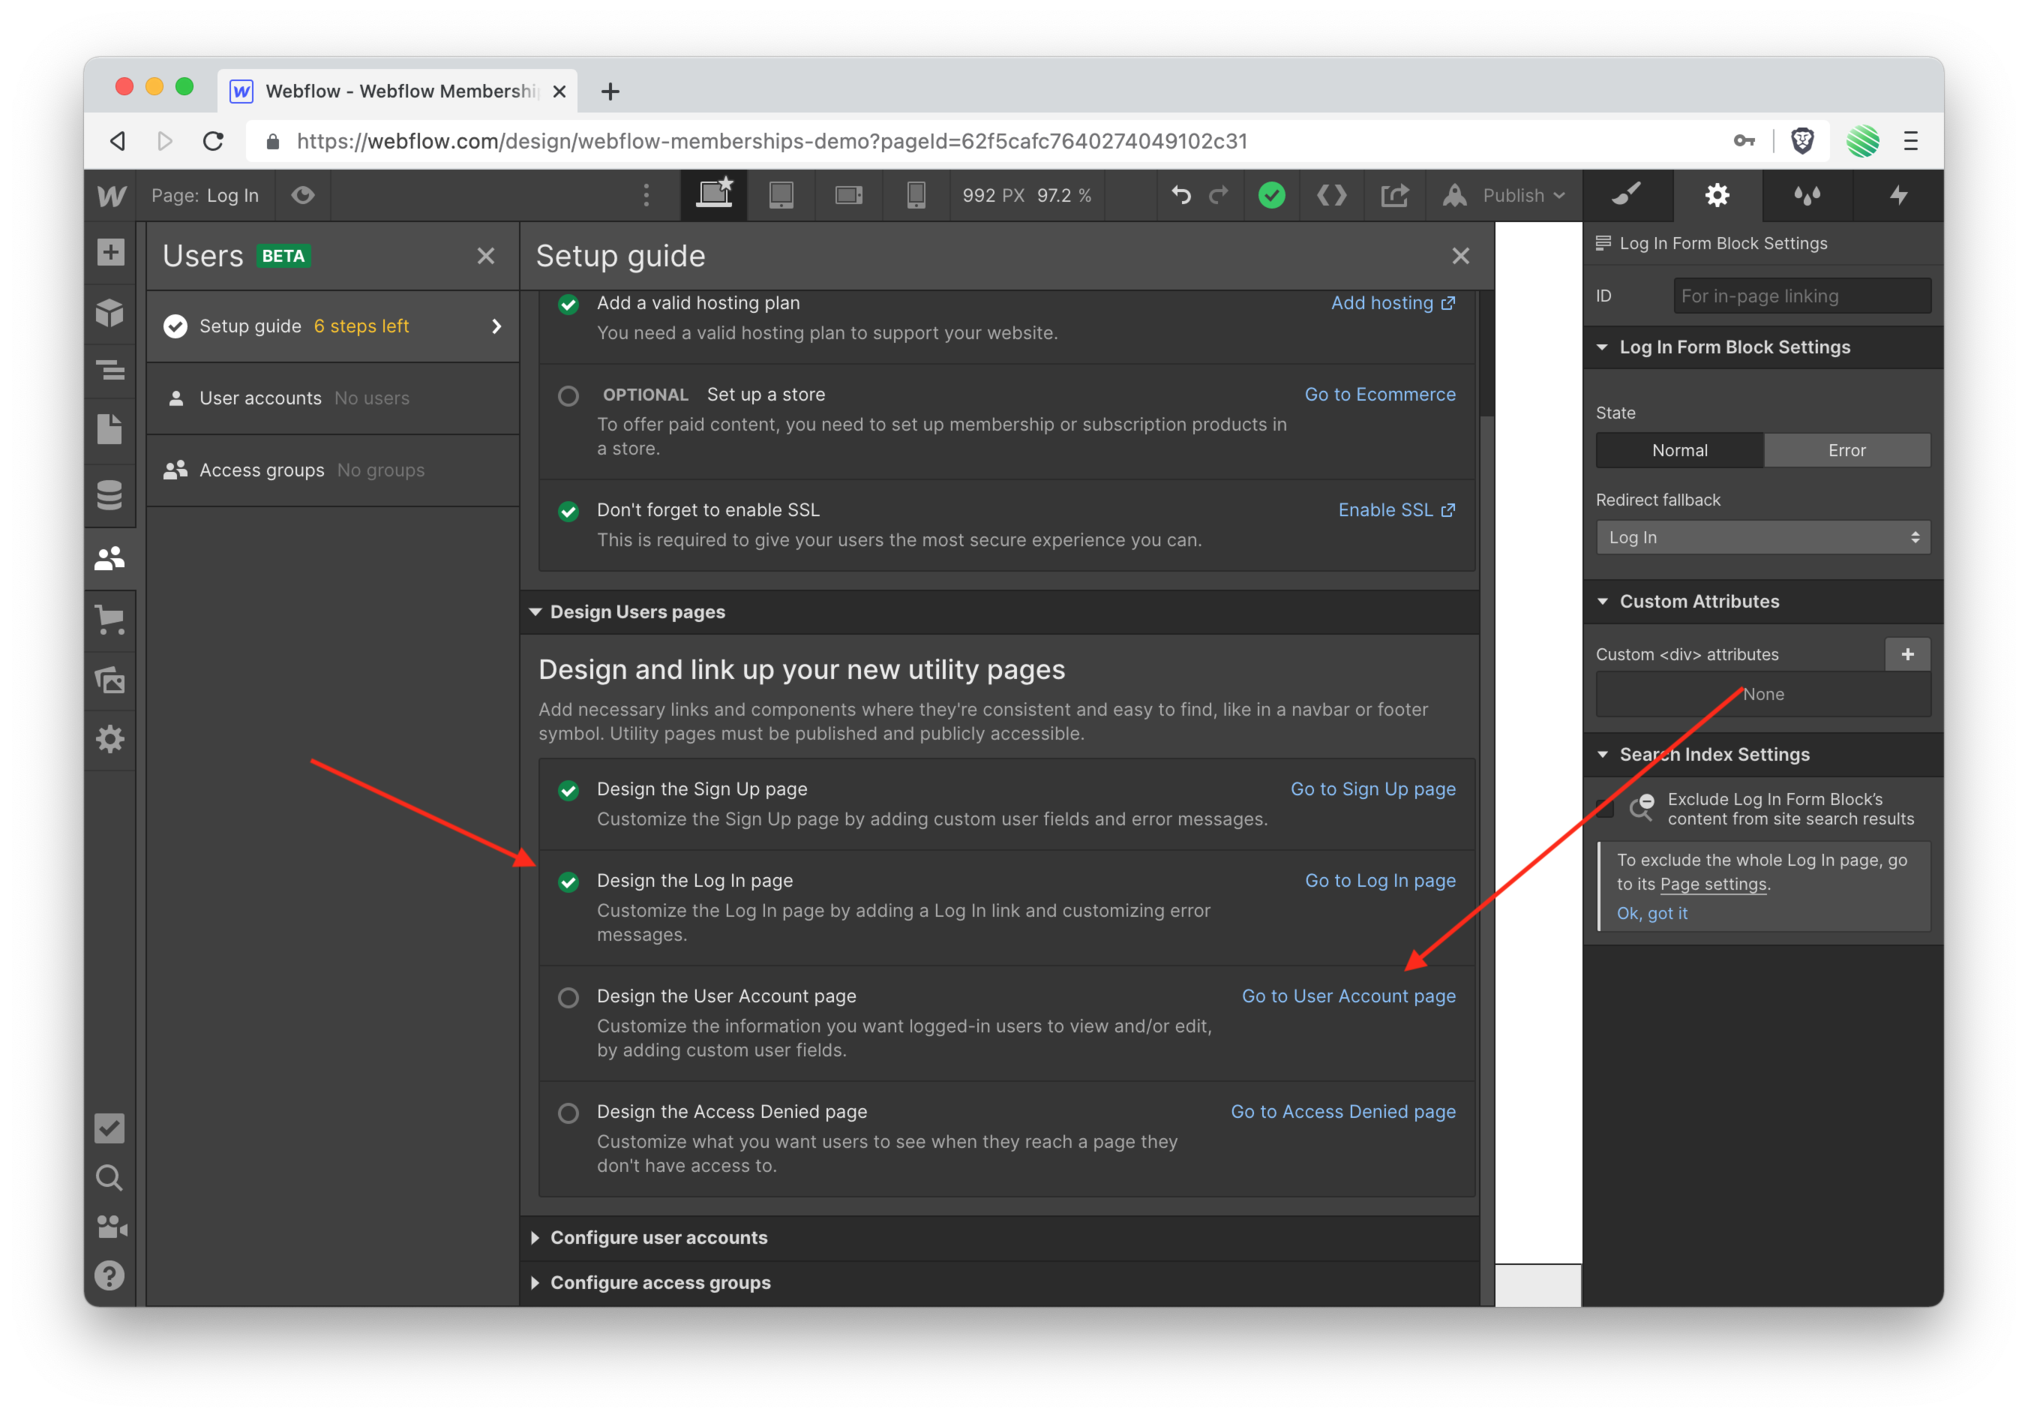 Clicking into the setup guide it's time to design the user account page.
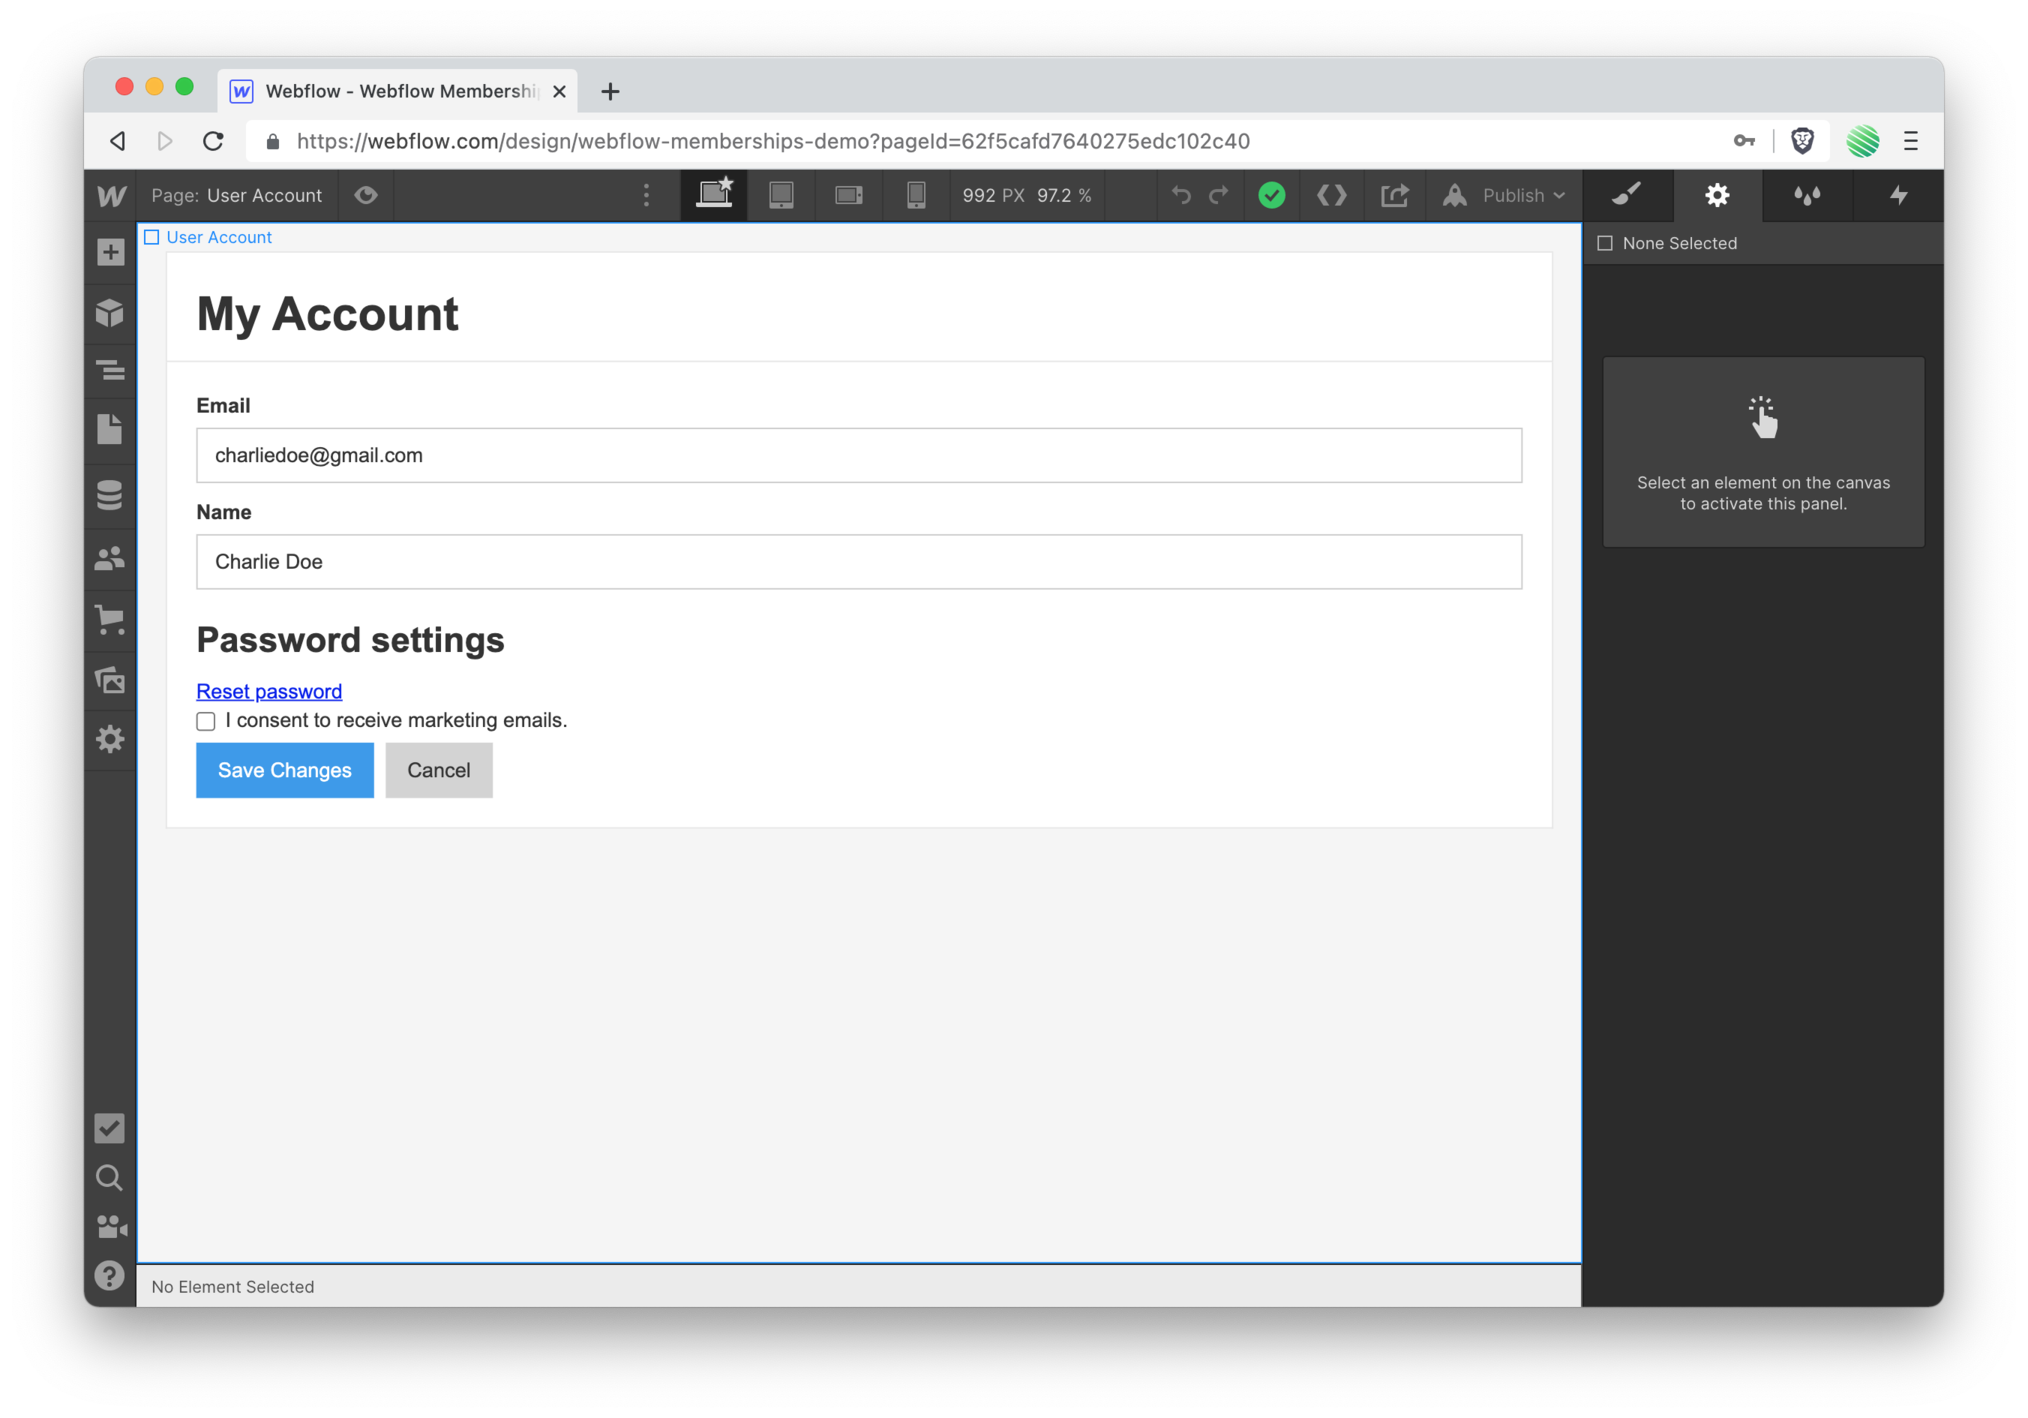 Dang, that's looking great out-of-the-box too!
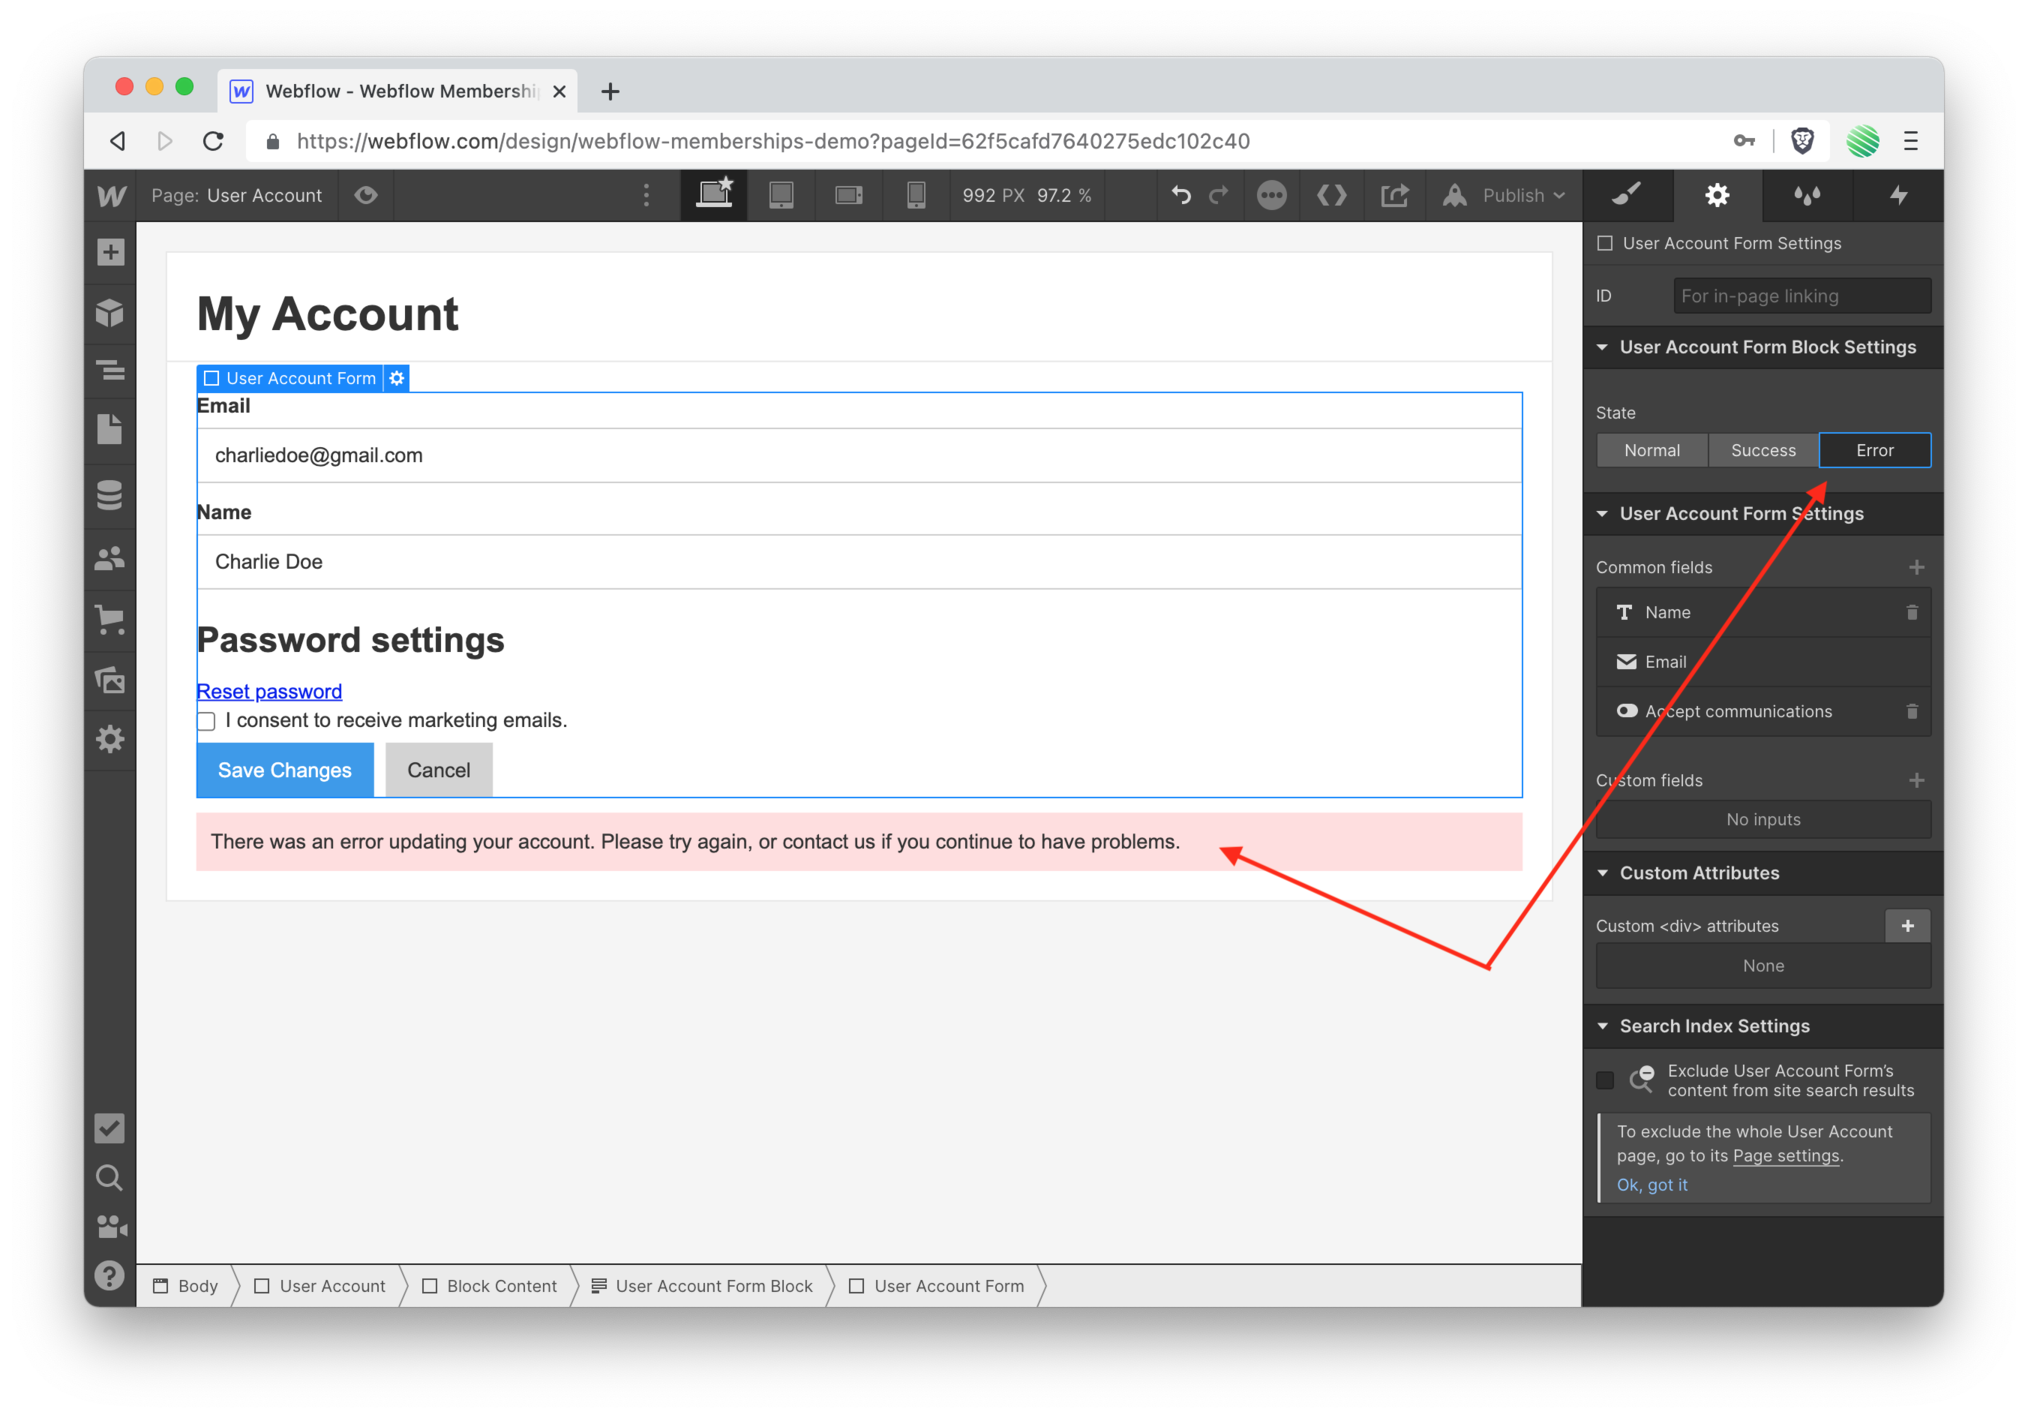
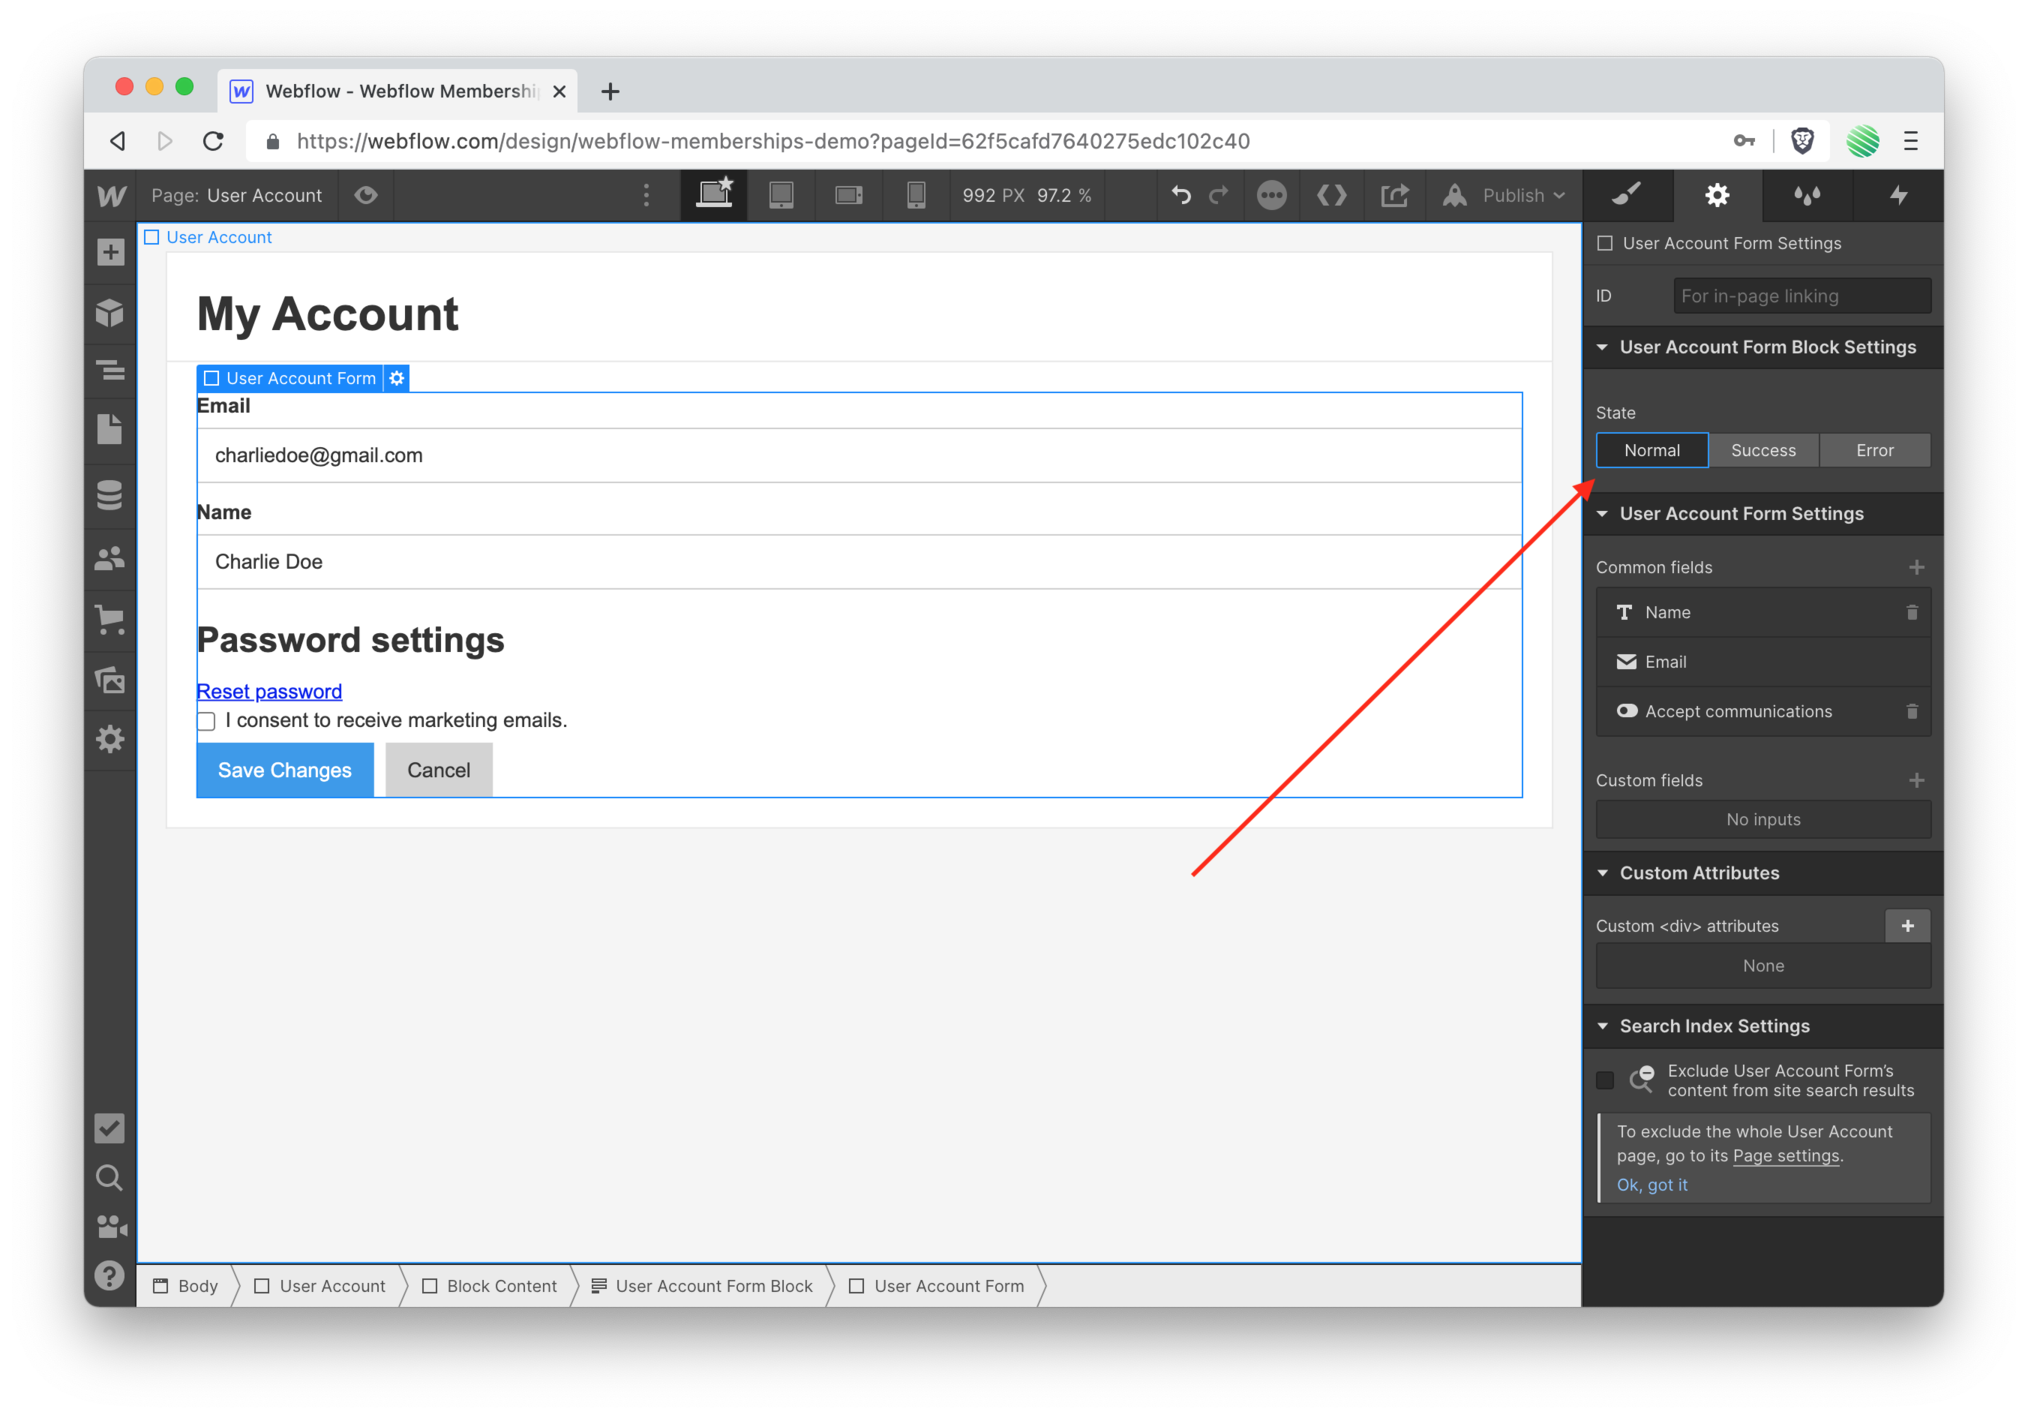 Just as with any native Webflow form you have the ability to toggle the forms state within it's settings pane.

 It's all looking really nice. But let's make a quick adjustment. That success message is a tad bit hidden. Let's give a little highlight so it pops for the user.
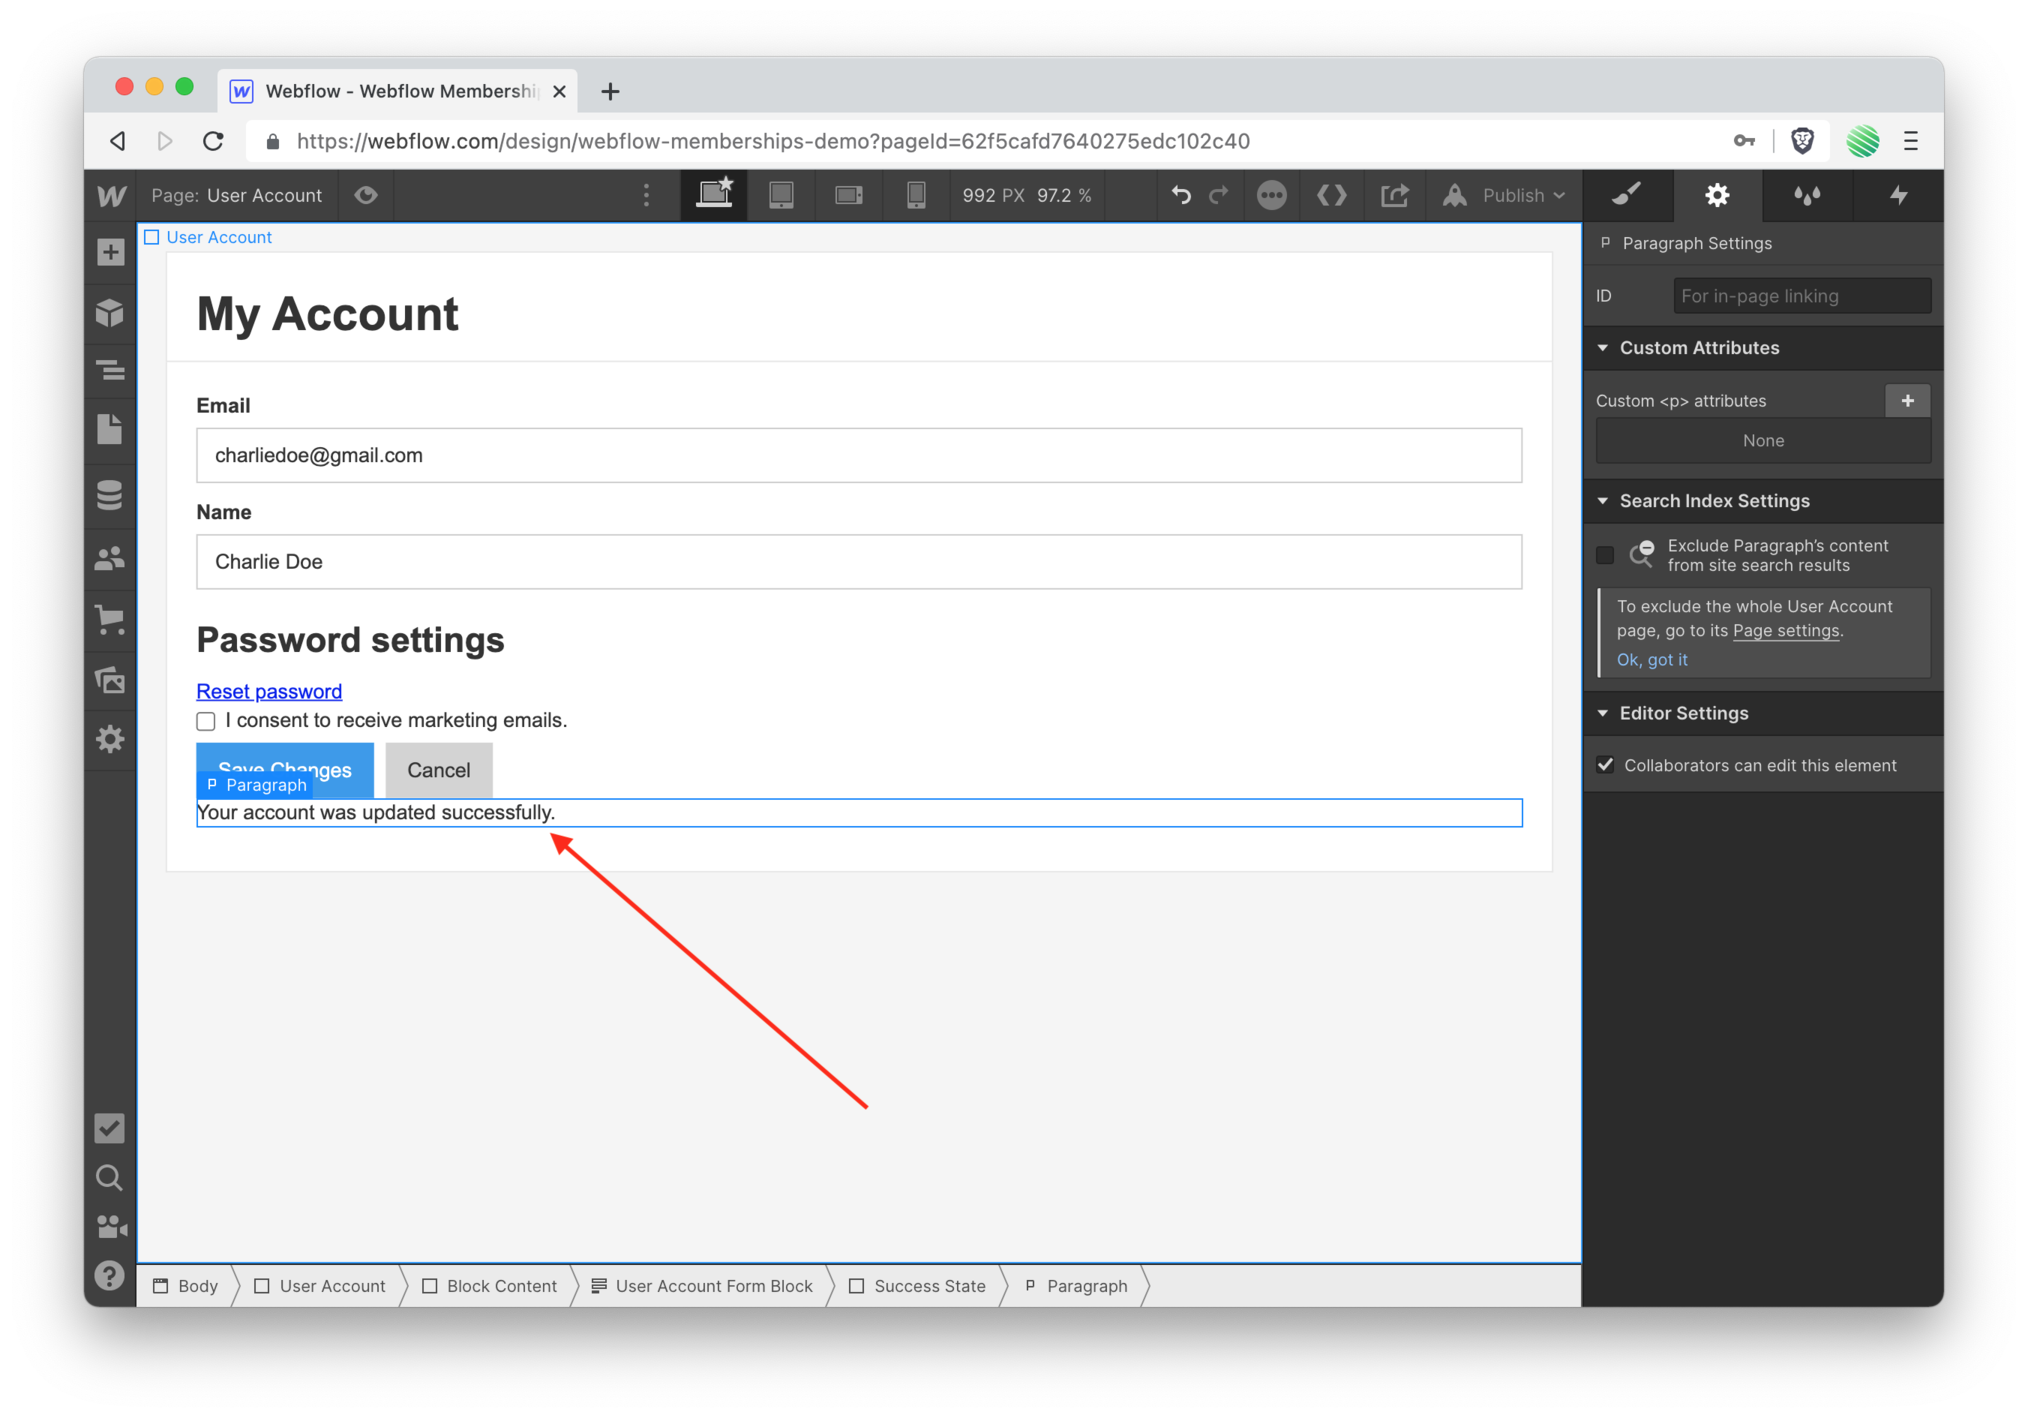 Selecting that element...
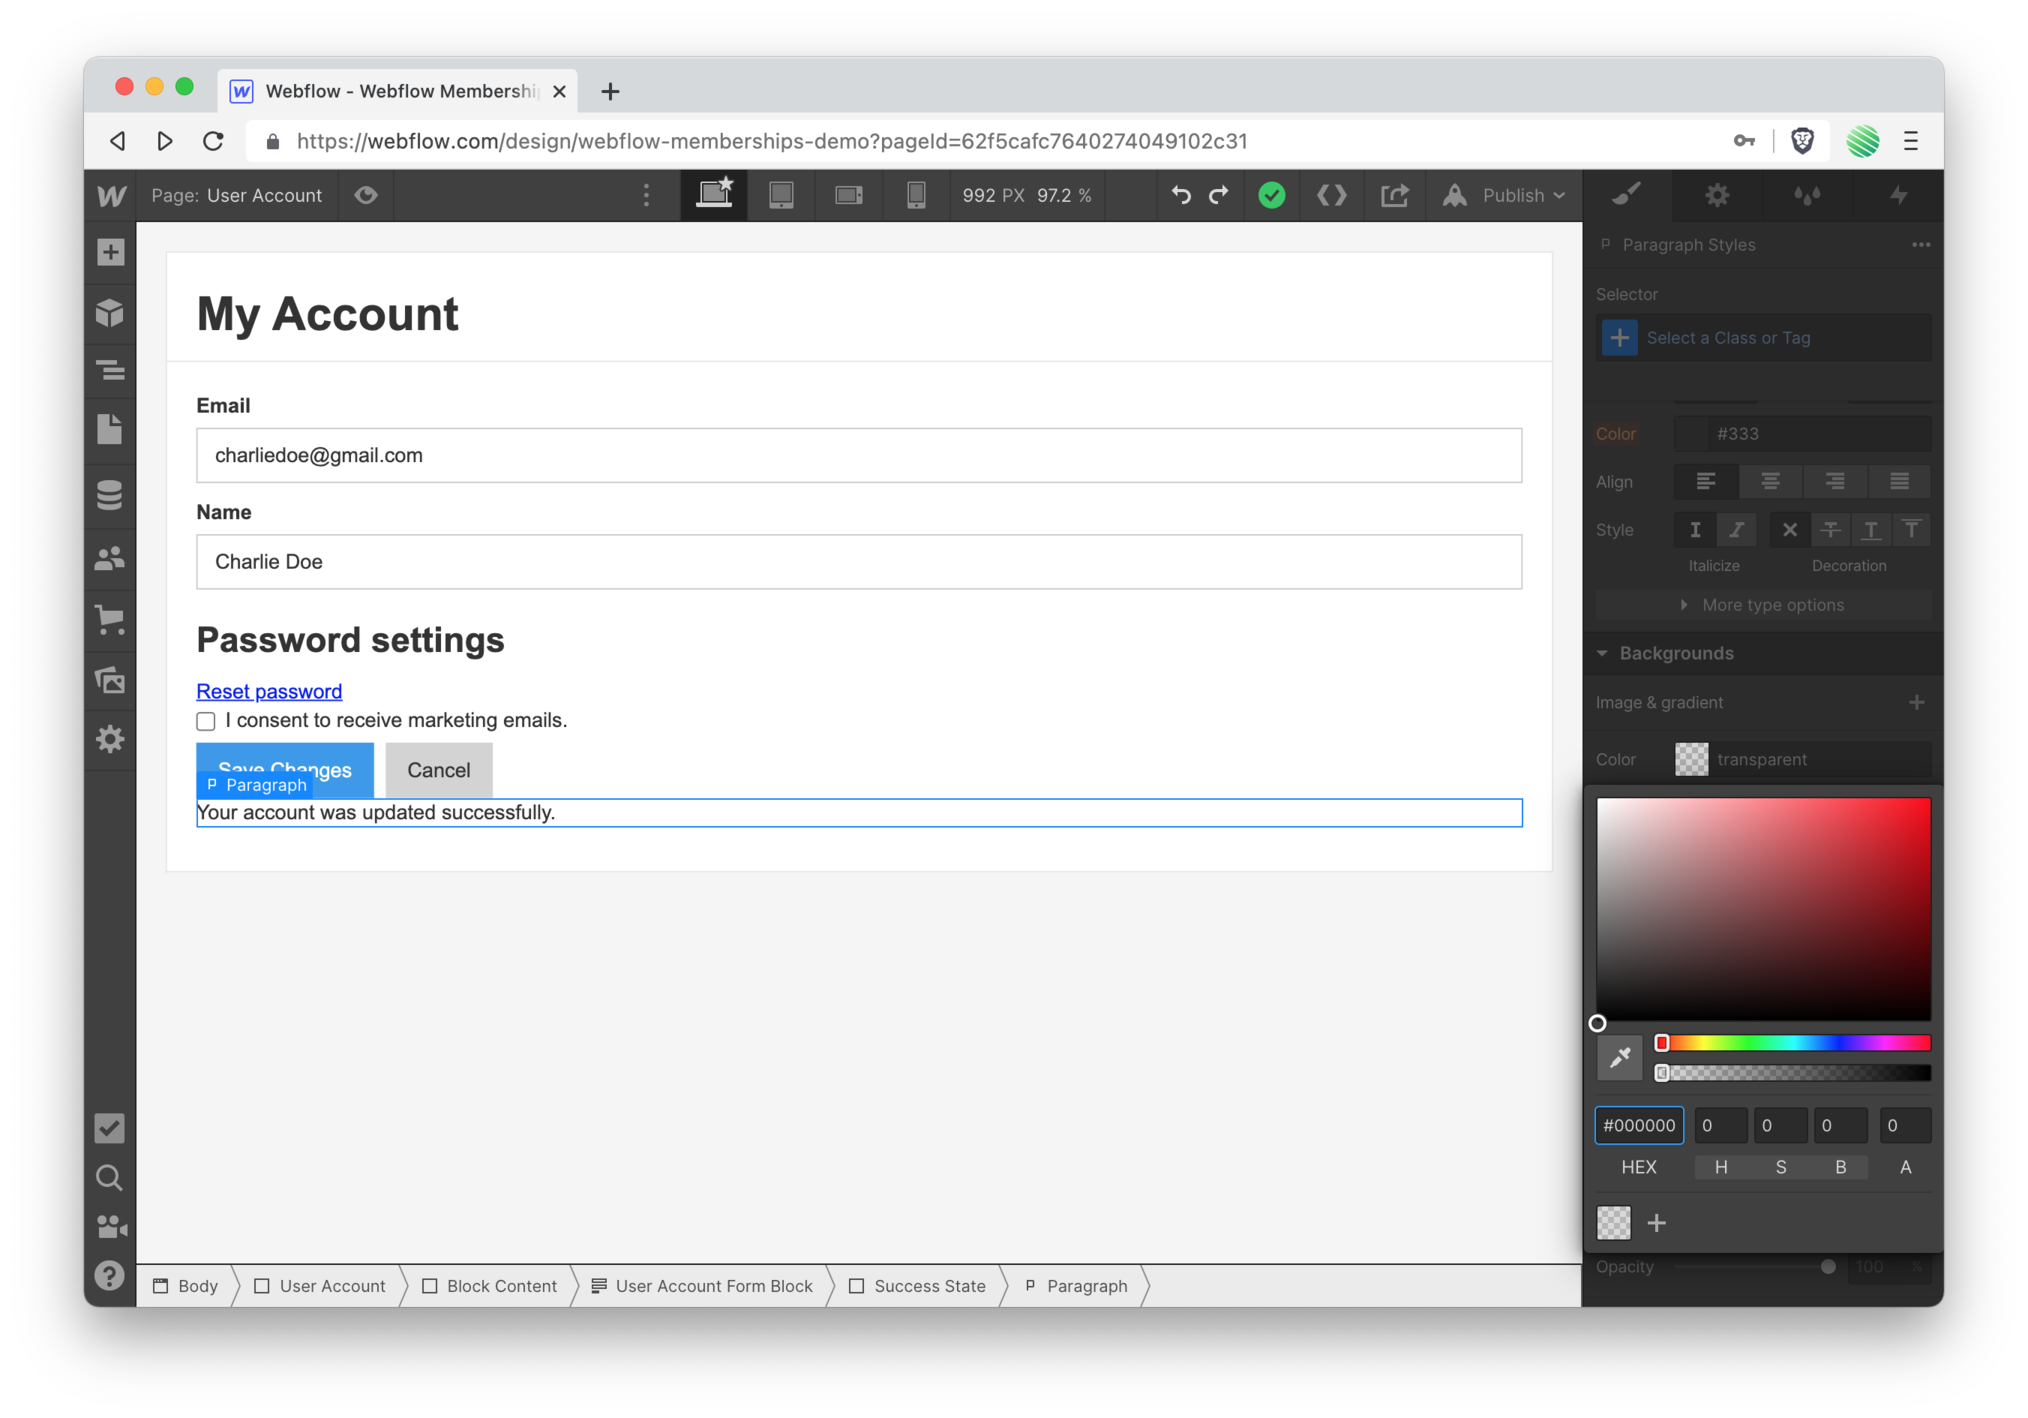 ...and you can make adjustments to it in the Designer like you always have for any Webflow element.
Simple!
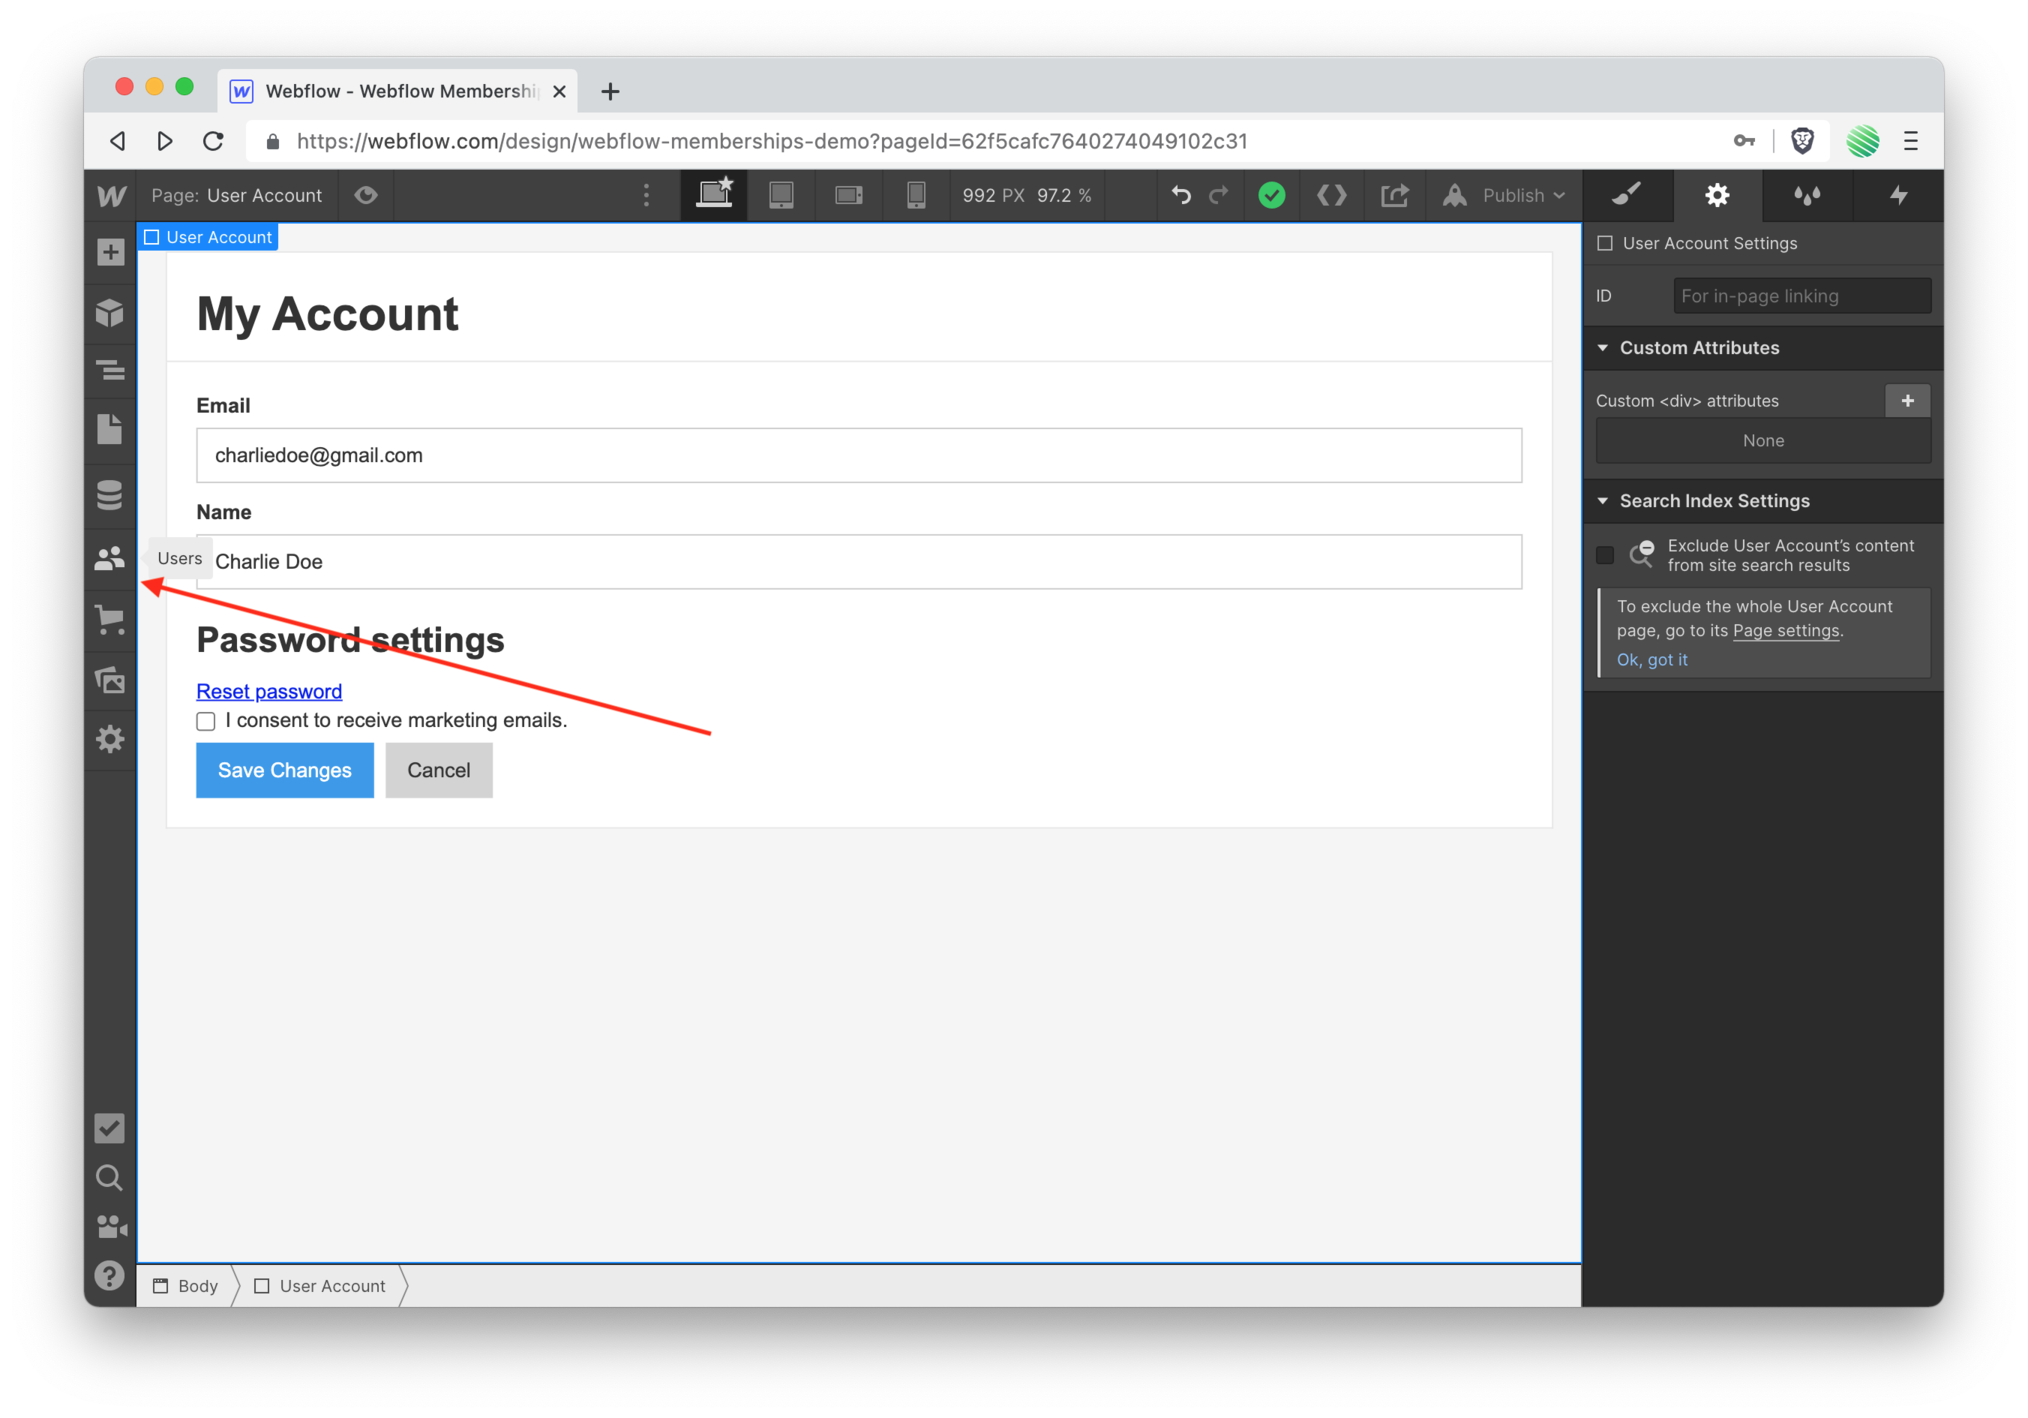 Once you’re done, flip back Users on the left side panel.
 You are down from 6 to 5 tasks remaining 👍
Design the Access Denied page
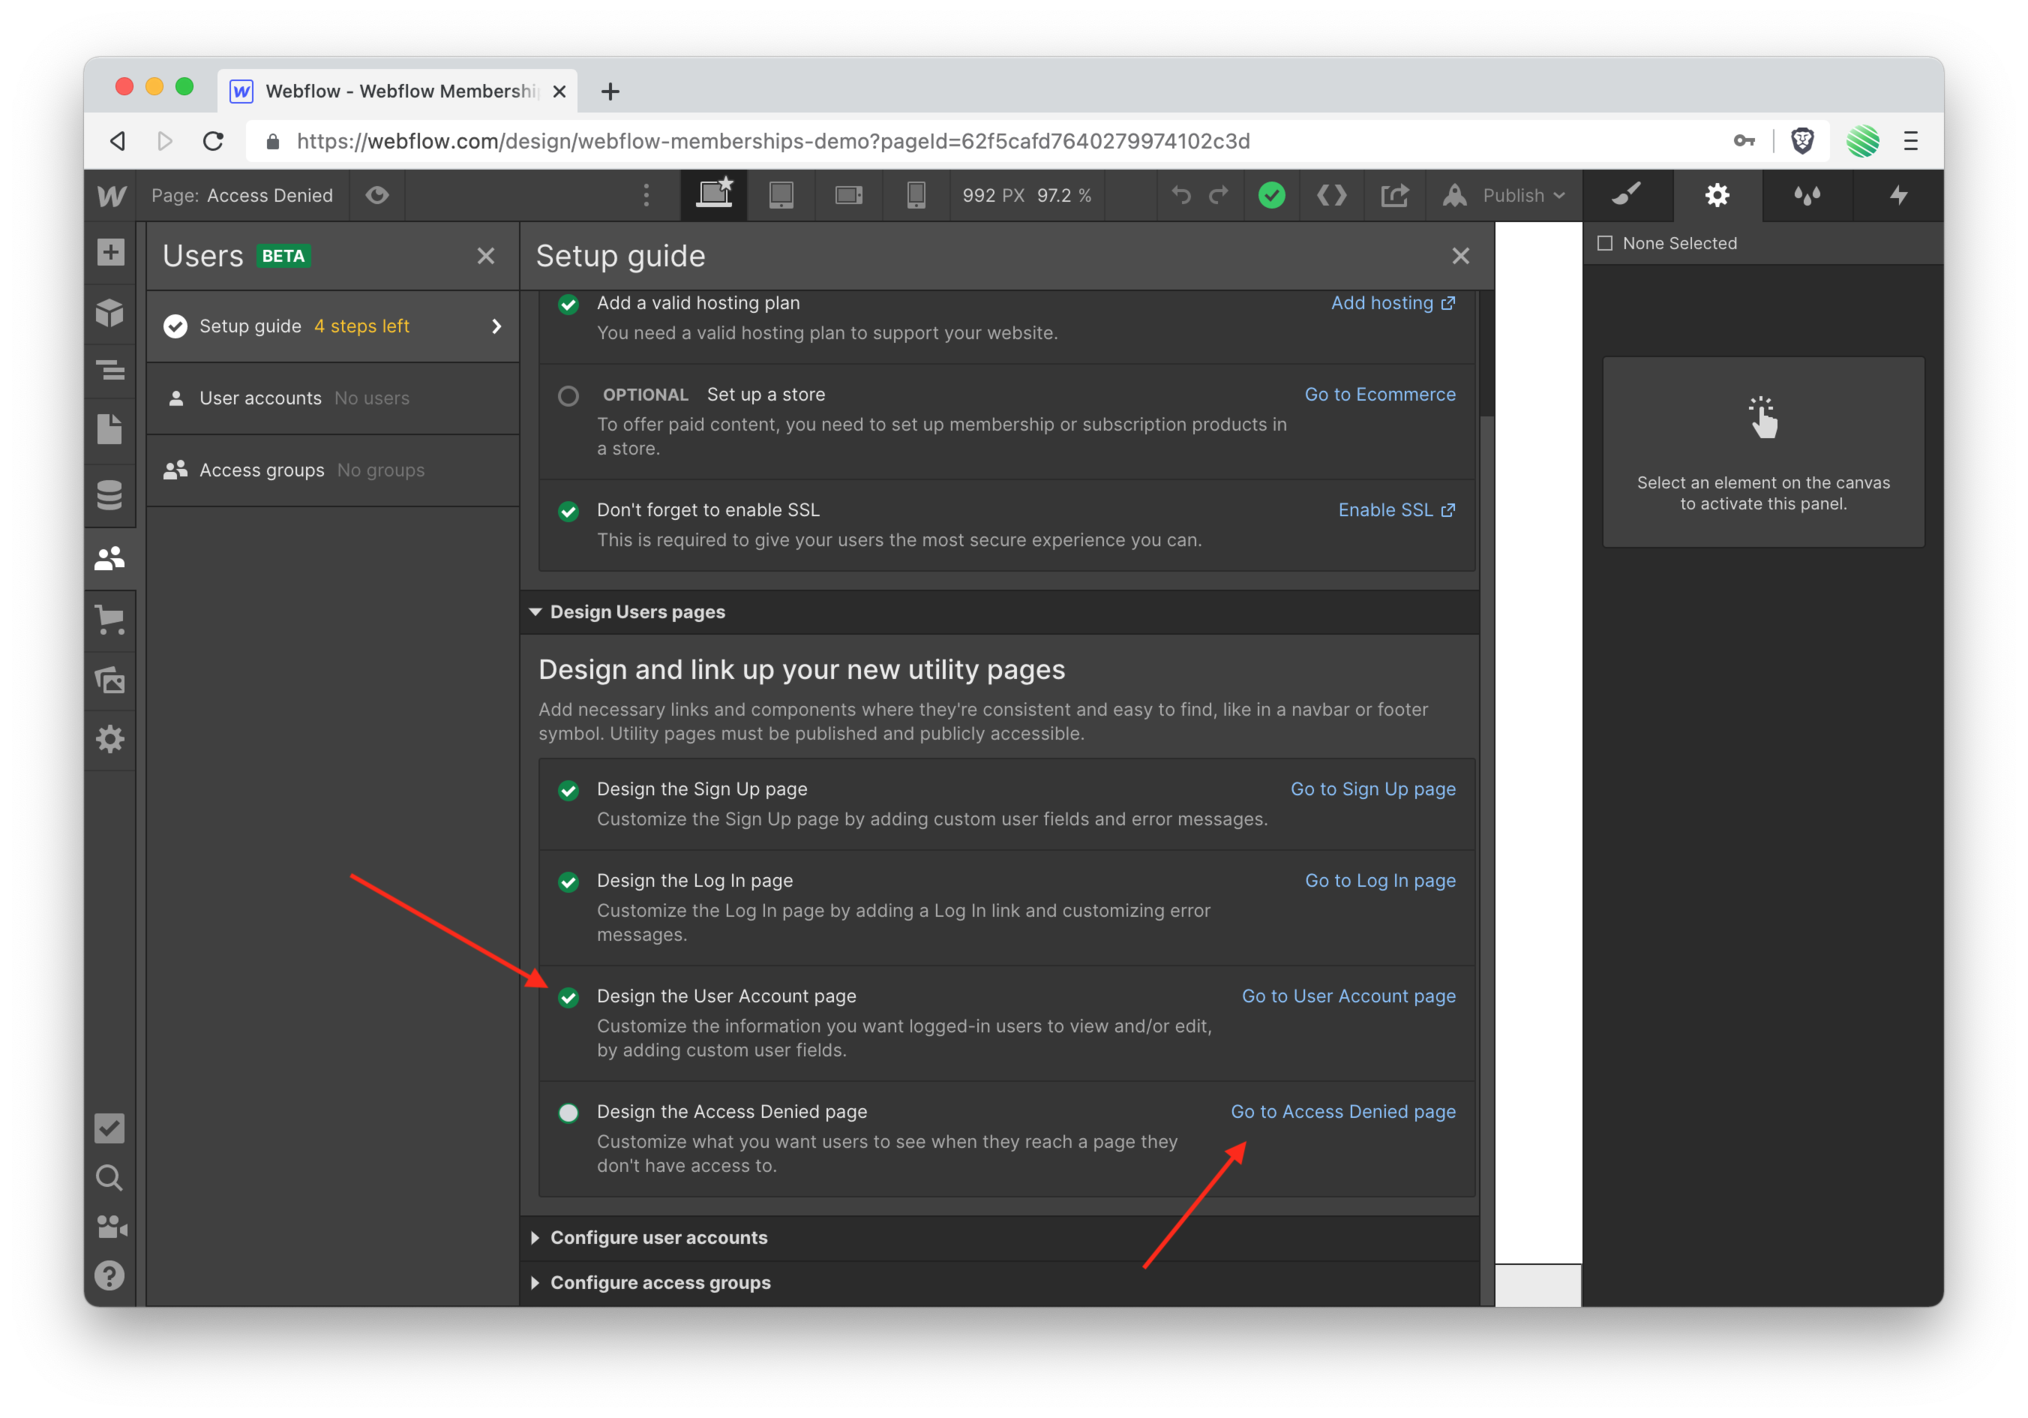 Time to design the access denied page.
 This is an interesting page that you'll go through right now, but you won't be using it for this walk through specifically.
For this walk through, if a non-logged User attempts to access gated content, you’ll be redirecting them to the login page instead.
That said, this access denied page does have its uses.
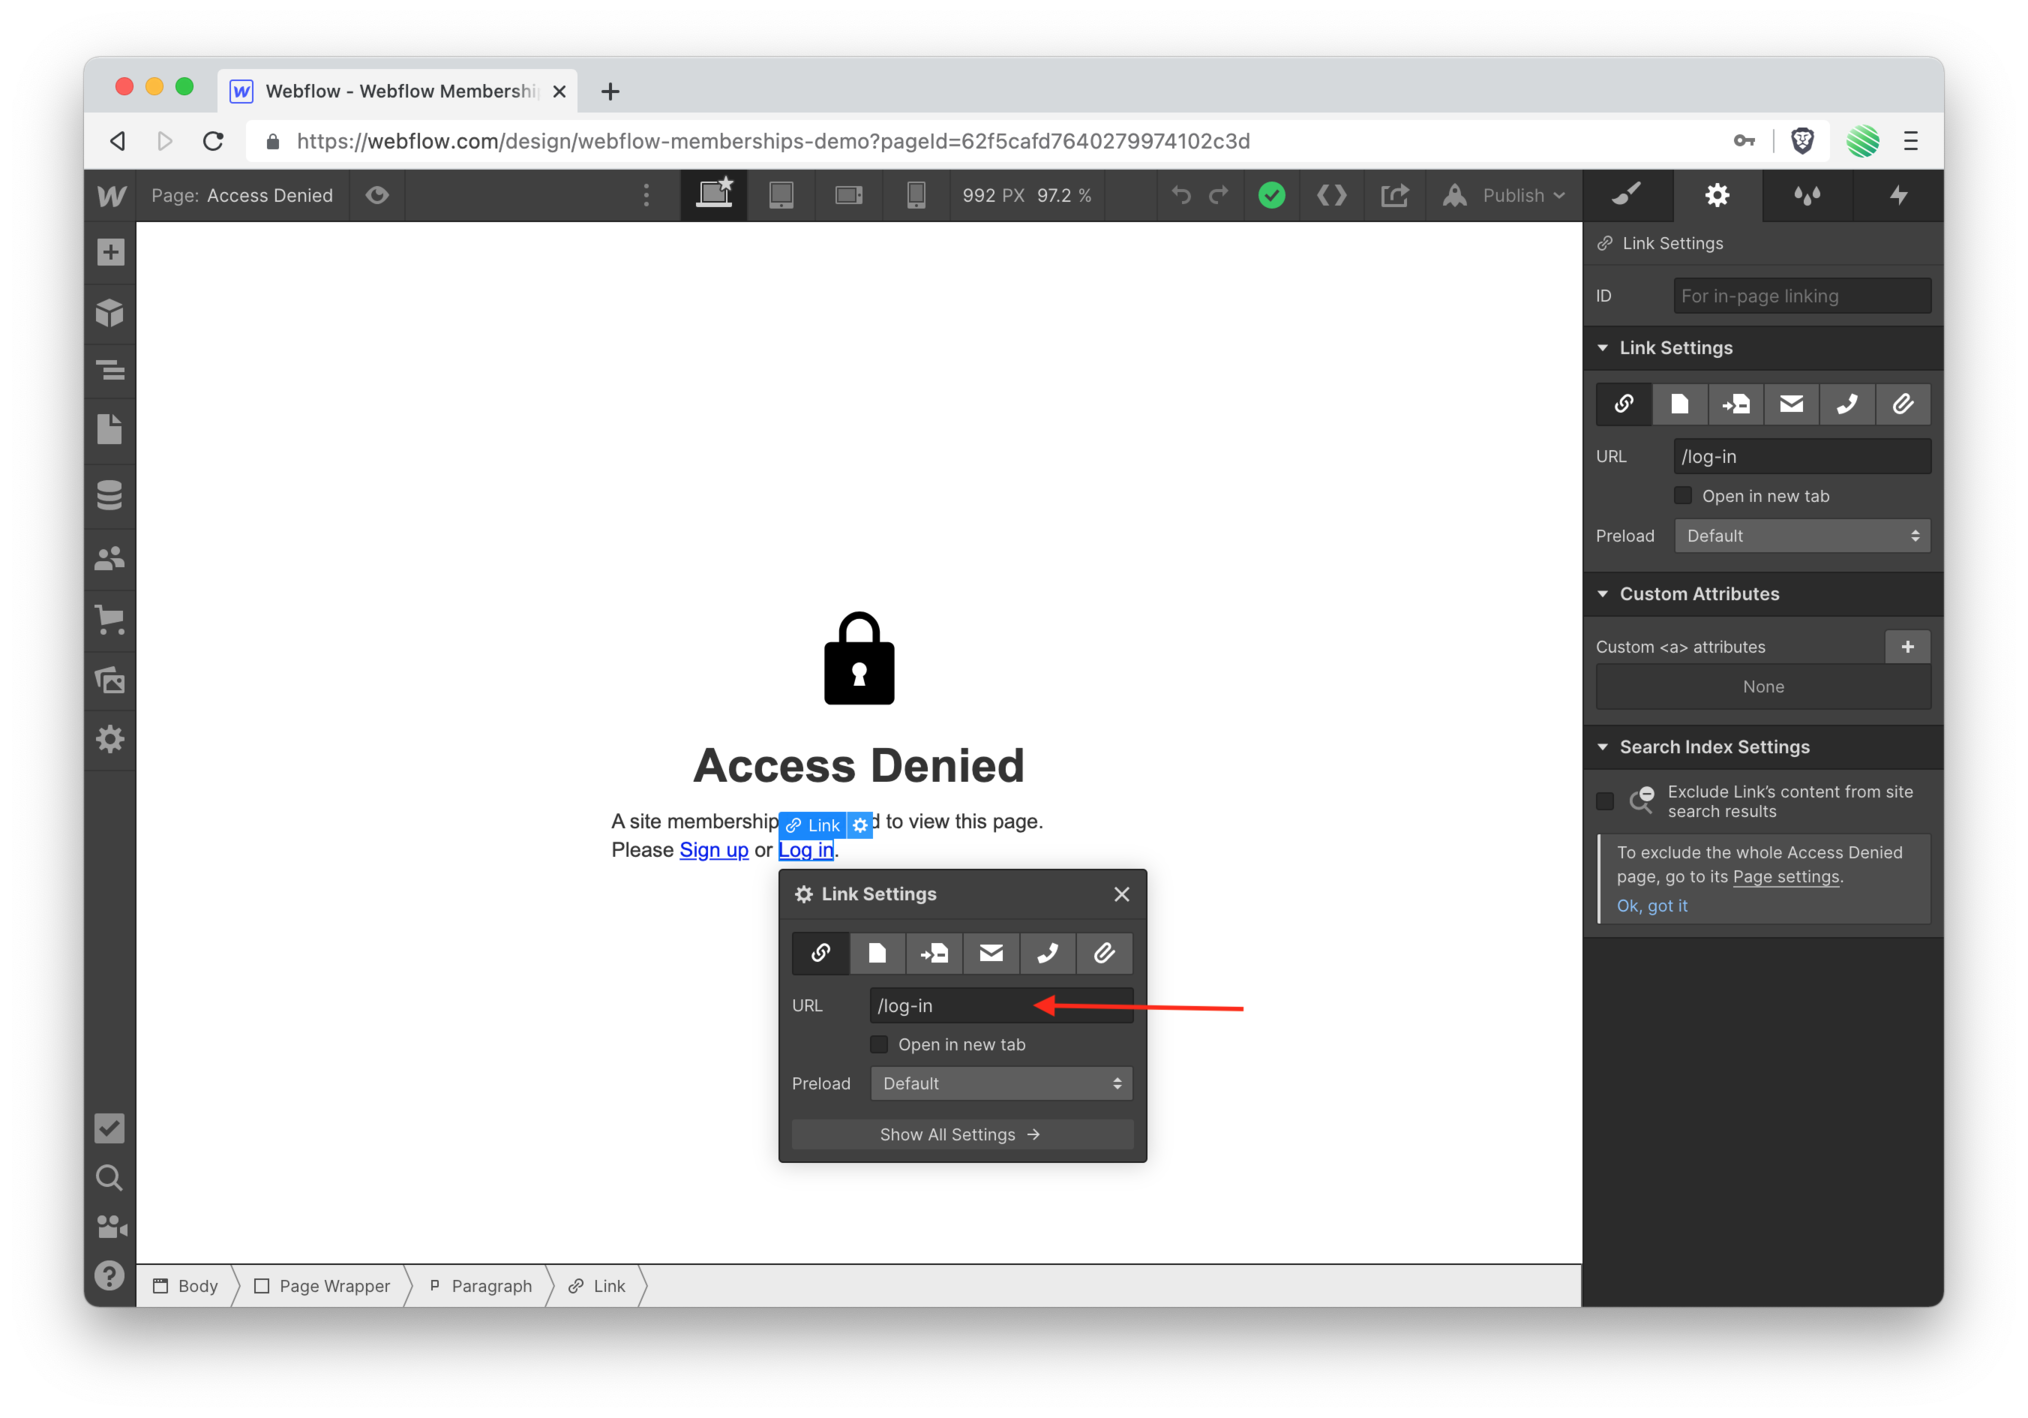
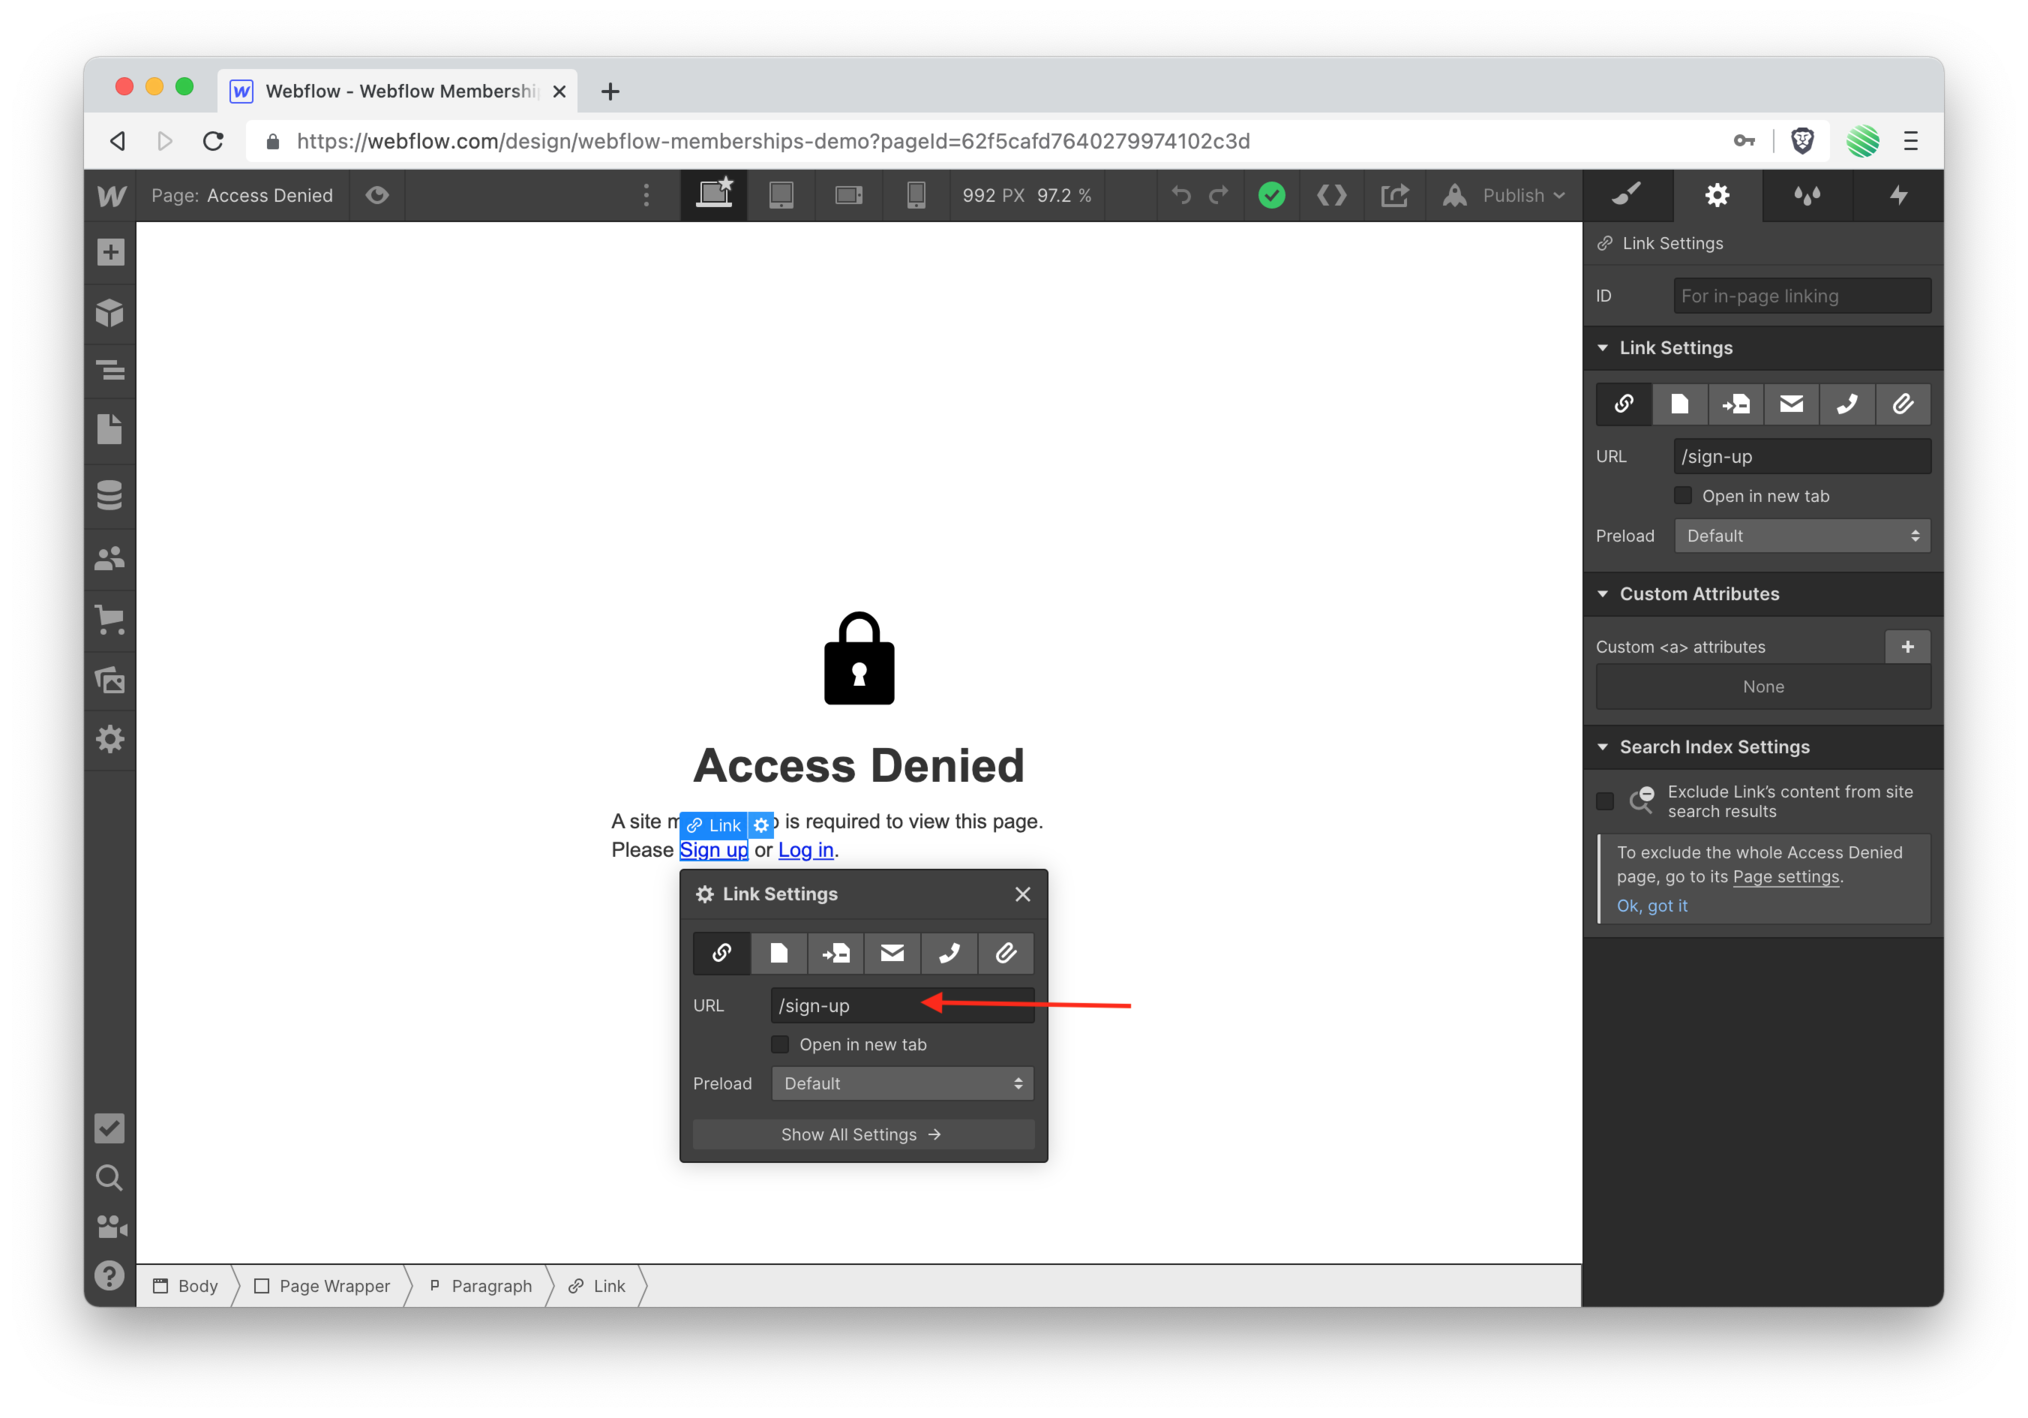 It’s nice that the default has all the links we need included.
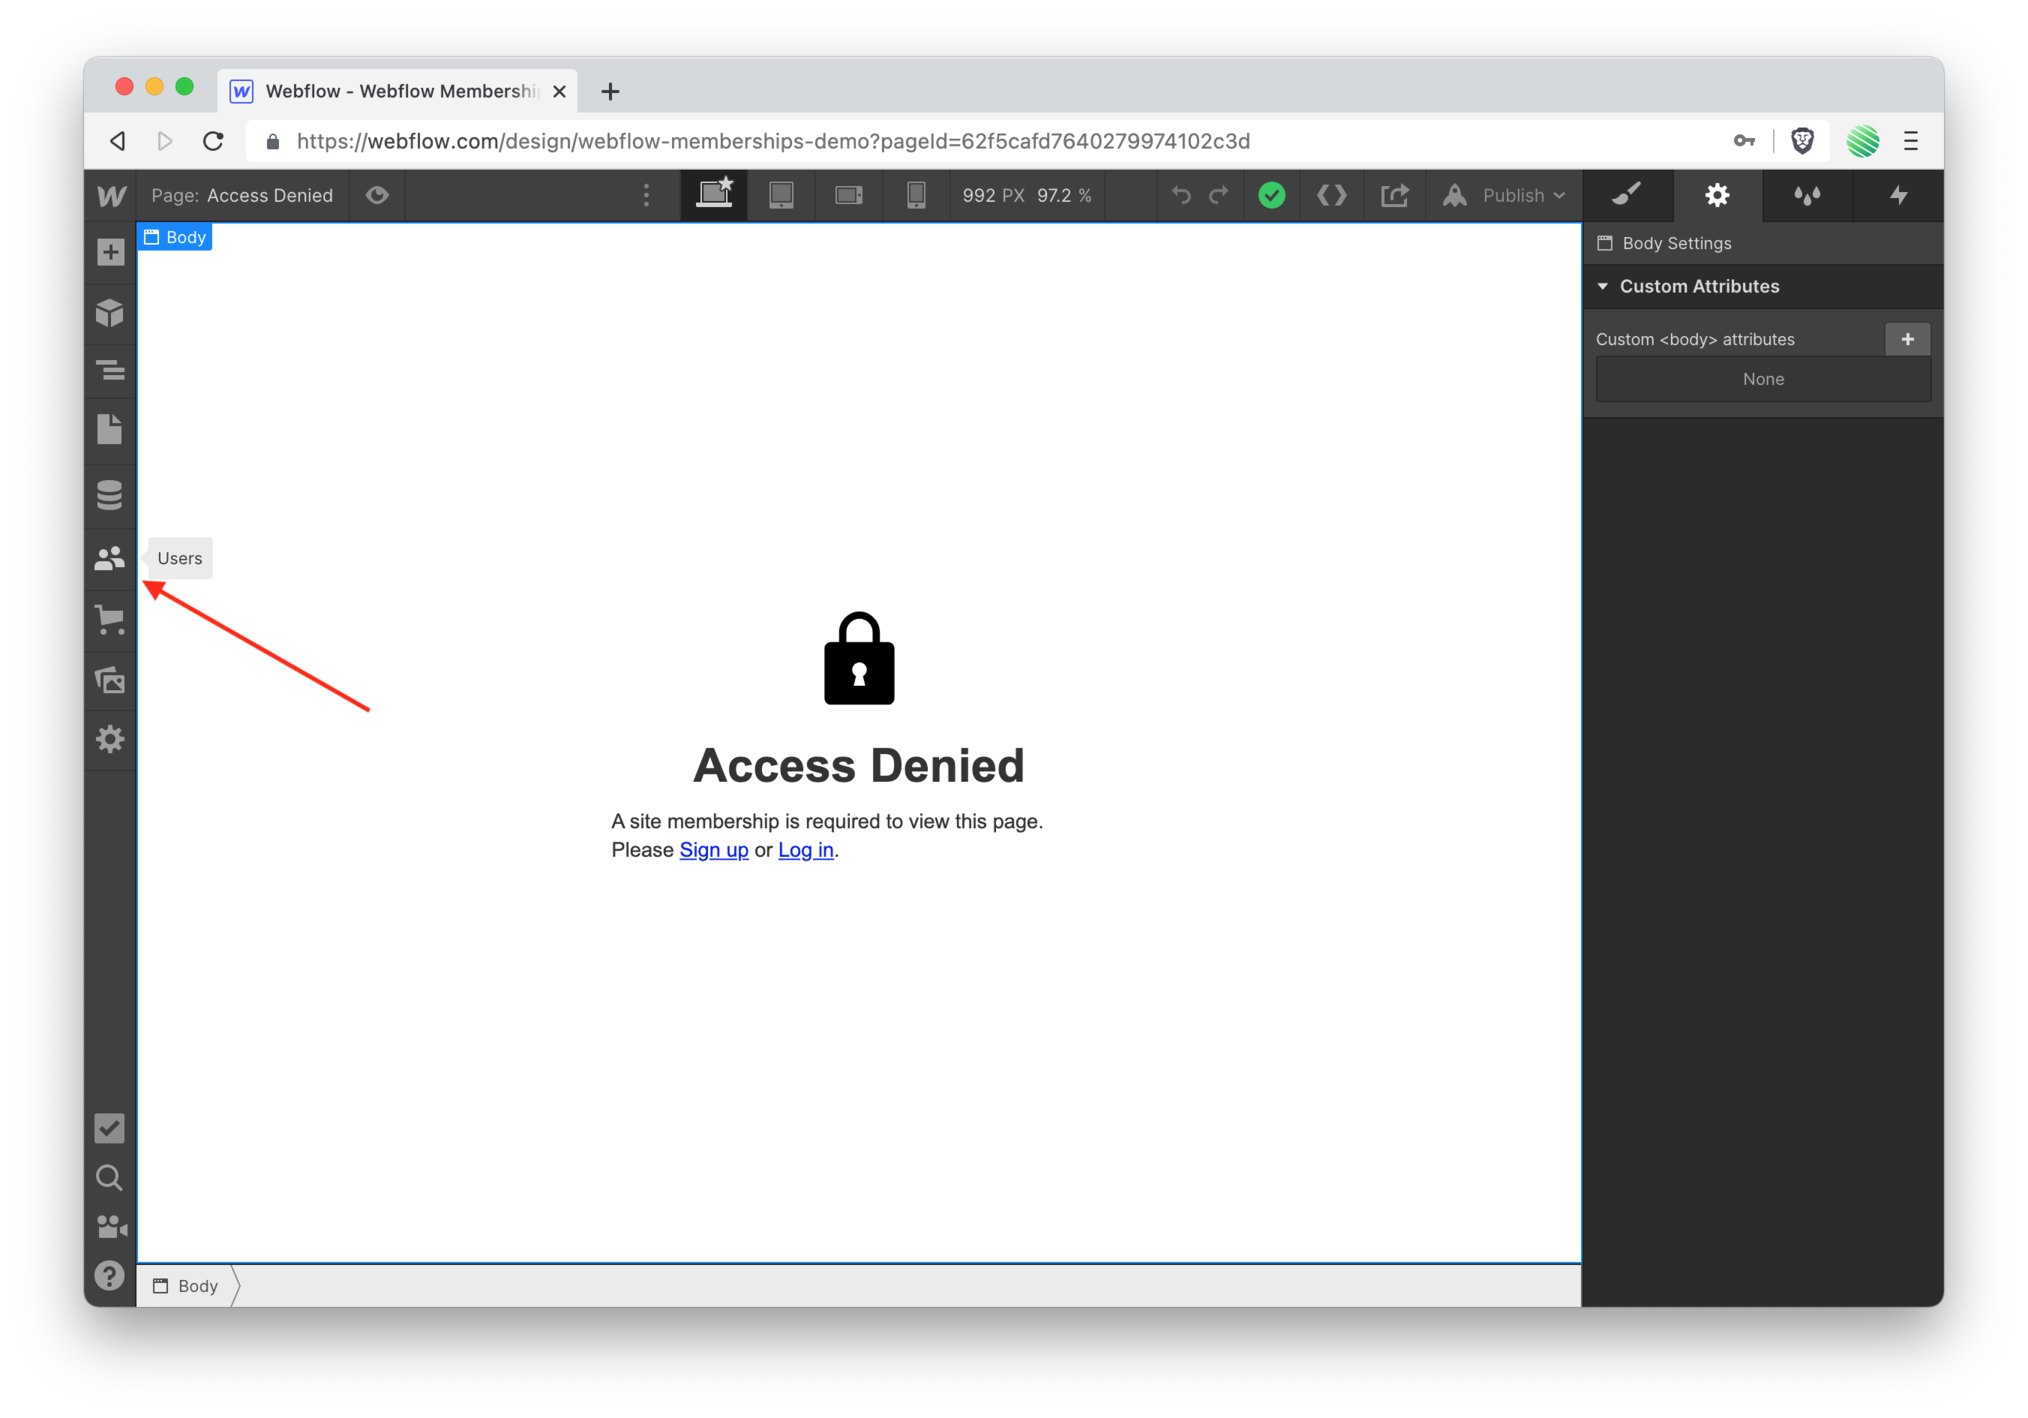 Okay, done. Back to Users (on the left side panel).
 Down from 5 to 4 setup steps. Things are moving quickly!
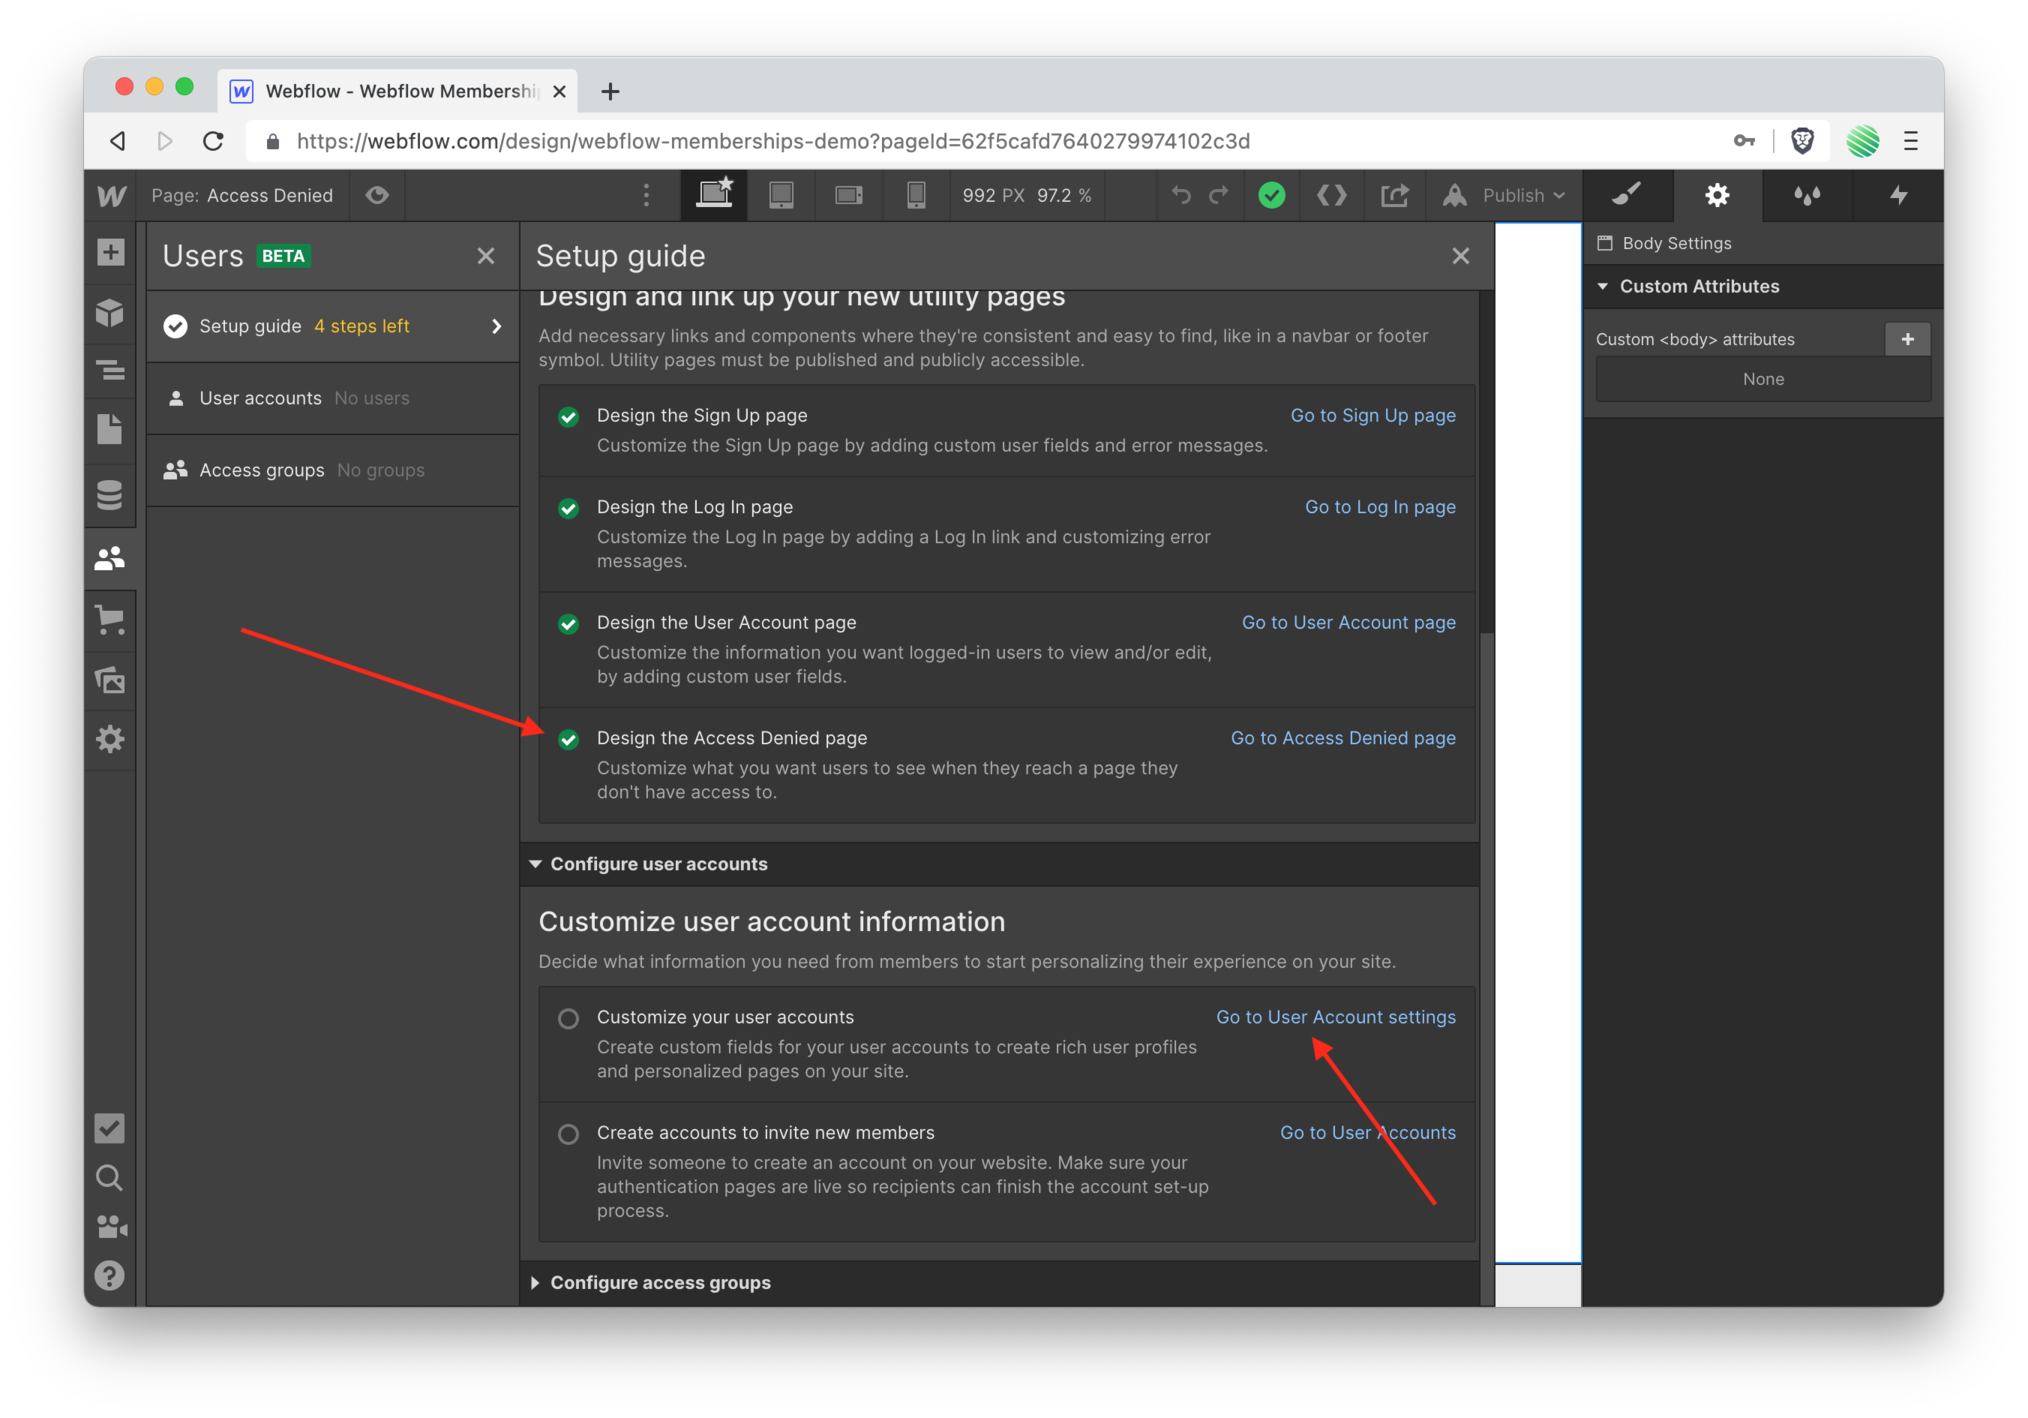
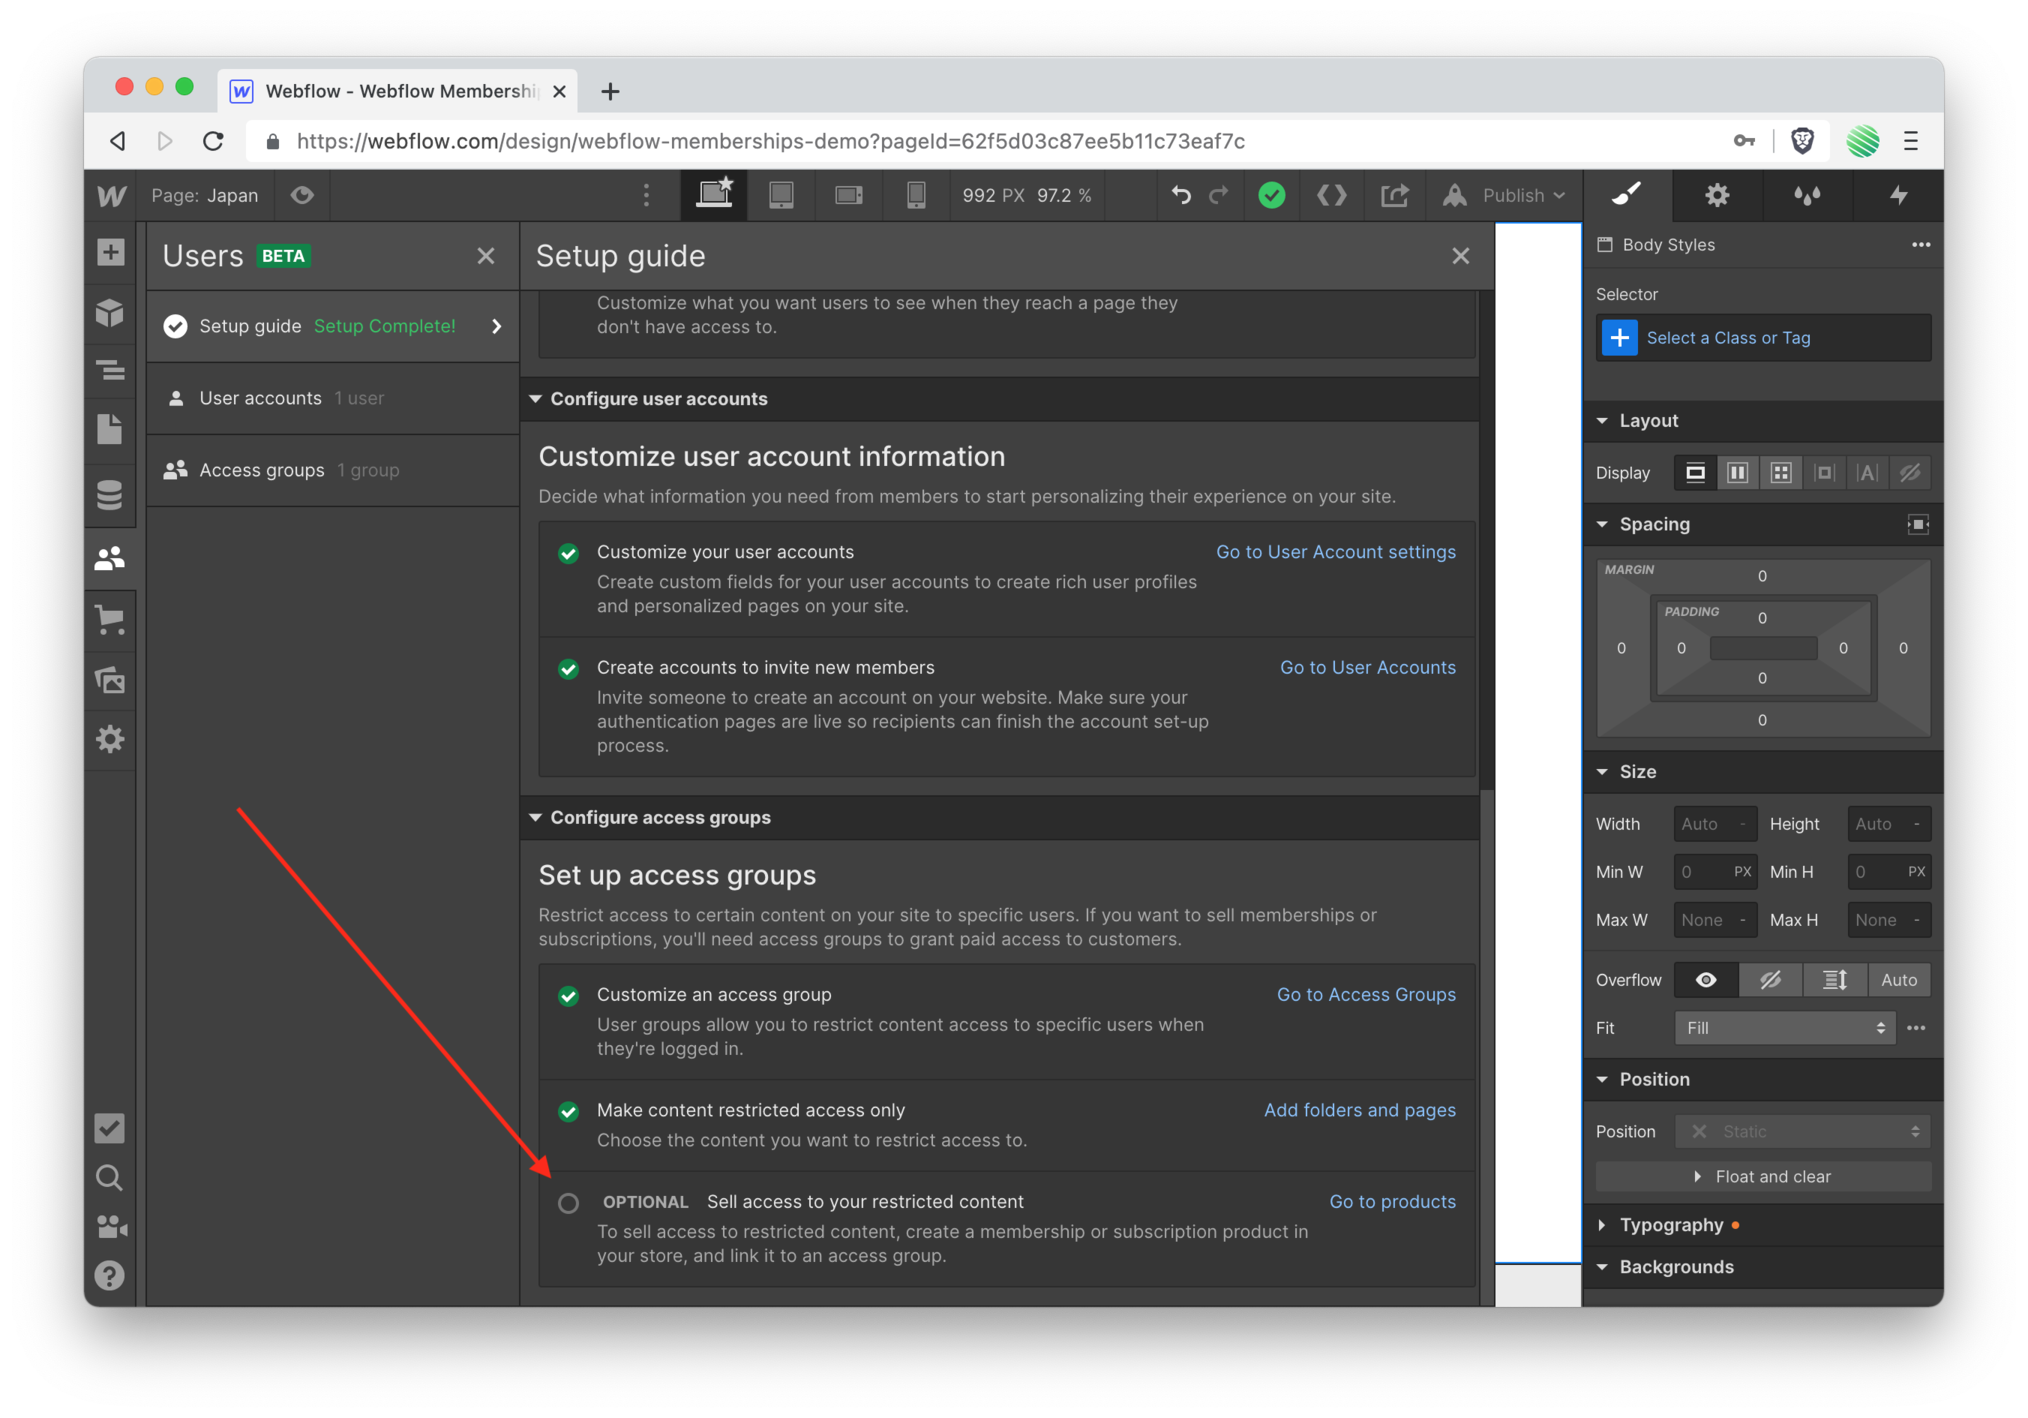
Customize Your User Accounts
Time to customize your user accounts.
Remember, this is just a CMS Collection that you’re already used to. Of course, it’s a “special” Collection and that’s why Webflow has moved it out of the CMS editor and into it’s own menu item.
Tap the “go to user account settings” link (screenshot above).
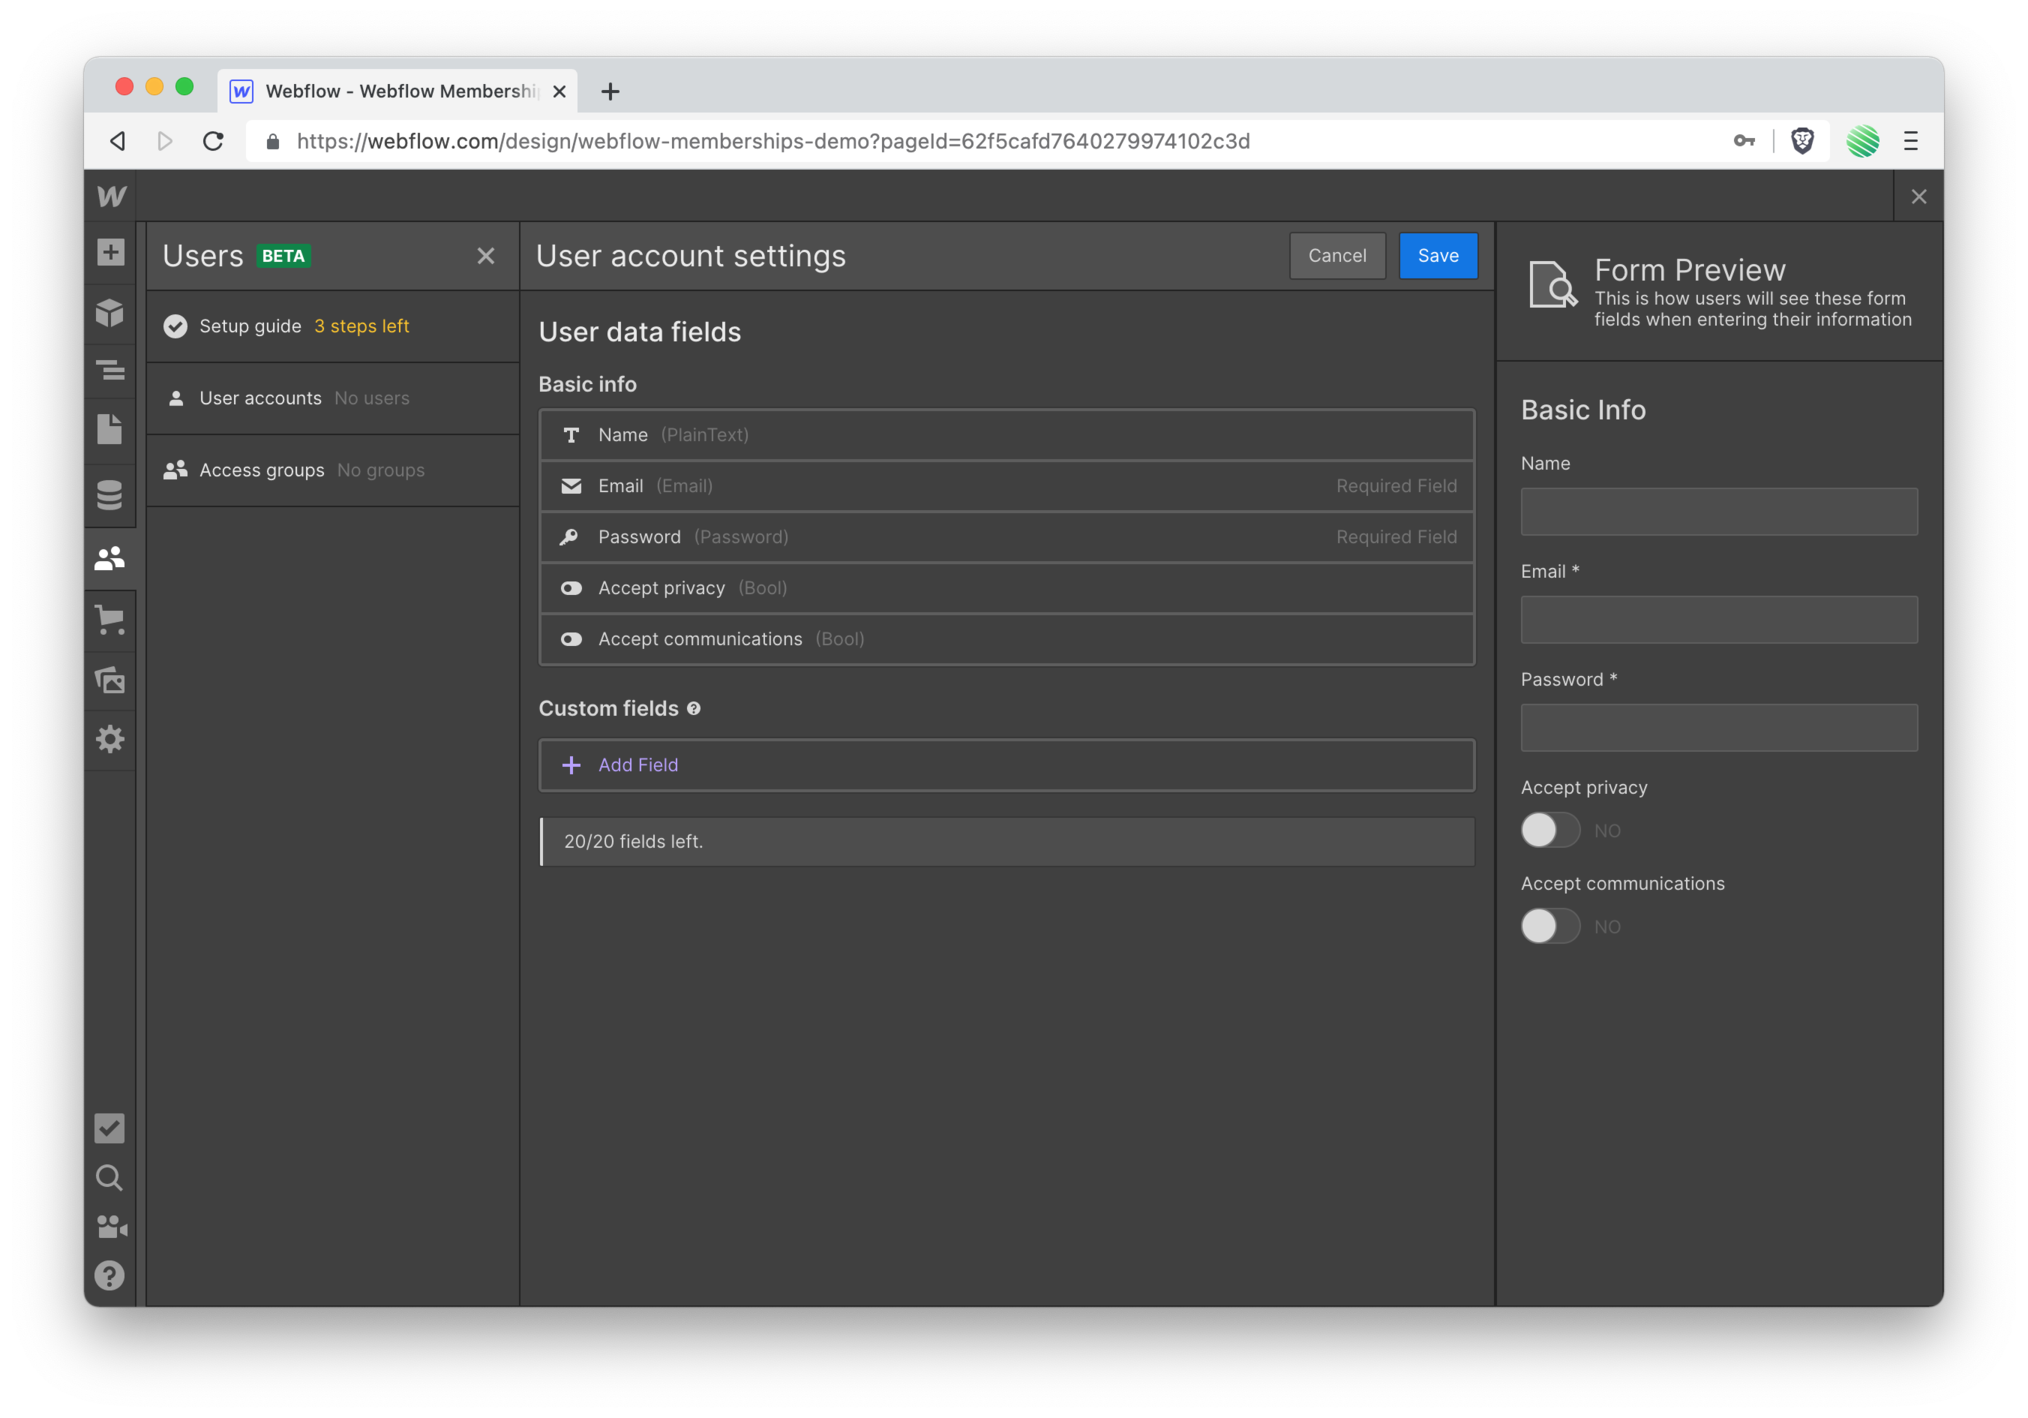 Looks familiar!
You can see a bunch of default CMS fields already set up for you. You can add more or remove the ones that aren’t required.
For this walk through you’ll leave it as-is. The defaults are perfect for you to get going, quickly.
 Back to Users (left side panel).
Notice you’re down from 4 to 3 steps remaining.
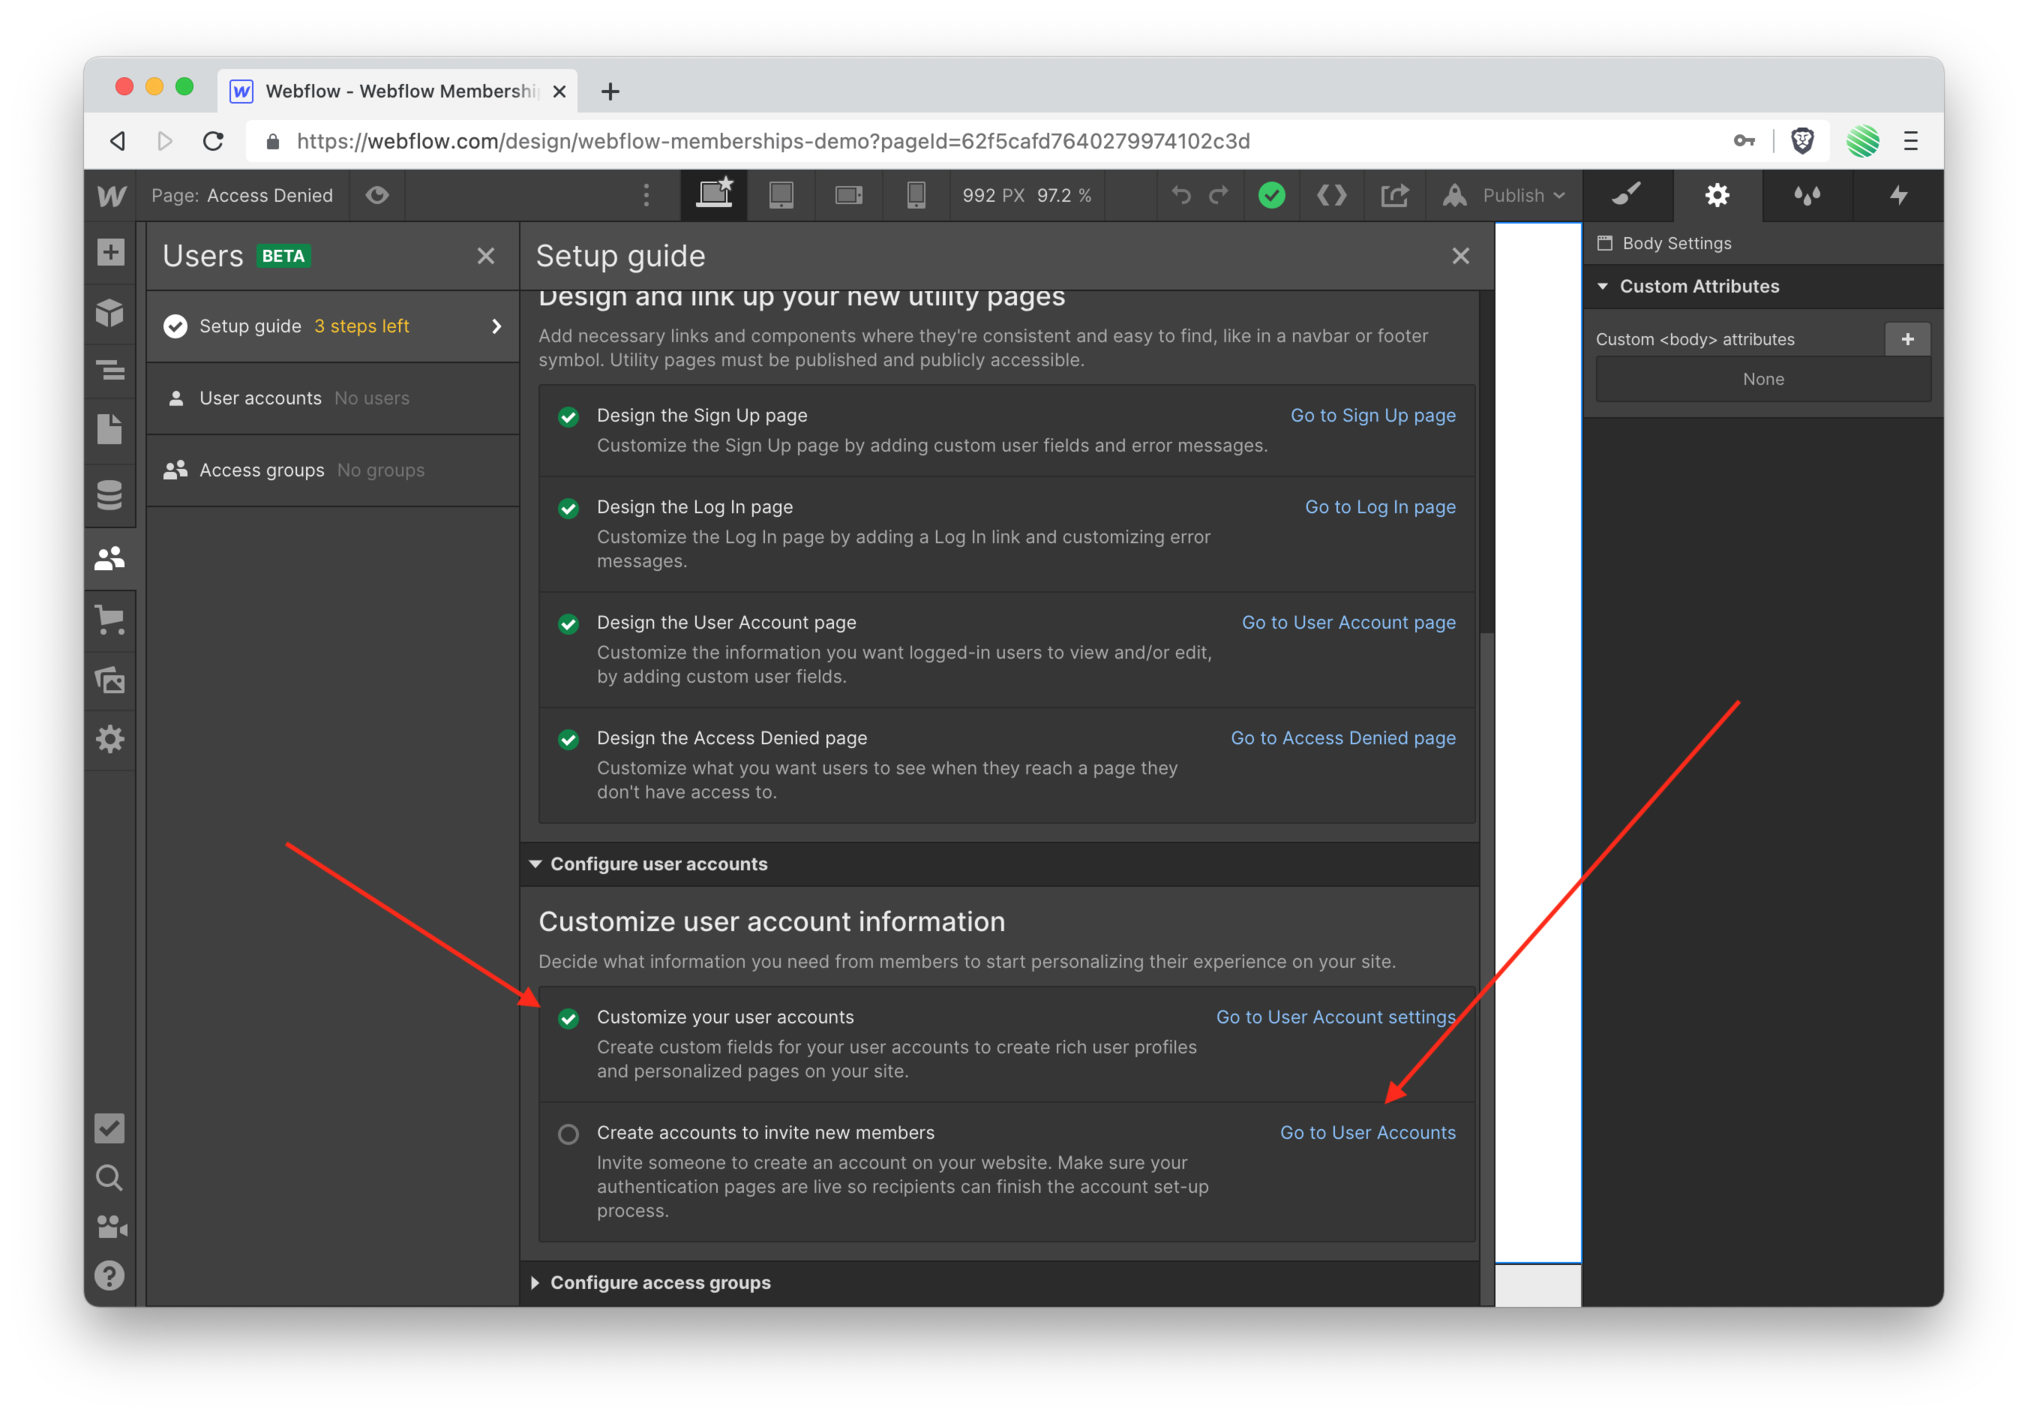
Invite a New User
Time to create accounts to invite new members. Tap on the “go to user accounts” link (screenshot above).
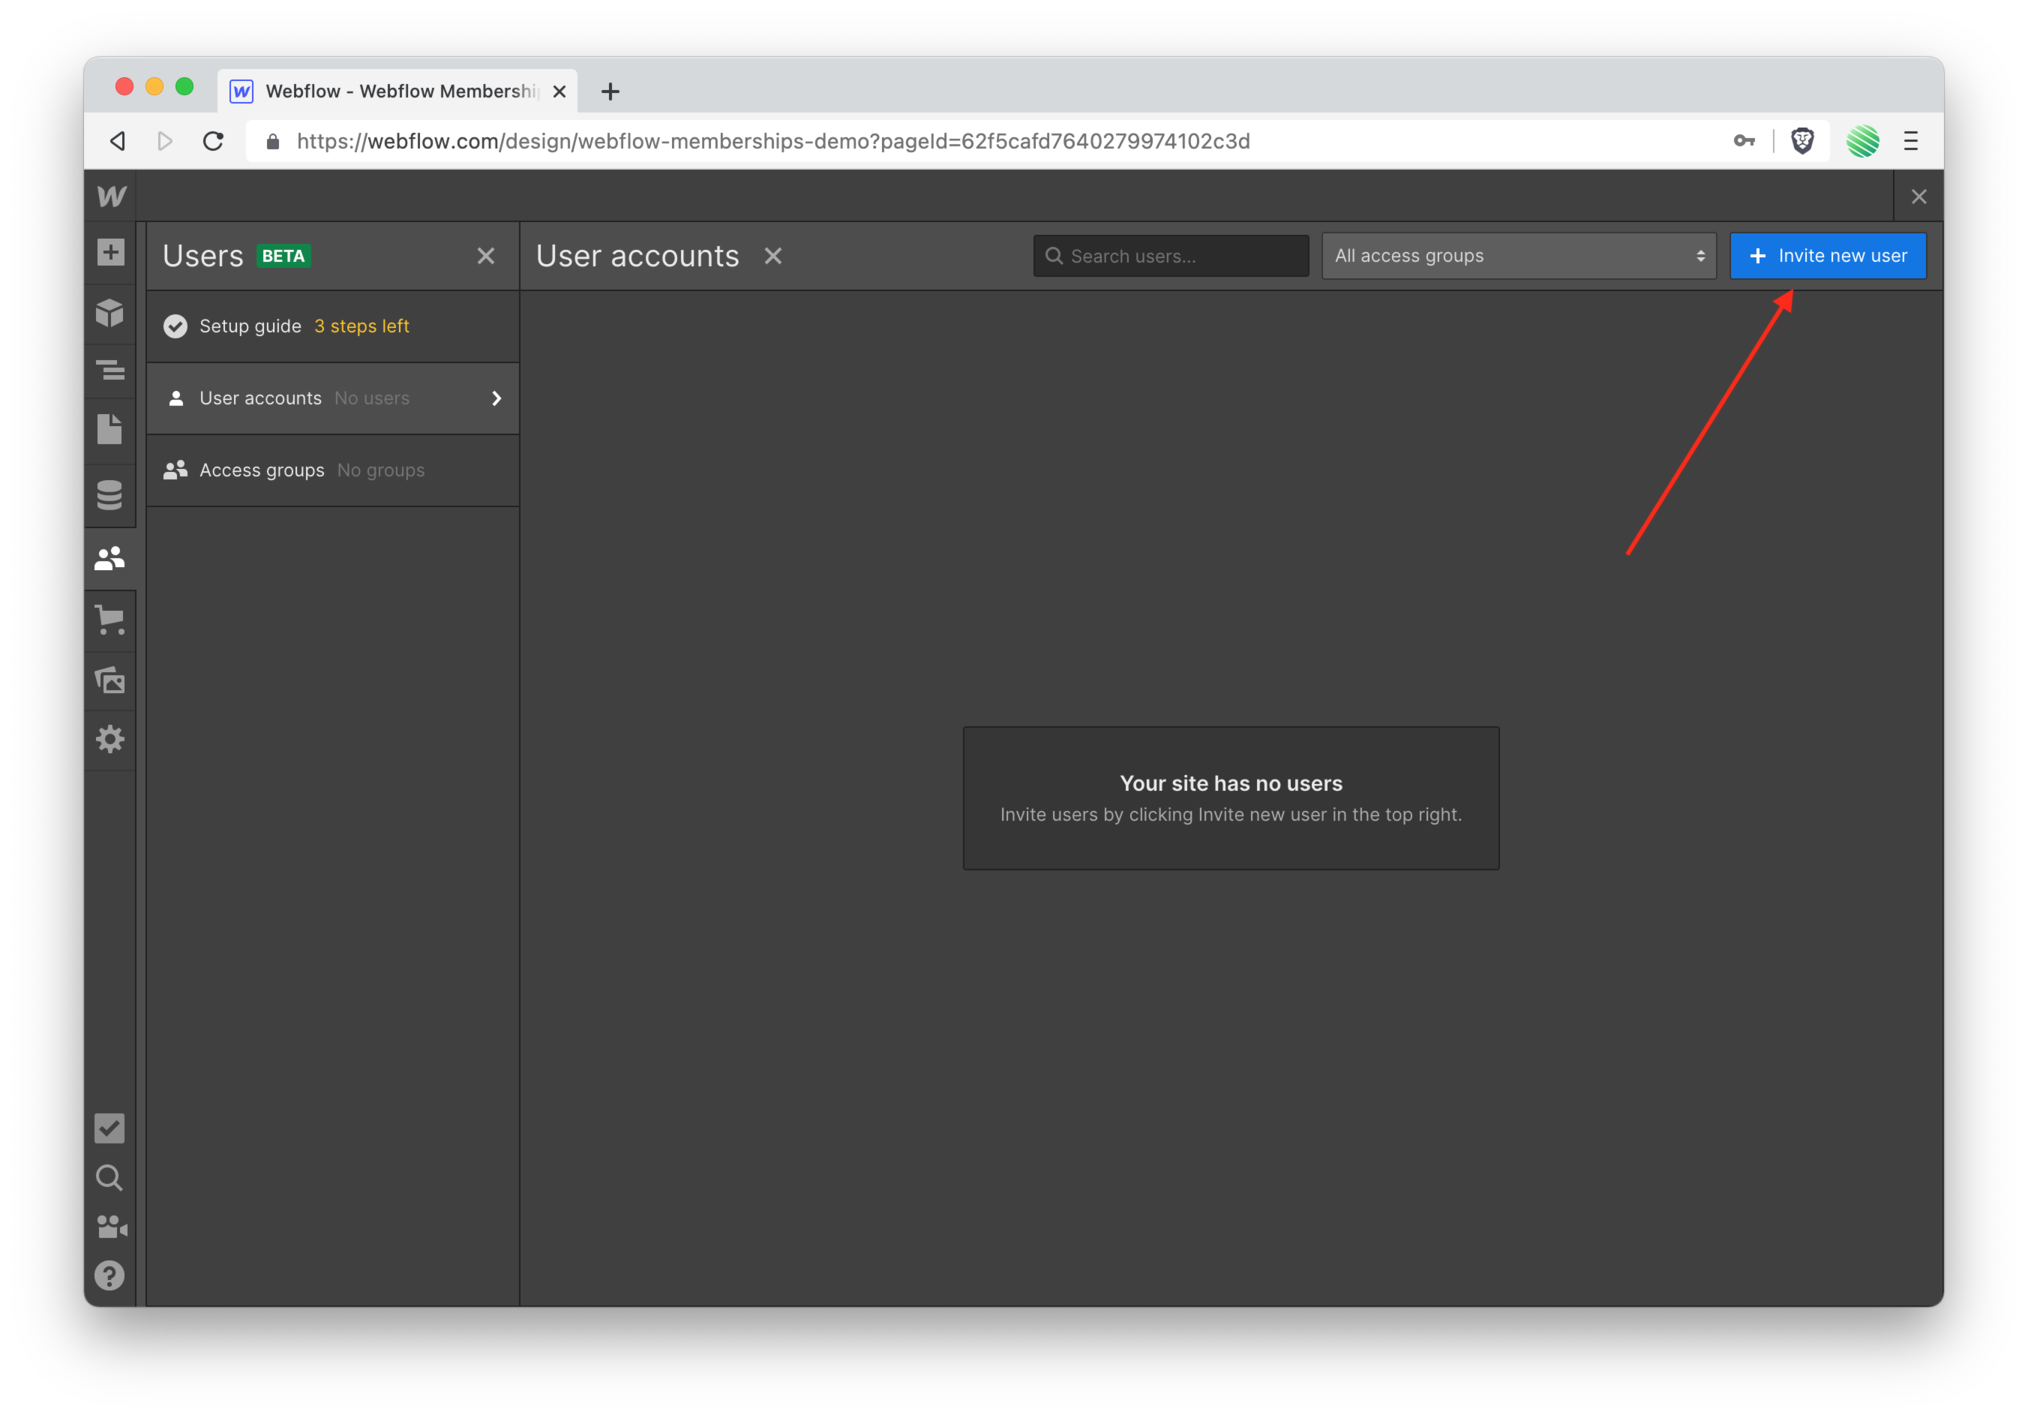 Tap on the “invite new user” button.
 Enter in a valid, working email address, you’ll be receiving an email invite!
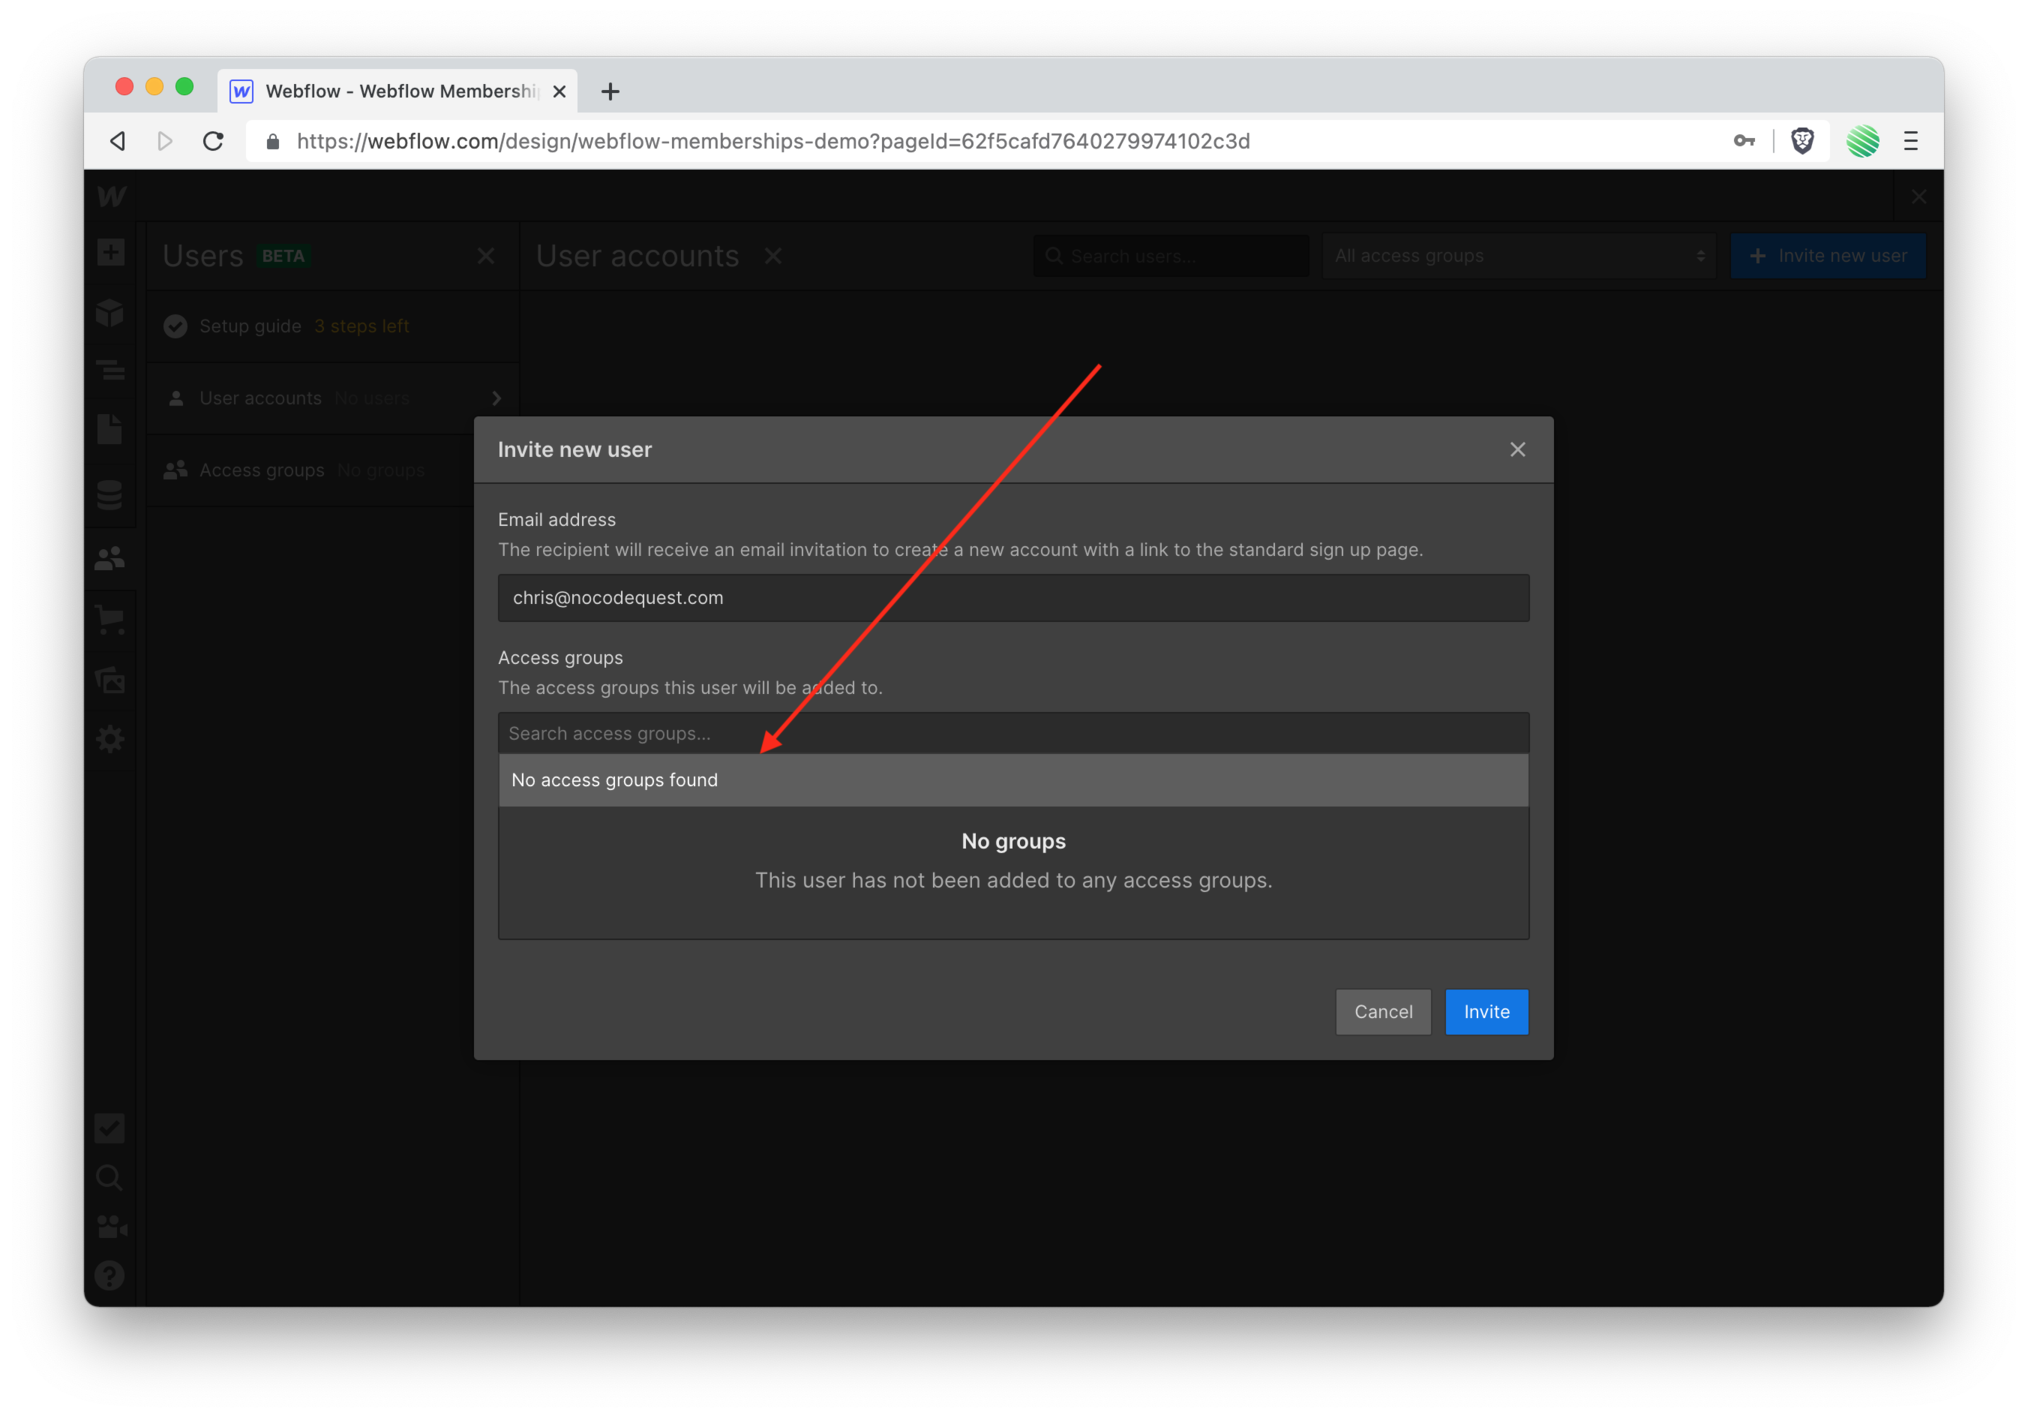 You haven’t set up any access groups, yet. So leave that as-is ( you’ll do this shortly ).
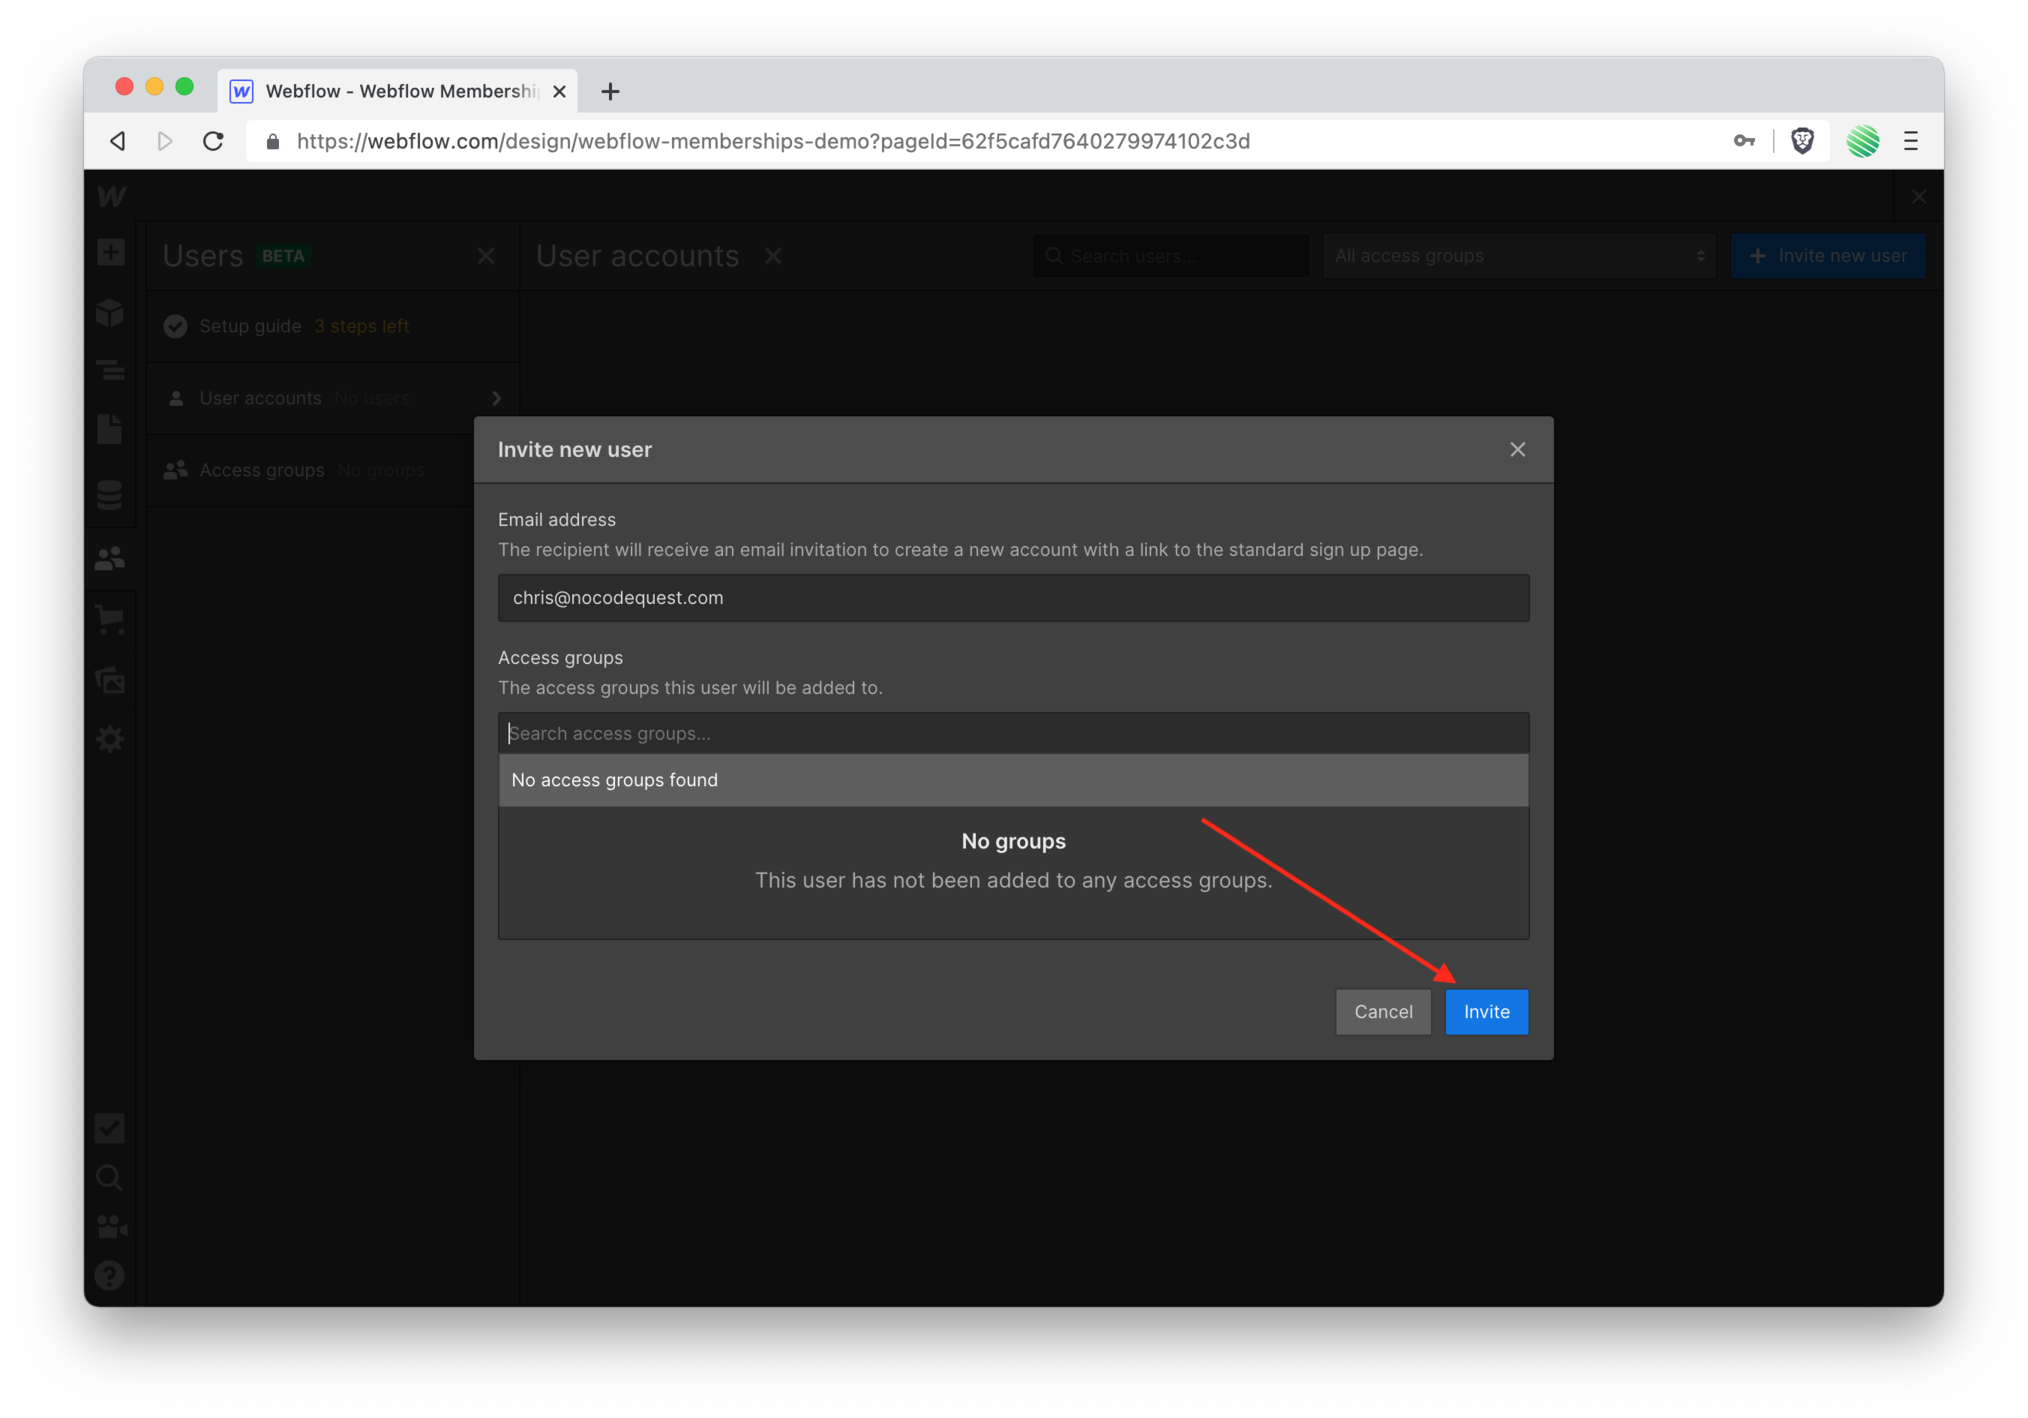 Tap the “invite” button.
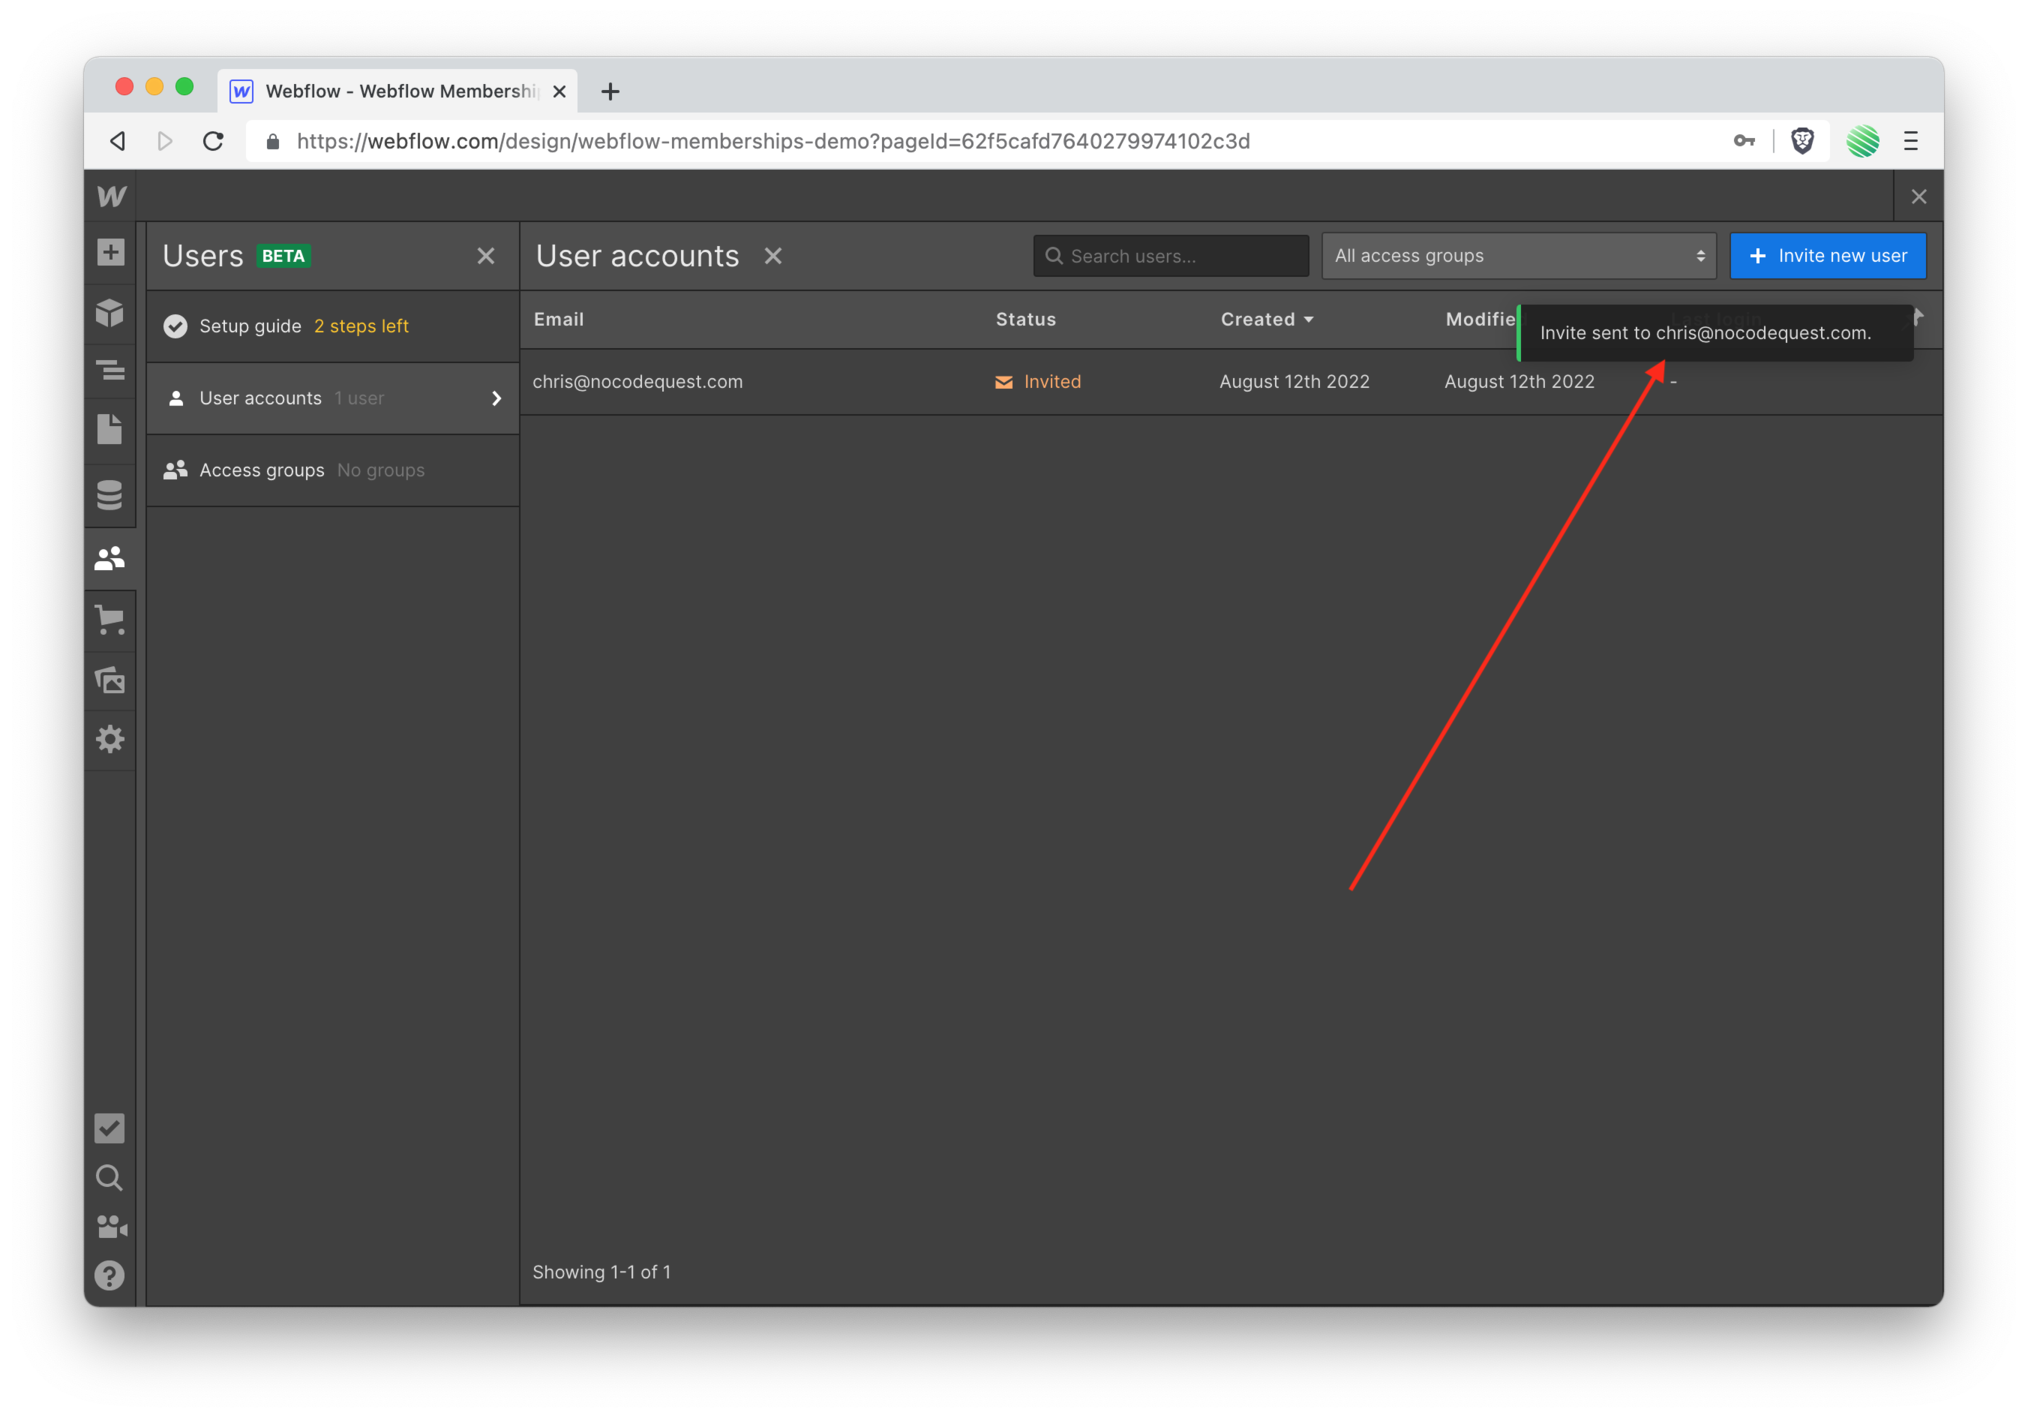
 💥 Boom!
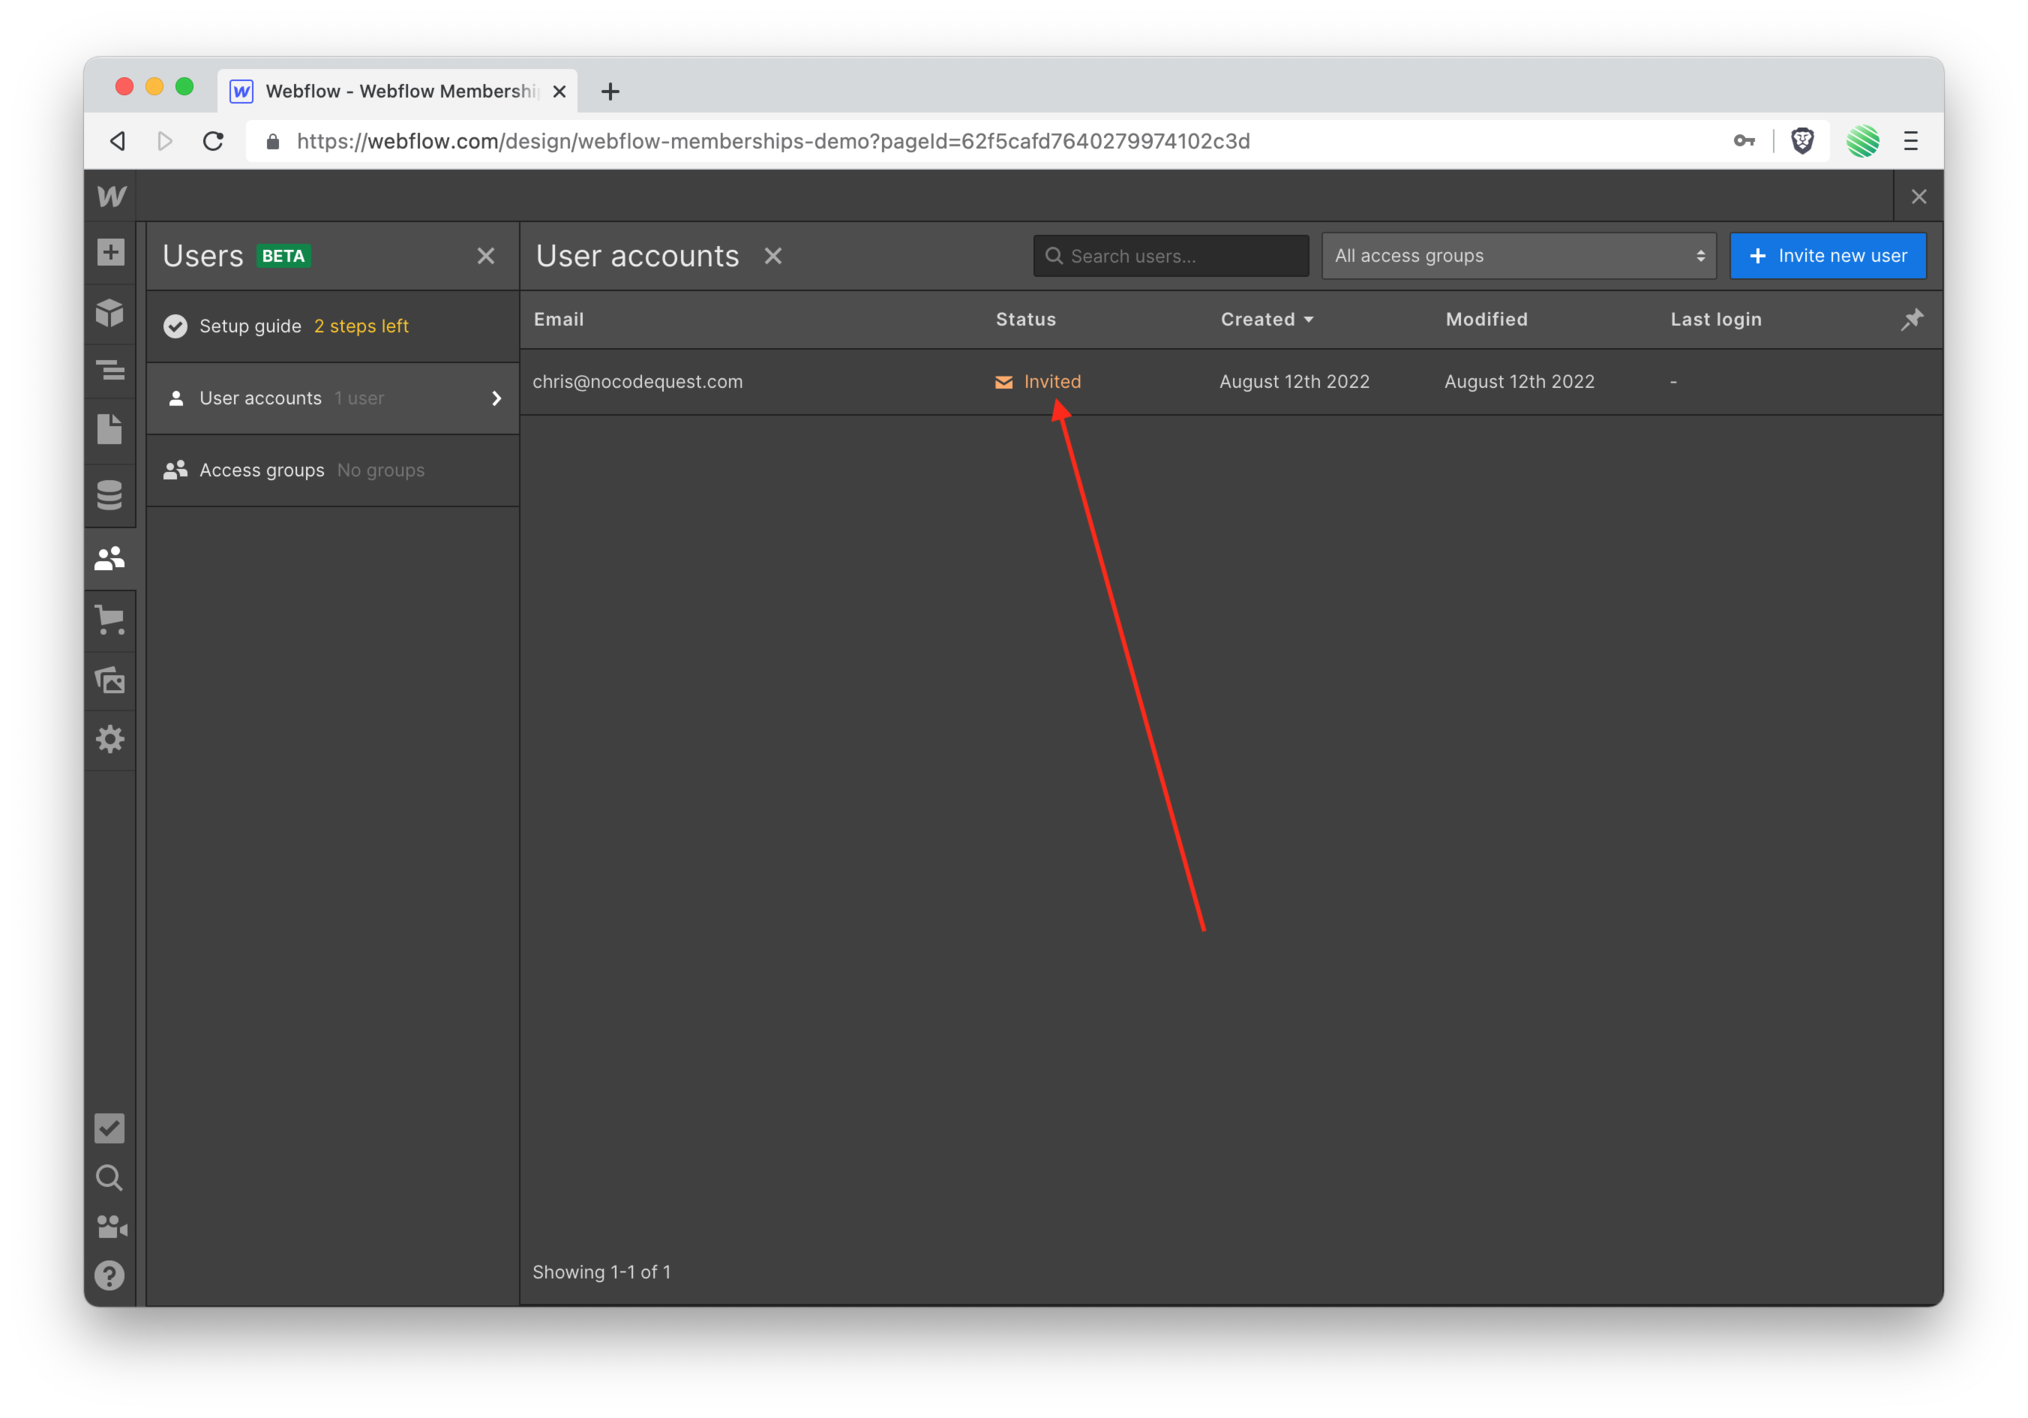
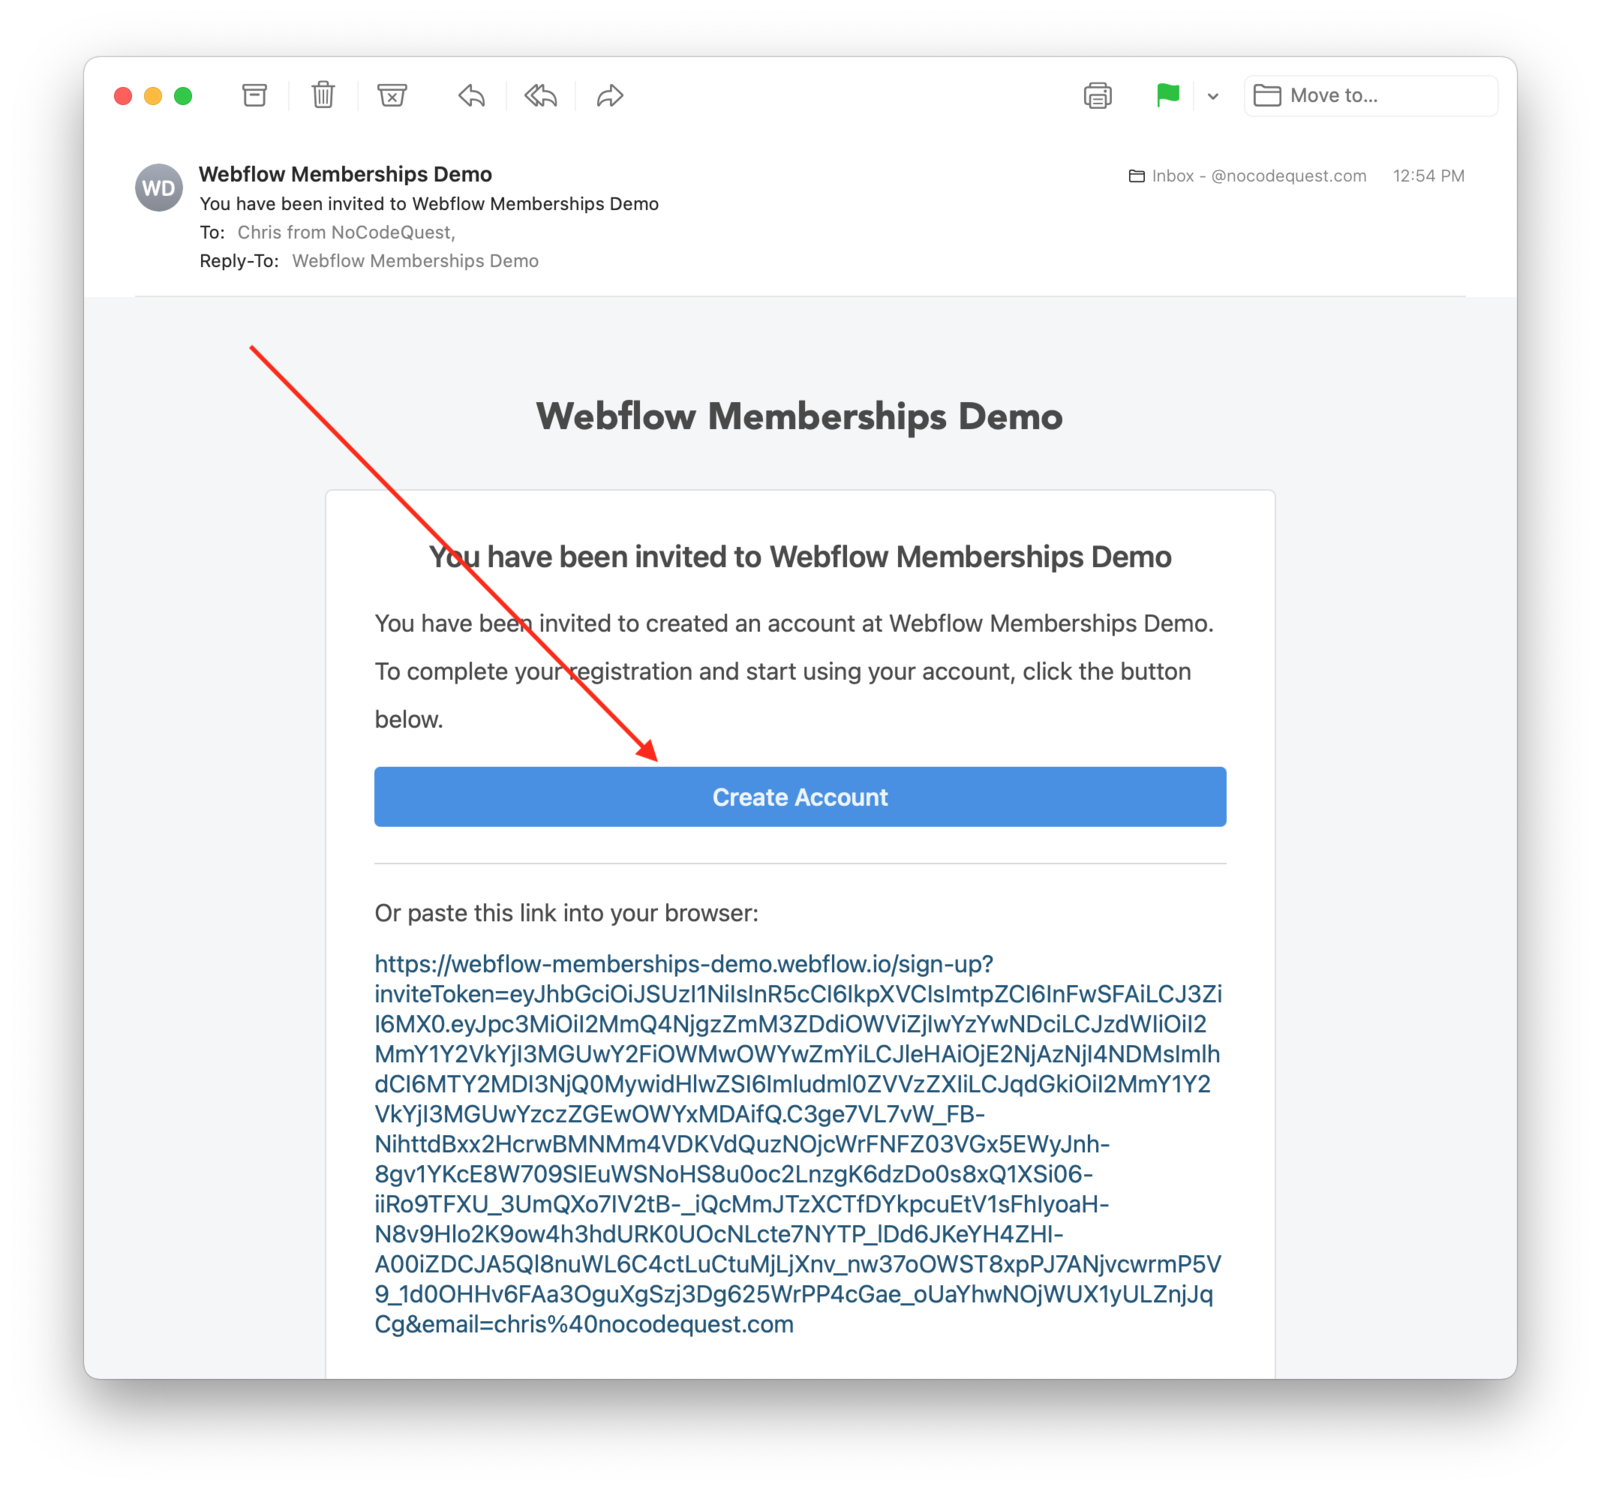
An invitation email was just sent to that email address. It contains a link / button to accept the invitation, and create an account on your Webflow site.
New User Invitation Email
…and your email invitation should have arrived.
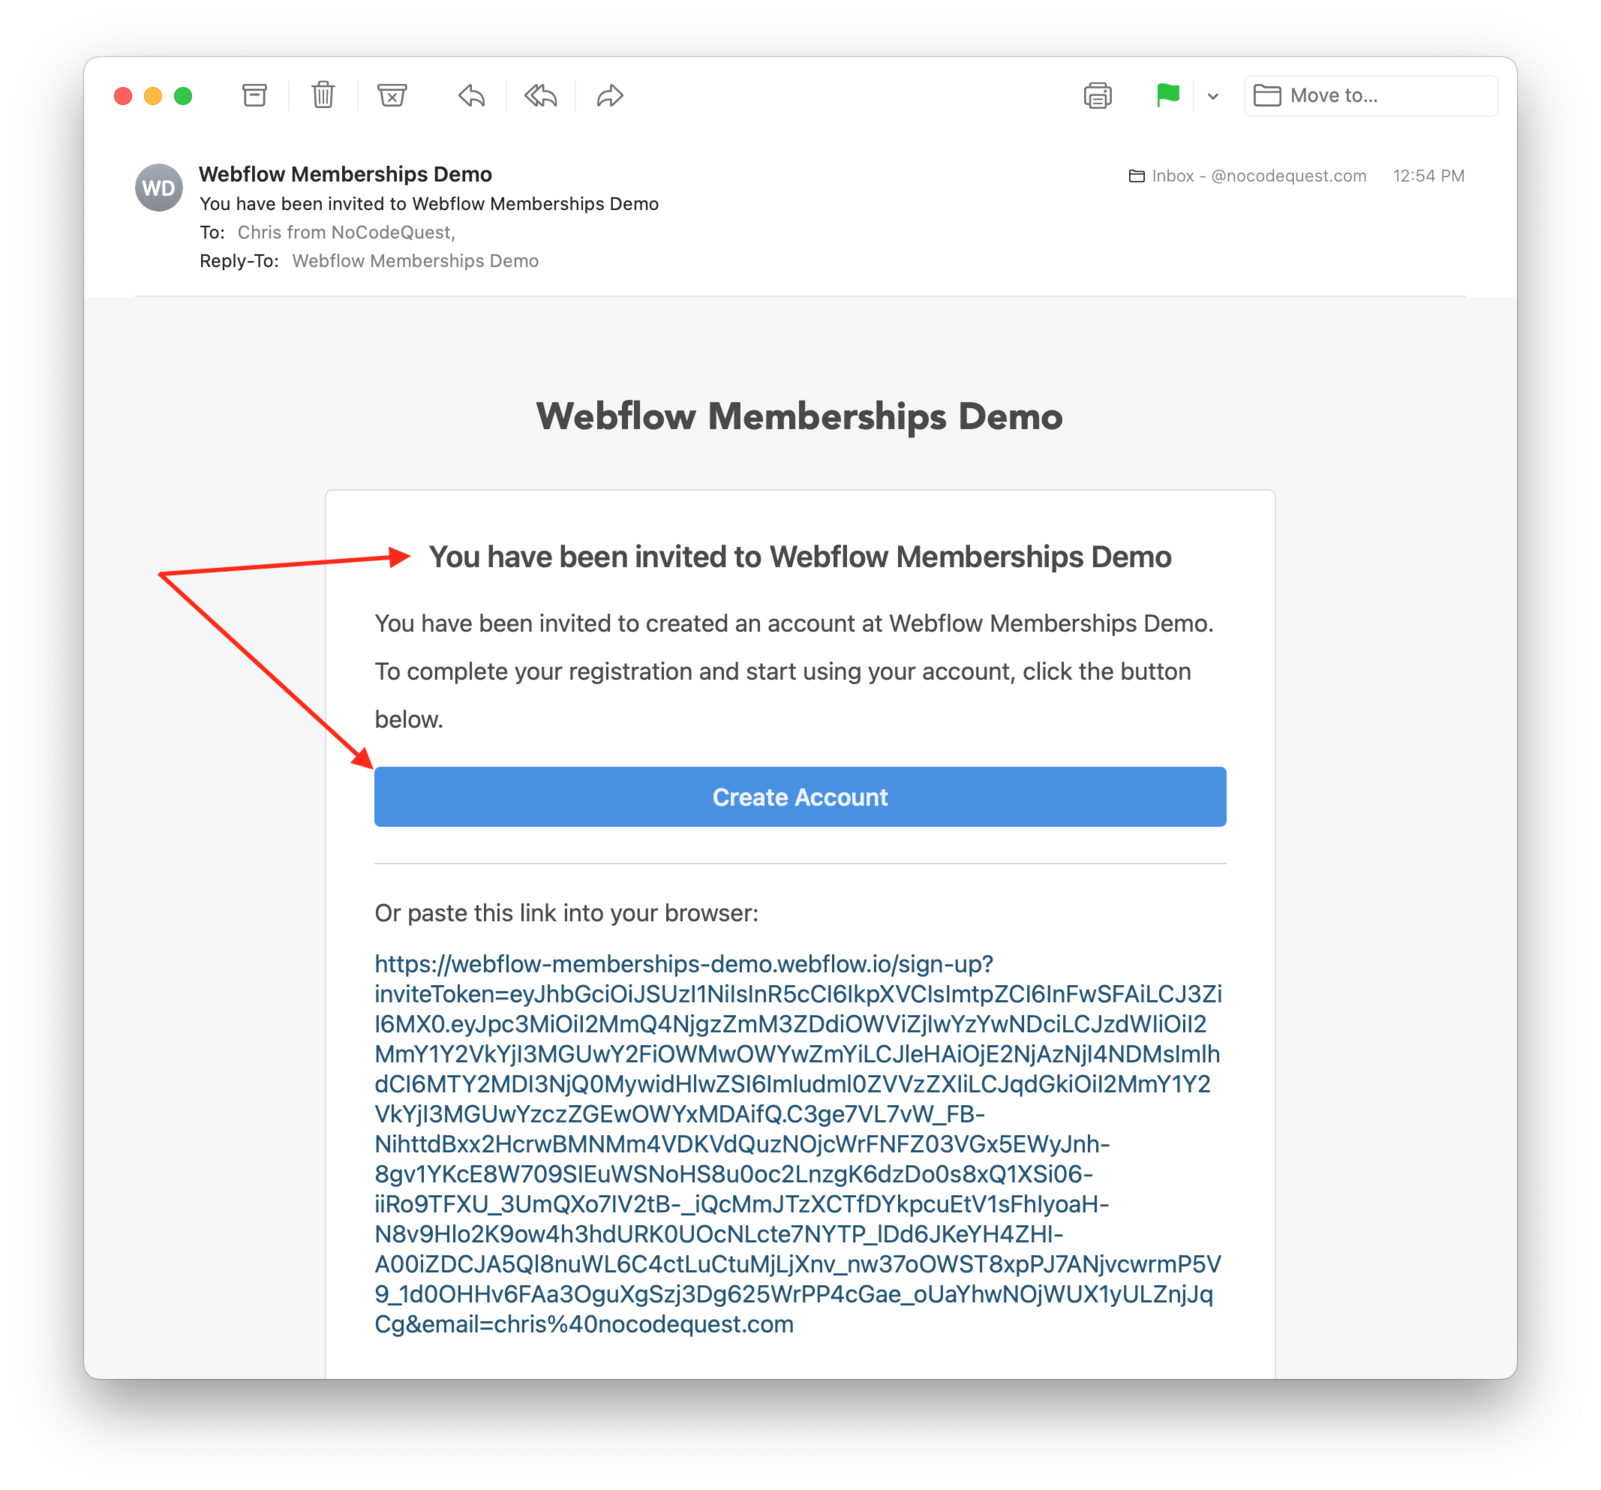 Don’t tap on the “create account” button just yet. You’ll first want to create an access group and a static page that this access group provides access to.
 Go back to Users (on the left side panel). You’re down from 3 to 2 steps remaining.
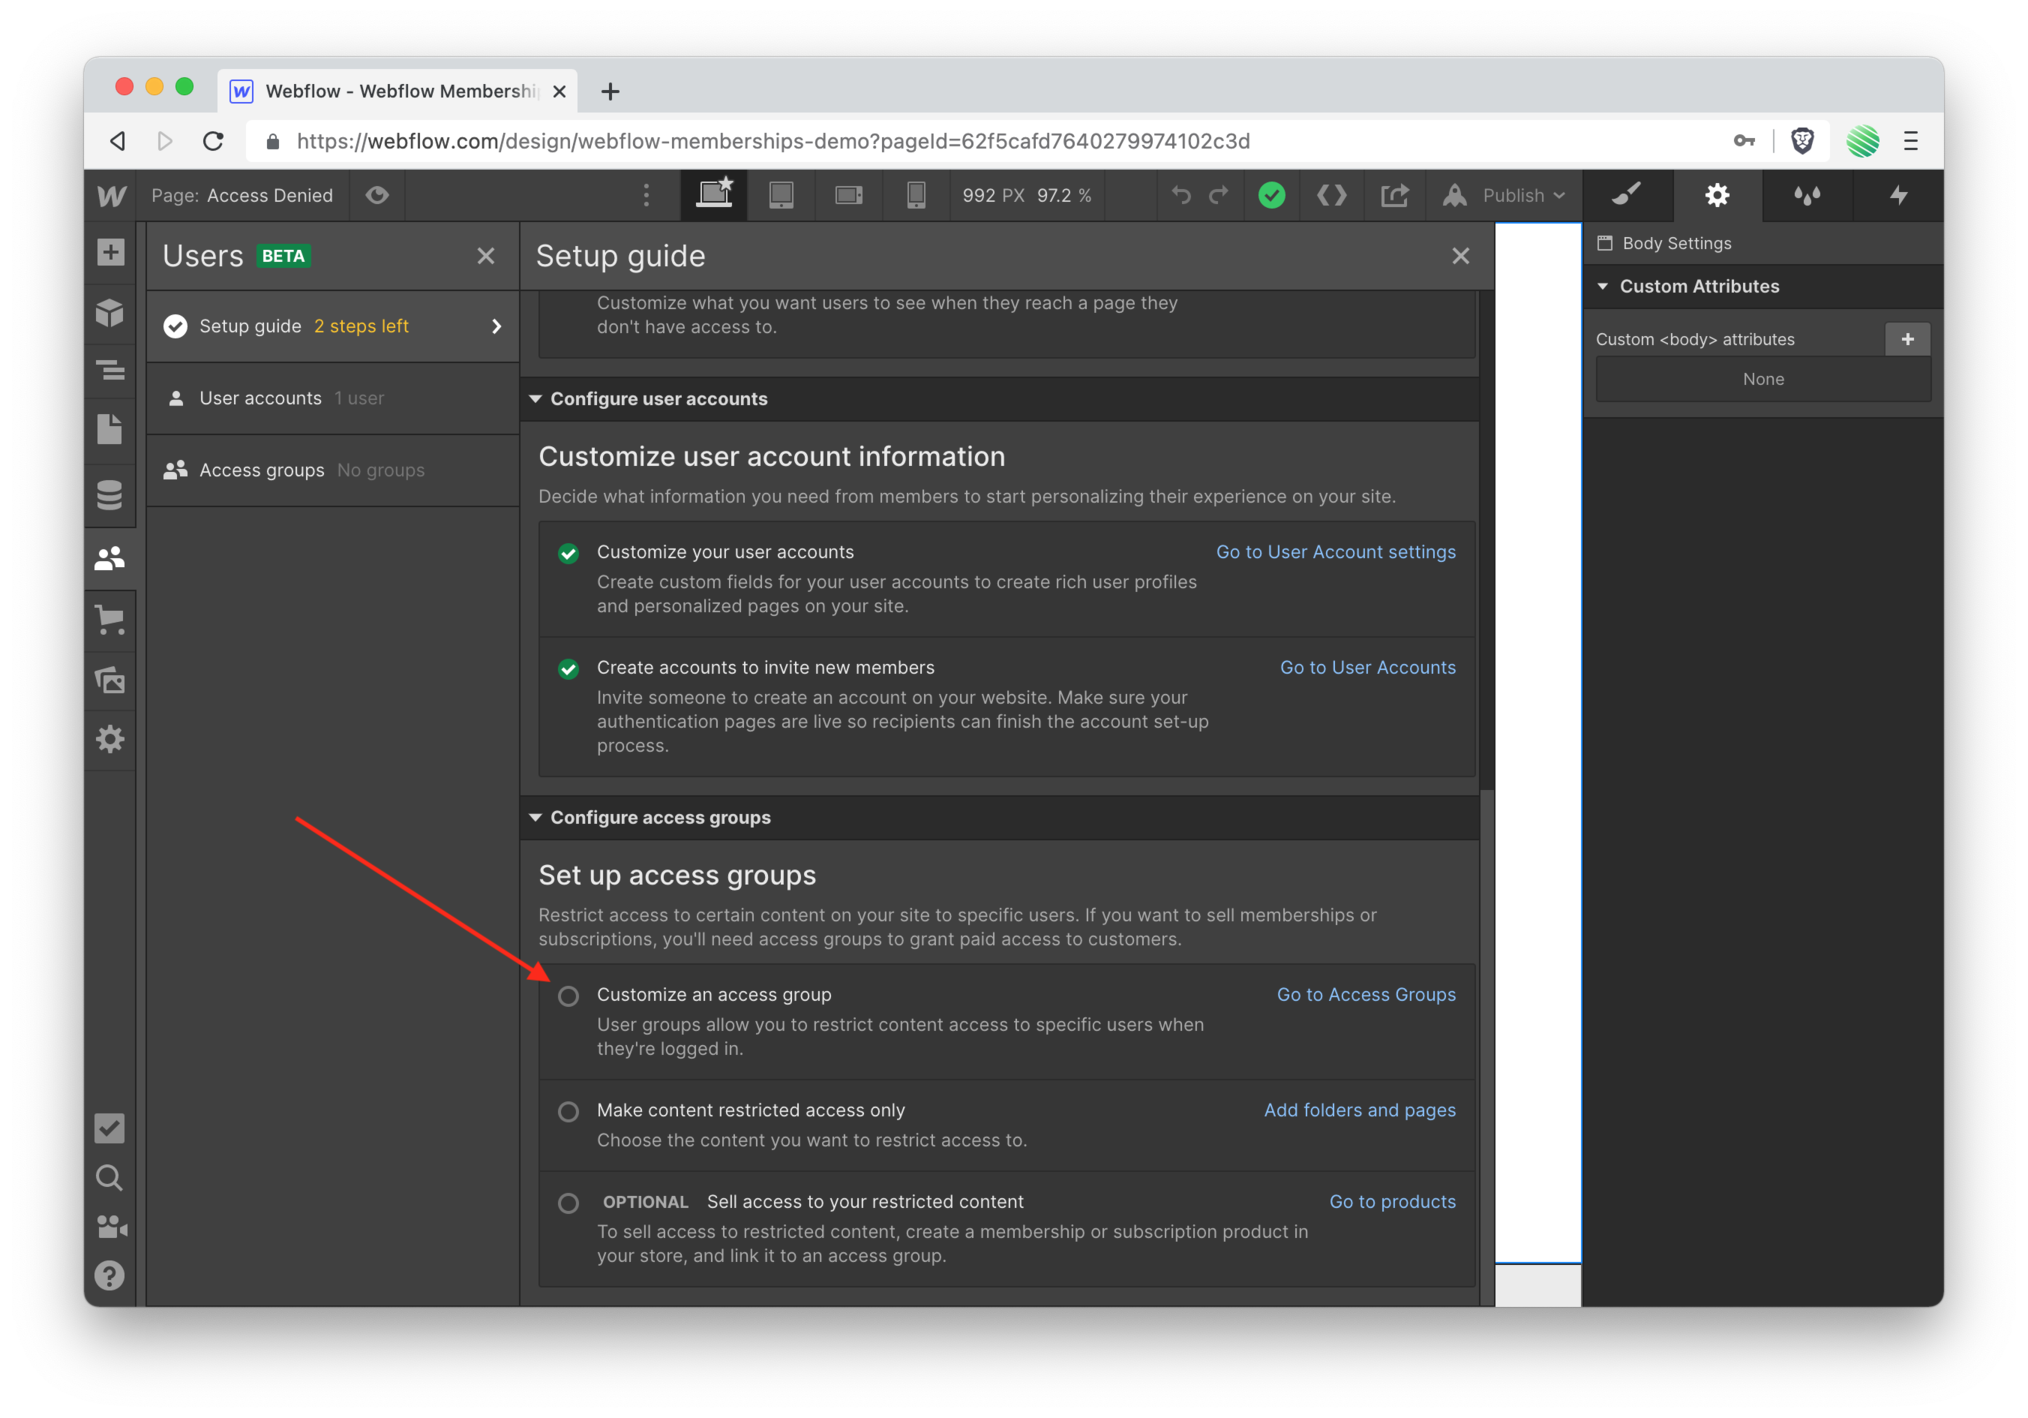
Customize an Access Group
Tap on the “go to access group” link (screenshot above).
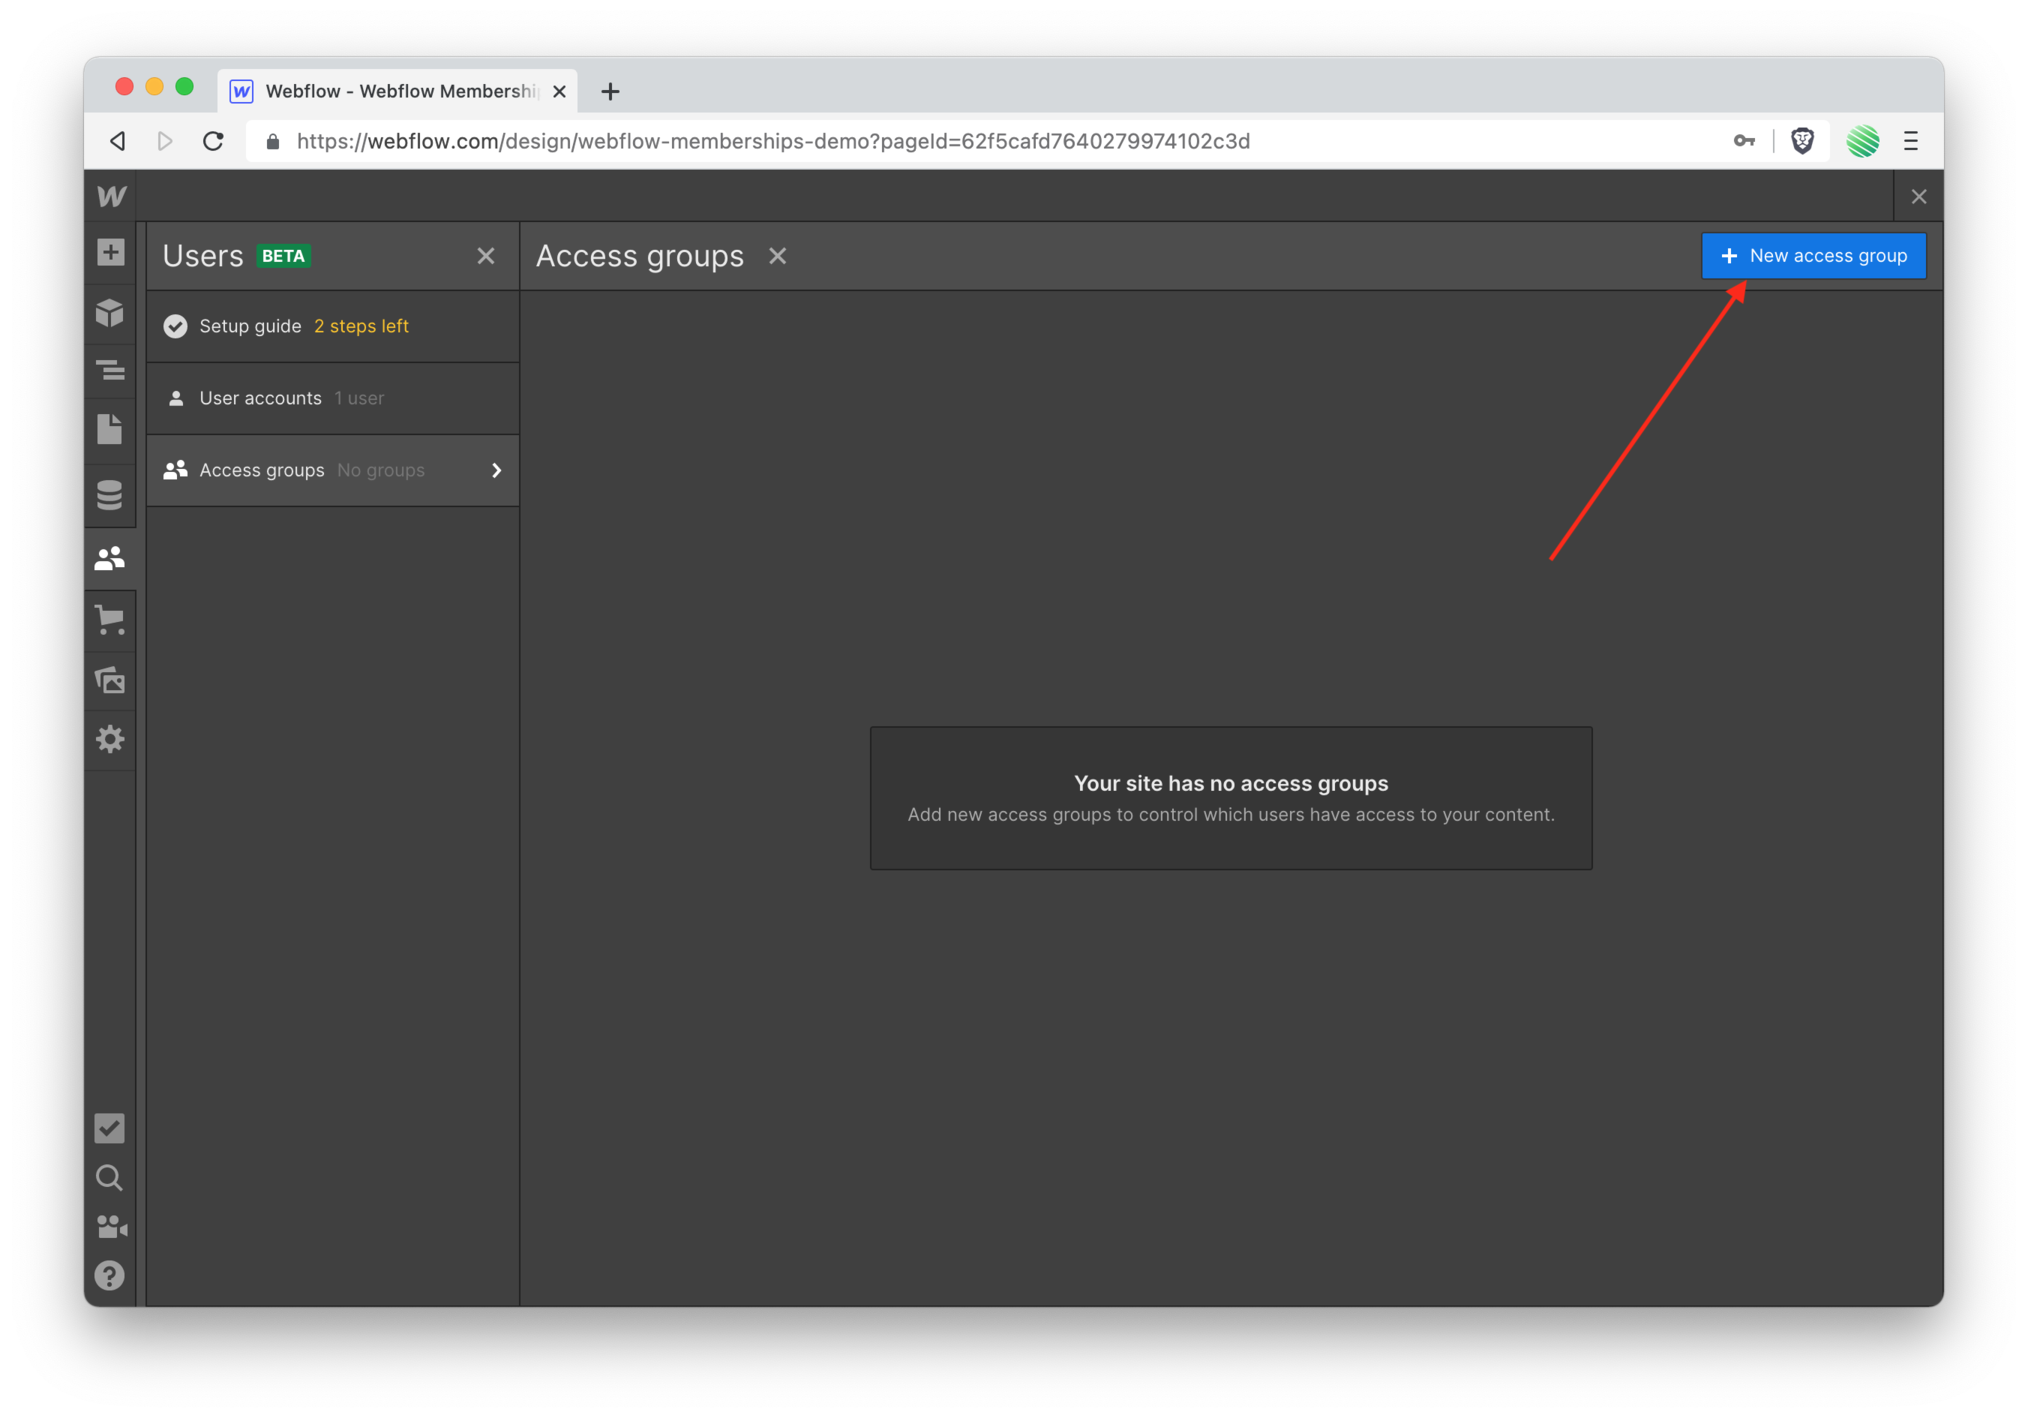 Tap the “new access group” button.
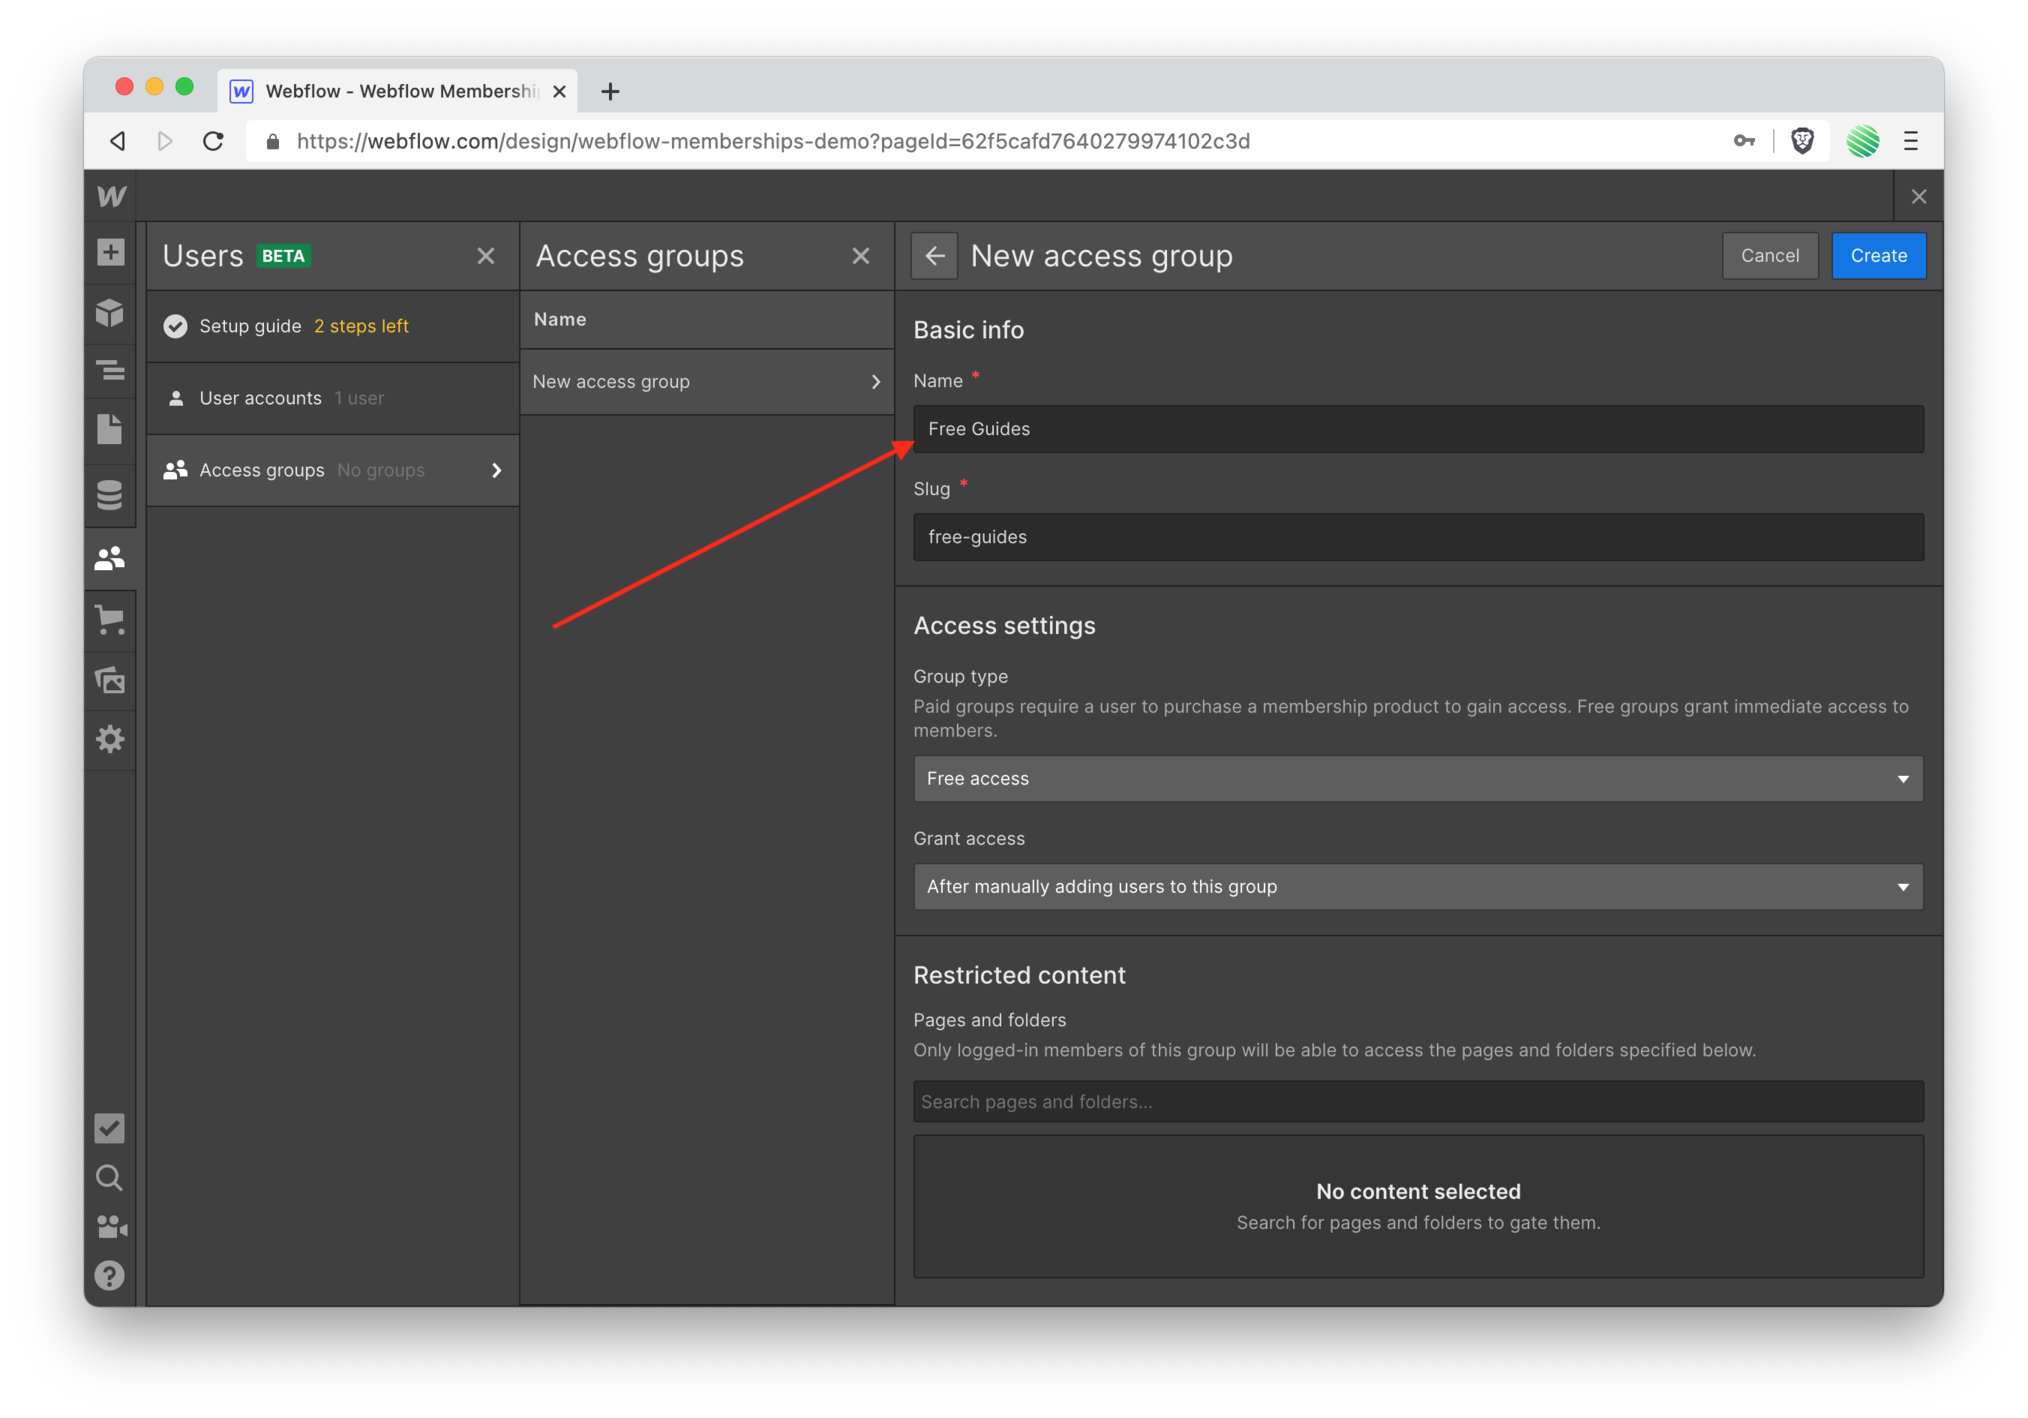 Give your access group a name.
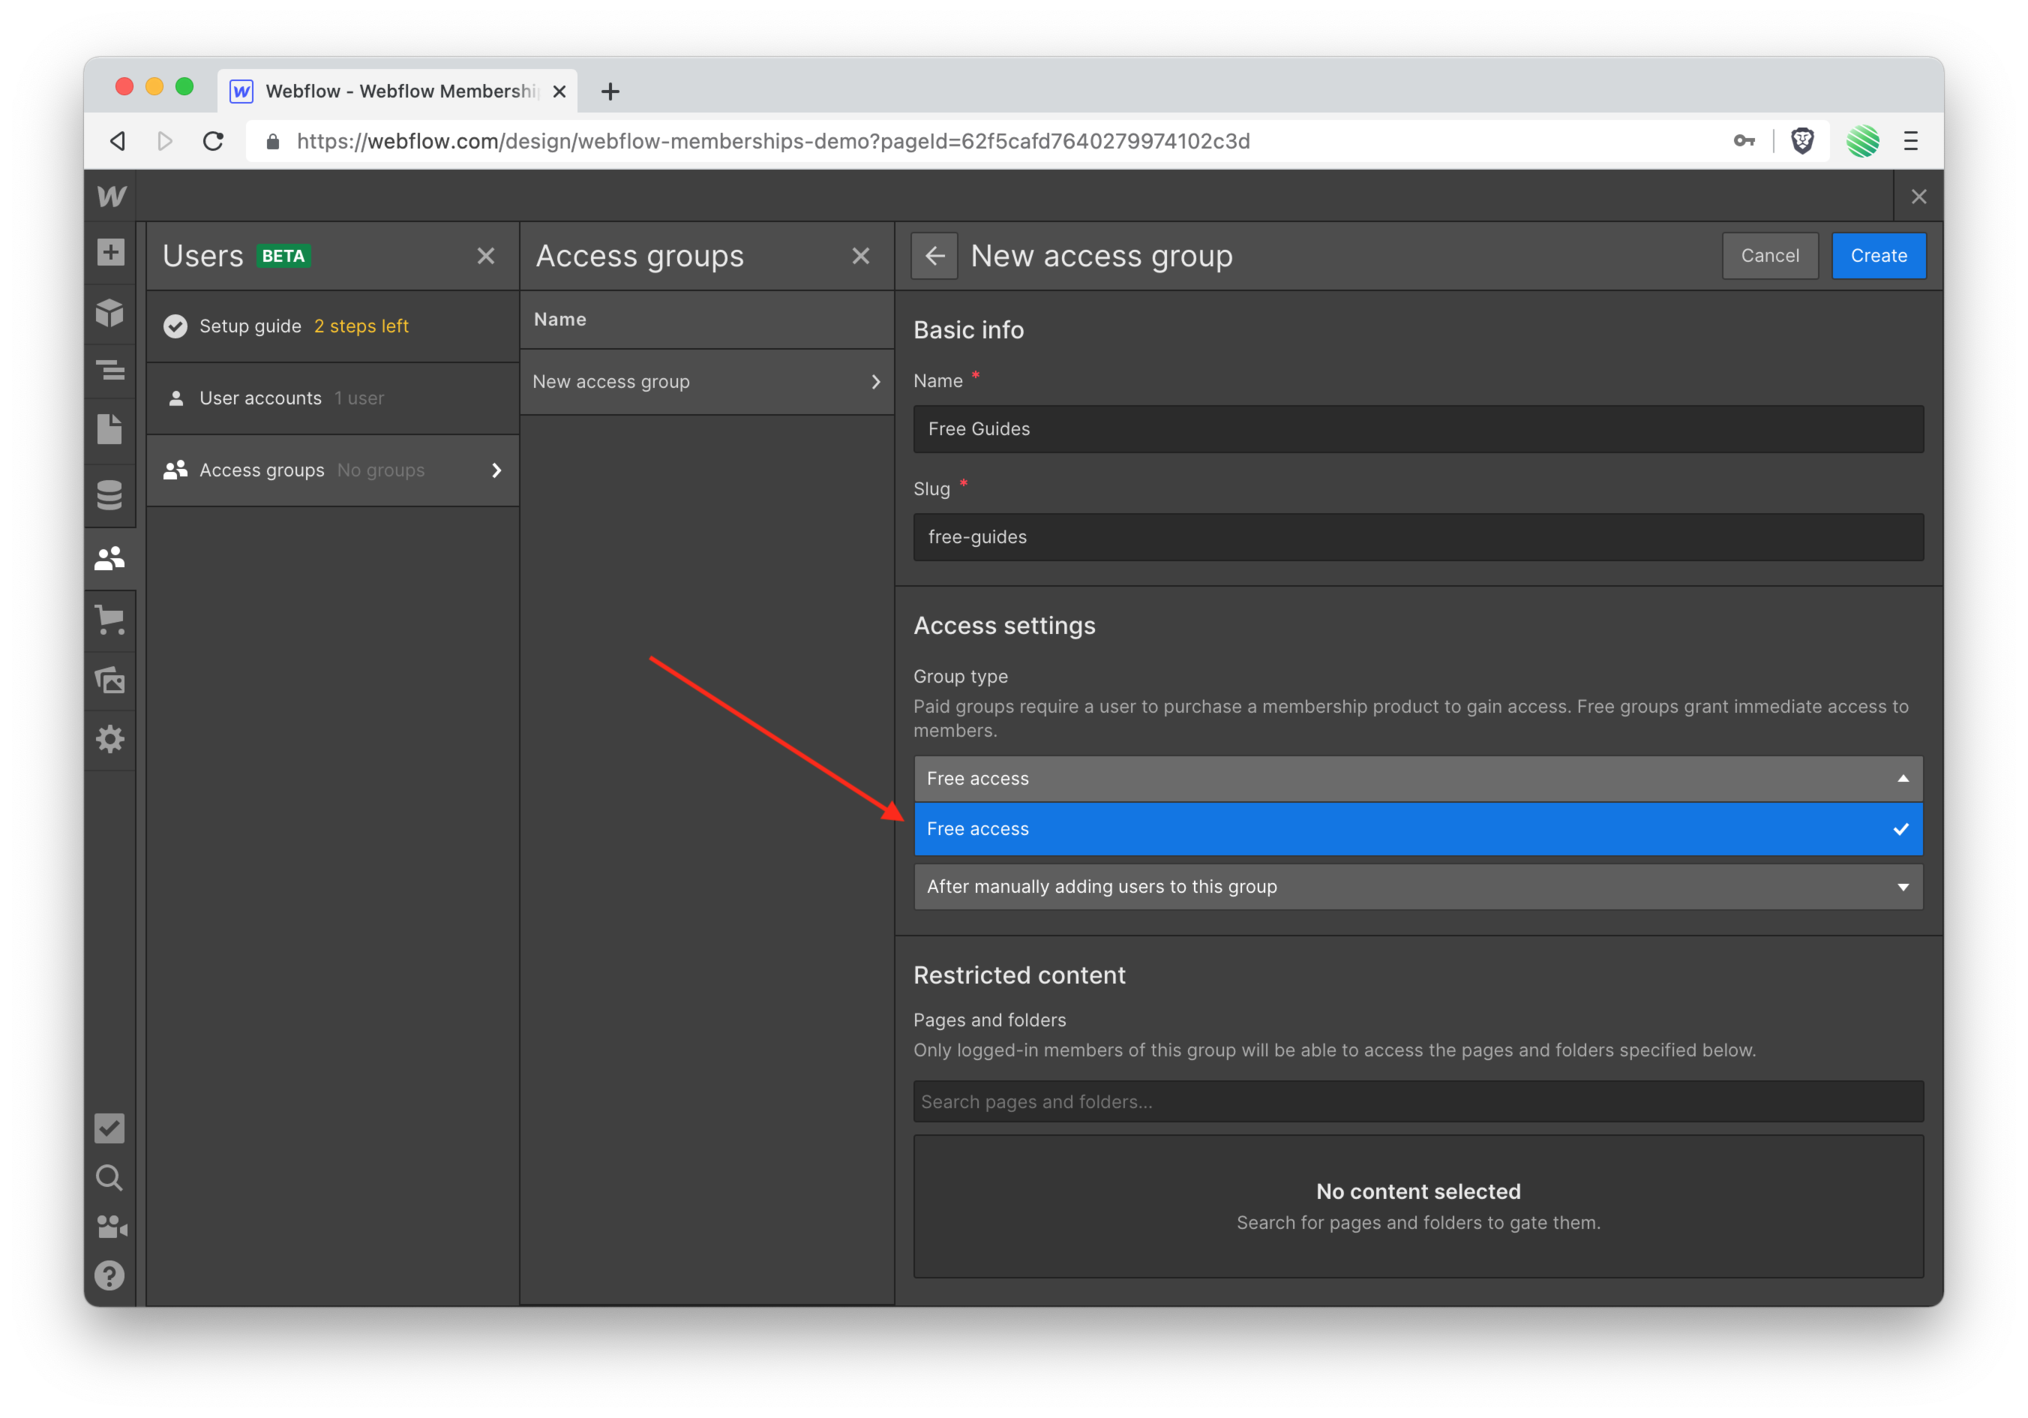 Notice the “group type” section.
If you set this up with an eCommerce site, you’ll have paid group types. If you didn’t your only option is free access.
For this walk through I am not setting up an eCommerce site (would you like me to walk through that? email and let me know: chris@nocodequest.com).
 After the free access type has been selected, notice the next field: "Grant access"
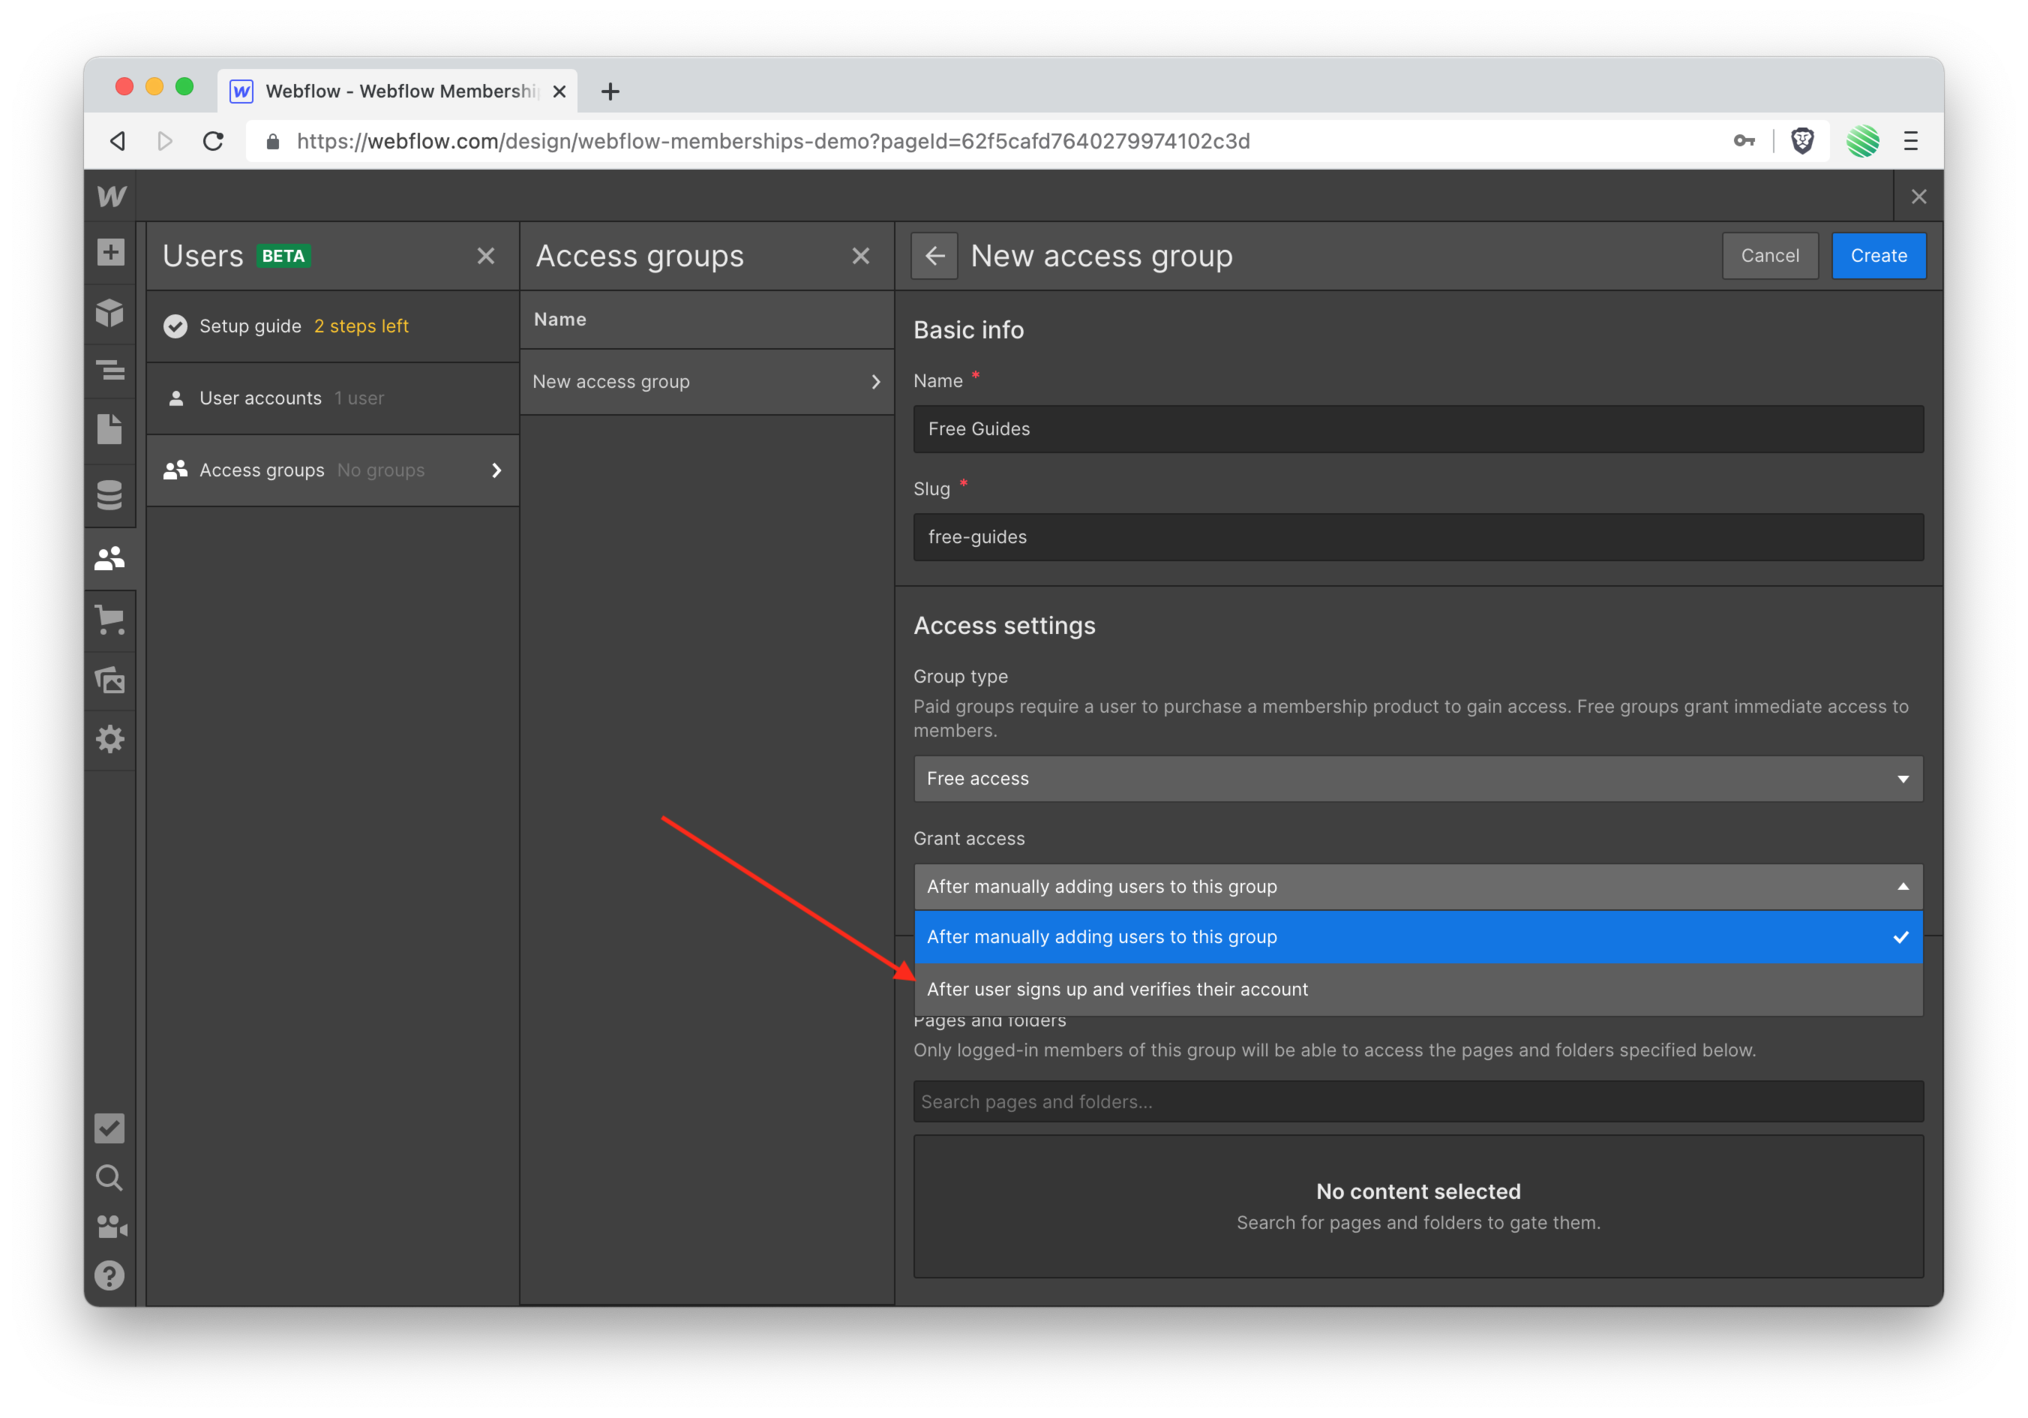 This access group will either grant access to the resource (which you'll setup in just a moment) after you add the user here, or automatically after the user accepts their email invitation and creates a valid account on your Webflow site.
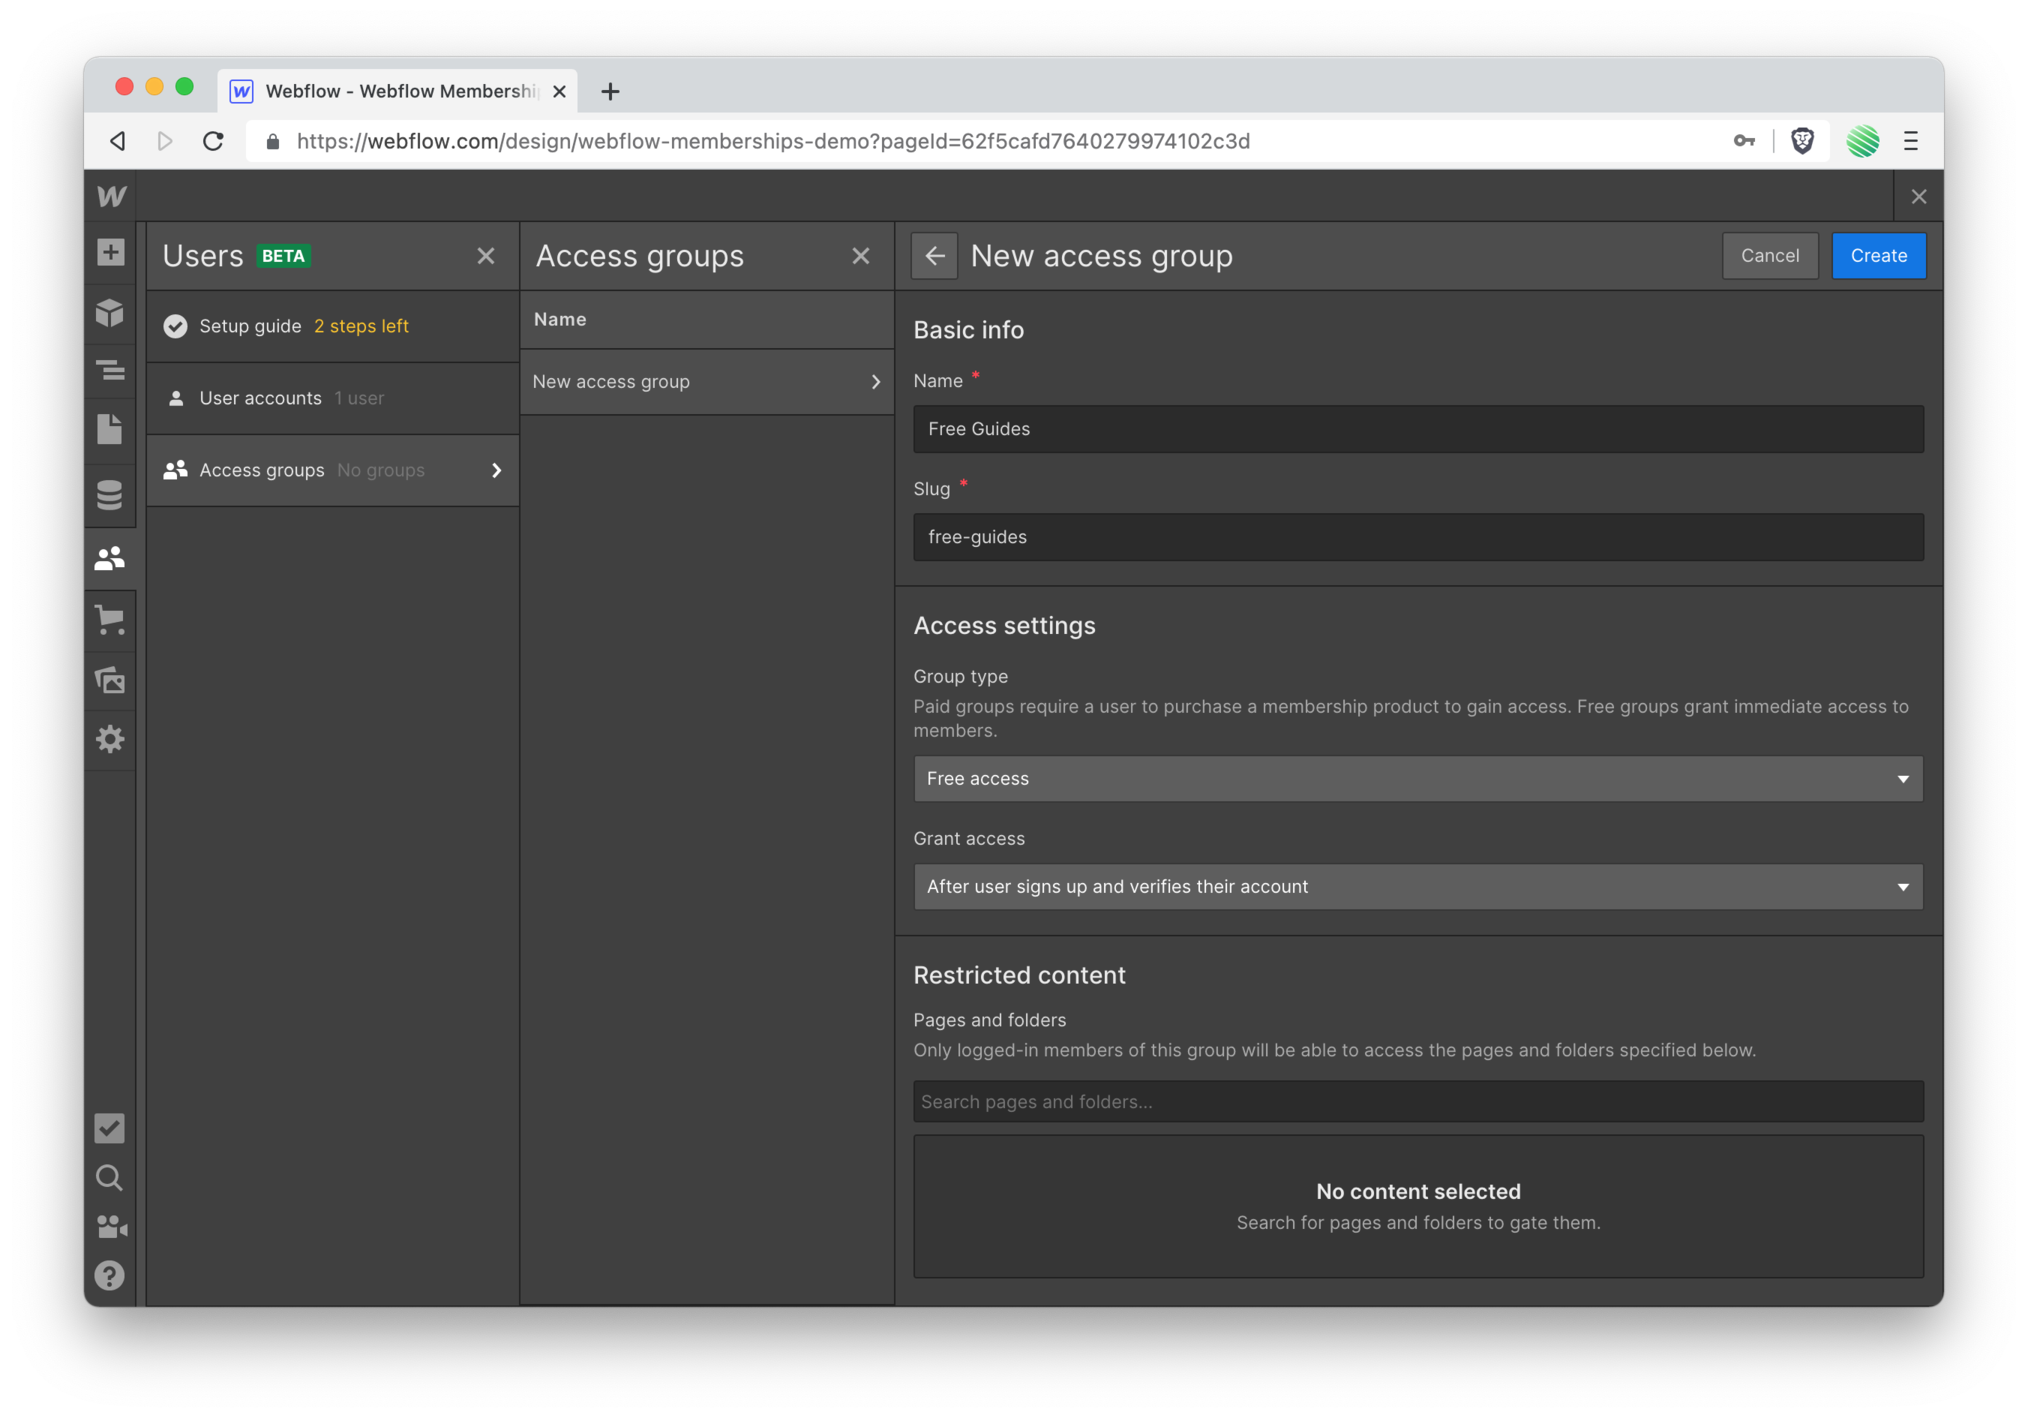 For this walk through, select after the user signs up and verifies their account.
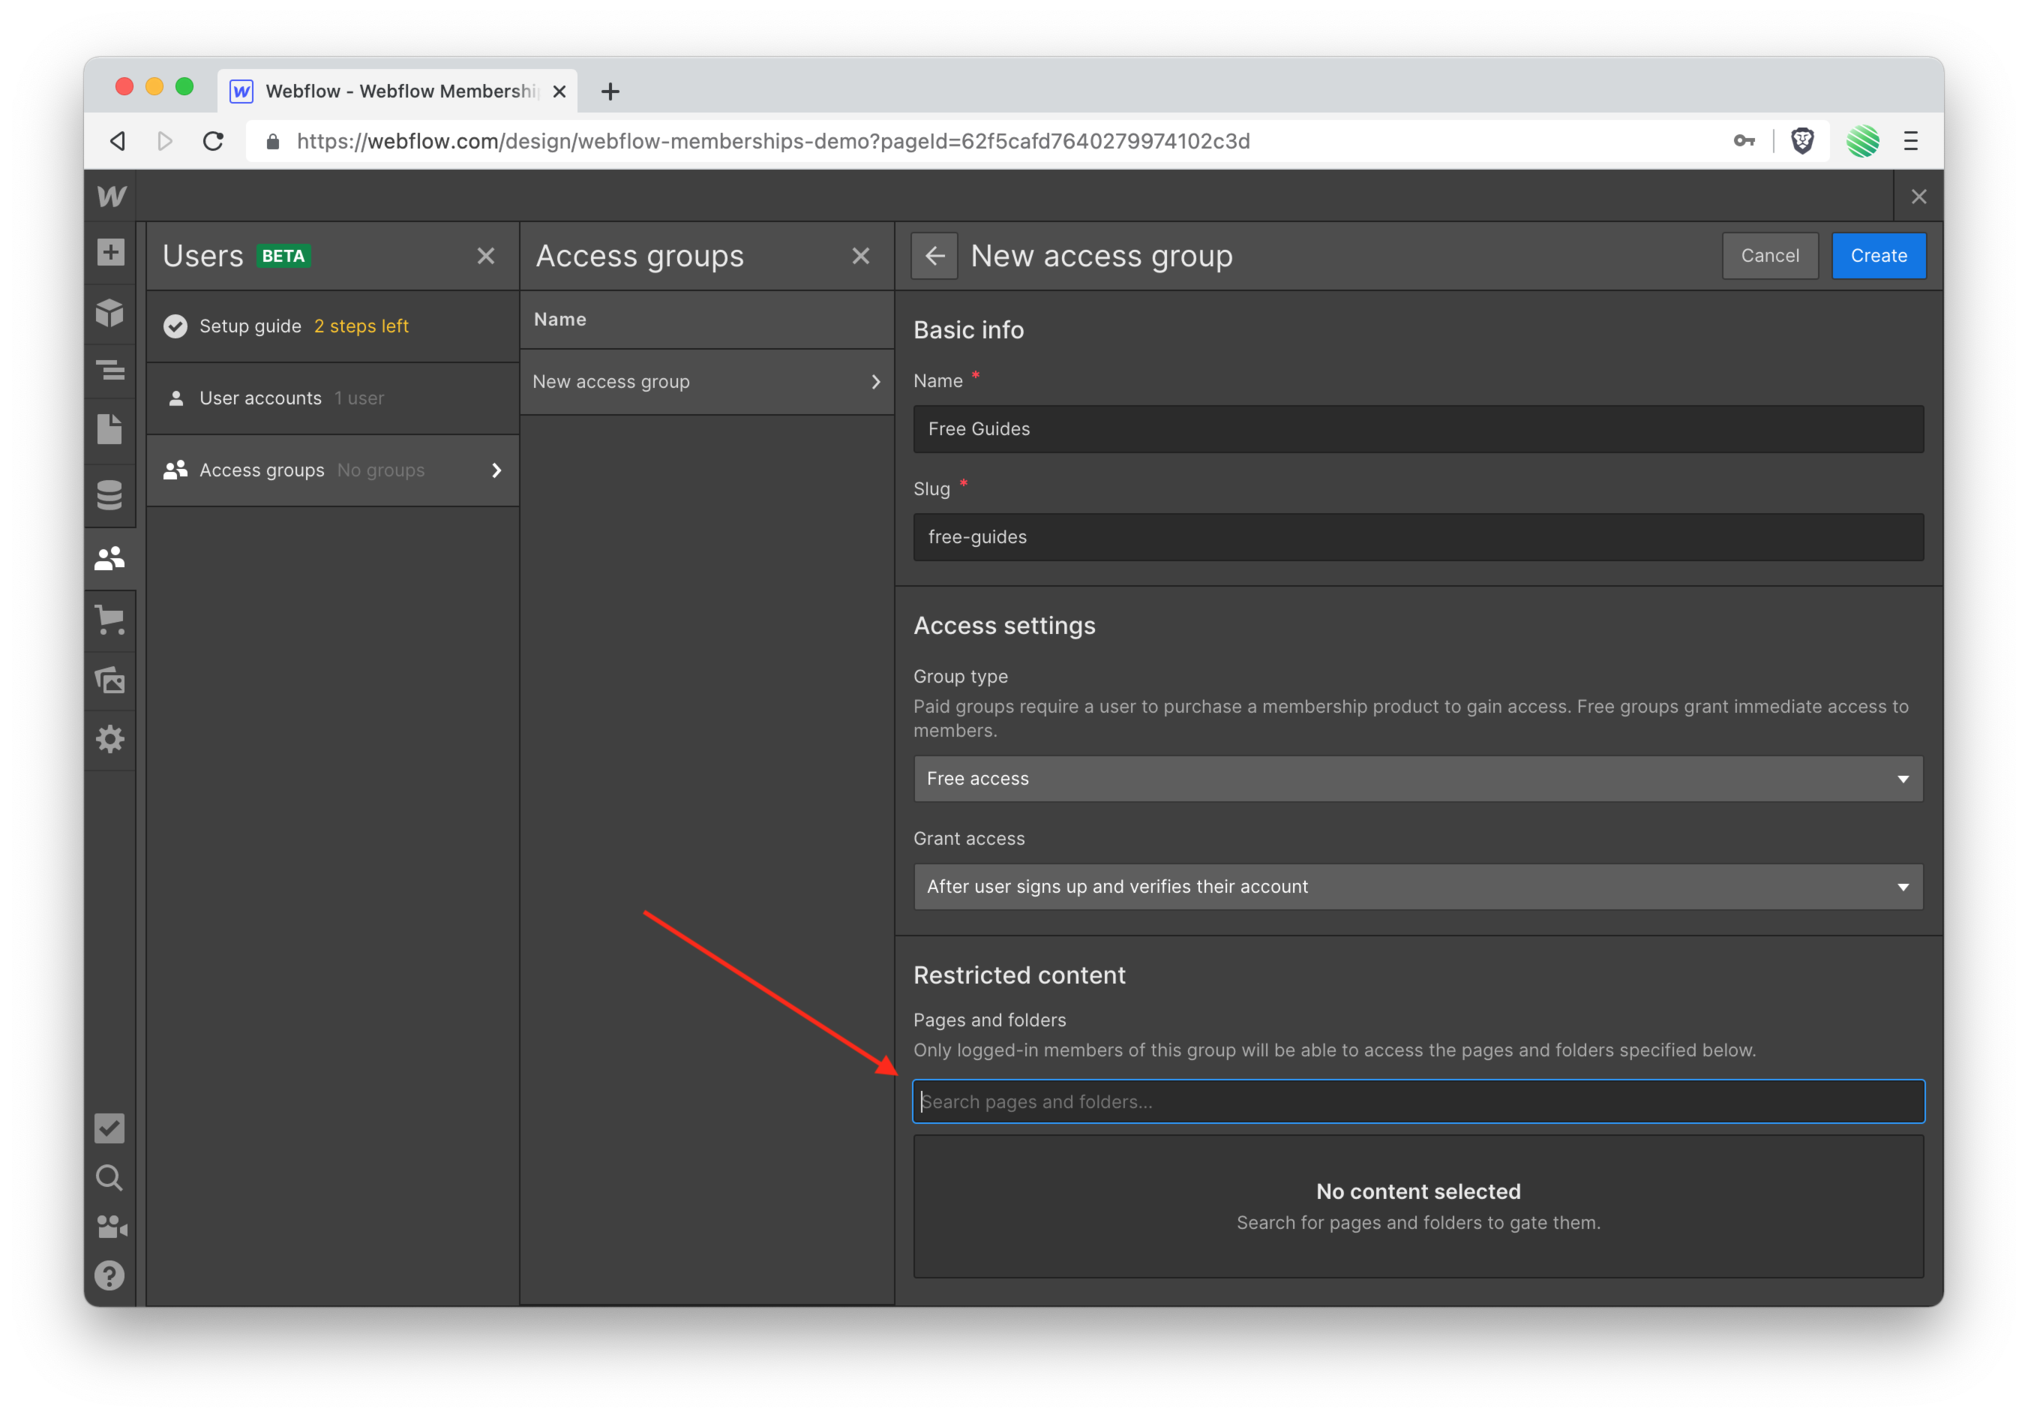 Notice the restricted content section. When tapping your mouse into the field nothing shows up.
Why?
This is because you haven’t yet added any restricted content for this access group to govern.
Let’s do that 😃
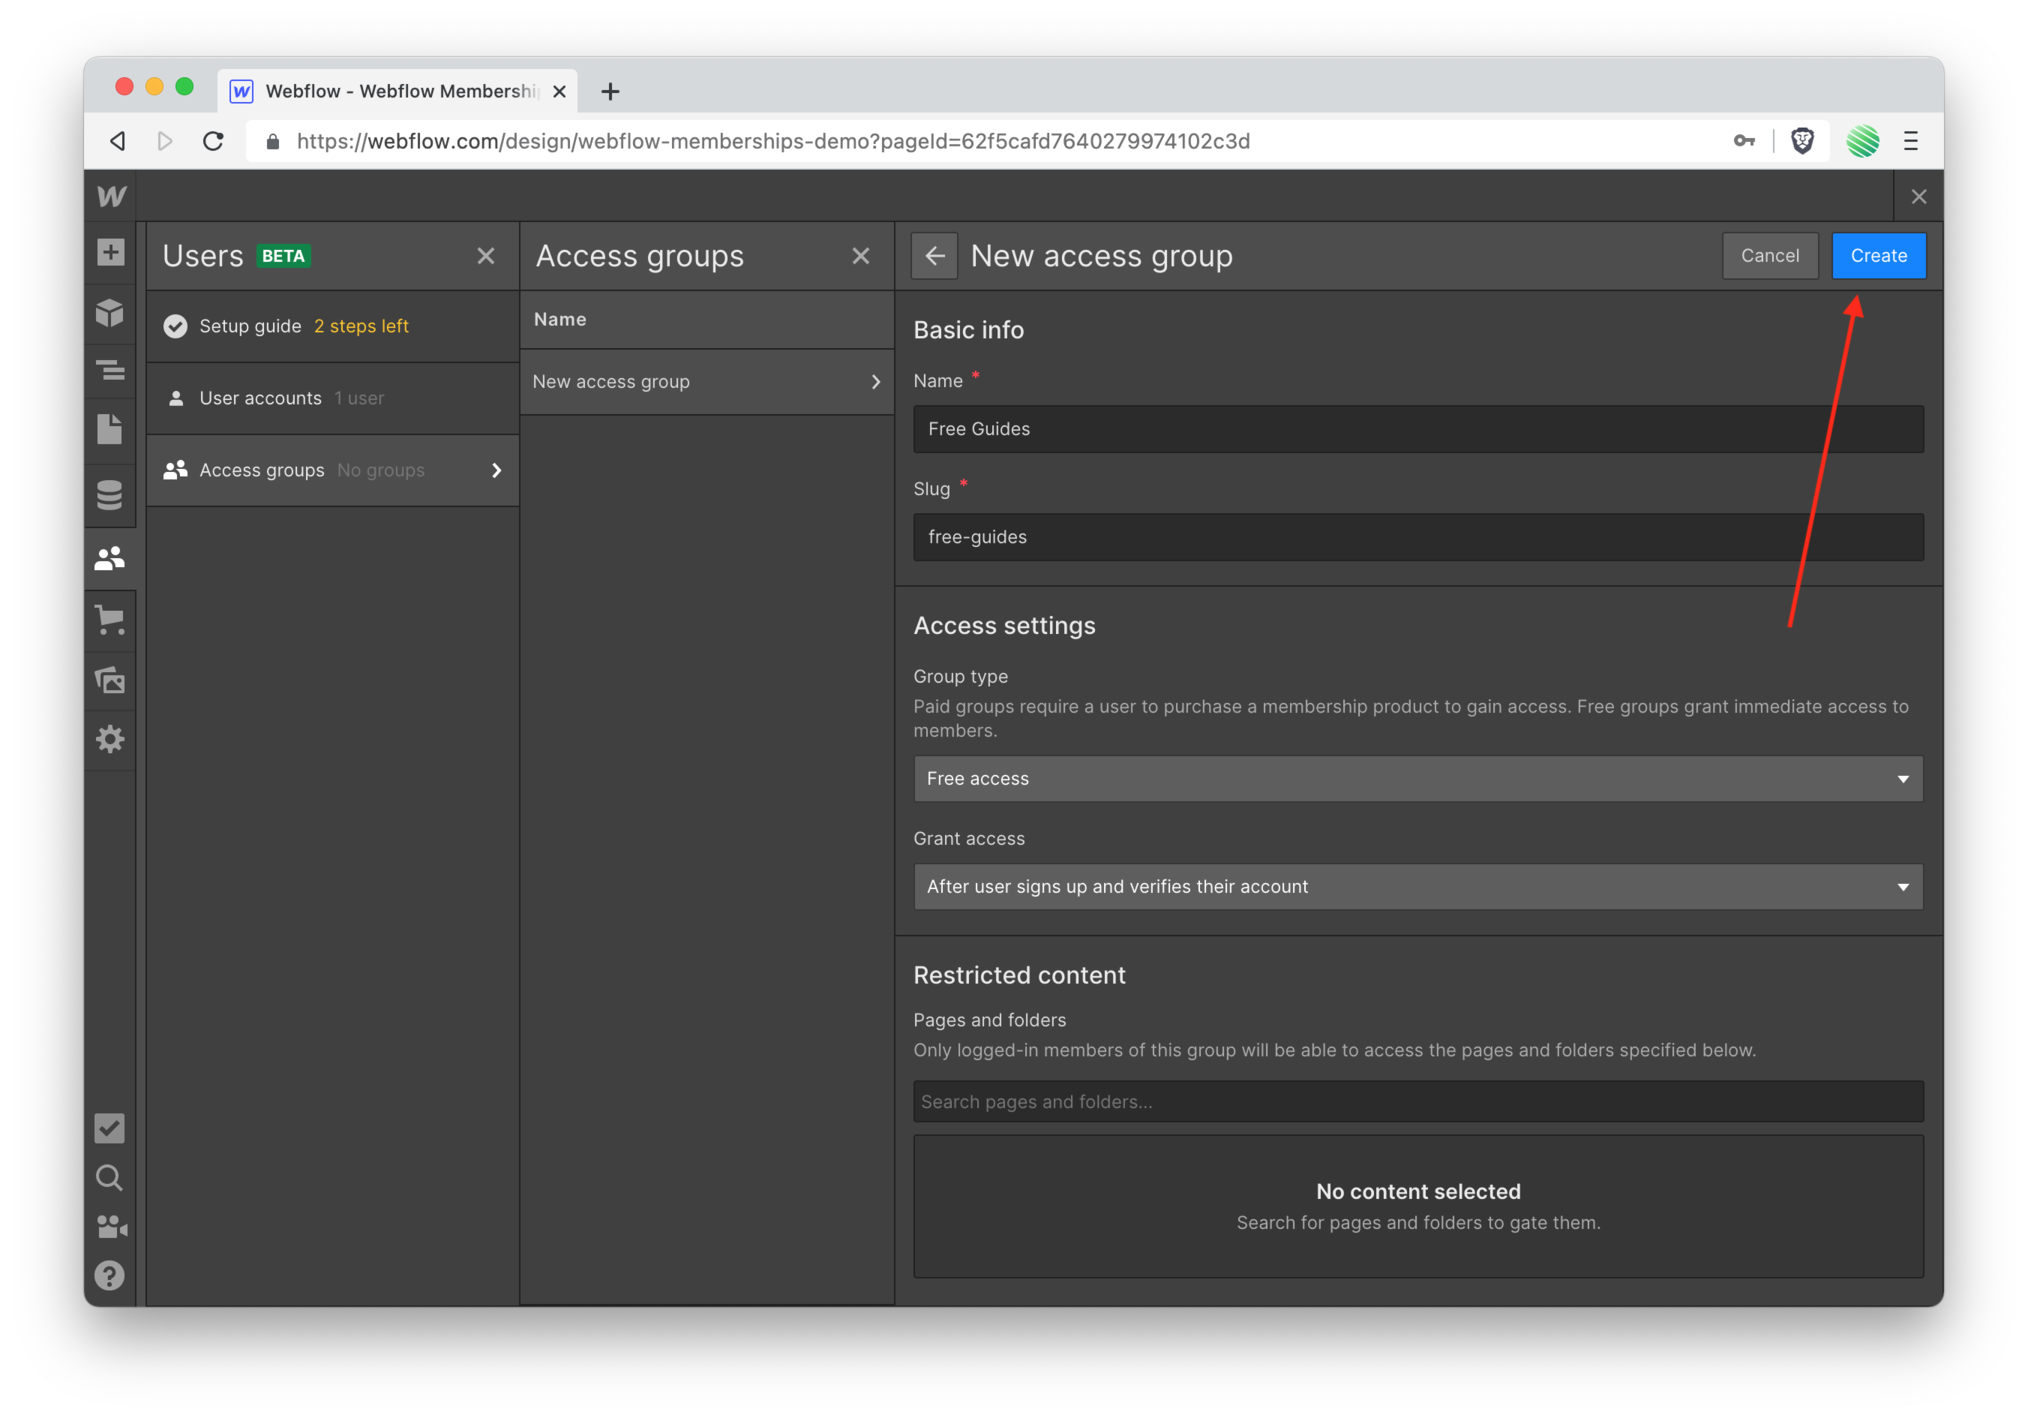 Tap the “create” button for this new access group.
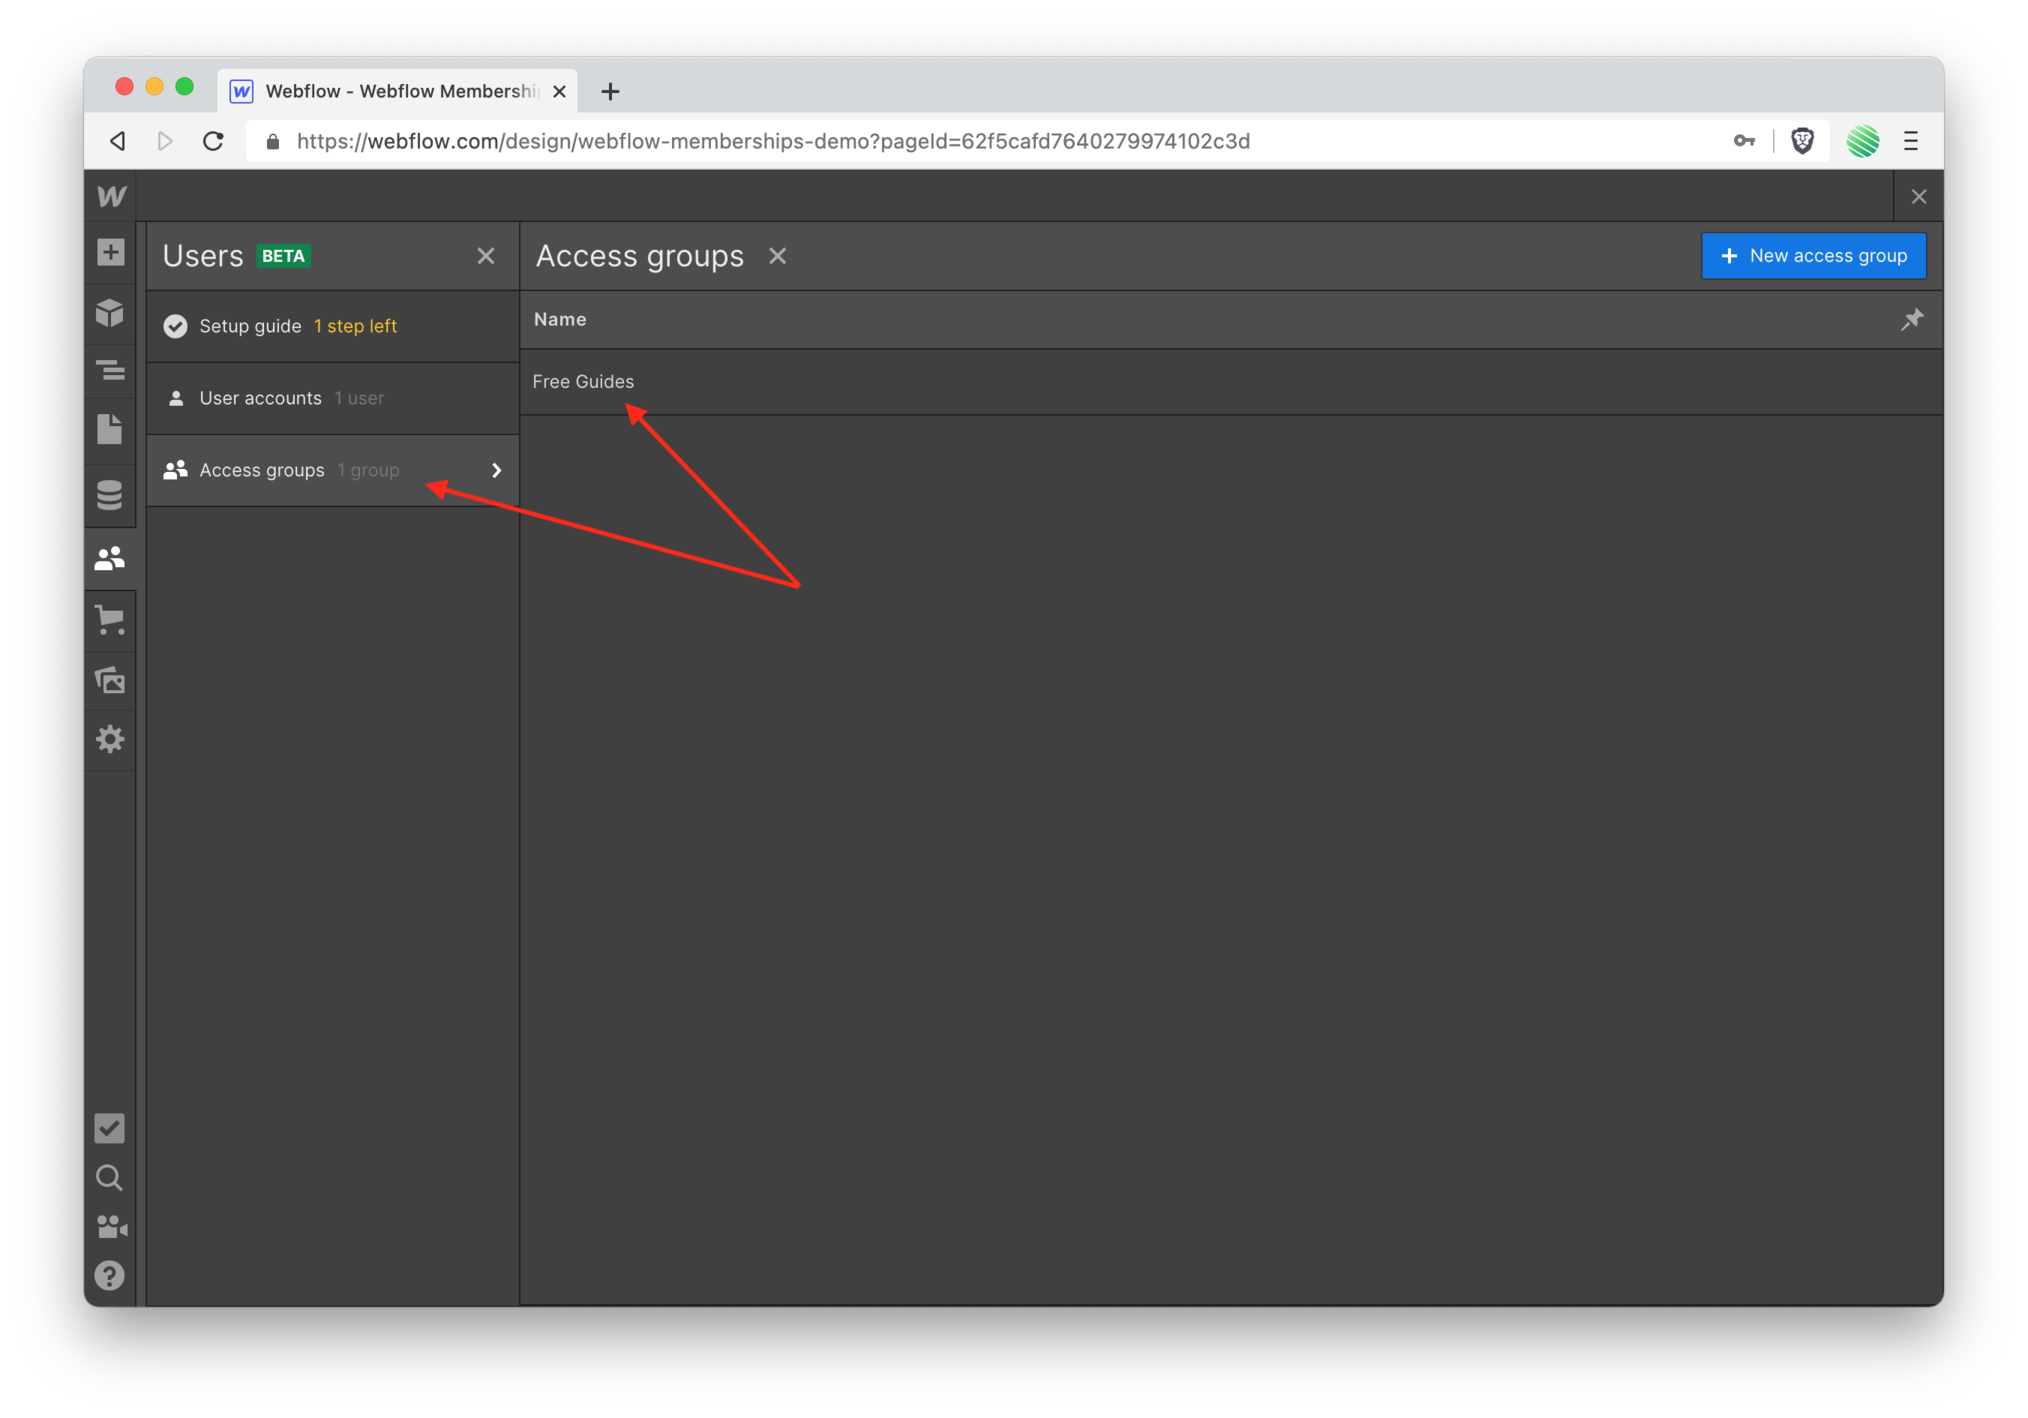 Notice it’s been successfully created.
 Go back to Users (left side panel). Notice you’re down from 2 to 1 steps remaining 🥳
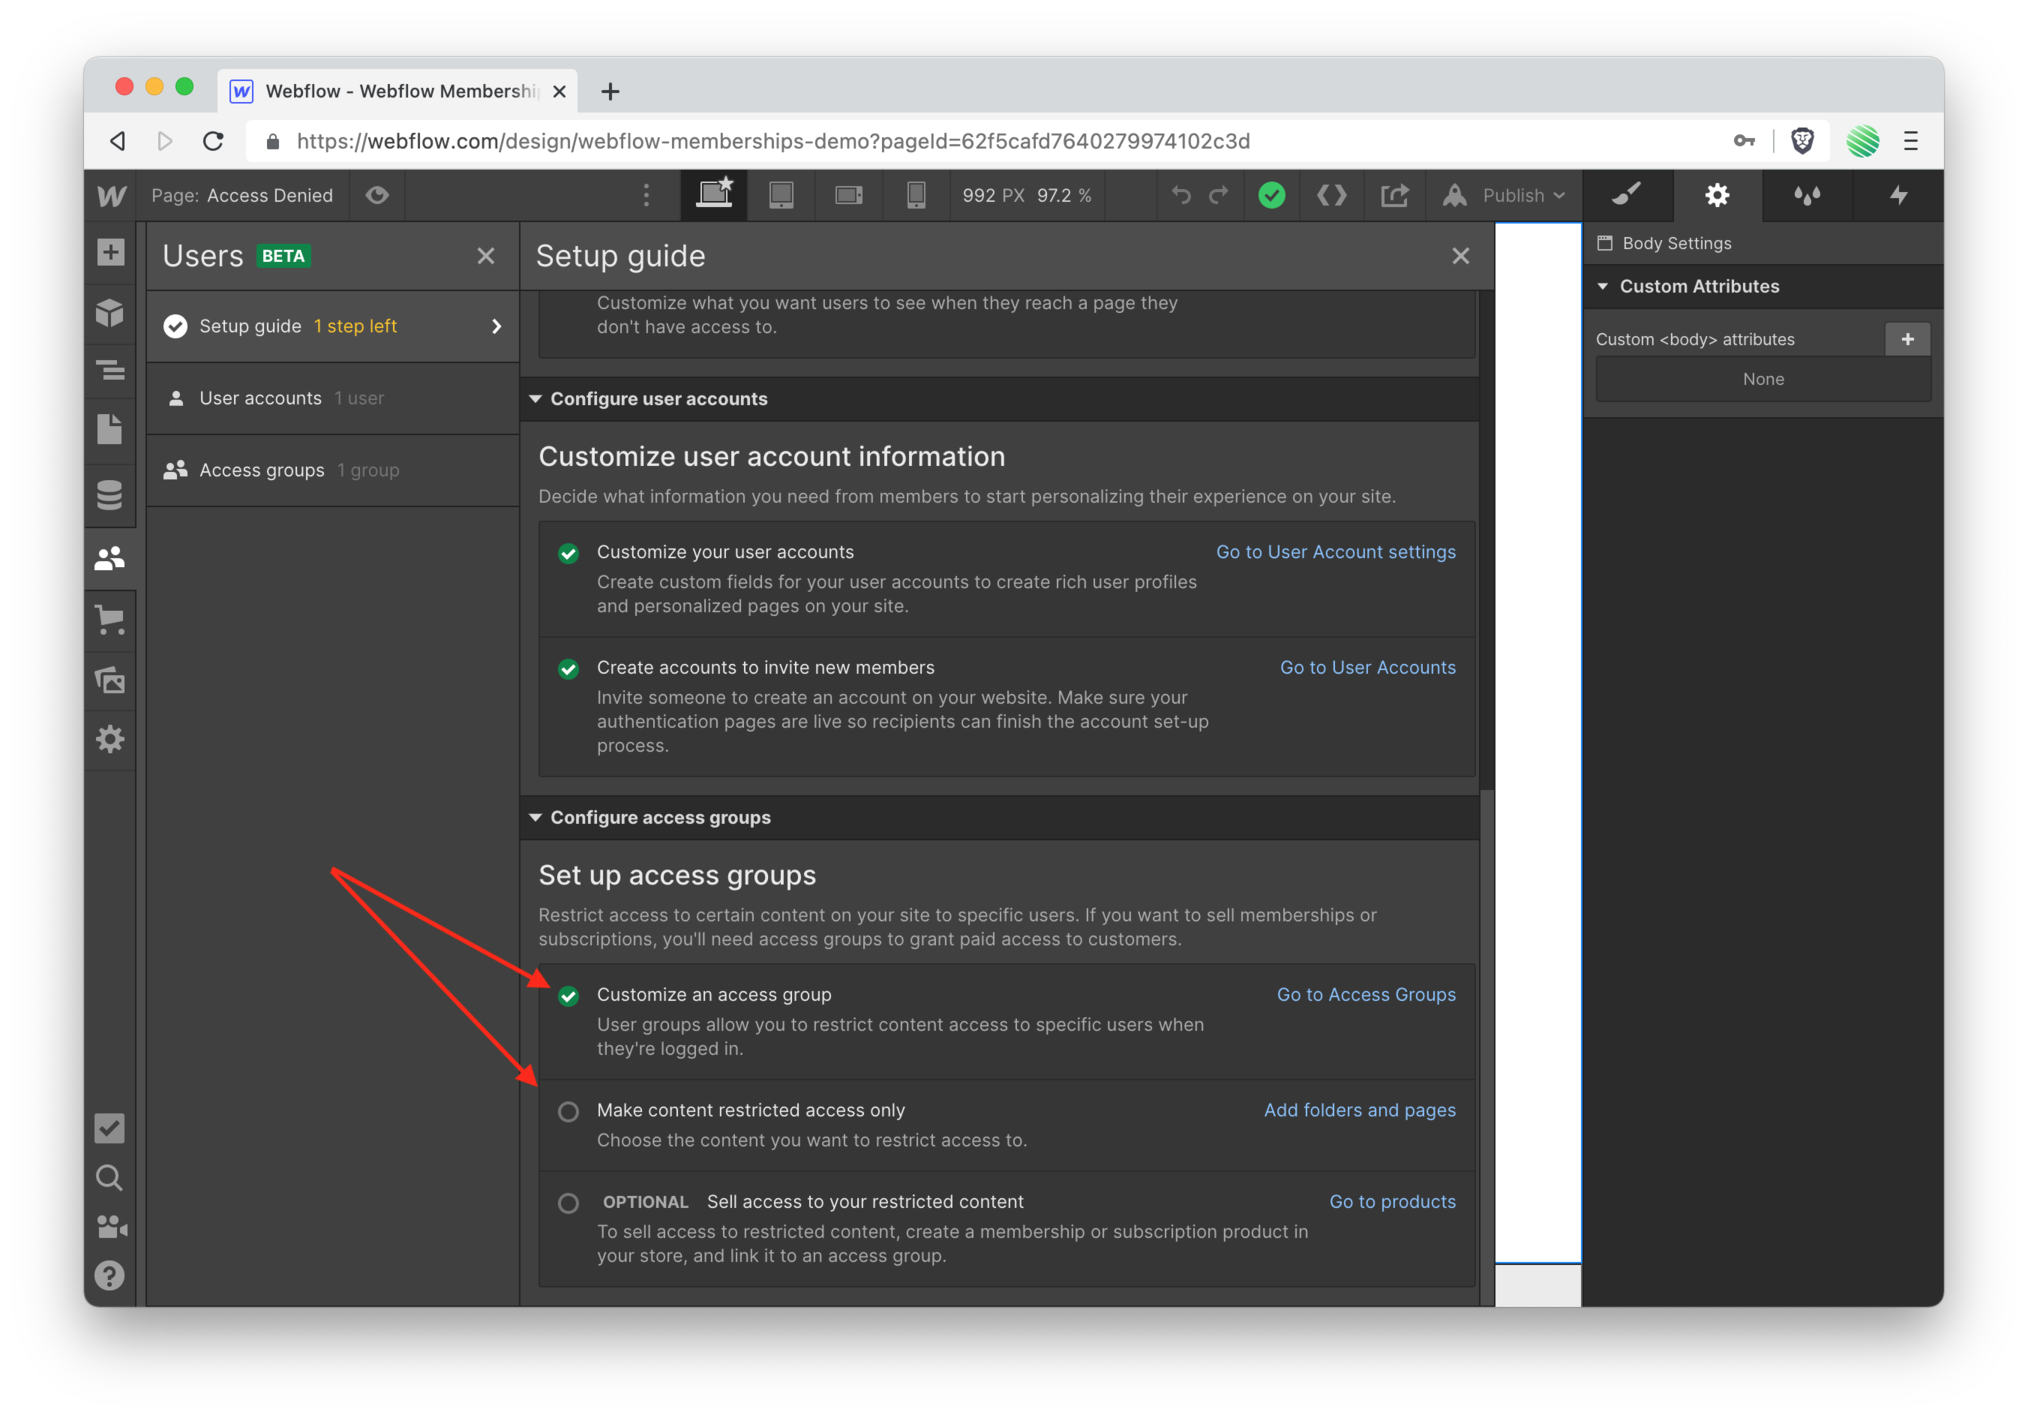
Make Content Restricted Access Only (Gated)
Tap the “add folder’s and pages” link.
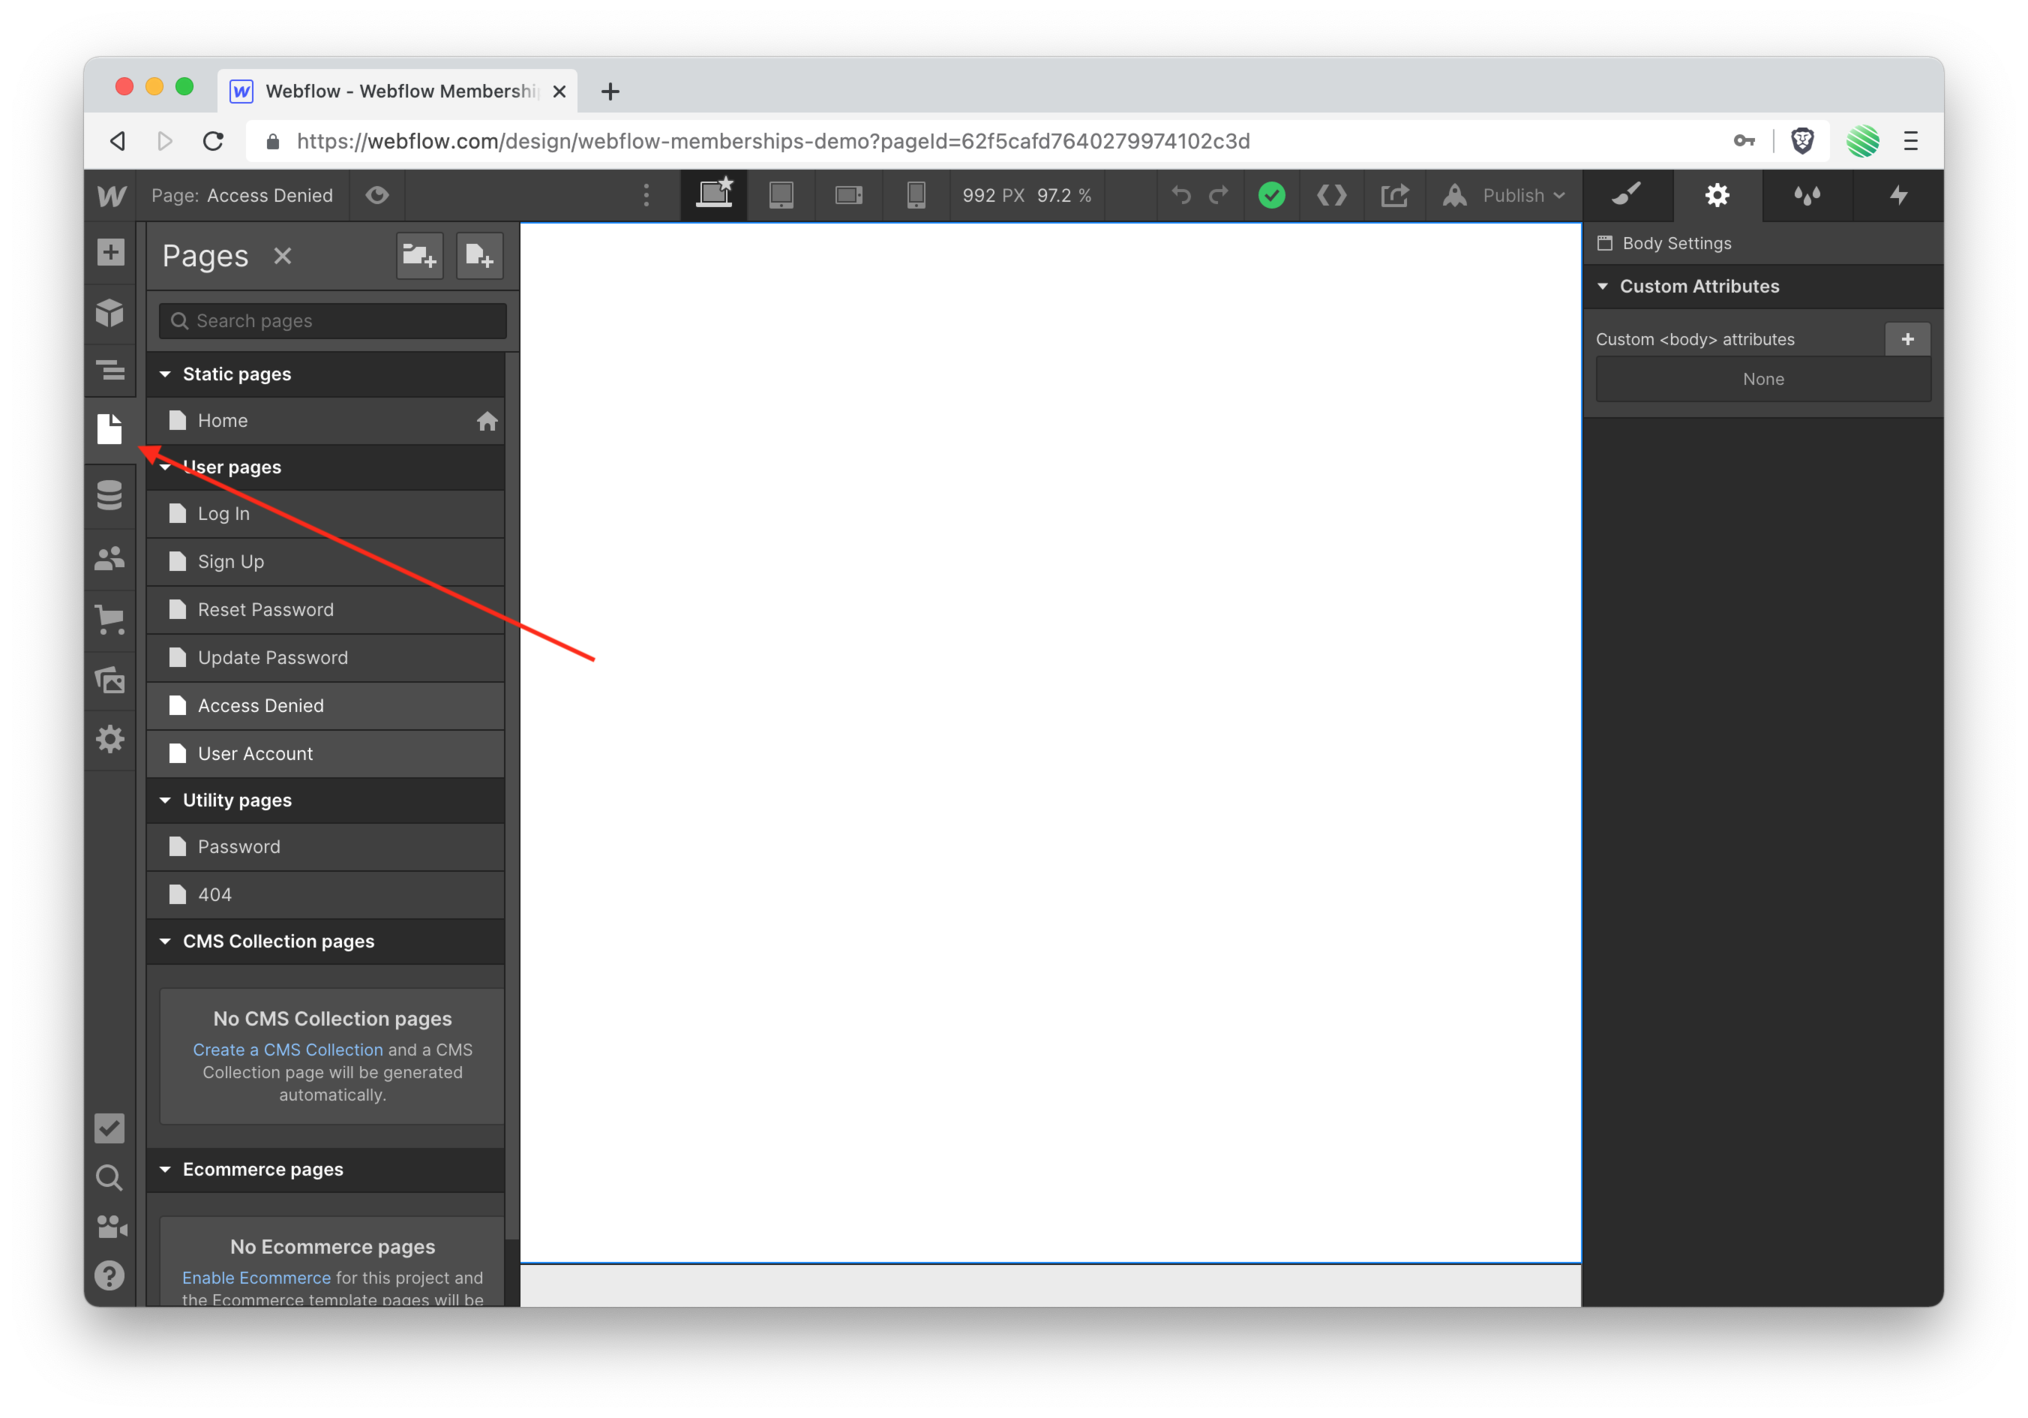 You’ll be dumped out to the Pages pane.
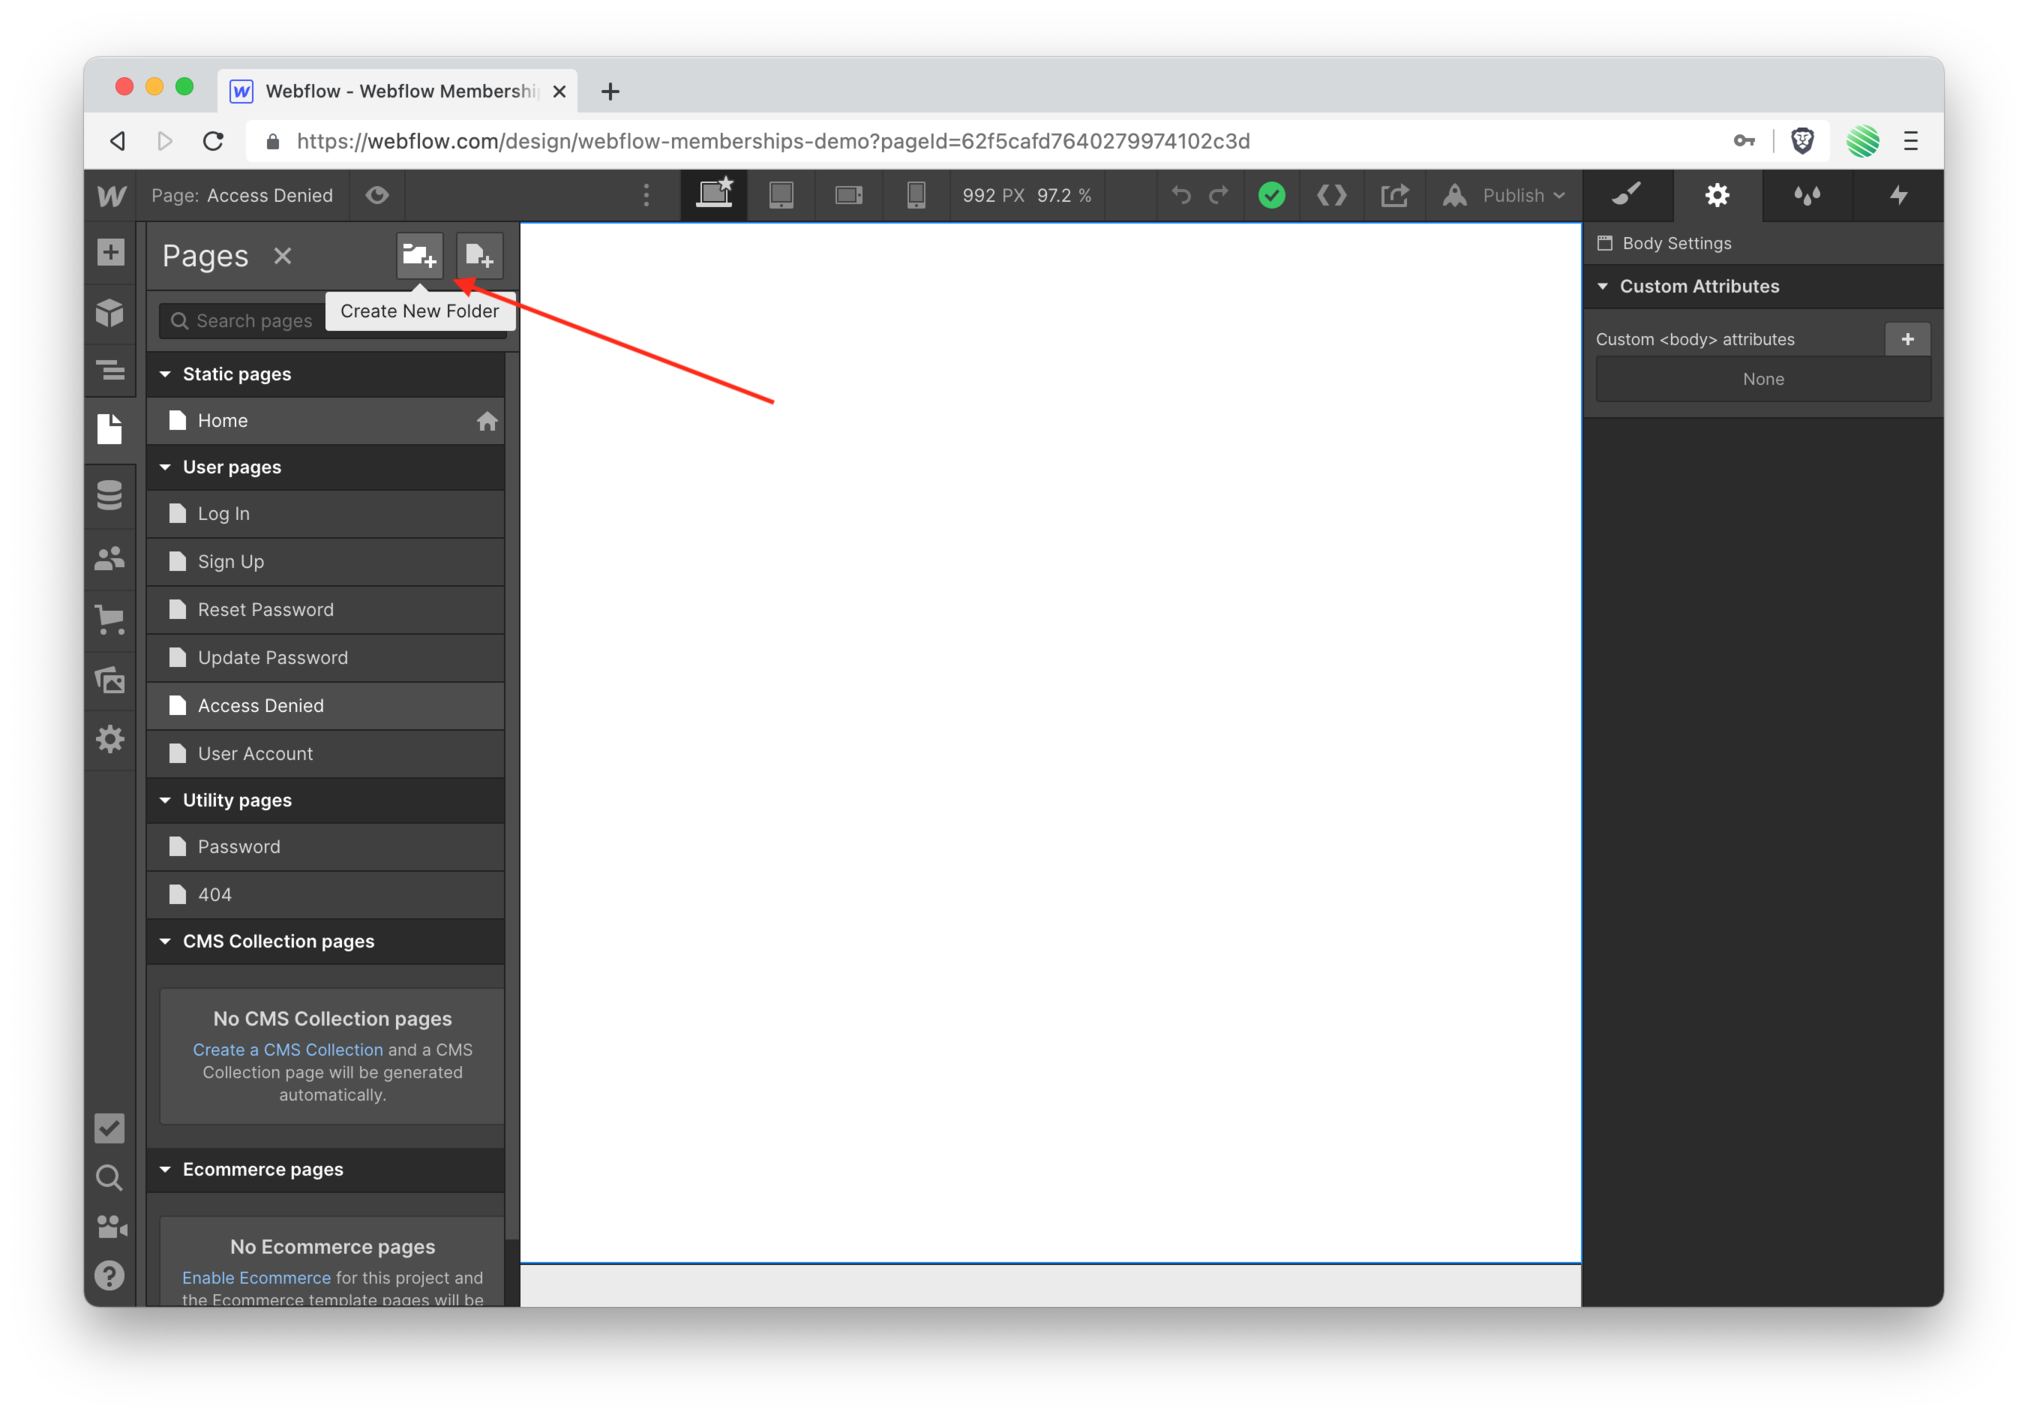 Create a new folder for your static pages.
 Nothing different so far. Do the same you’ve always done.
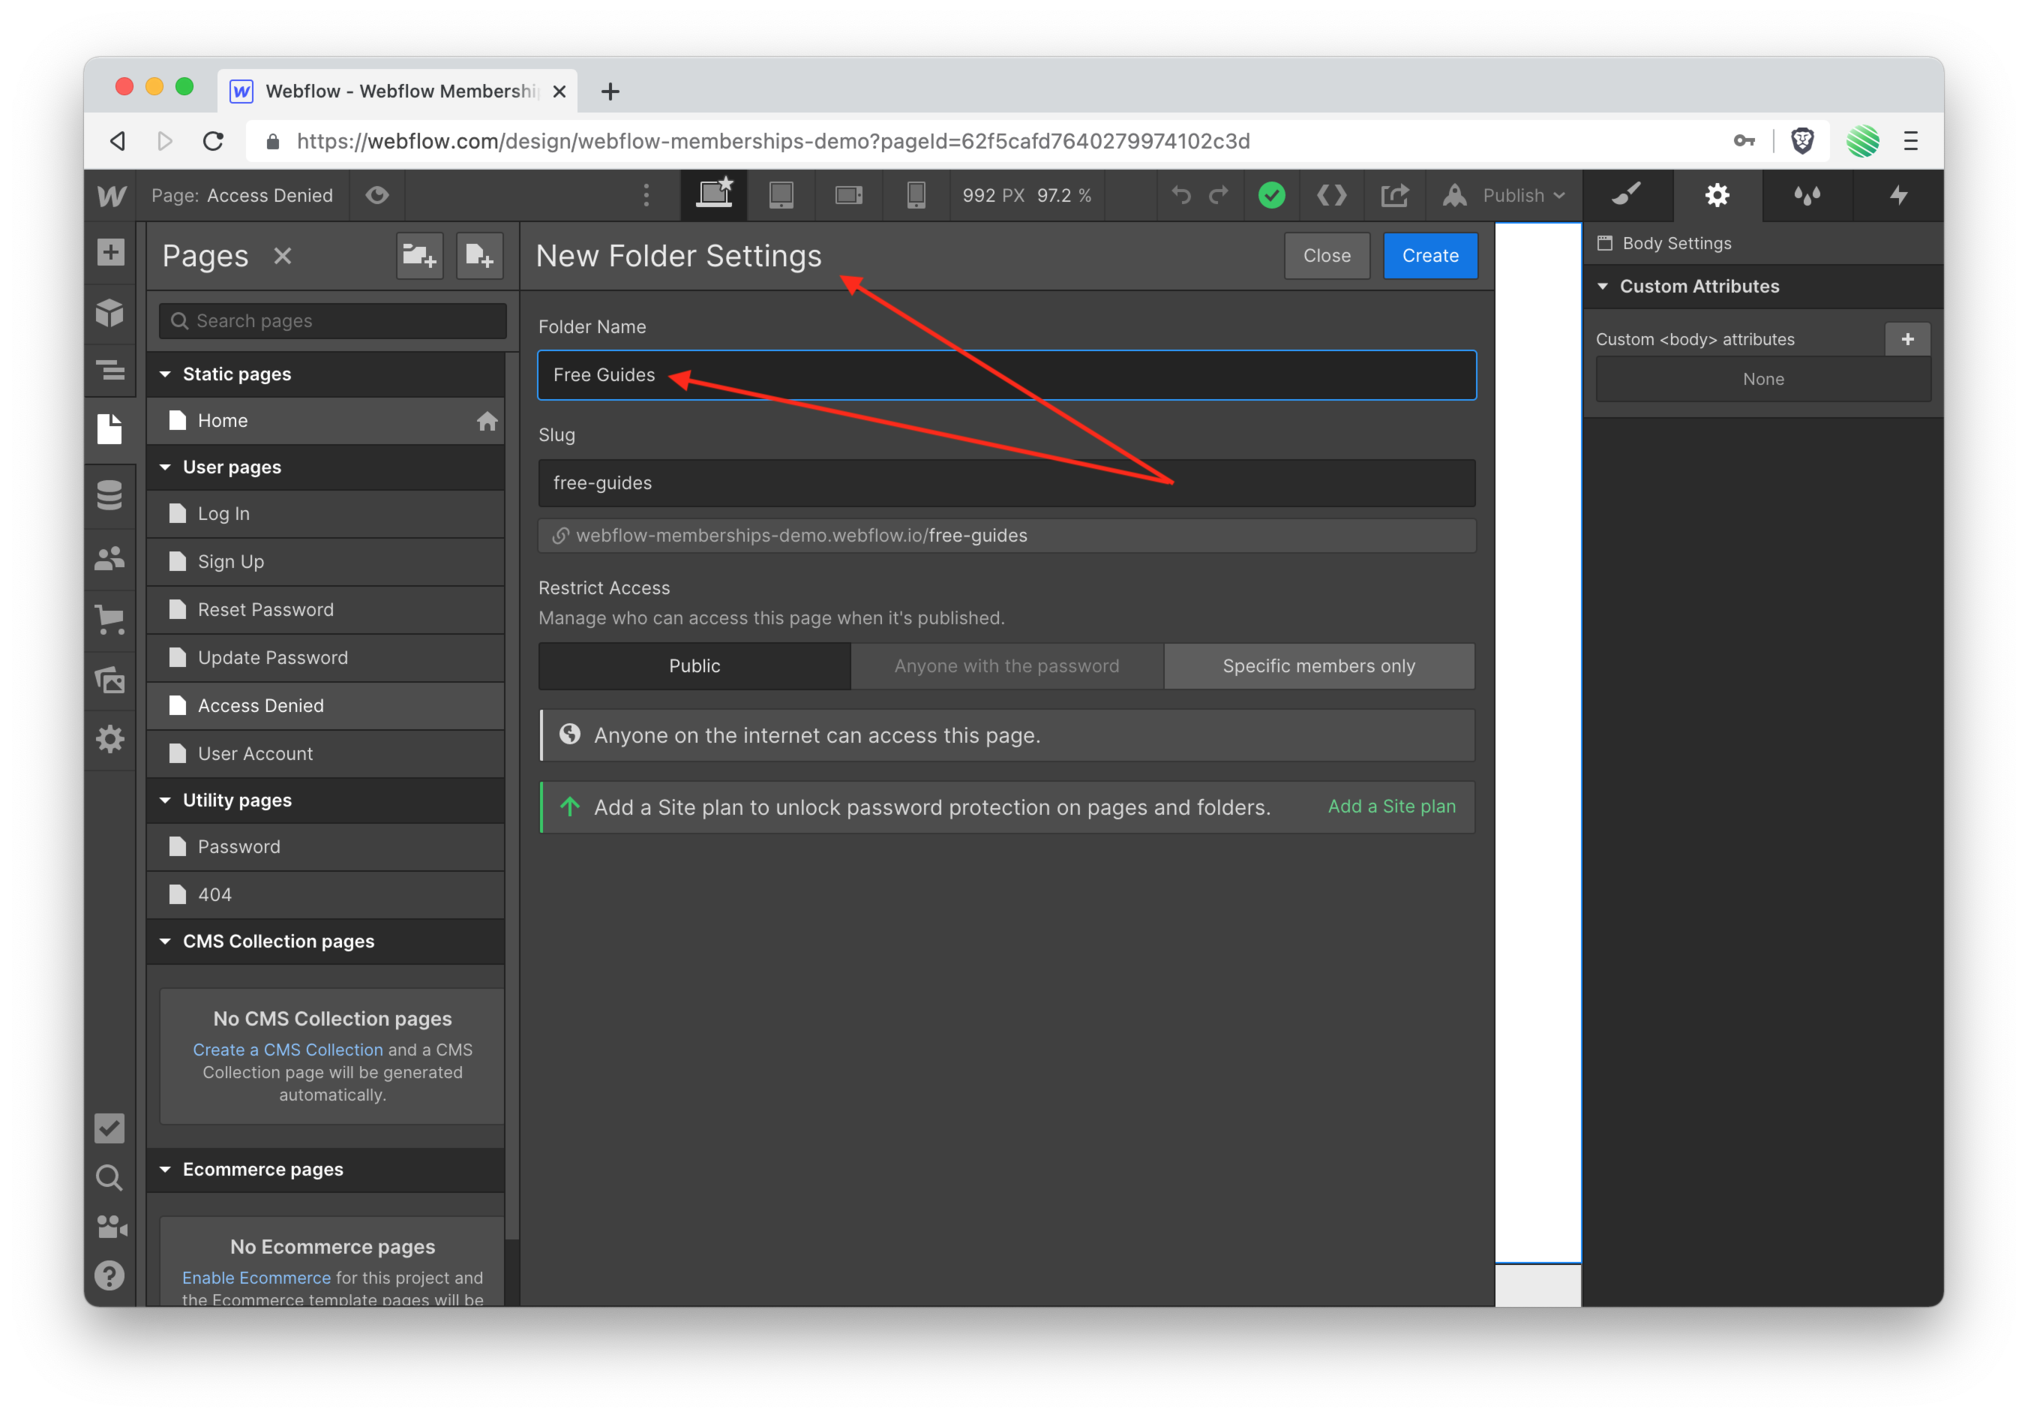
 But notice the new section now.
Restricted Access.
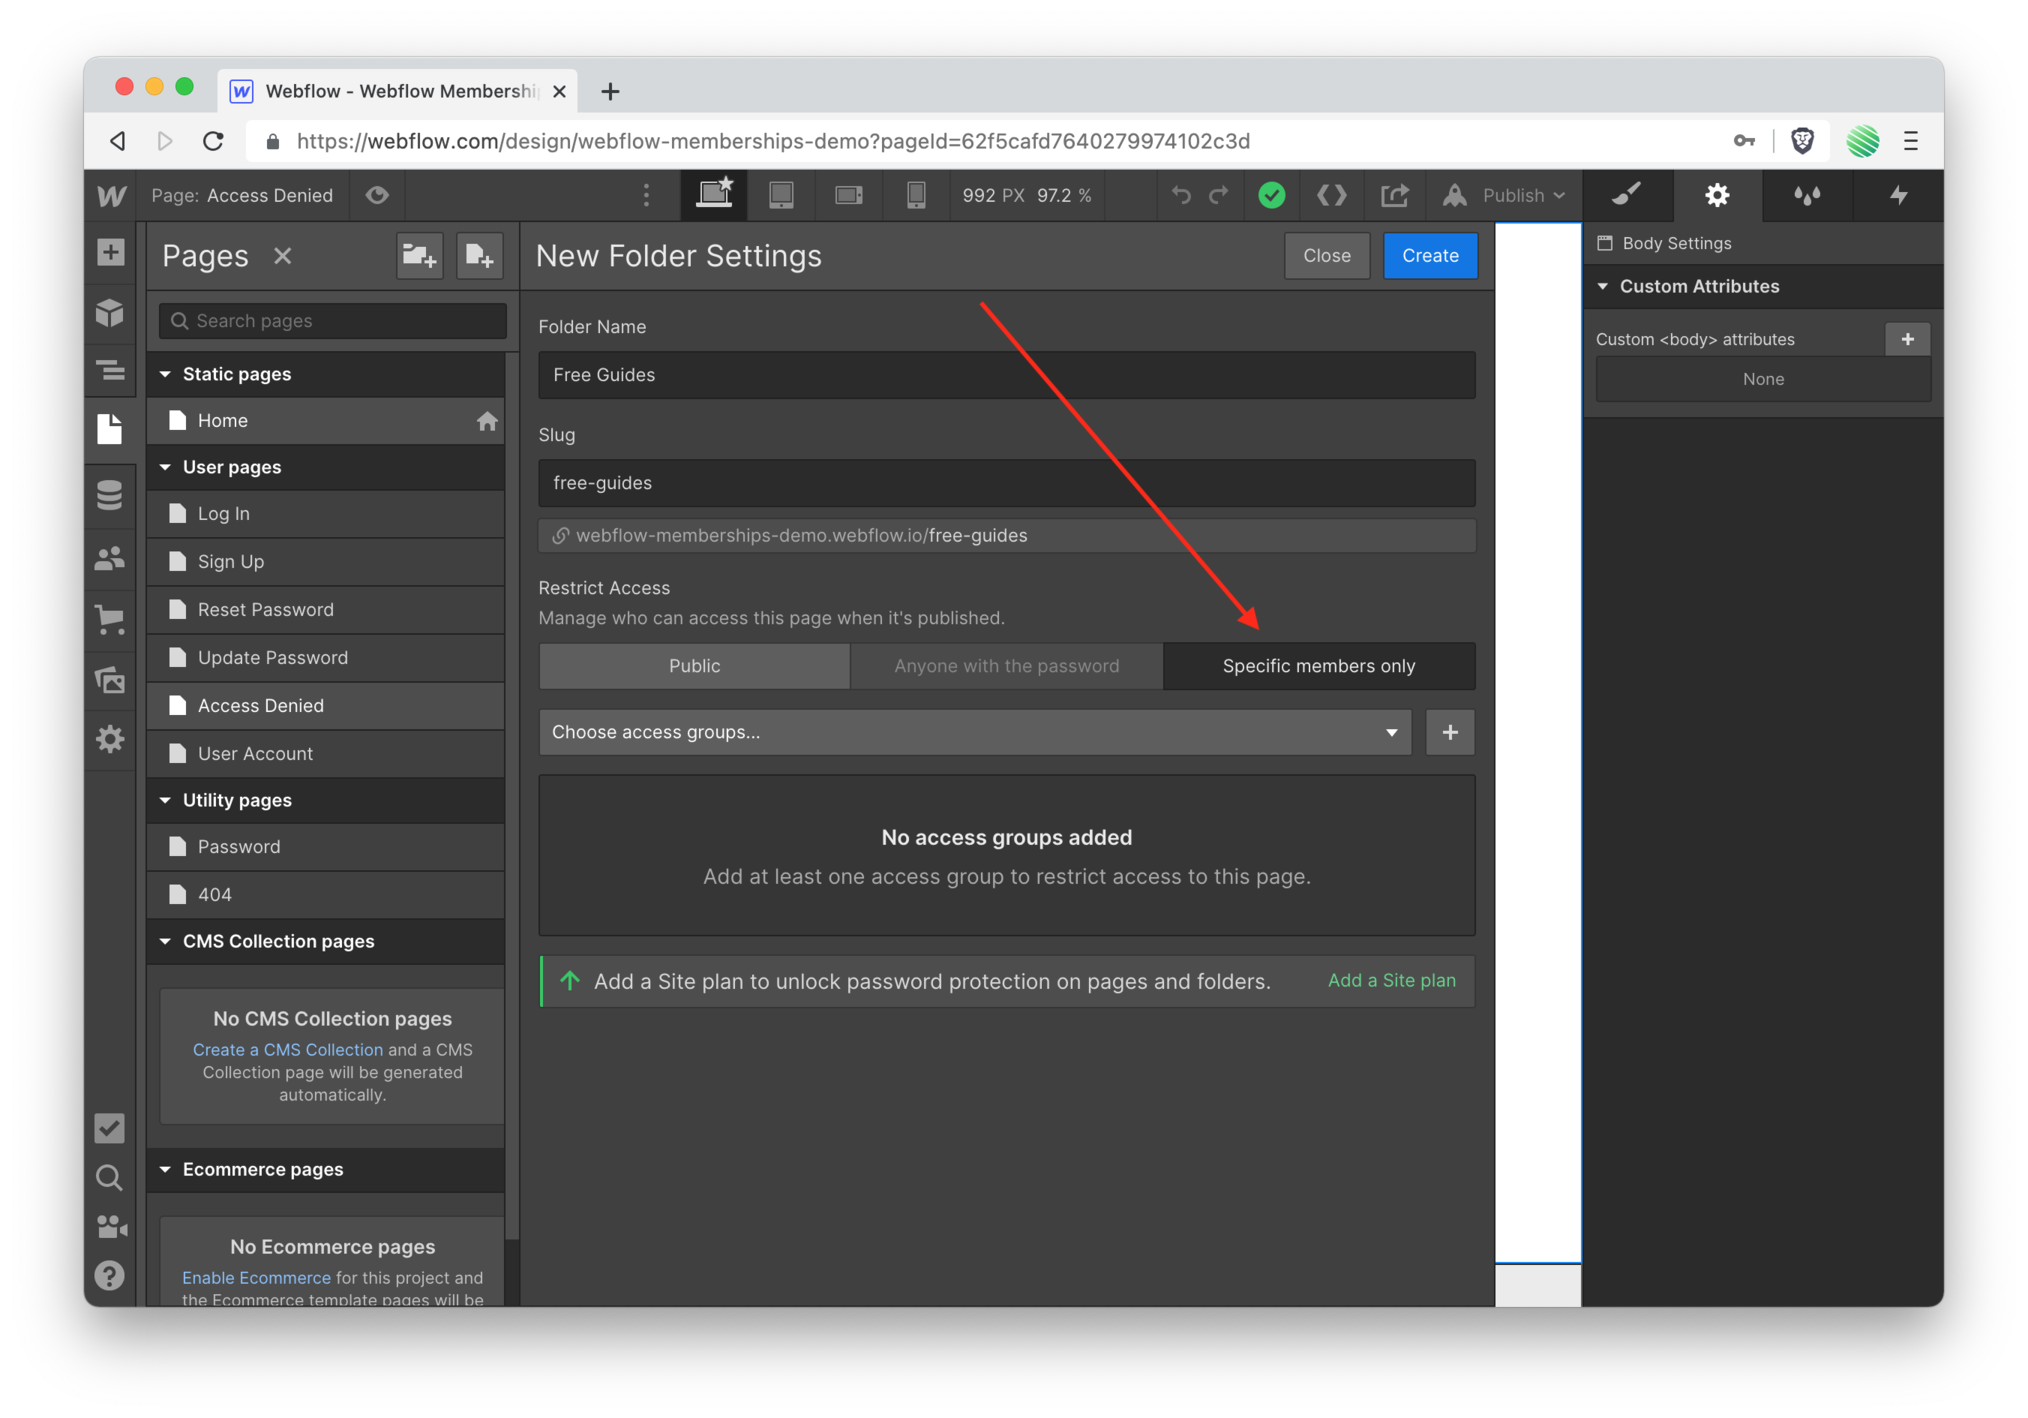
Select “specific members only” for this folder.
This is the magic ✨
This is what links your access group to a specific page / folder.
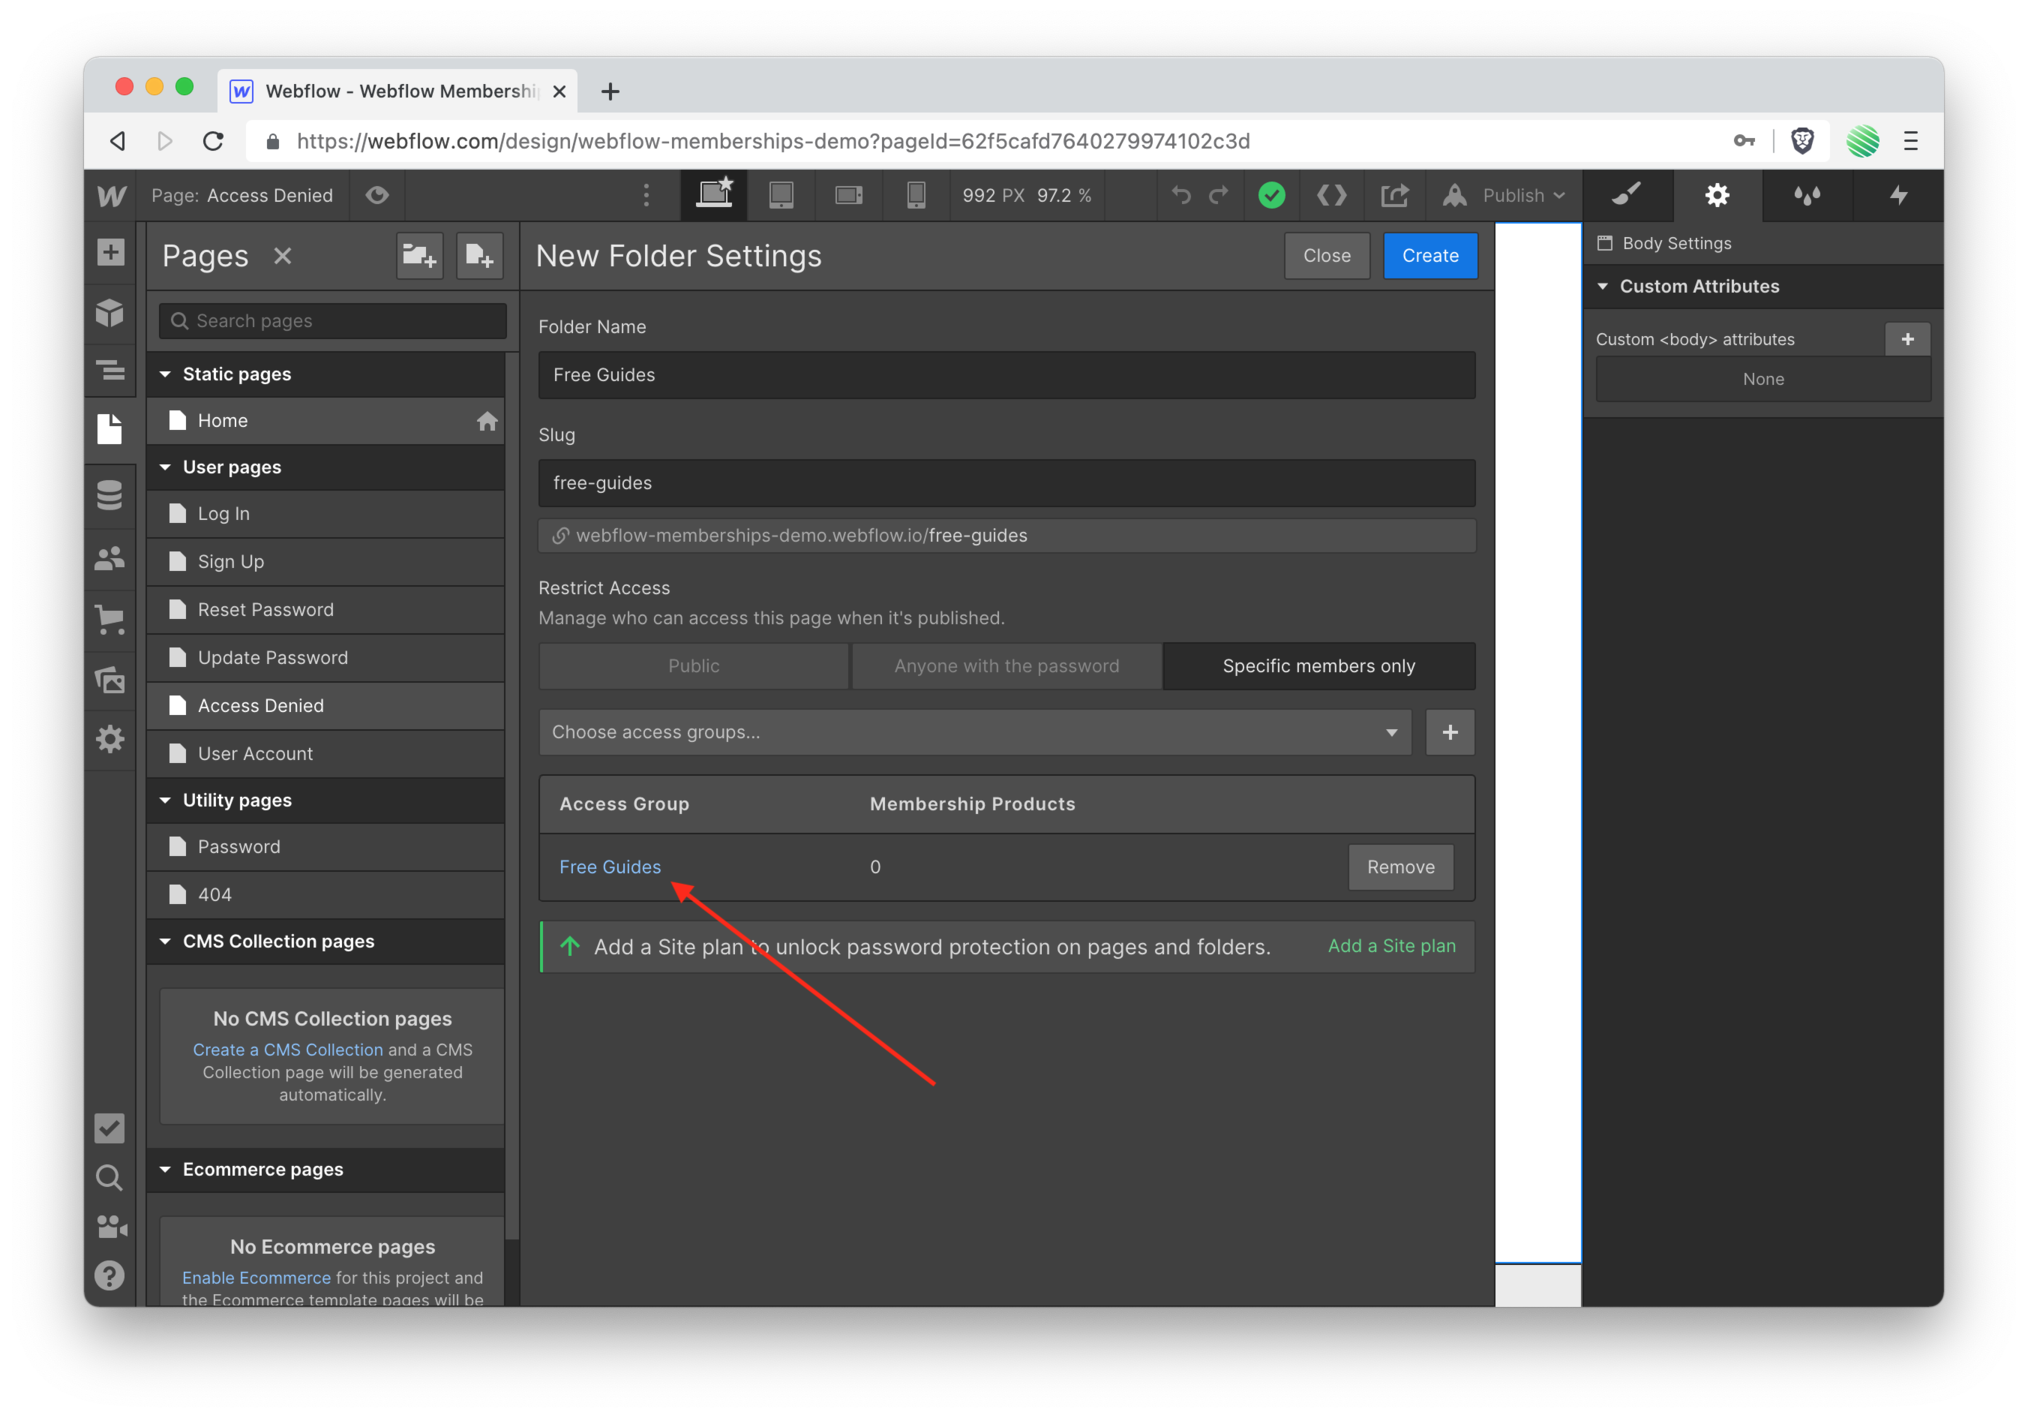 Choose the access group you just created.
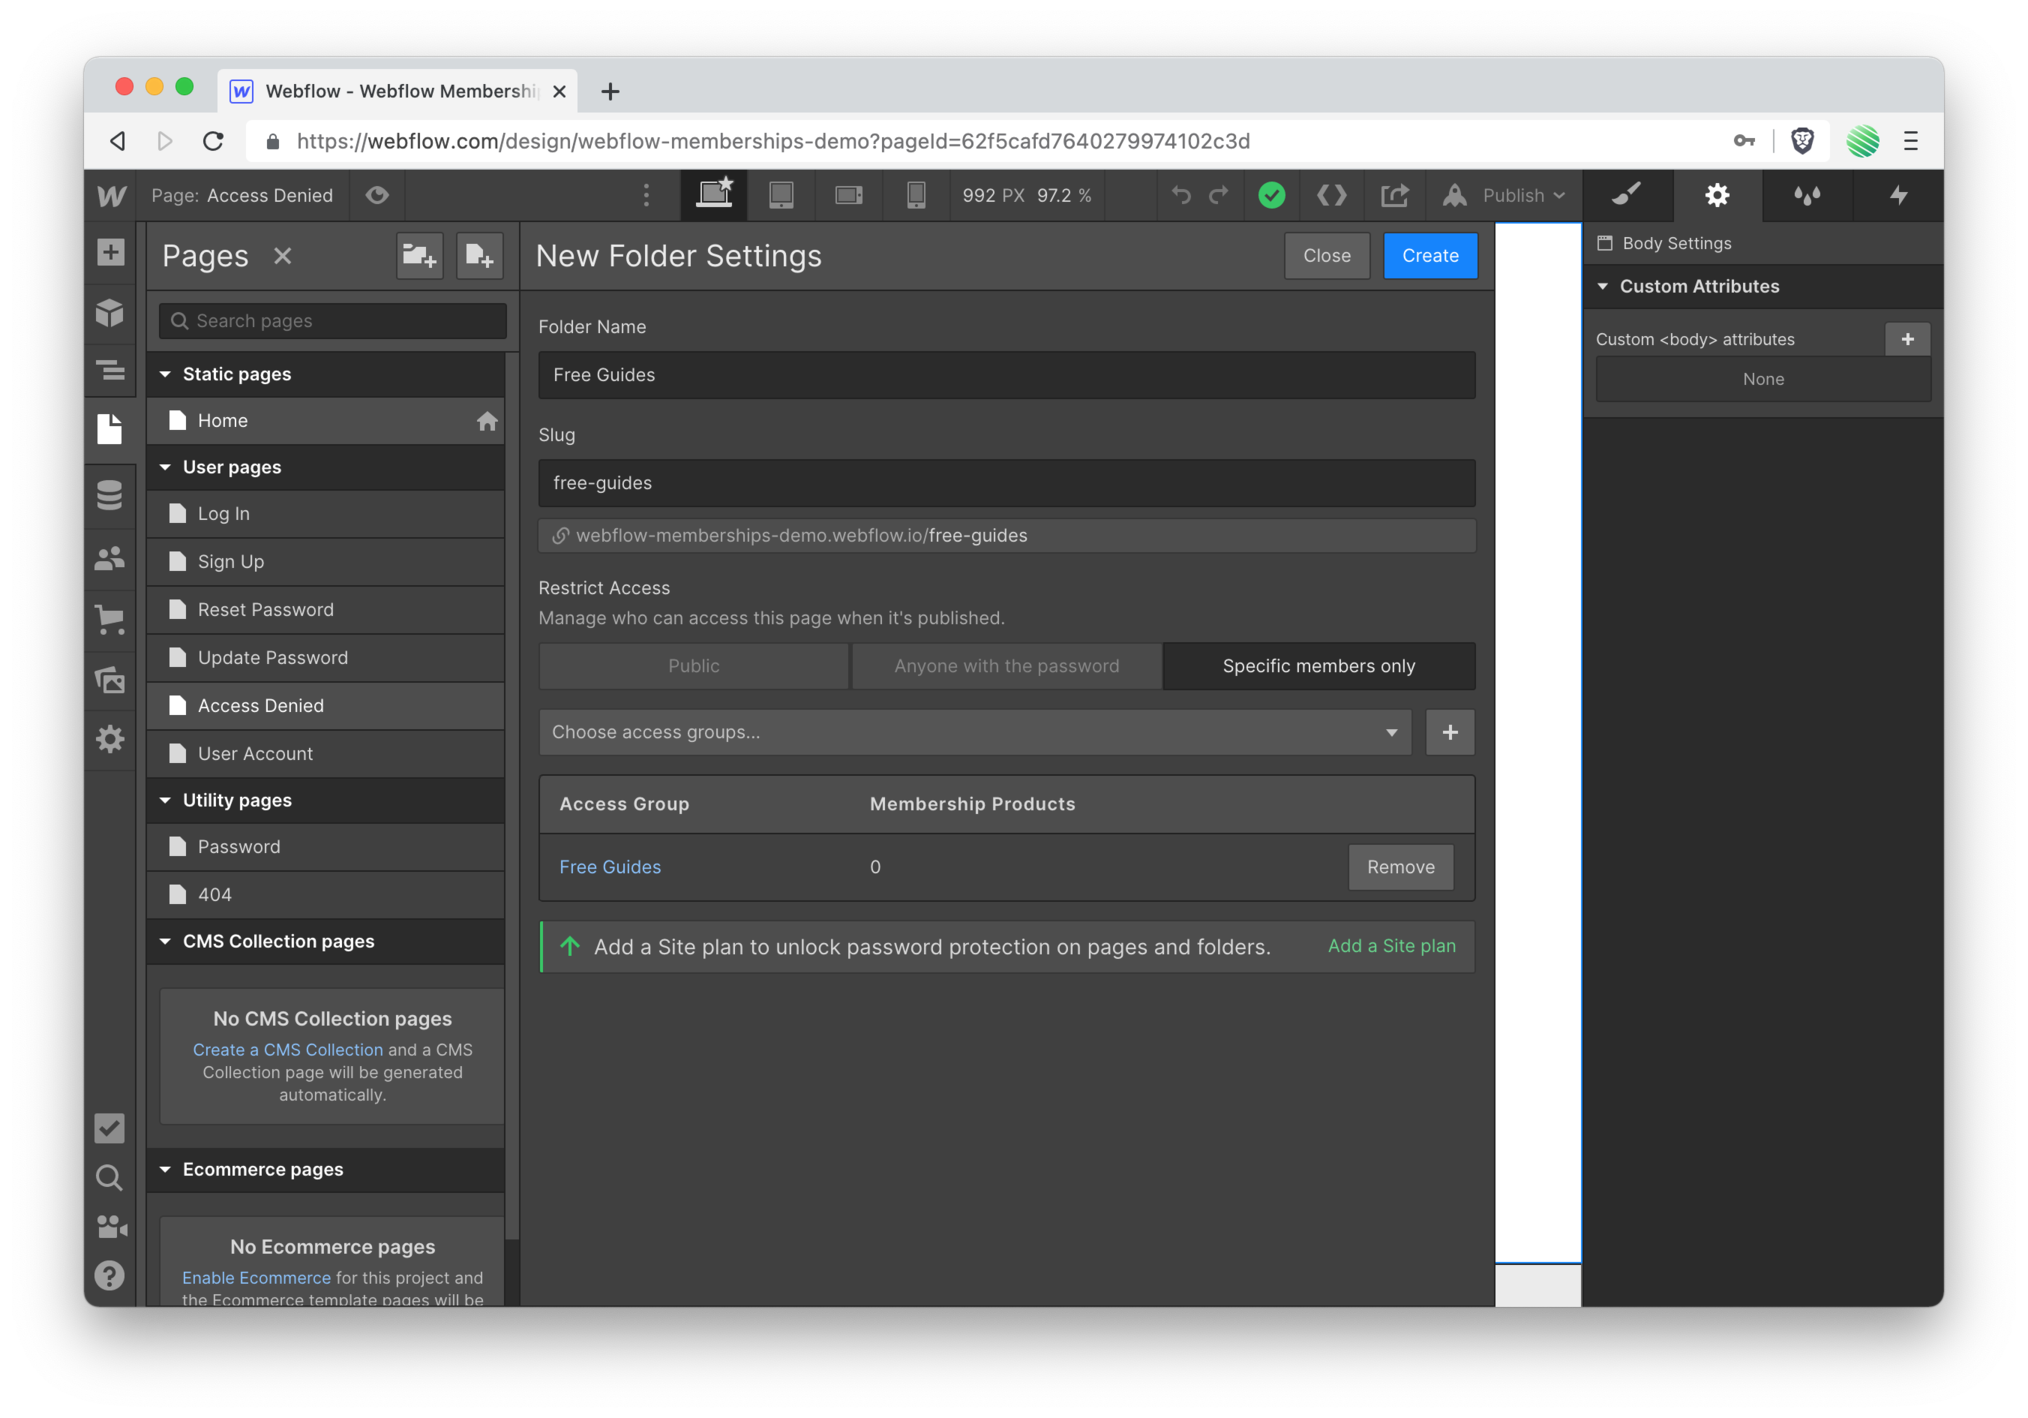 And tap the “create” button (top right) to create this folder.
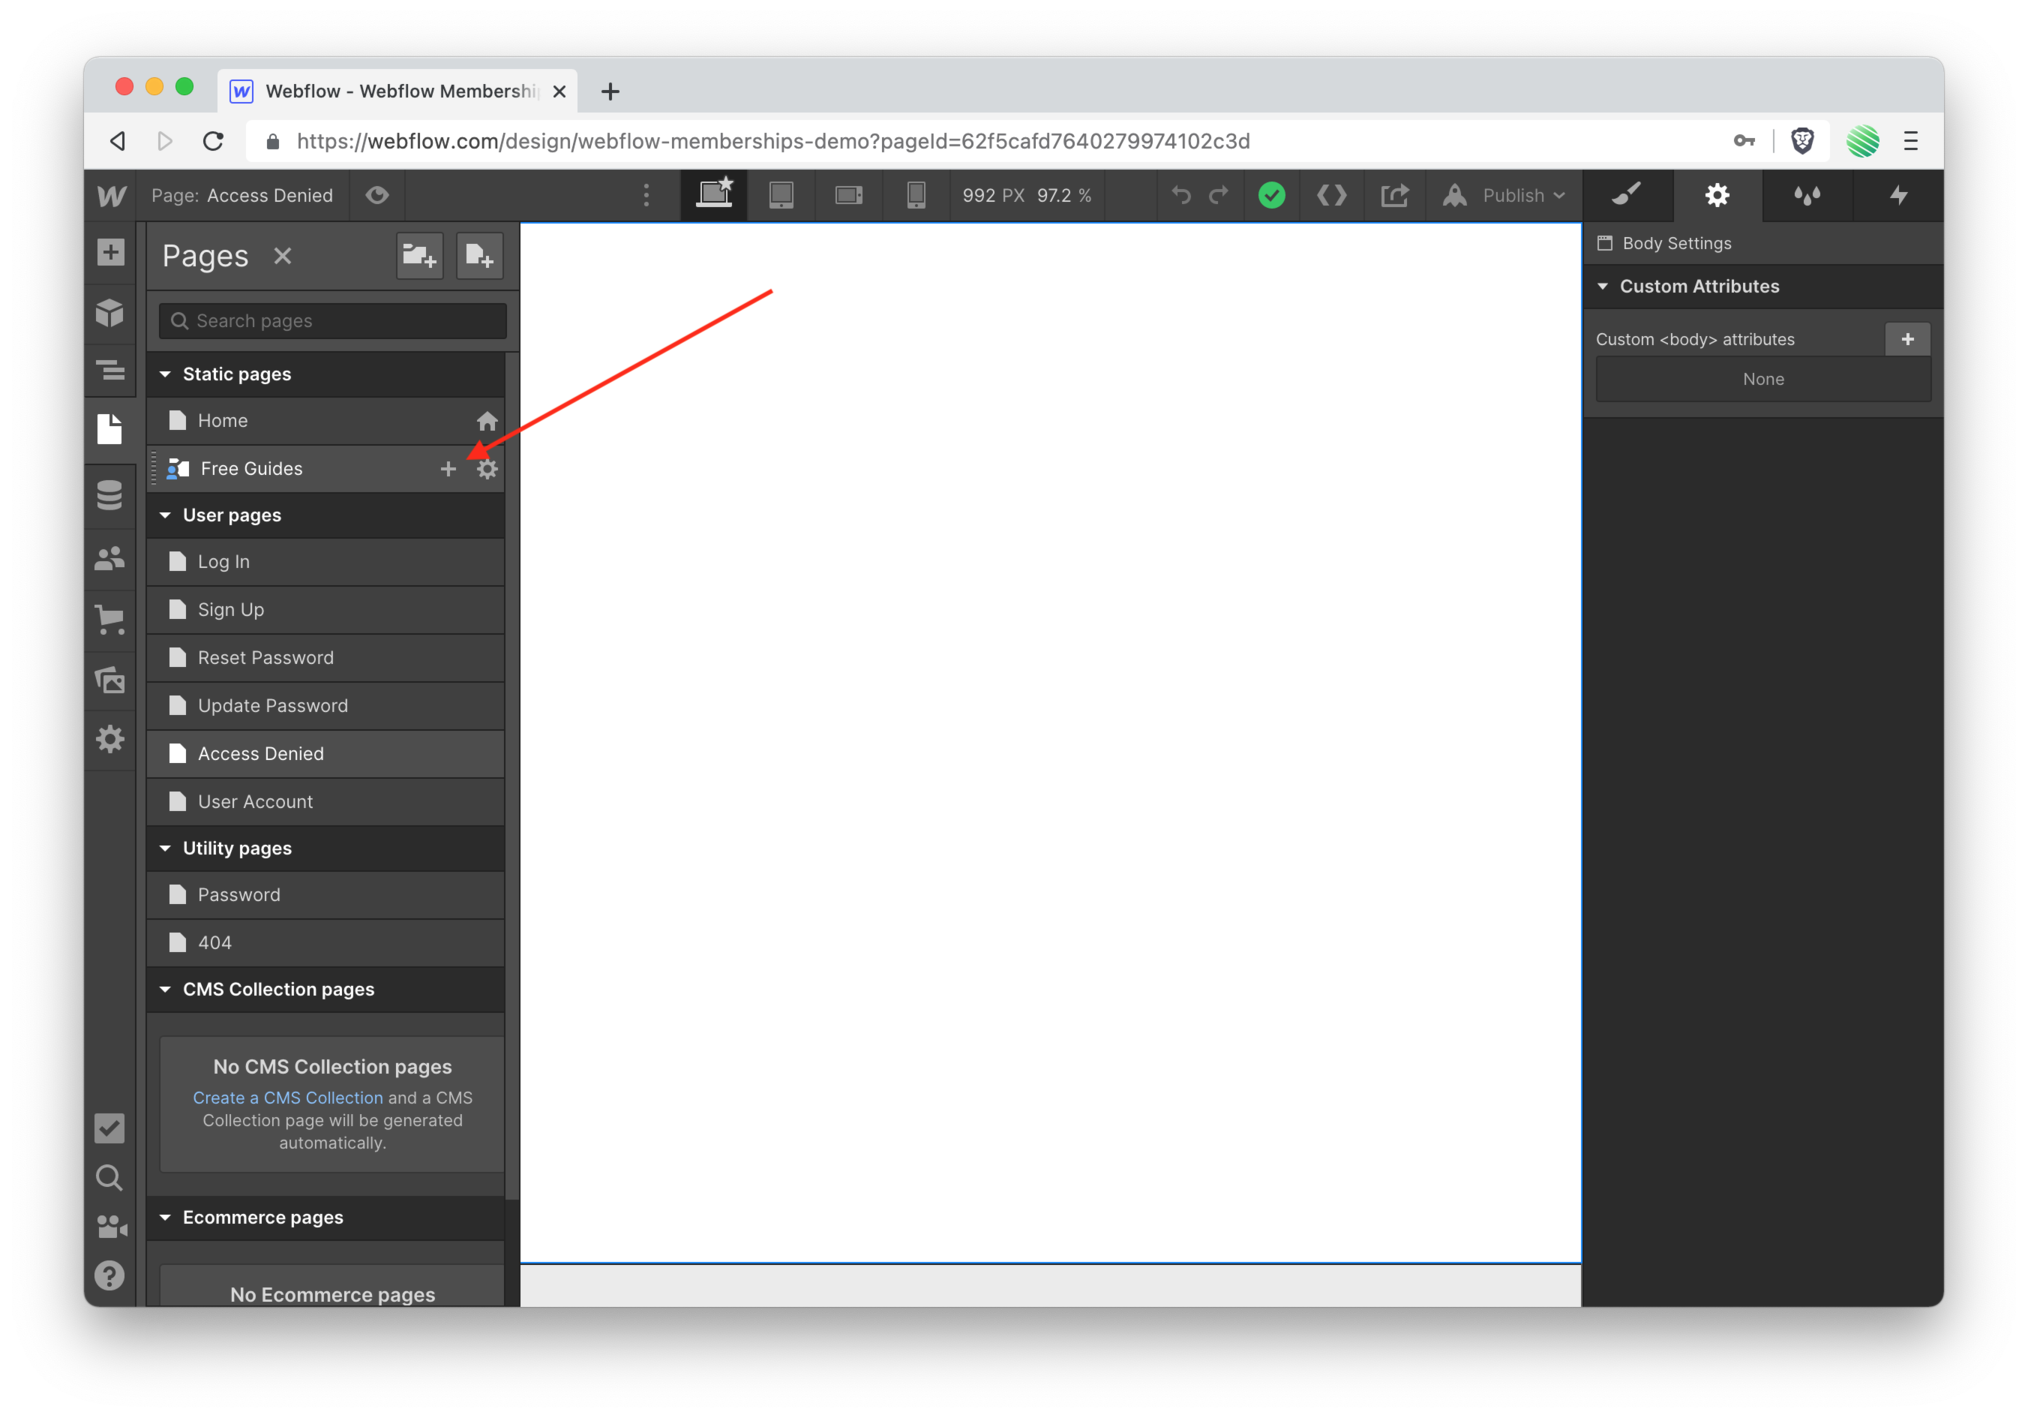 And there it is, your new folder. Notice, if you look really close, the new folder icon. It denotes restricted access.
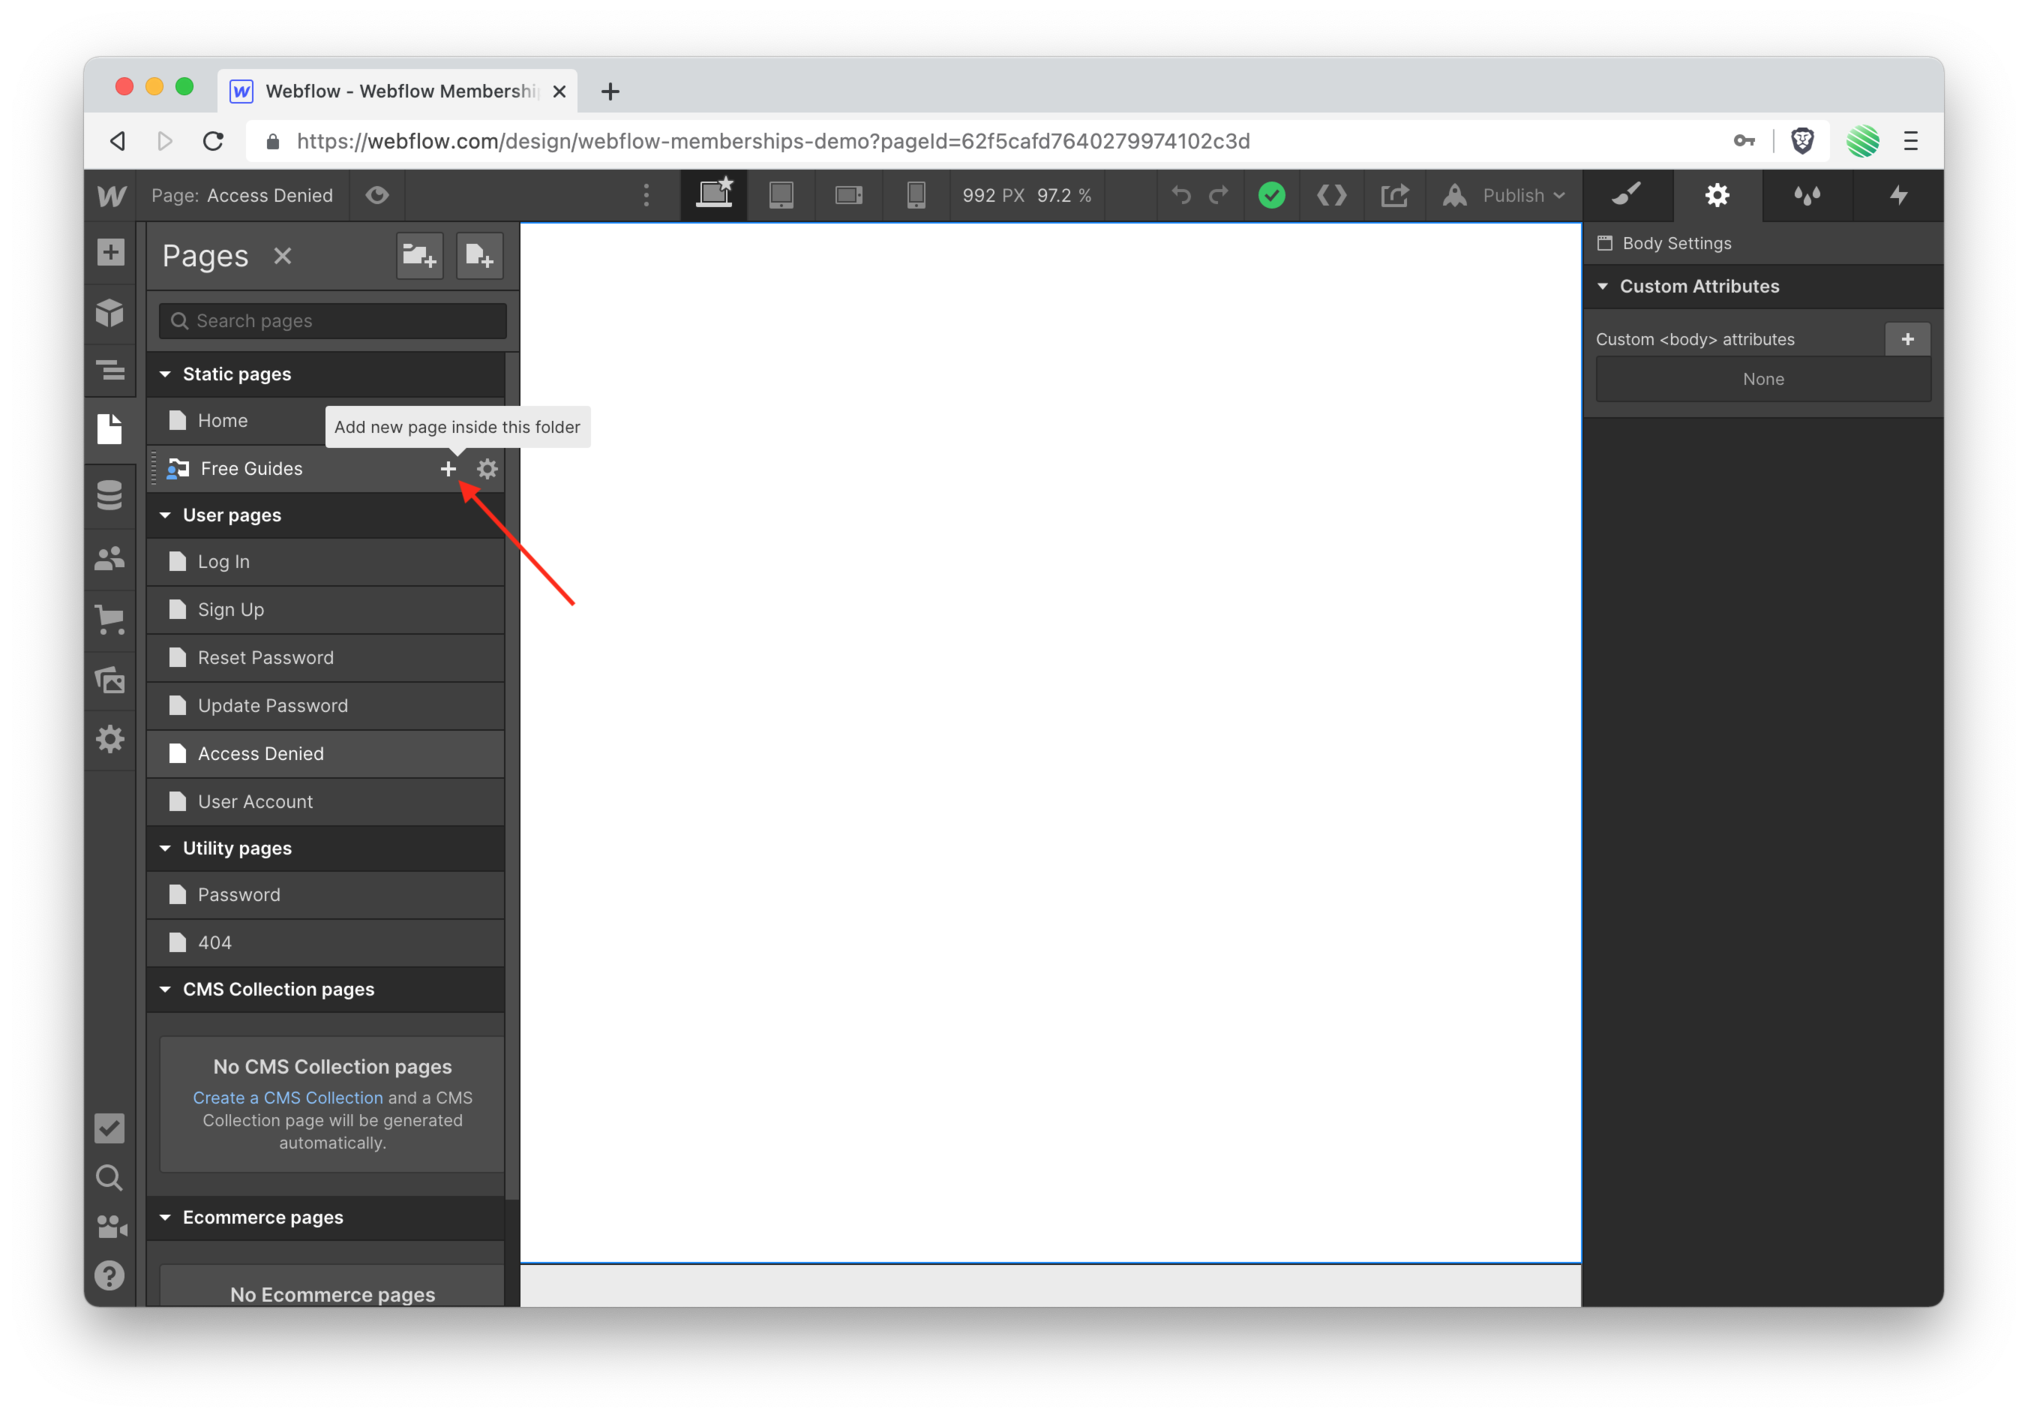 Time to create a new static page within this folder.
Any pages you add to this folder will be gated by your folders access group setting.
Only users who belong to that access group may access pages within this folder.
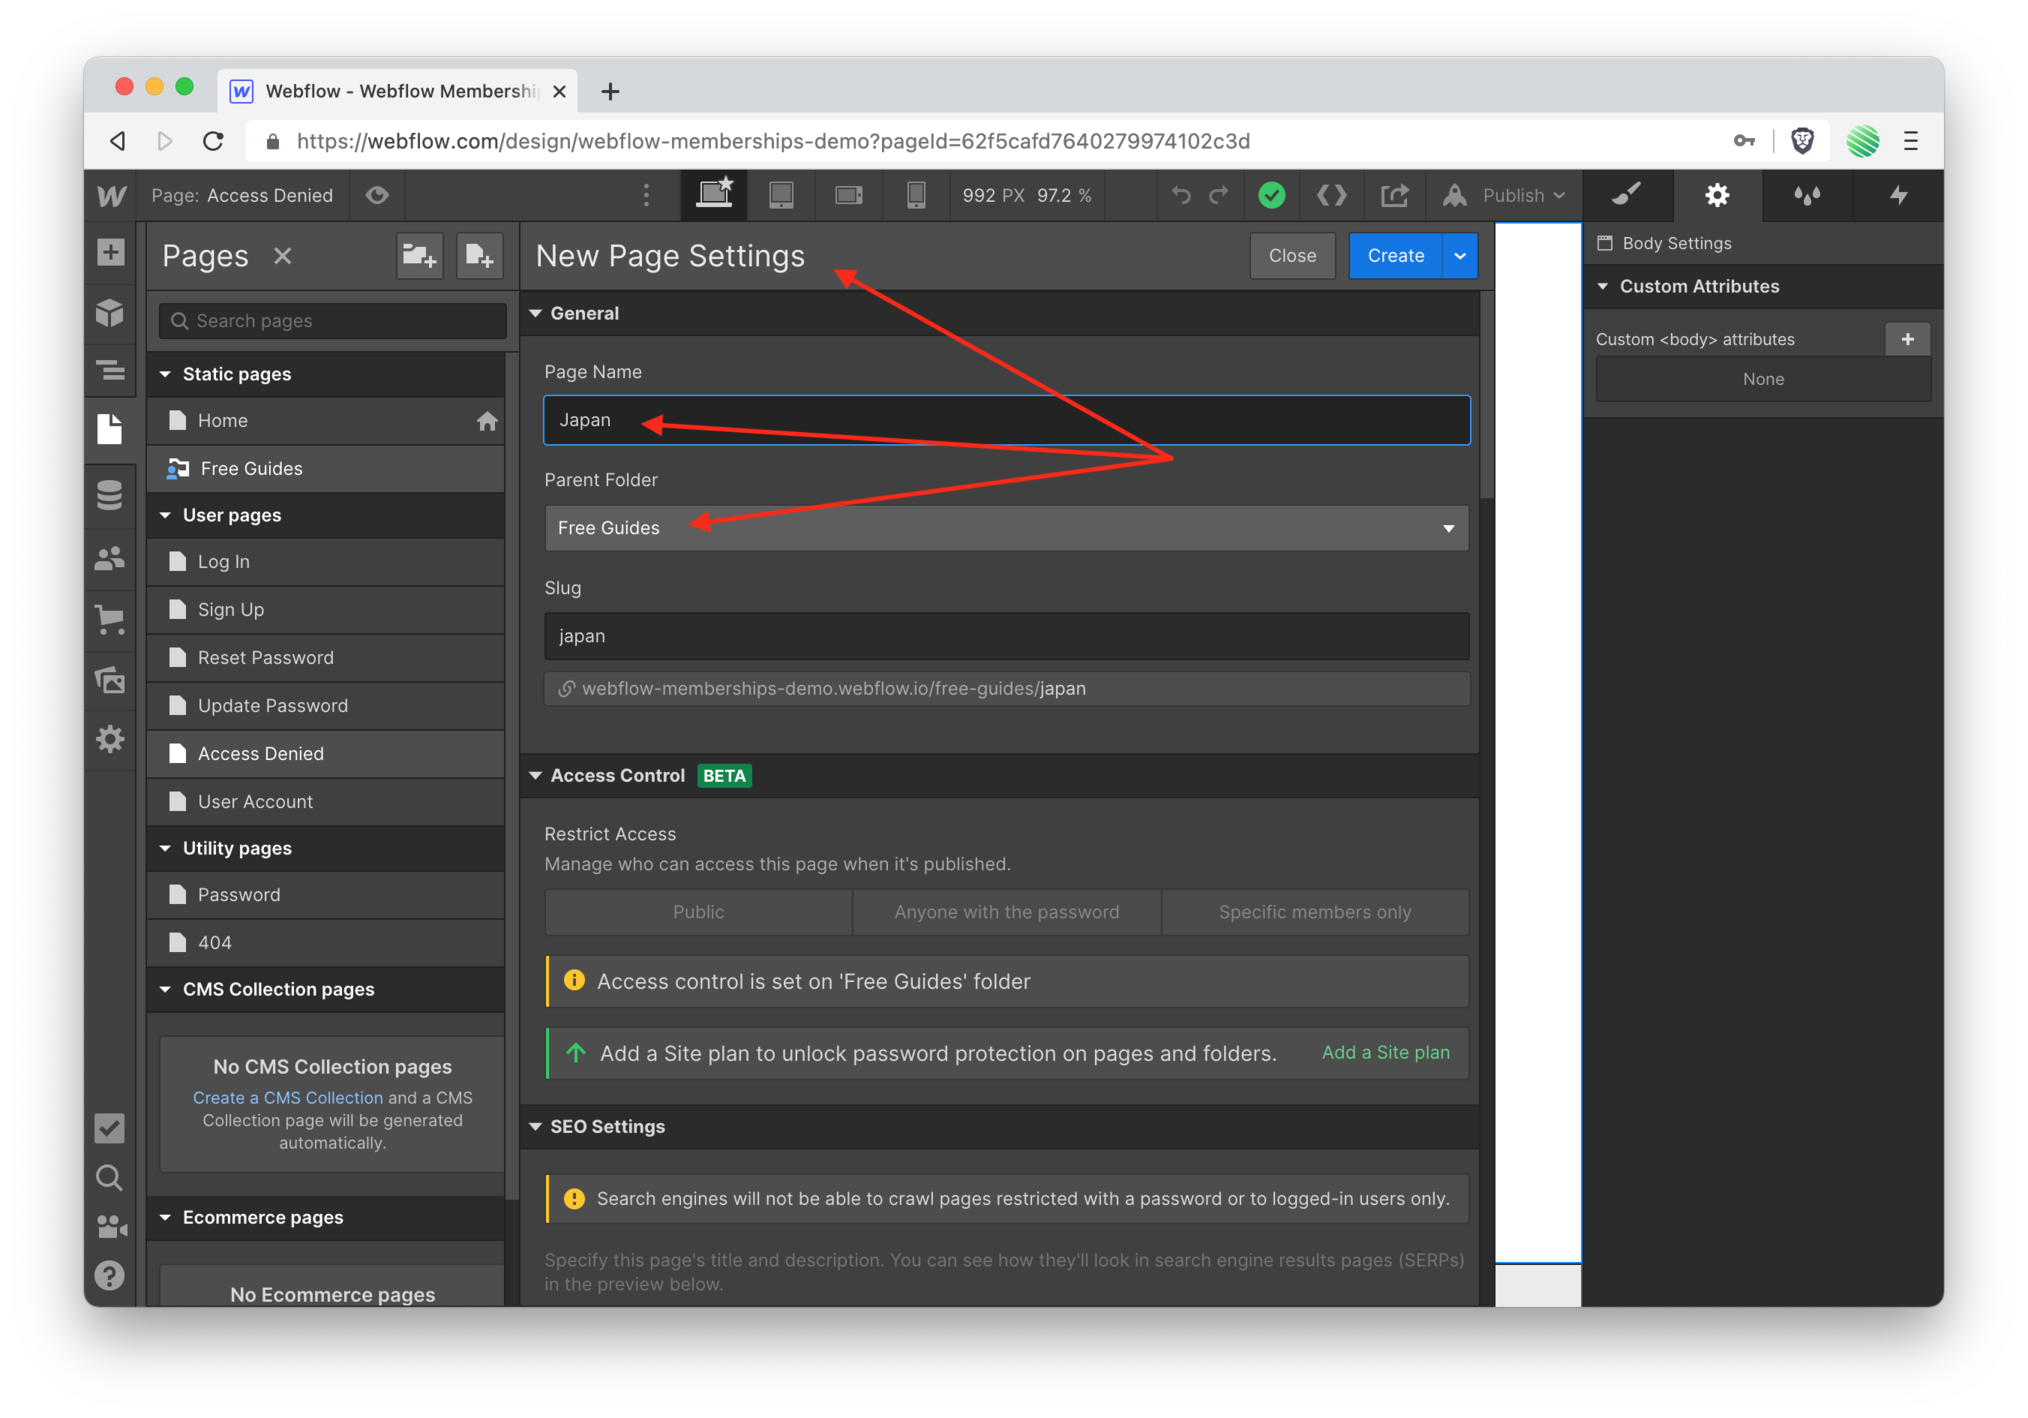 Create a new static page. Nothing different here. The same as you’ve always done.
 Notice the new section “Access Control” in the page settings.
You can’t change anything because you’ve added this static page within a folder that has an access group already applied.
If you added a static page outside of this folder you’d be able to apply an access group specifically to it.
🤯 Starting to see the power?
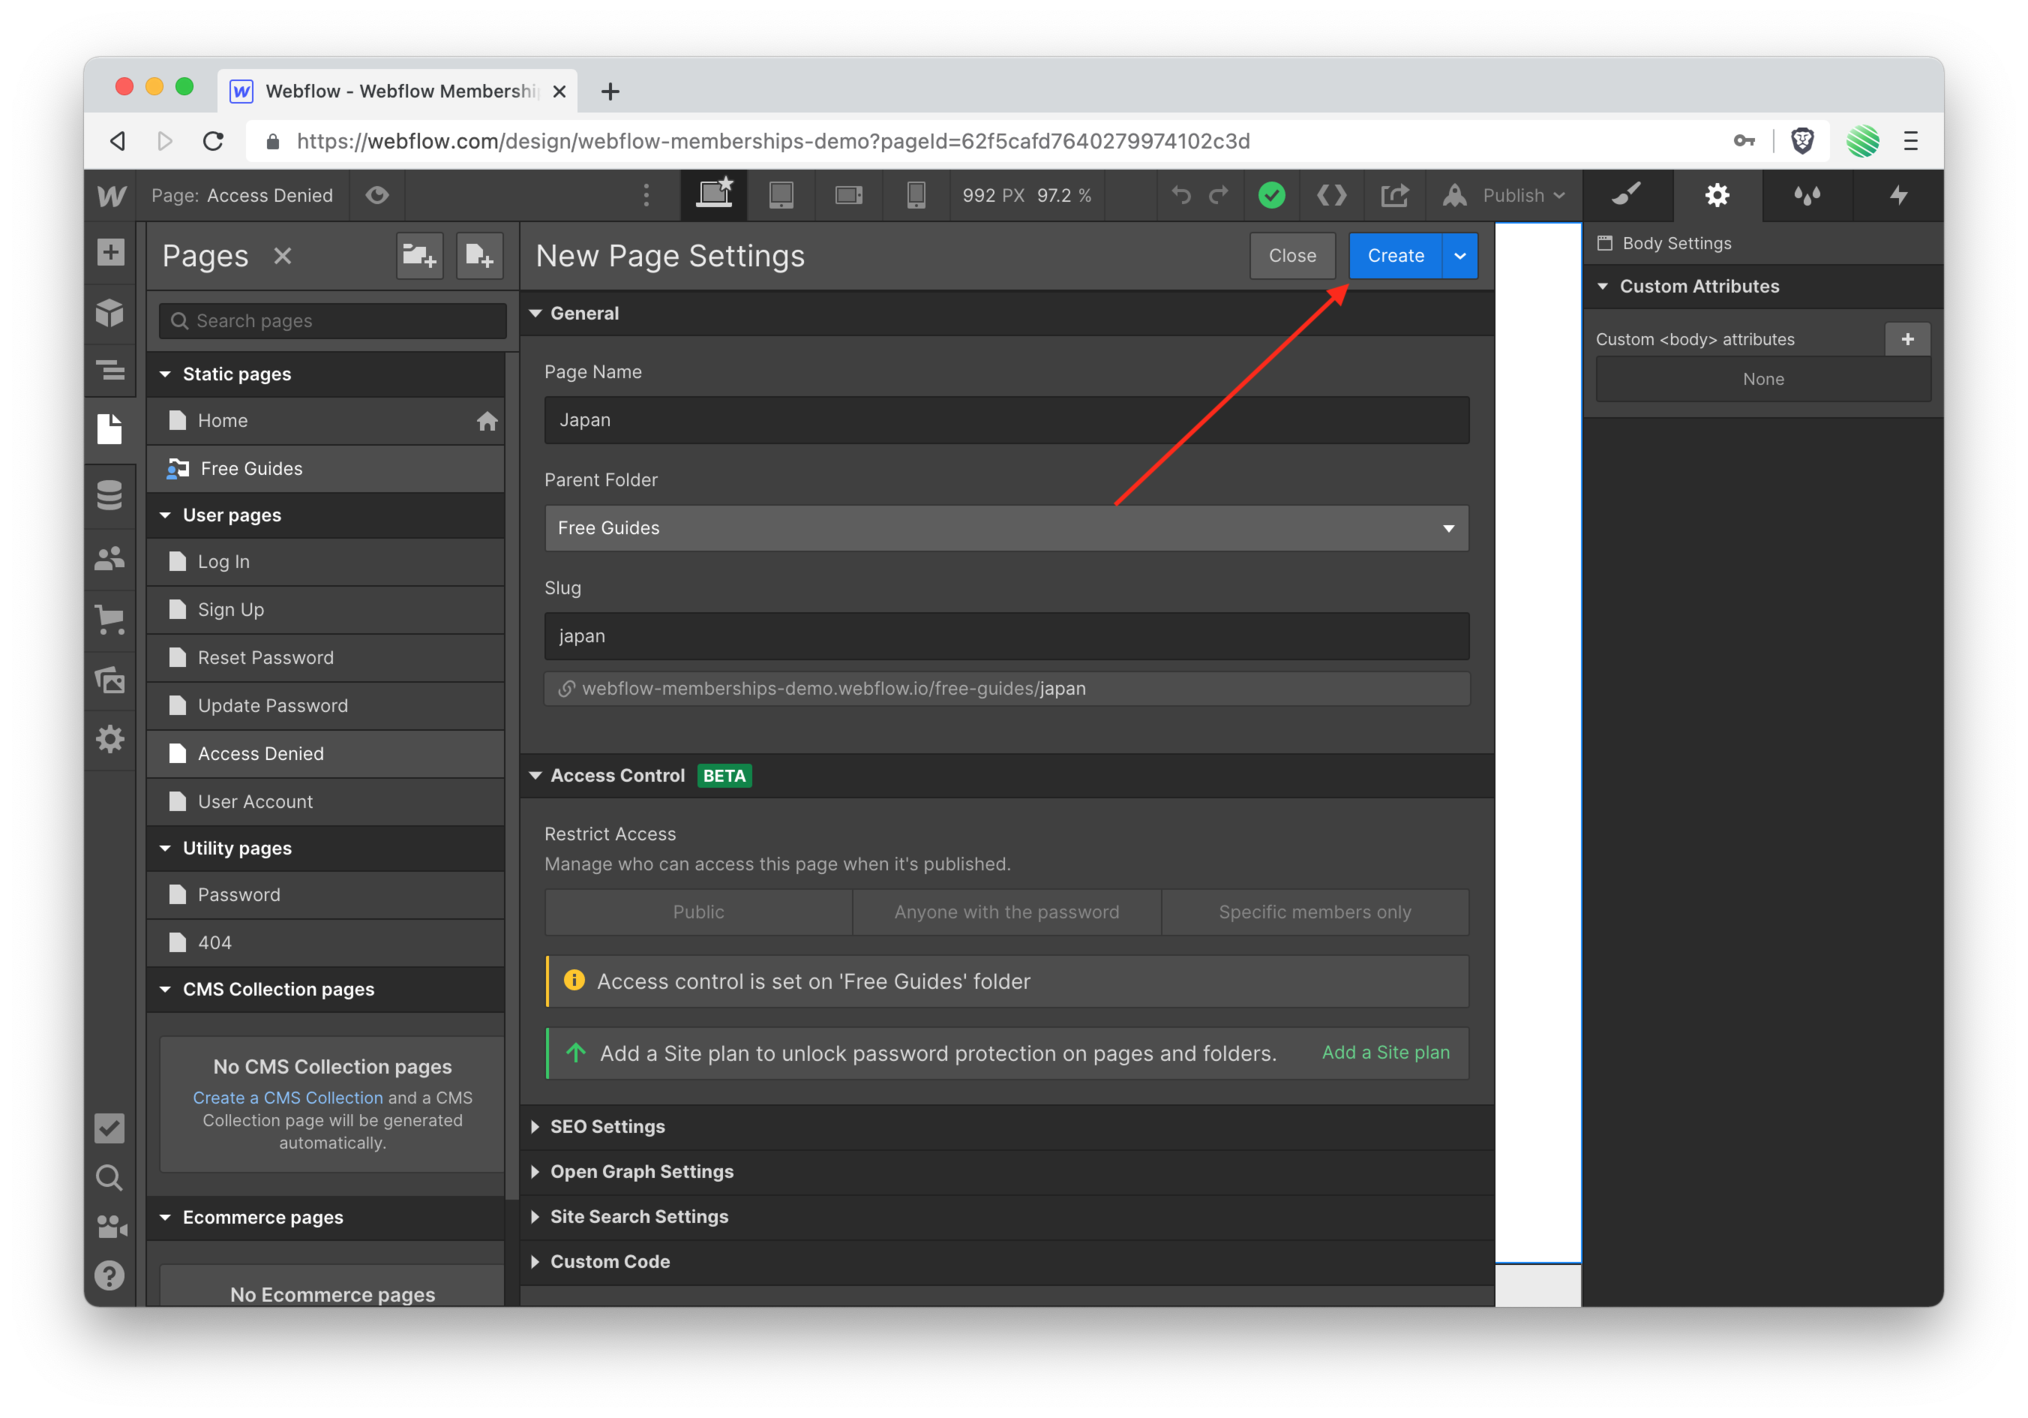 Tap the “create” button for this new static page.
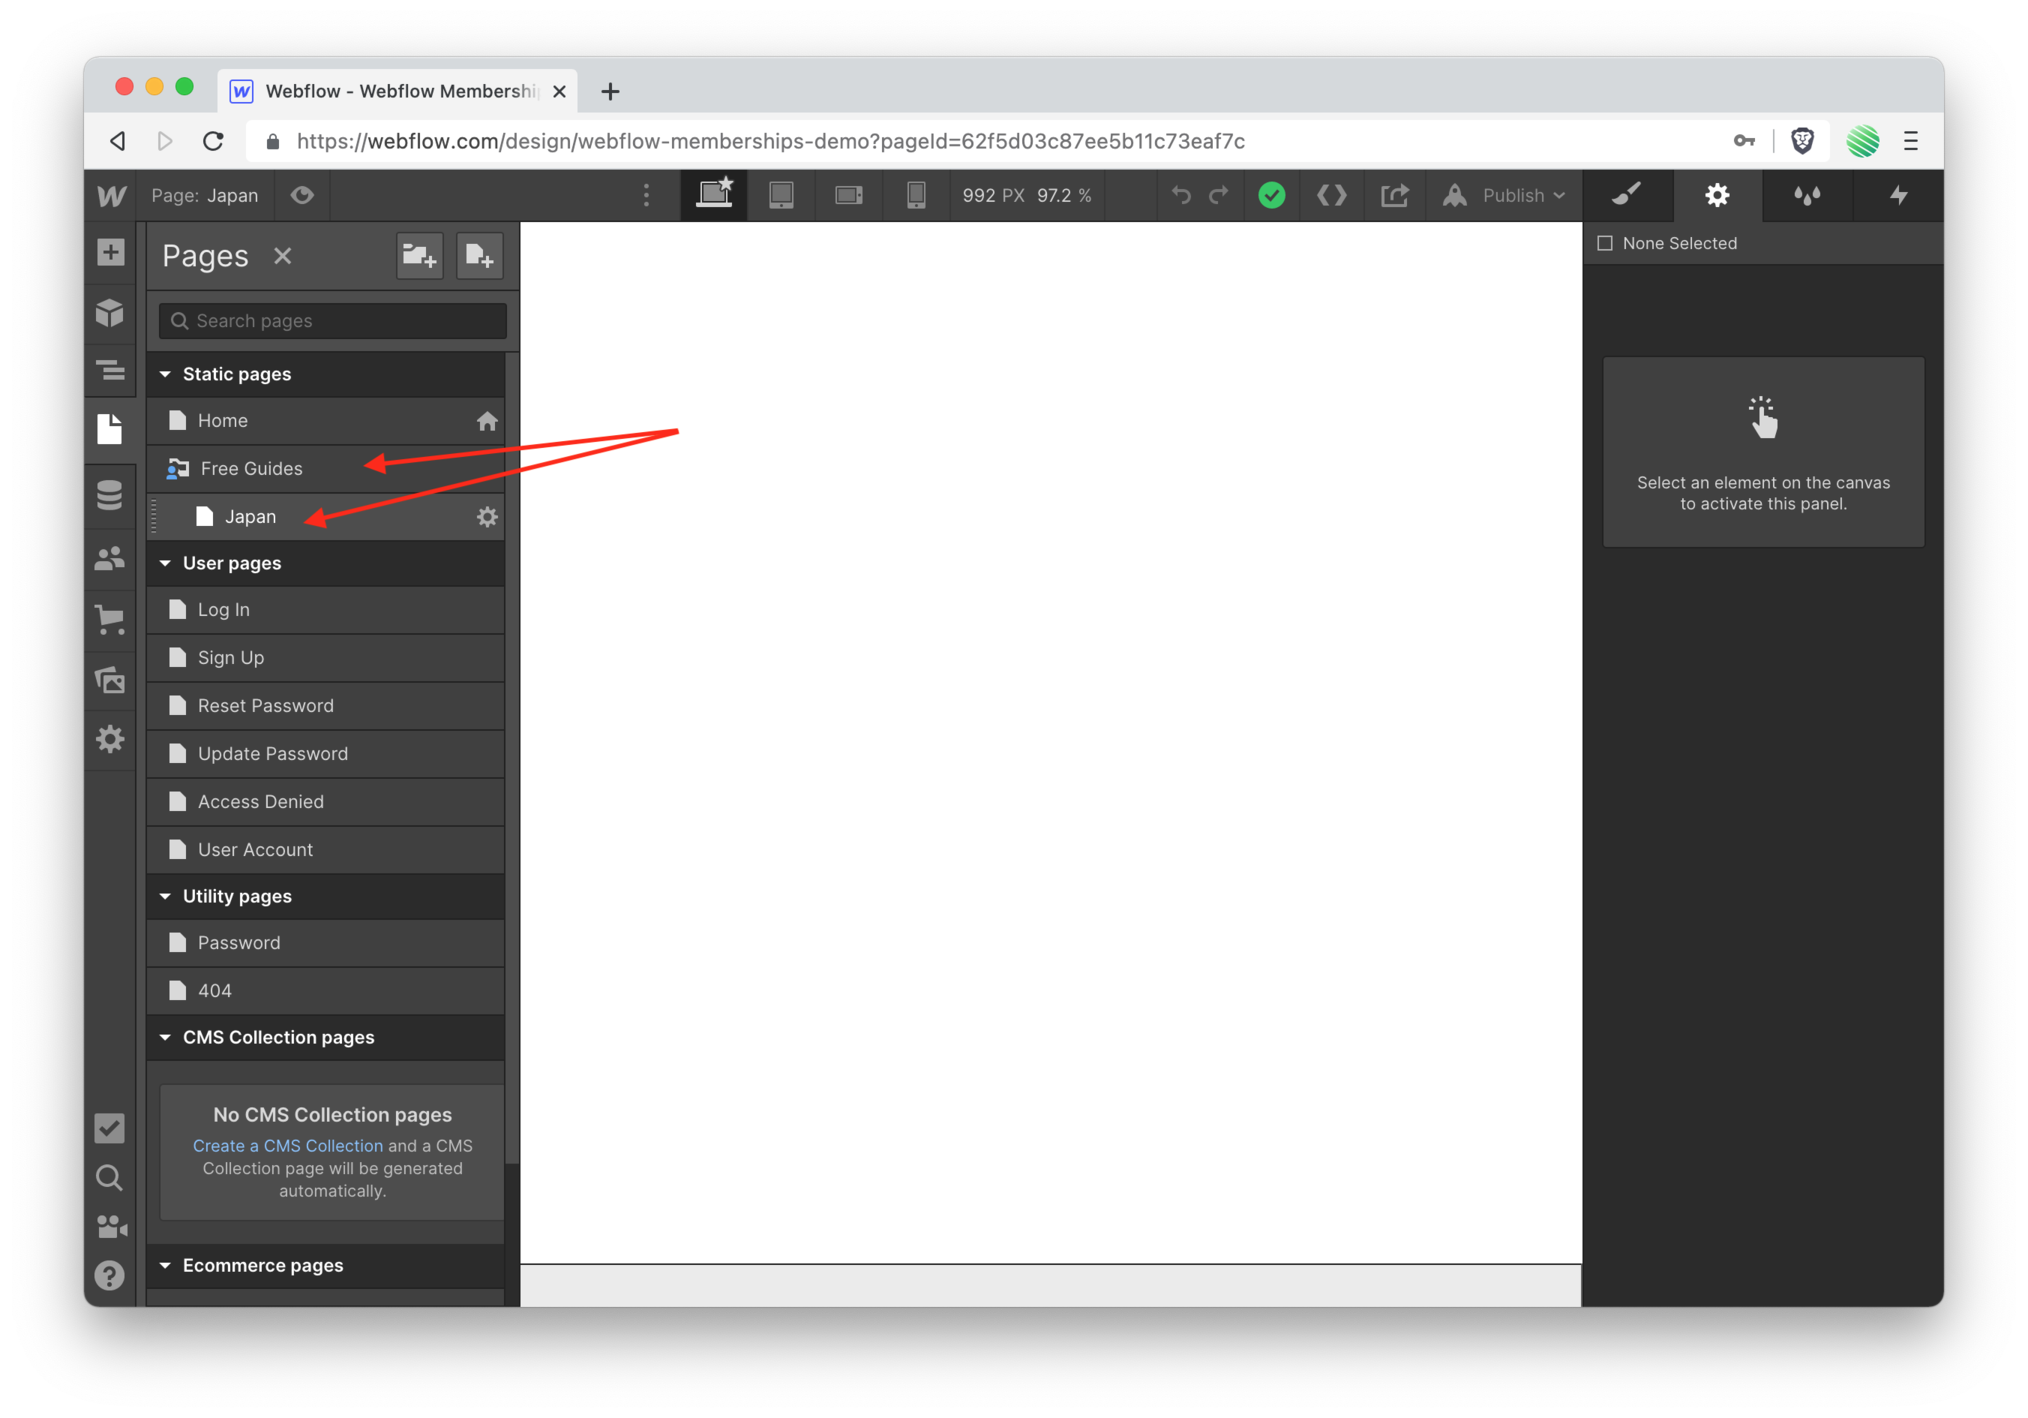 Open up this new static page.
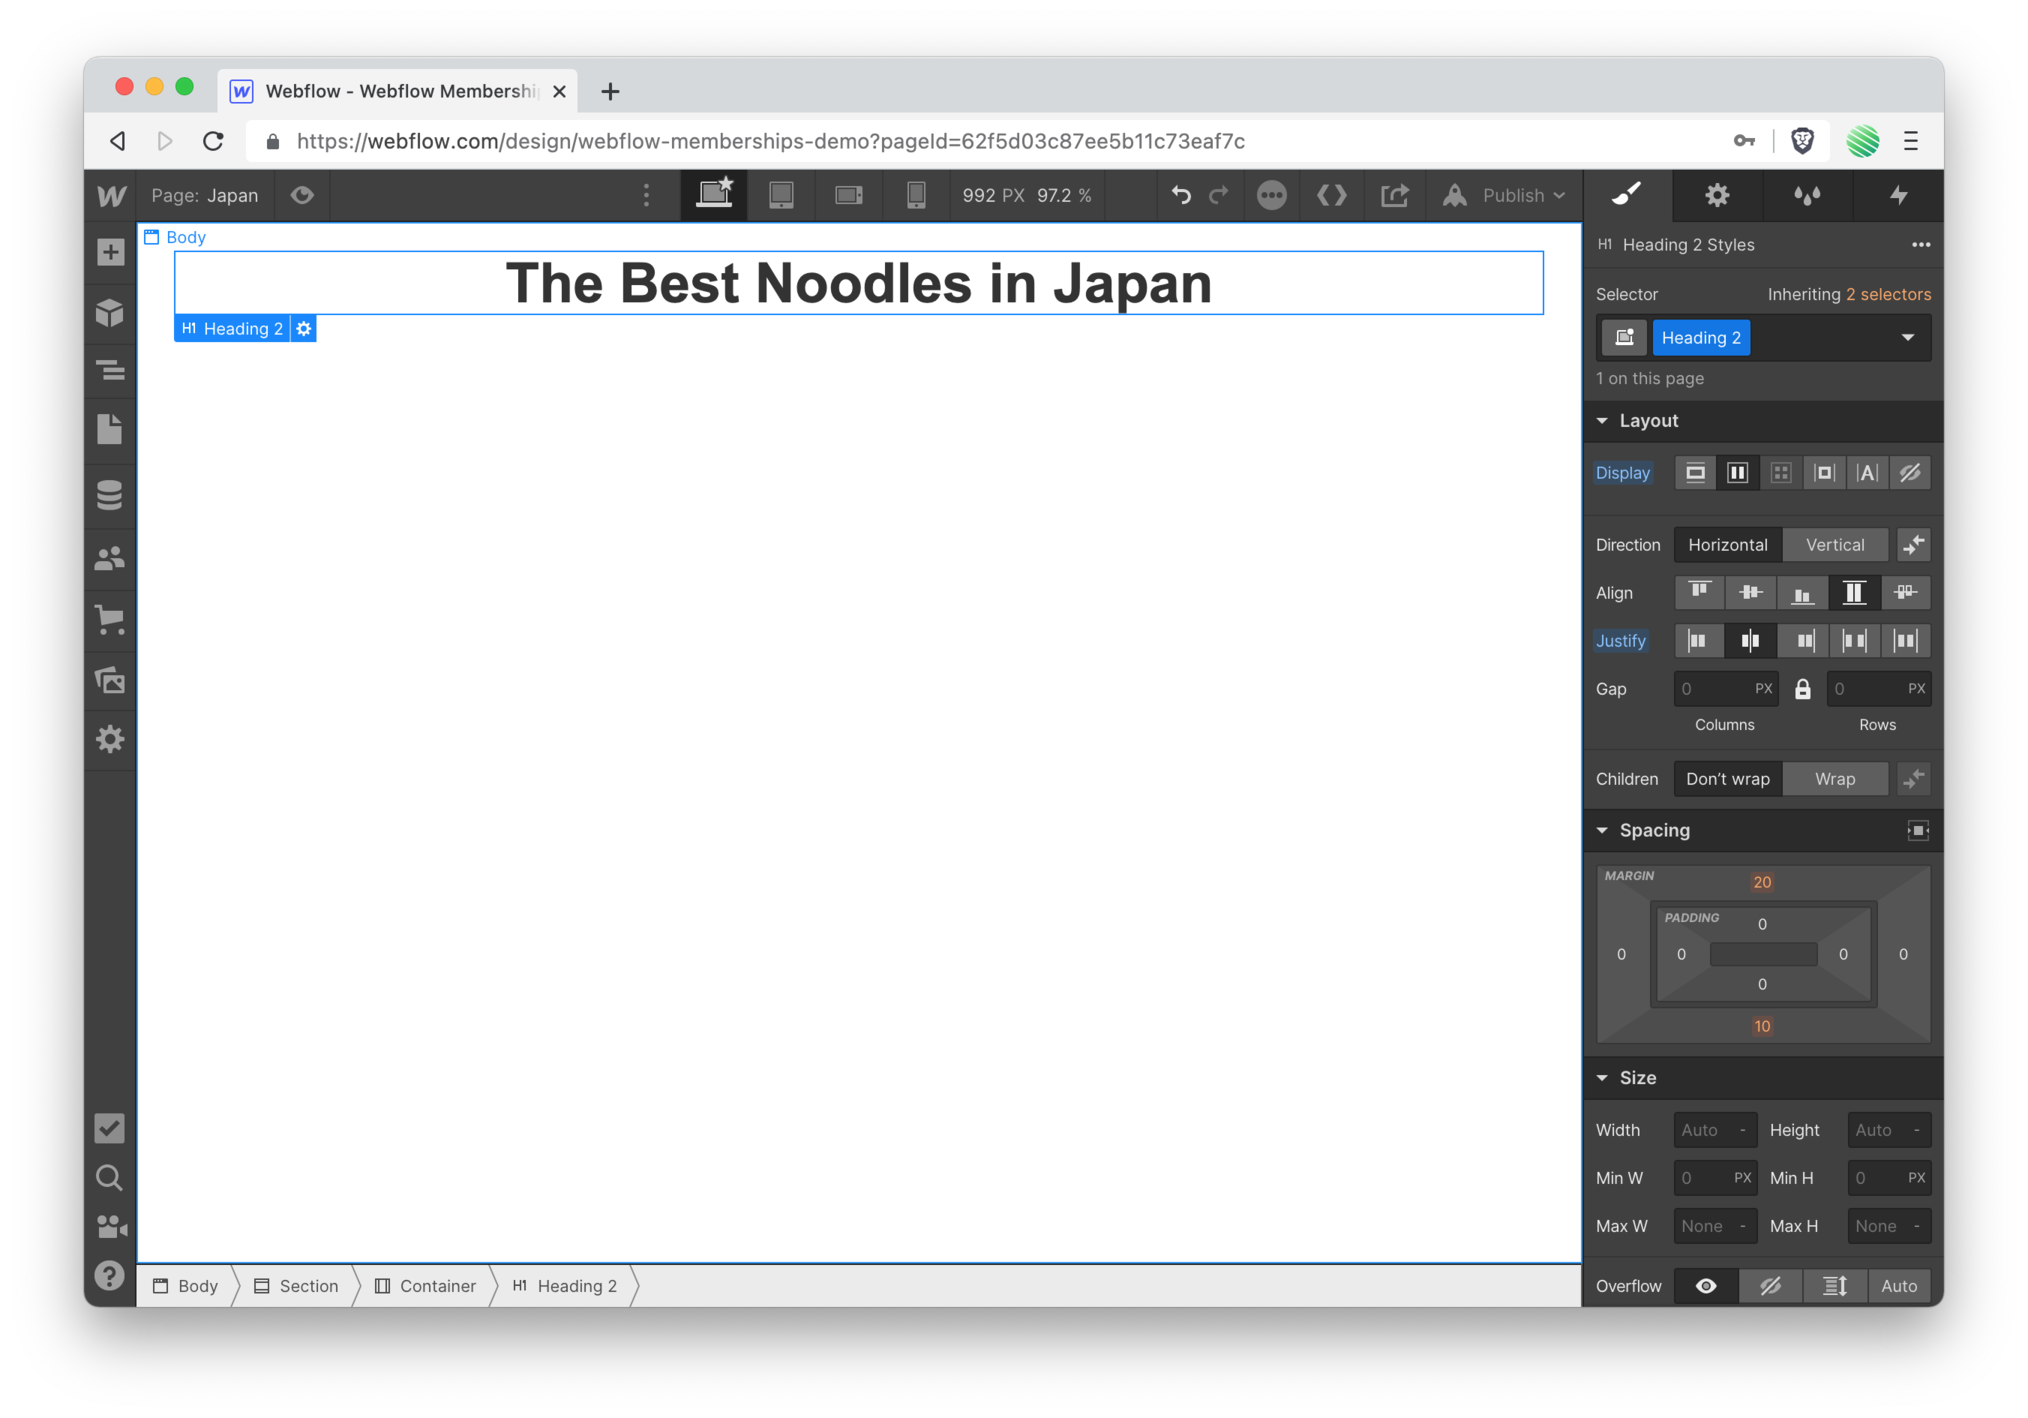 Add some content to it.
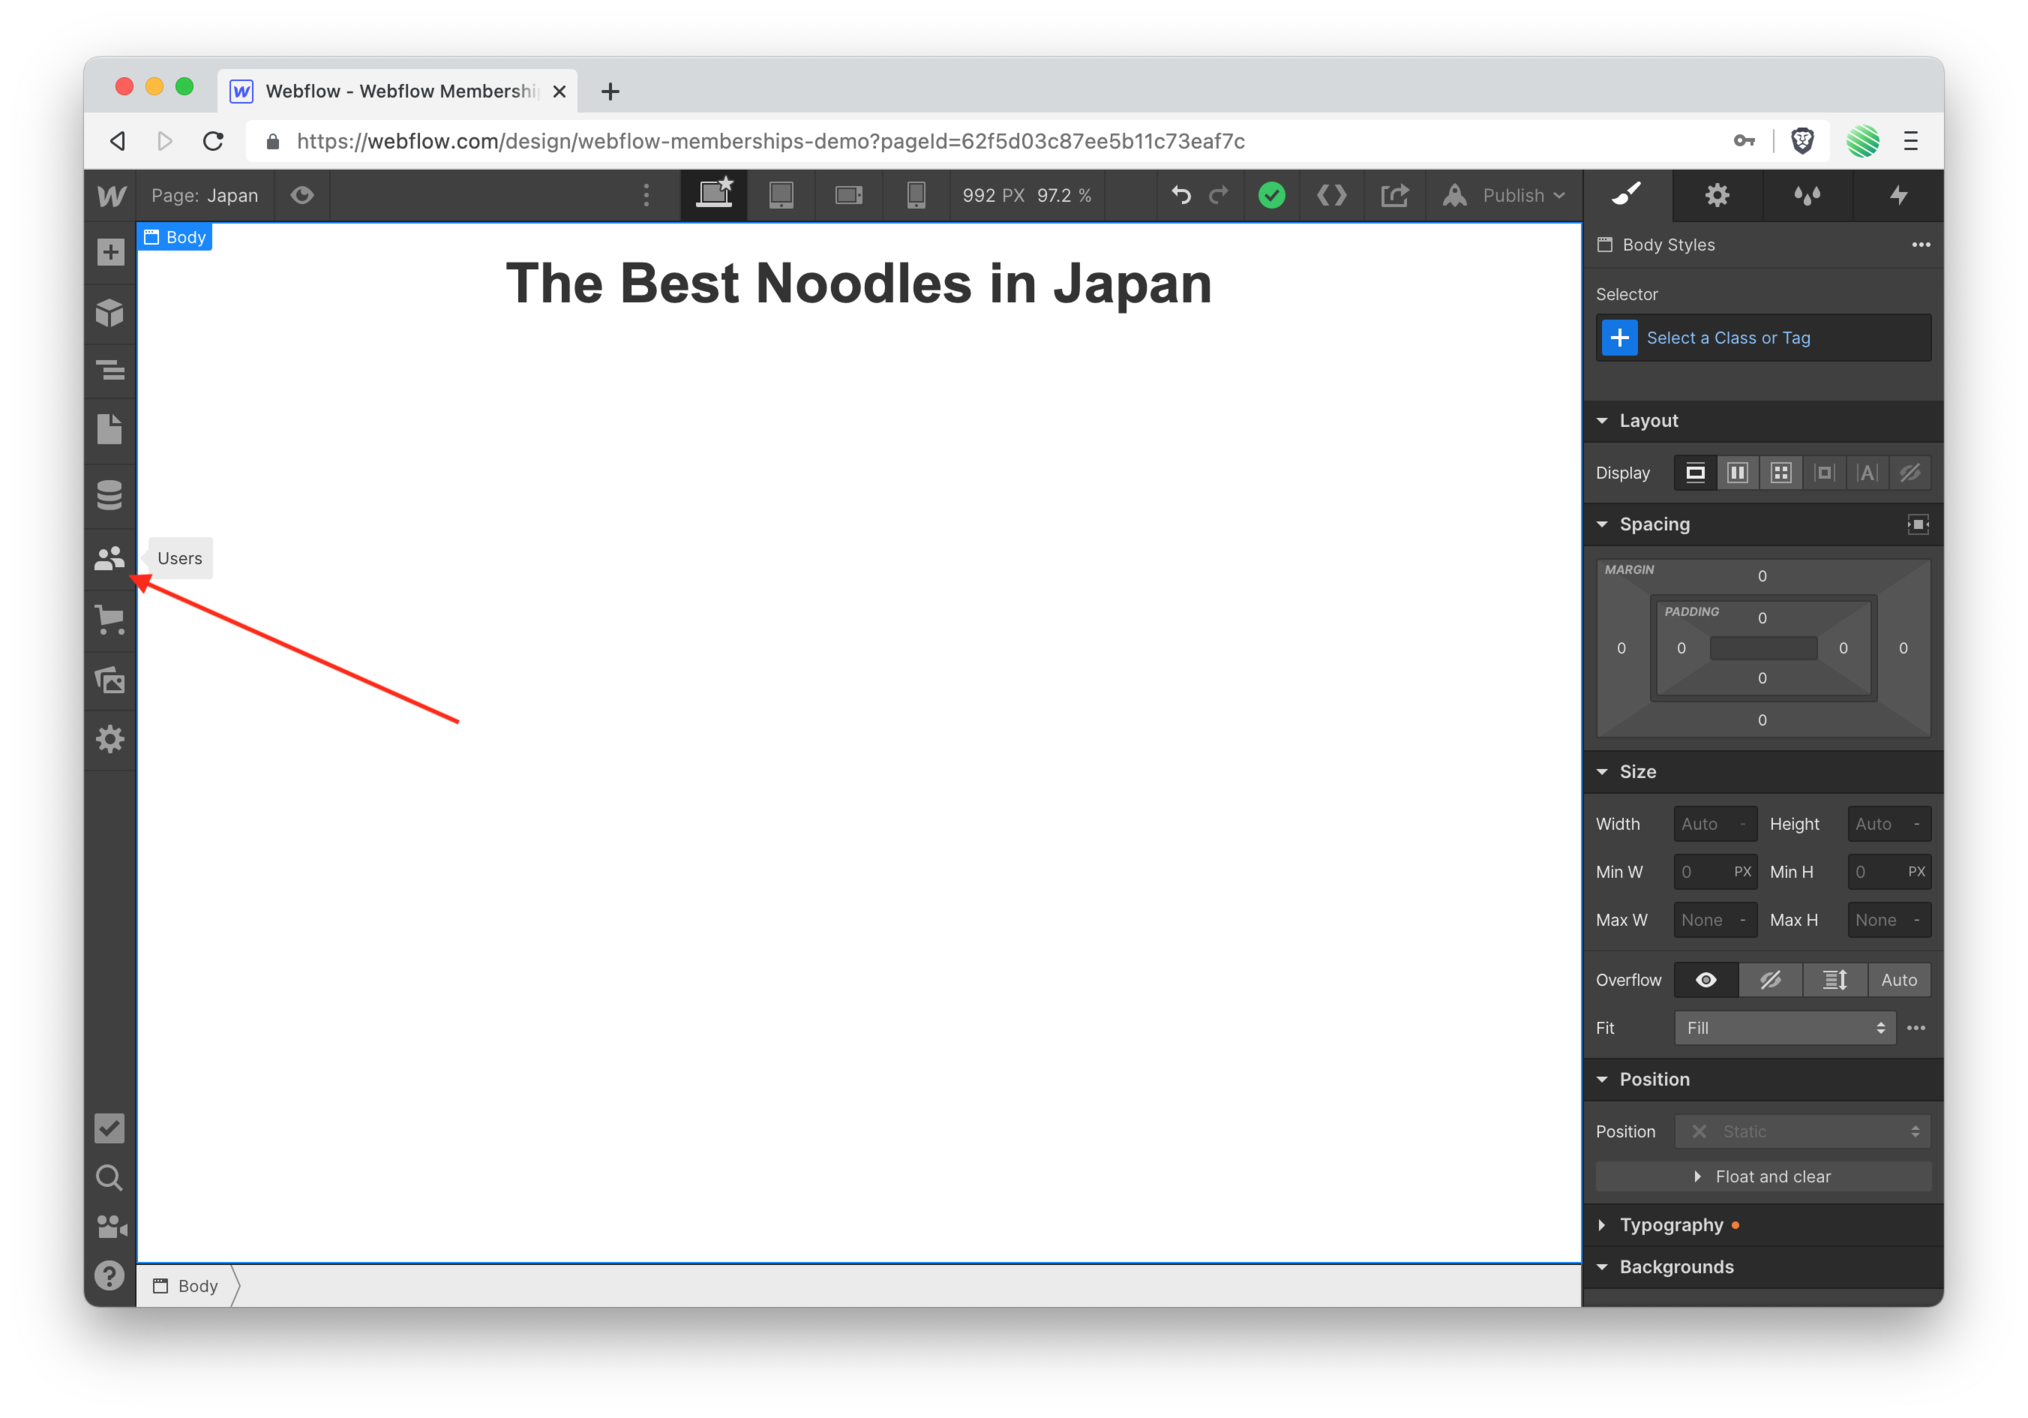 And go back to Users (left side panel).
 Notice your setup is complete 😅
Optional Setup Steps
 Also...
If you noticed, there are 2 setup options we skipped and Webflow didn’t include those options in it’s count of remaining steps.
Why?
Those are intended for use with eCommerce sites, and this is not an eCommerce site.
For this walk through I am not setting up an eCommerce site (would you like me to walk through that? email and let me know: chris@nocodequest.com).
Time to try your new Memberships site!
Test Your New Webflow Membership Site
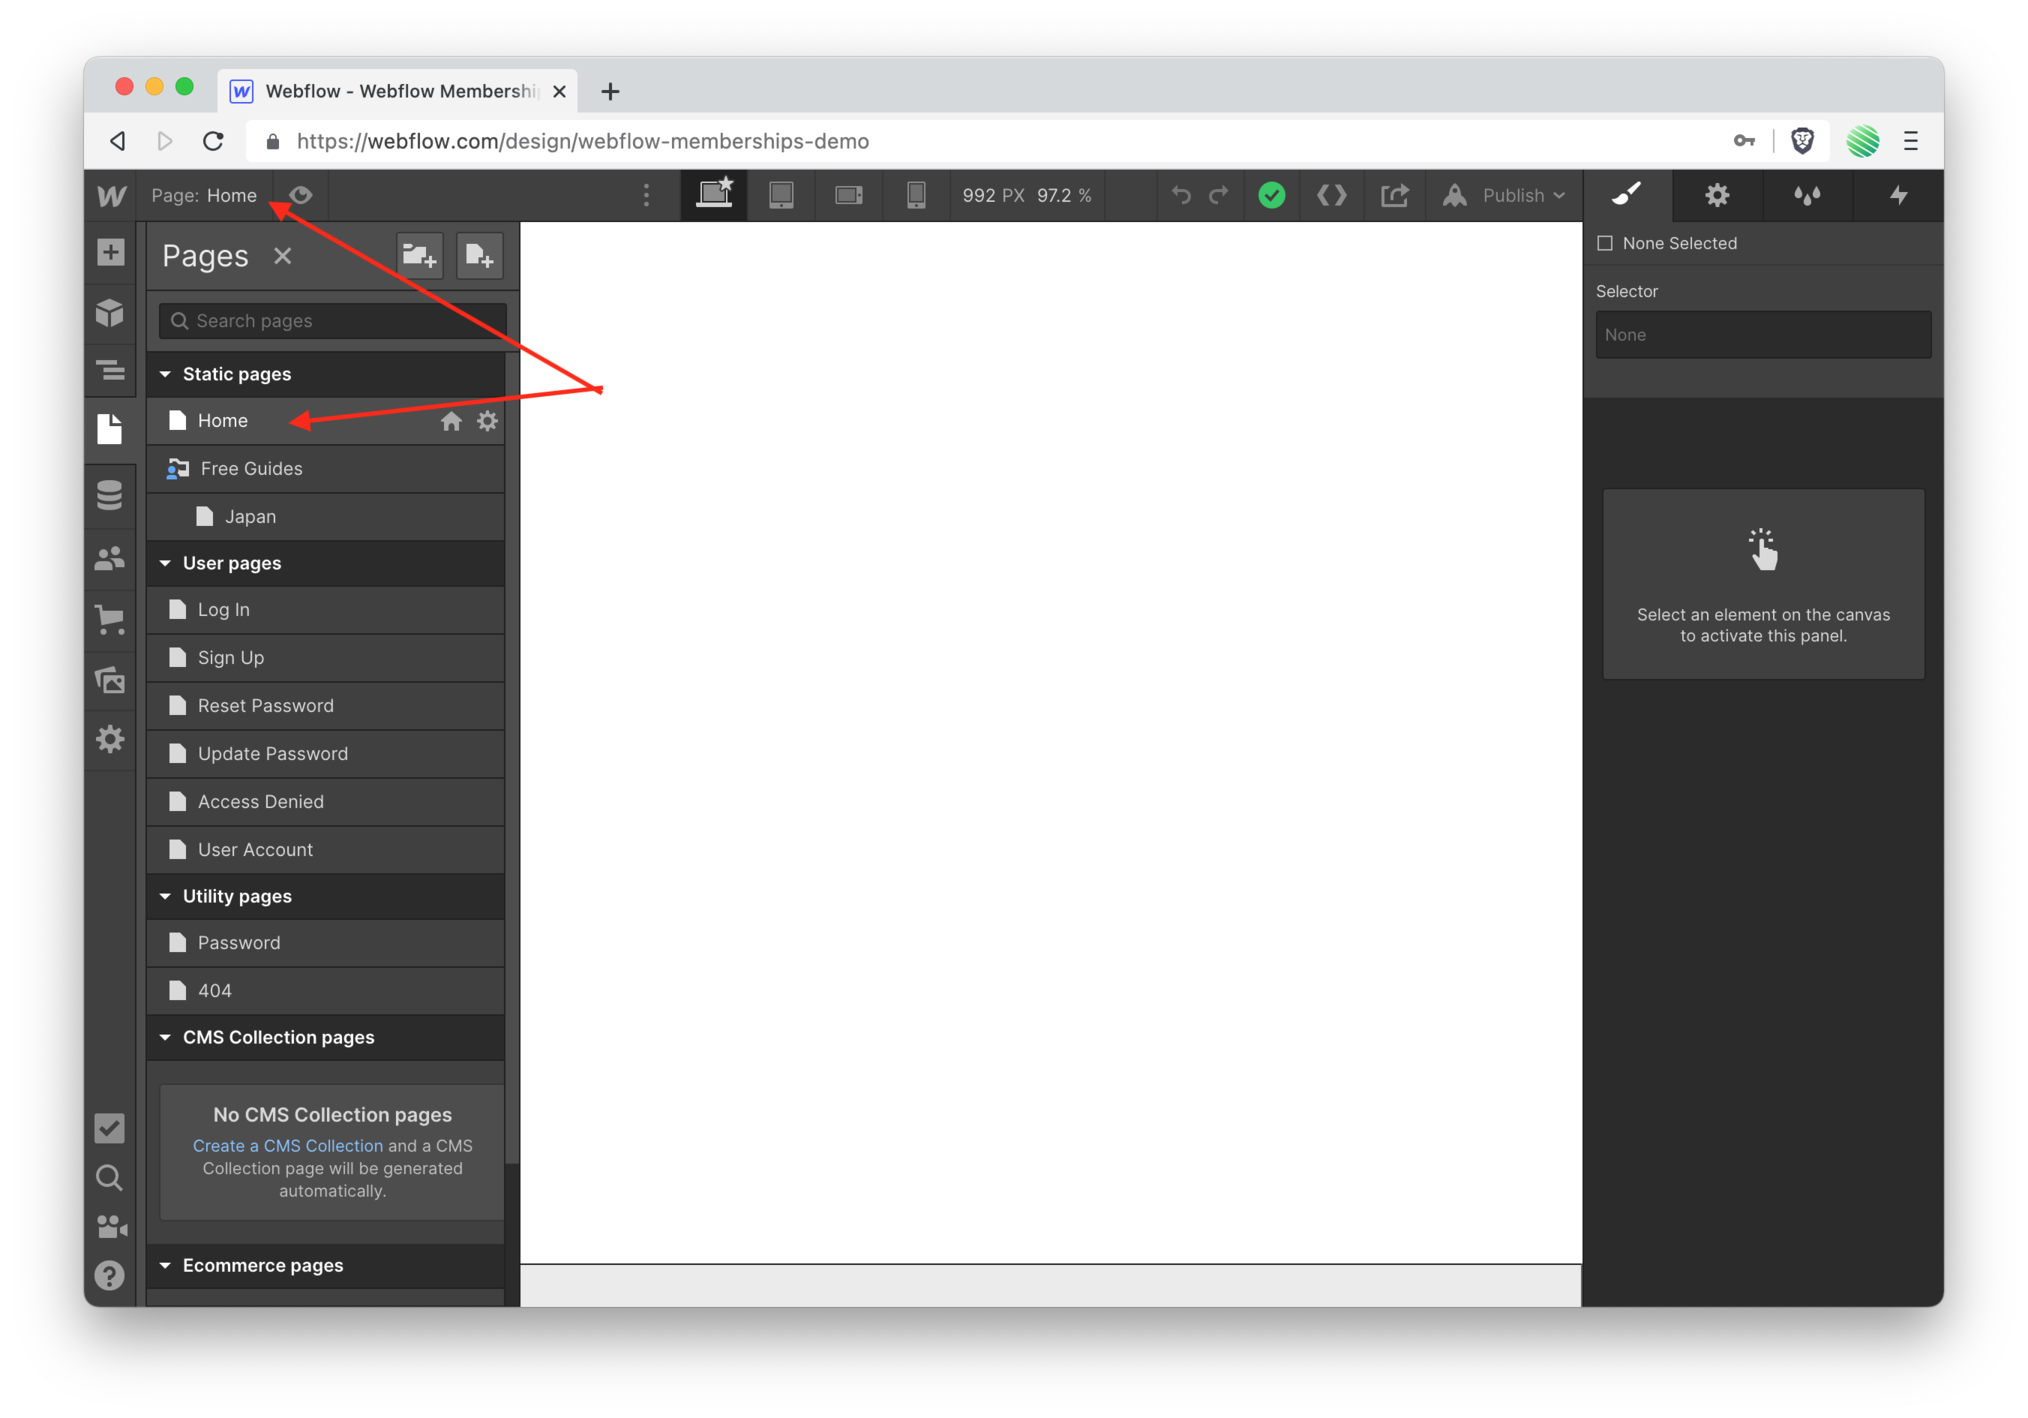 Go back to your home page.
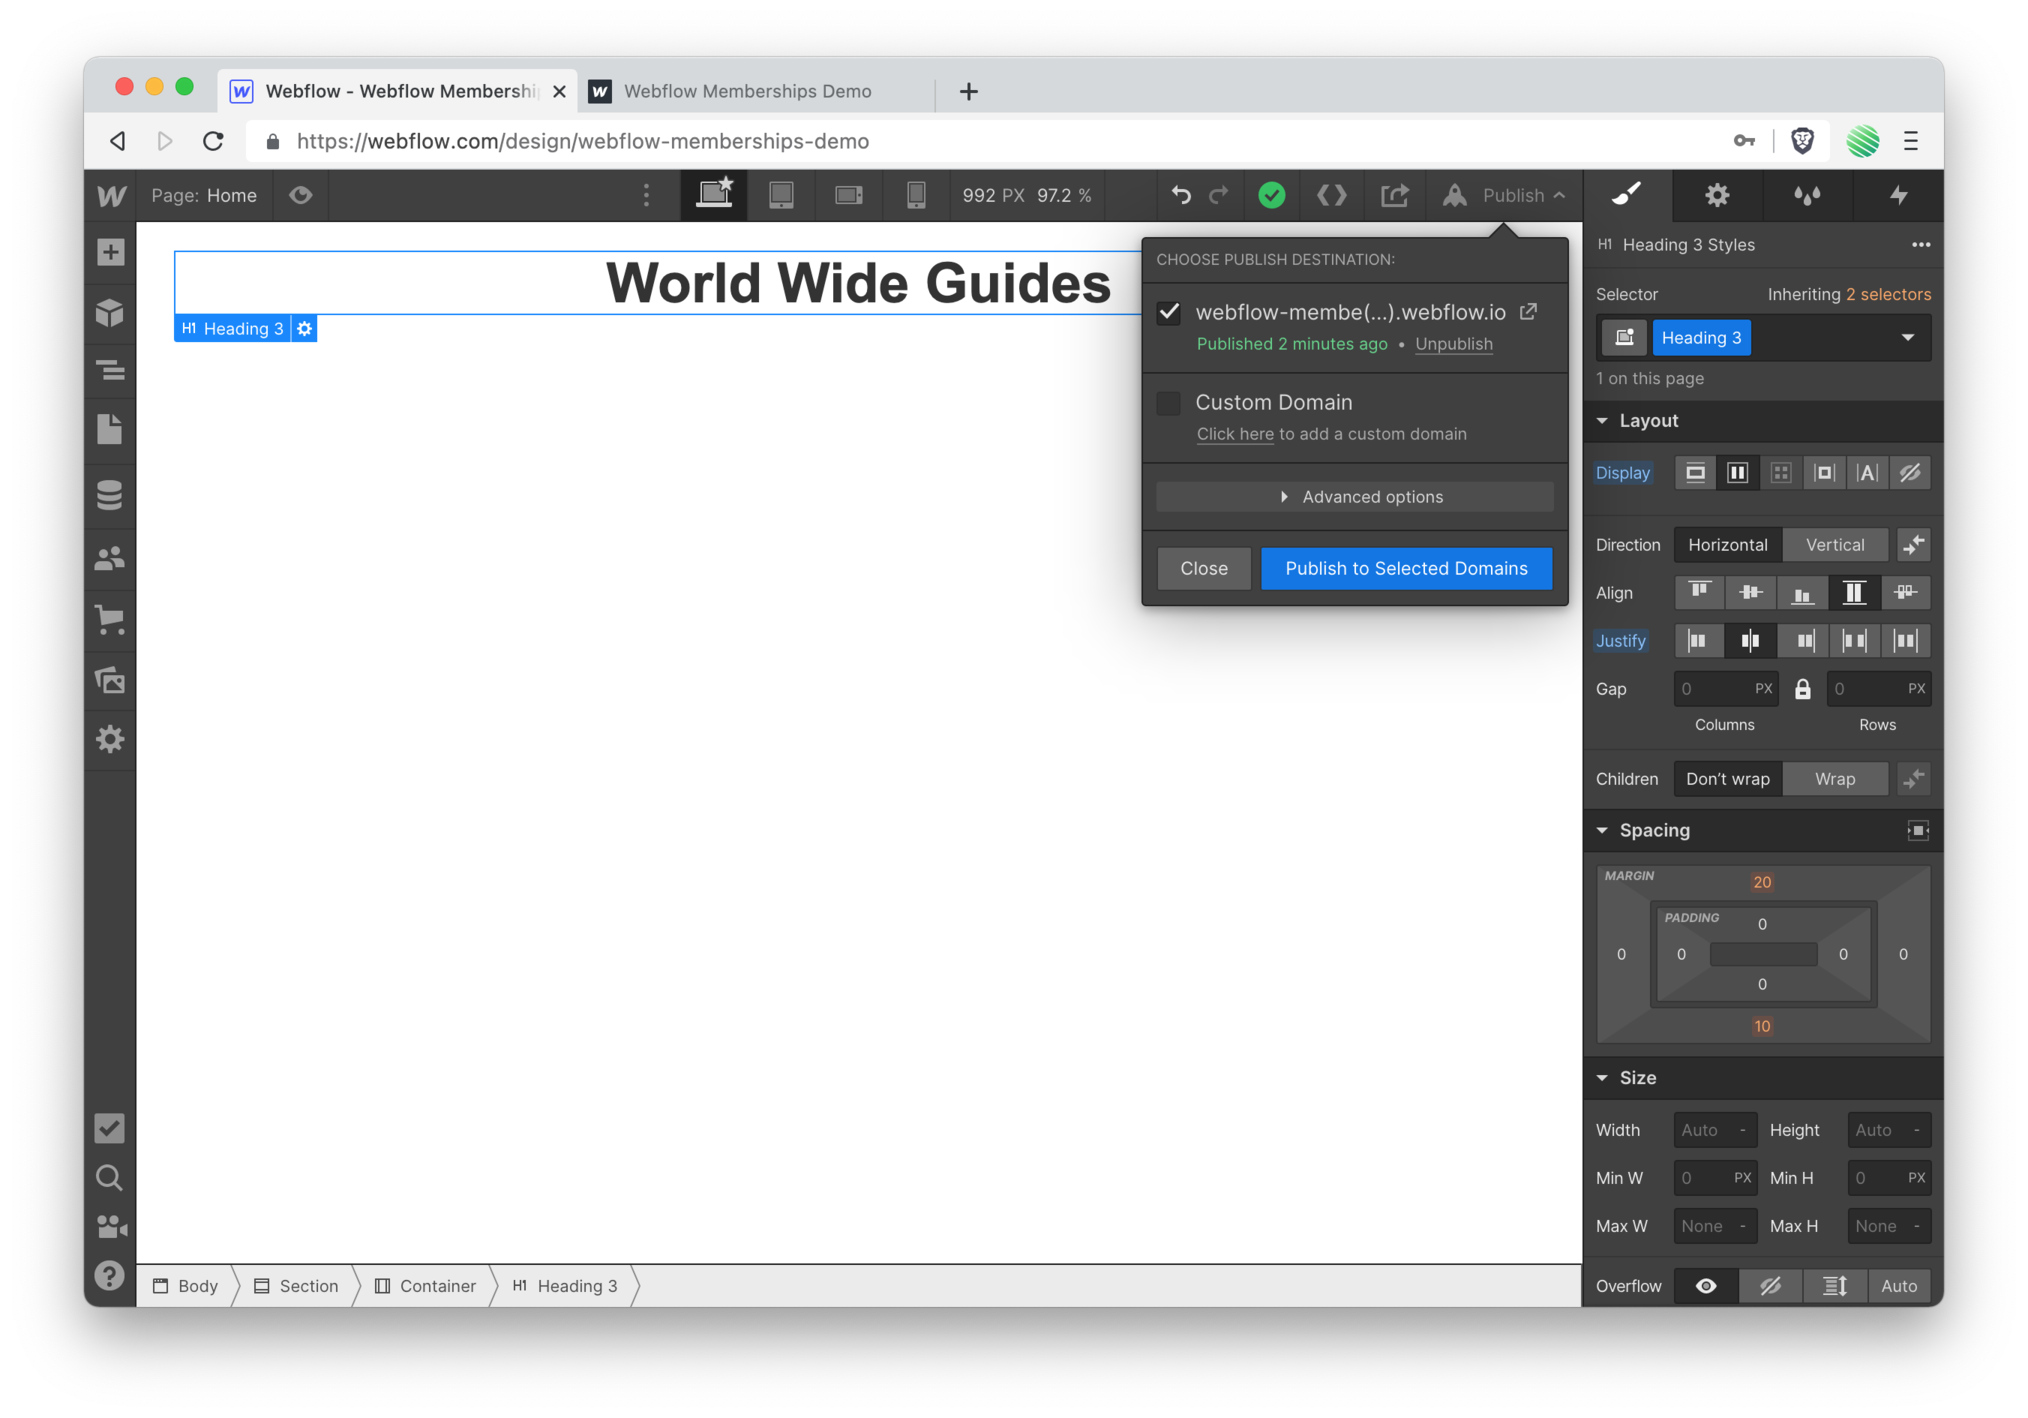
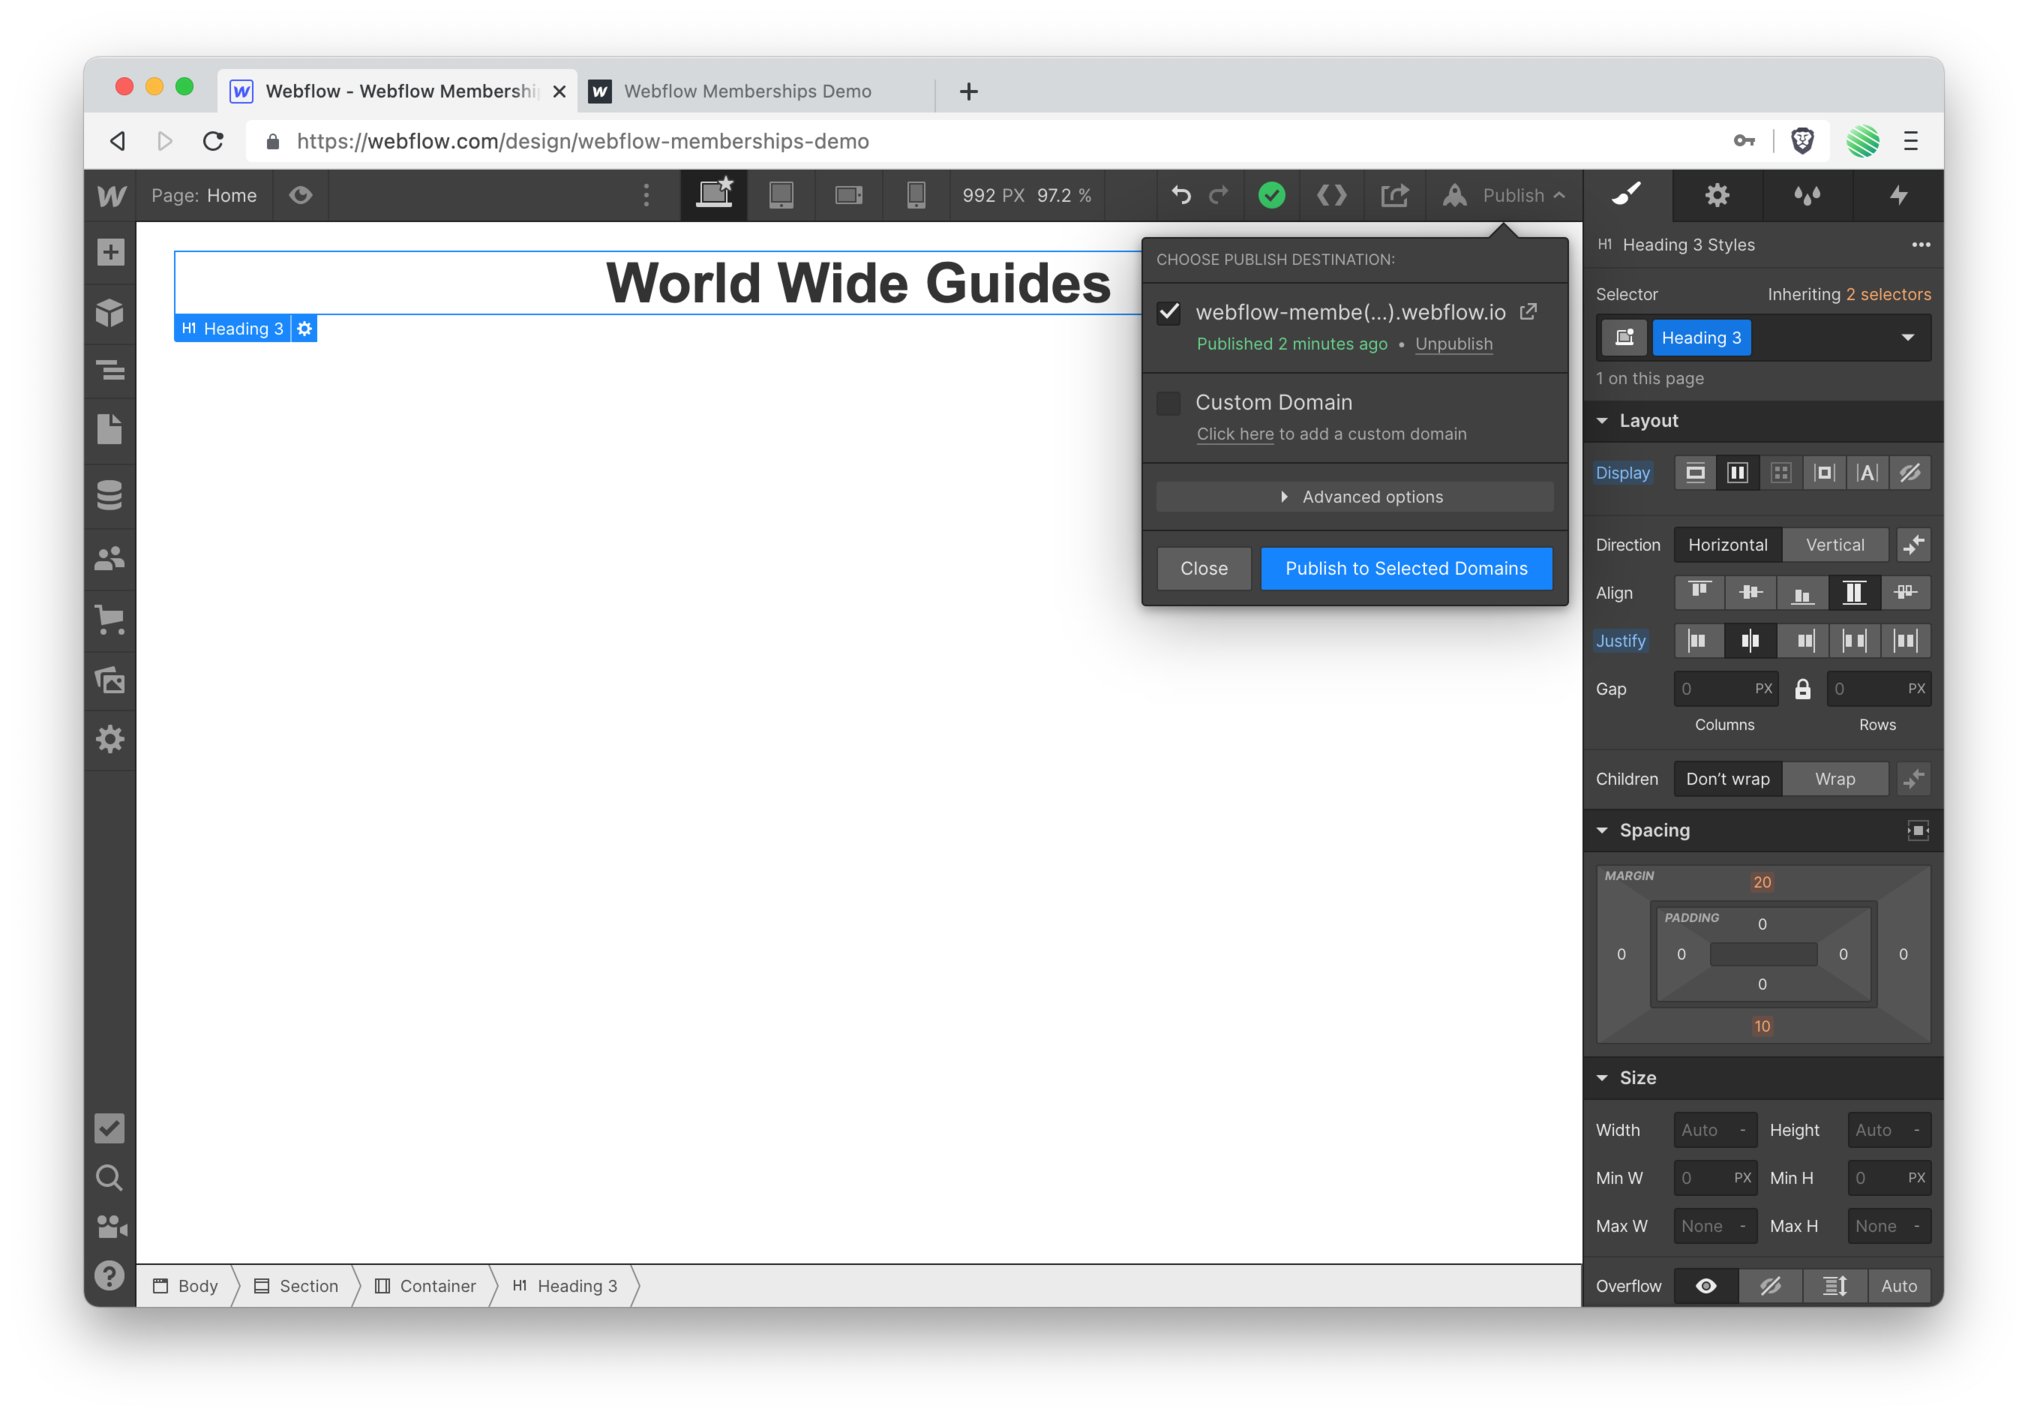
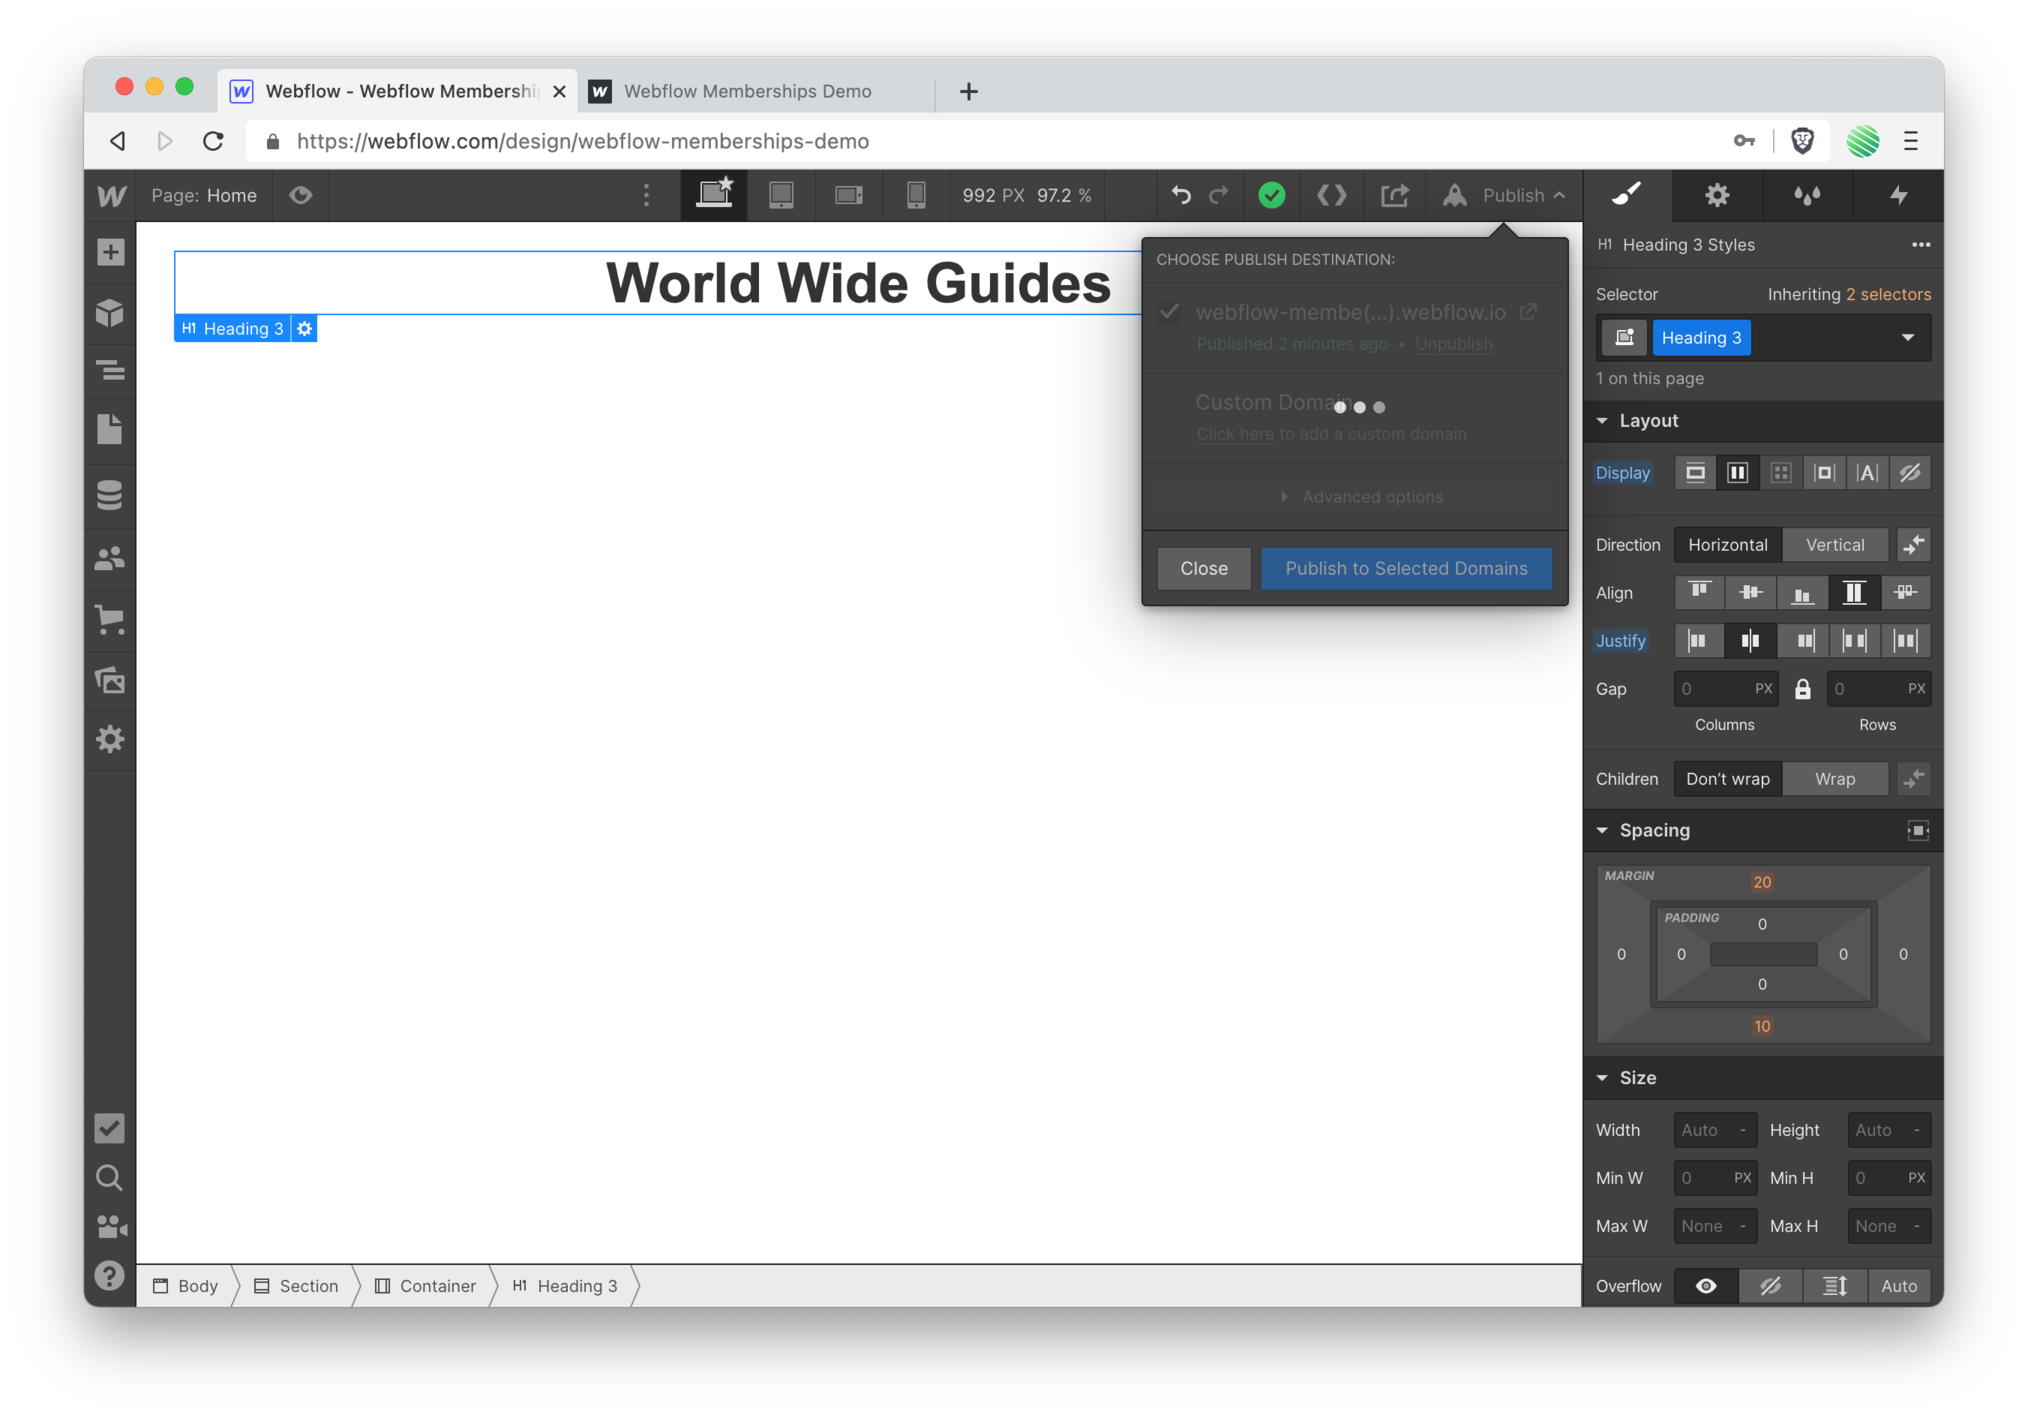
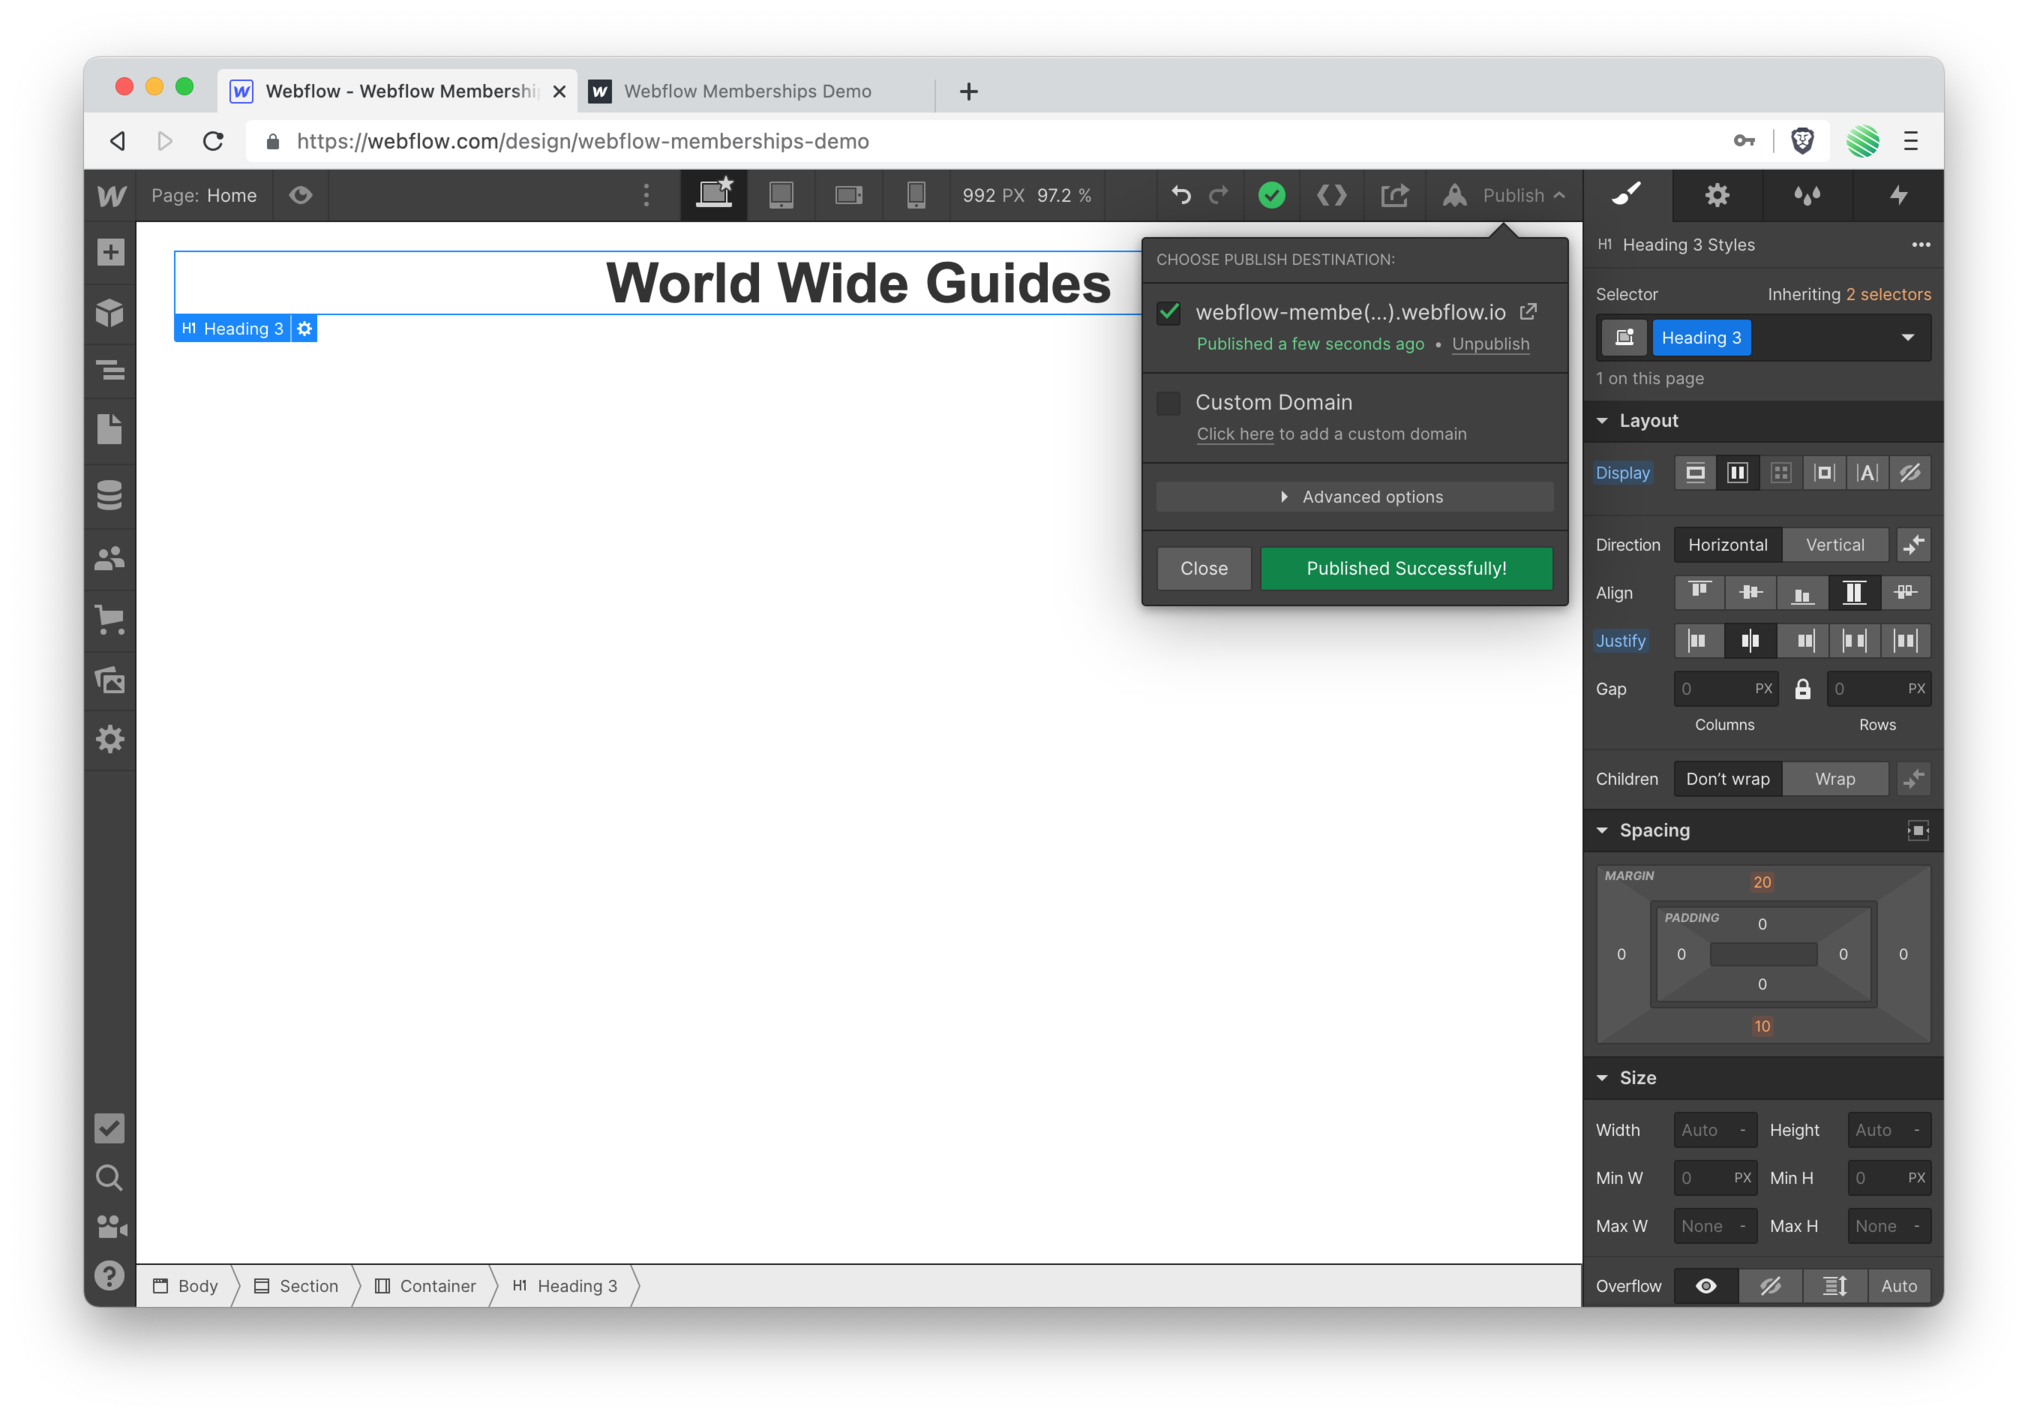
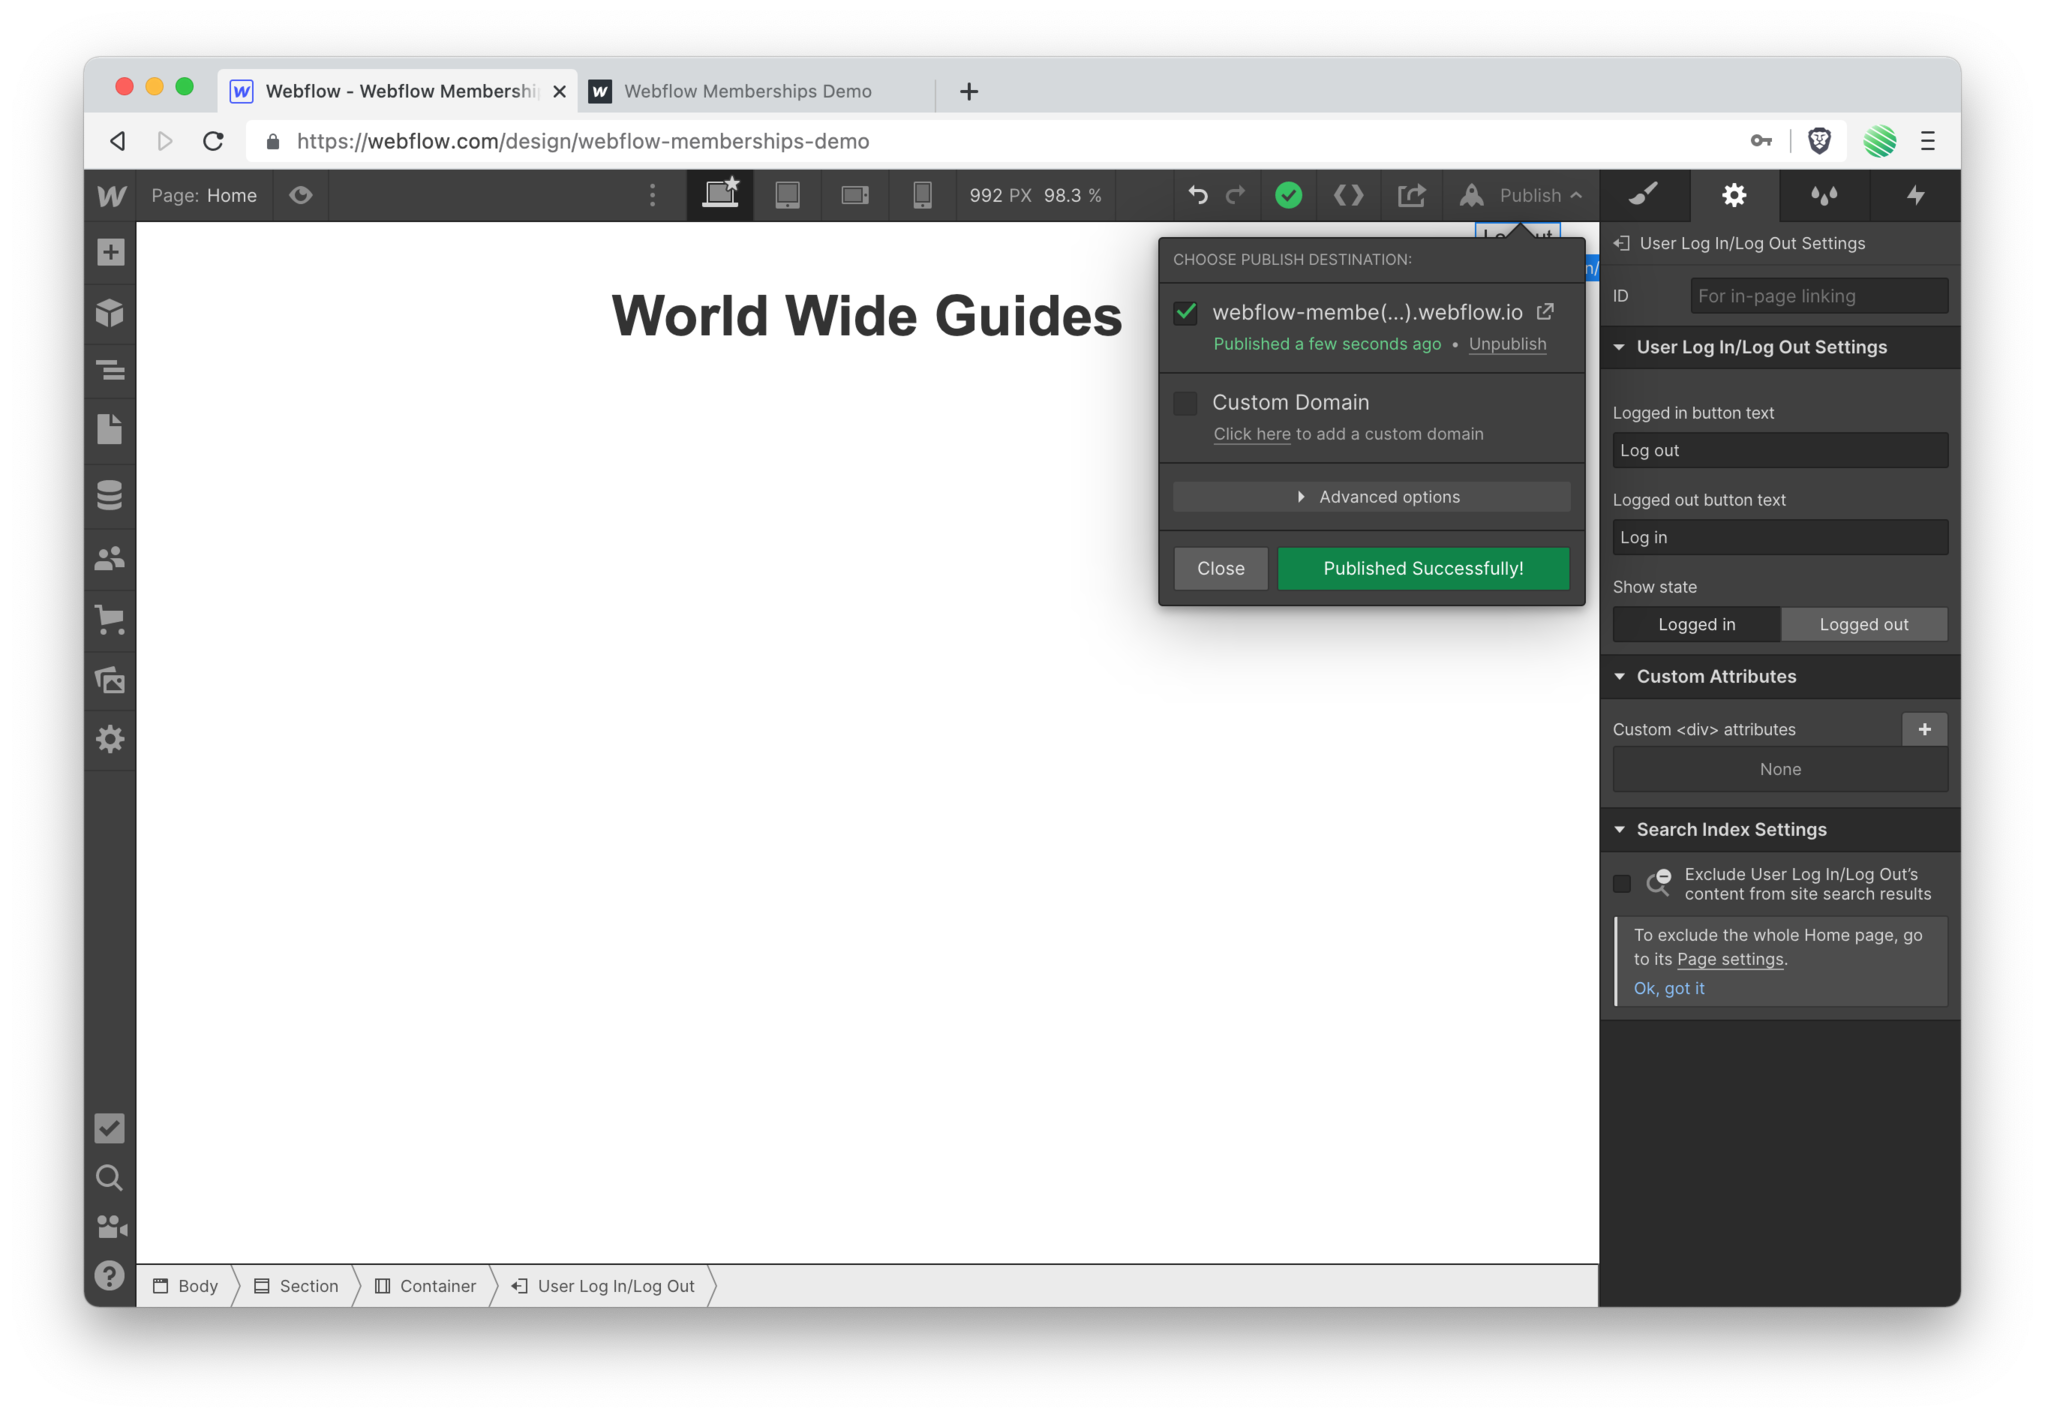
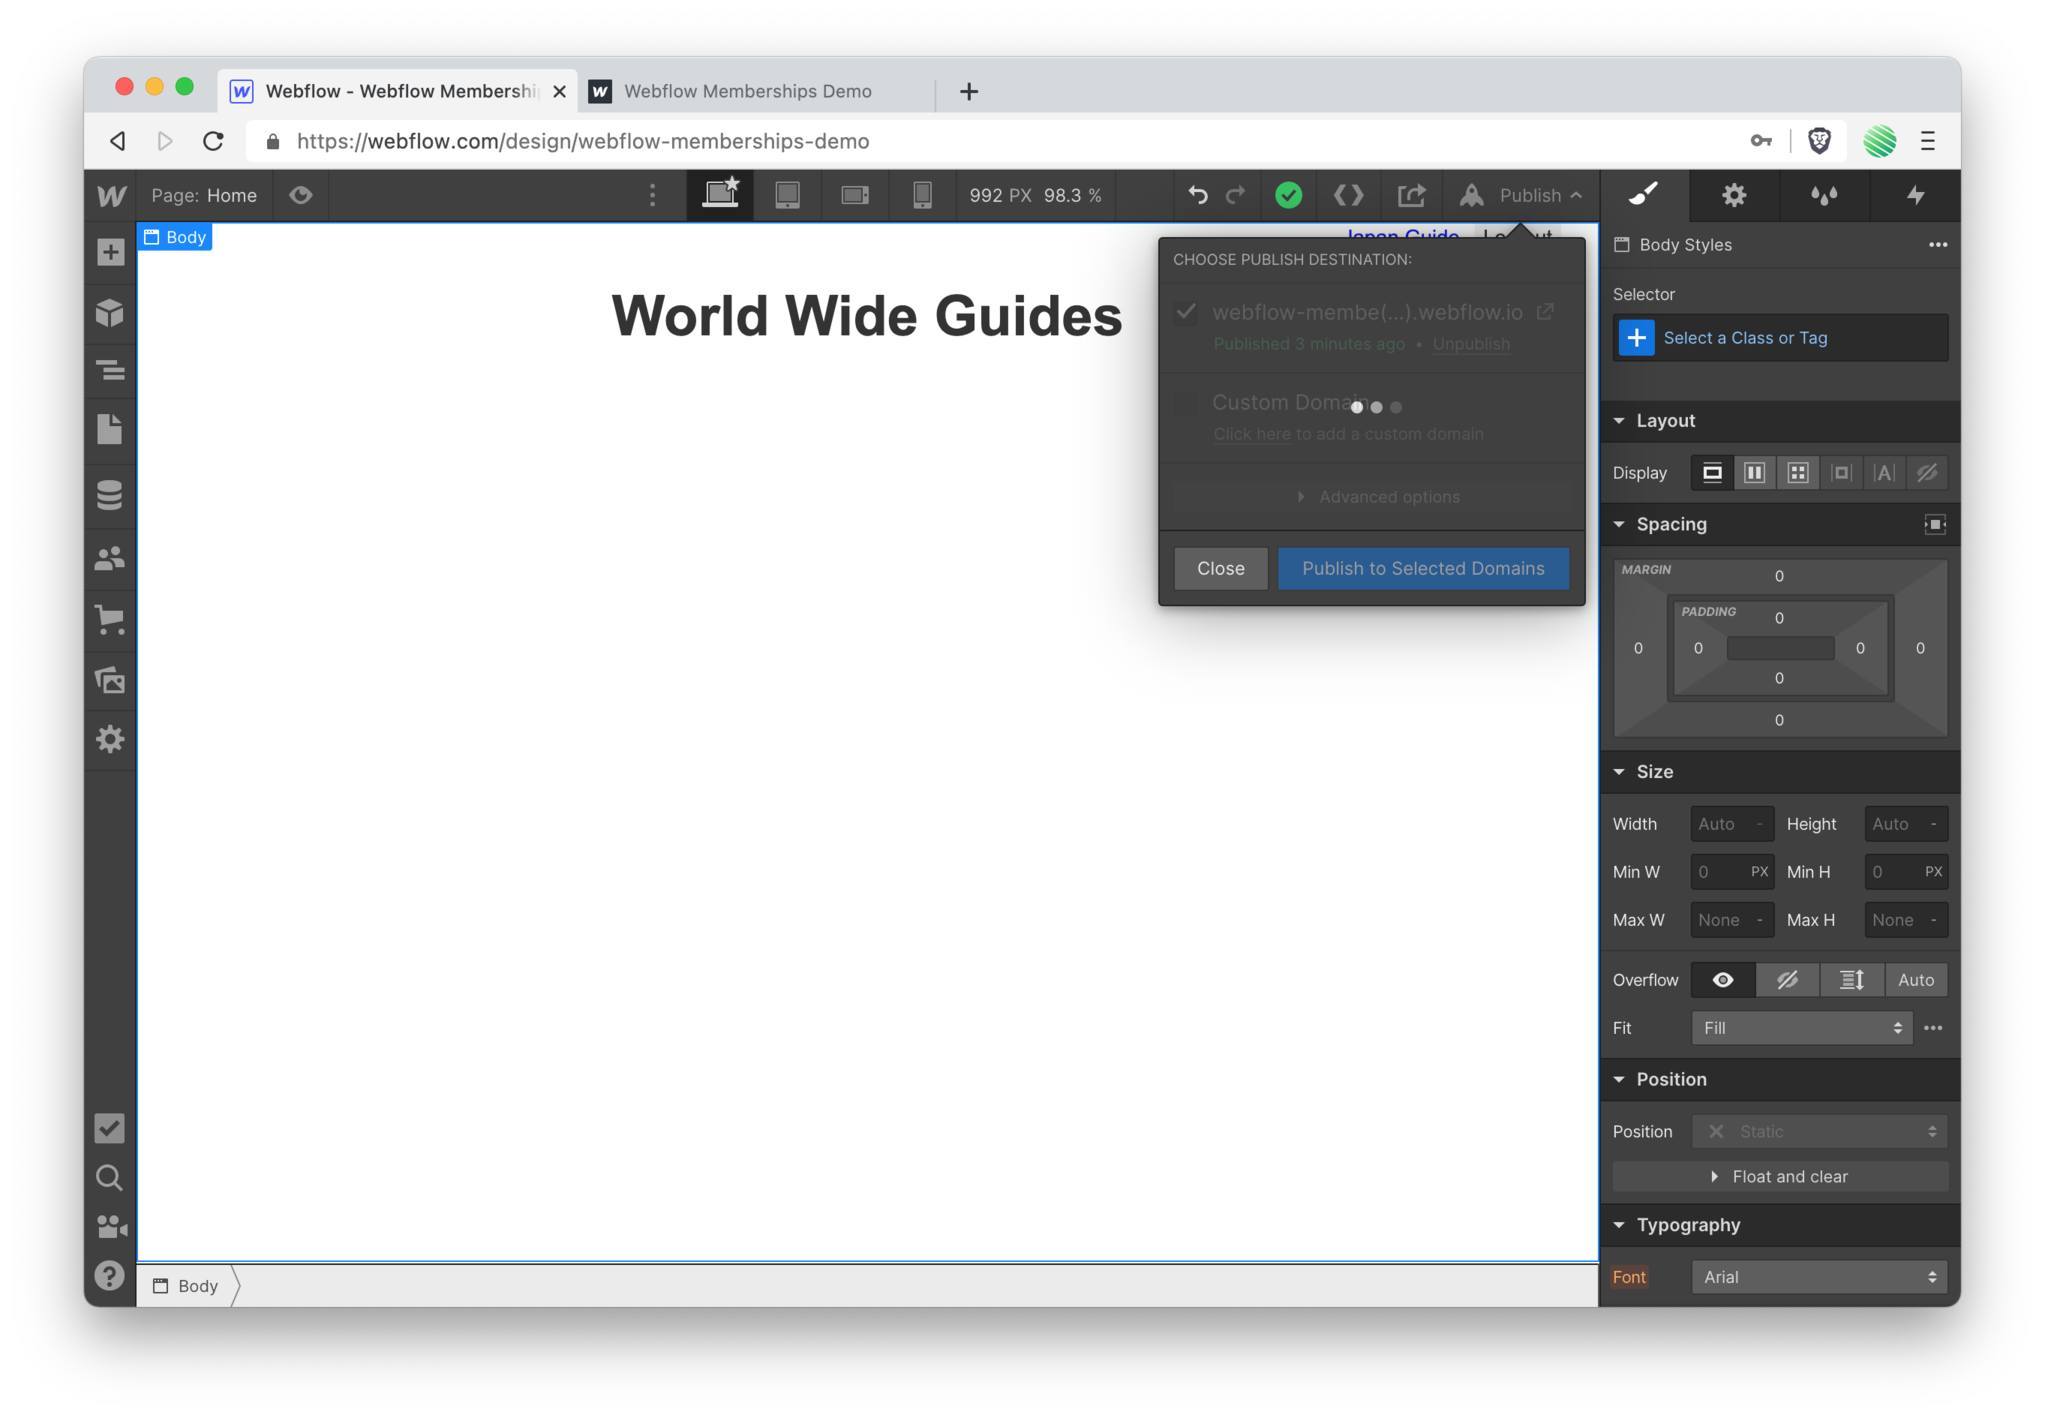
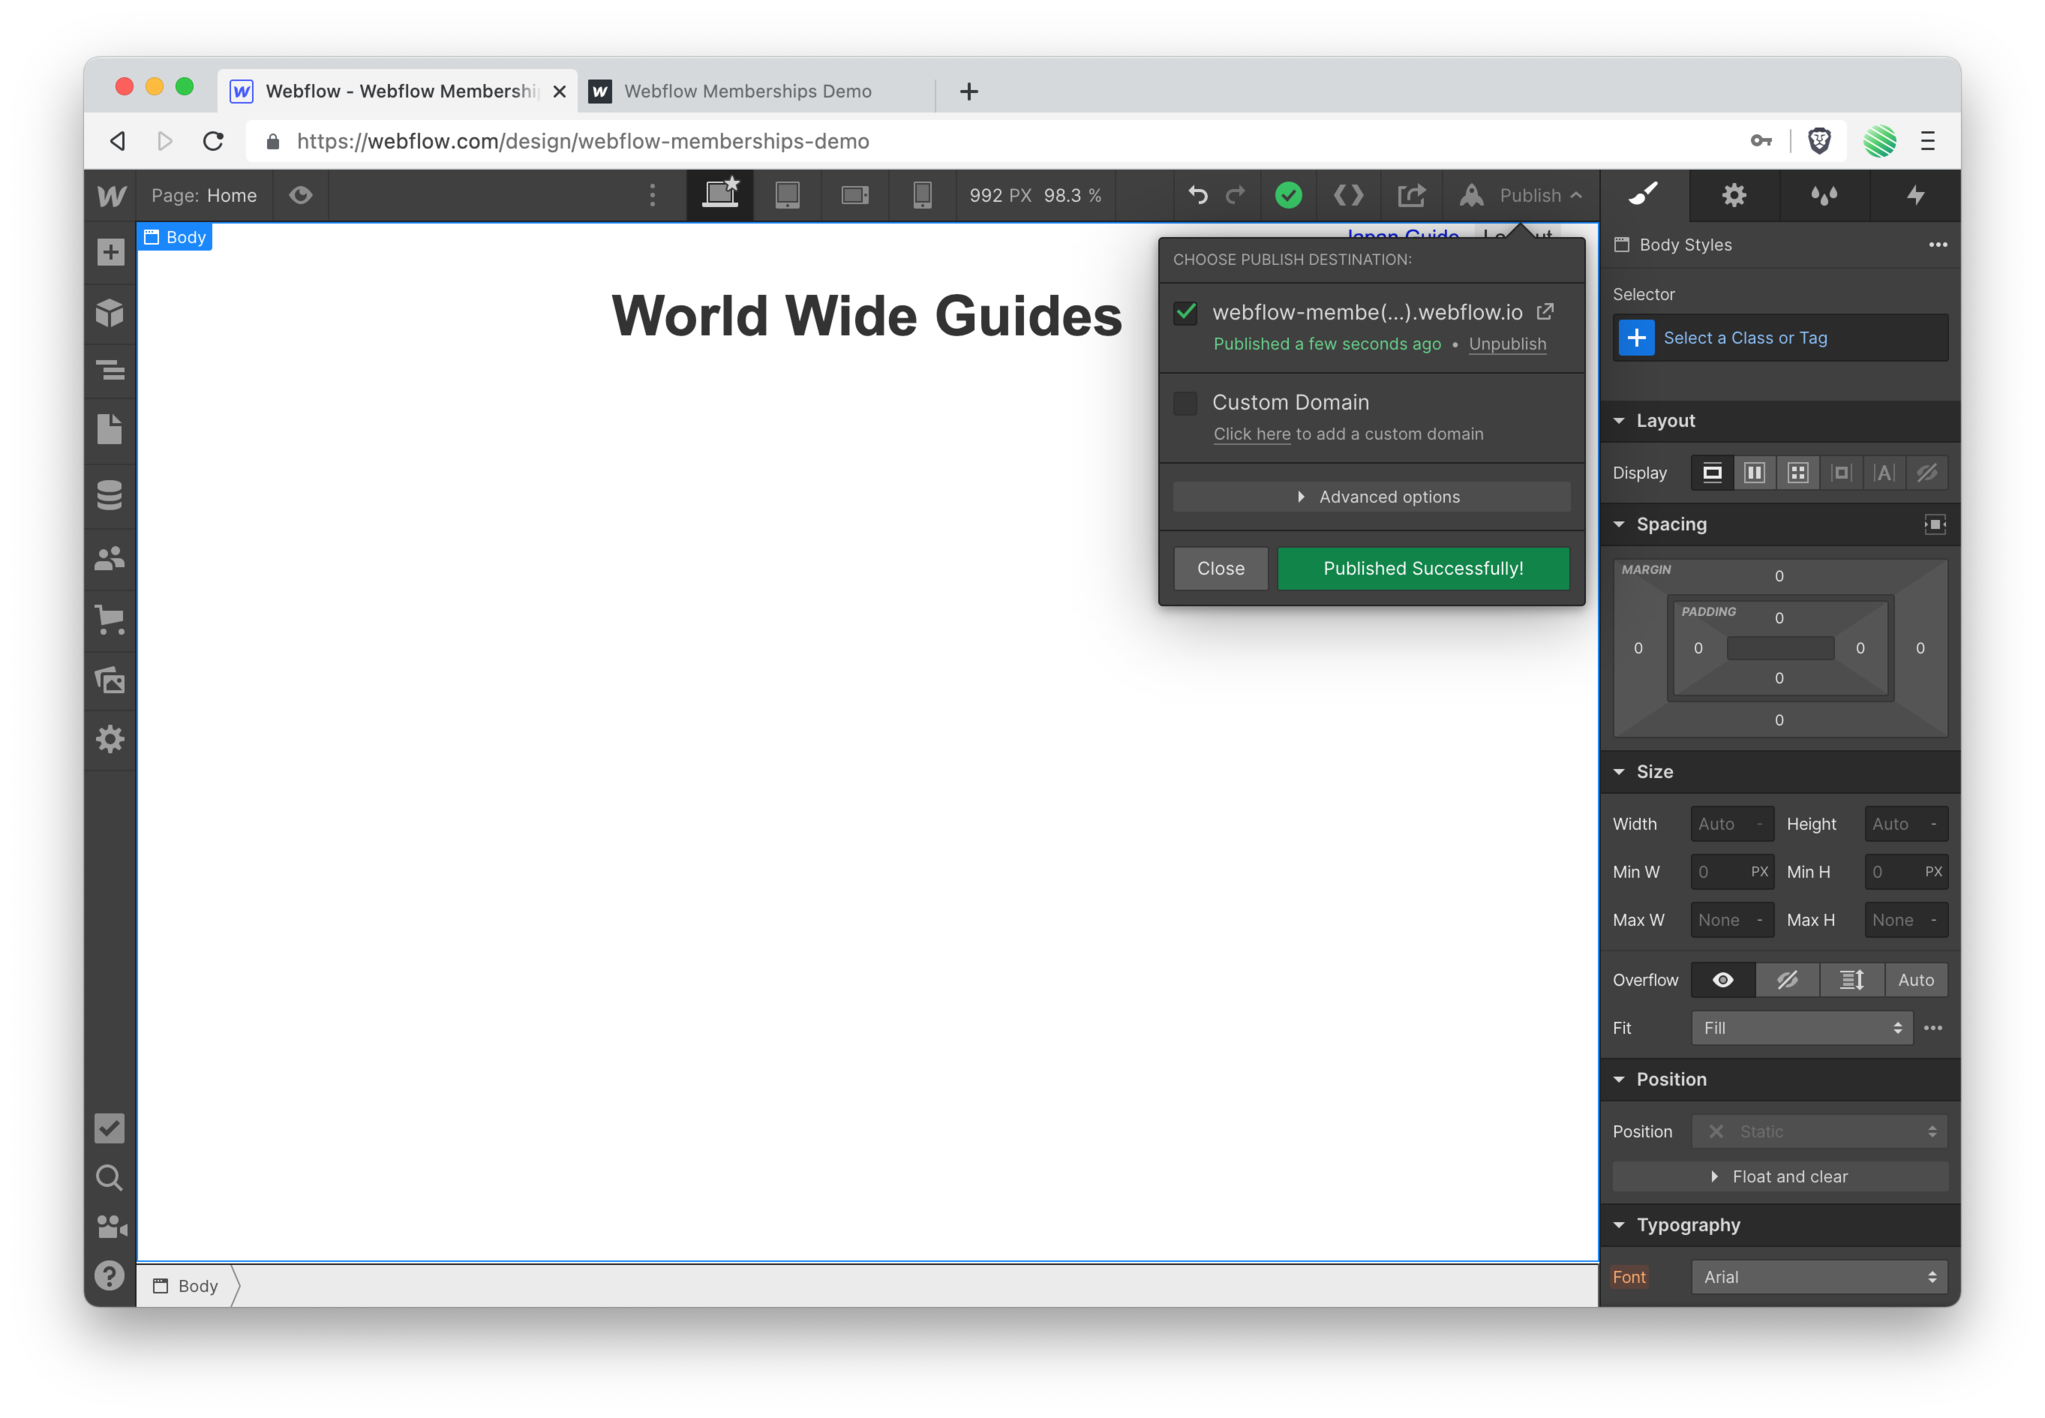
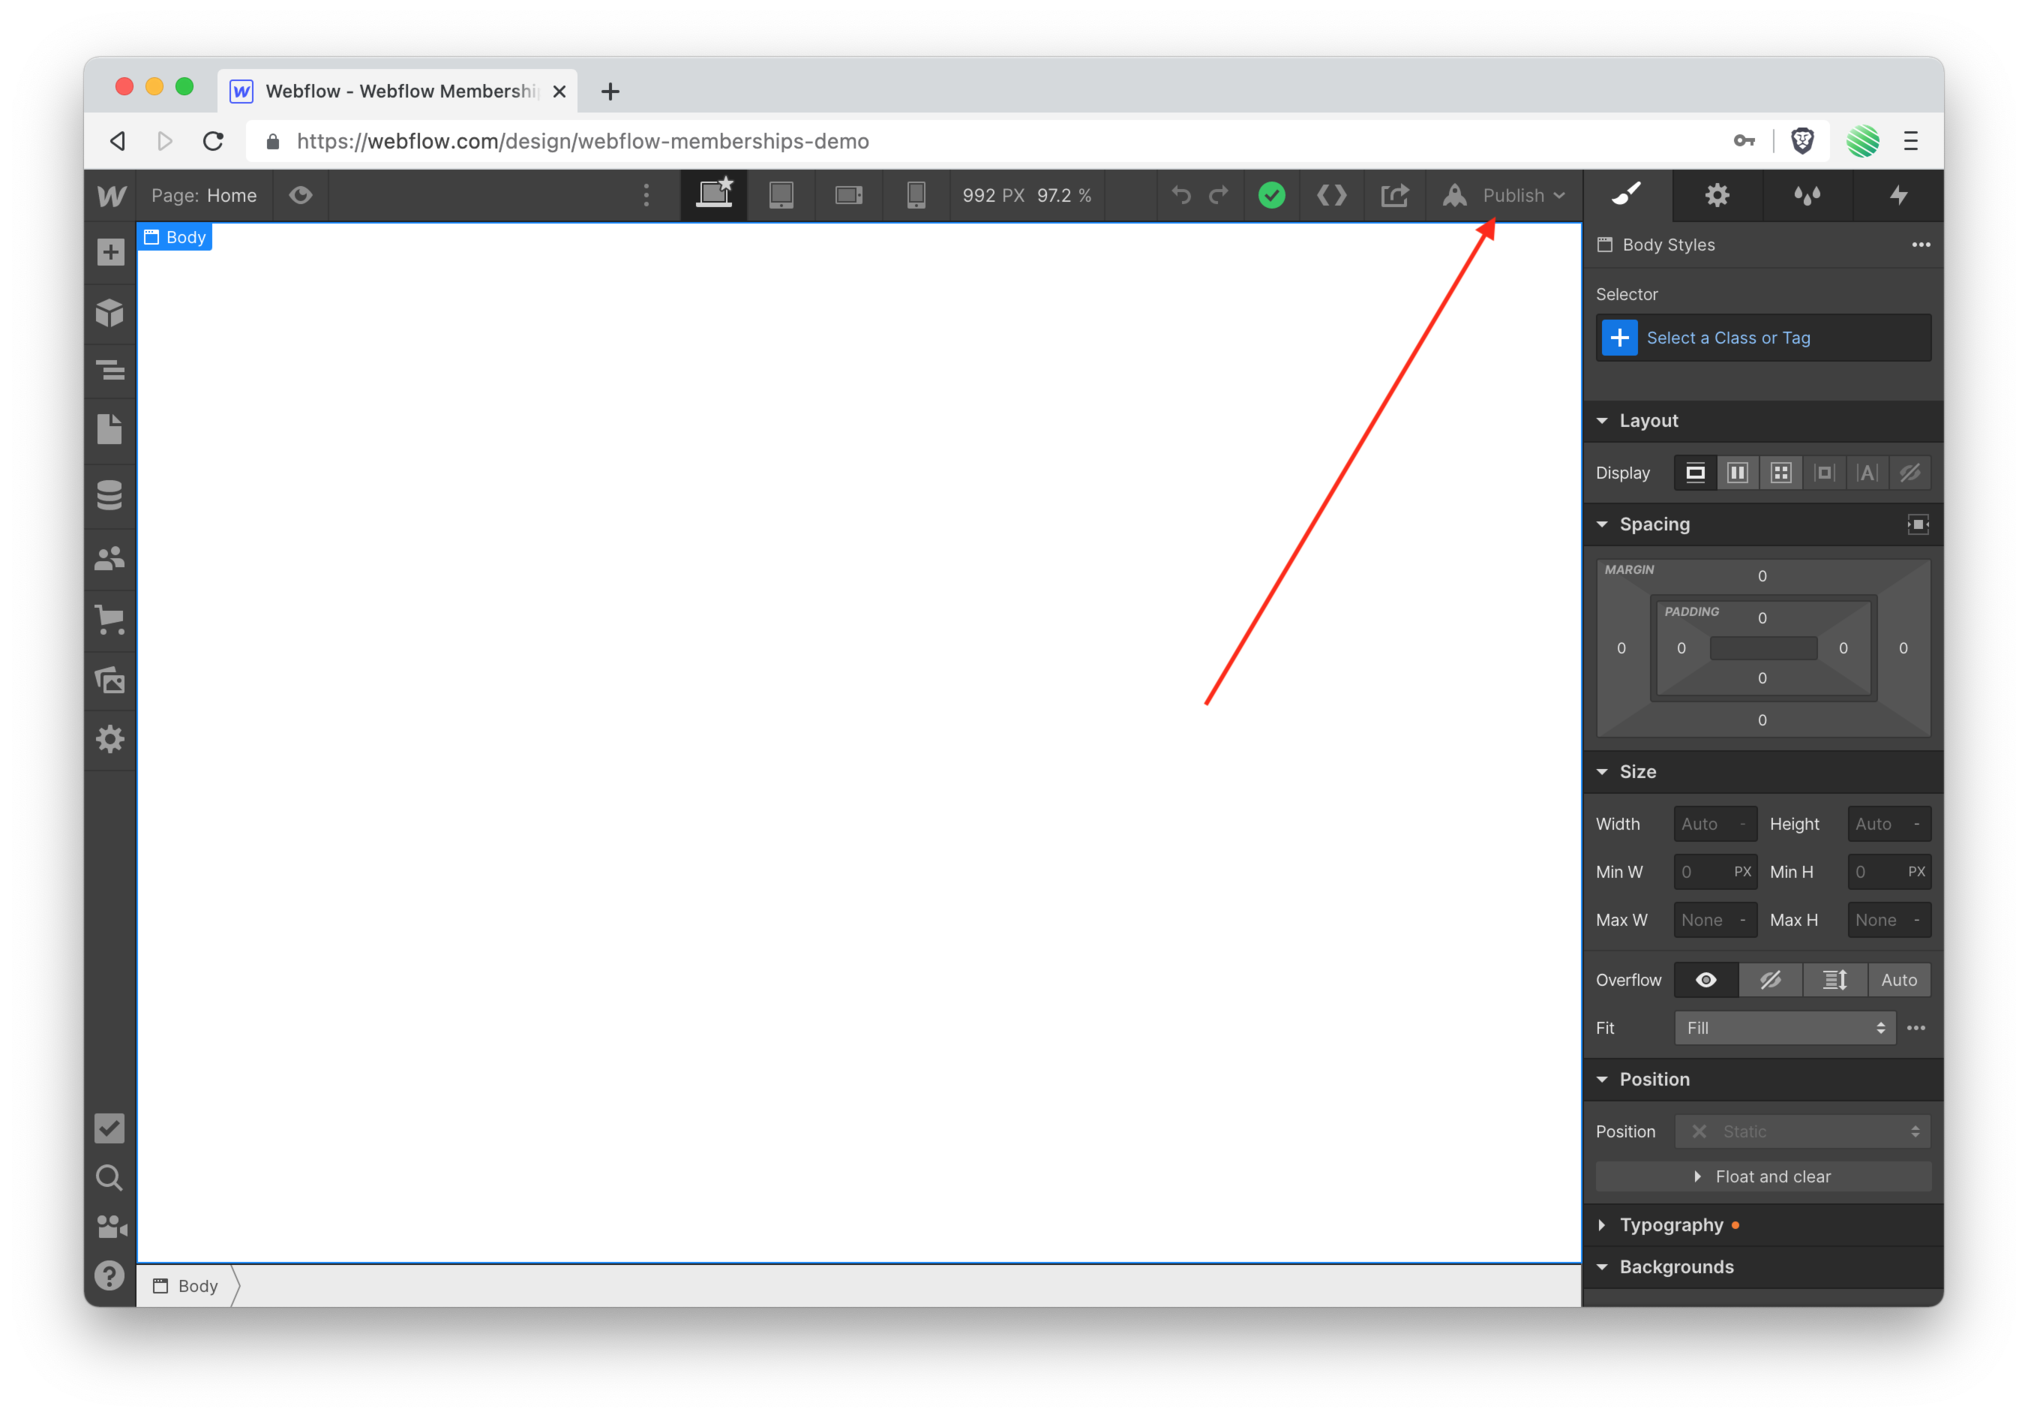 Publish your site.

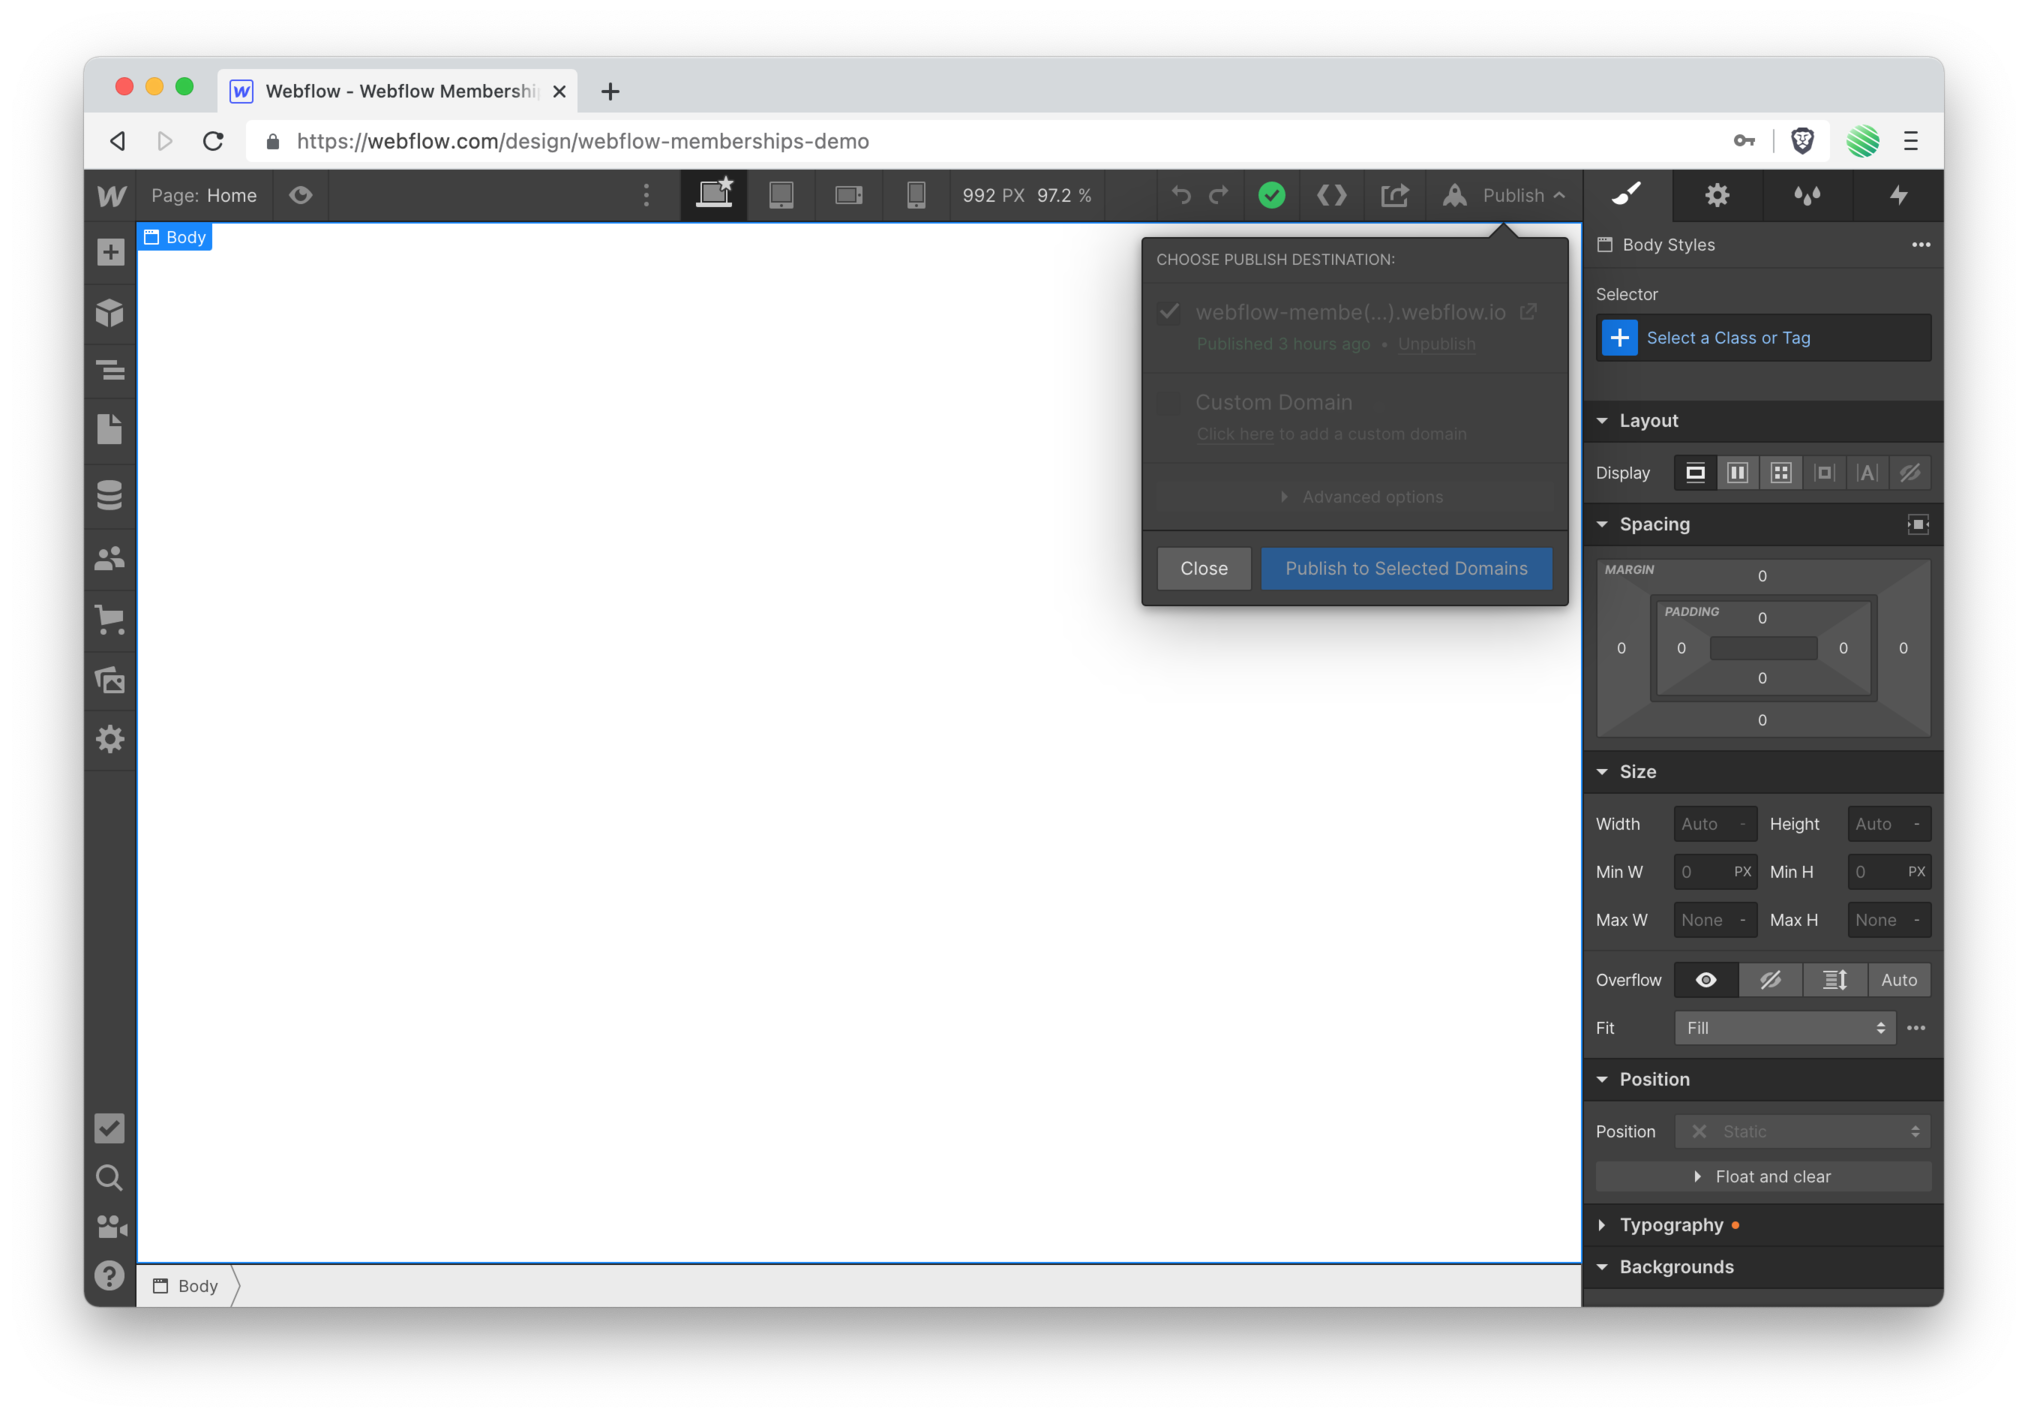
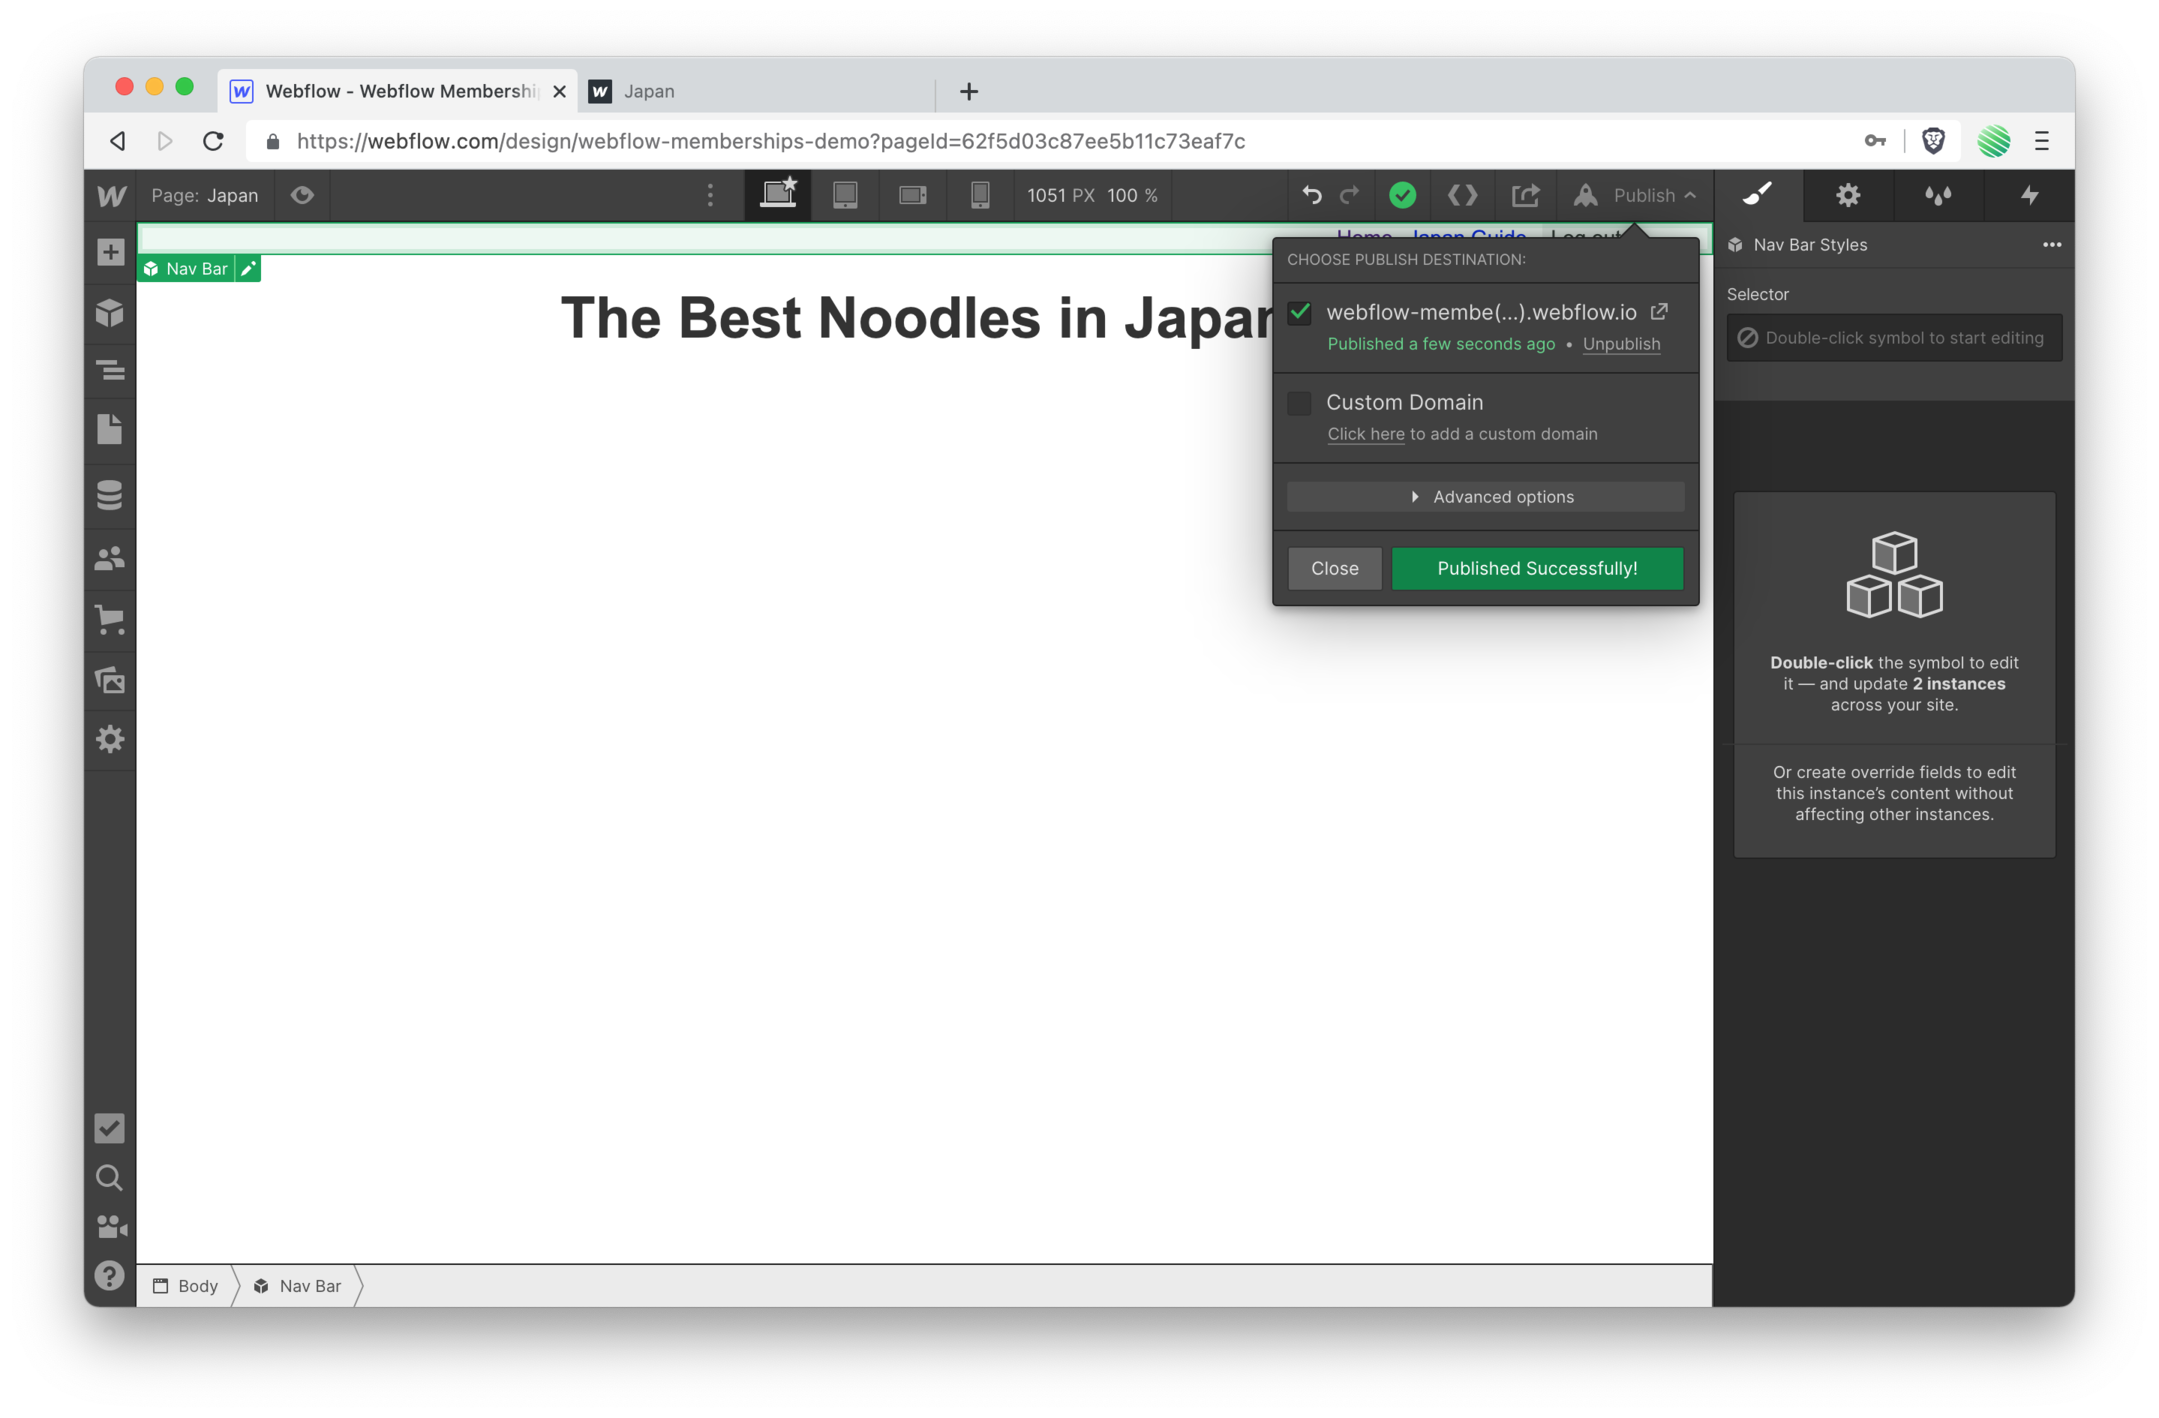
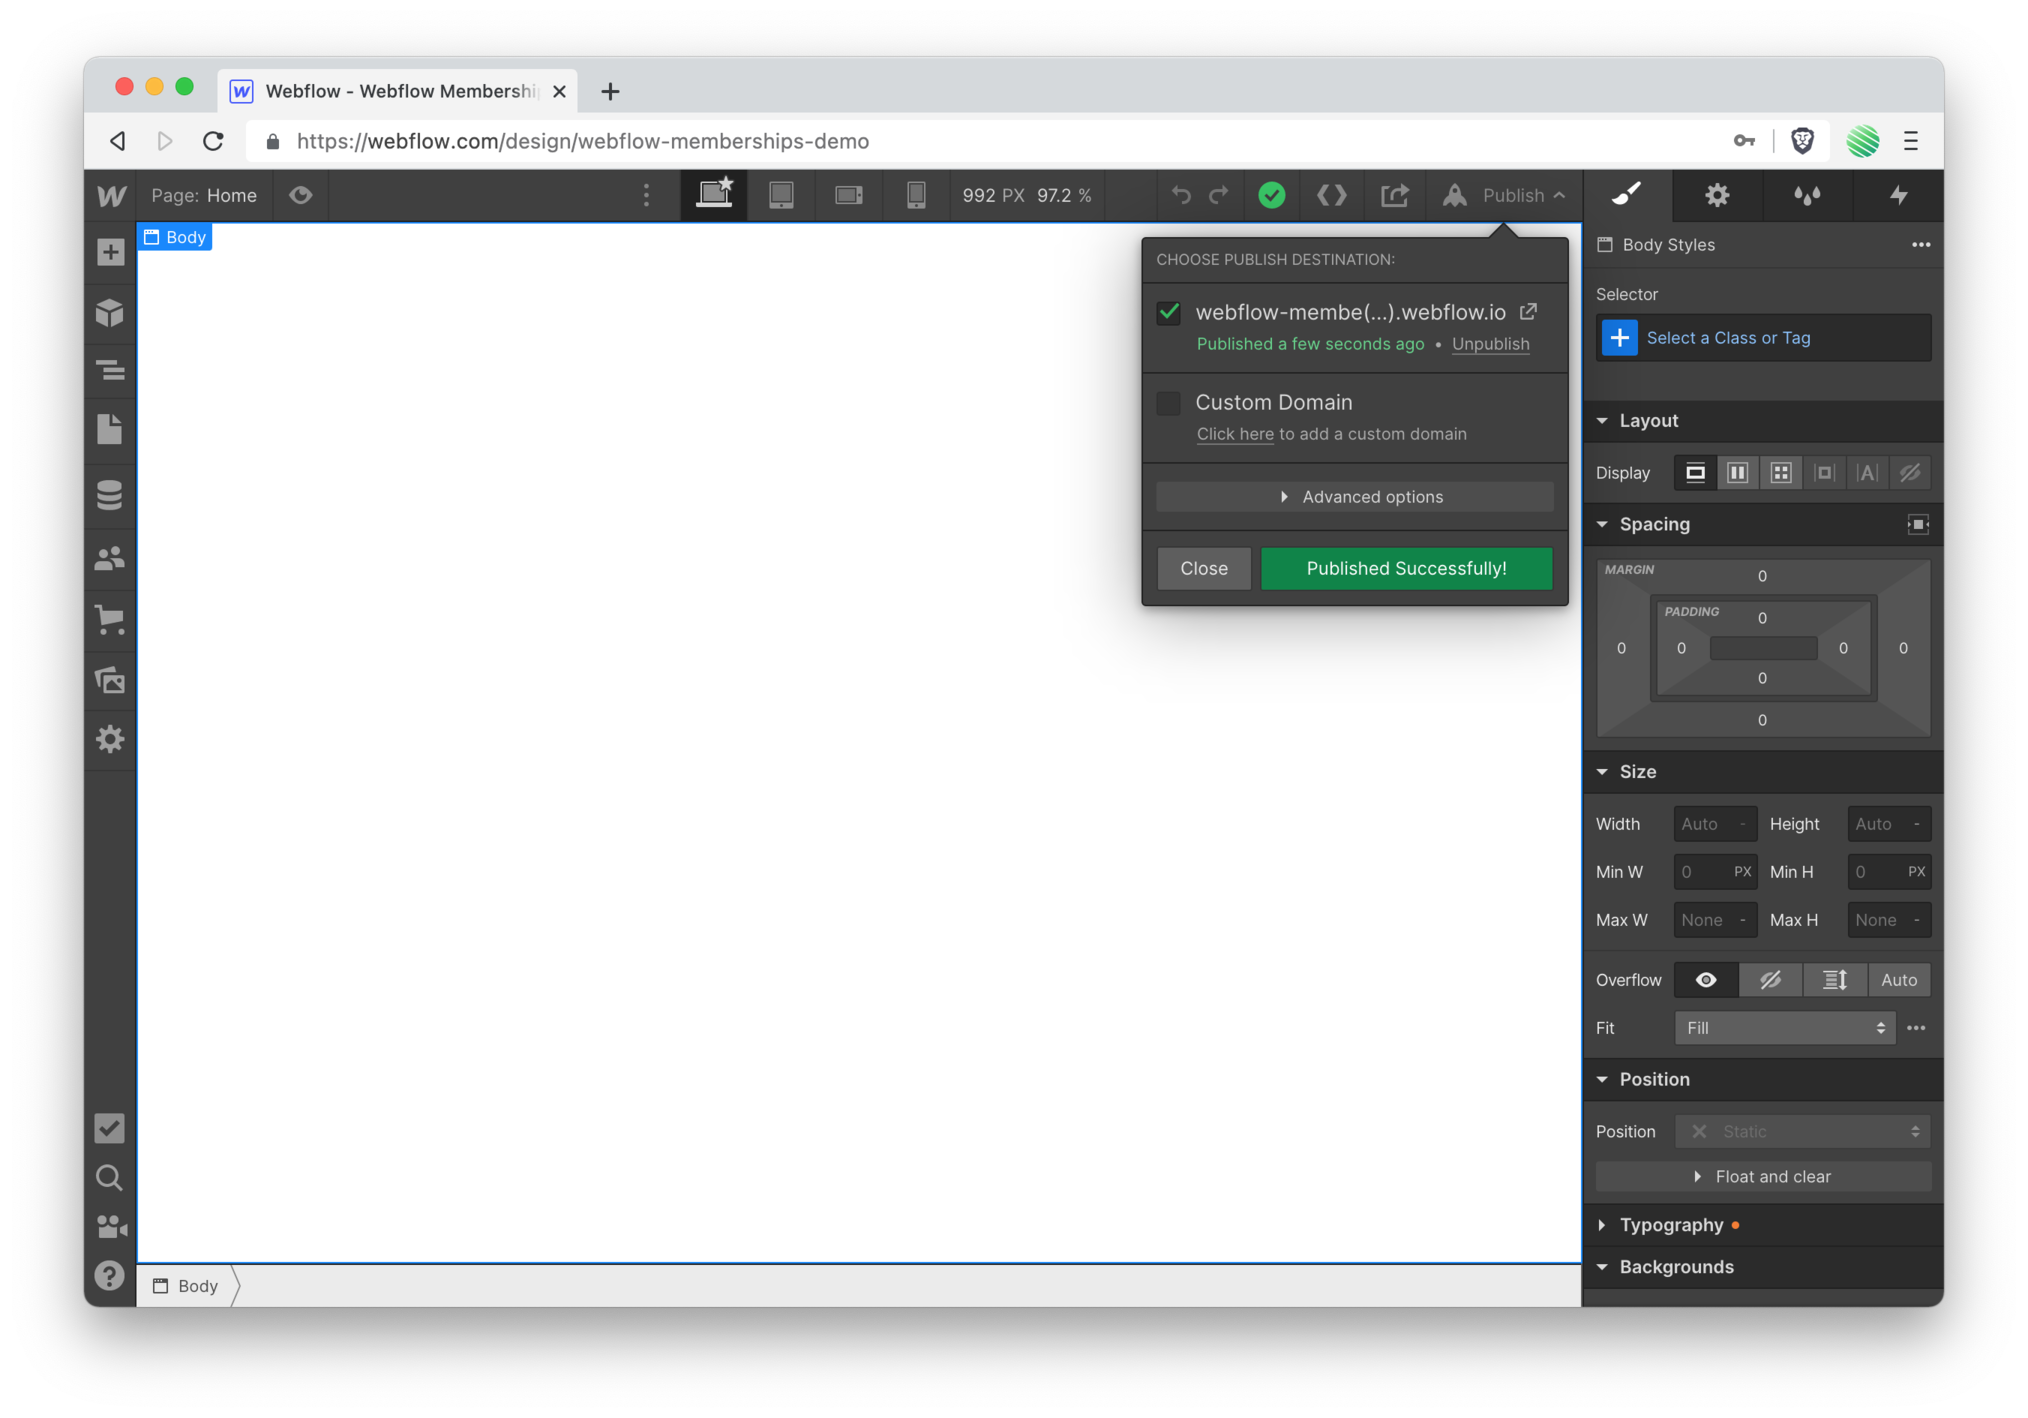 Publishing is the same as it's always been. Nothings changed.
Accept Your Email Invitation
But before opening your new site, return to your invitation email.
 You’ve setup gated content, governed by an access group, and you can now test the entire flow.
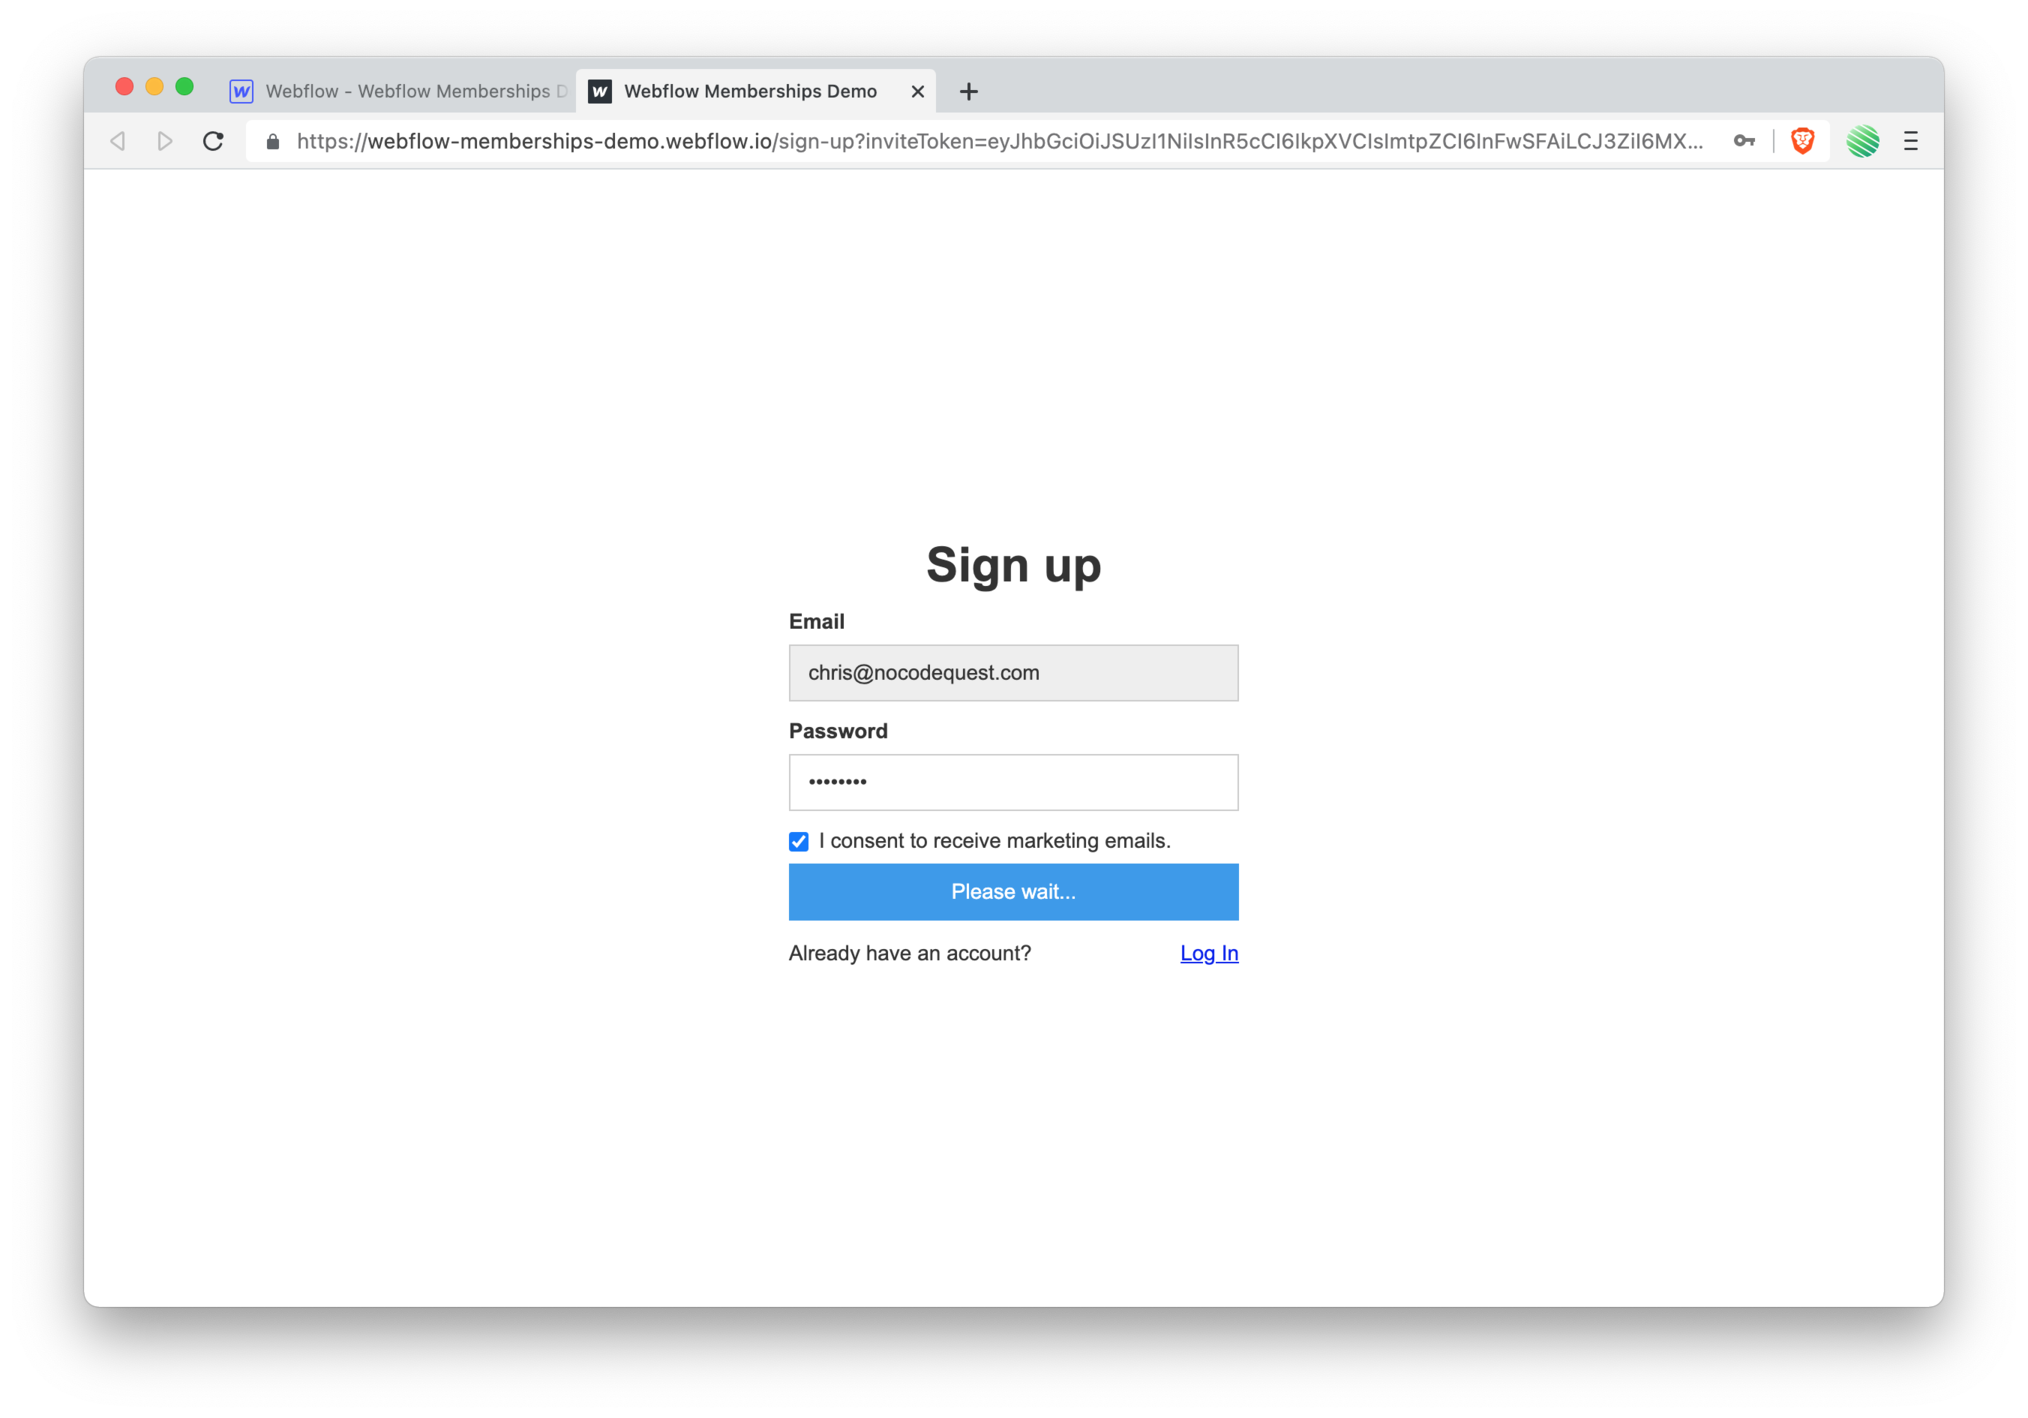
Tap the “create account” button from within your email invitation.
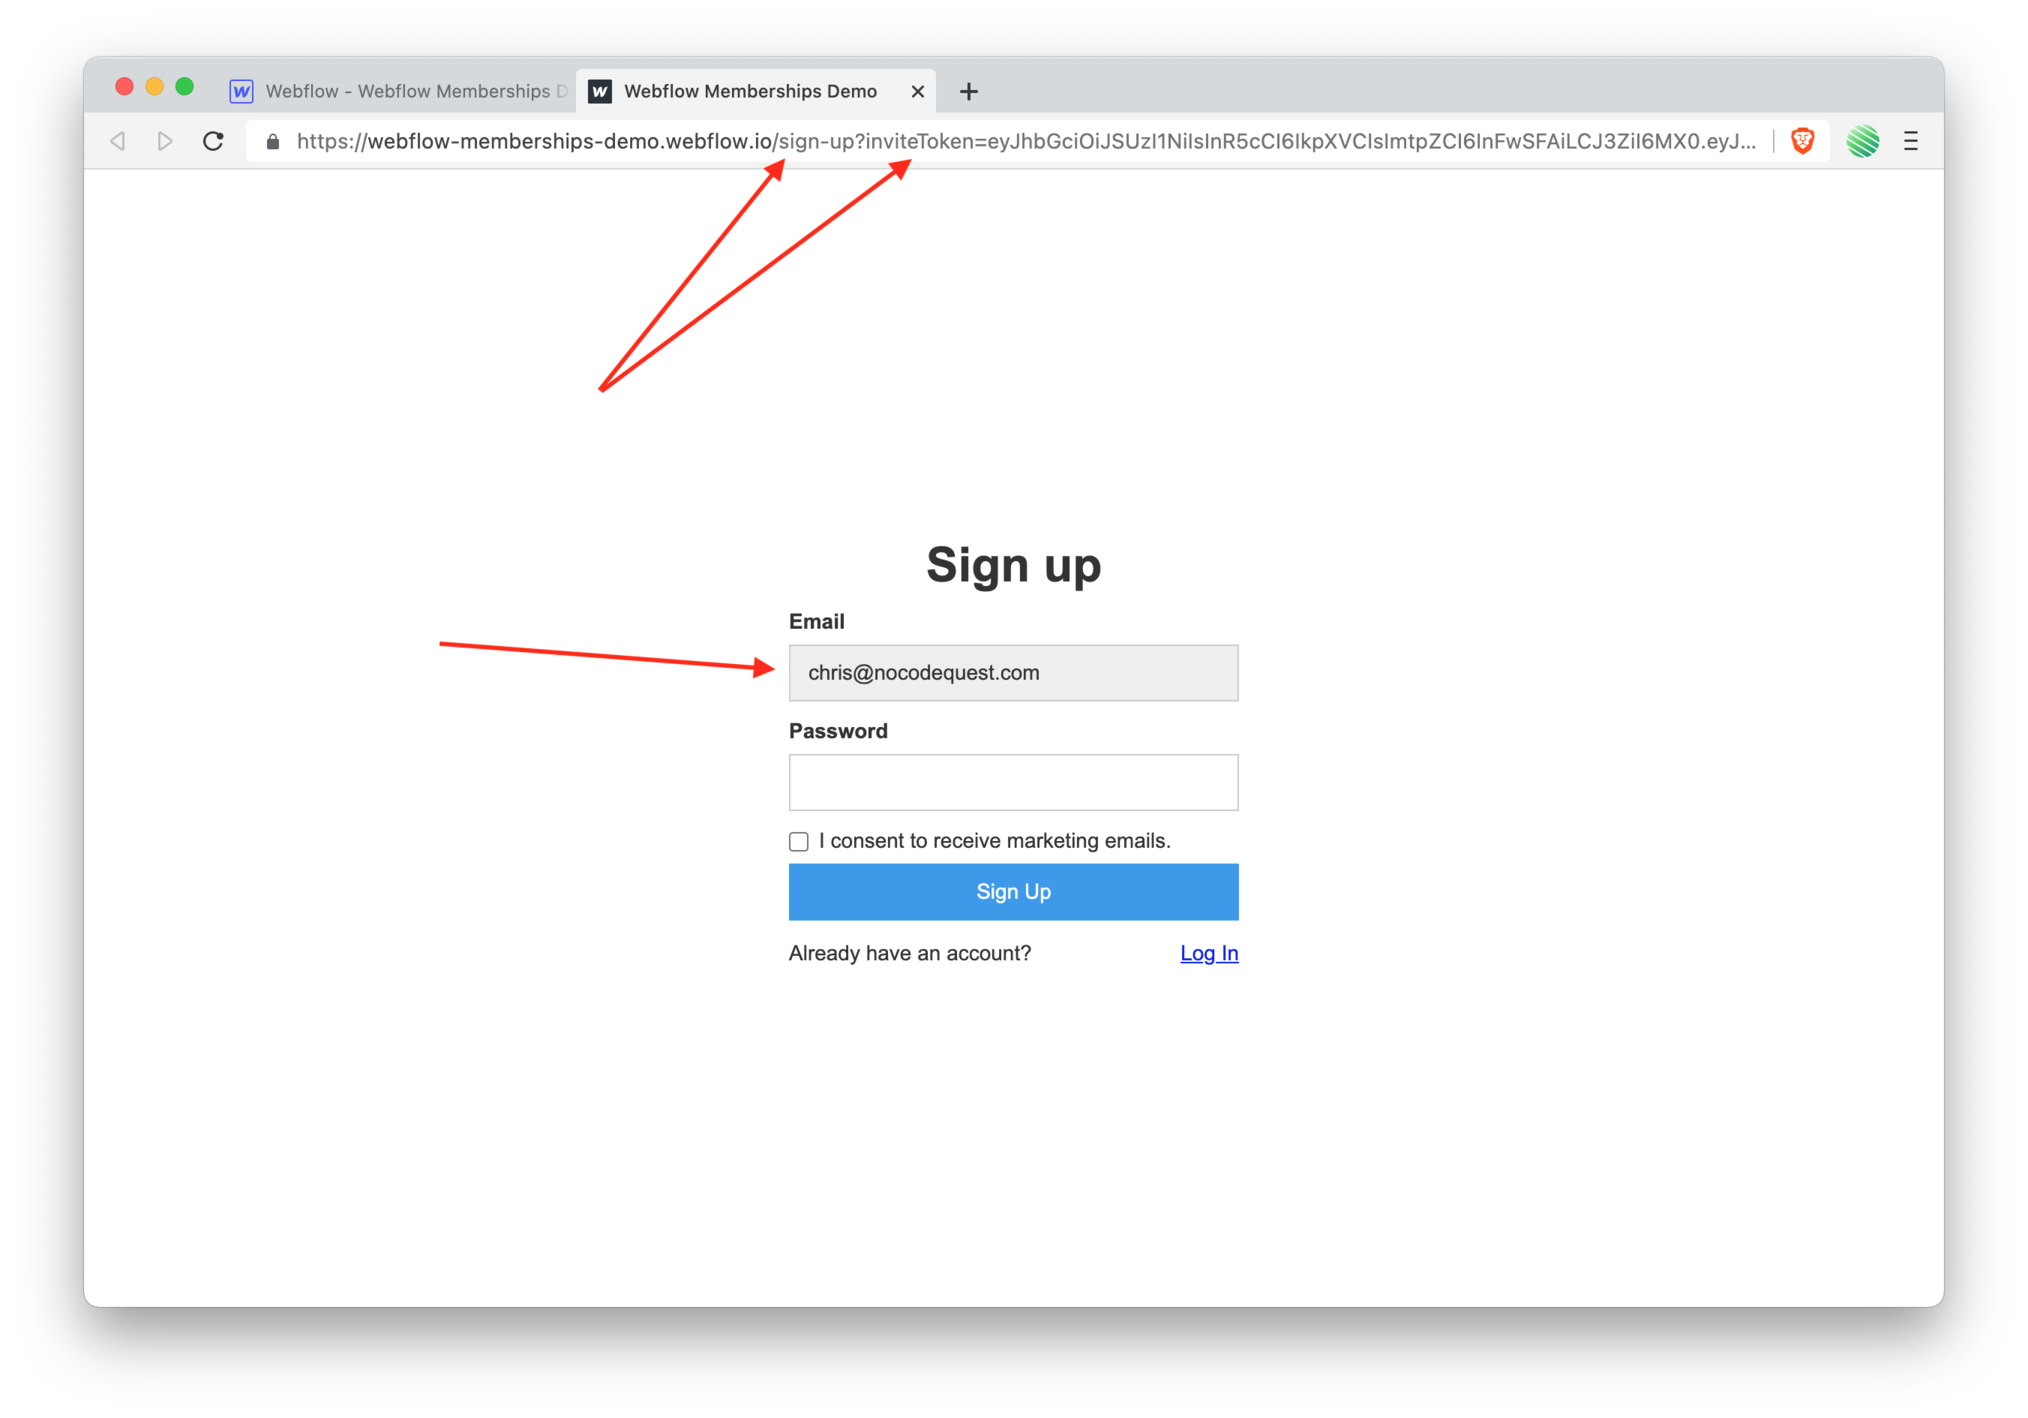 You’ve landed on your new sign up page with an invitation token passed in the URL. This tells Webflow to pre-populate the email address you were invited from.
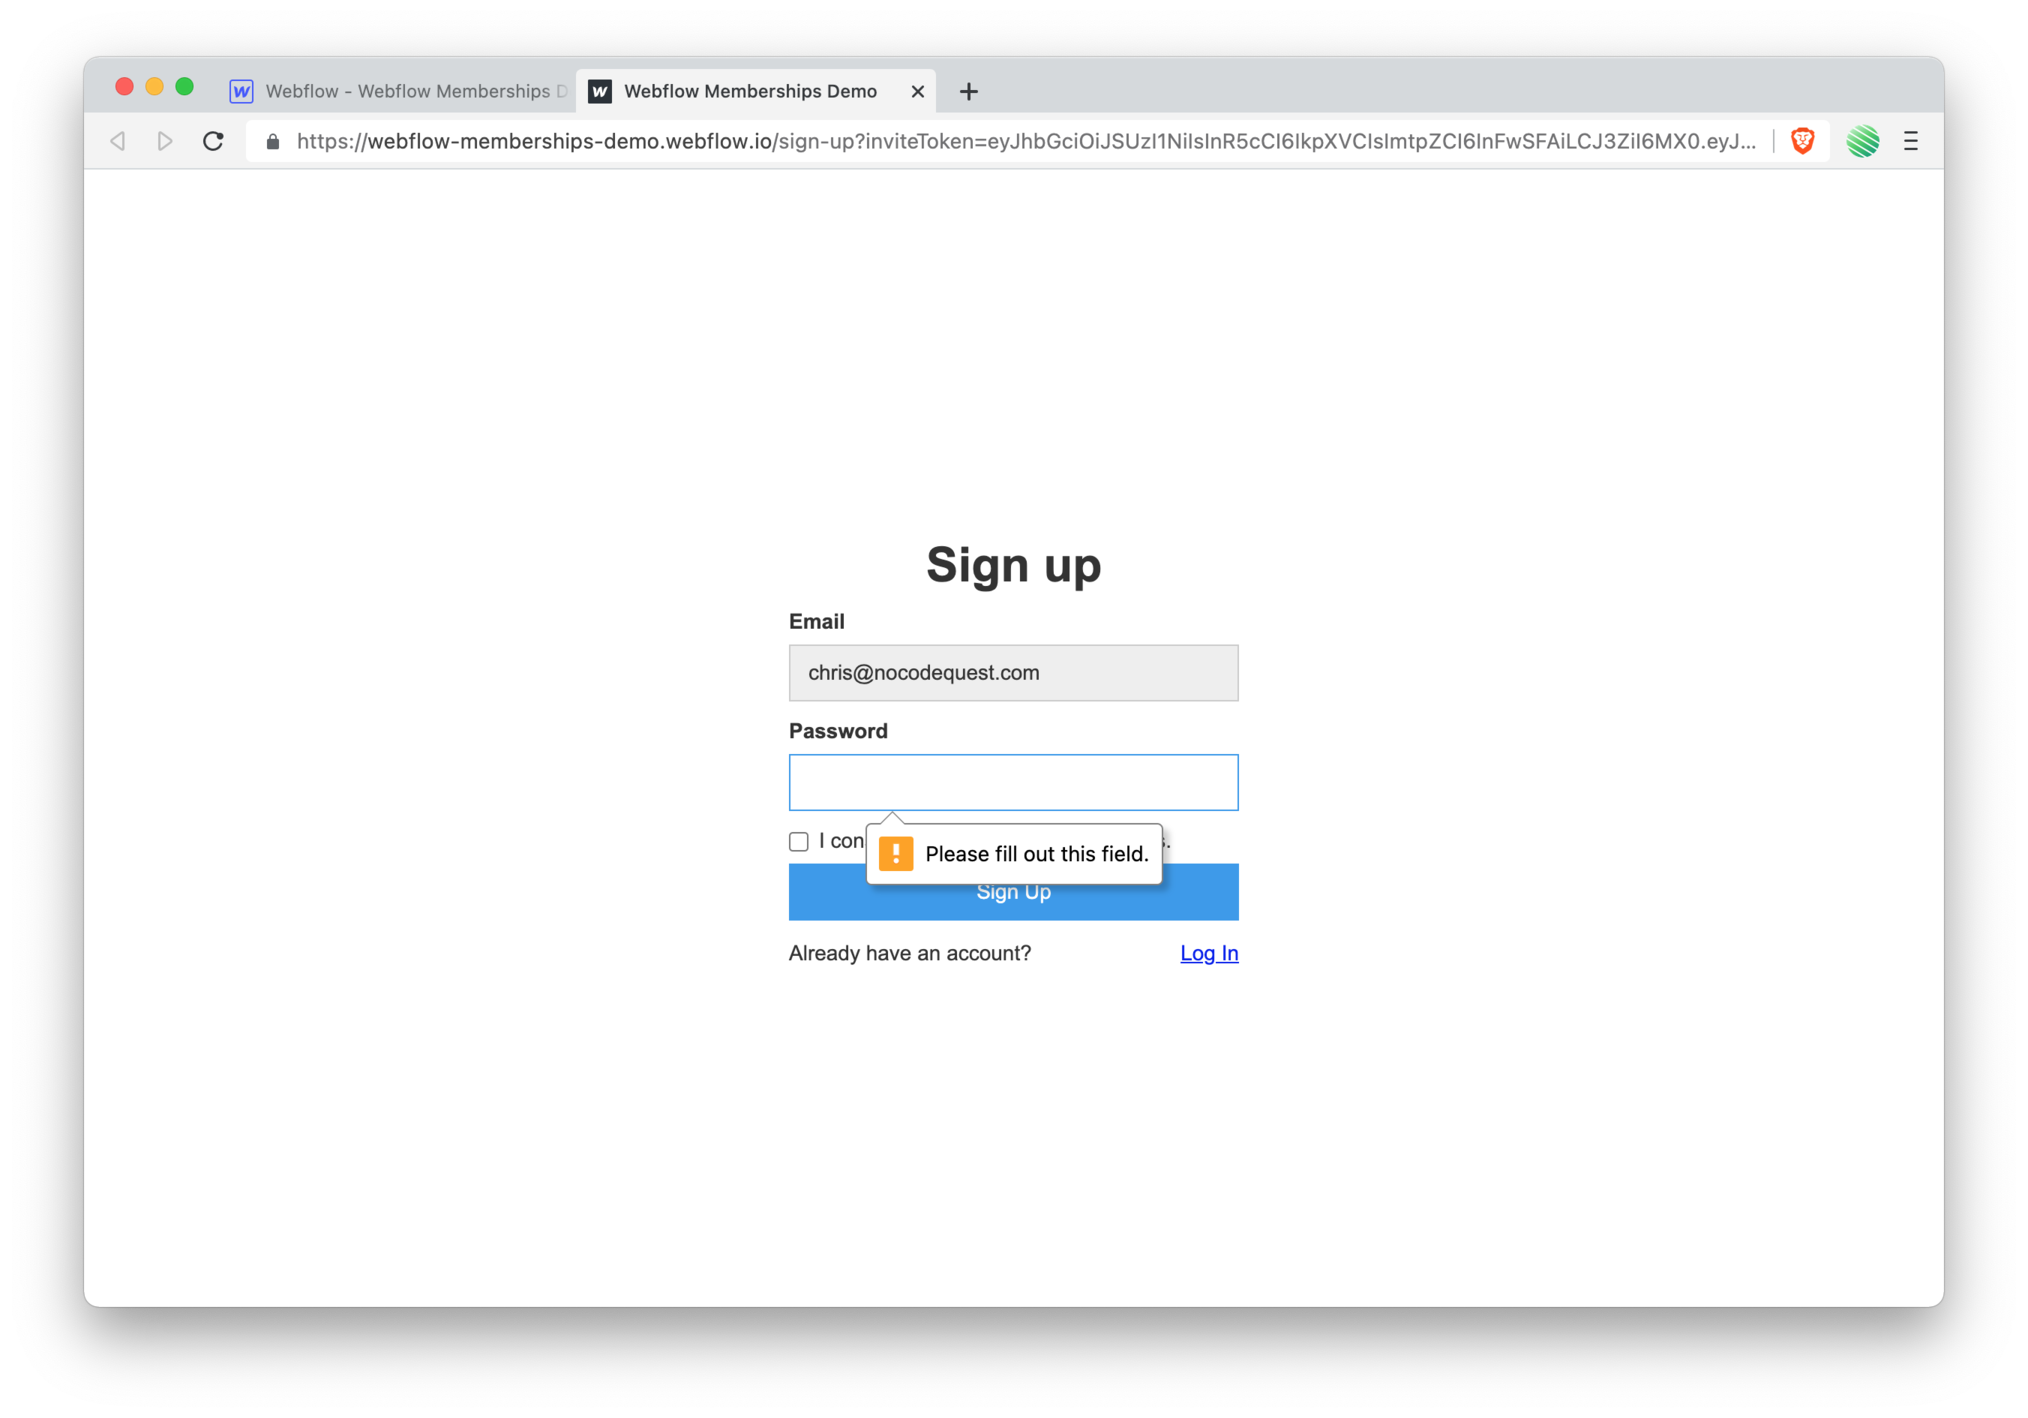 Since this is just your typical Webflow form, everything you’re already used to works just the same.
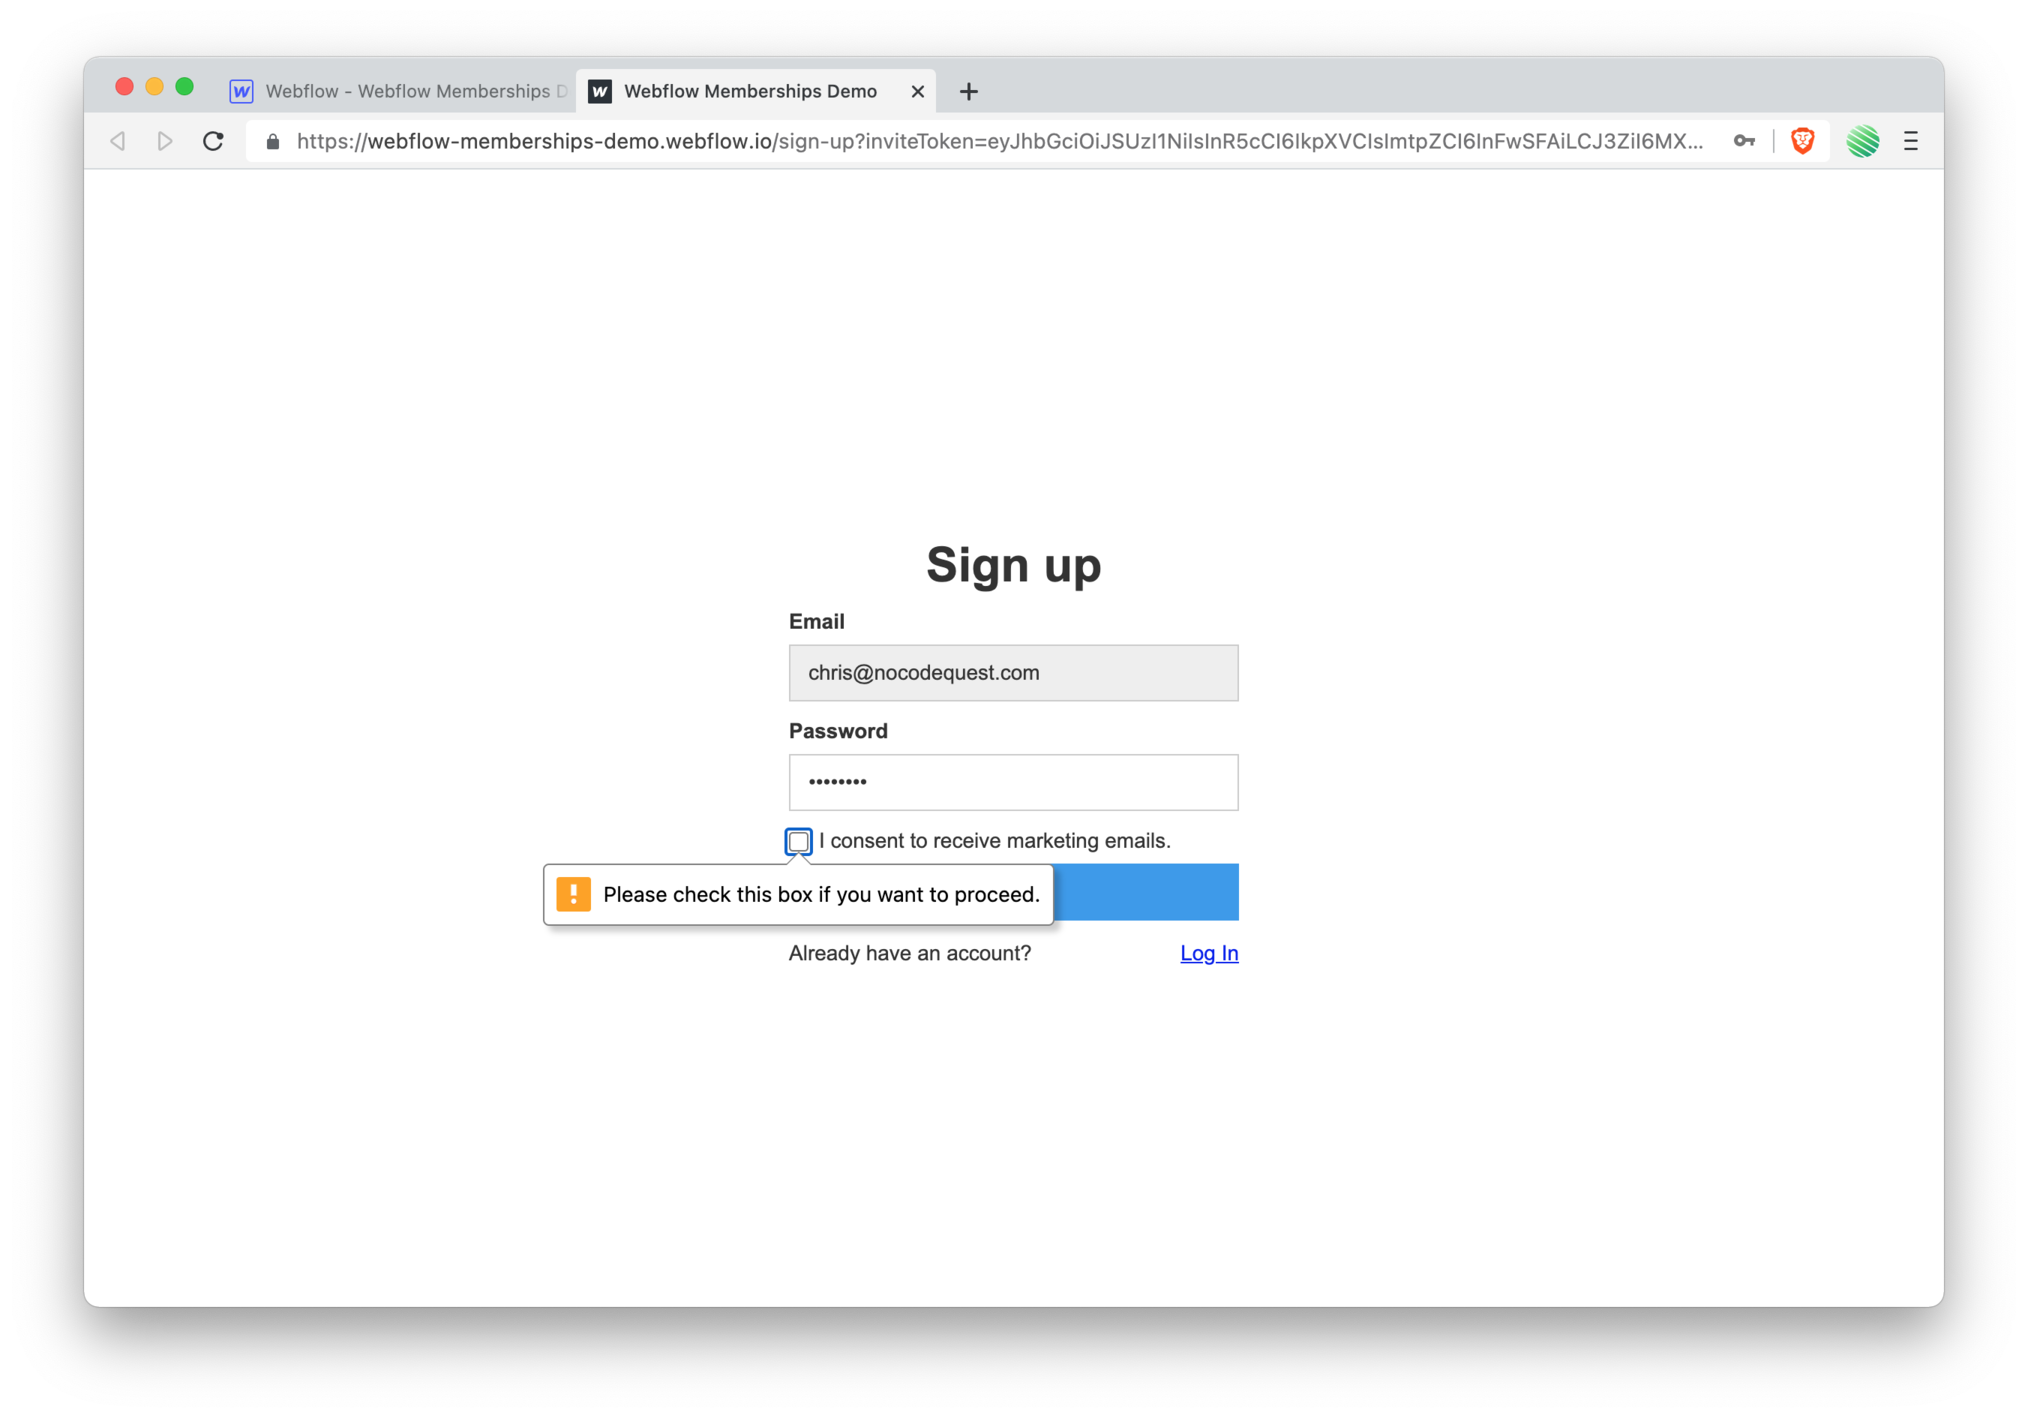
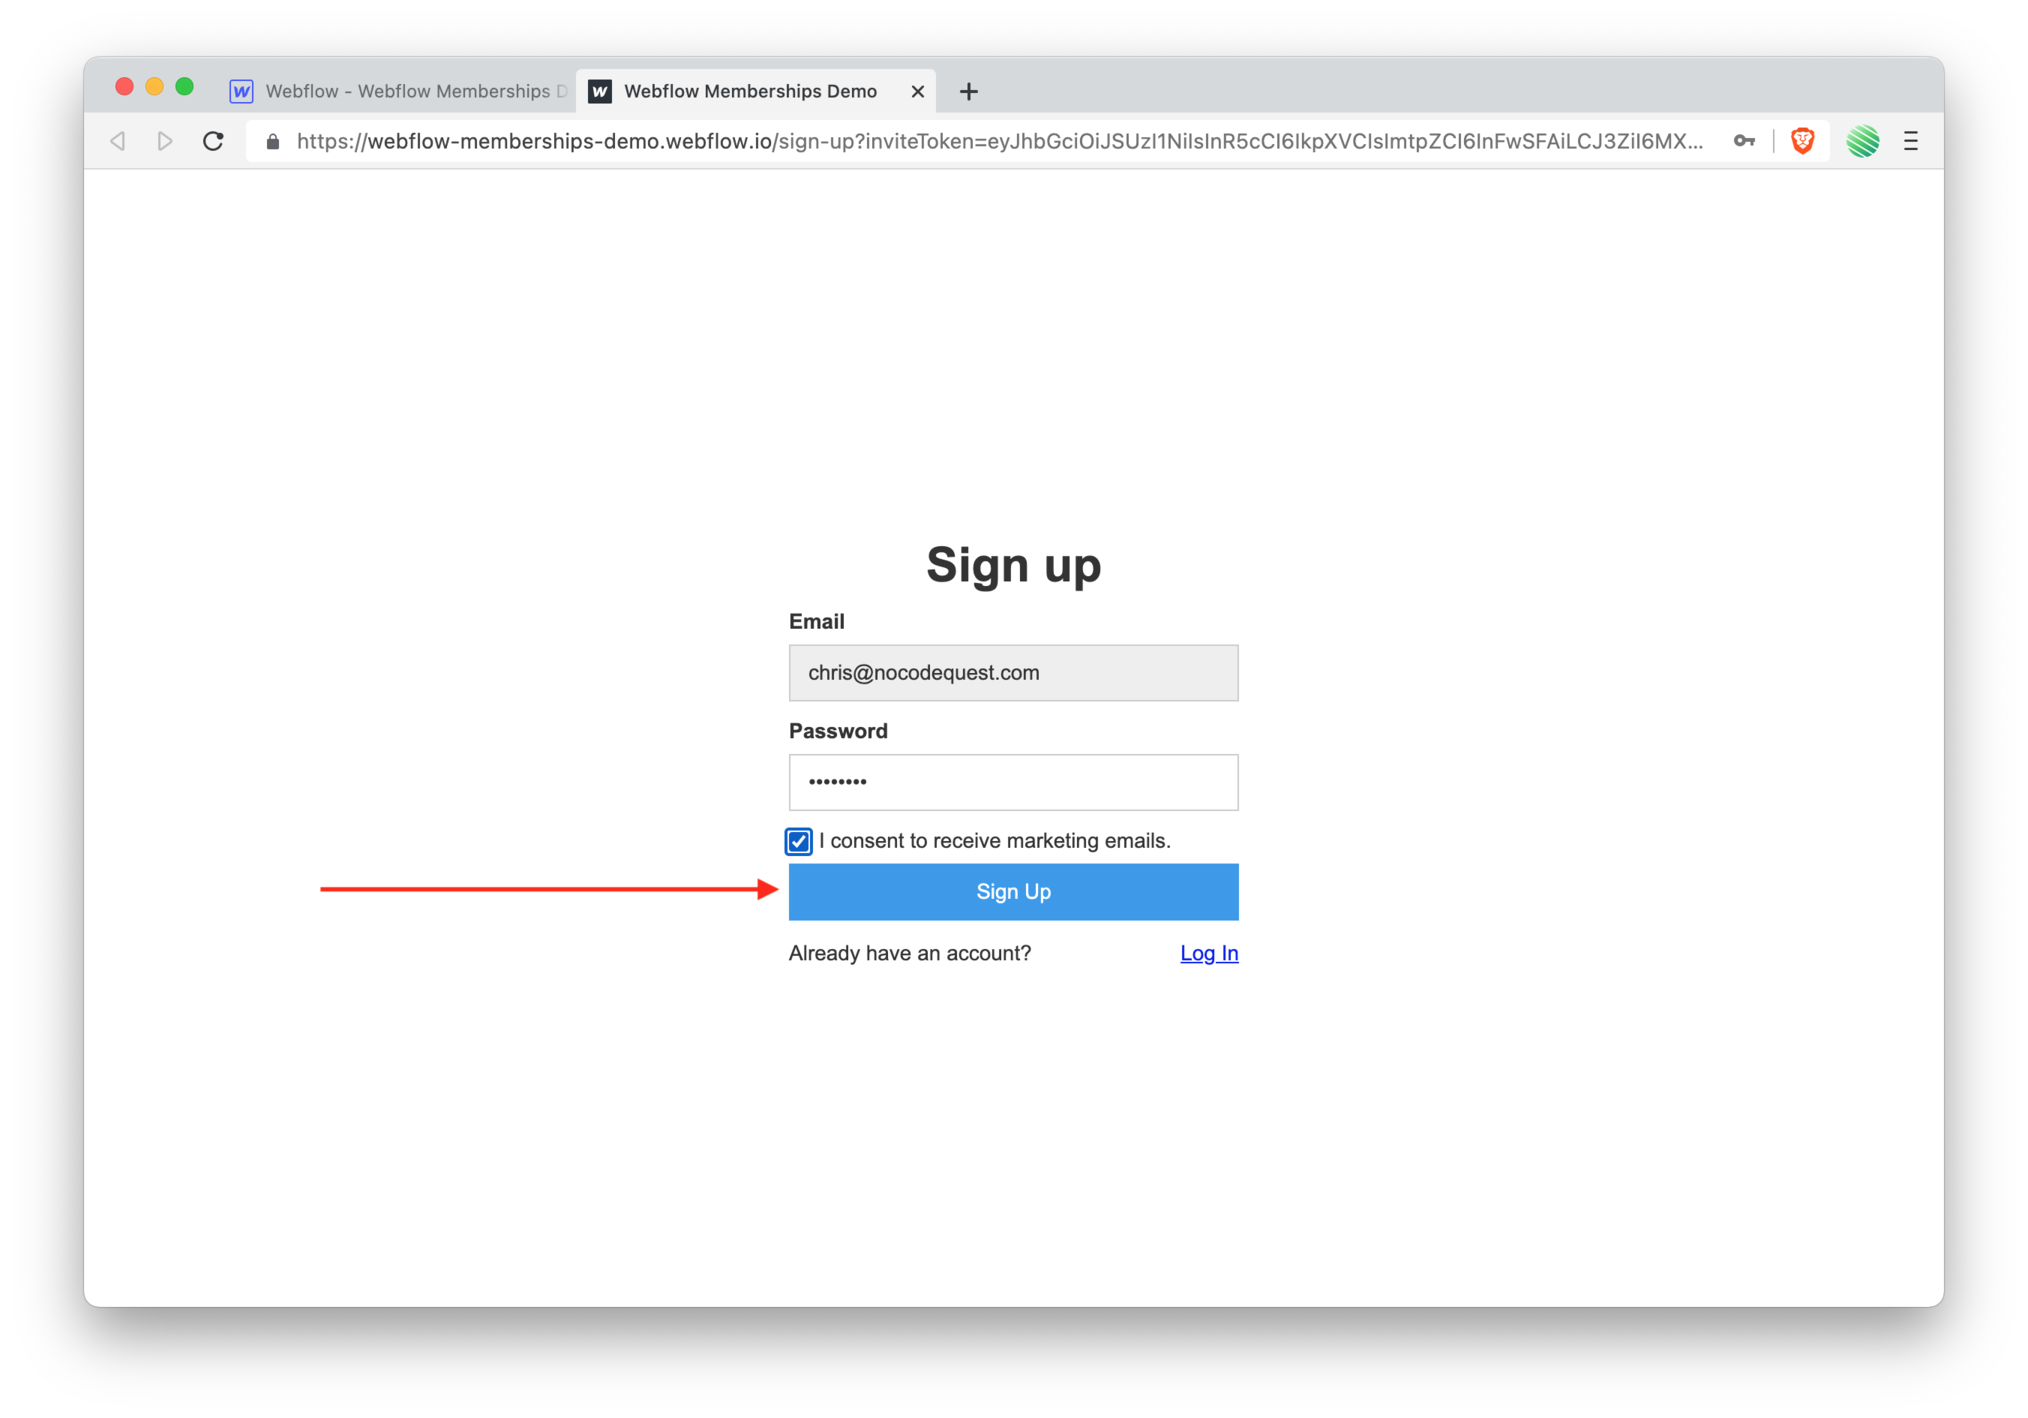 With the form filled out, tap the sign up button.
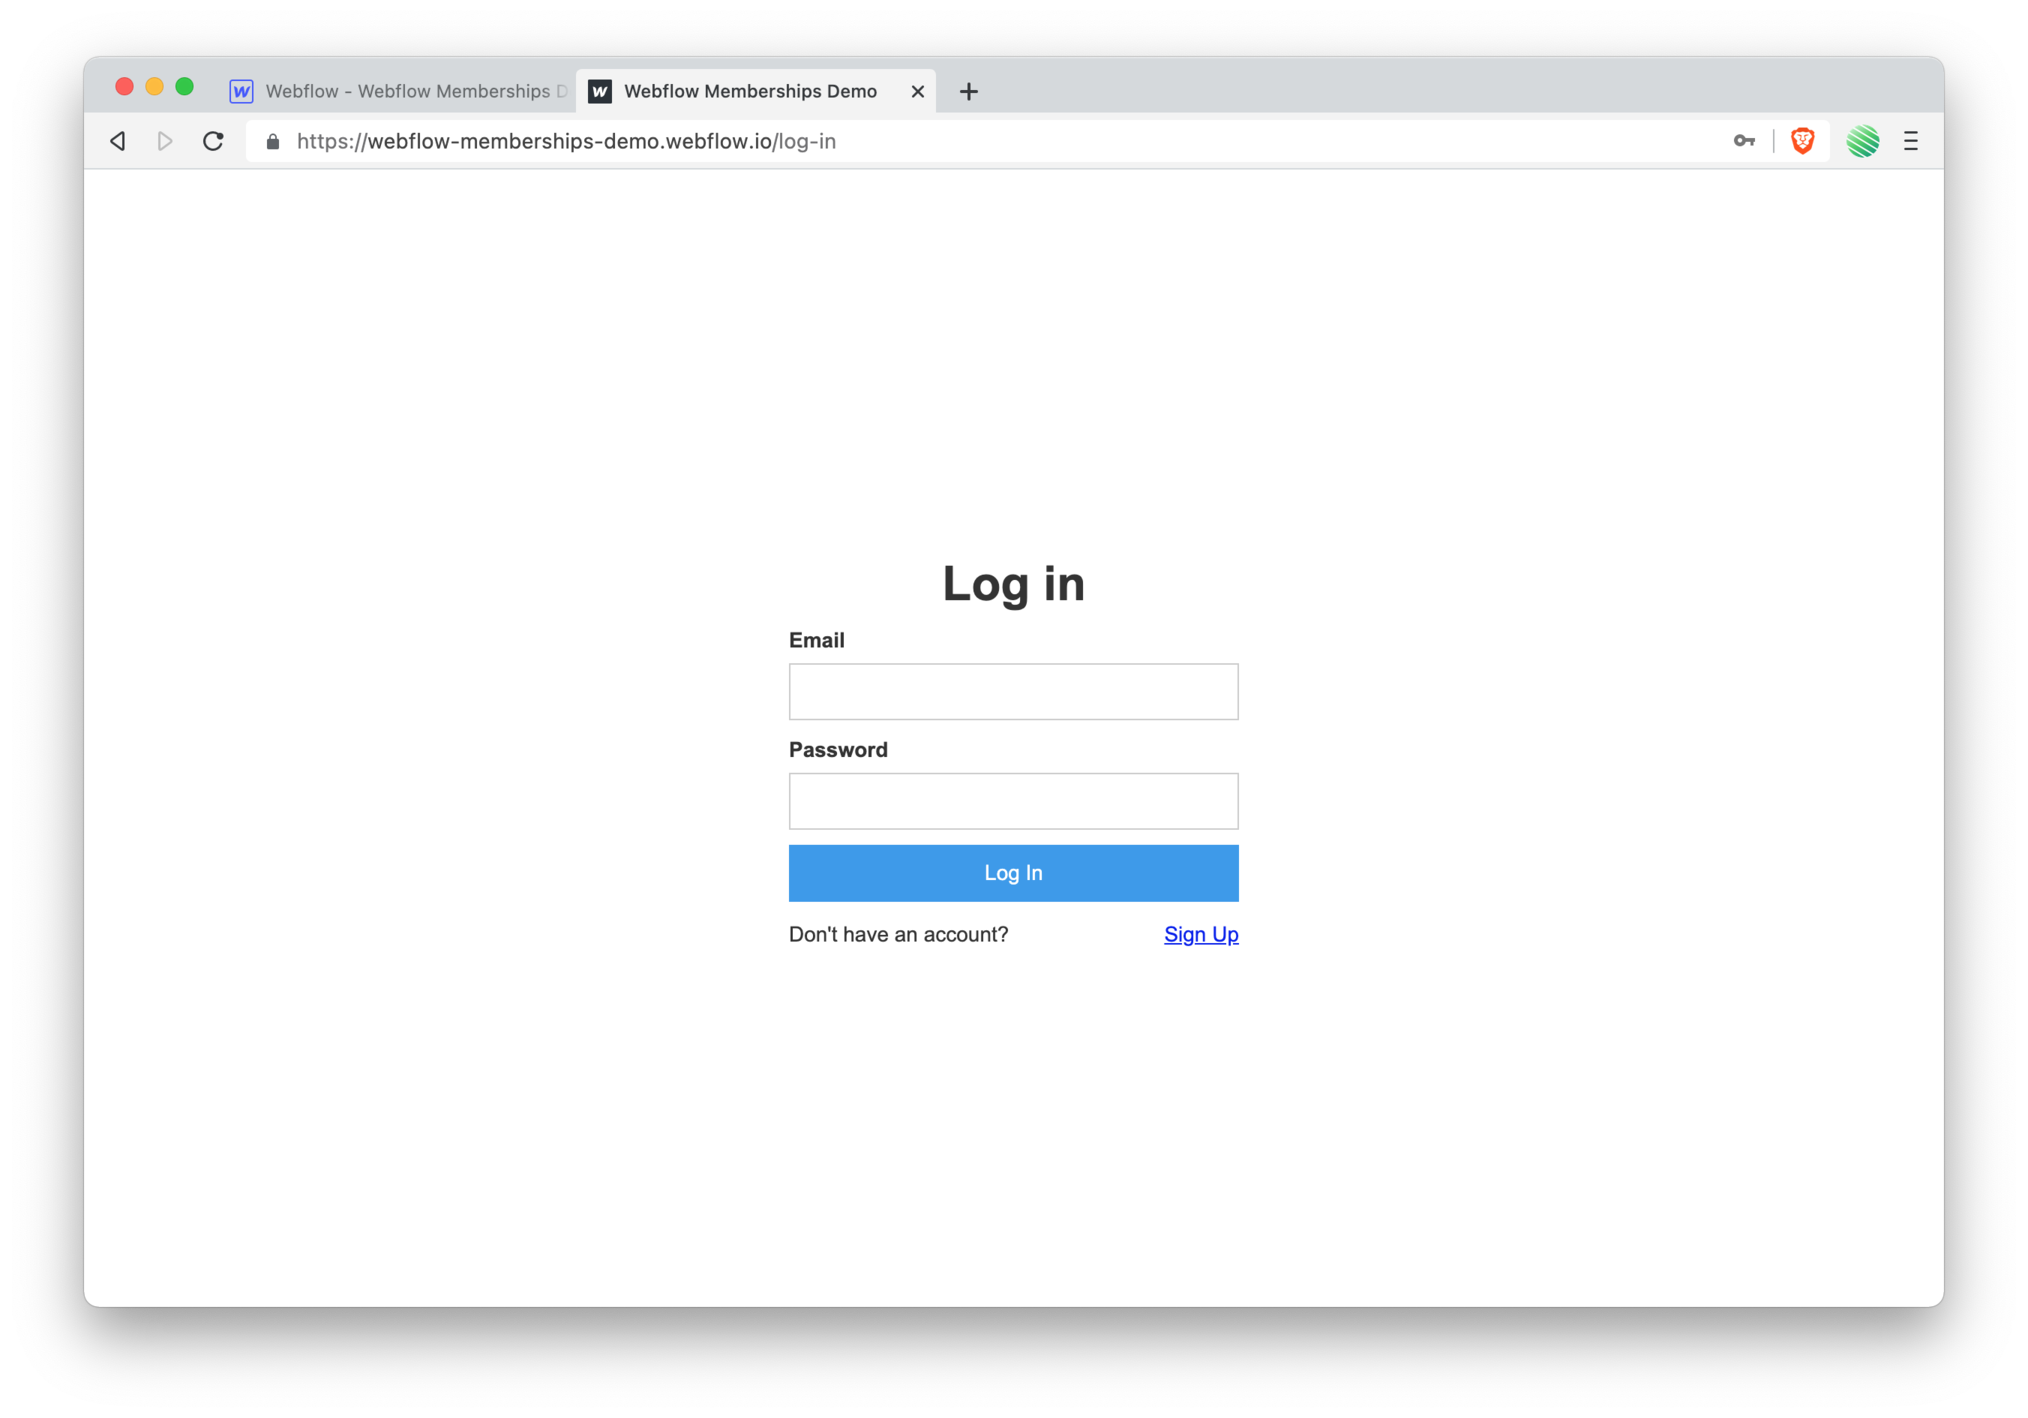 💥 Boom!
You’ve created a new account on your Webflow site and are now presented with the log in form to sign in.
Now…
This could be a bit smoother than it is. And from what I’ve seen, Webflow is aware of this fact as community members have provided that feedback.
I’m sure they’ll make this a smoother process, soon.
Until then, a little patients will go a long way 🙏 as with very little effort you’ve been able to bolt on massive, native power to your Webflow site ( in very little time ).
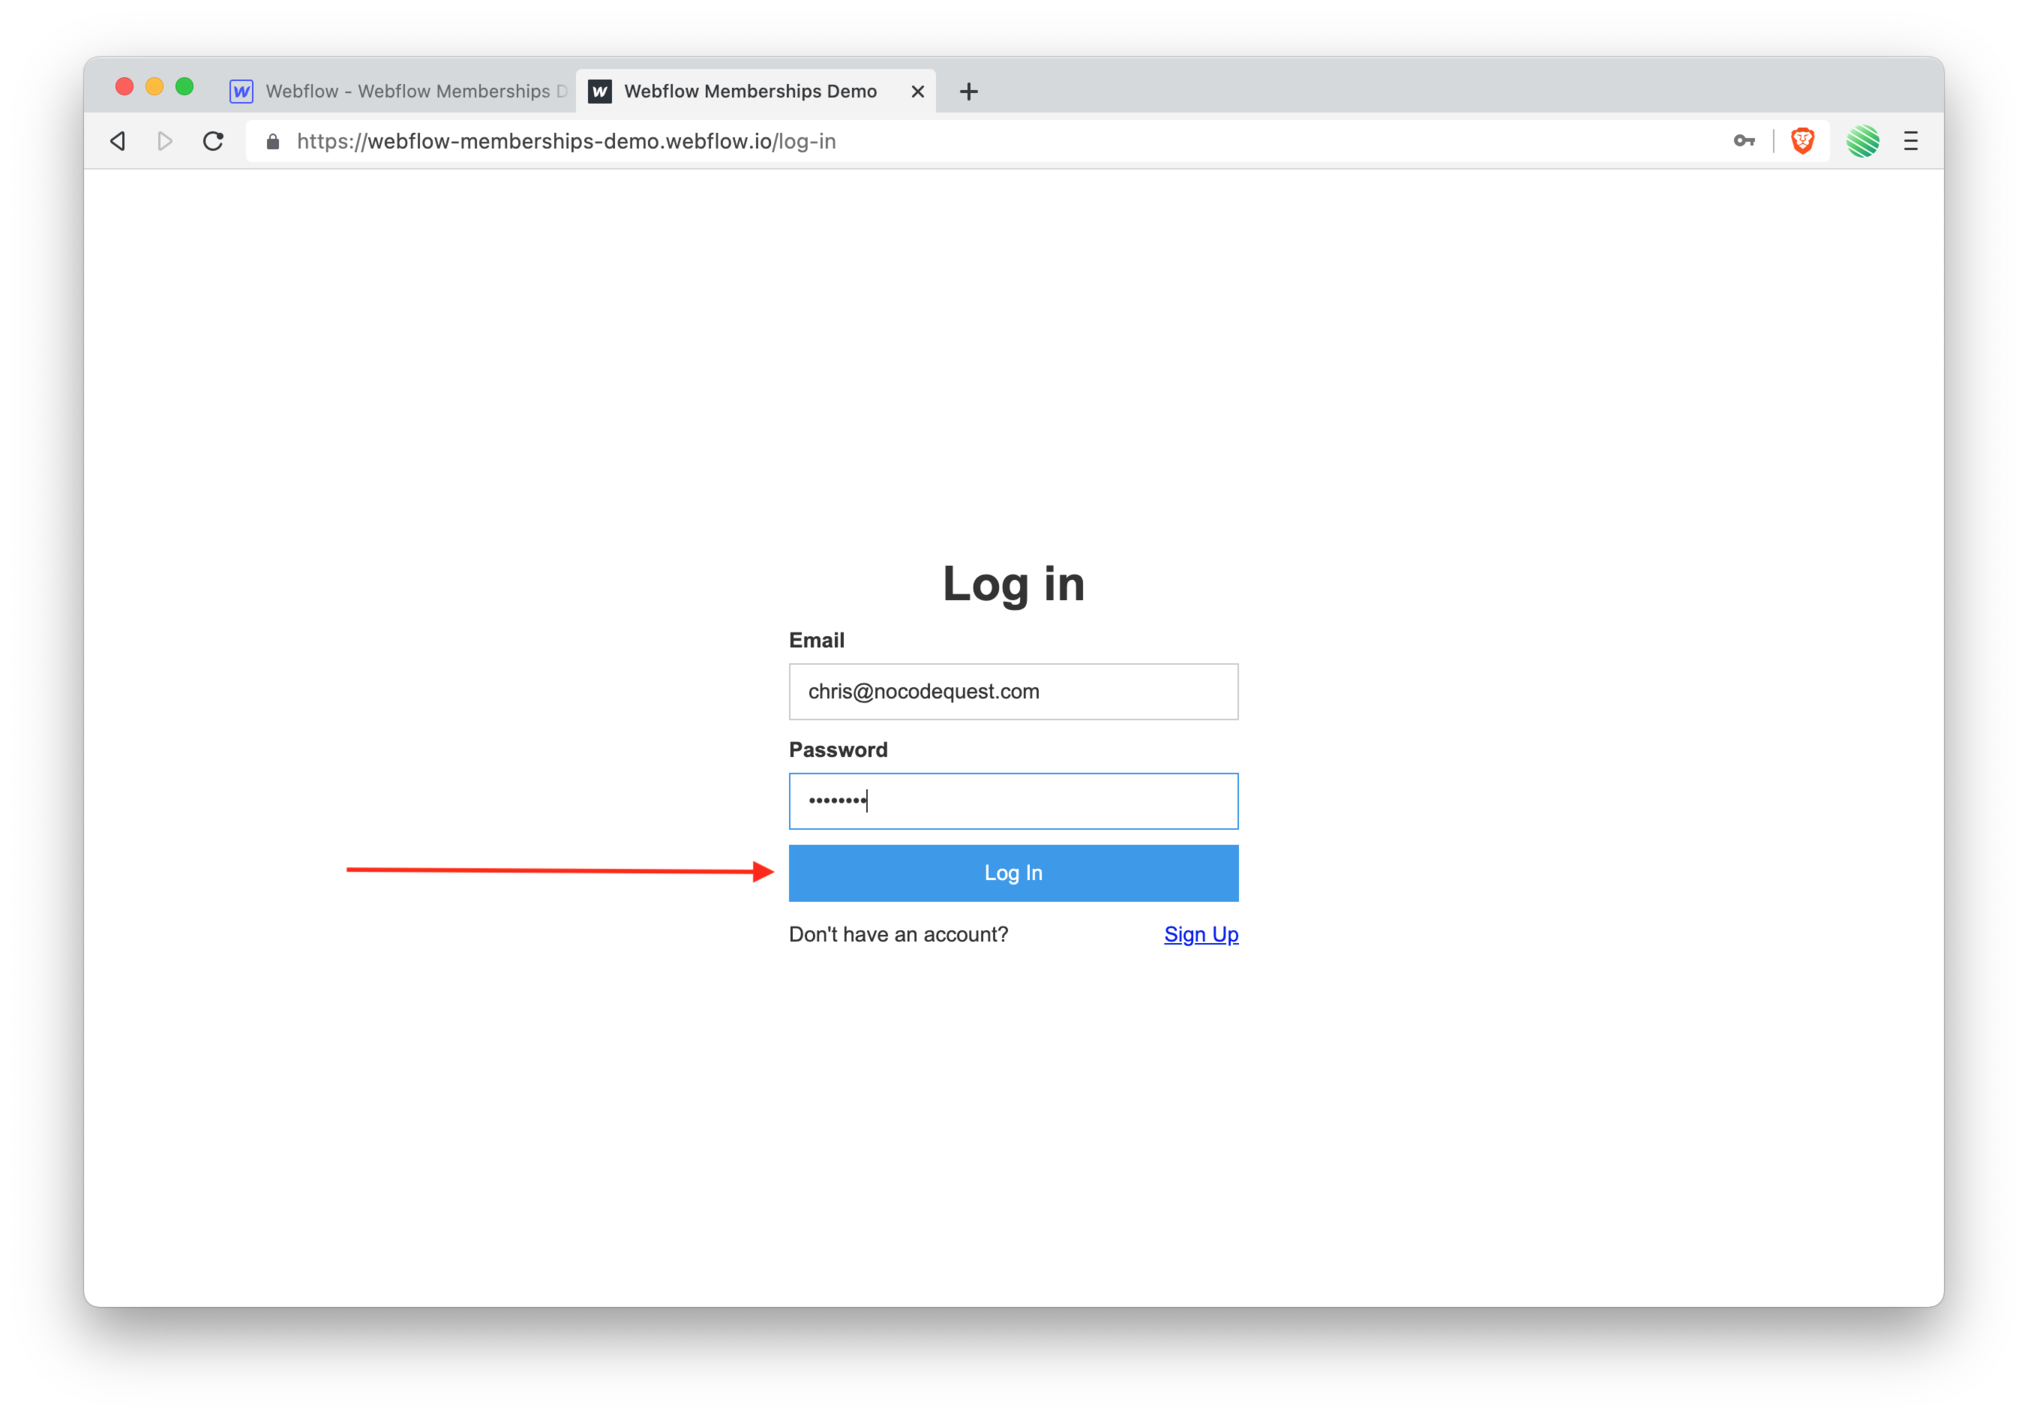 Go ahead and log in.
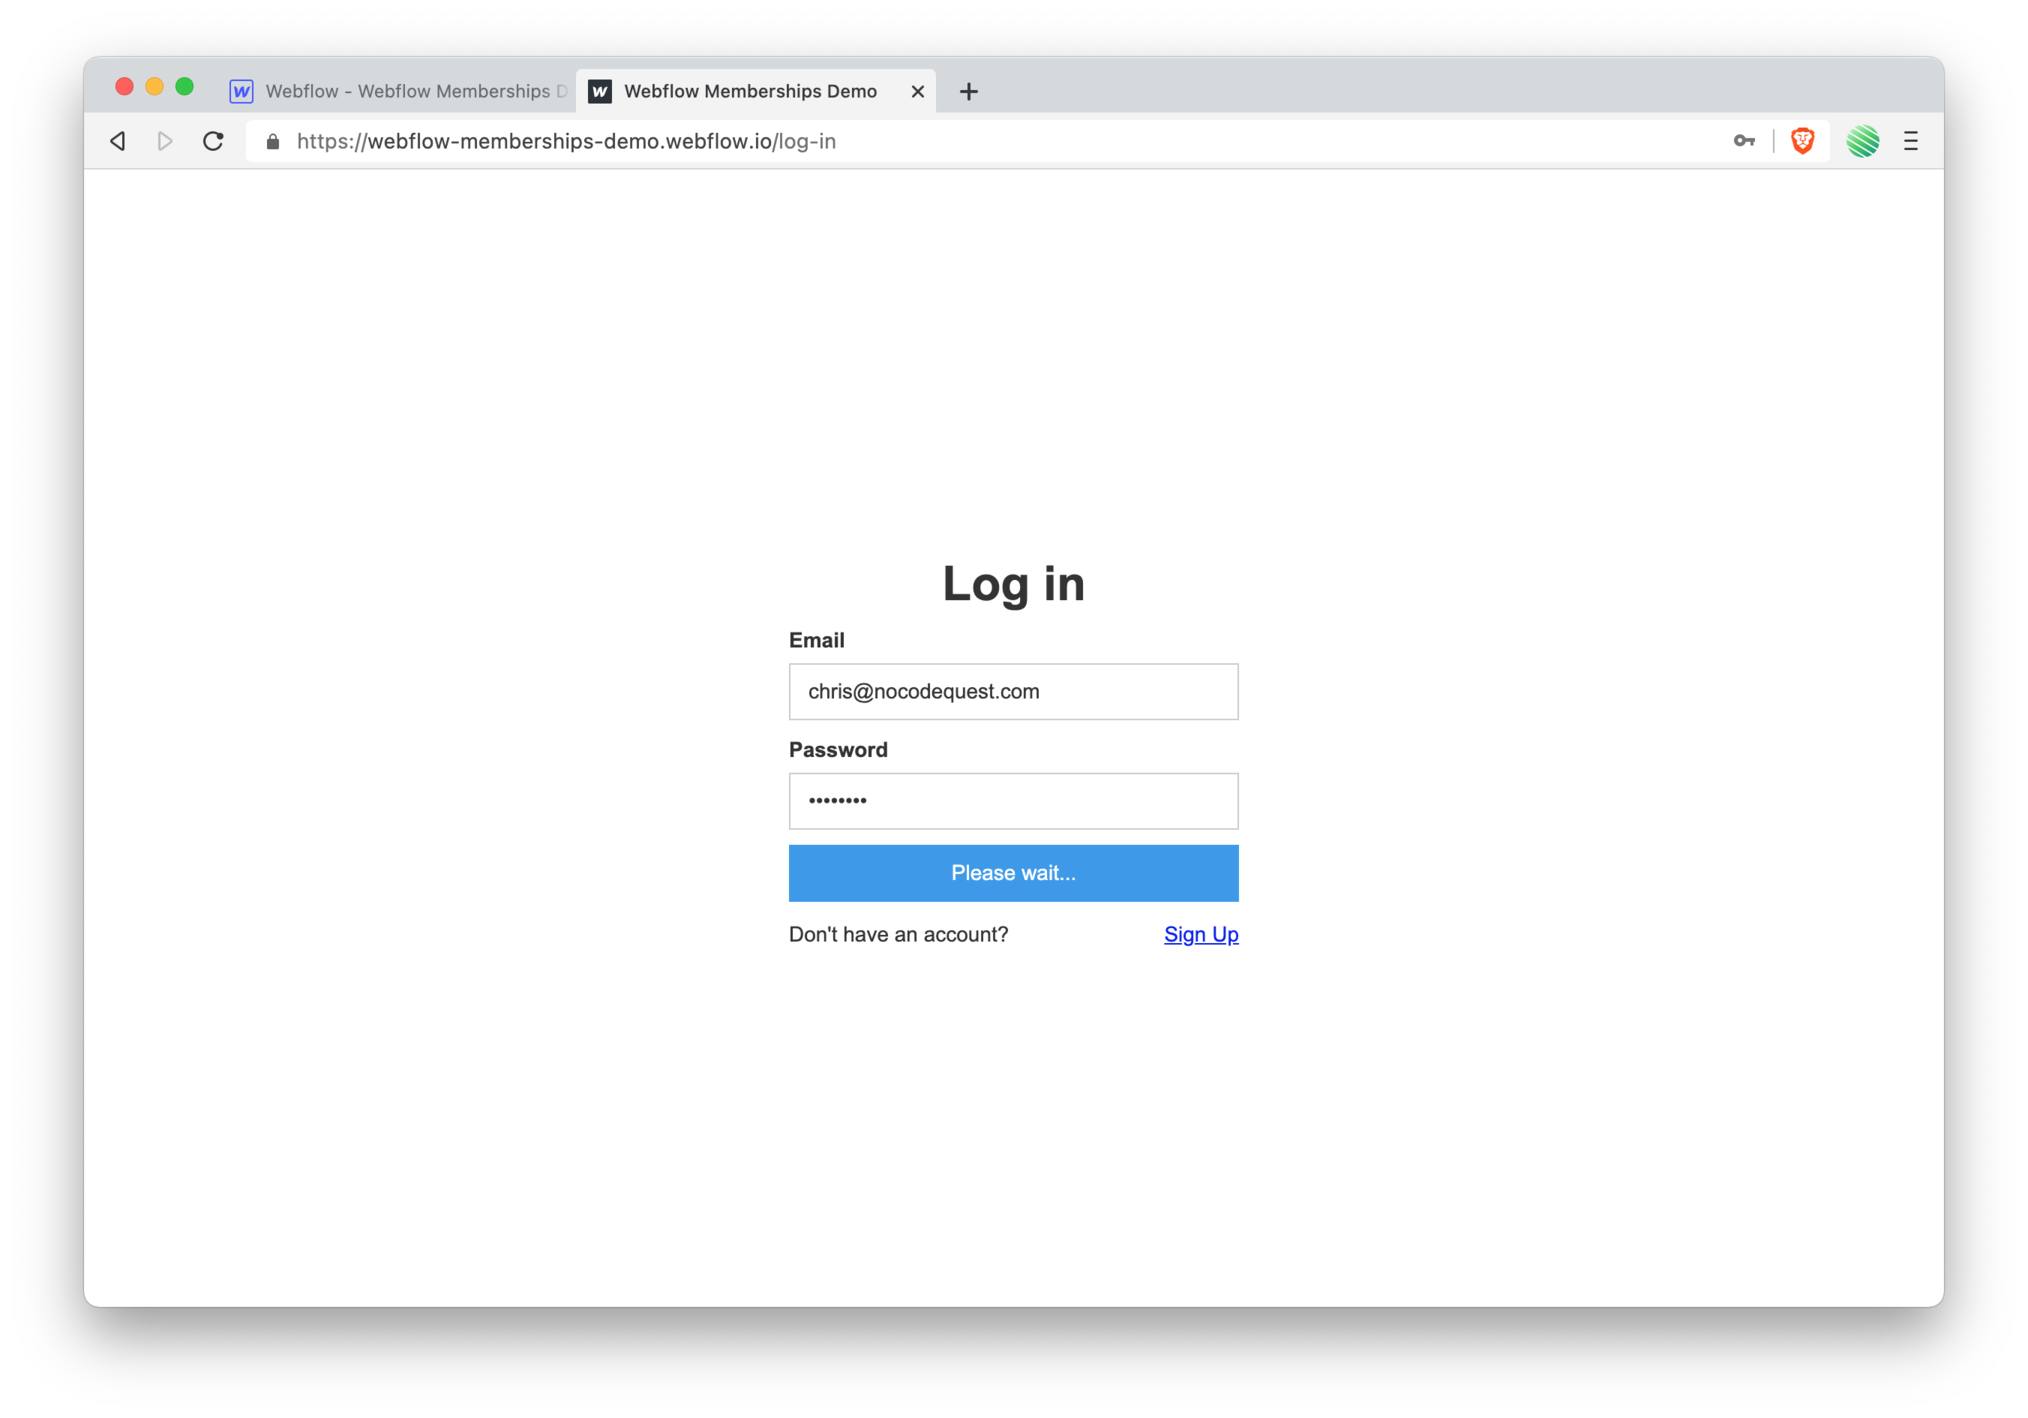
 💥 Bam!
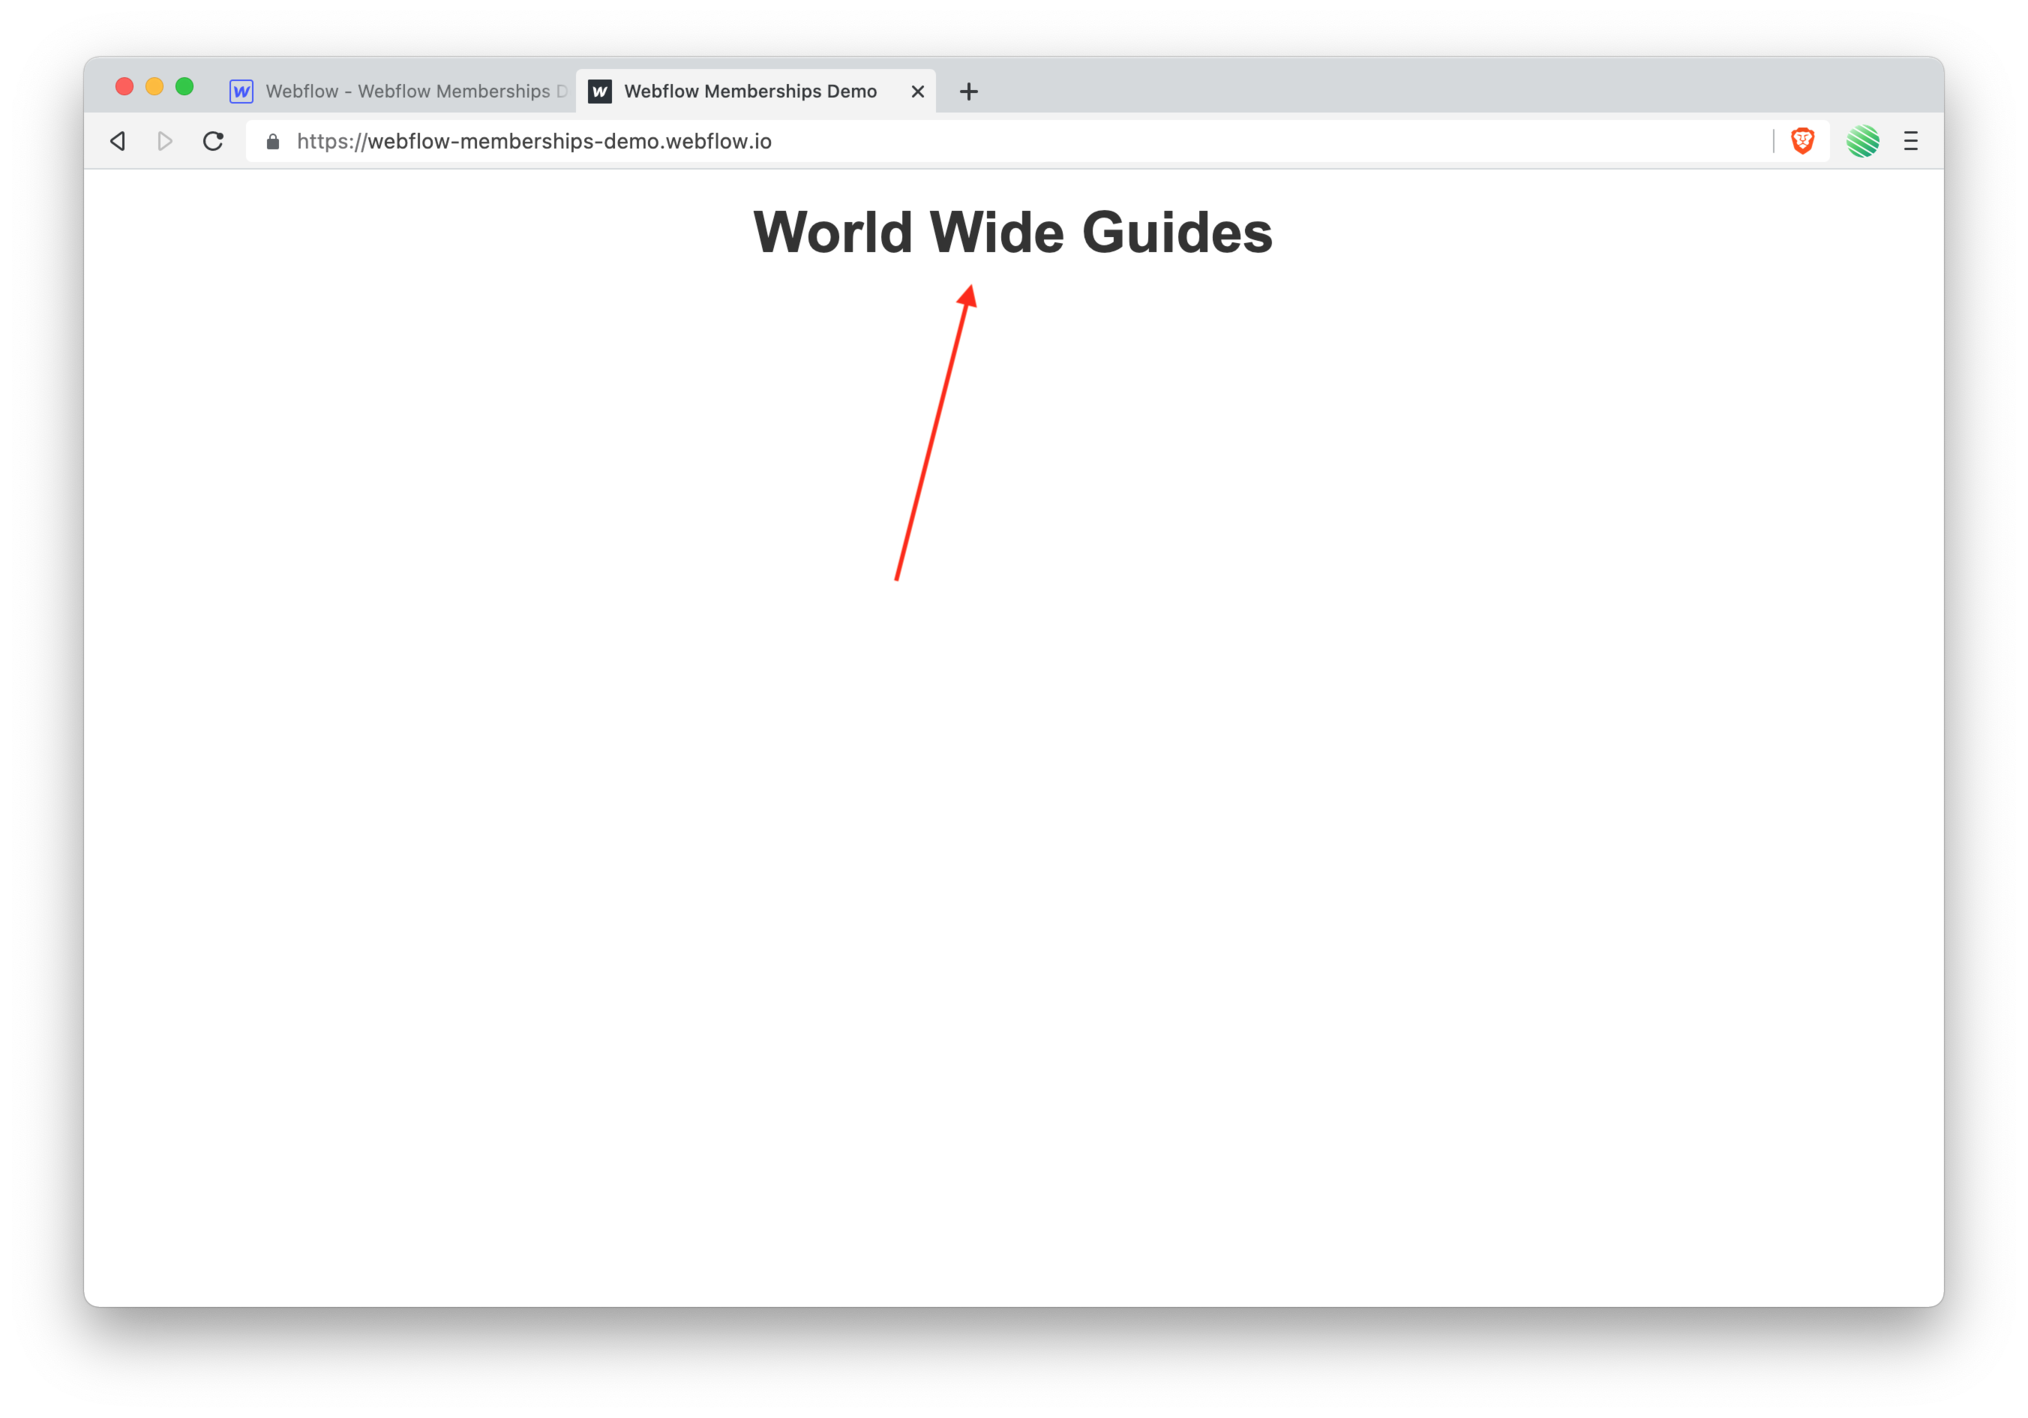
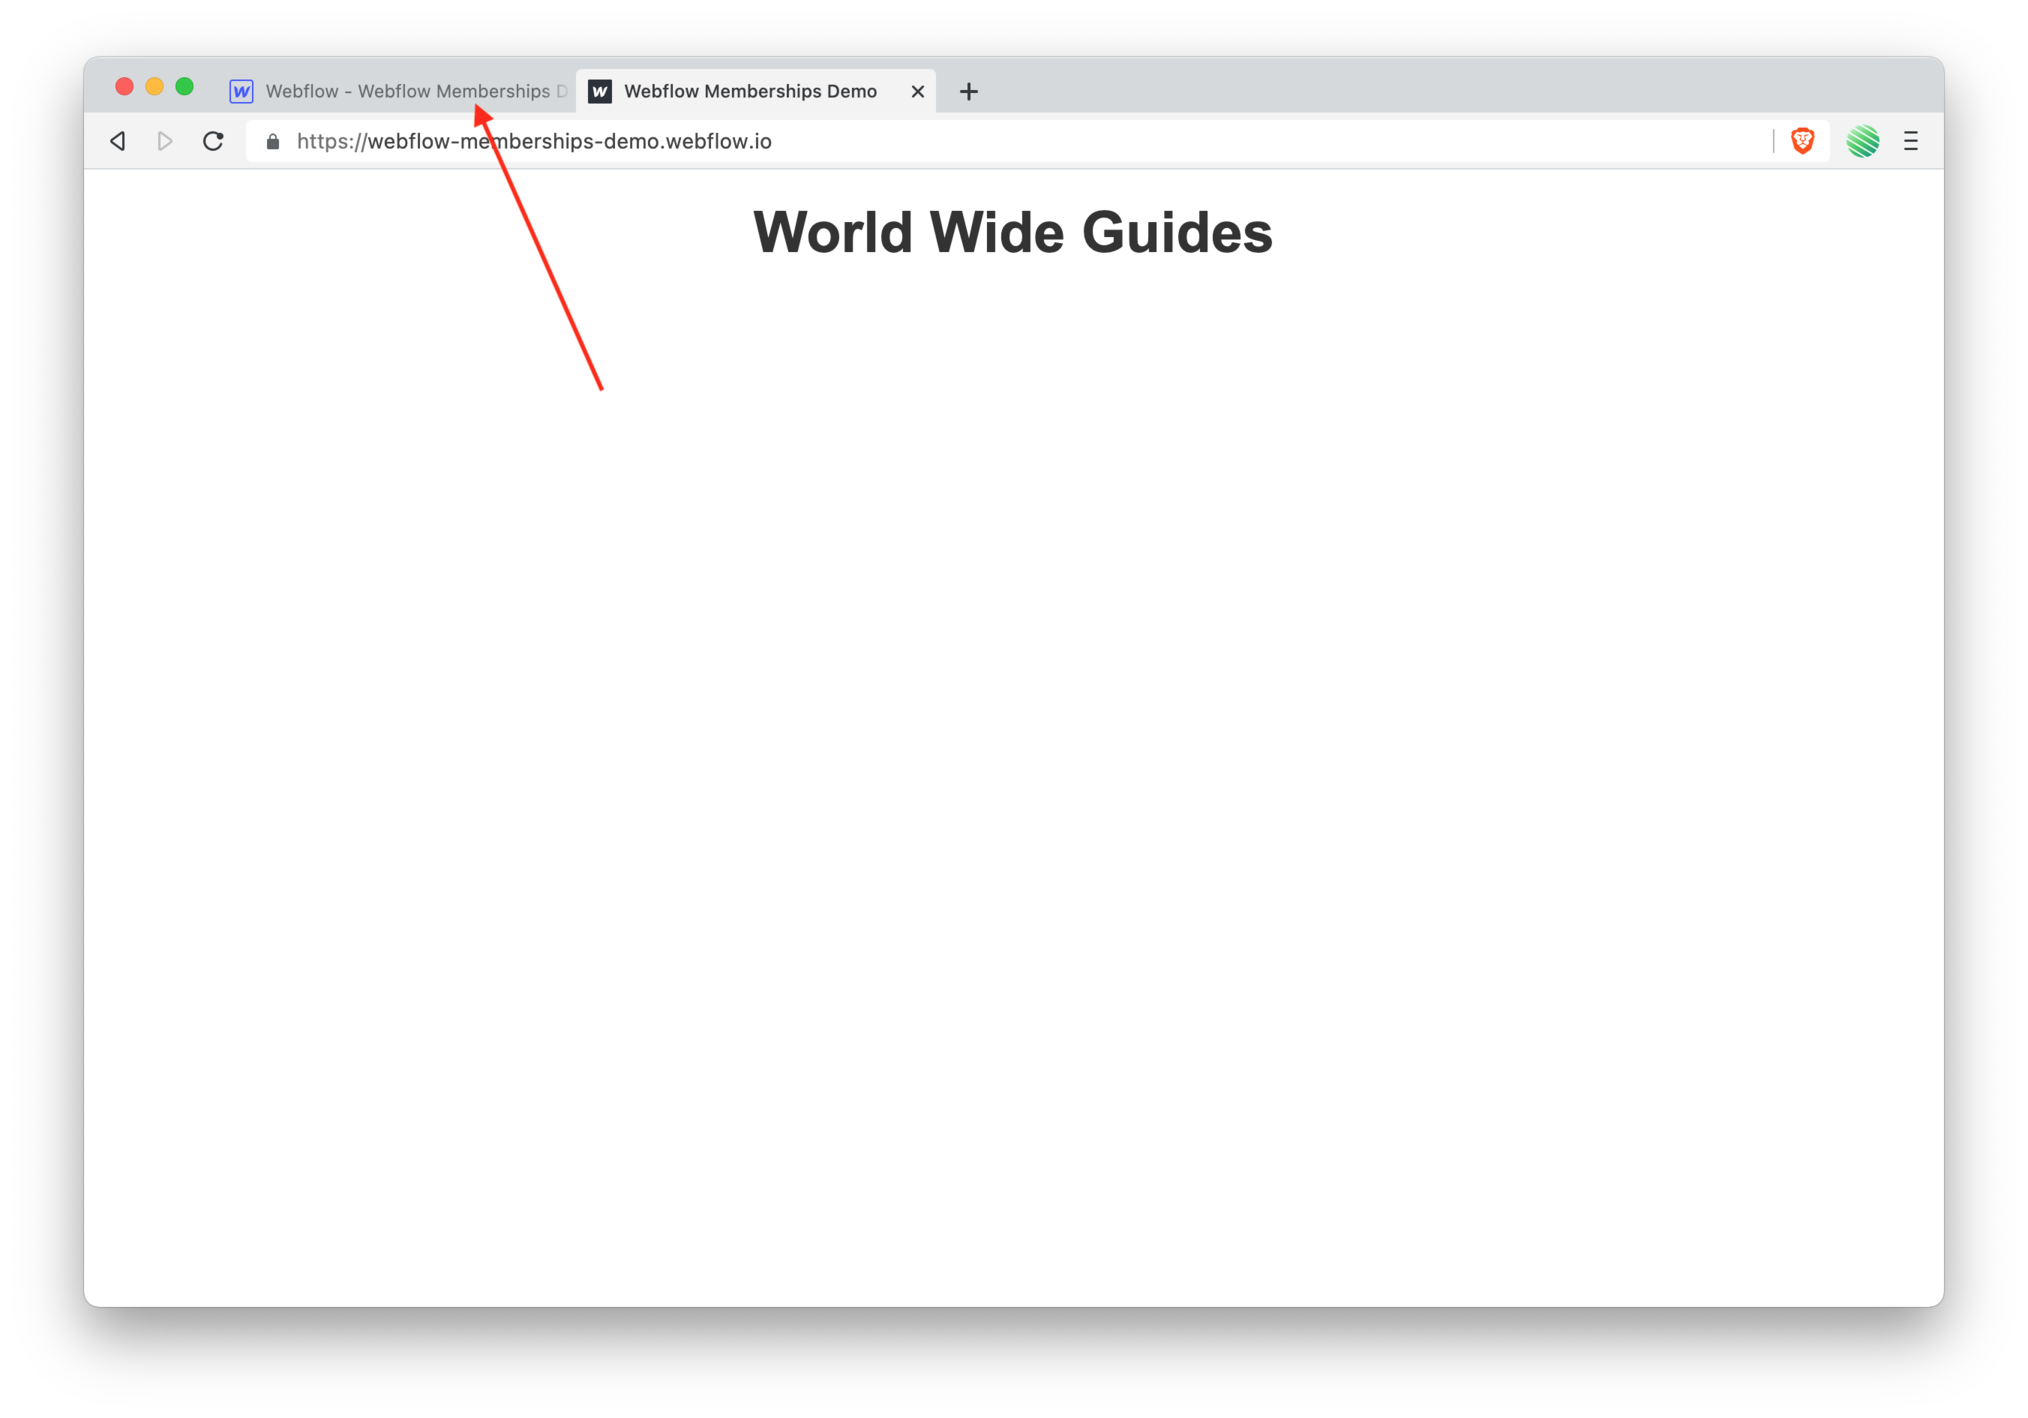
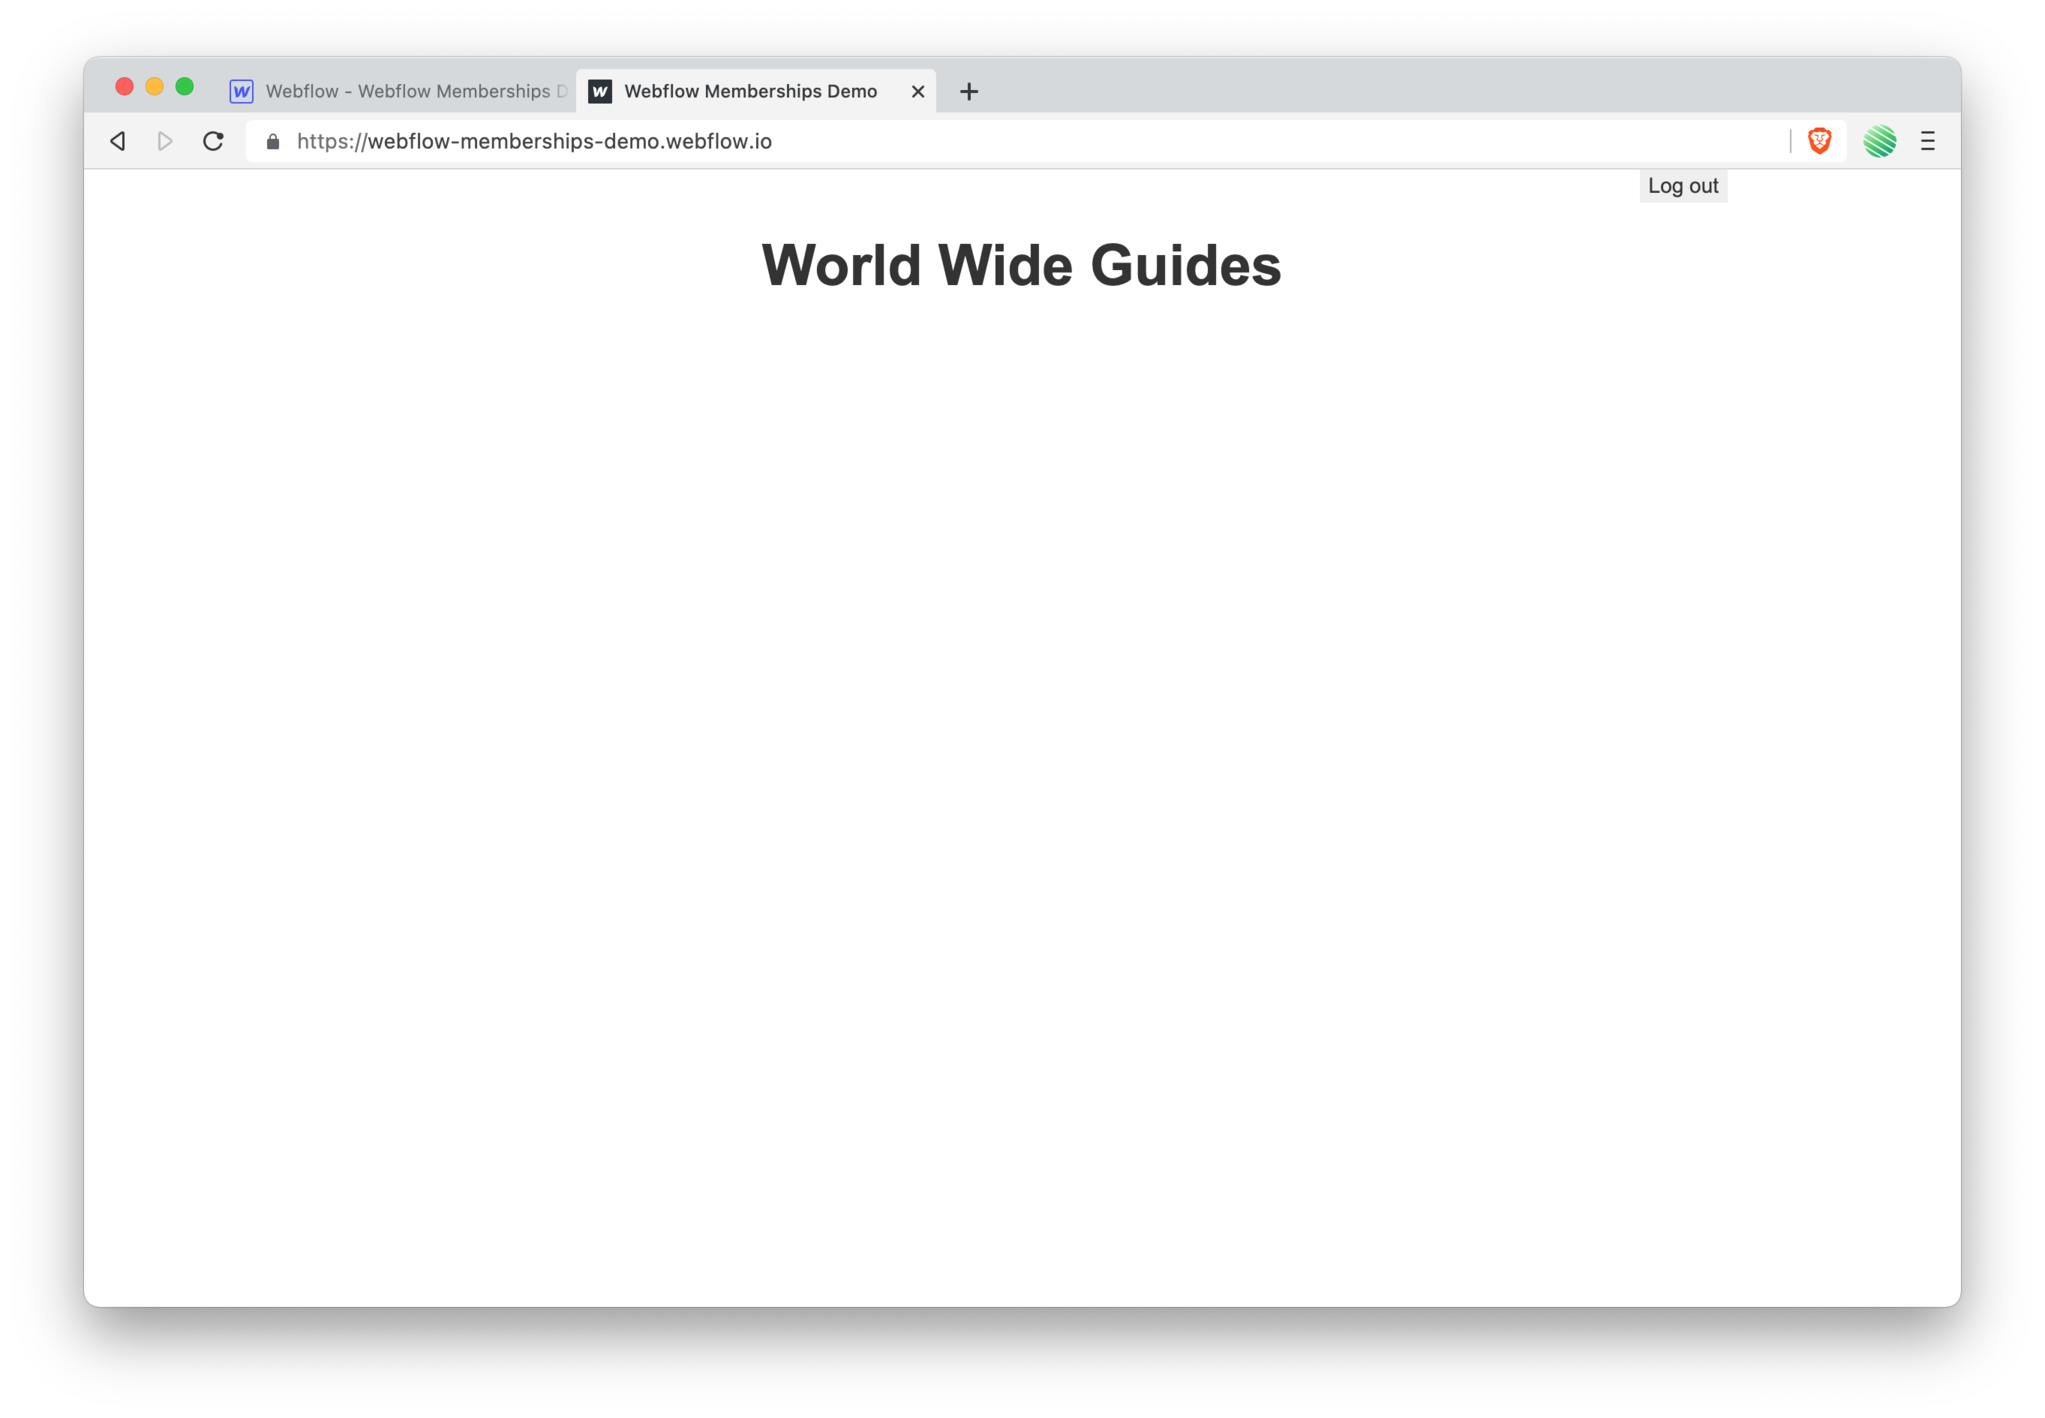
You’ve logged in. But how do you know you’ve logged in?
Nothing say’s you’ve logged in, it’s just a blank white home page!
Let’s fix that now.
Create a Log In / Log Out Button
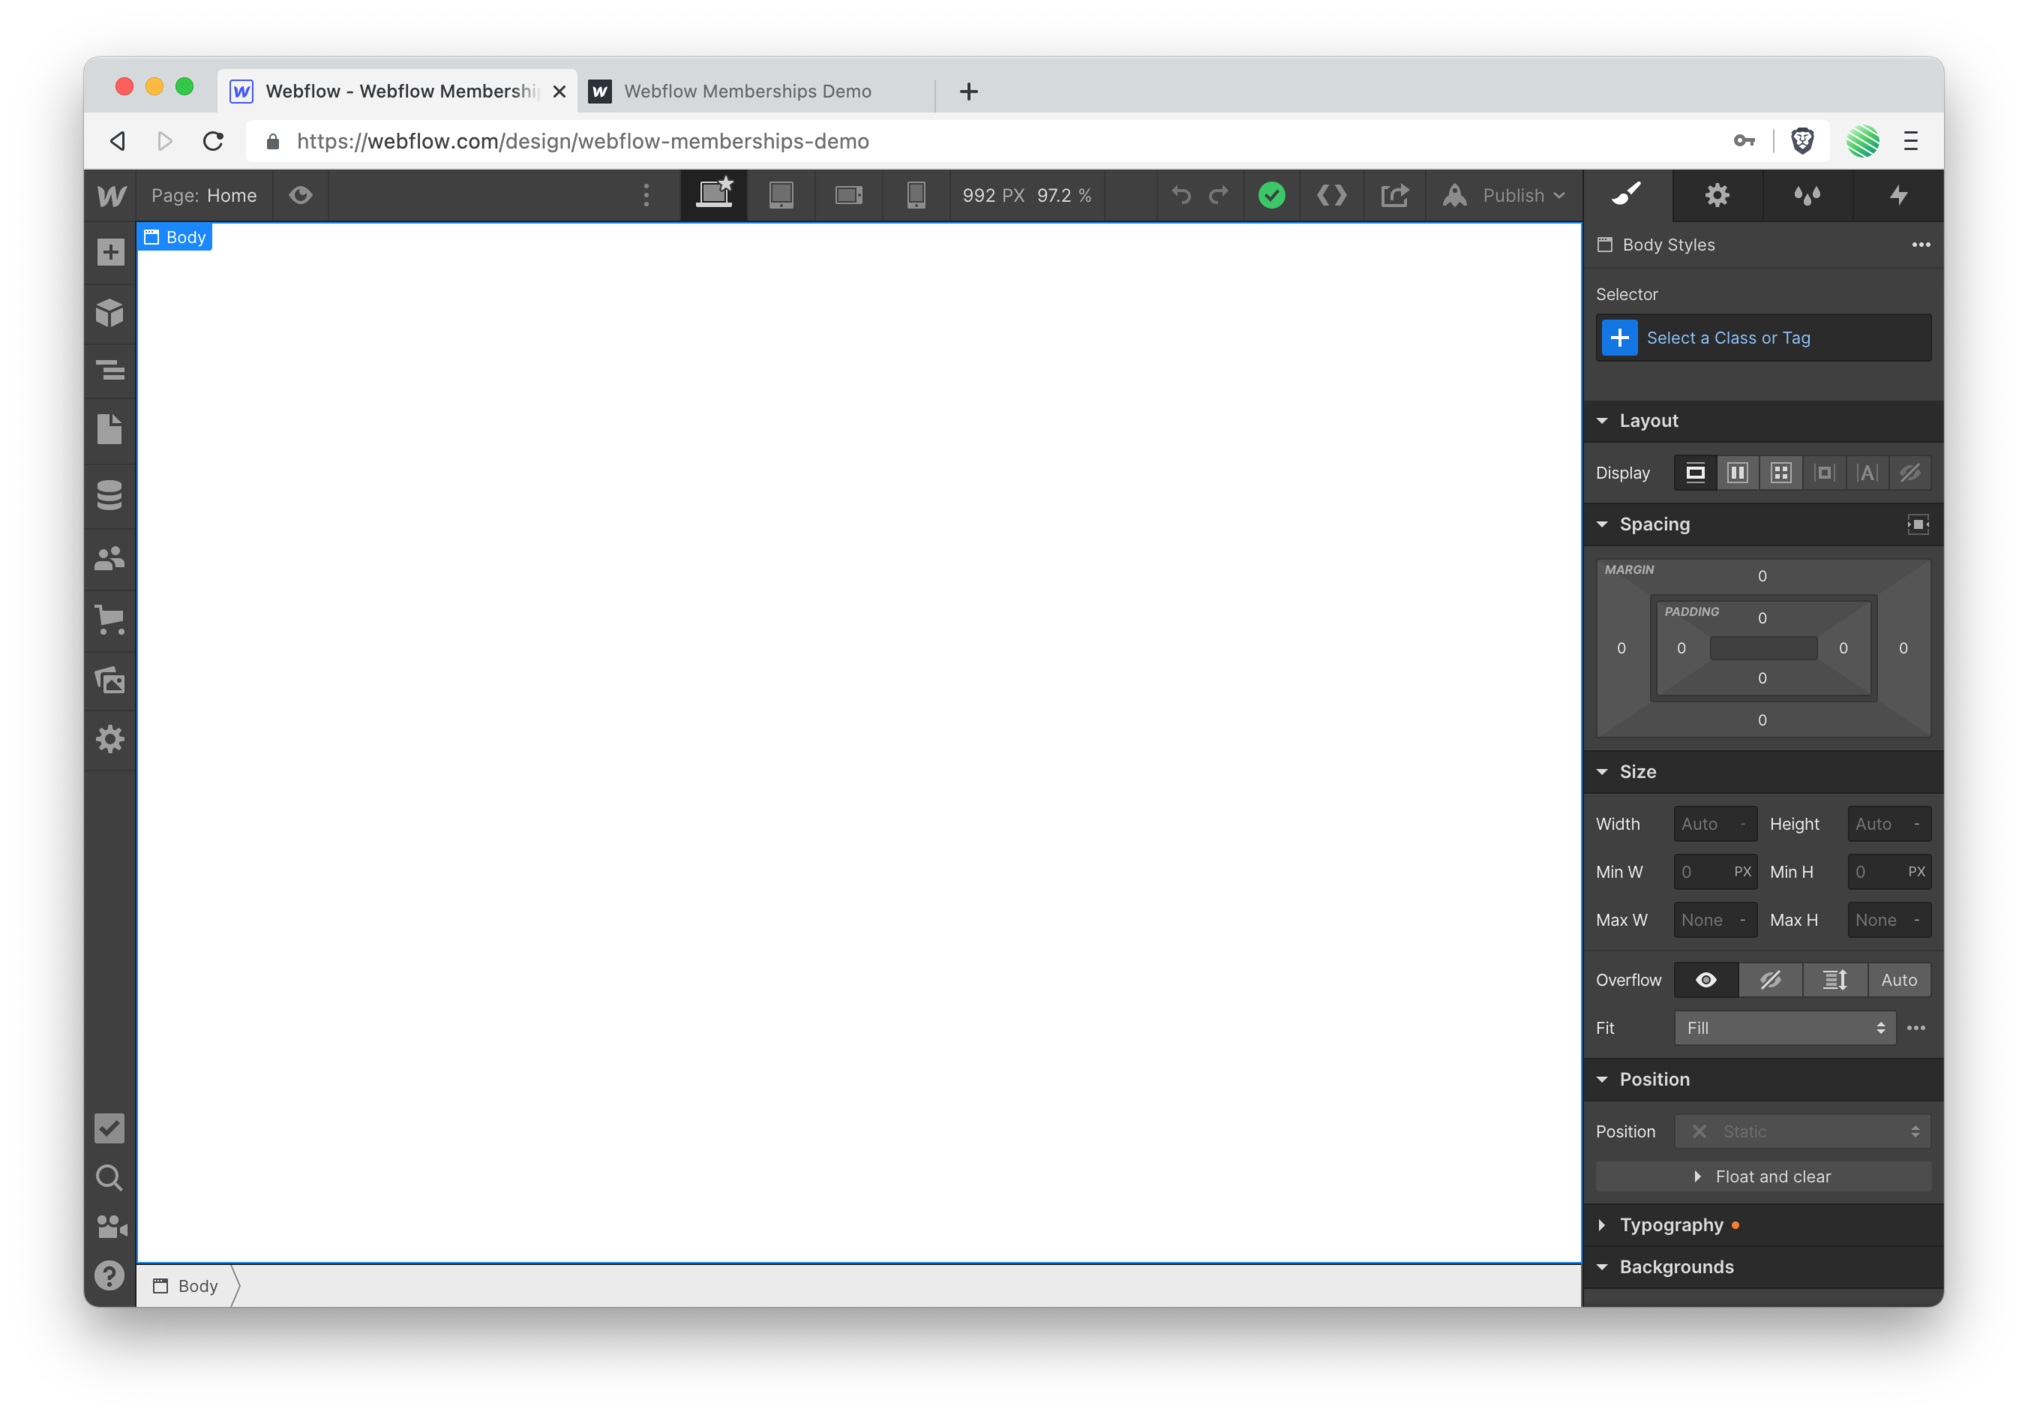 Go back to your Webflow Designer. Open up the Home page.
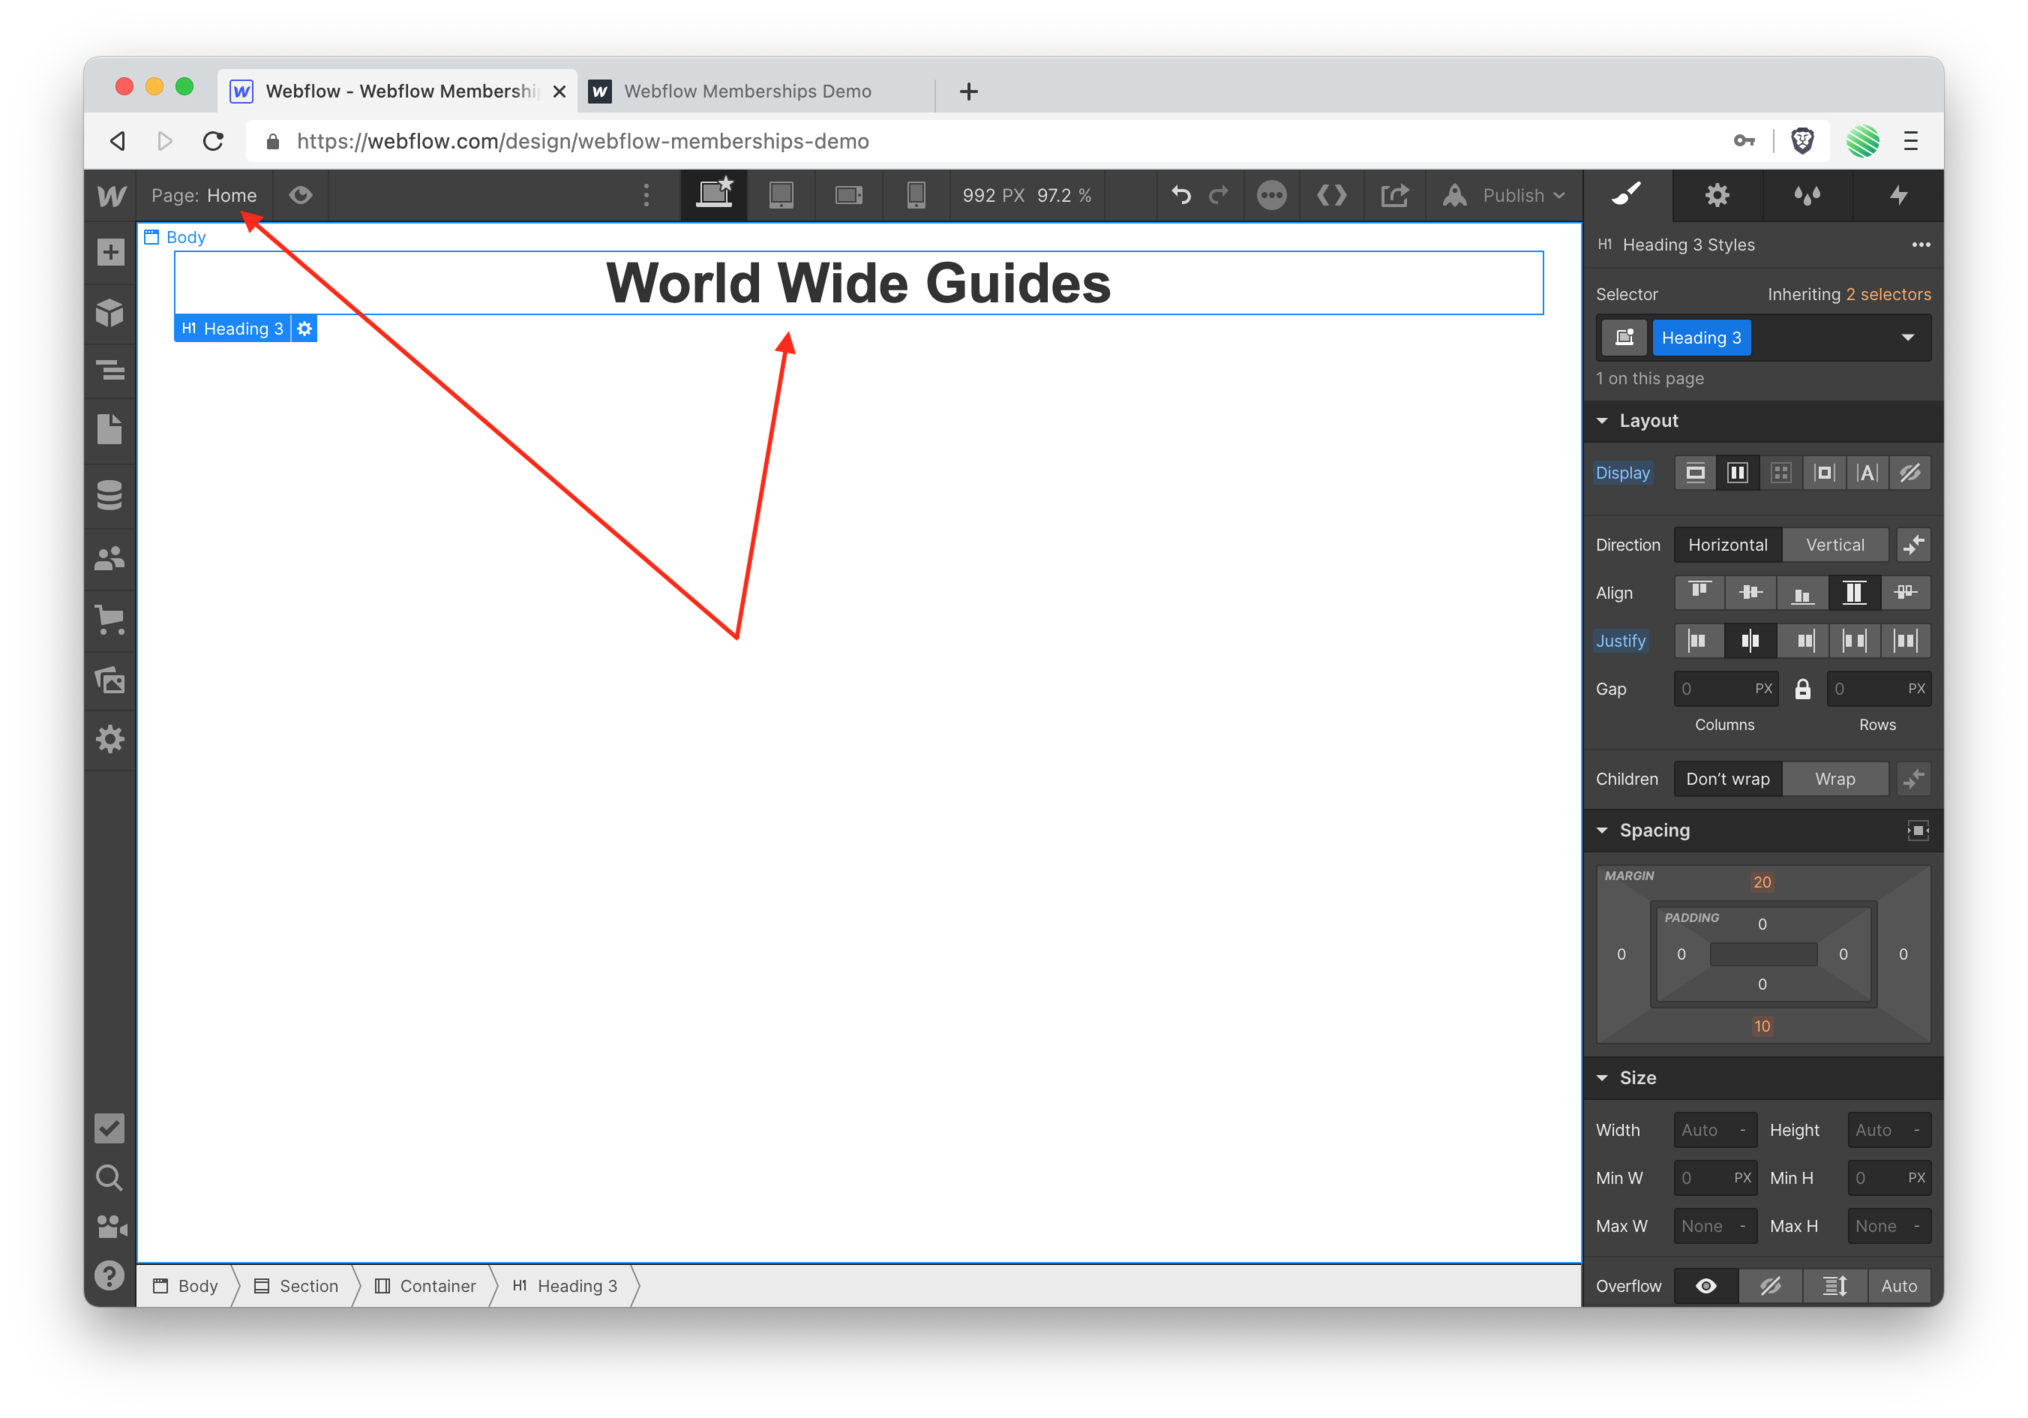 Add some basic content as a quick test.
 Re-publish your site.
 Reload your live site and find your new content. Great, it's all working as expected, and remember, at this point you are logged in.
Let’s keep improving things…
 Flip back to your Webflow Designer.
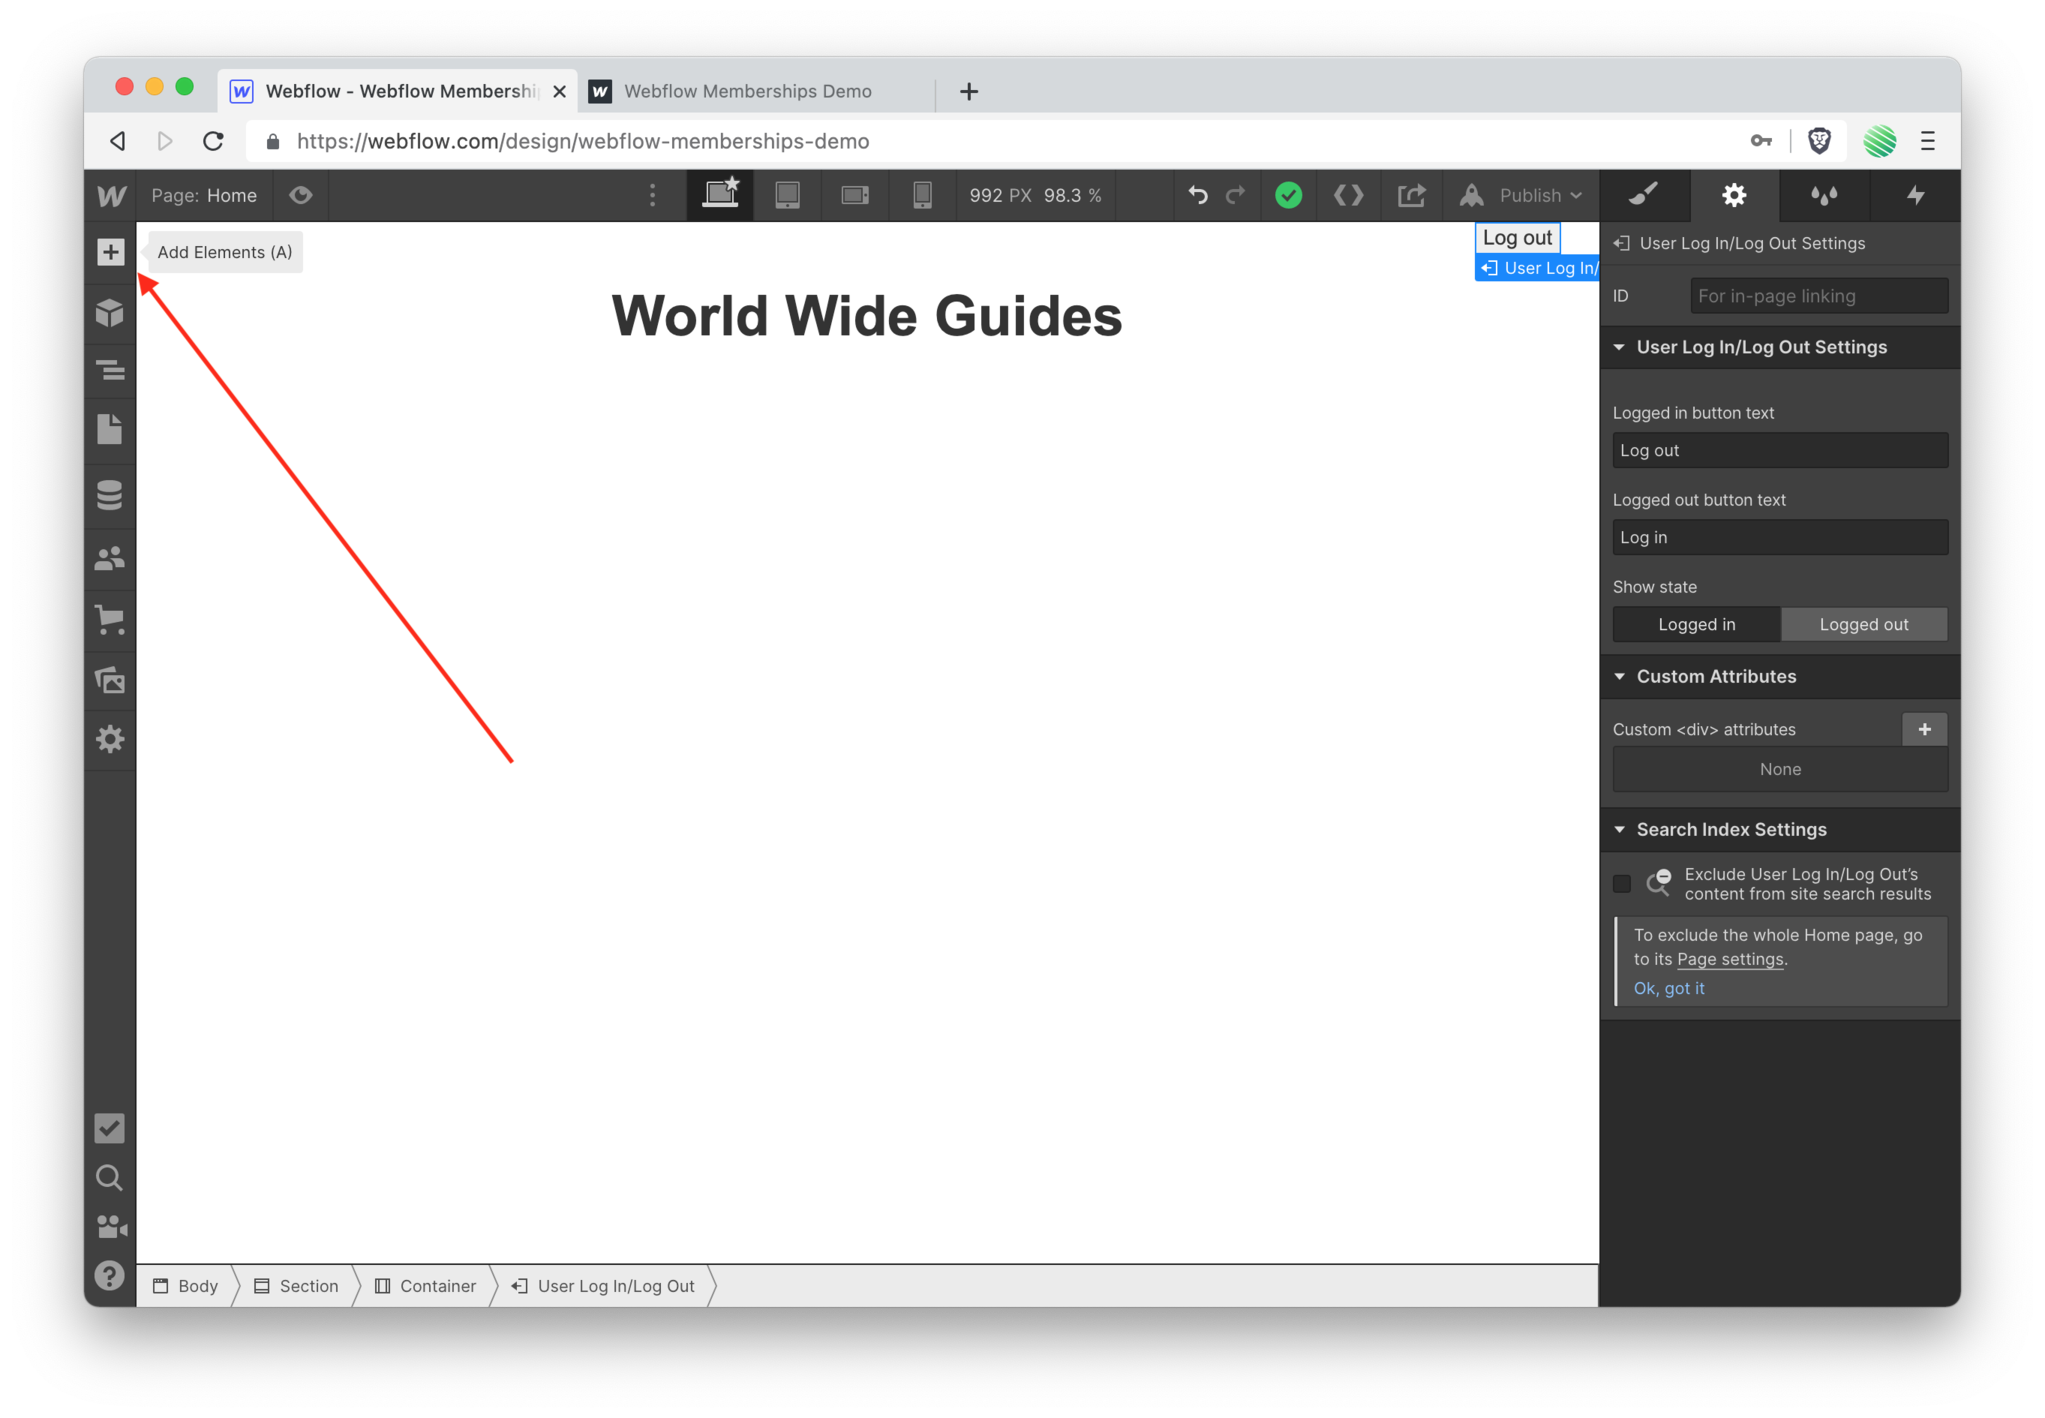
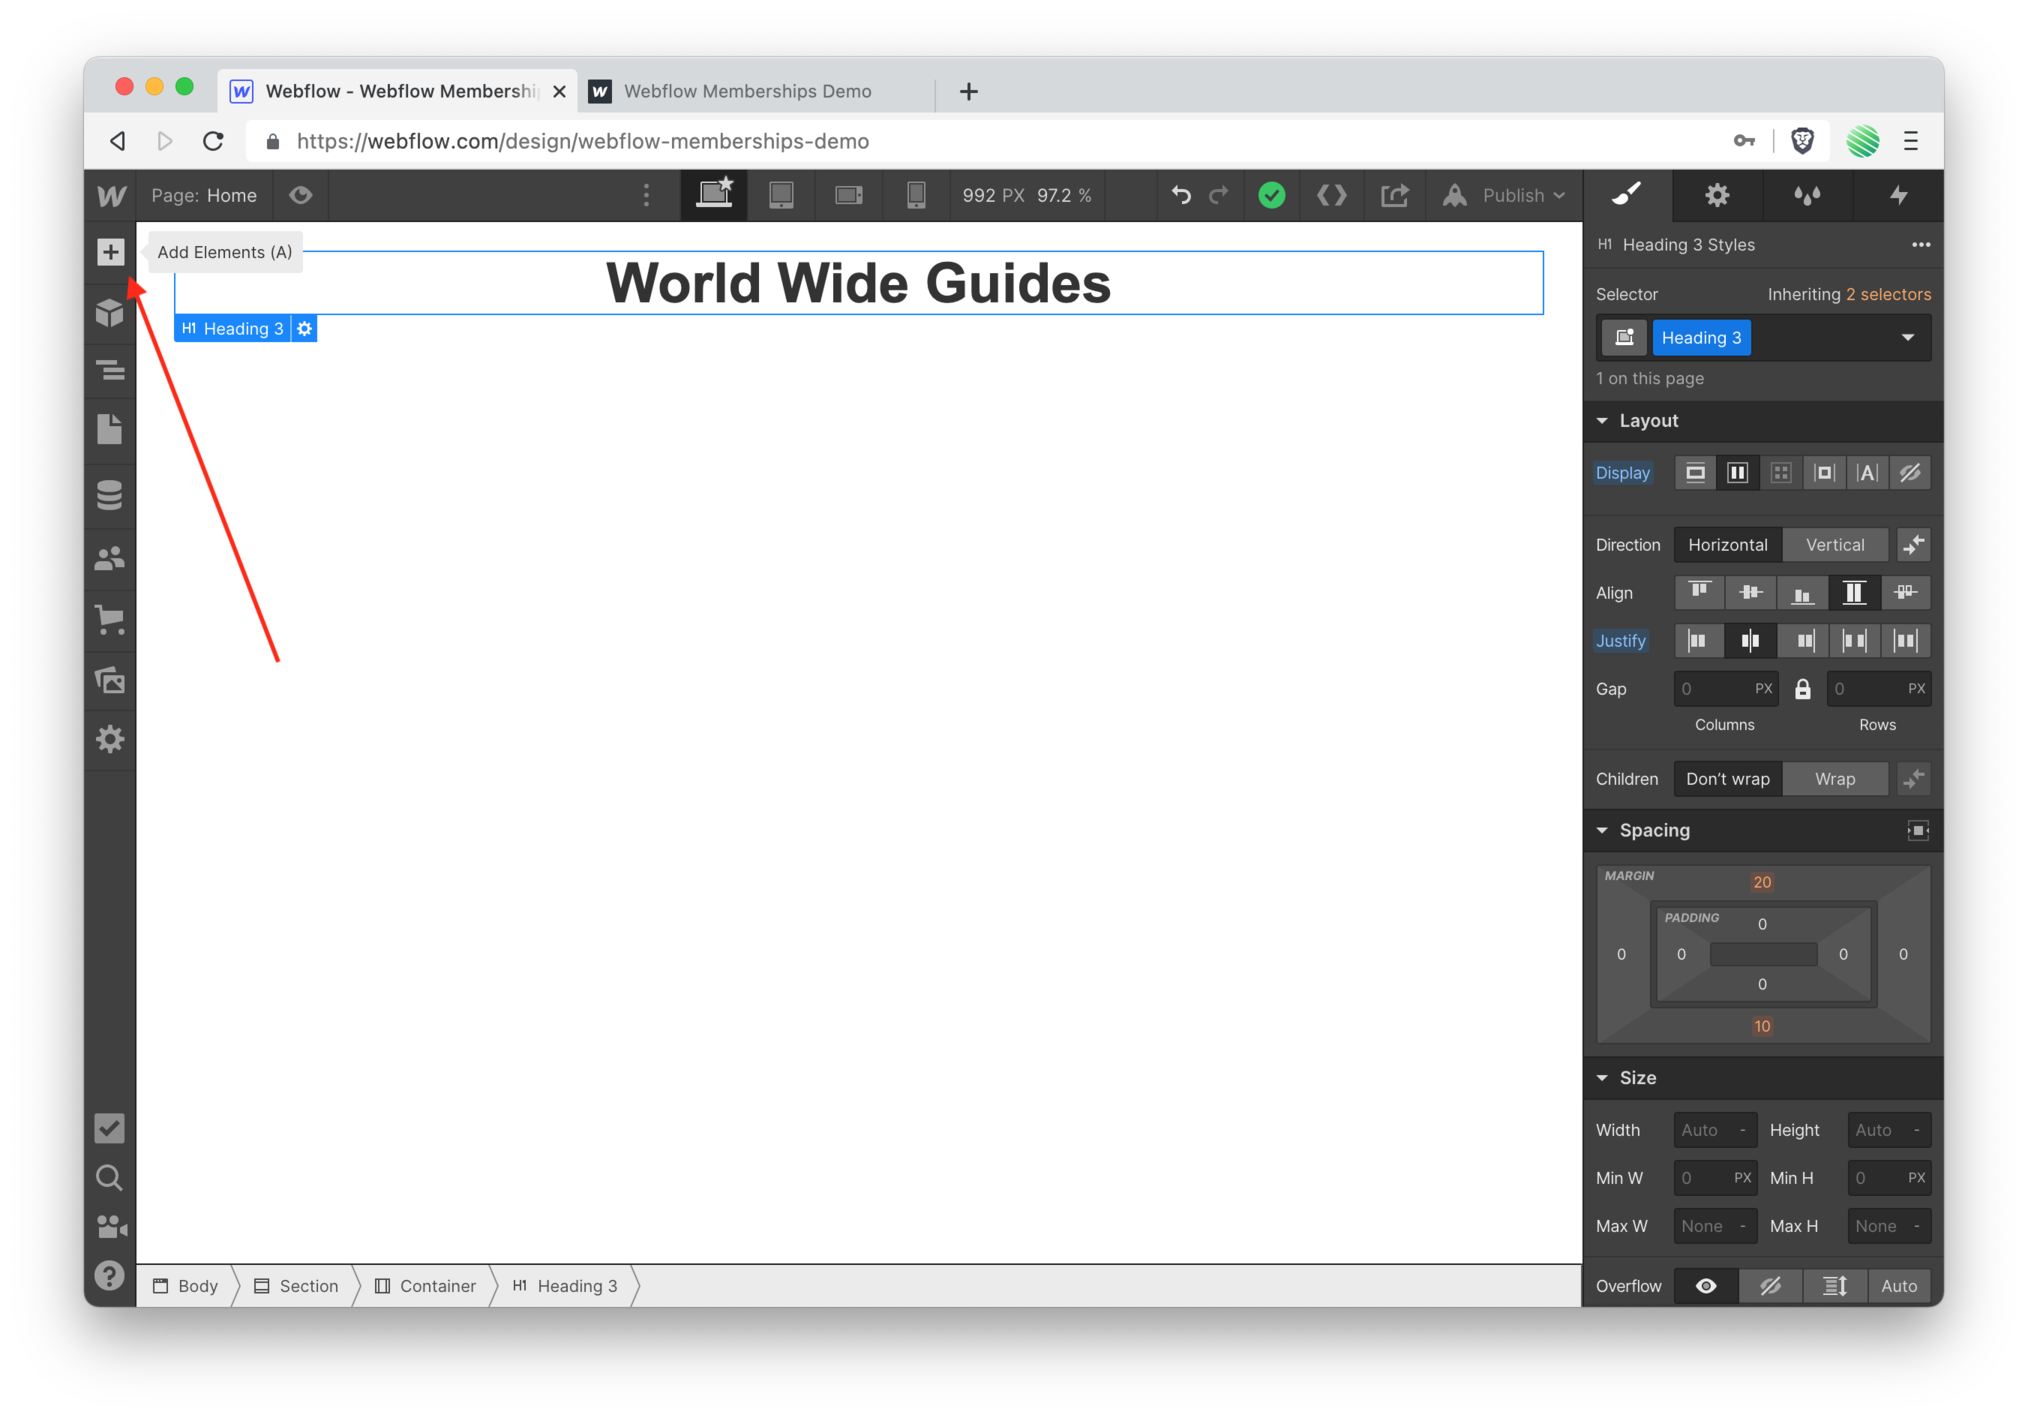 Open the add elements pane.
 Scroll down.
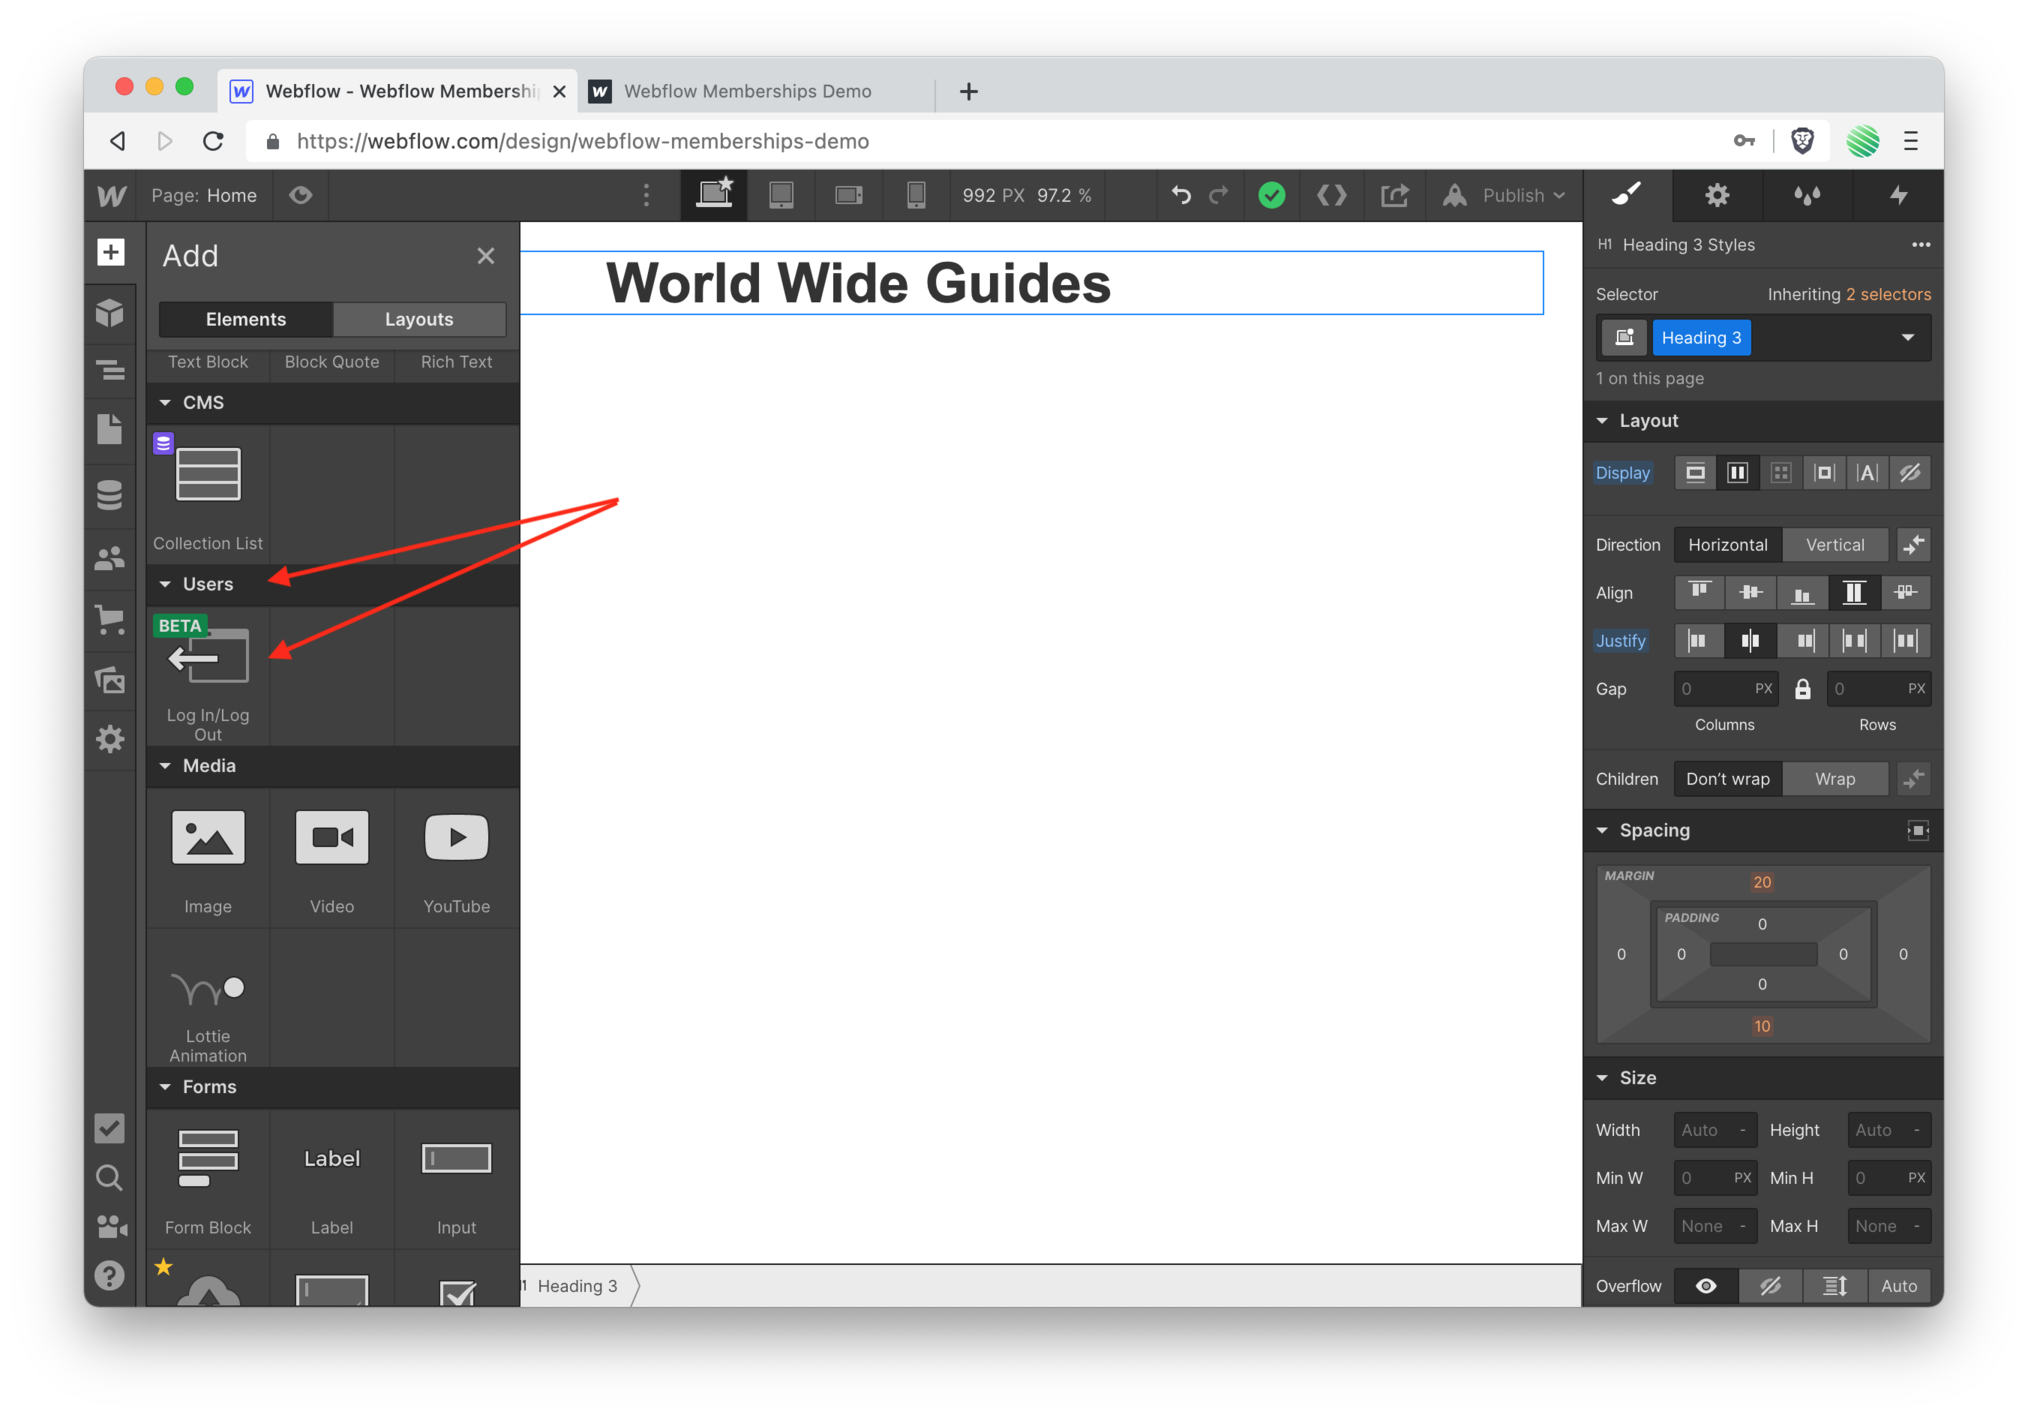 And find a new element under the Users section.
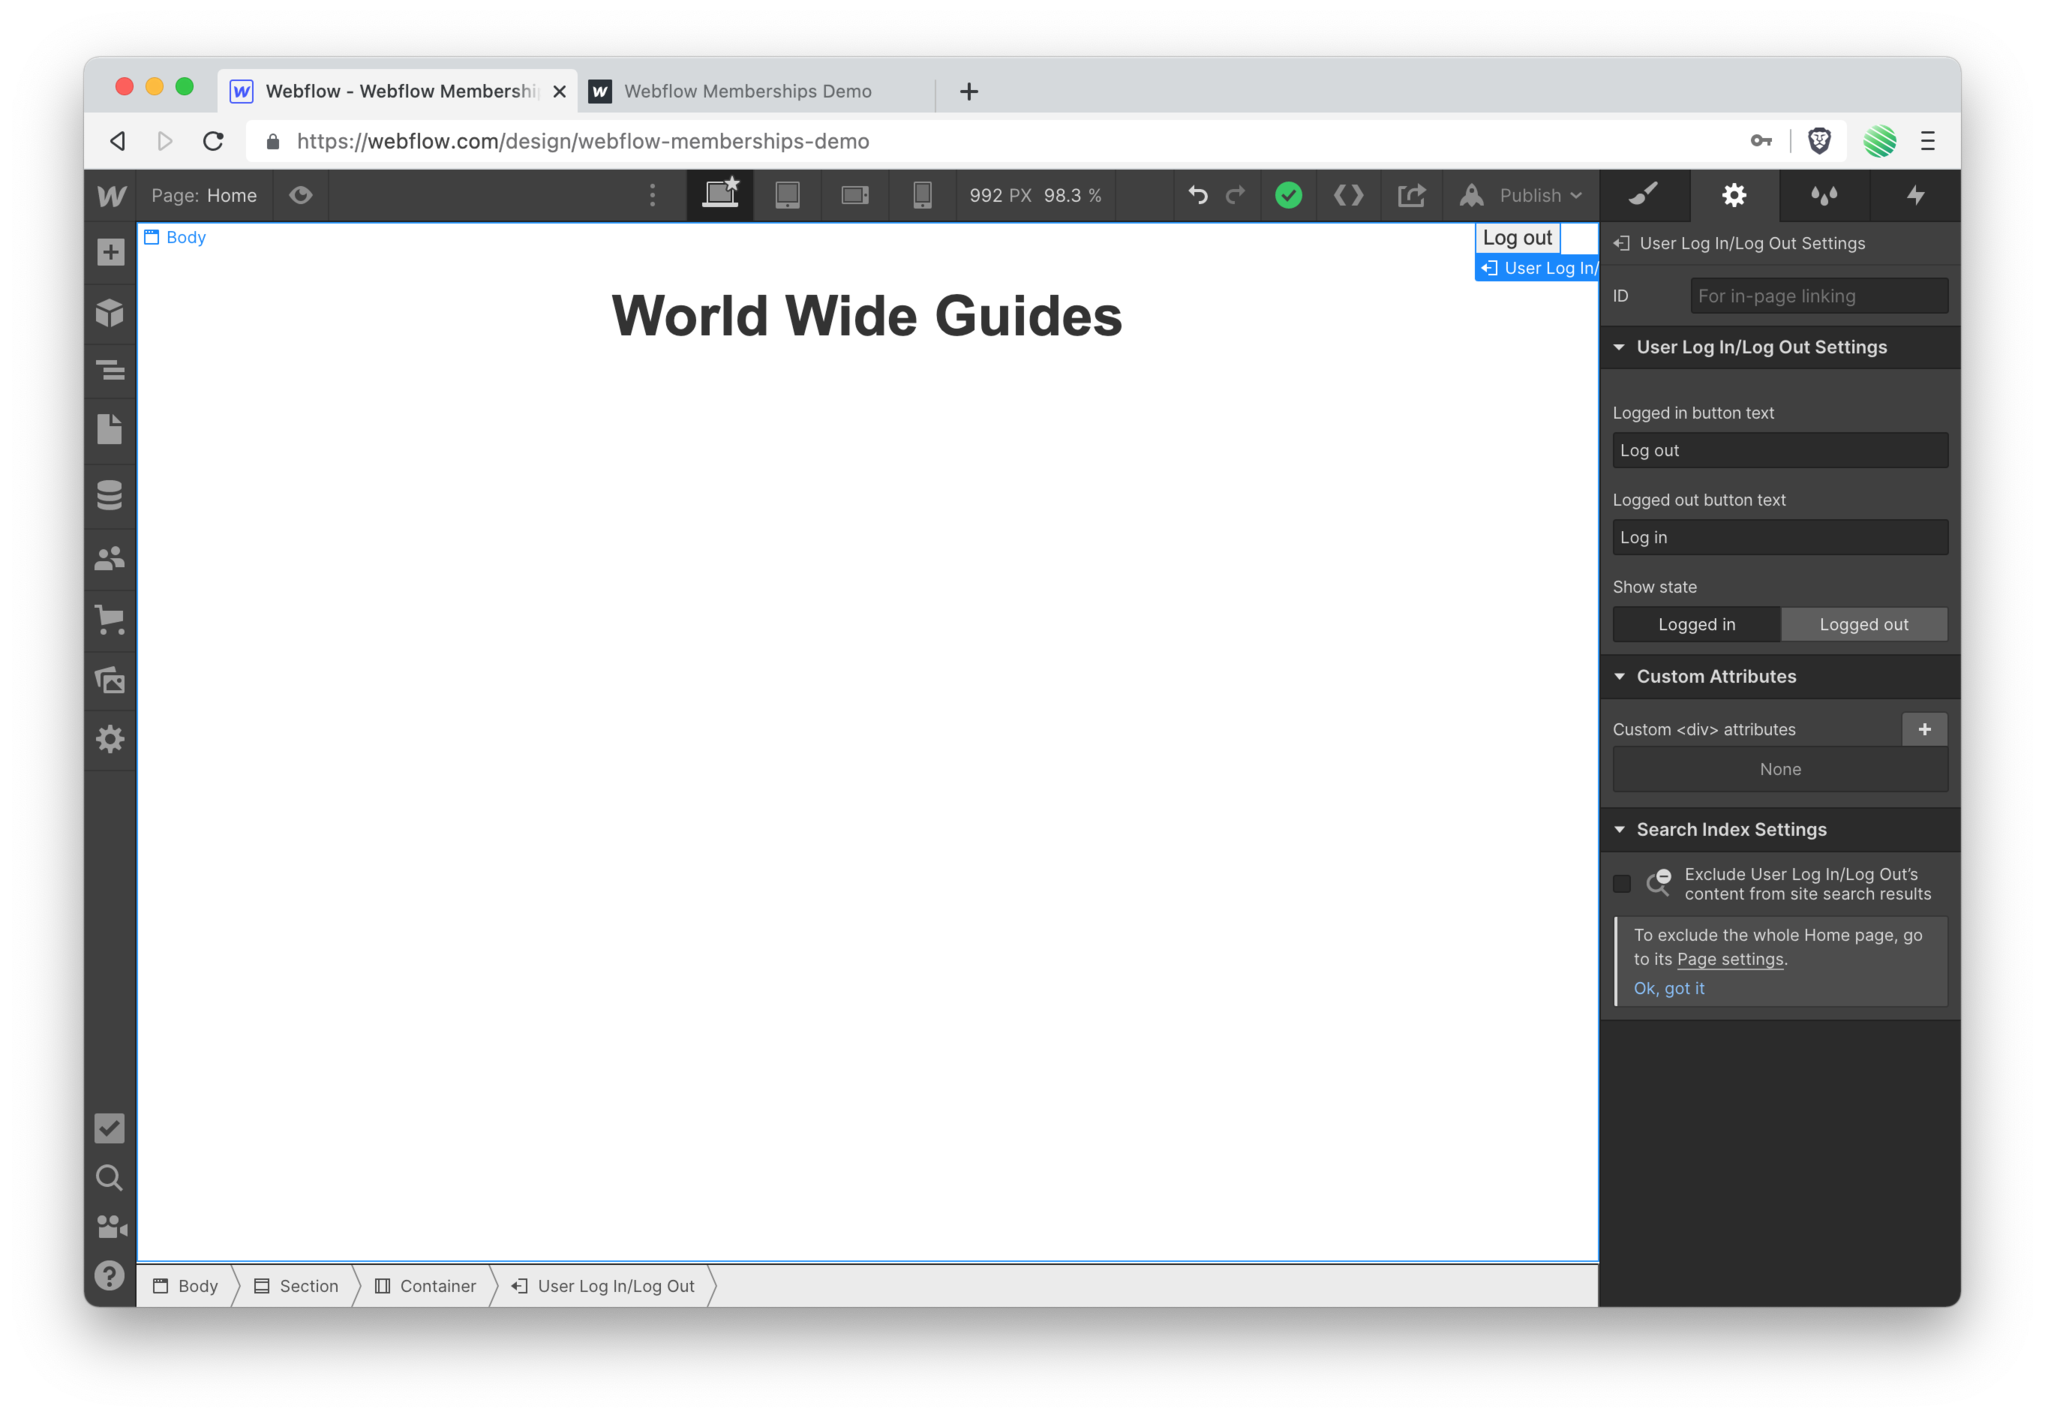
This is the Log In / Log Out button.
It will automatically change state for you based upon the current user being logged in or logged out of your site.
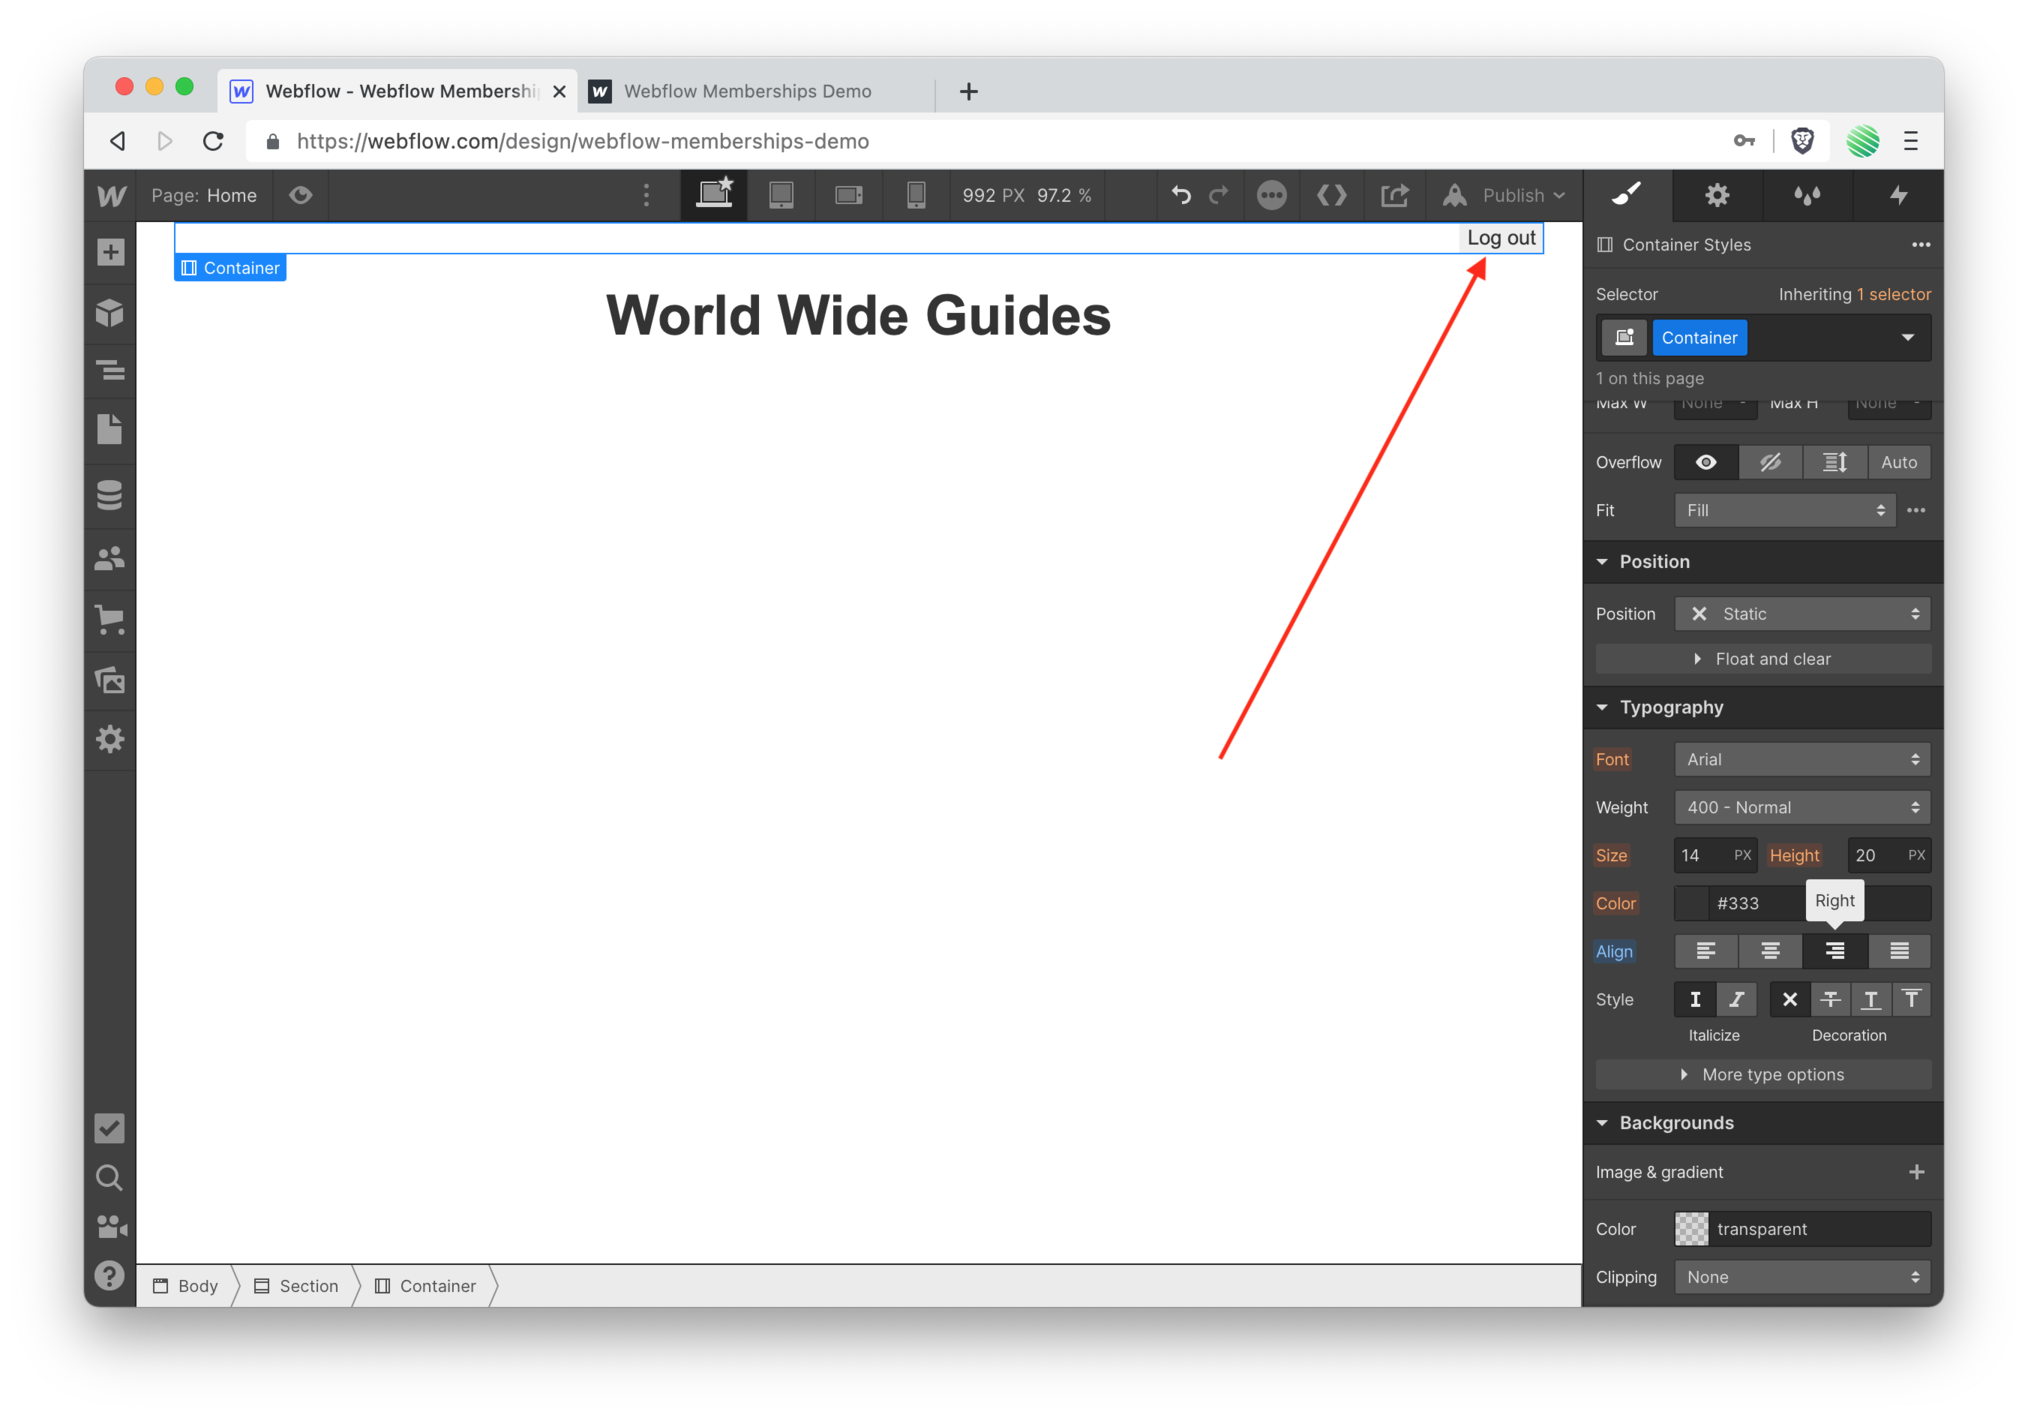 Add this button to the top of your site.
 Notice you can toggle between “Logged in” and “Logged out” states to change the text, colors, etc..
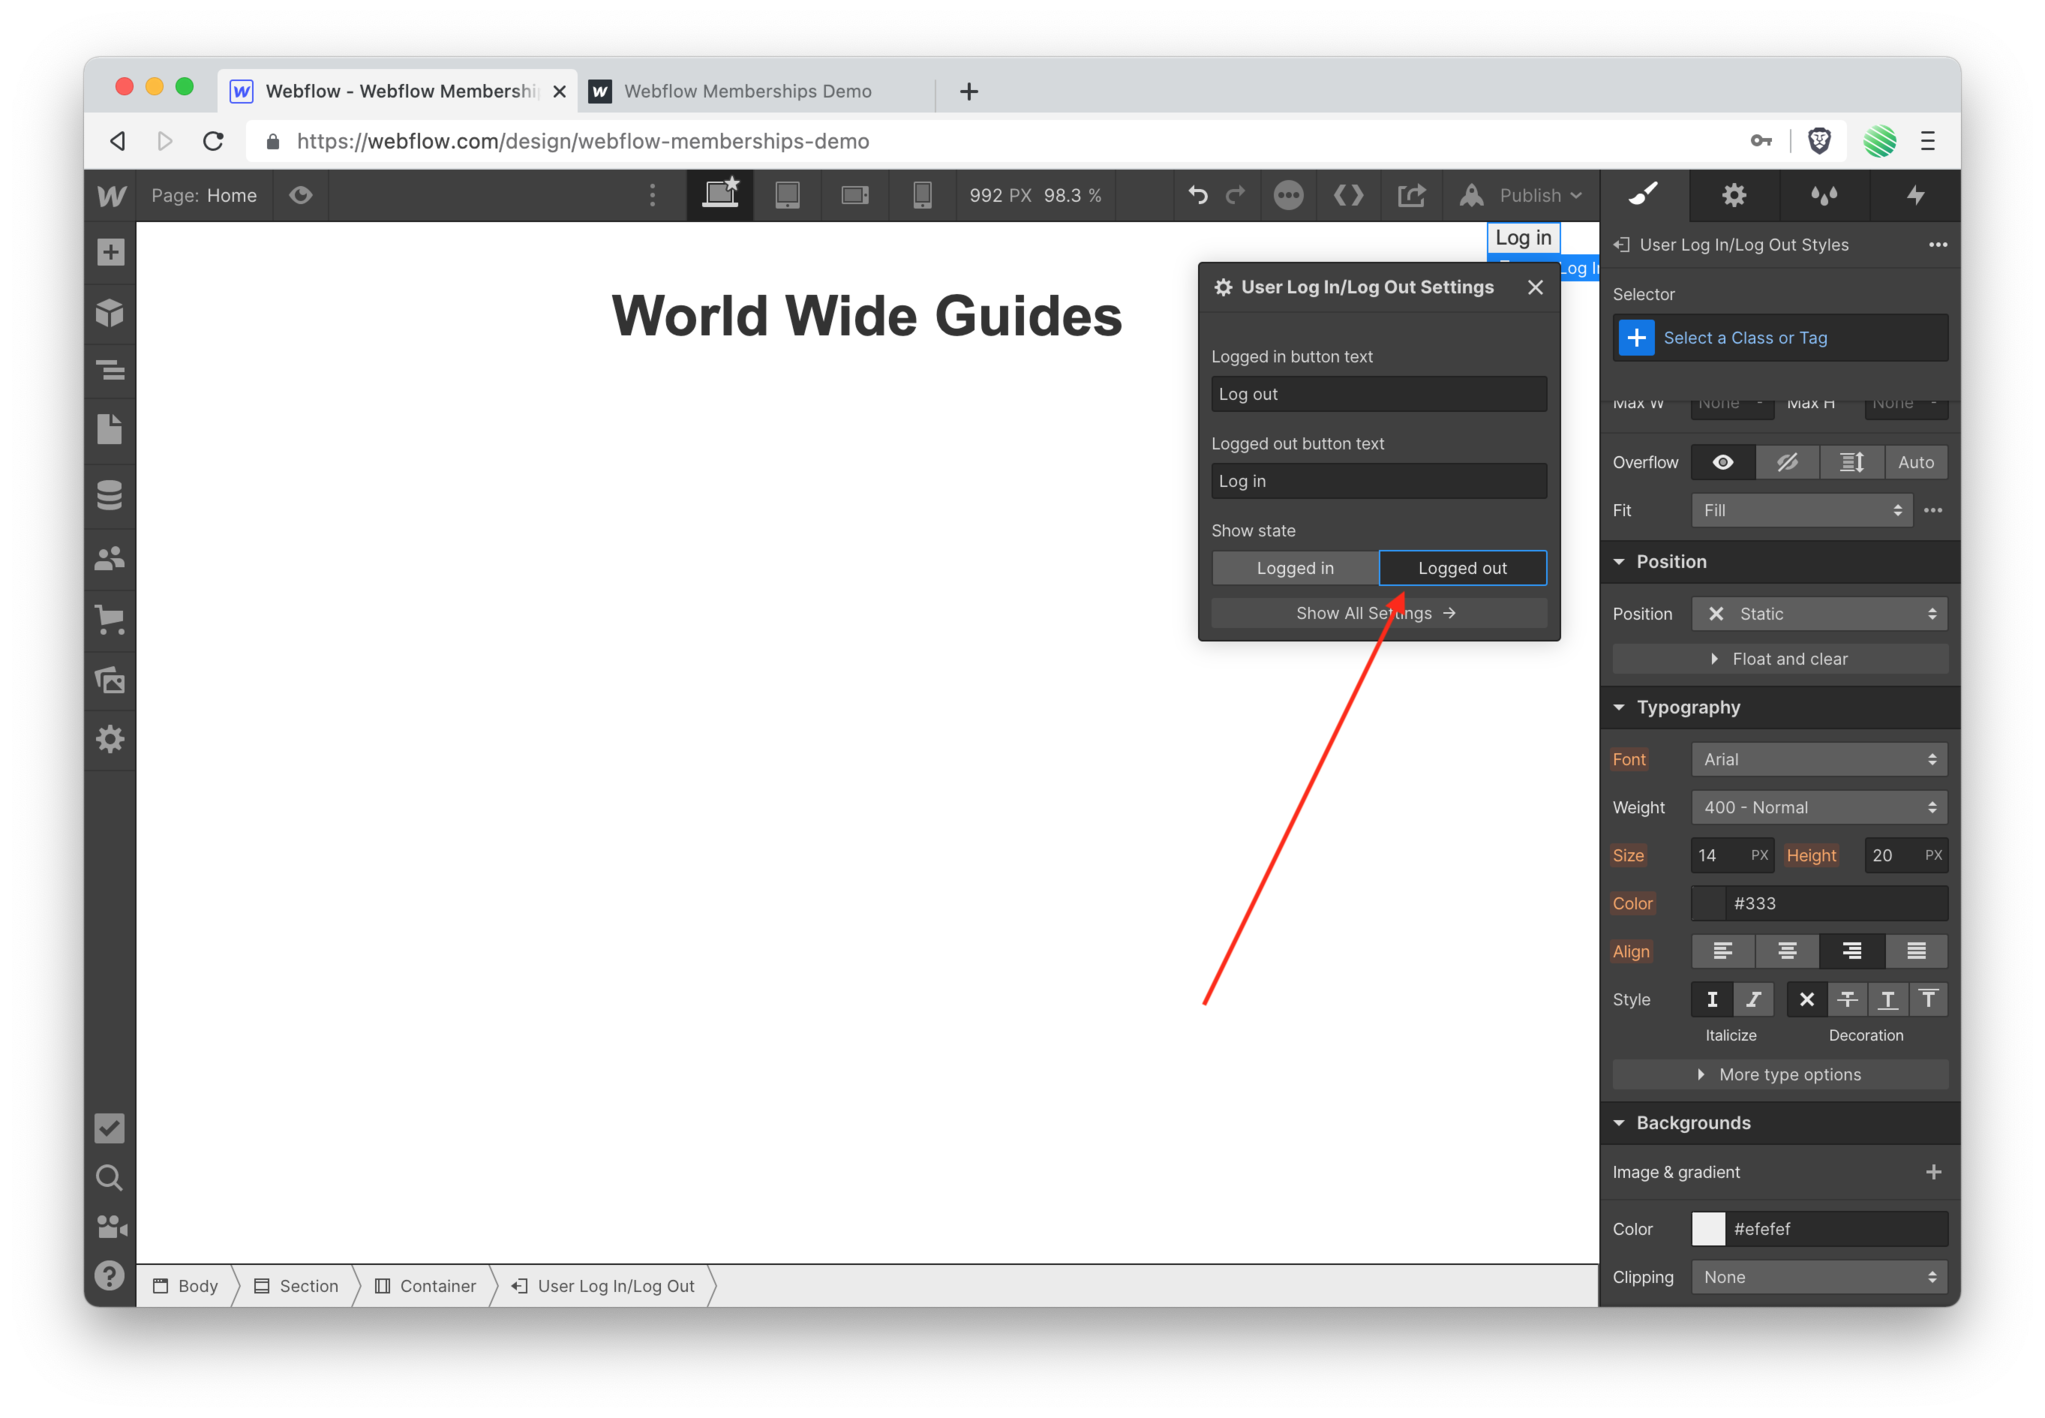
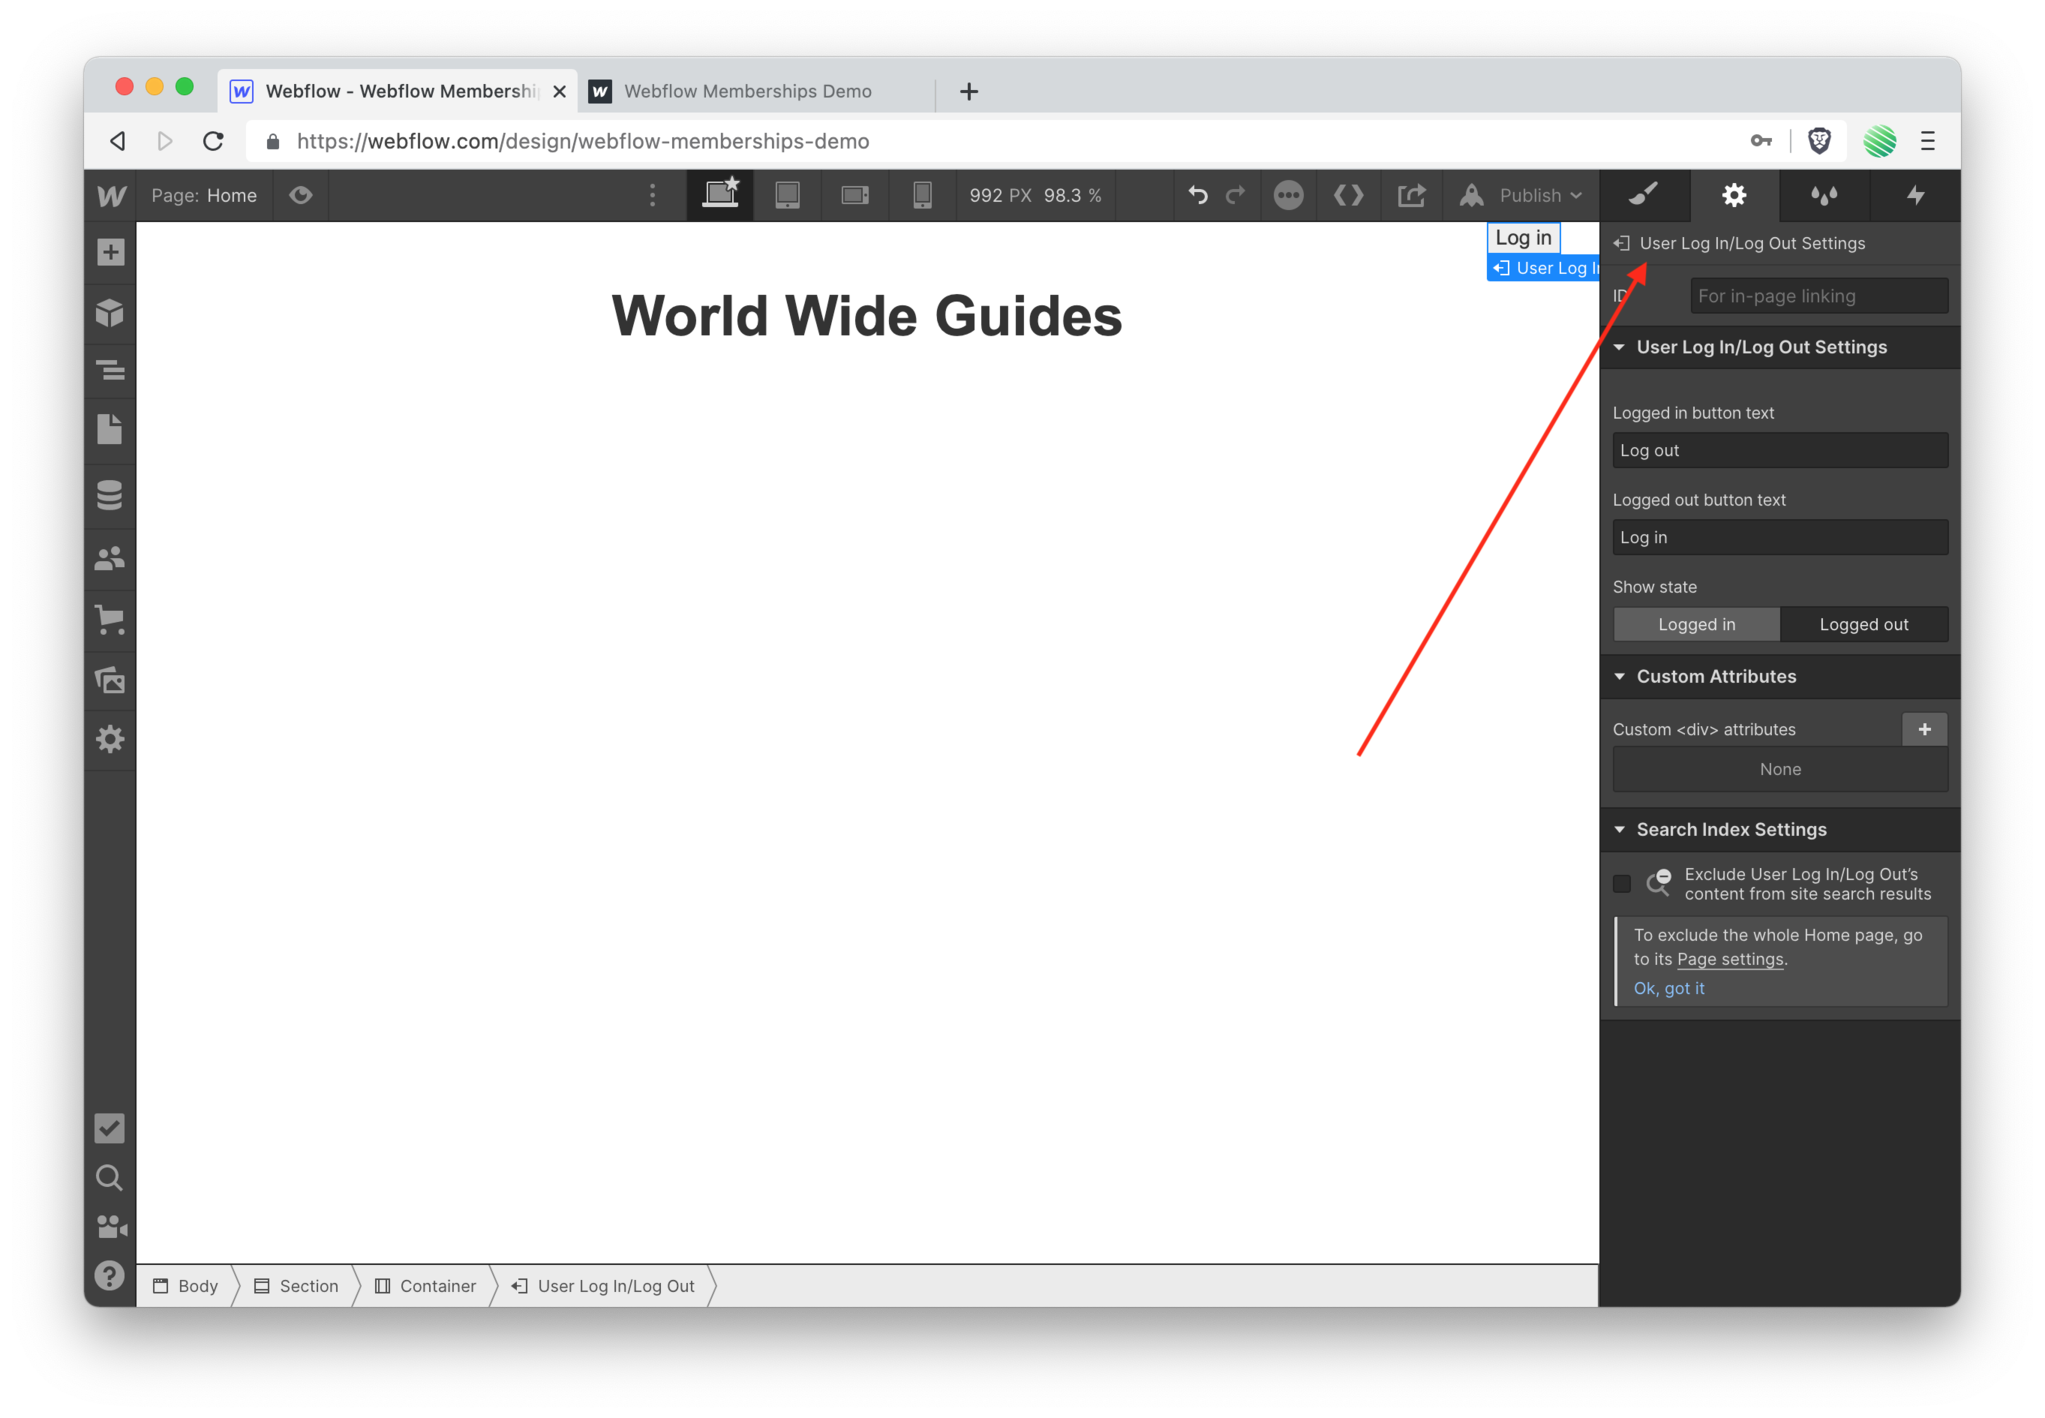 Also notice you’re now within a new settings pane.
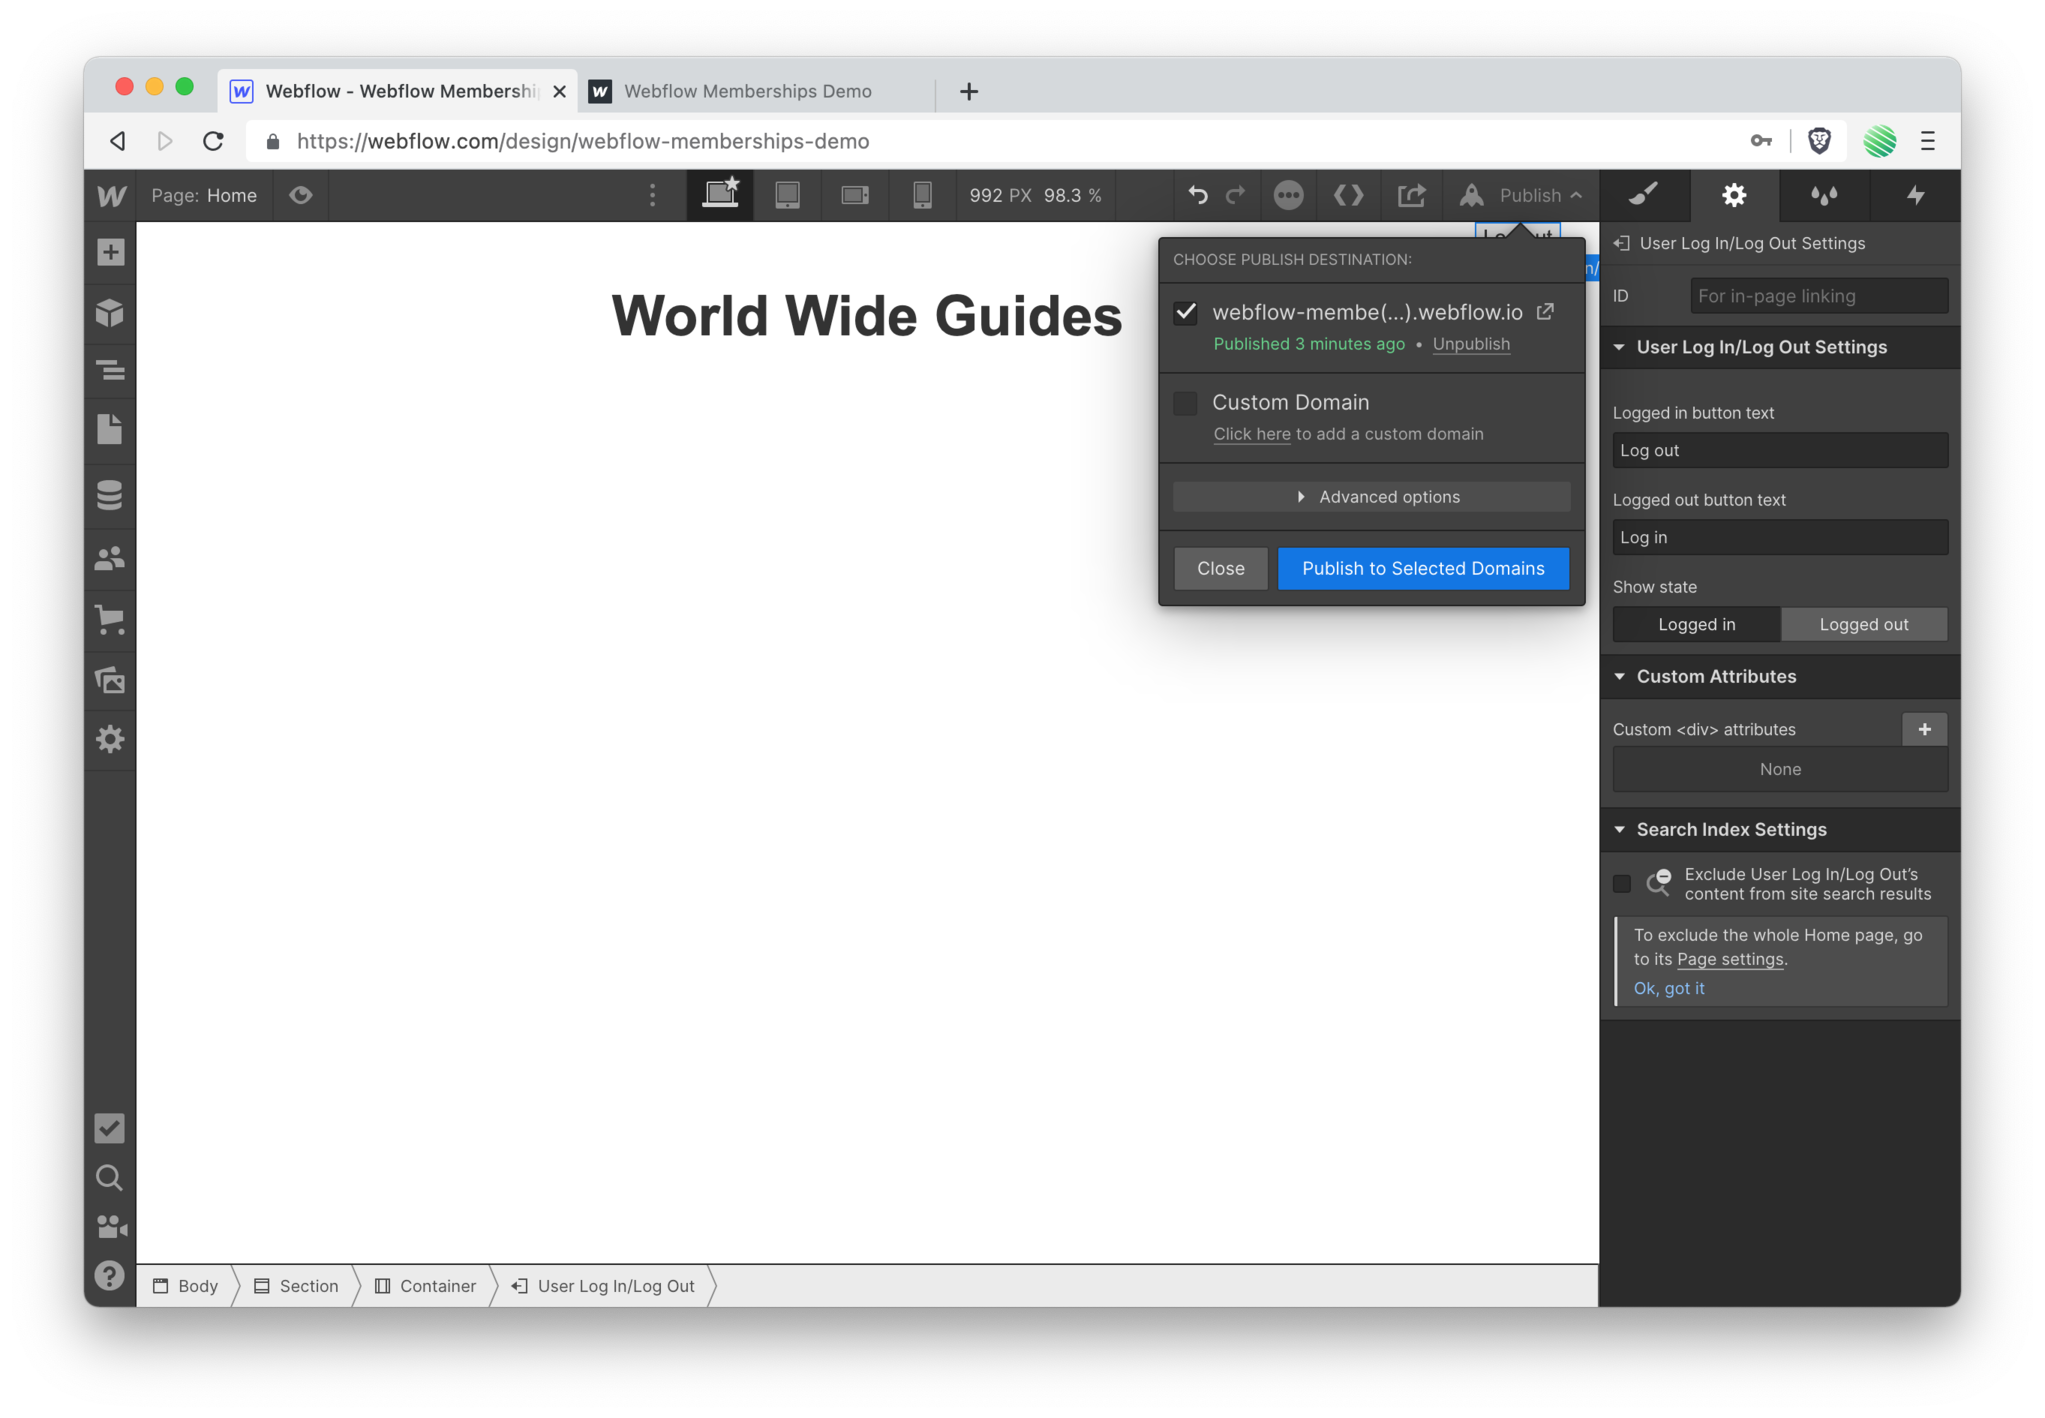 Go ahead an re-publish your site.
 Flip back to your live sites tab and reload the page.
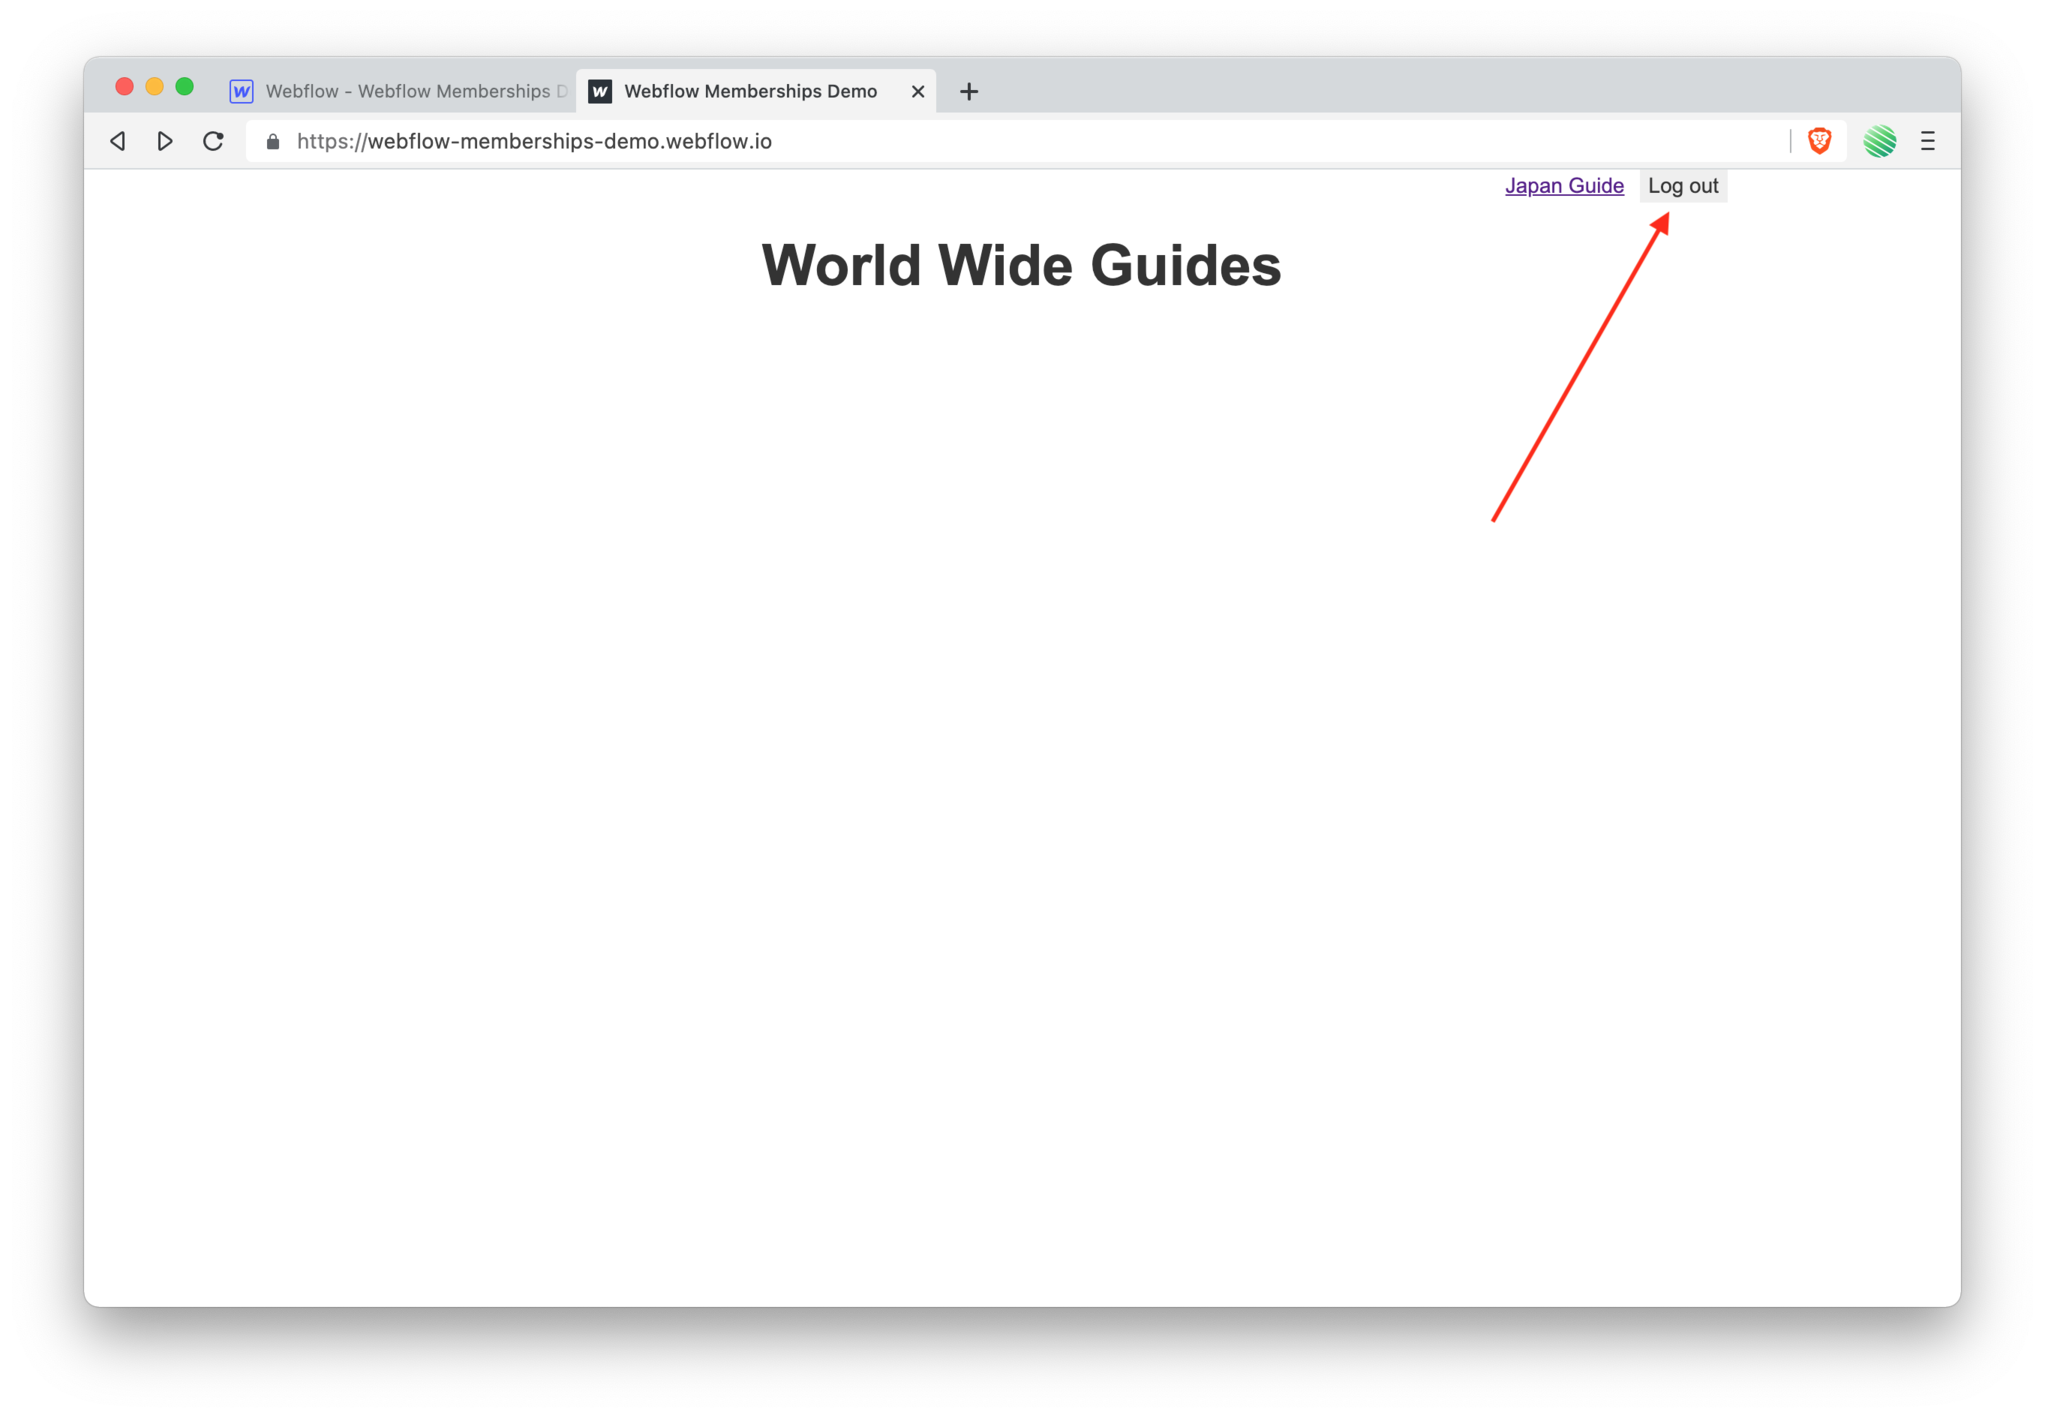
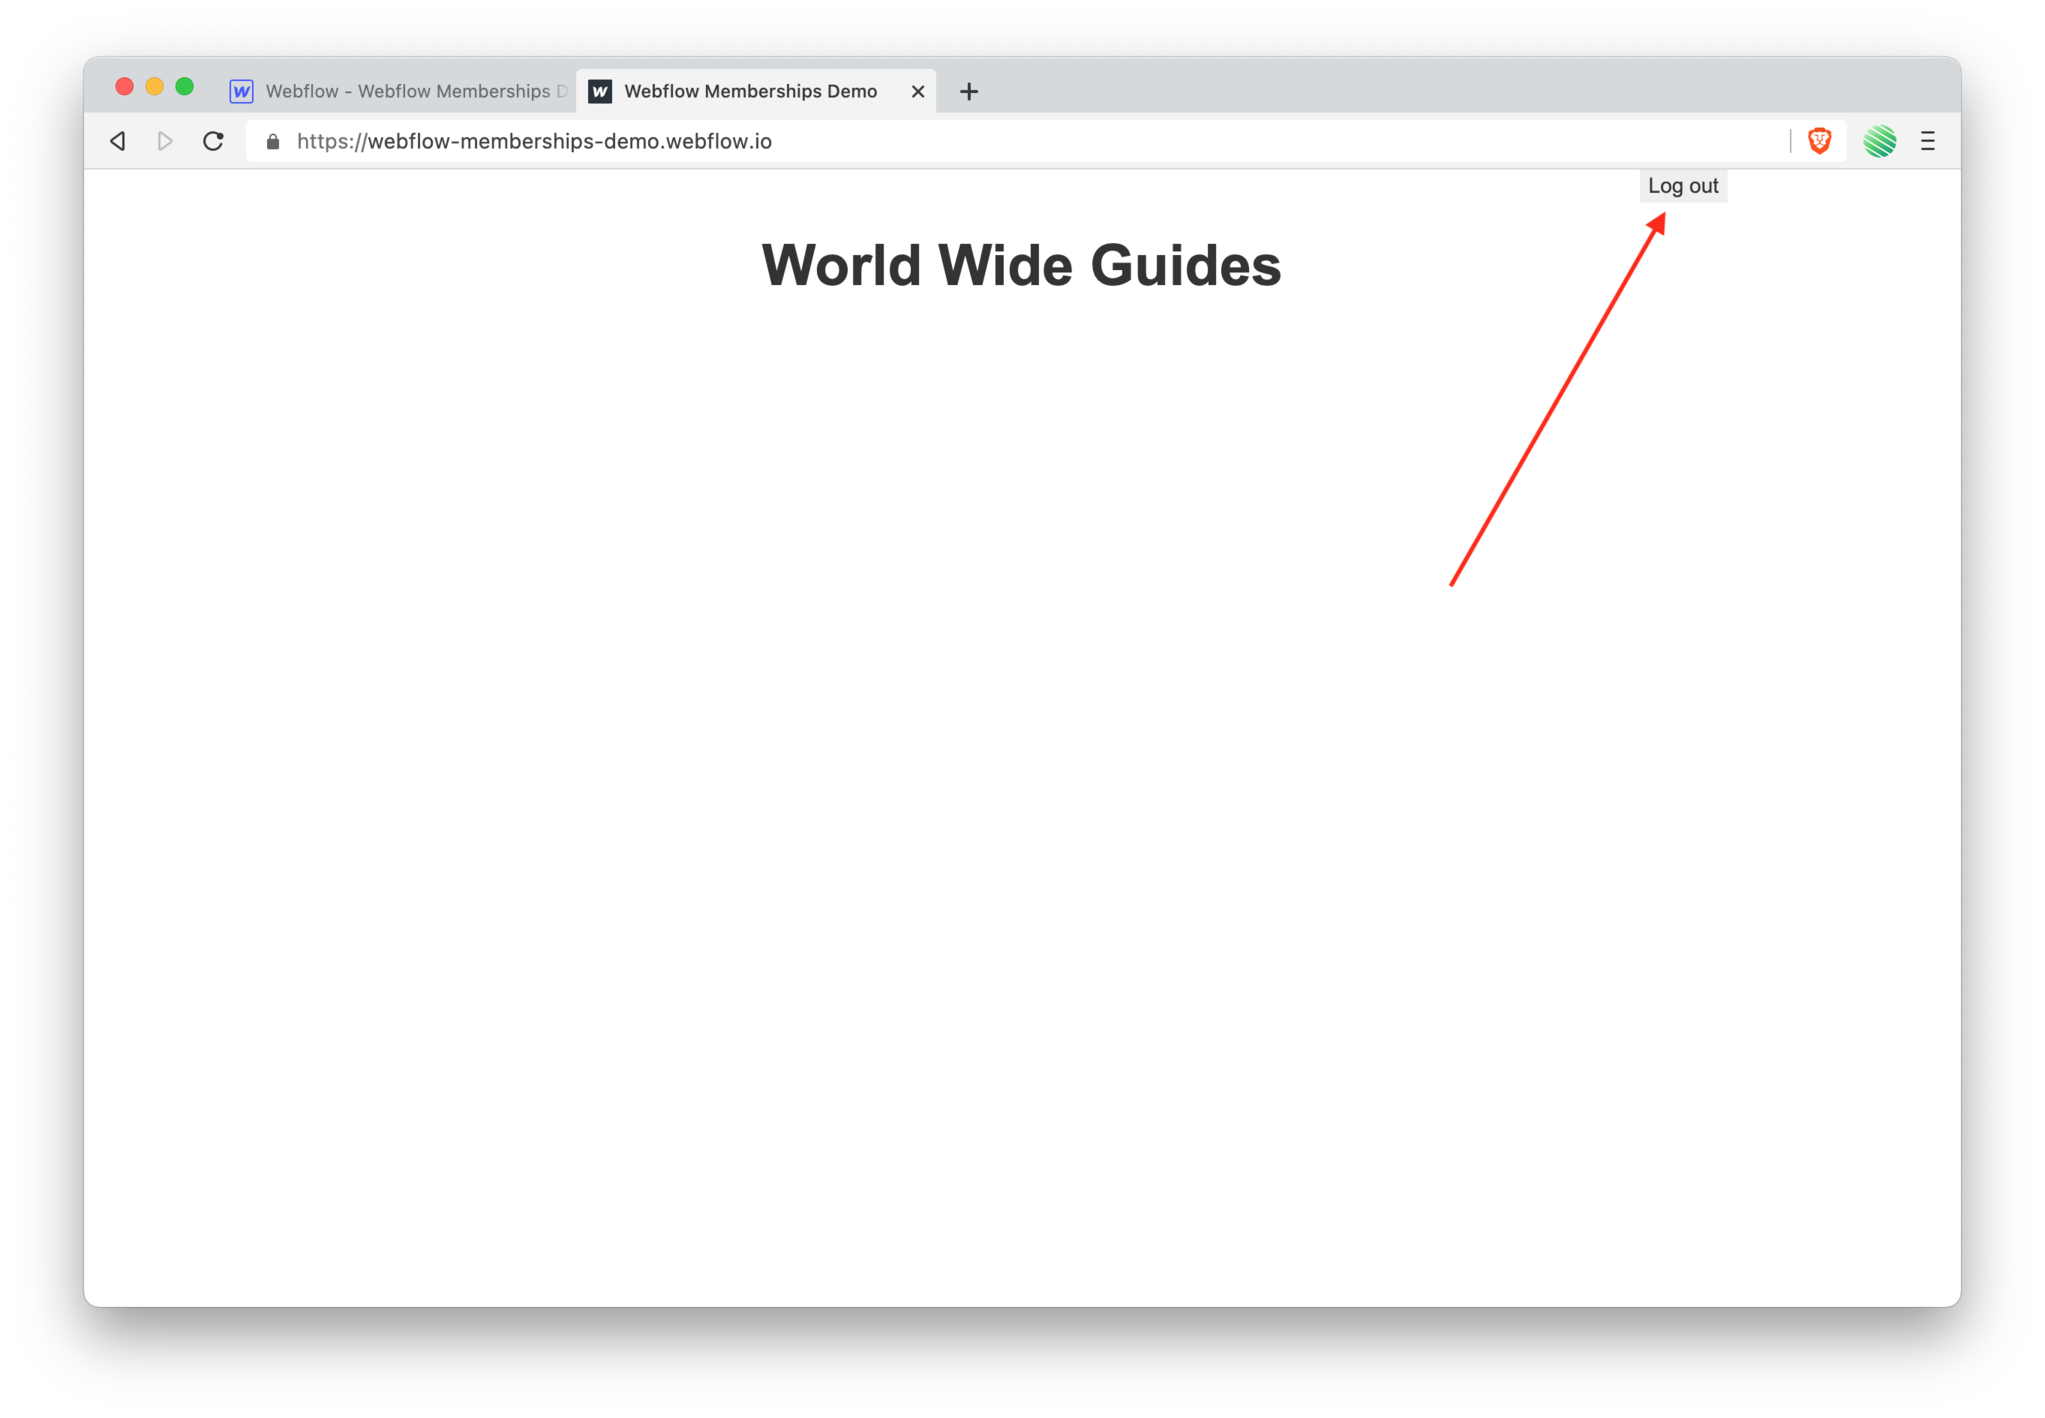 Nice! You're still logged in and you are shown a log out button.
Welcome Email & User Account Page
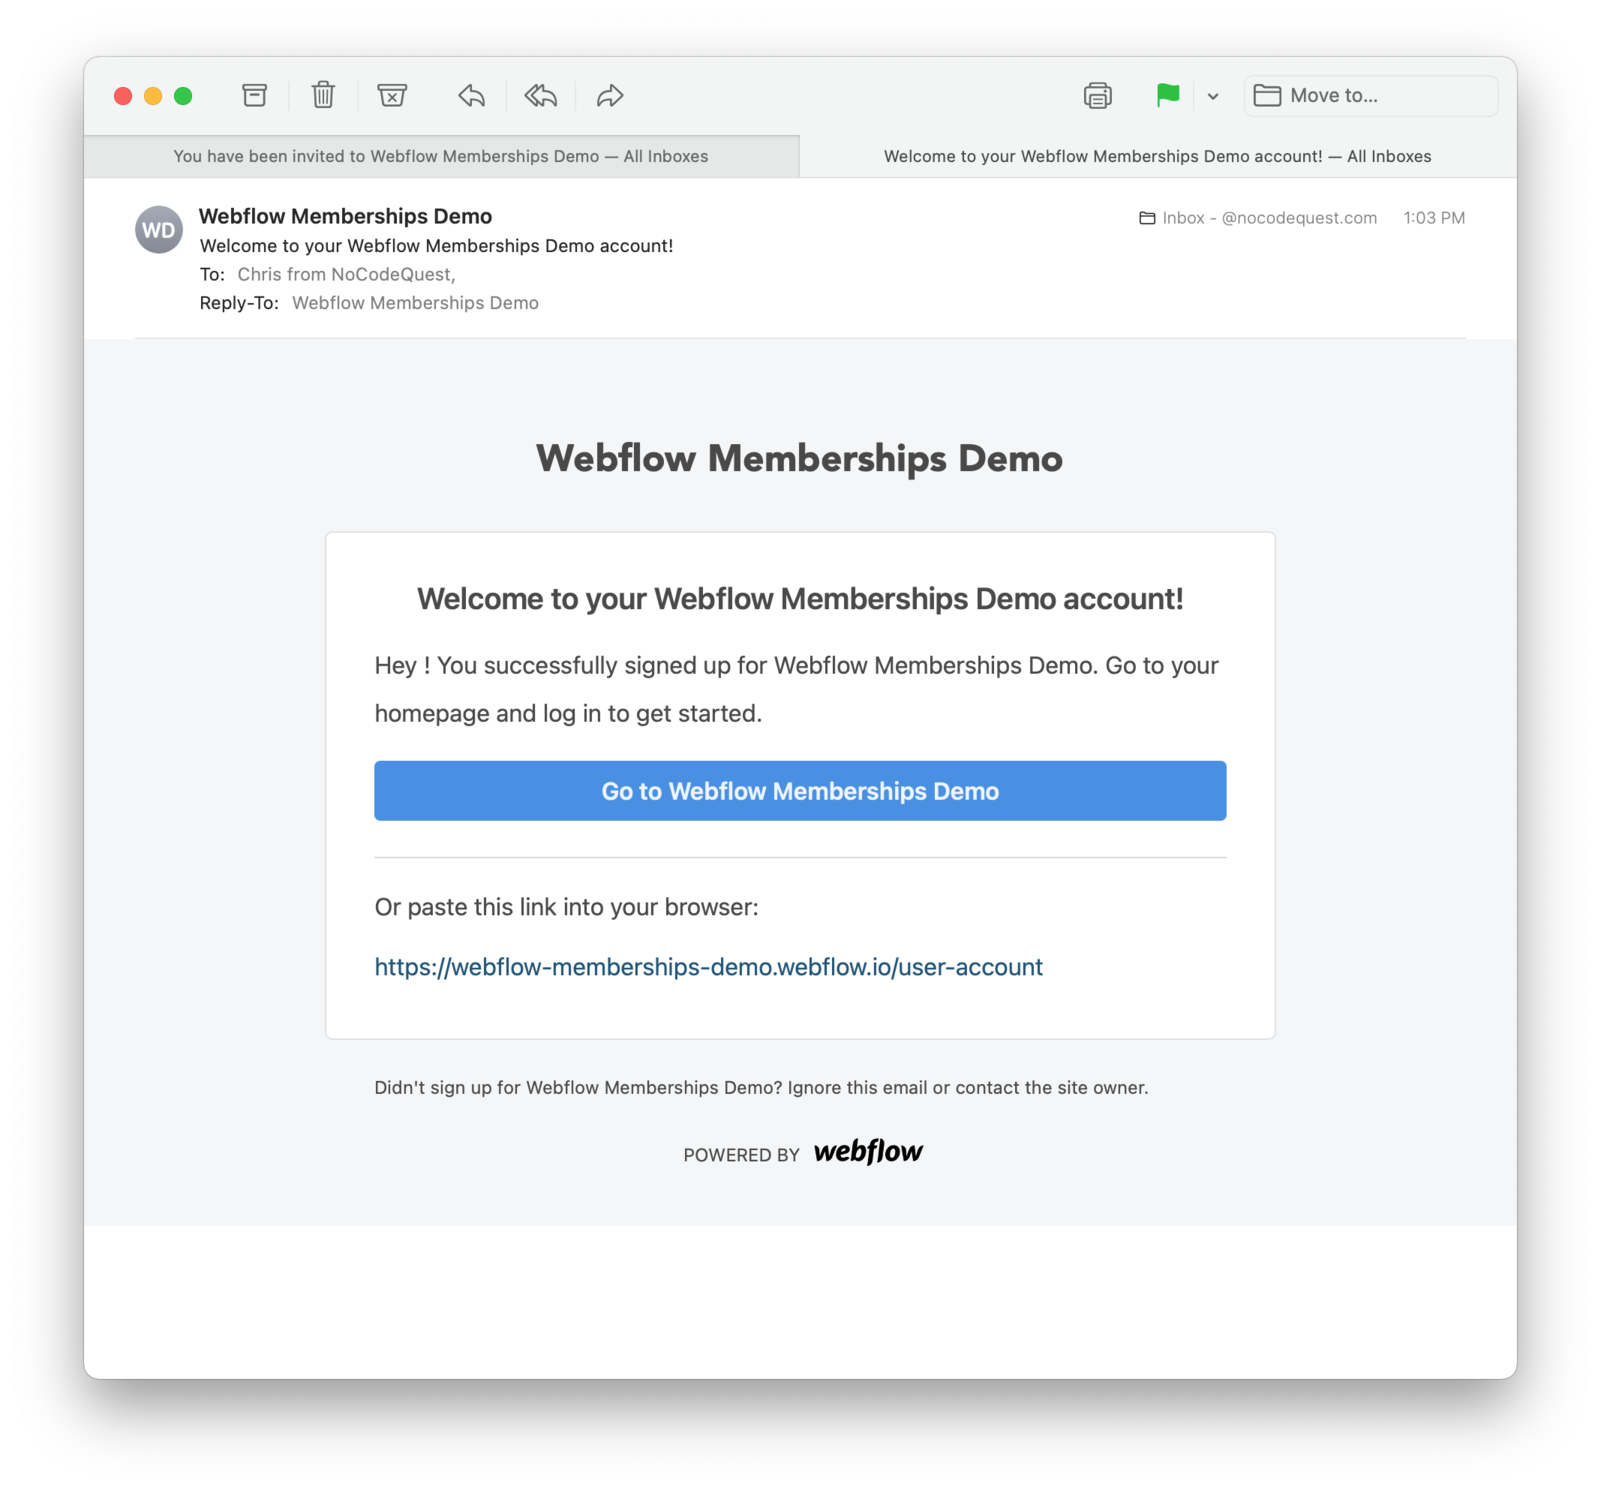 If you go back to your email client. You should also find a welcome email that'll have arrived after you successfully signed up.
Tap the “go to webflow memberships demo” button within the email.
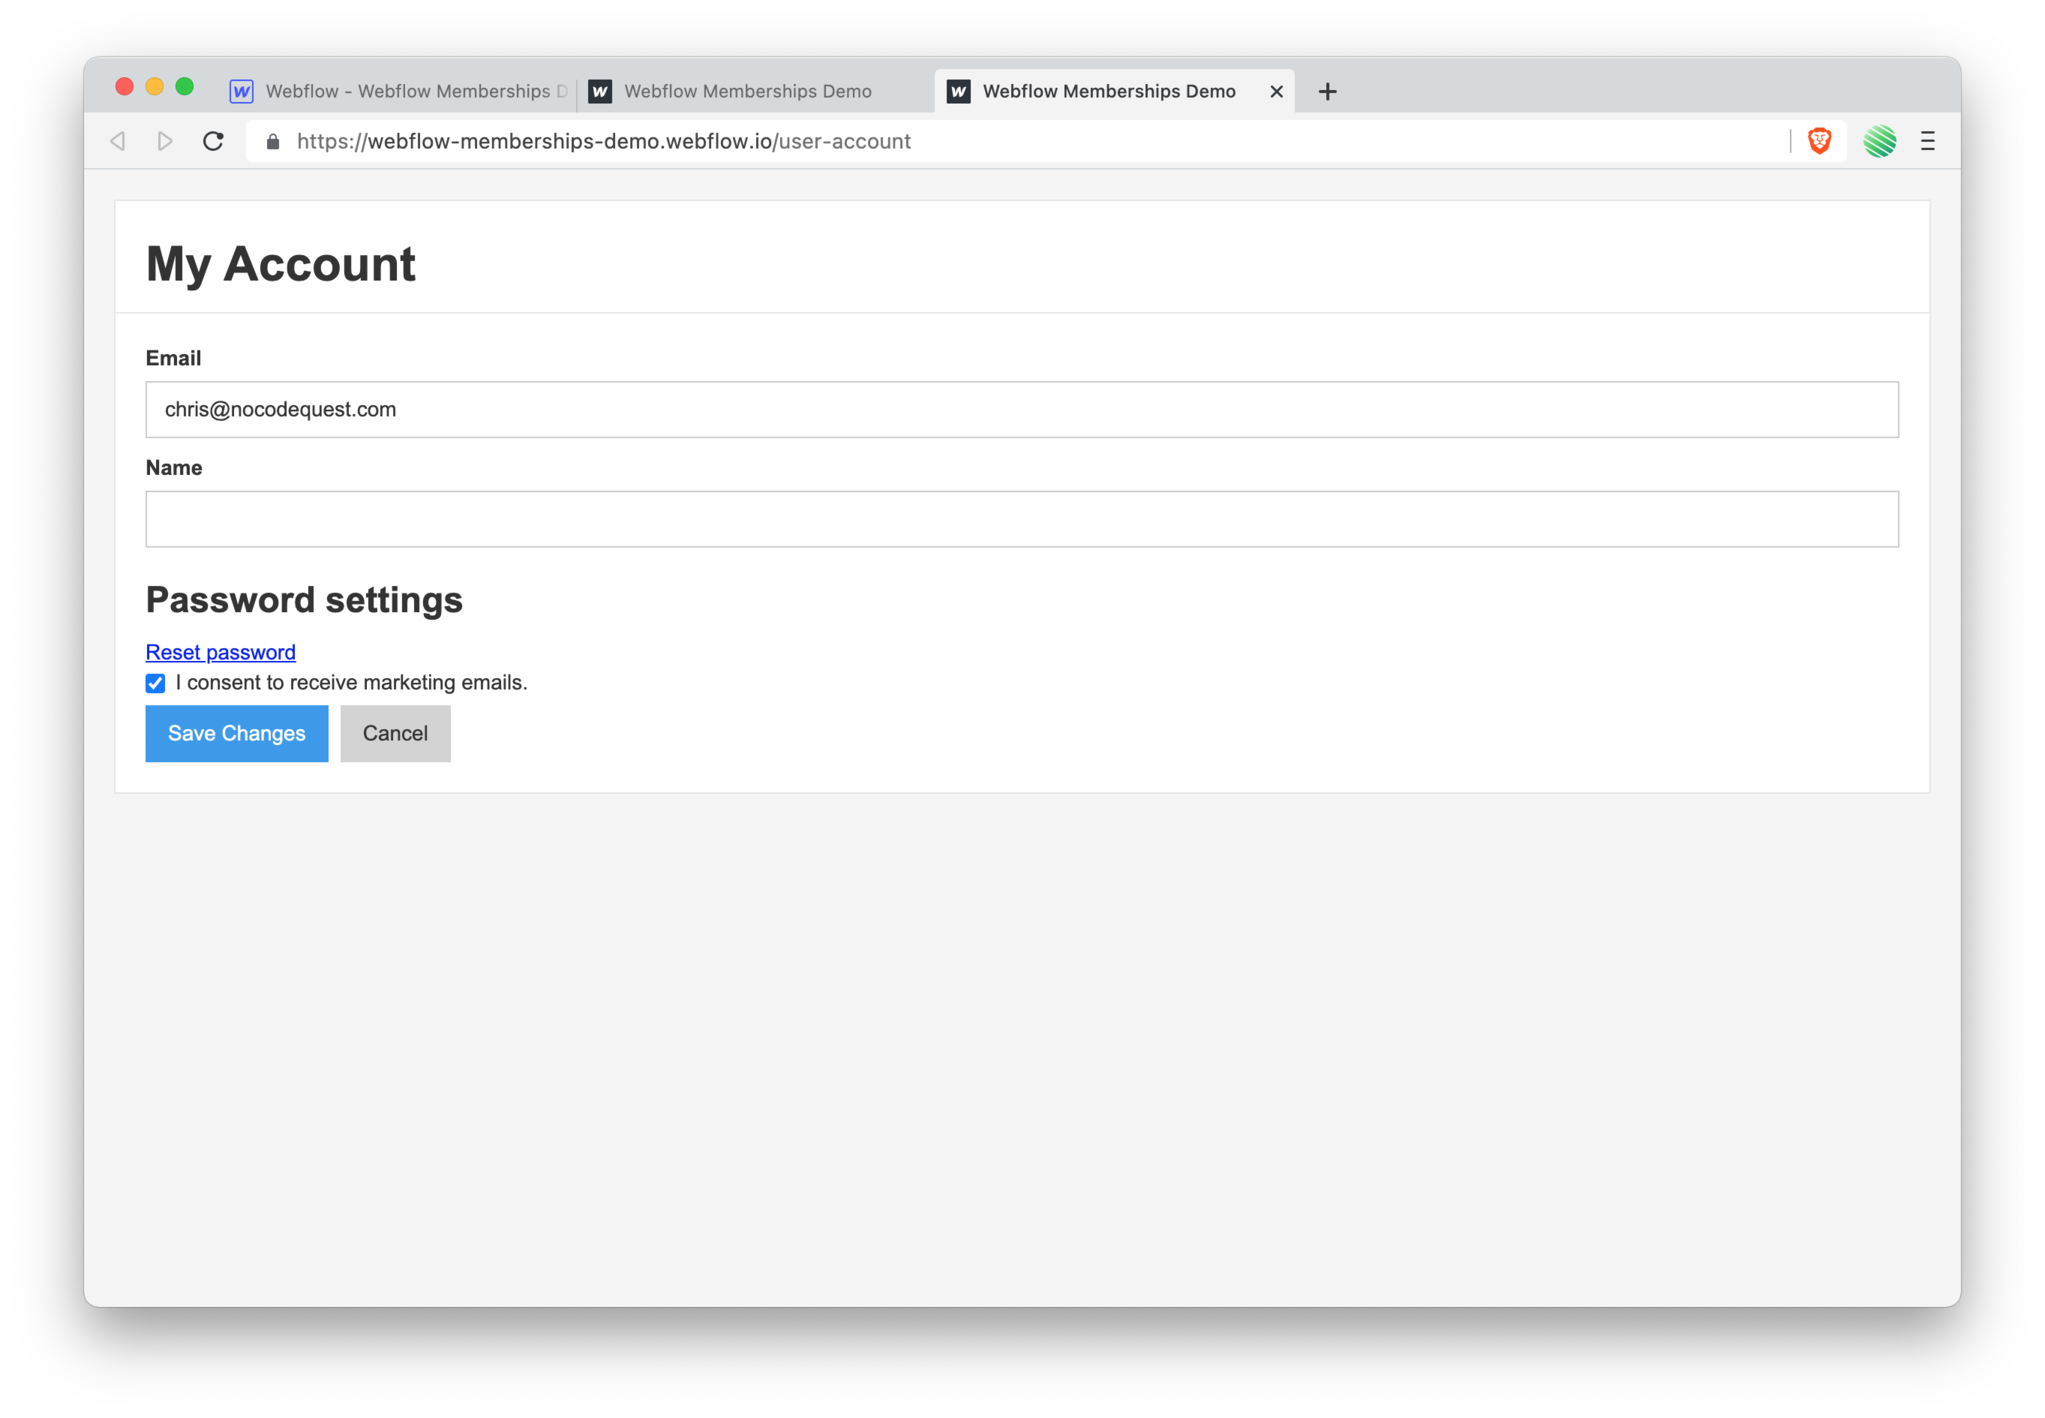 And find yourself on your account page. Ready for updating!
Create a Link to Members Only (Gated) Pages
 Back to the Webflow Designer.
 Open up the add elements pan.
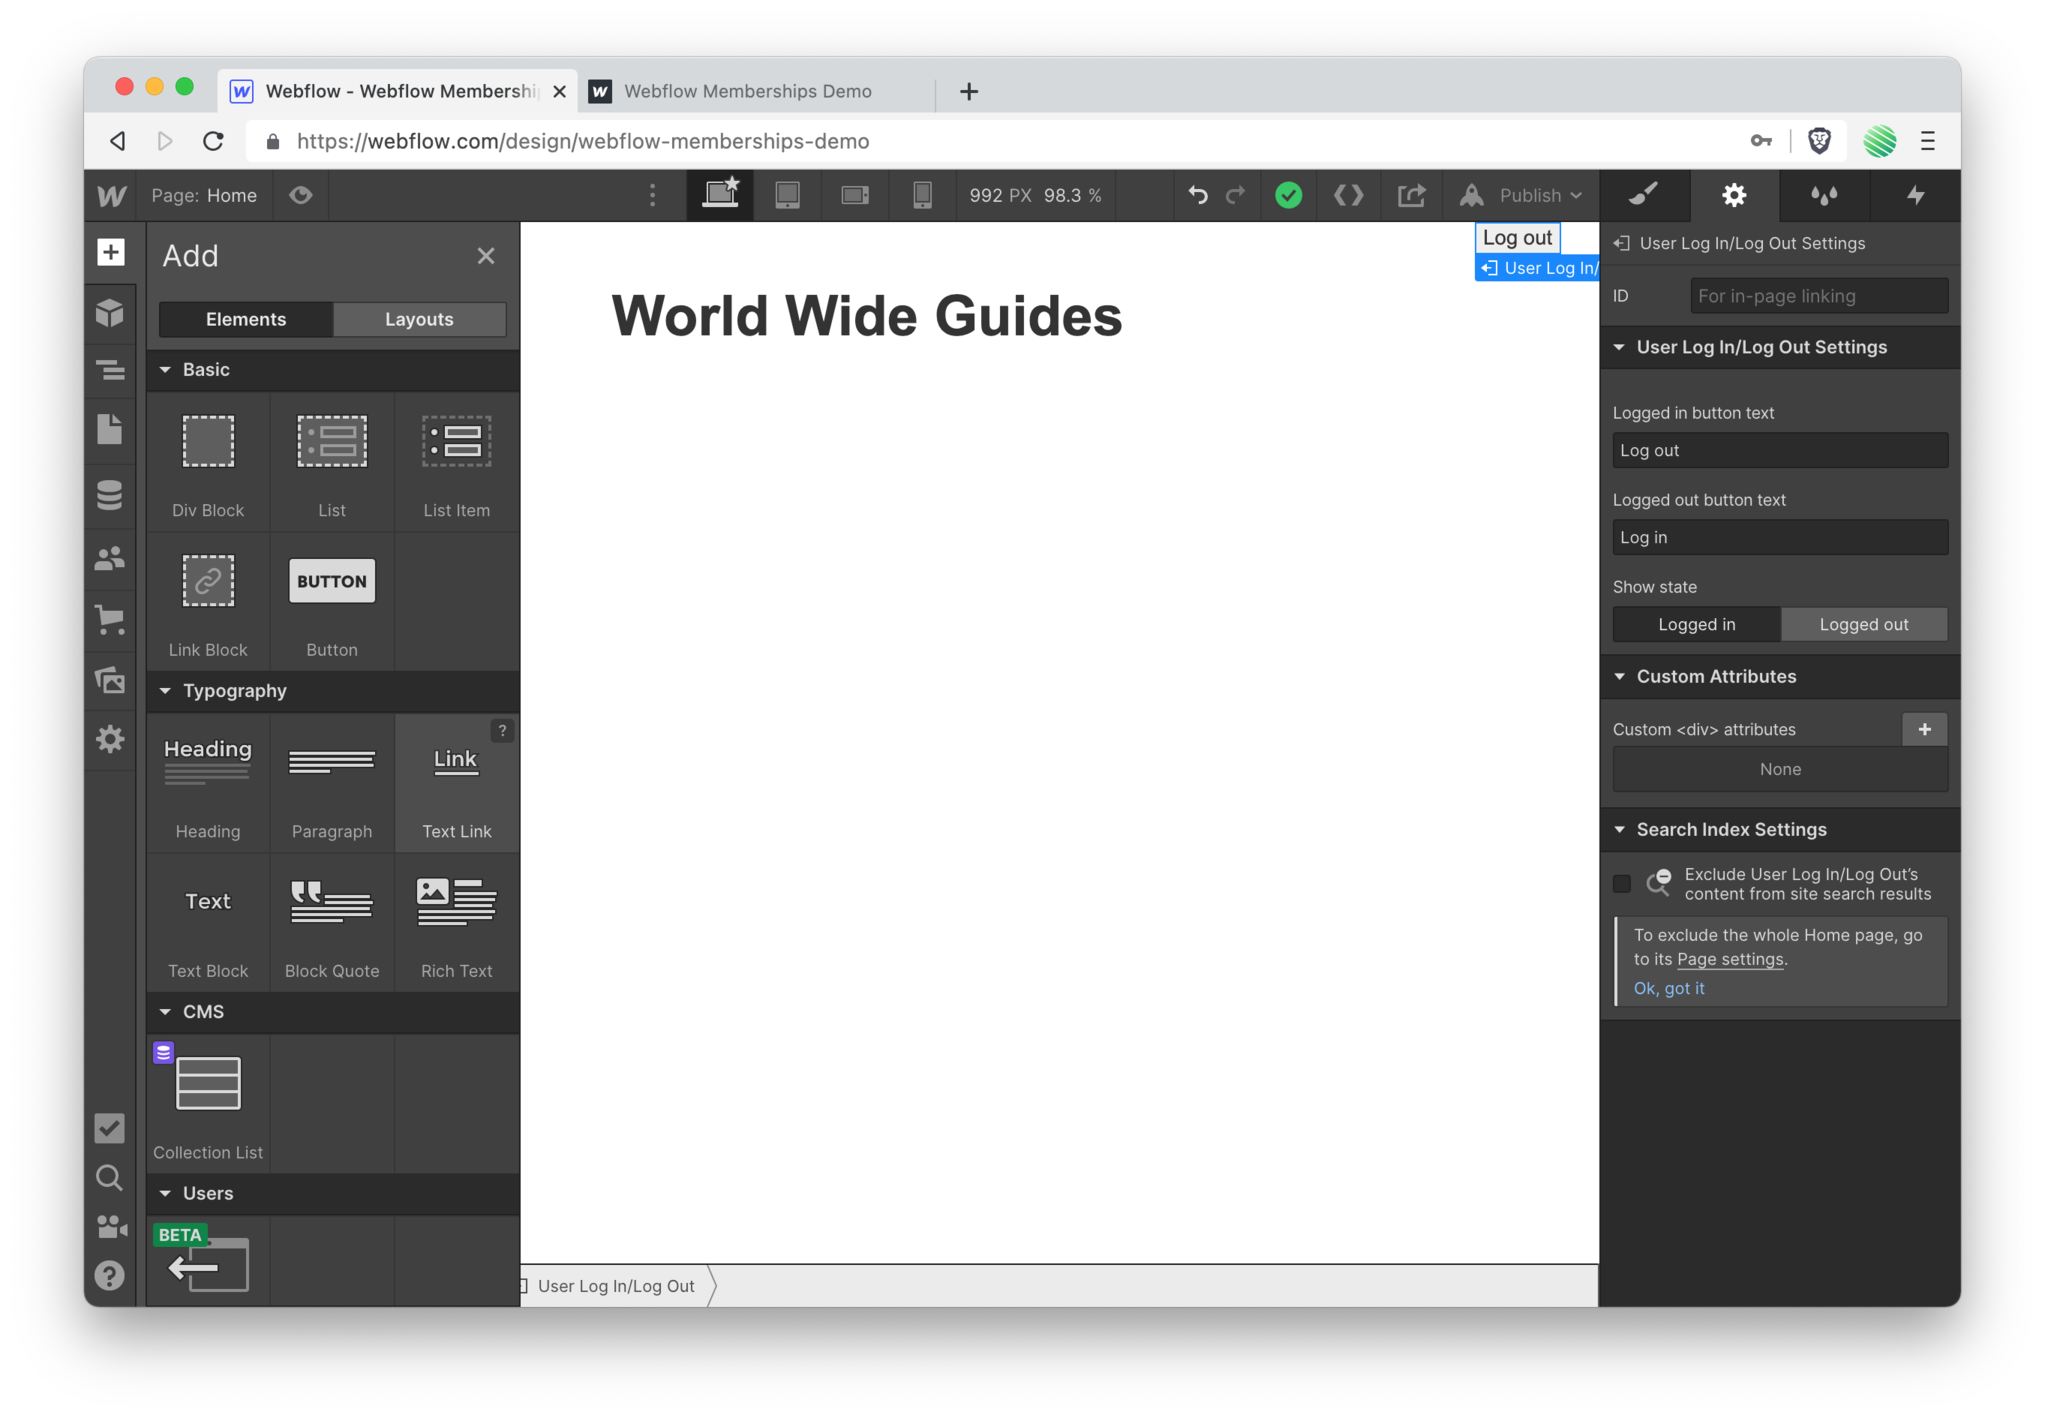 Find a text link element.
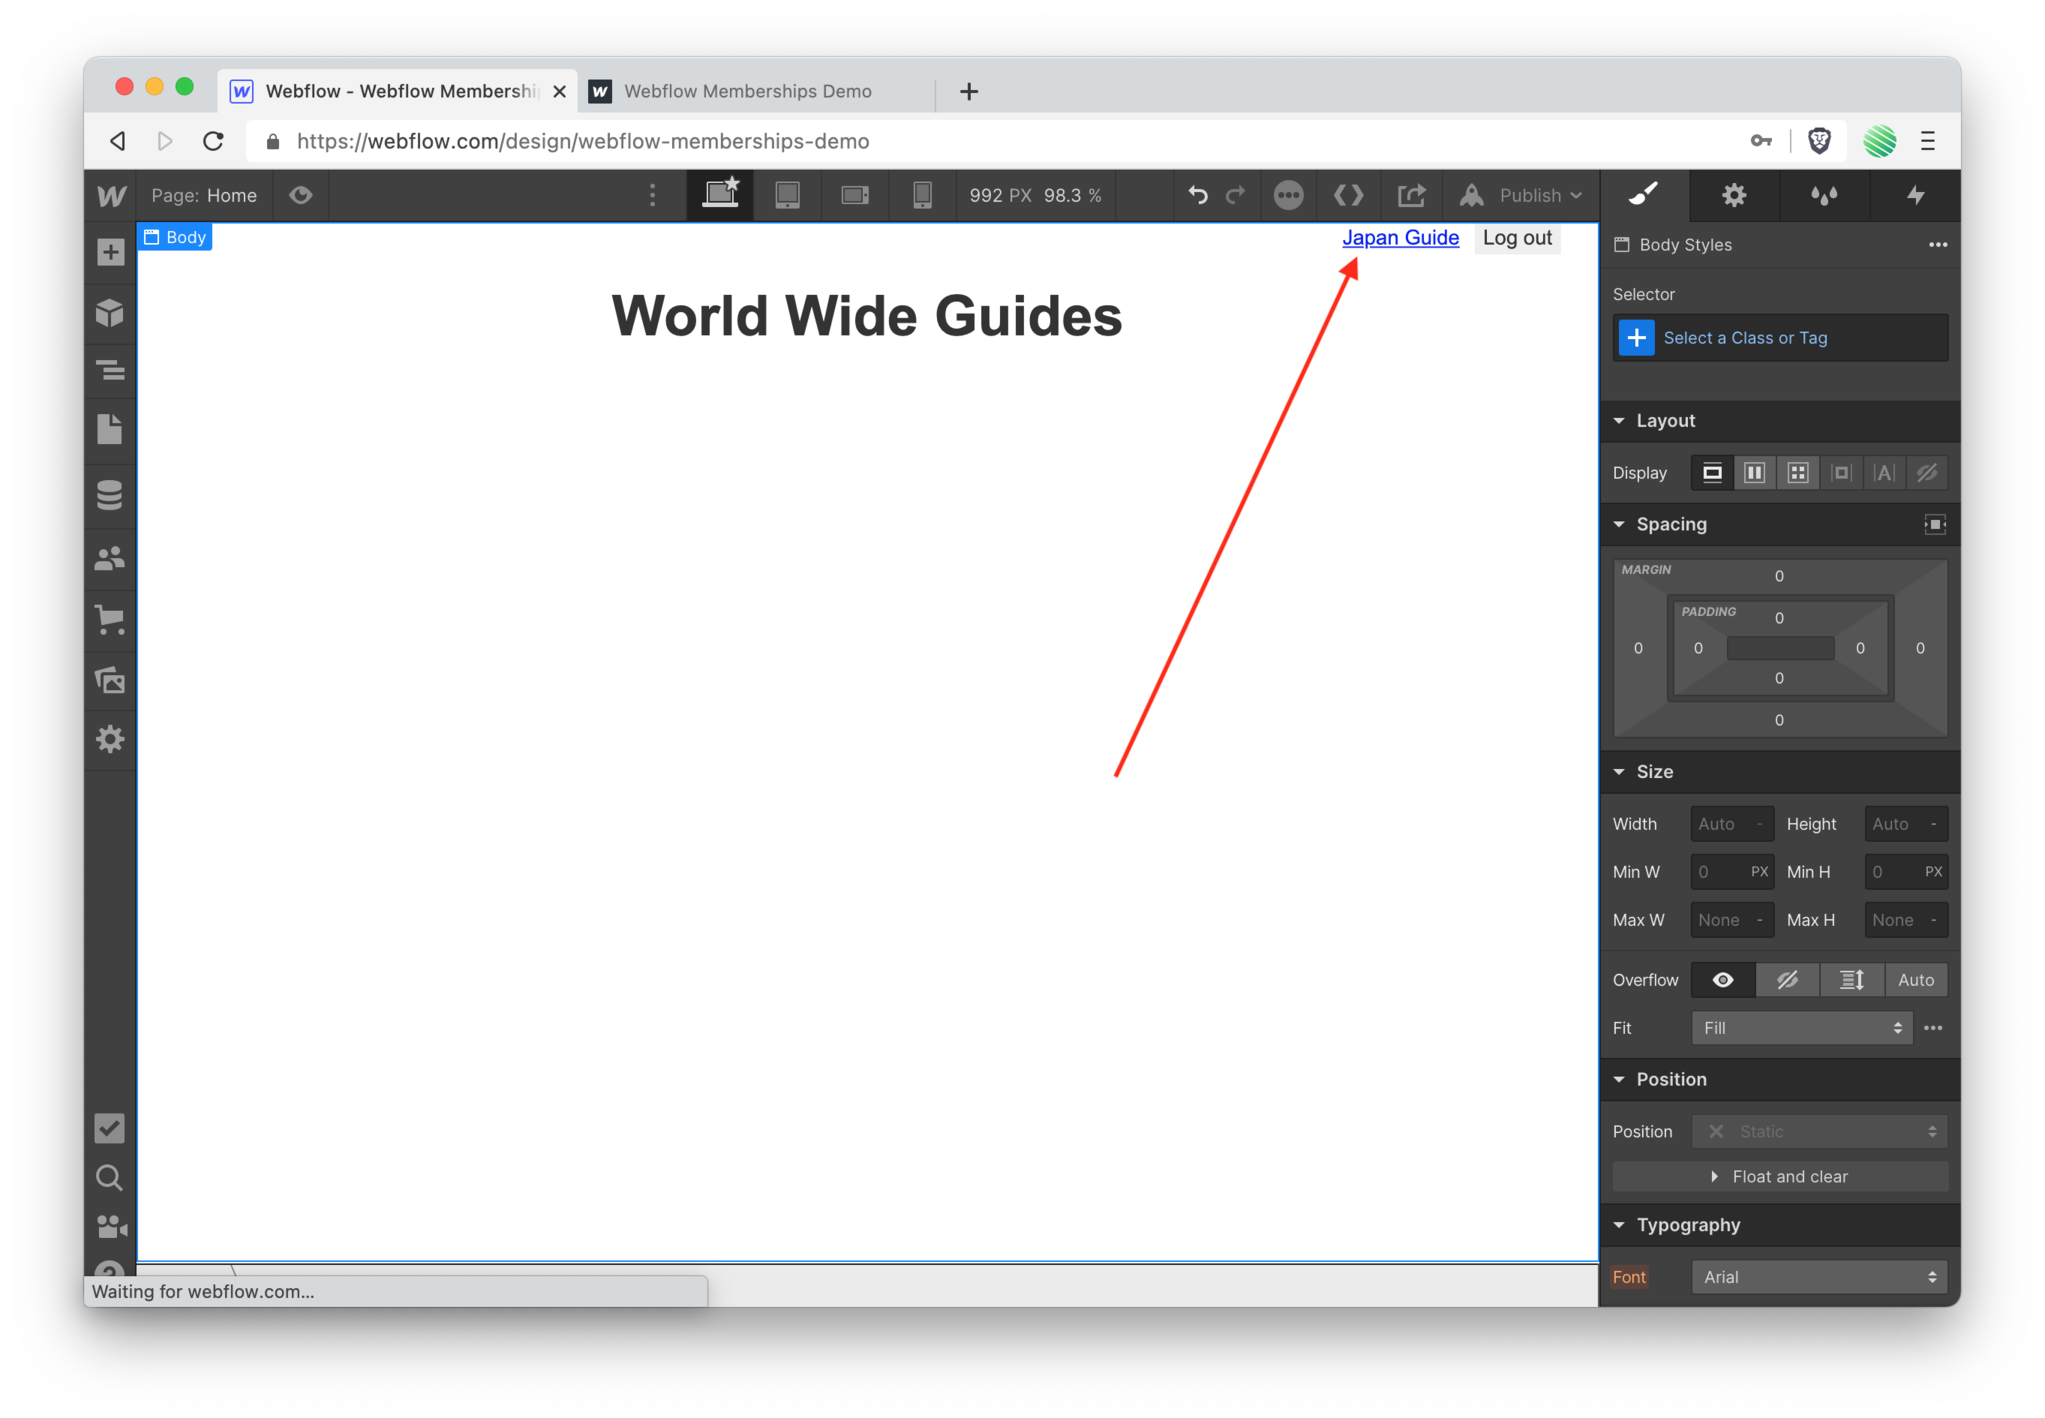
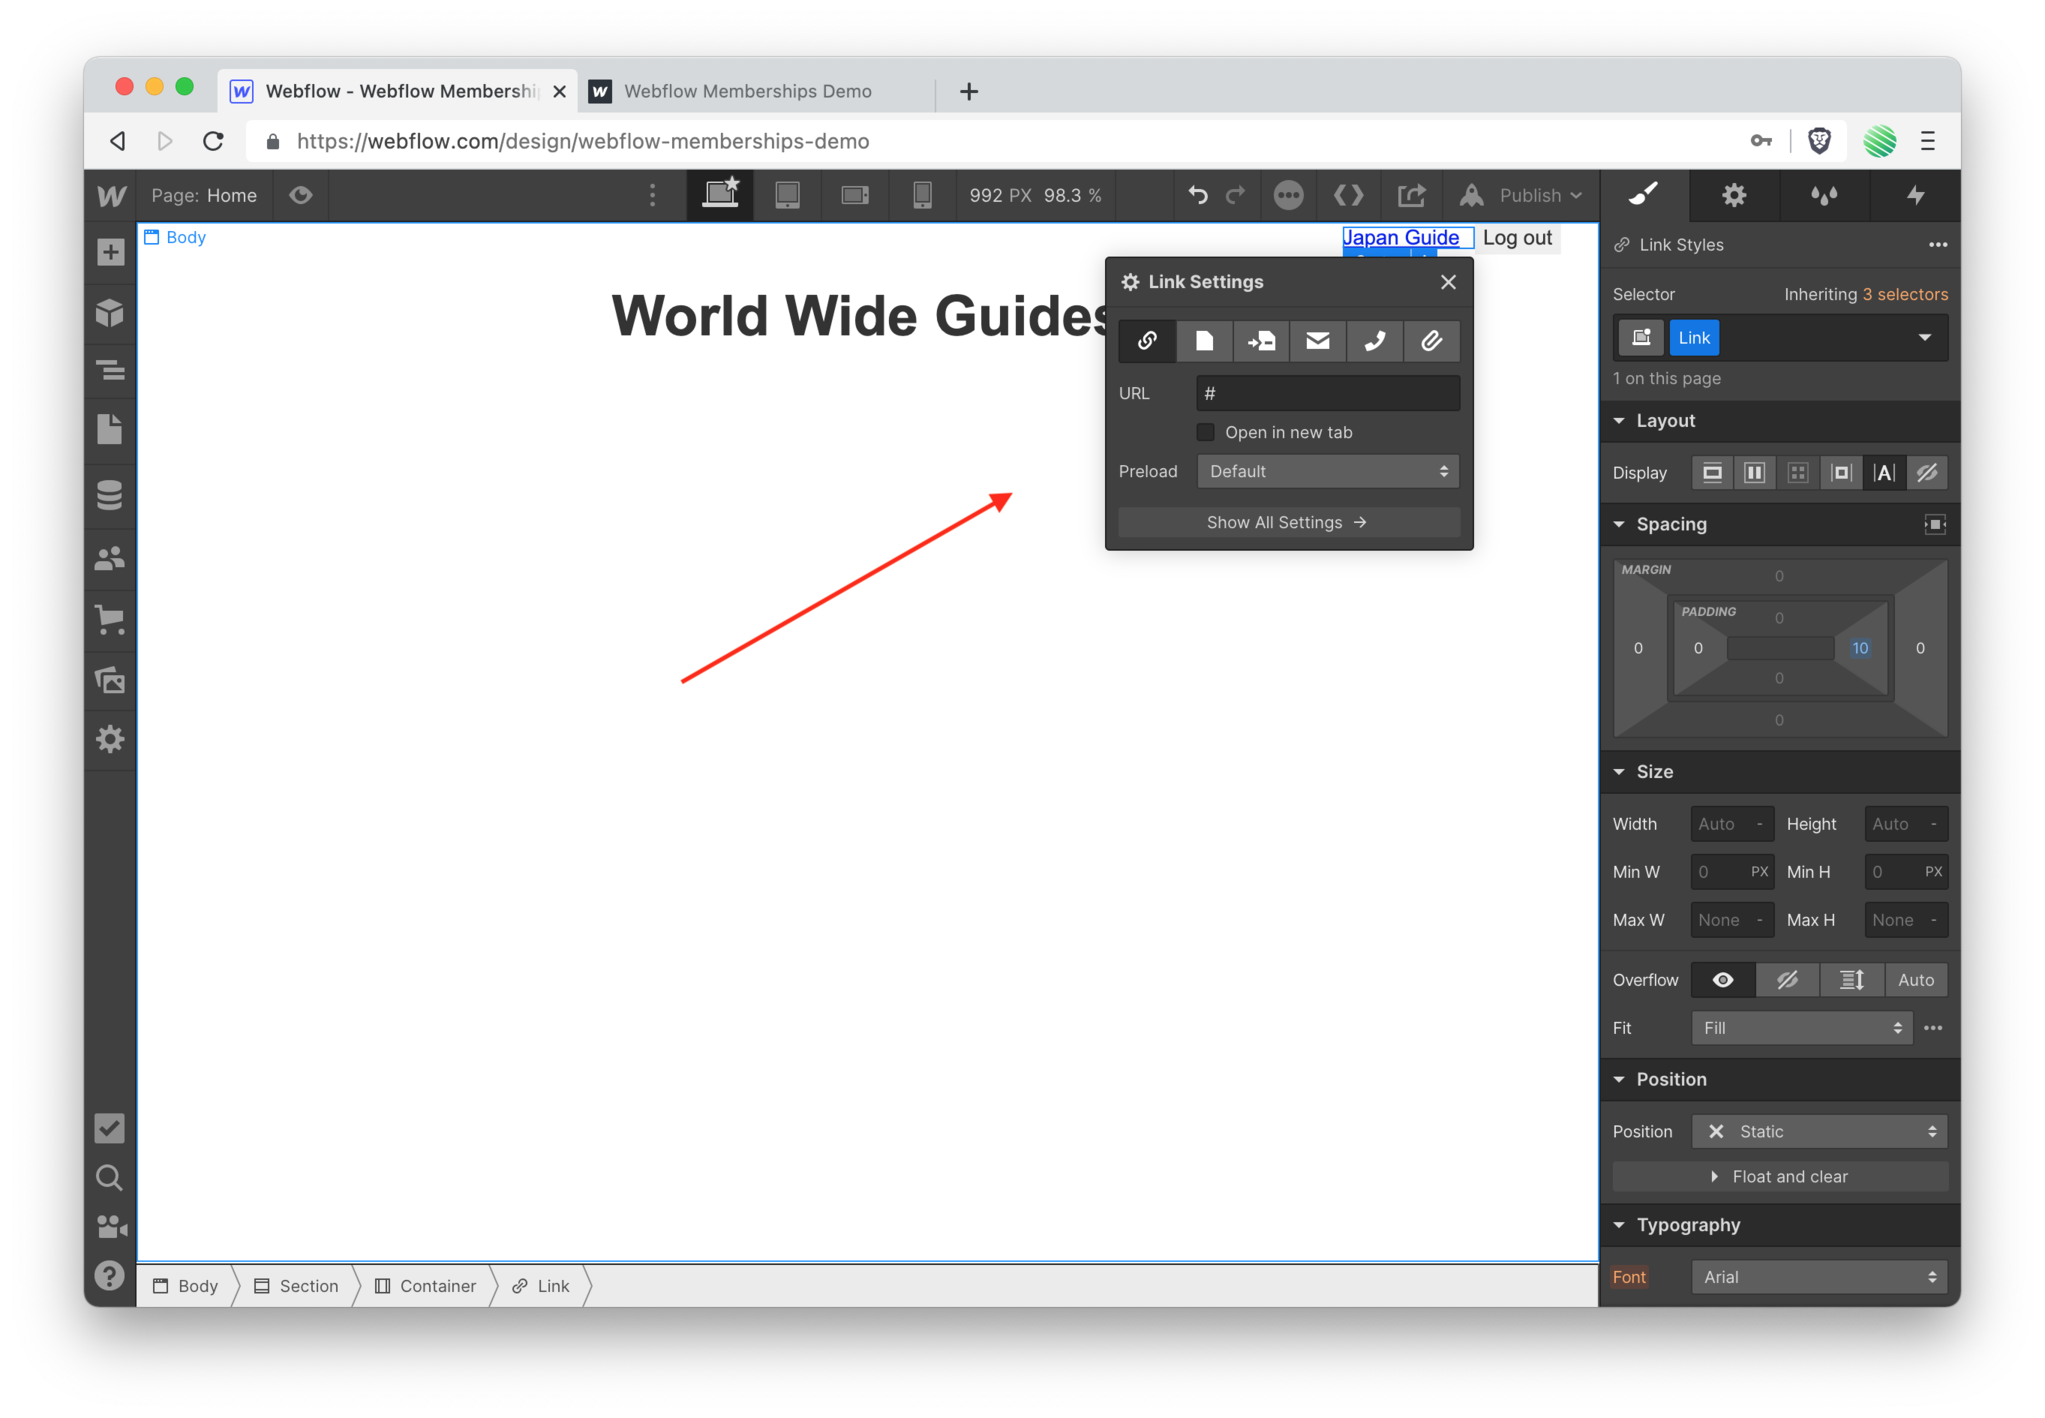 Add it to your top navigation and change the text.
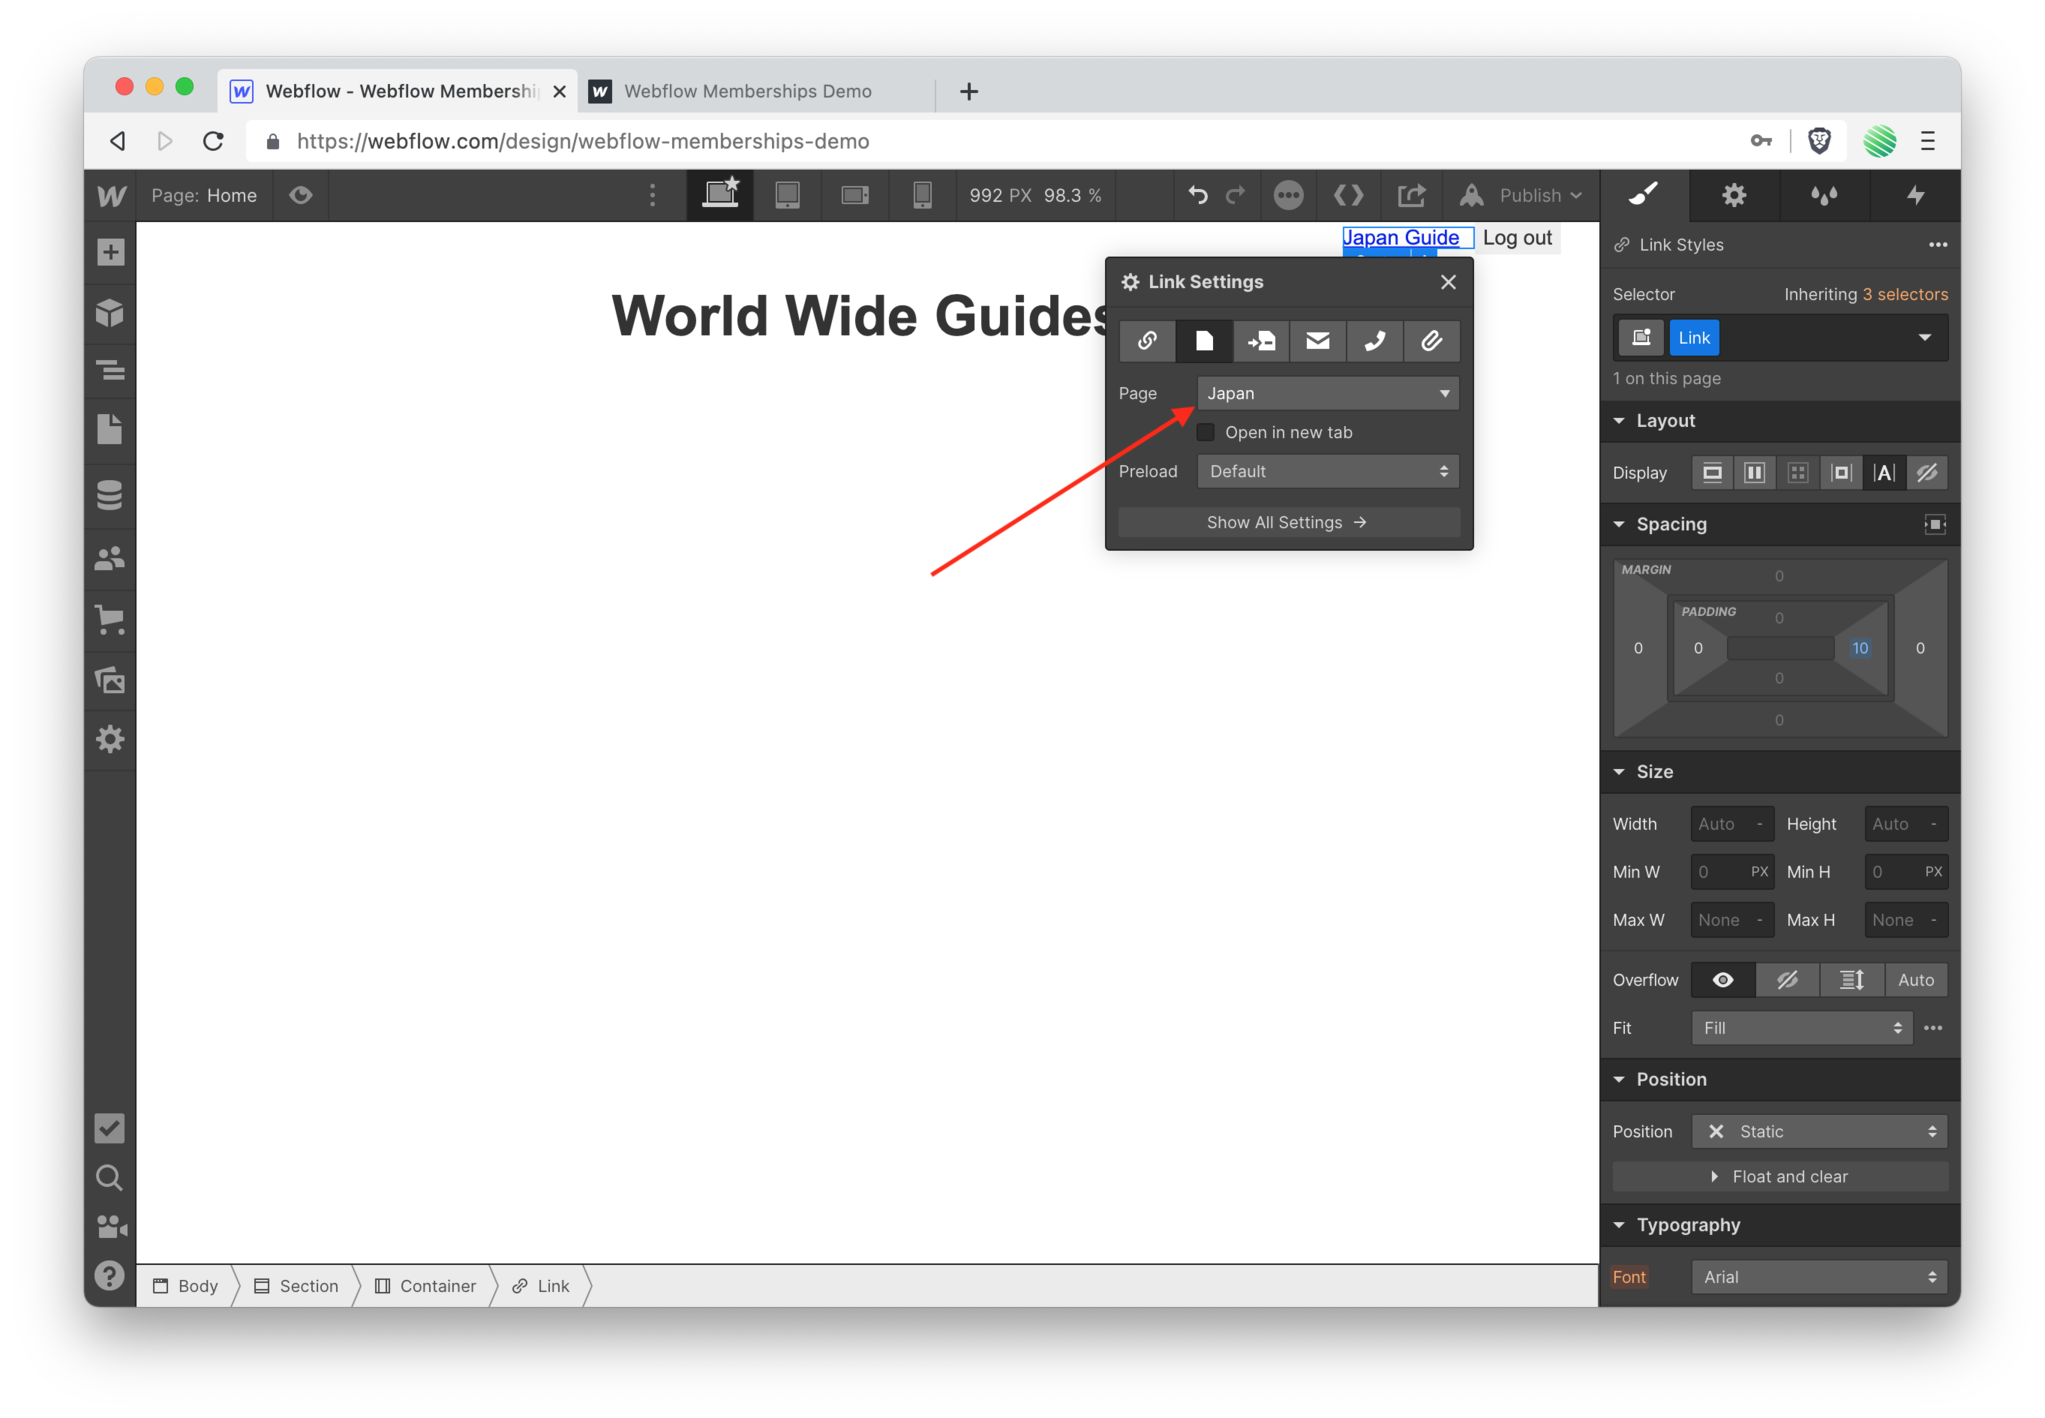
 Select the "Page" option.
 Tap on the "Choose a page..." dropdown.
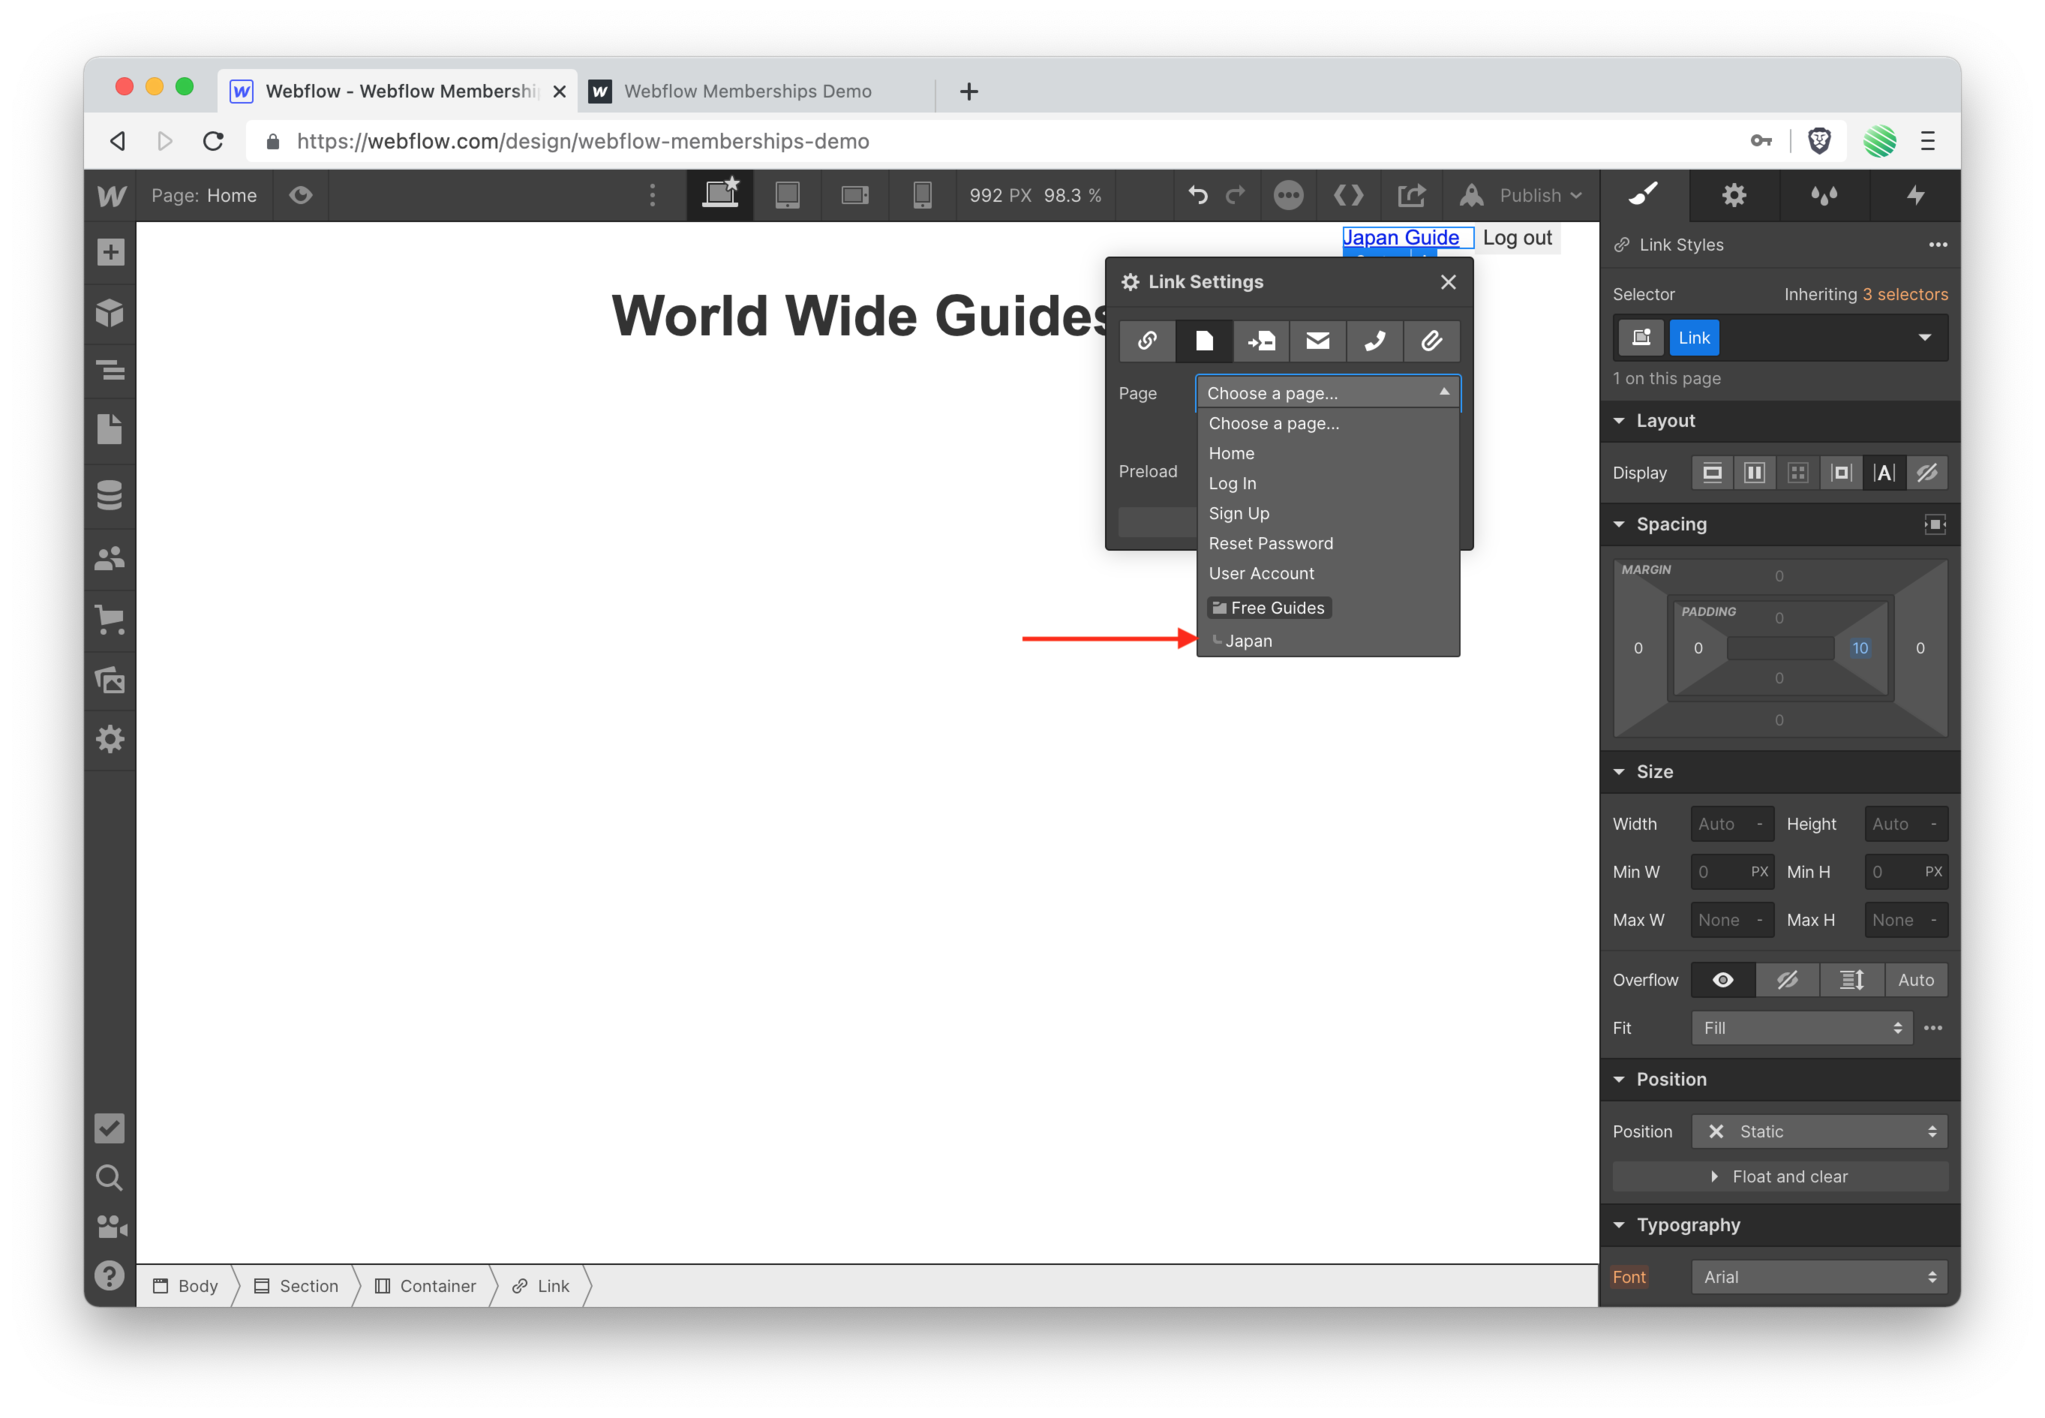 Choose your access controlled static page.
 Re-publish your site.
 Flip back to your live site and reload the browser tab.
 Find you new link and tap it.
 💥 Boom!
Test Log In / Log Out Button
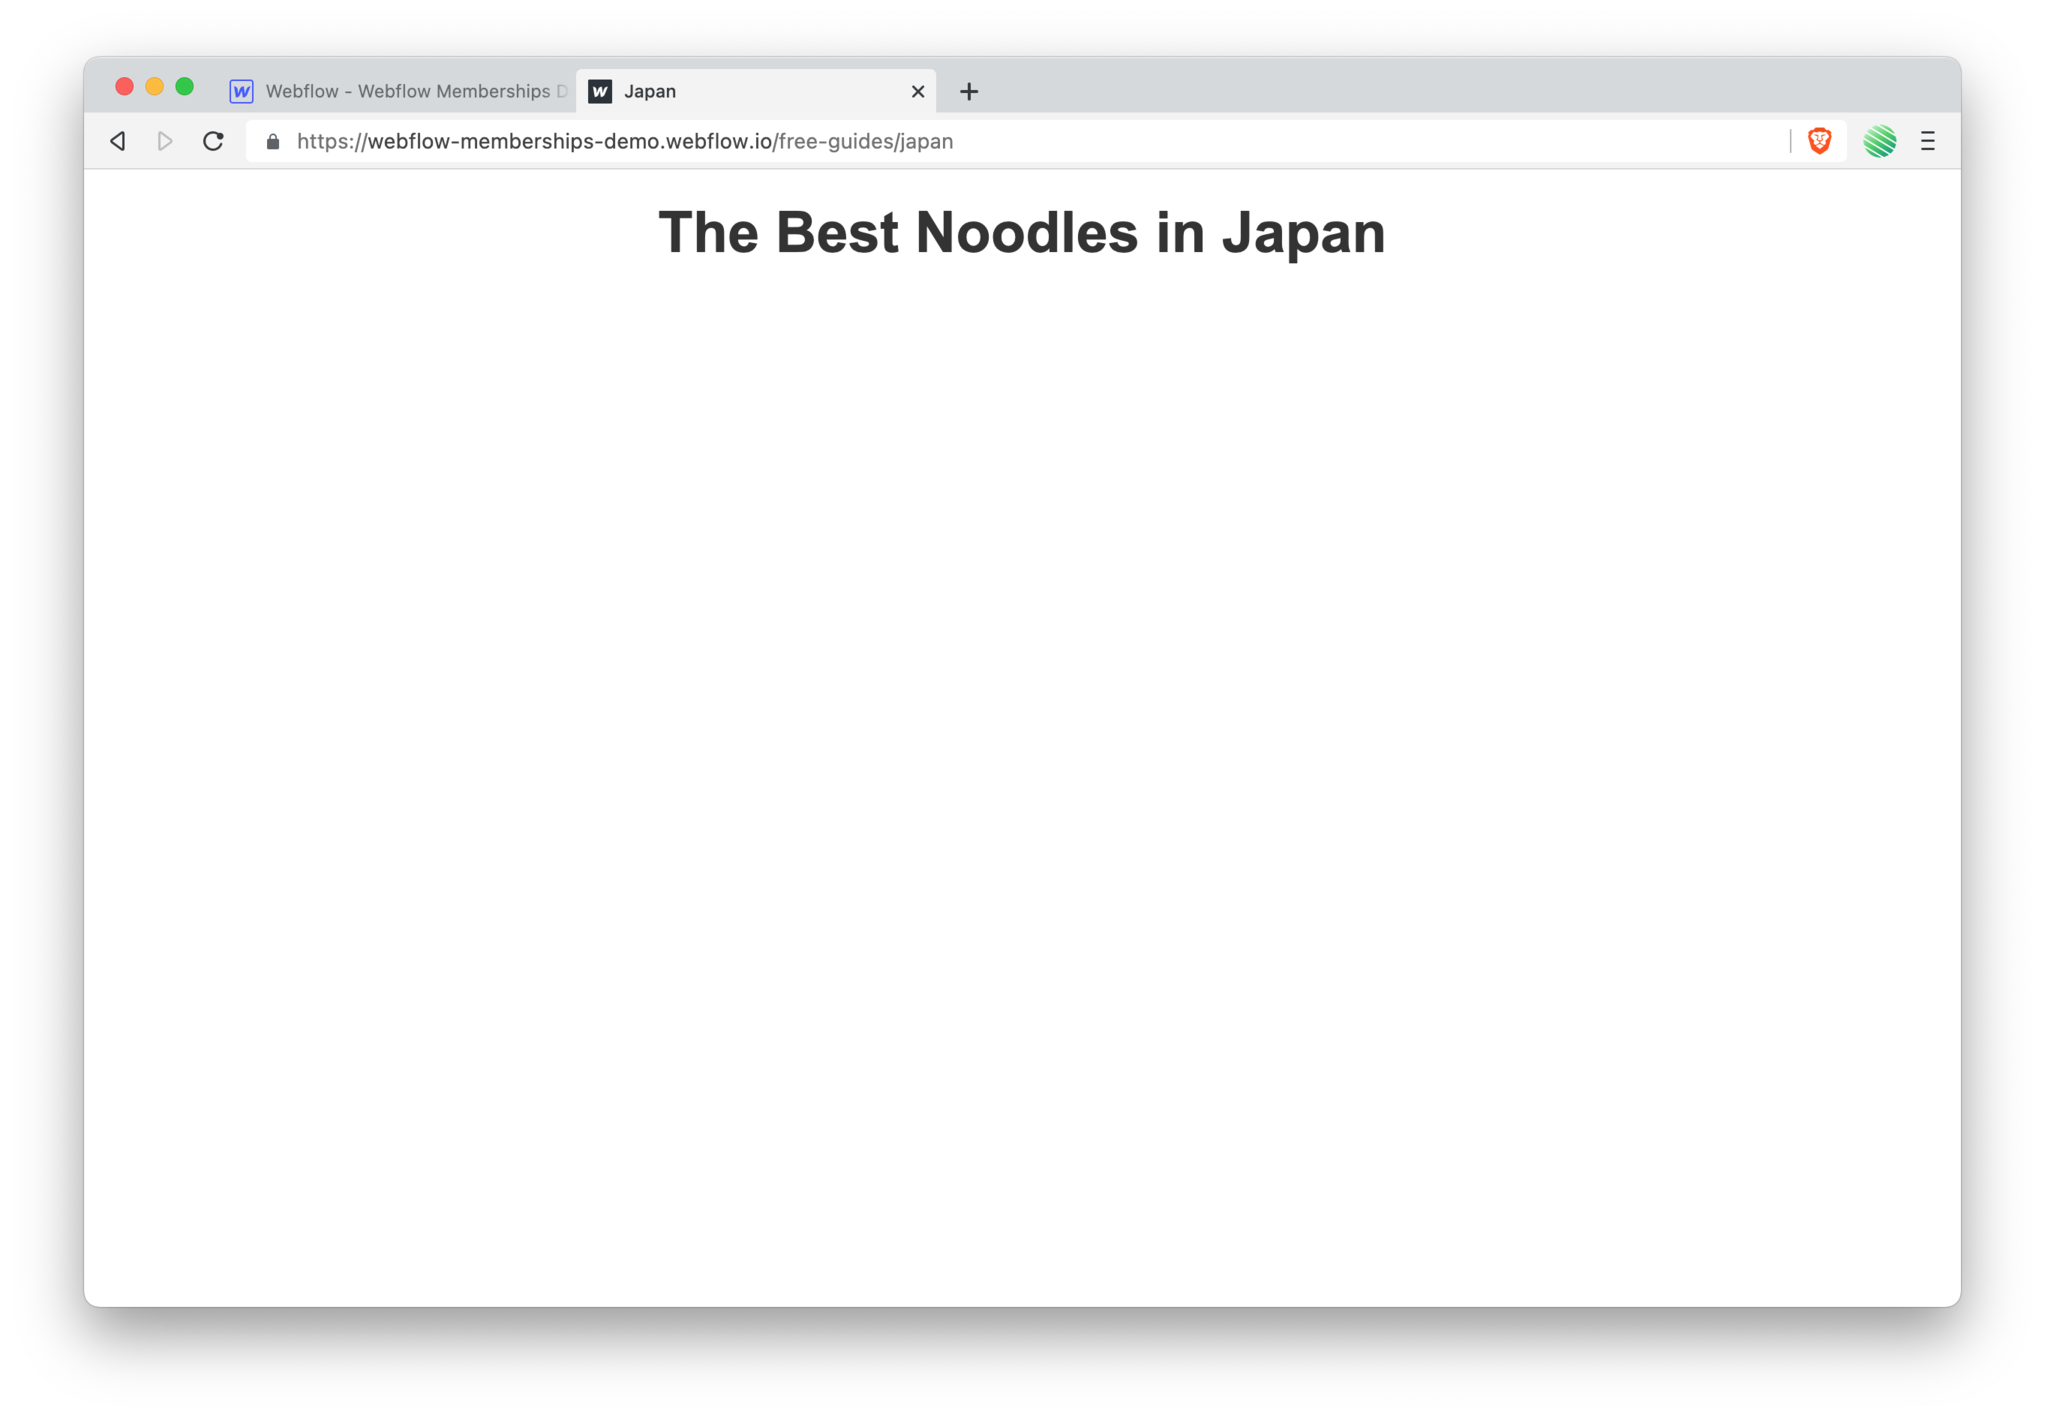
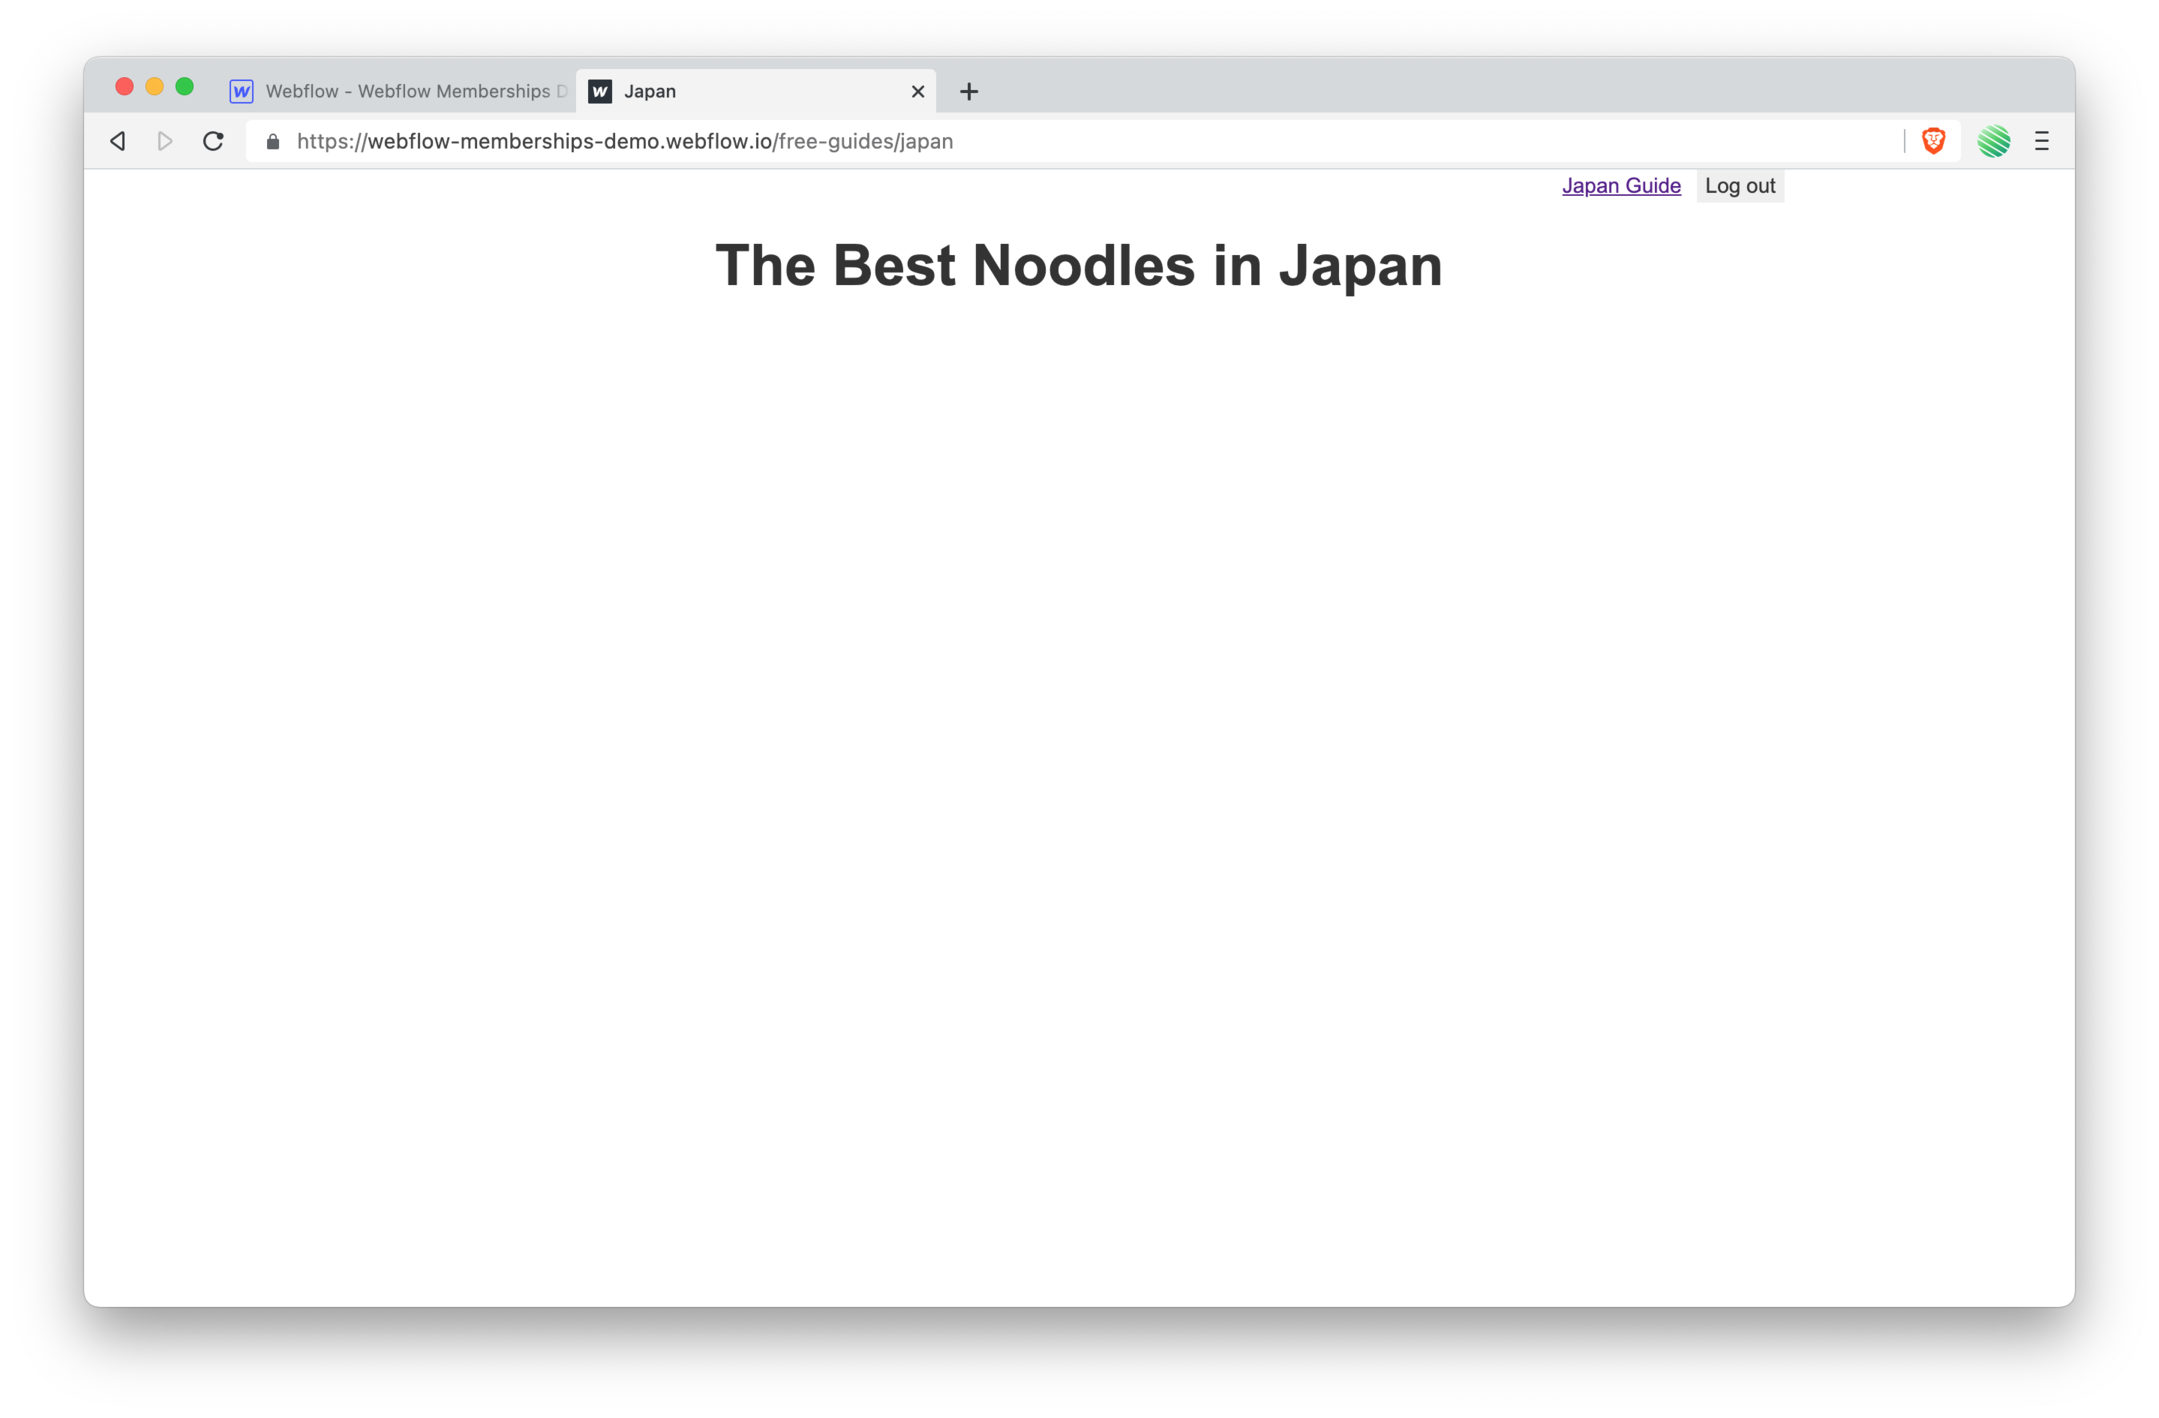
You’re in a gated, password protect static page on your Webflow site.
Let’s test that this actually works!
 Go back to the home page and log out.
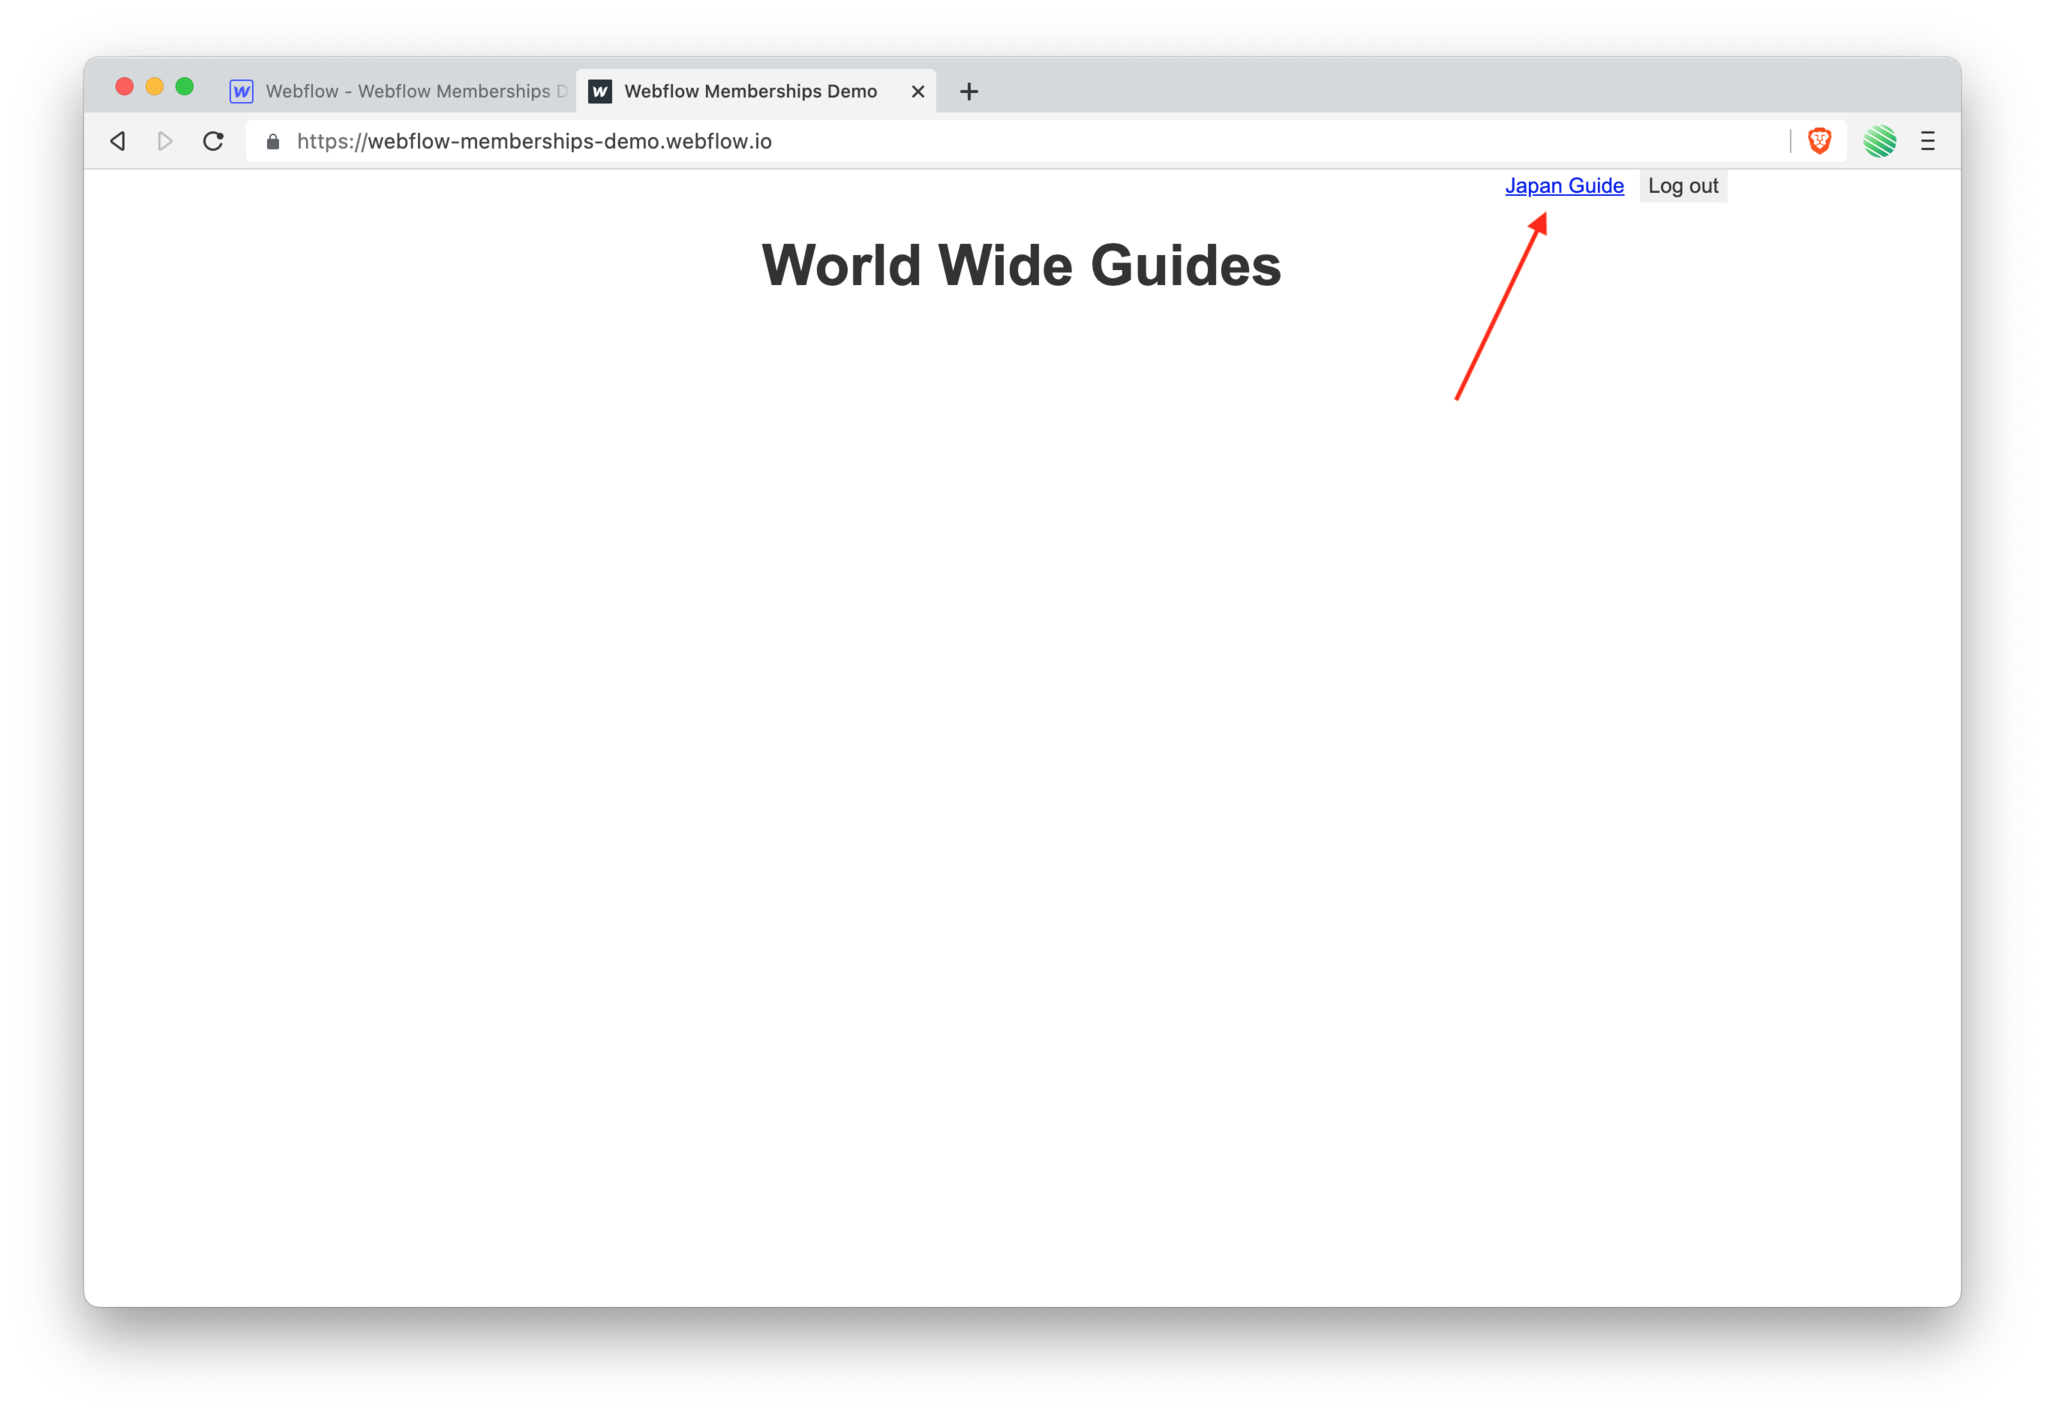
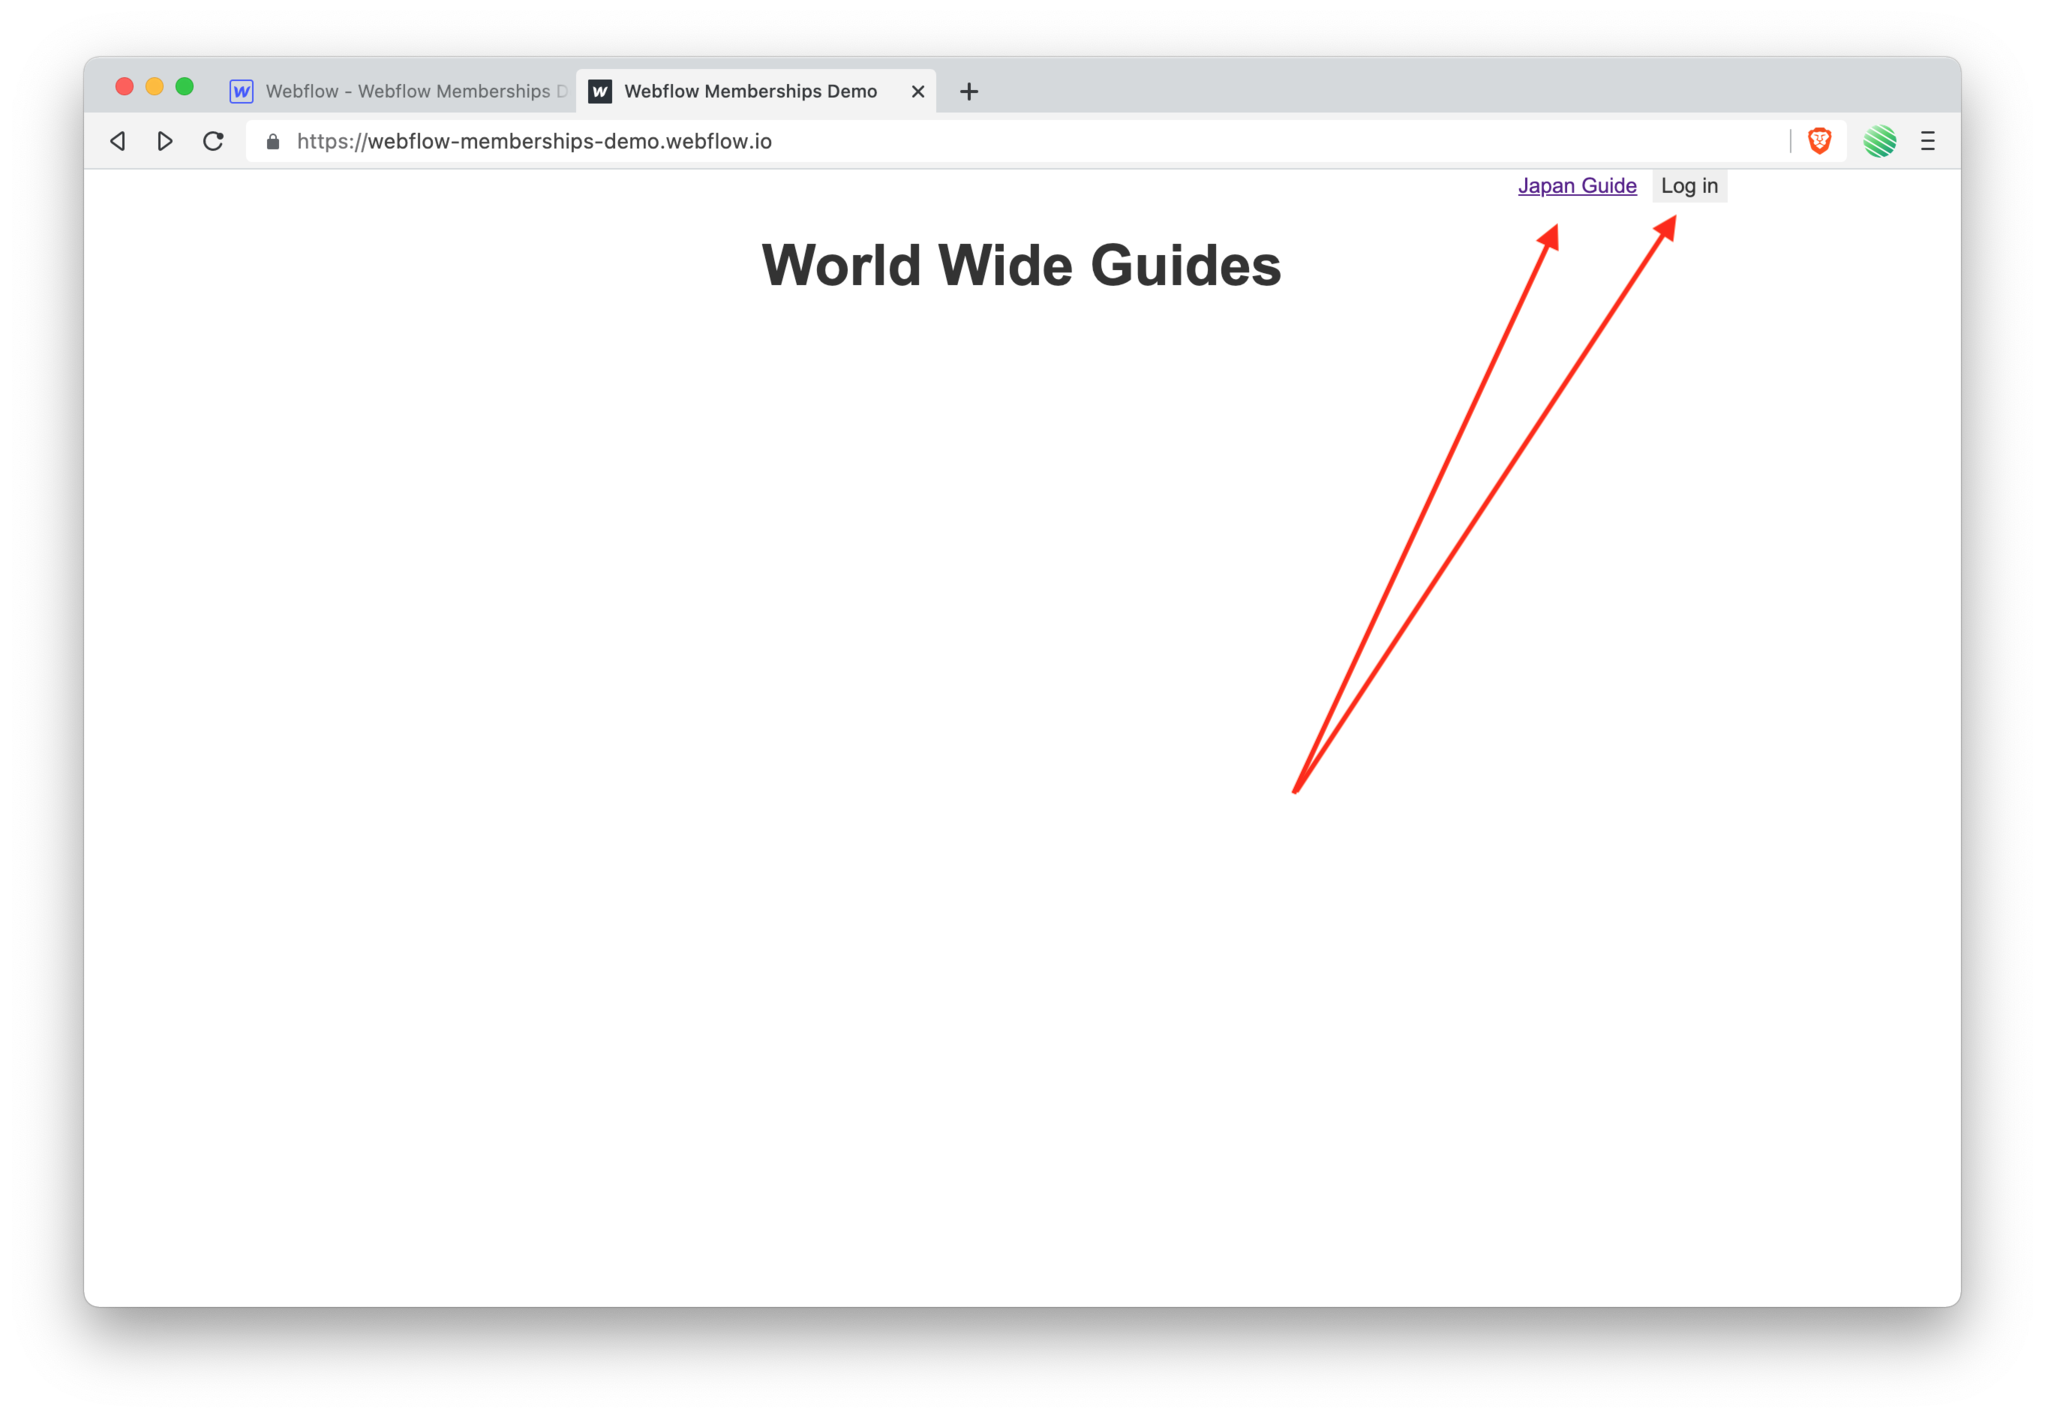 Notice that the button changed from log out to log in, meaning you are now officially logged out.
But you can still see the “japan guide” link which is a password protected (gated) page.
What happens if you tap that link? Can you access that page?
Give it a try. Tap the “japan guide” link.
 💥 Bam!
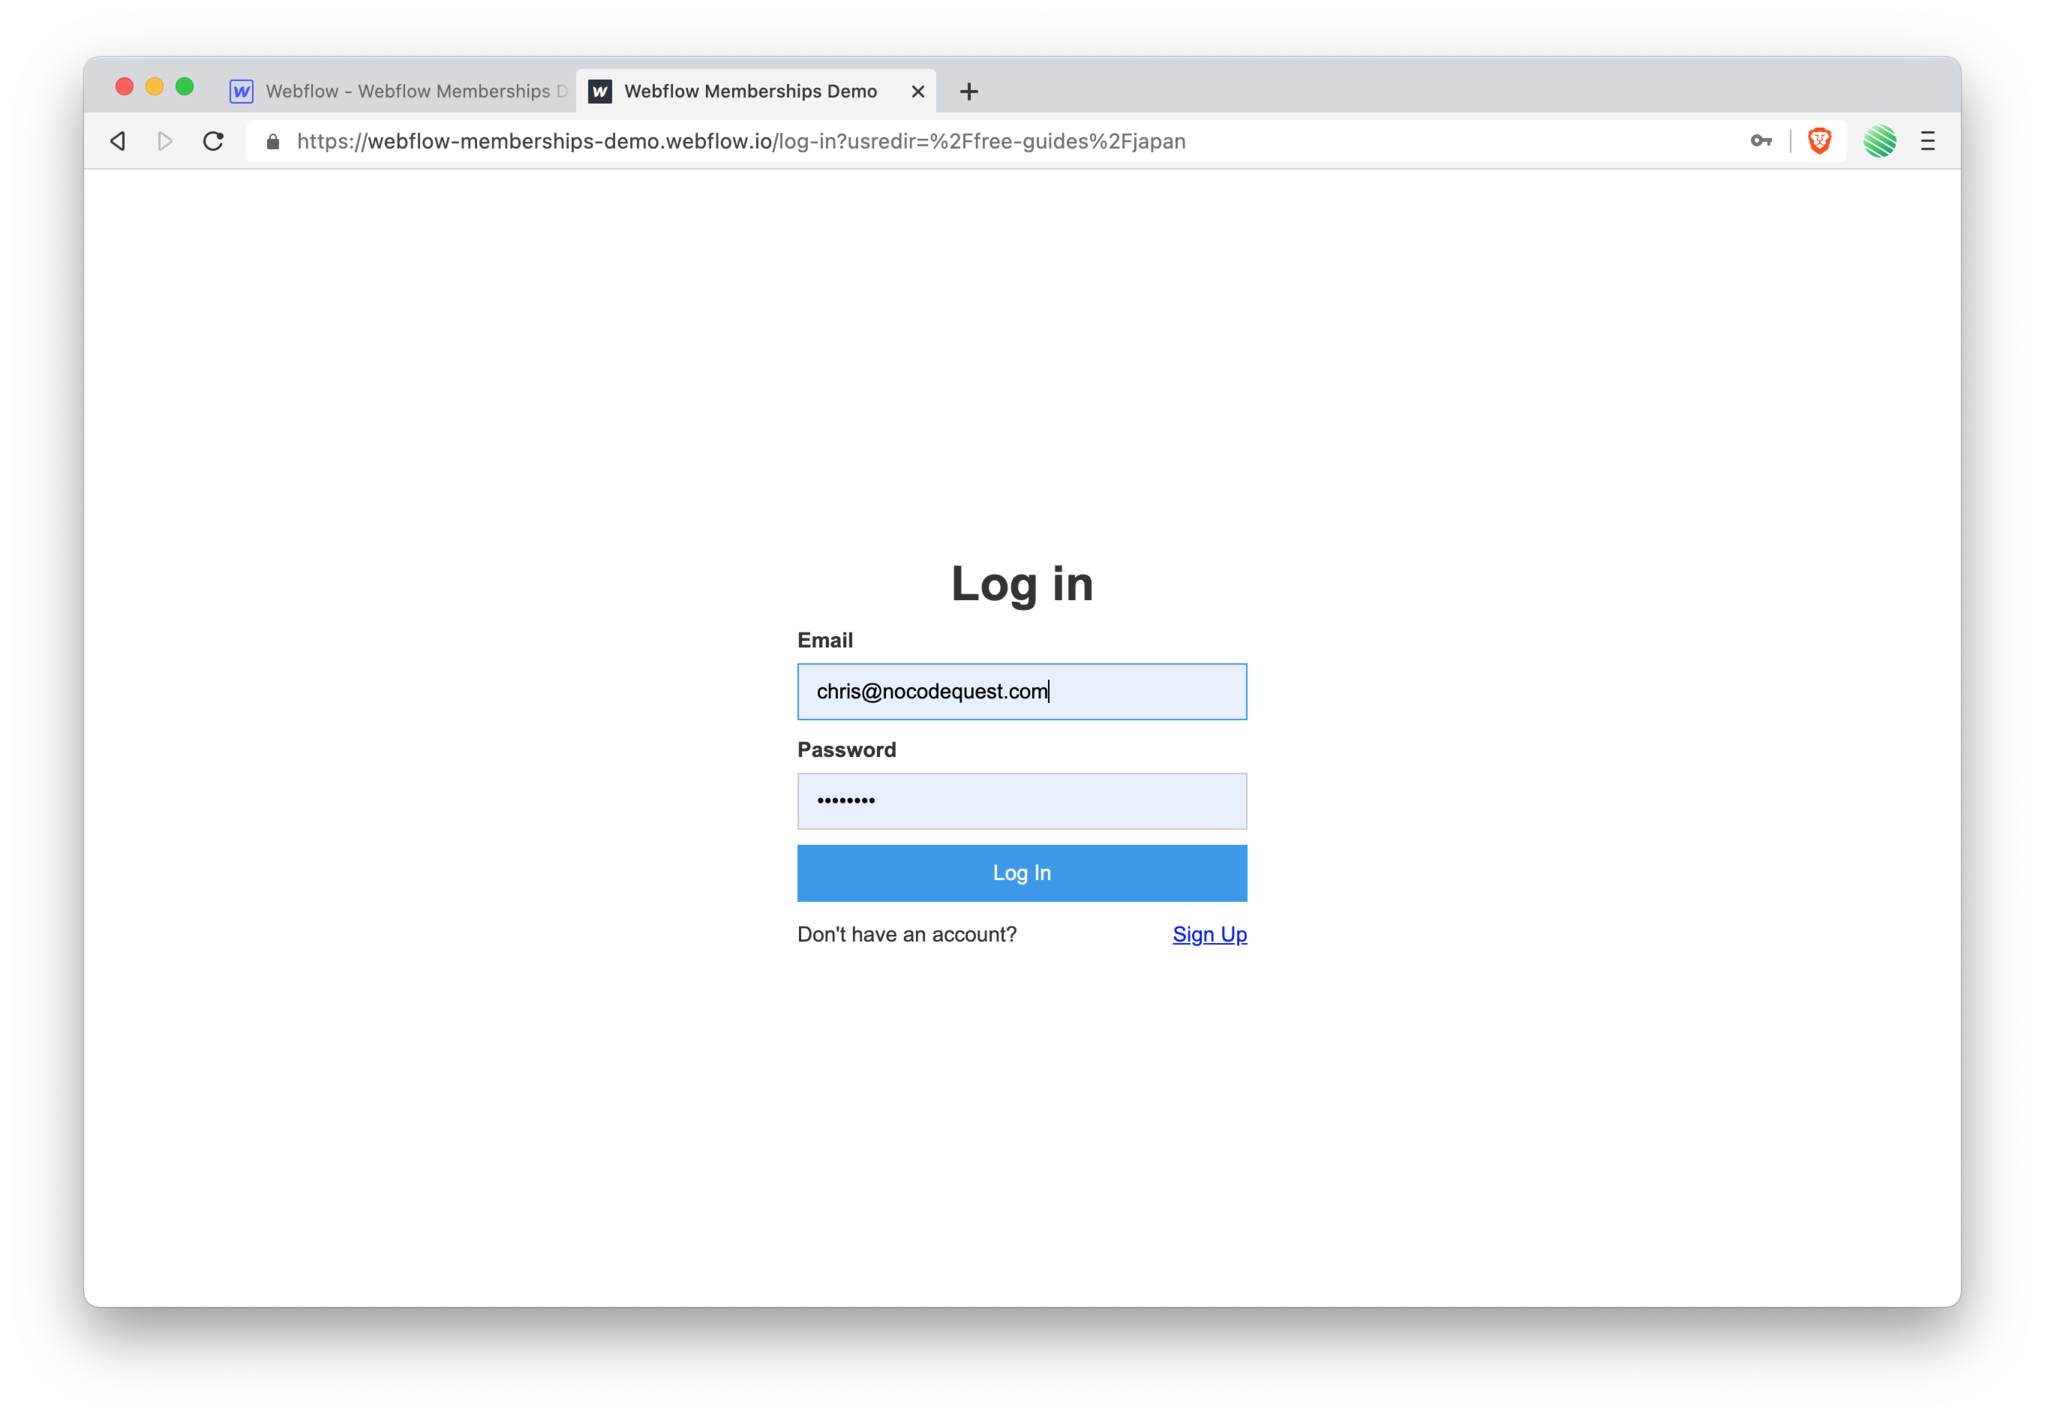
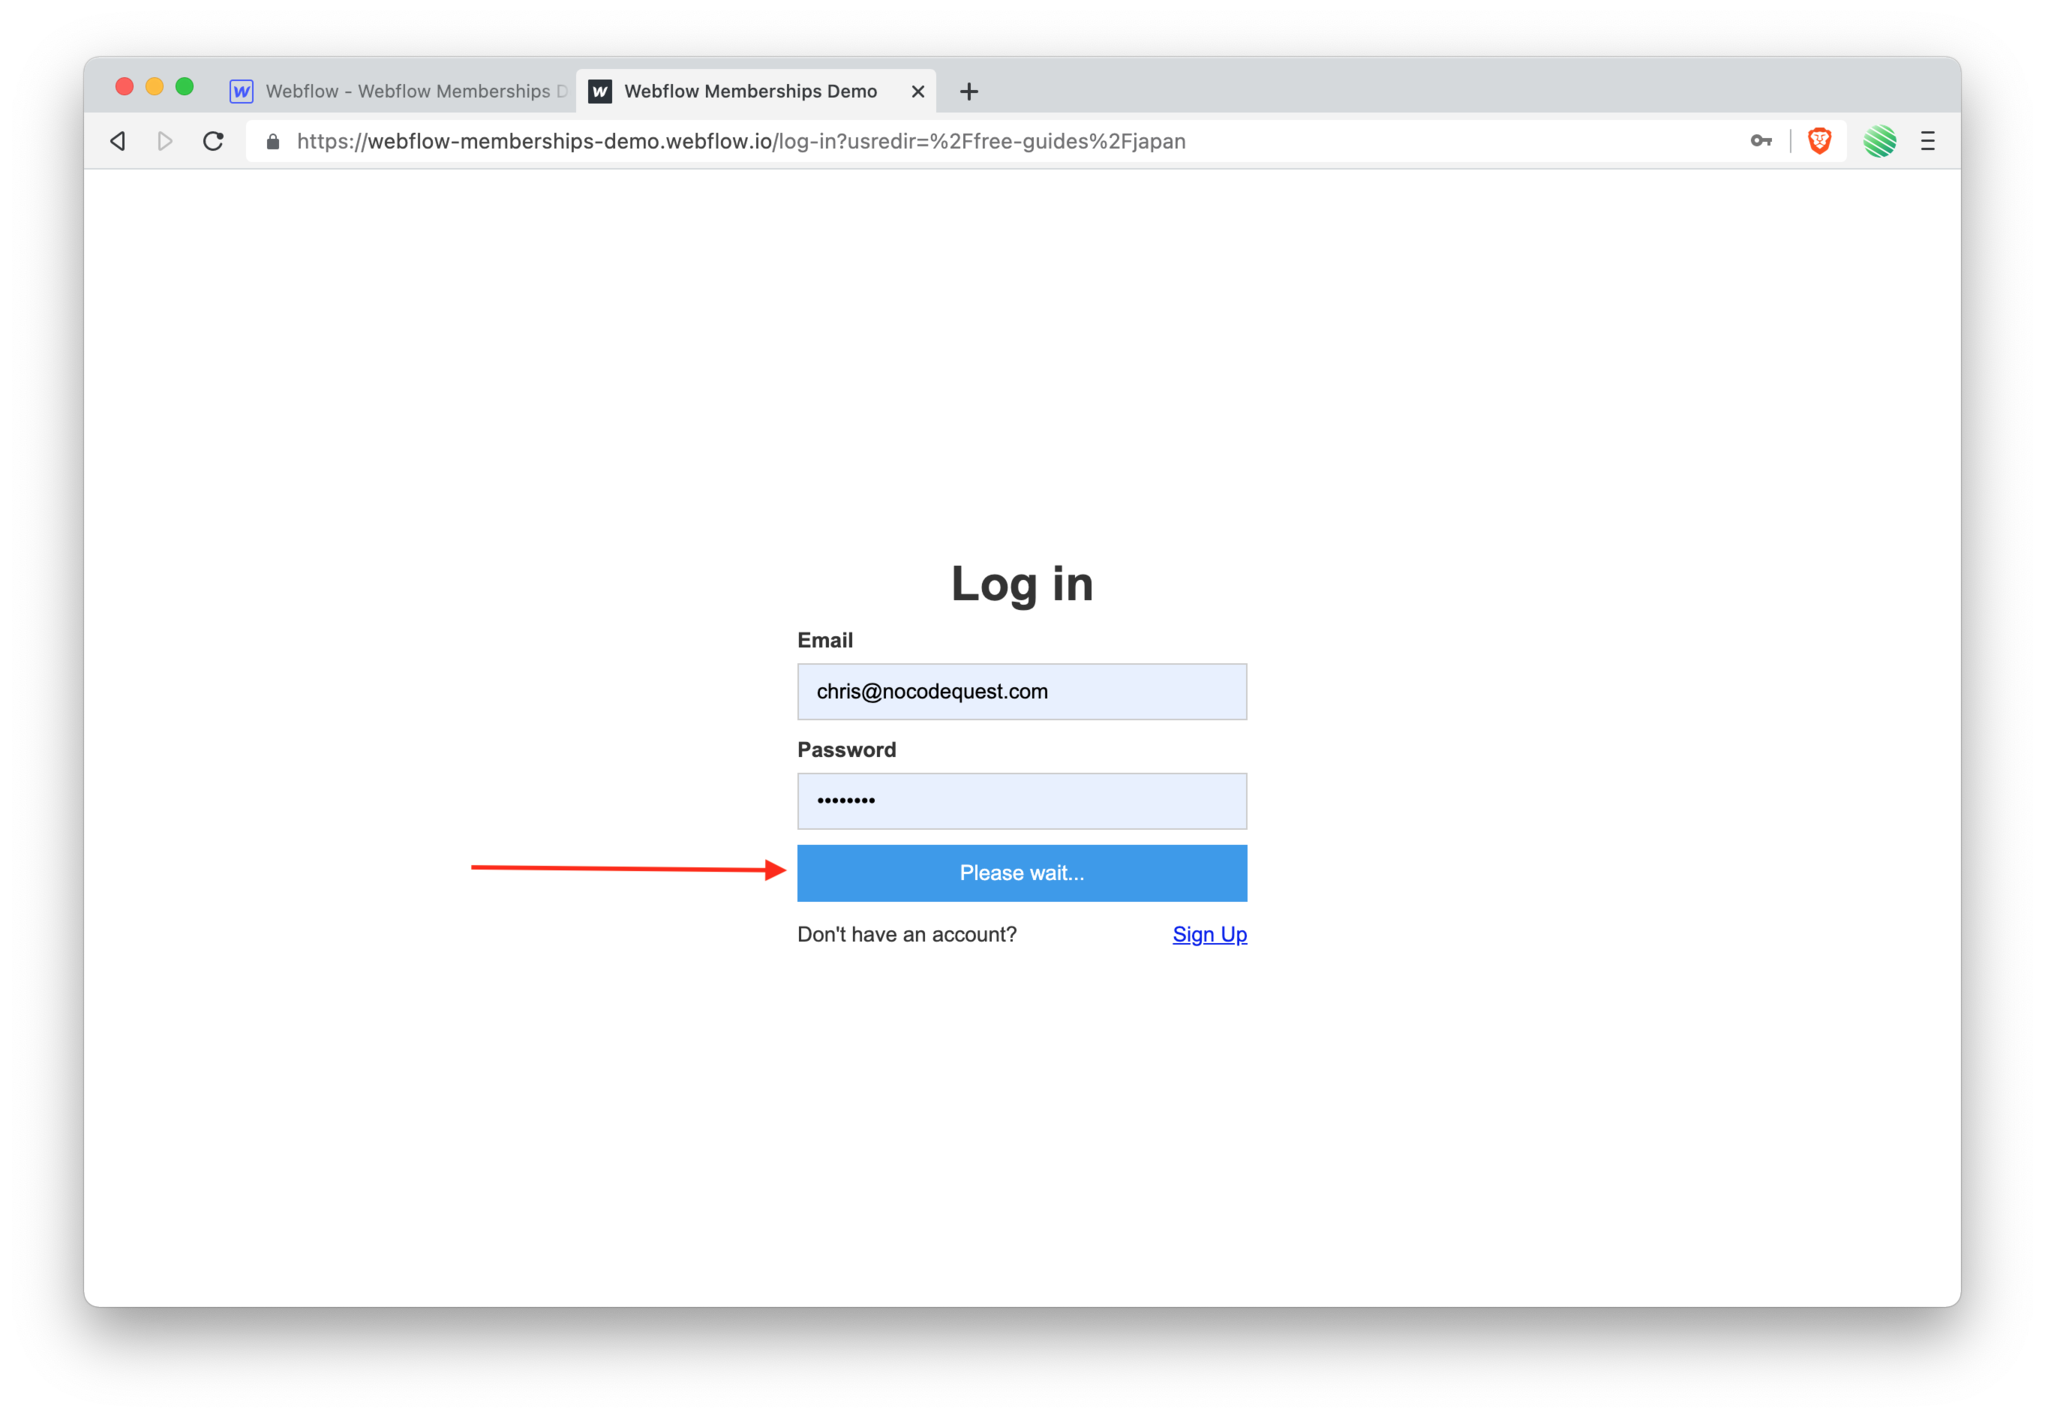
No you cannot. You are instead redirected to the log in page because Webflow’s backend knows that you must be authenticated to view that page.
Again, Webflow is not hiding your content. They are authenticating you from their backend servers.
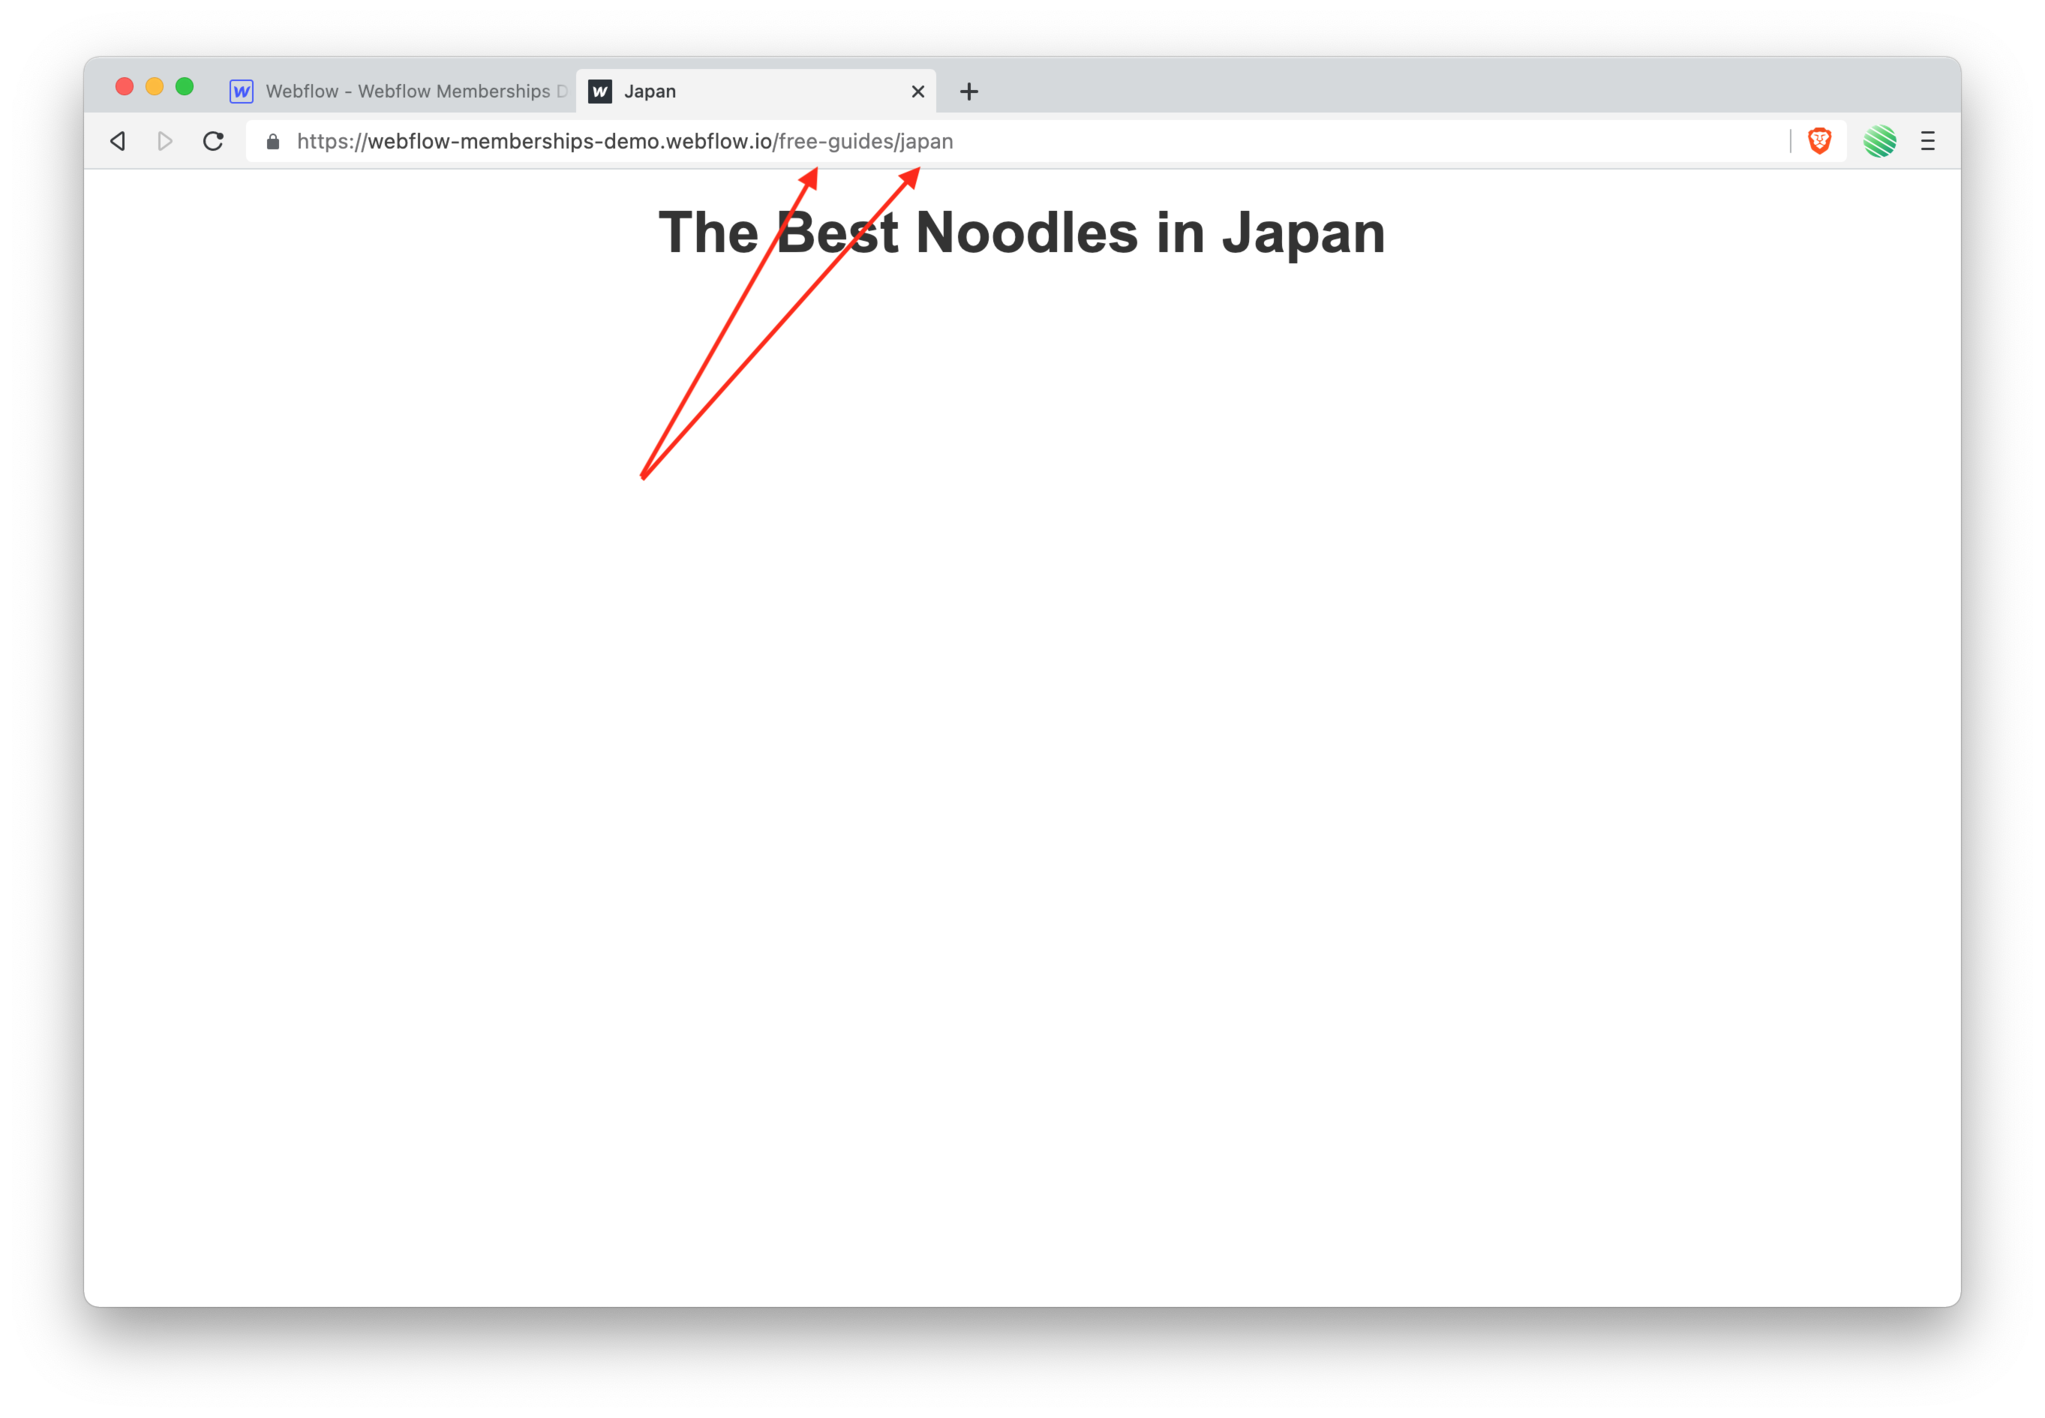
Also, if you look really close, you’ll see a redirect parameter in the url with that path to the page you intended to view.
 Go ahead and log in.
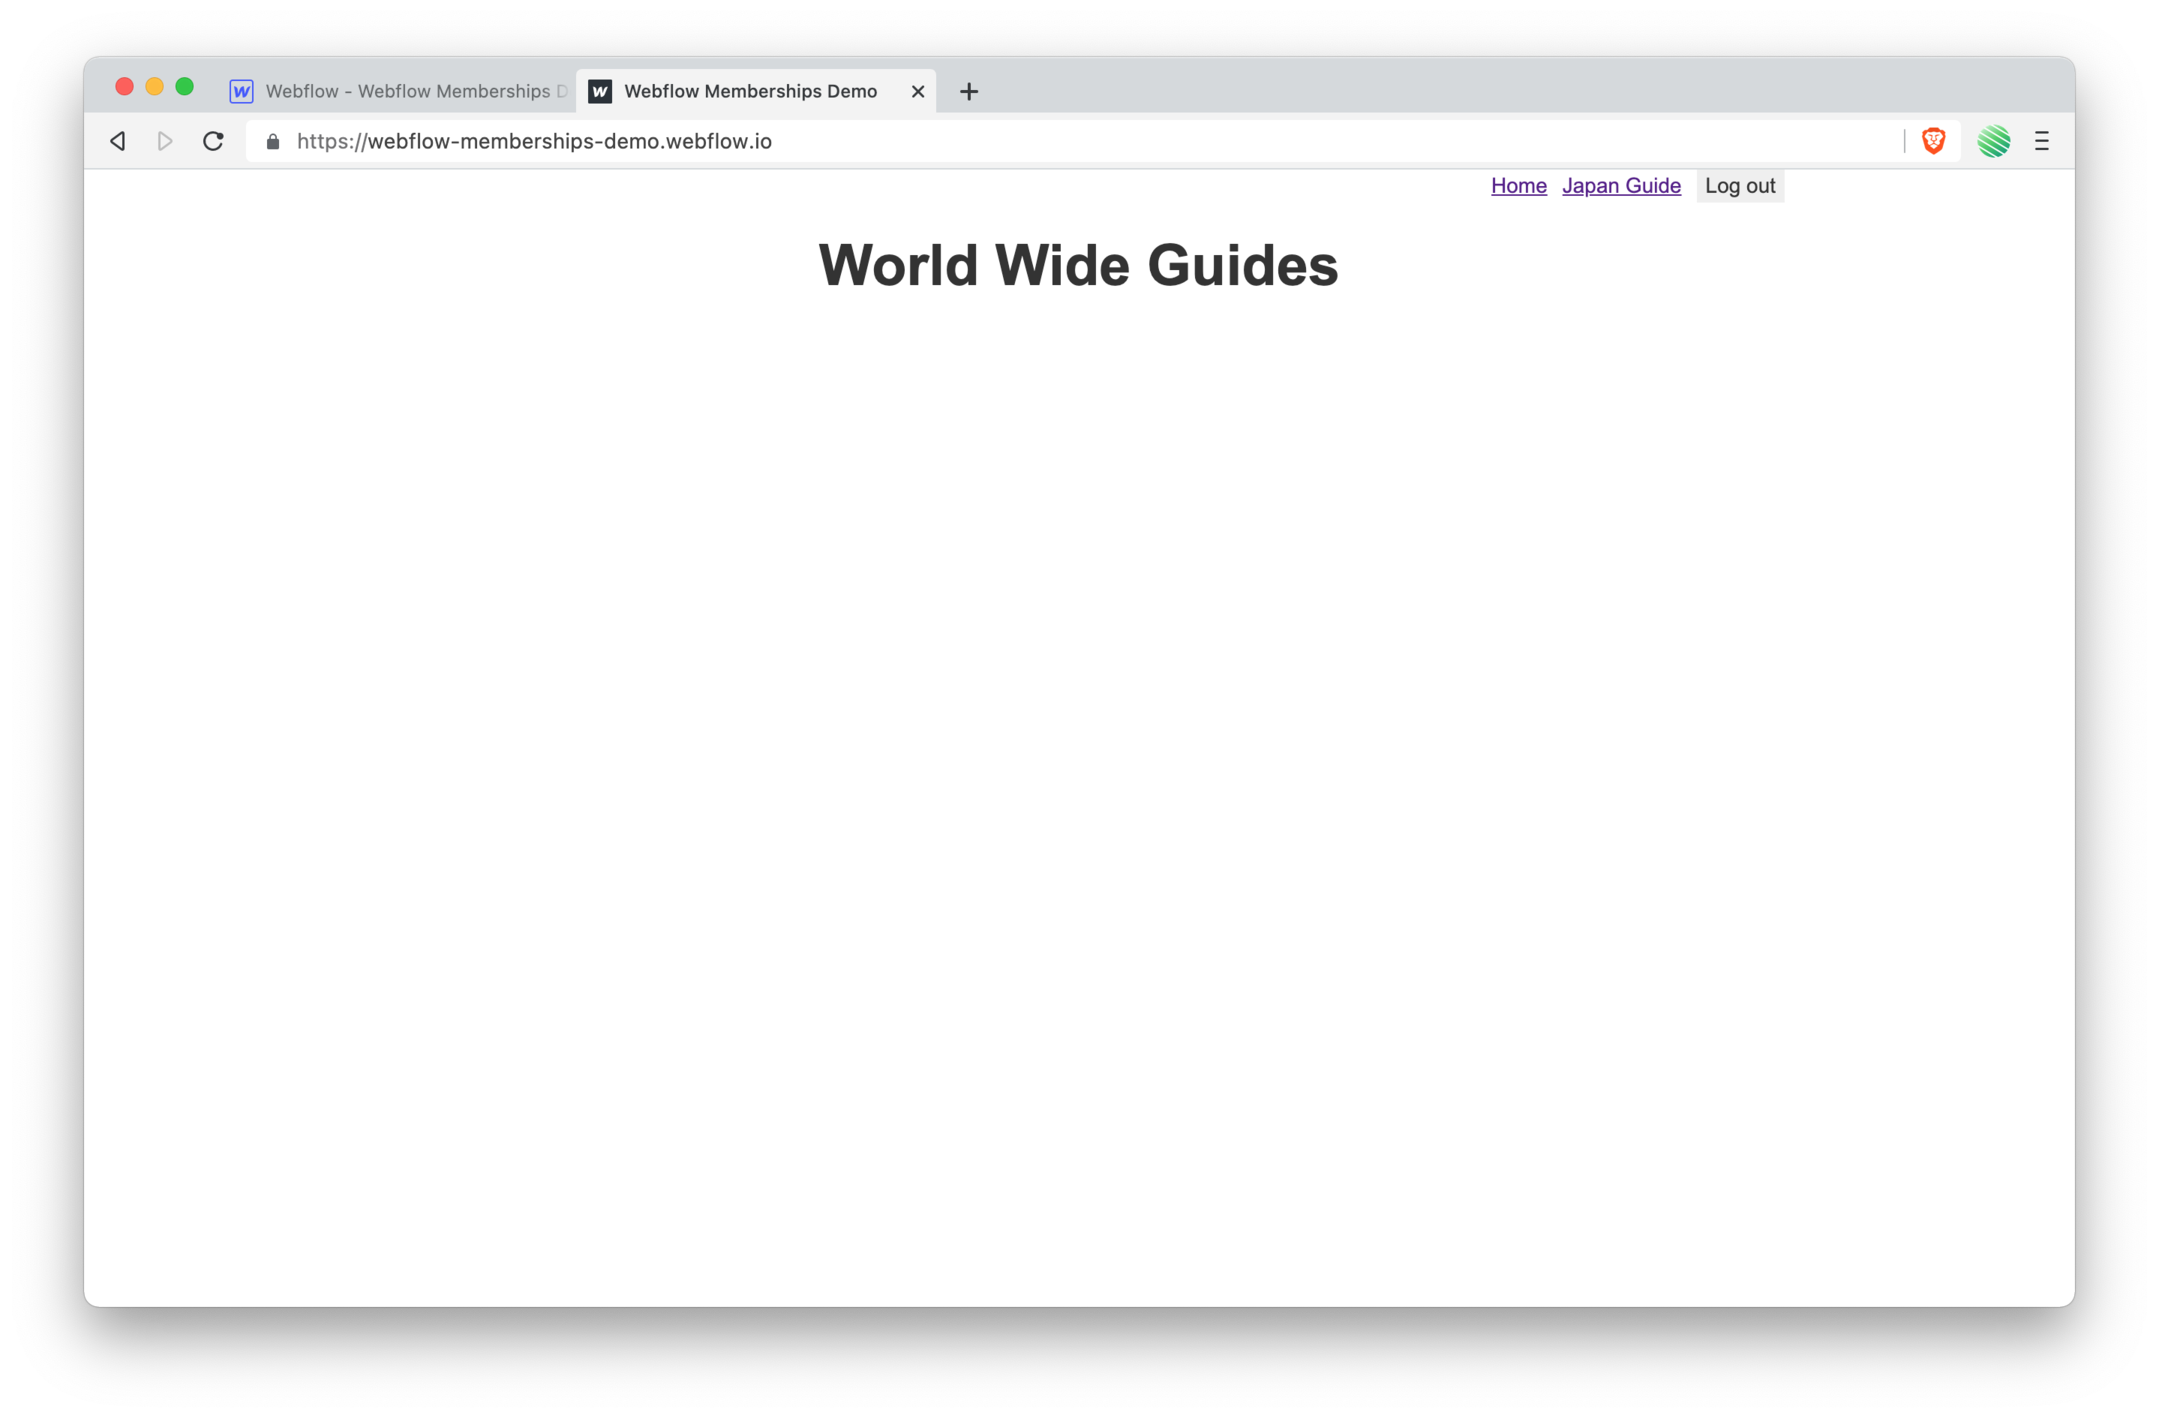
 Nice!
Nice!
Once you’ve successfully logged in you are automatically redirected to the gated page you had intended to go to in the first place 🤩
At this point some of you may be asking “Can I hide the link if you are logged out and it requires you to be logged in to access it?” and the answer is currently no 🤨
Again, this is in Beta and this is a feature the Webflow team knows about as I’ve personally seen this feature asked for by the community.
I’d expect this to be updated in the future 😀
Extending the Navigation Bar
At this point we only have our navigation bar on our home page. But we need to be able to log out and go to the home page from any page within our Webflow site.
Let’s fix that now.
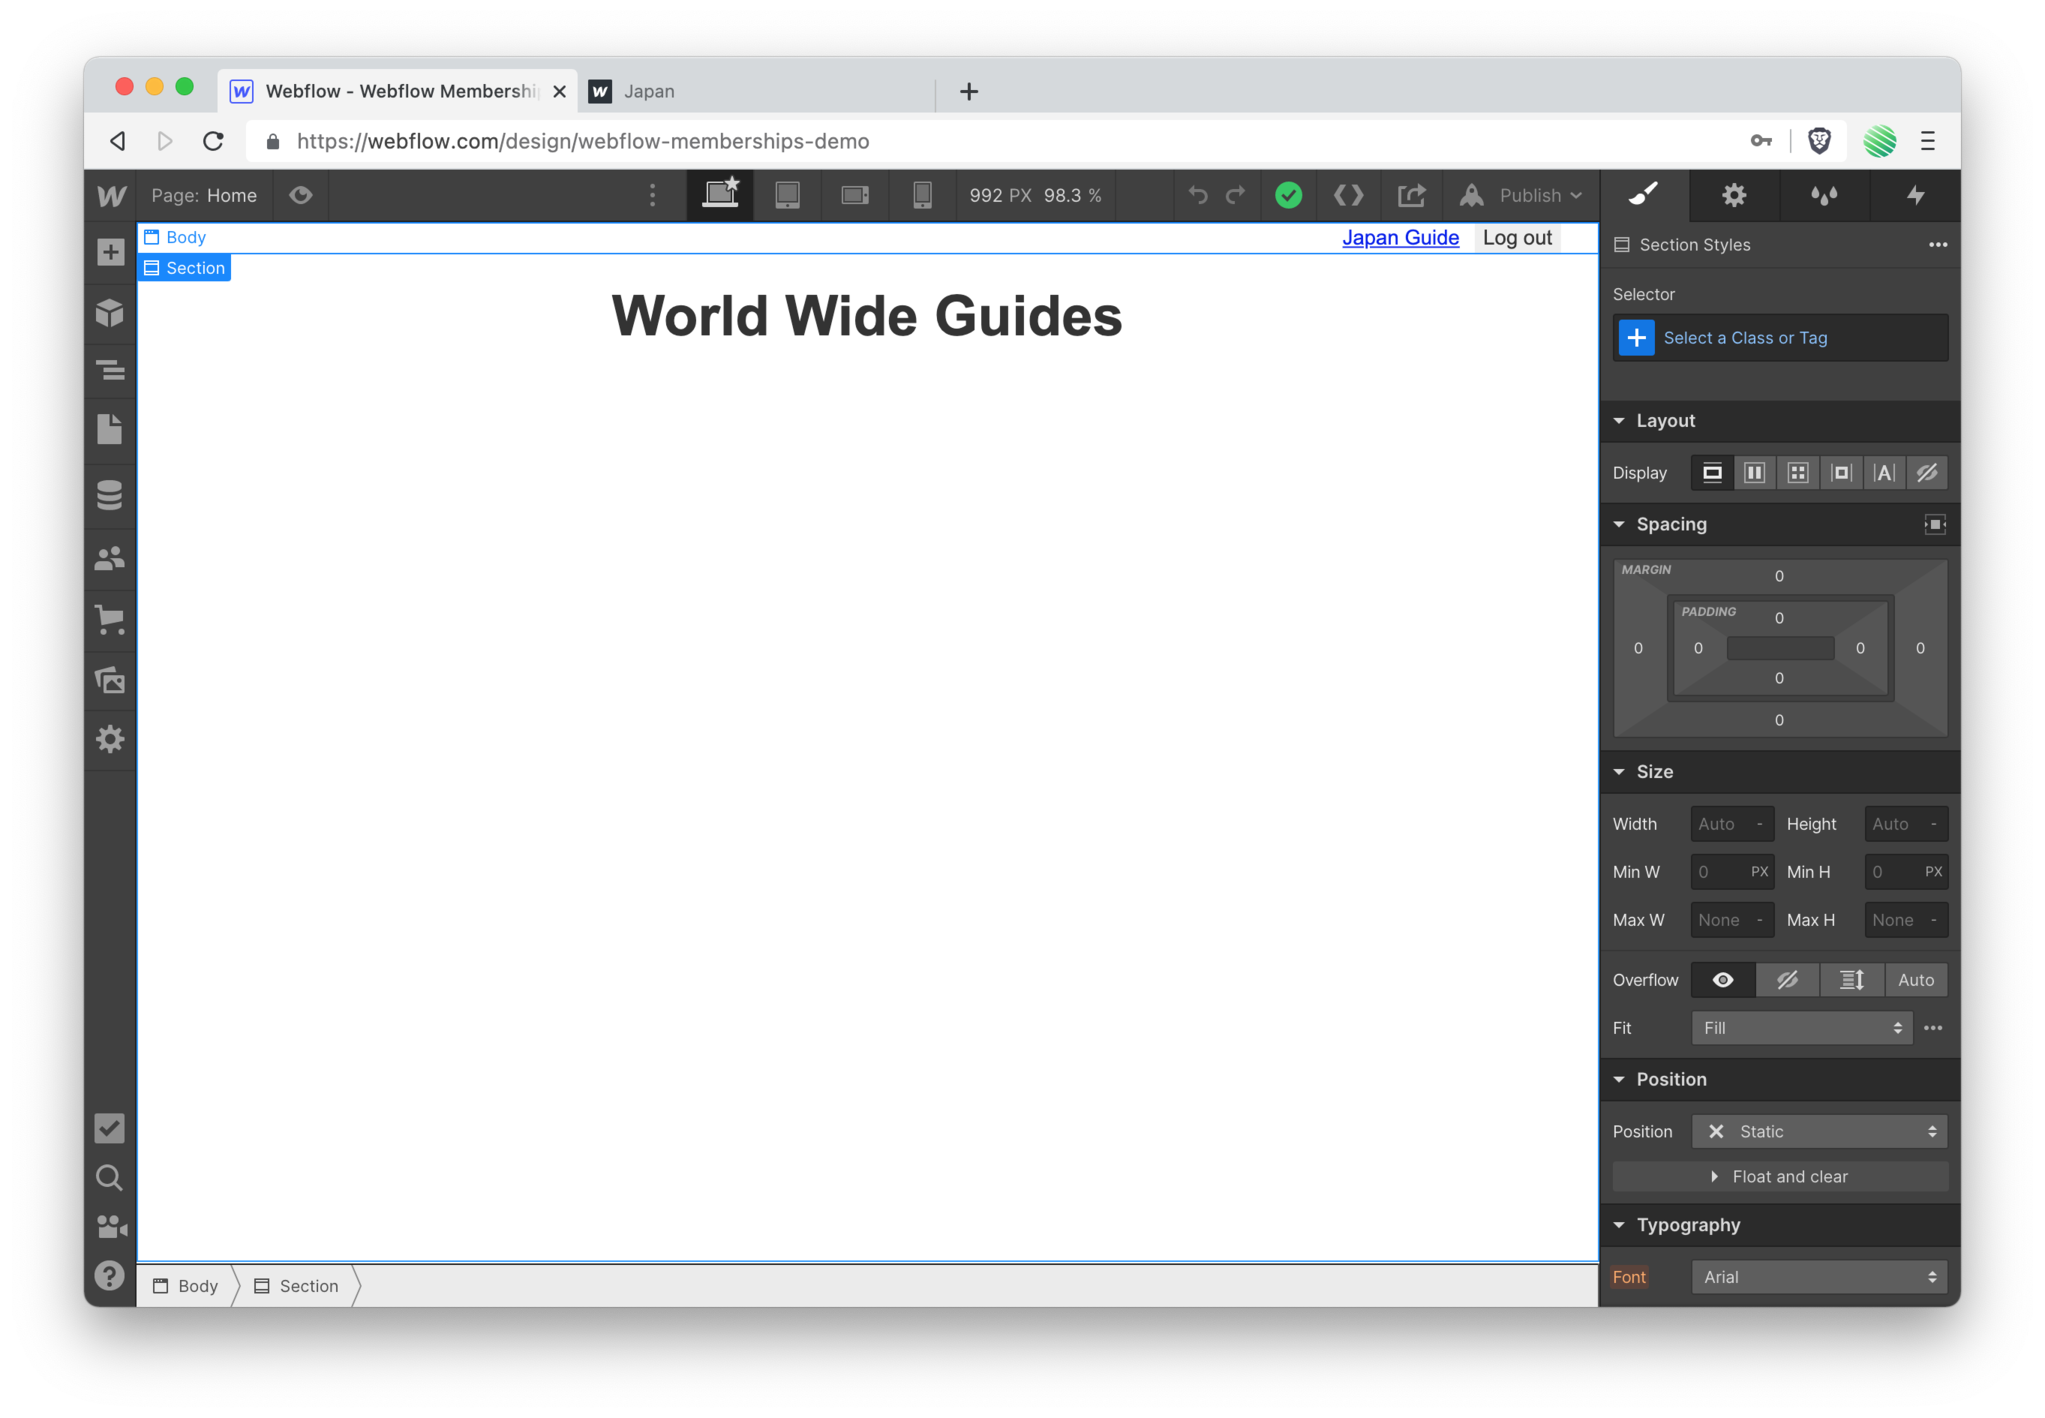 Back to the Webflow Designer.
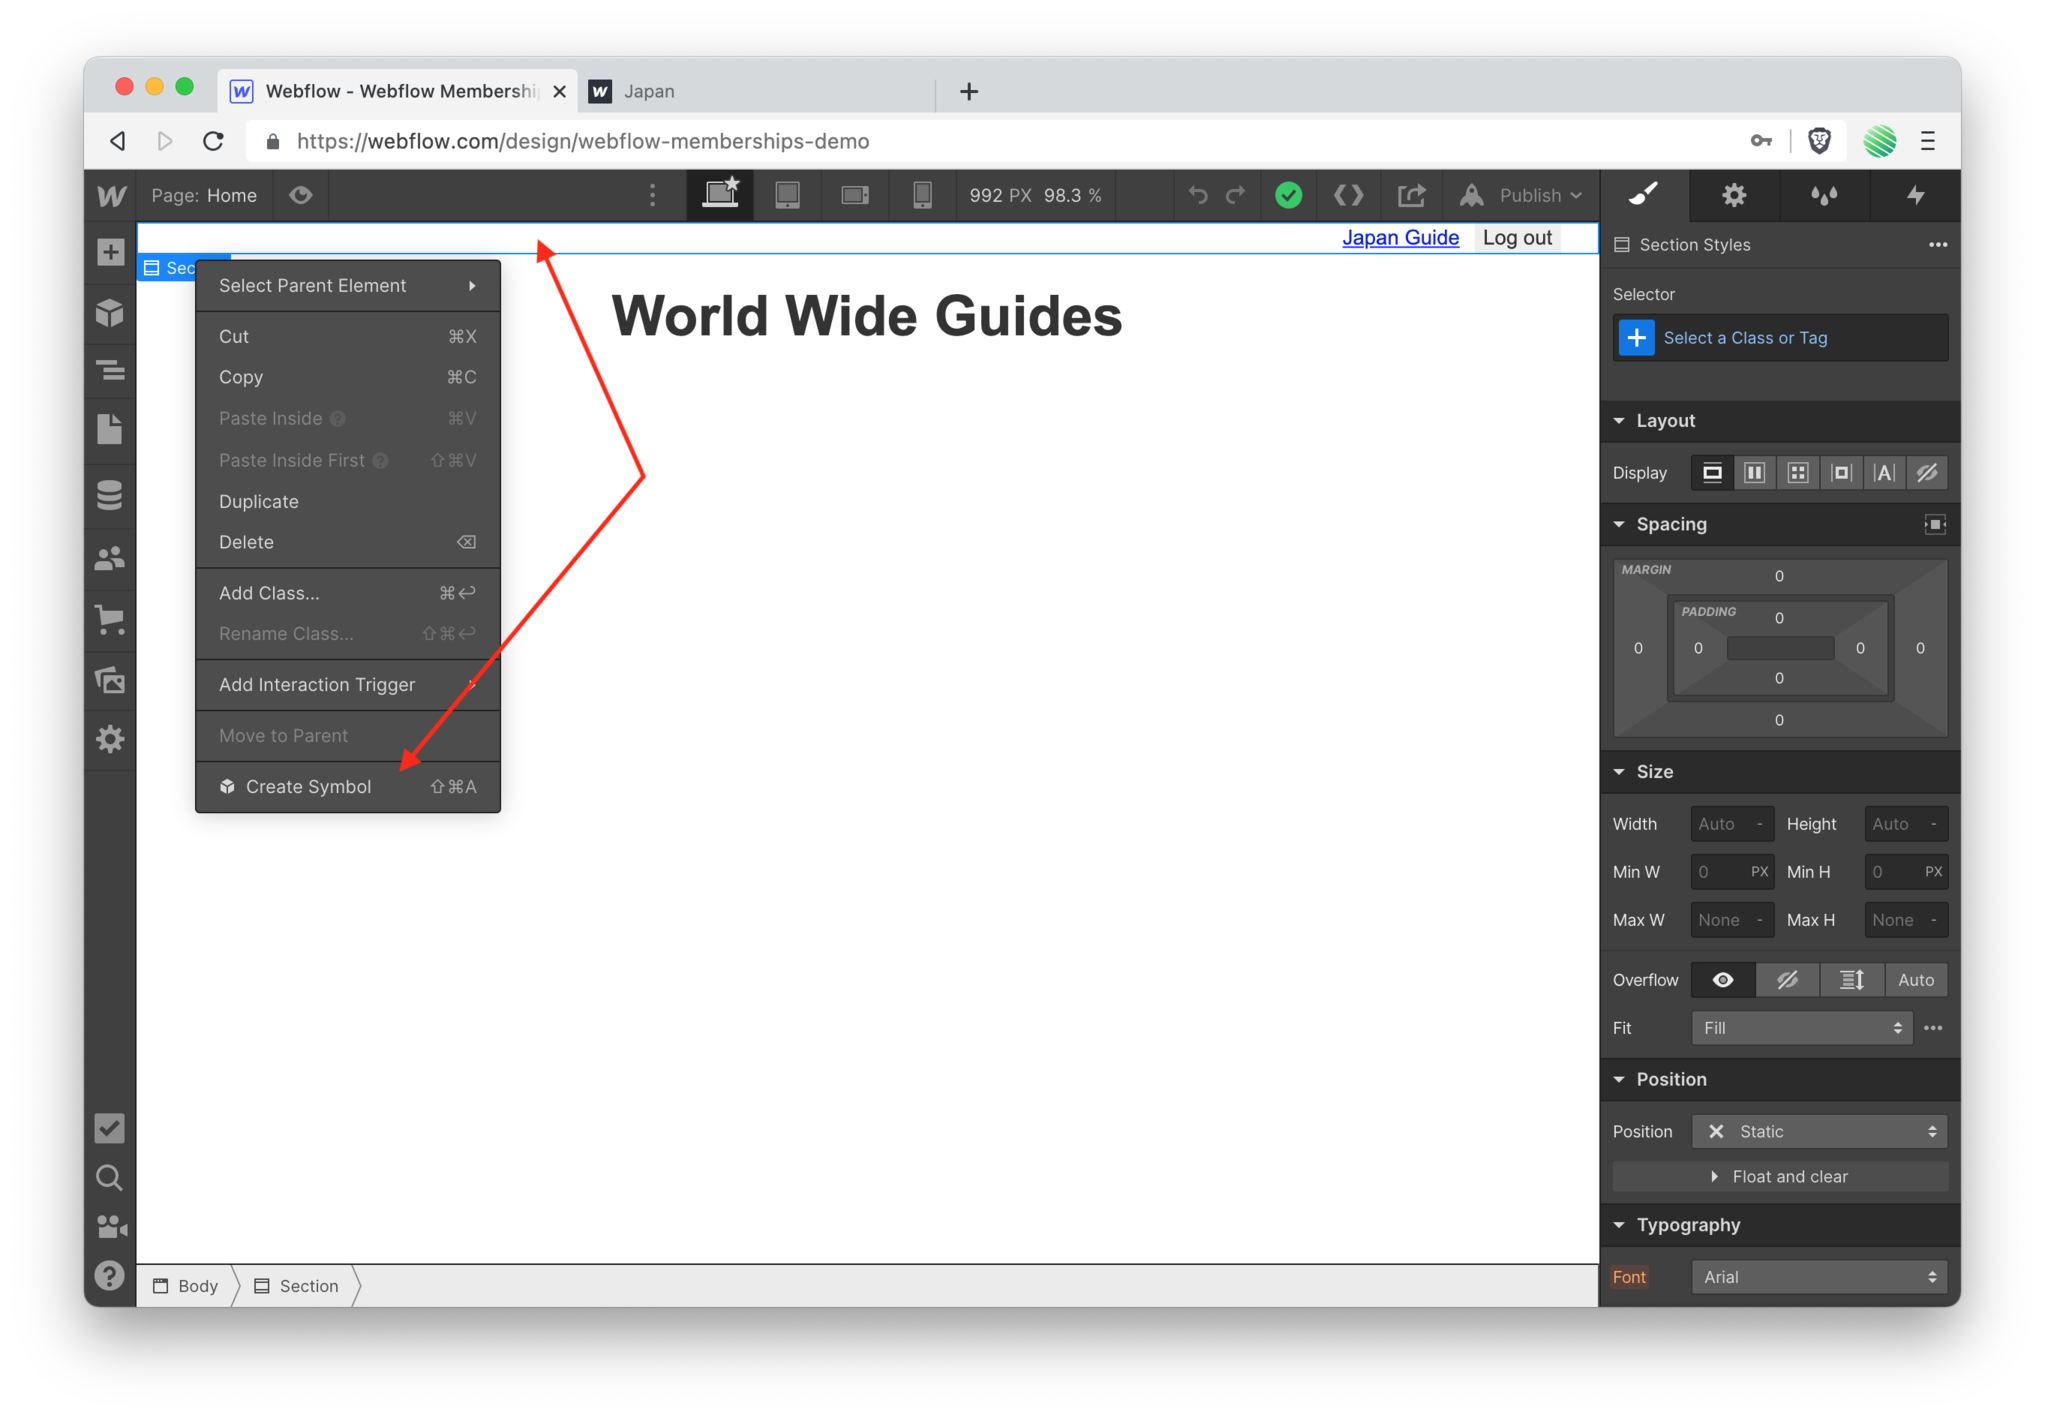 Right click the section that contains your links and select the “Create Symbol” option.
If you’re familiar with Symbols already, nothings changed and we are about to create one. If you are not familiar with them then they are just an easy way to reuse the same snippet of content from within any page on your site. Which is exactly what you need to do.
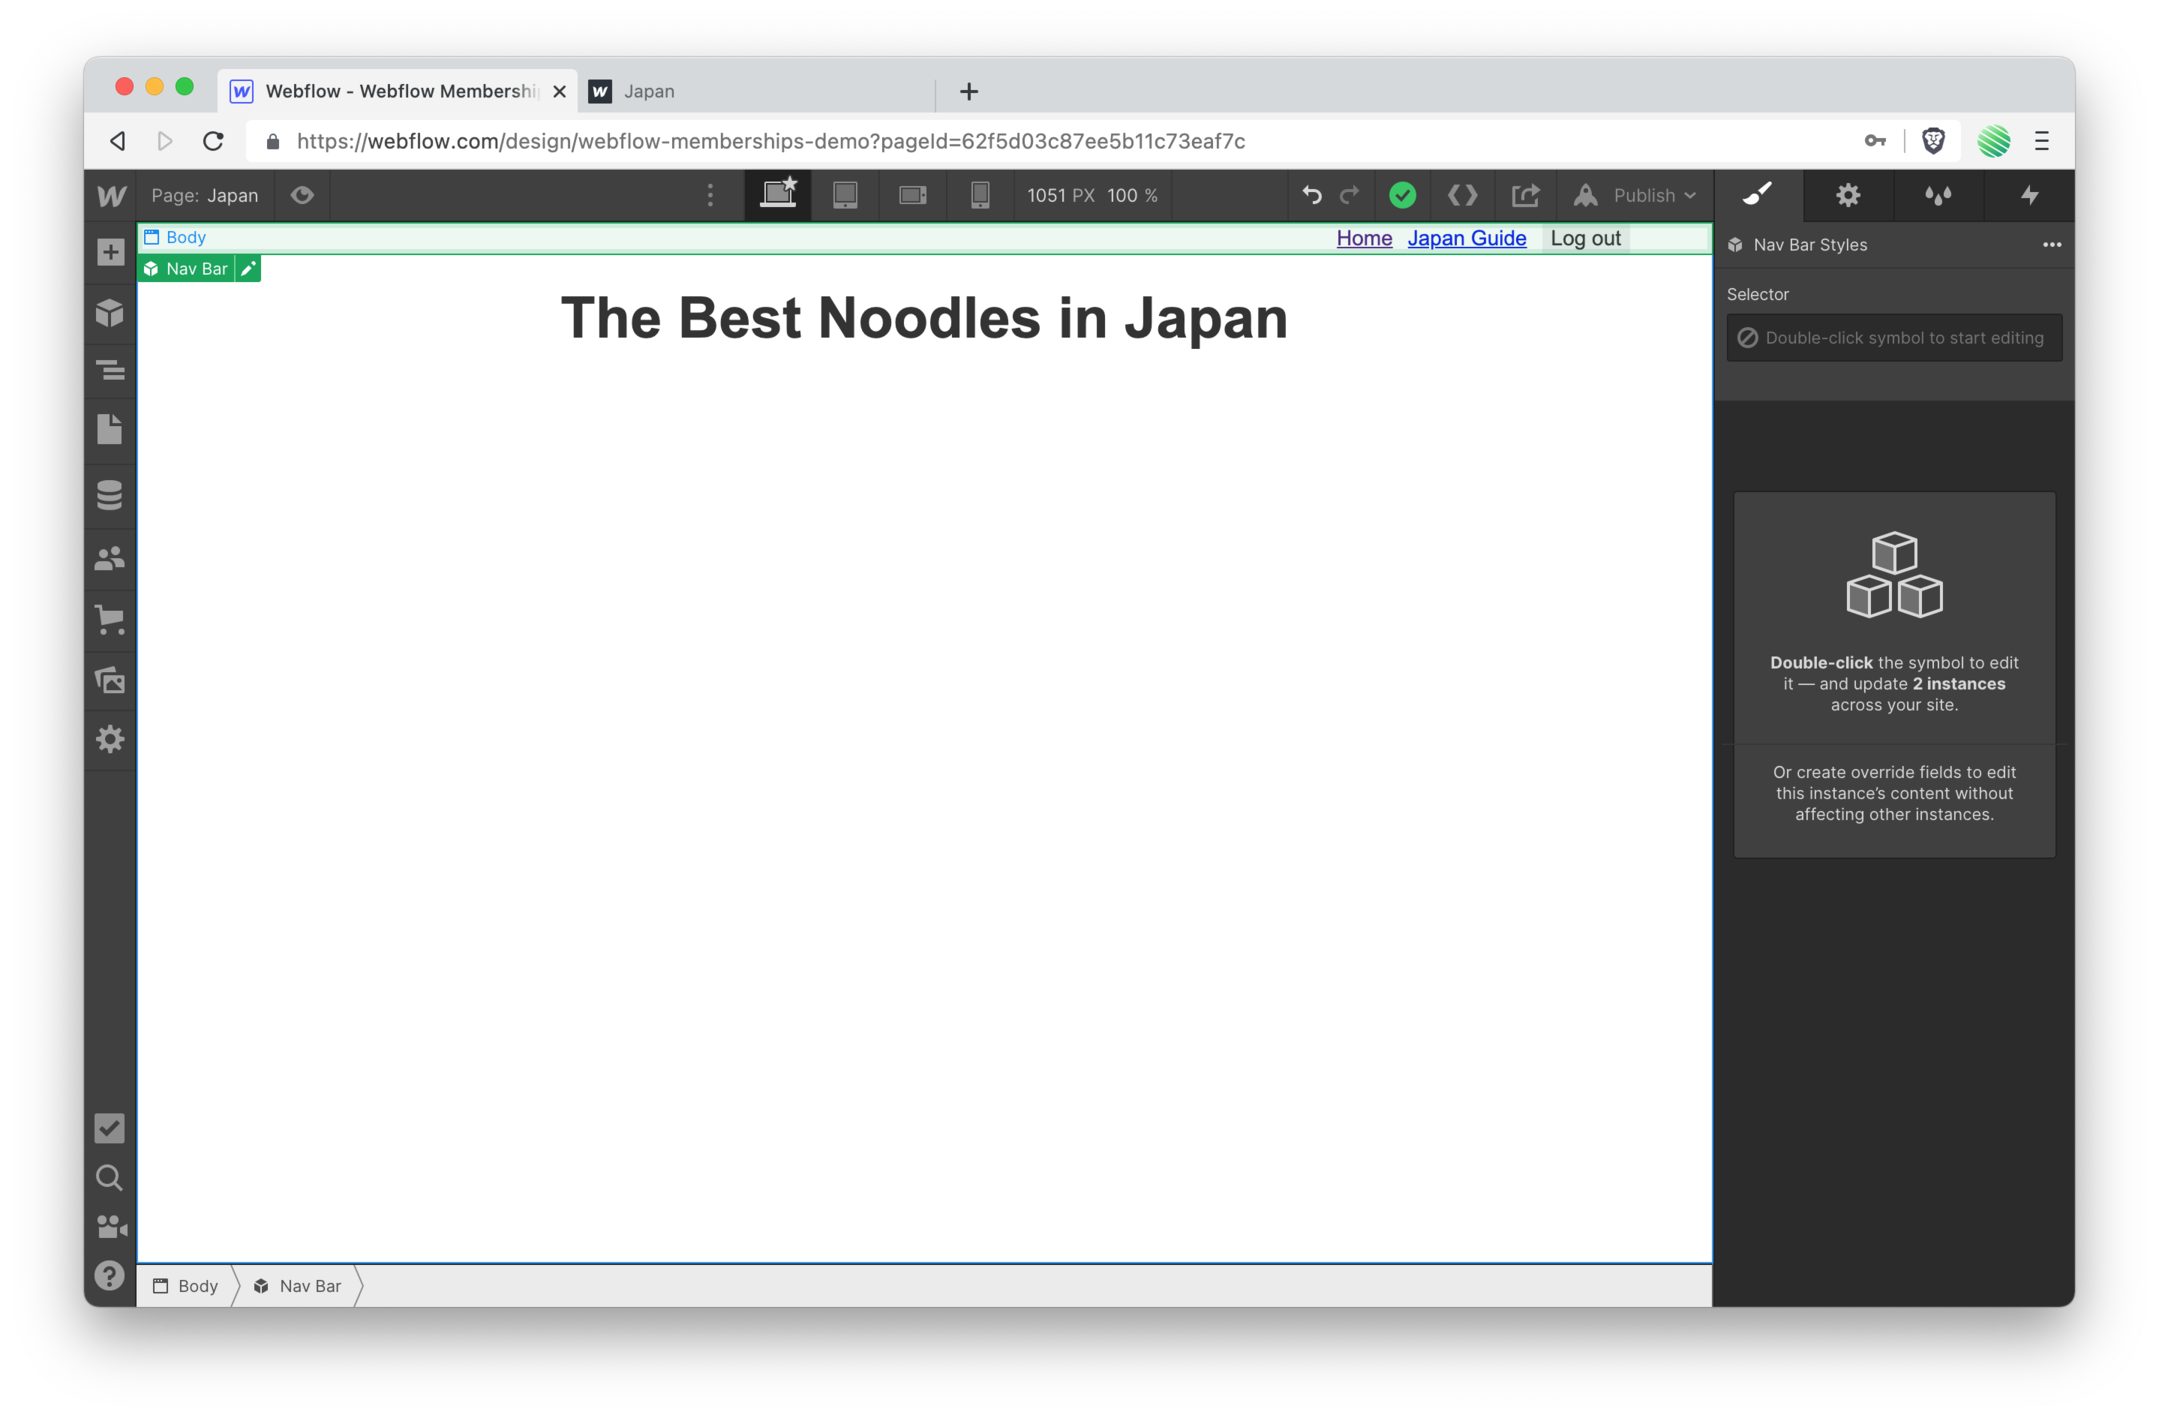
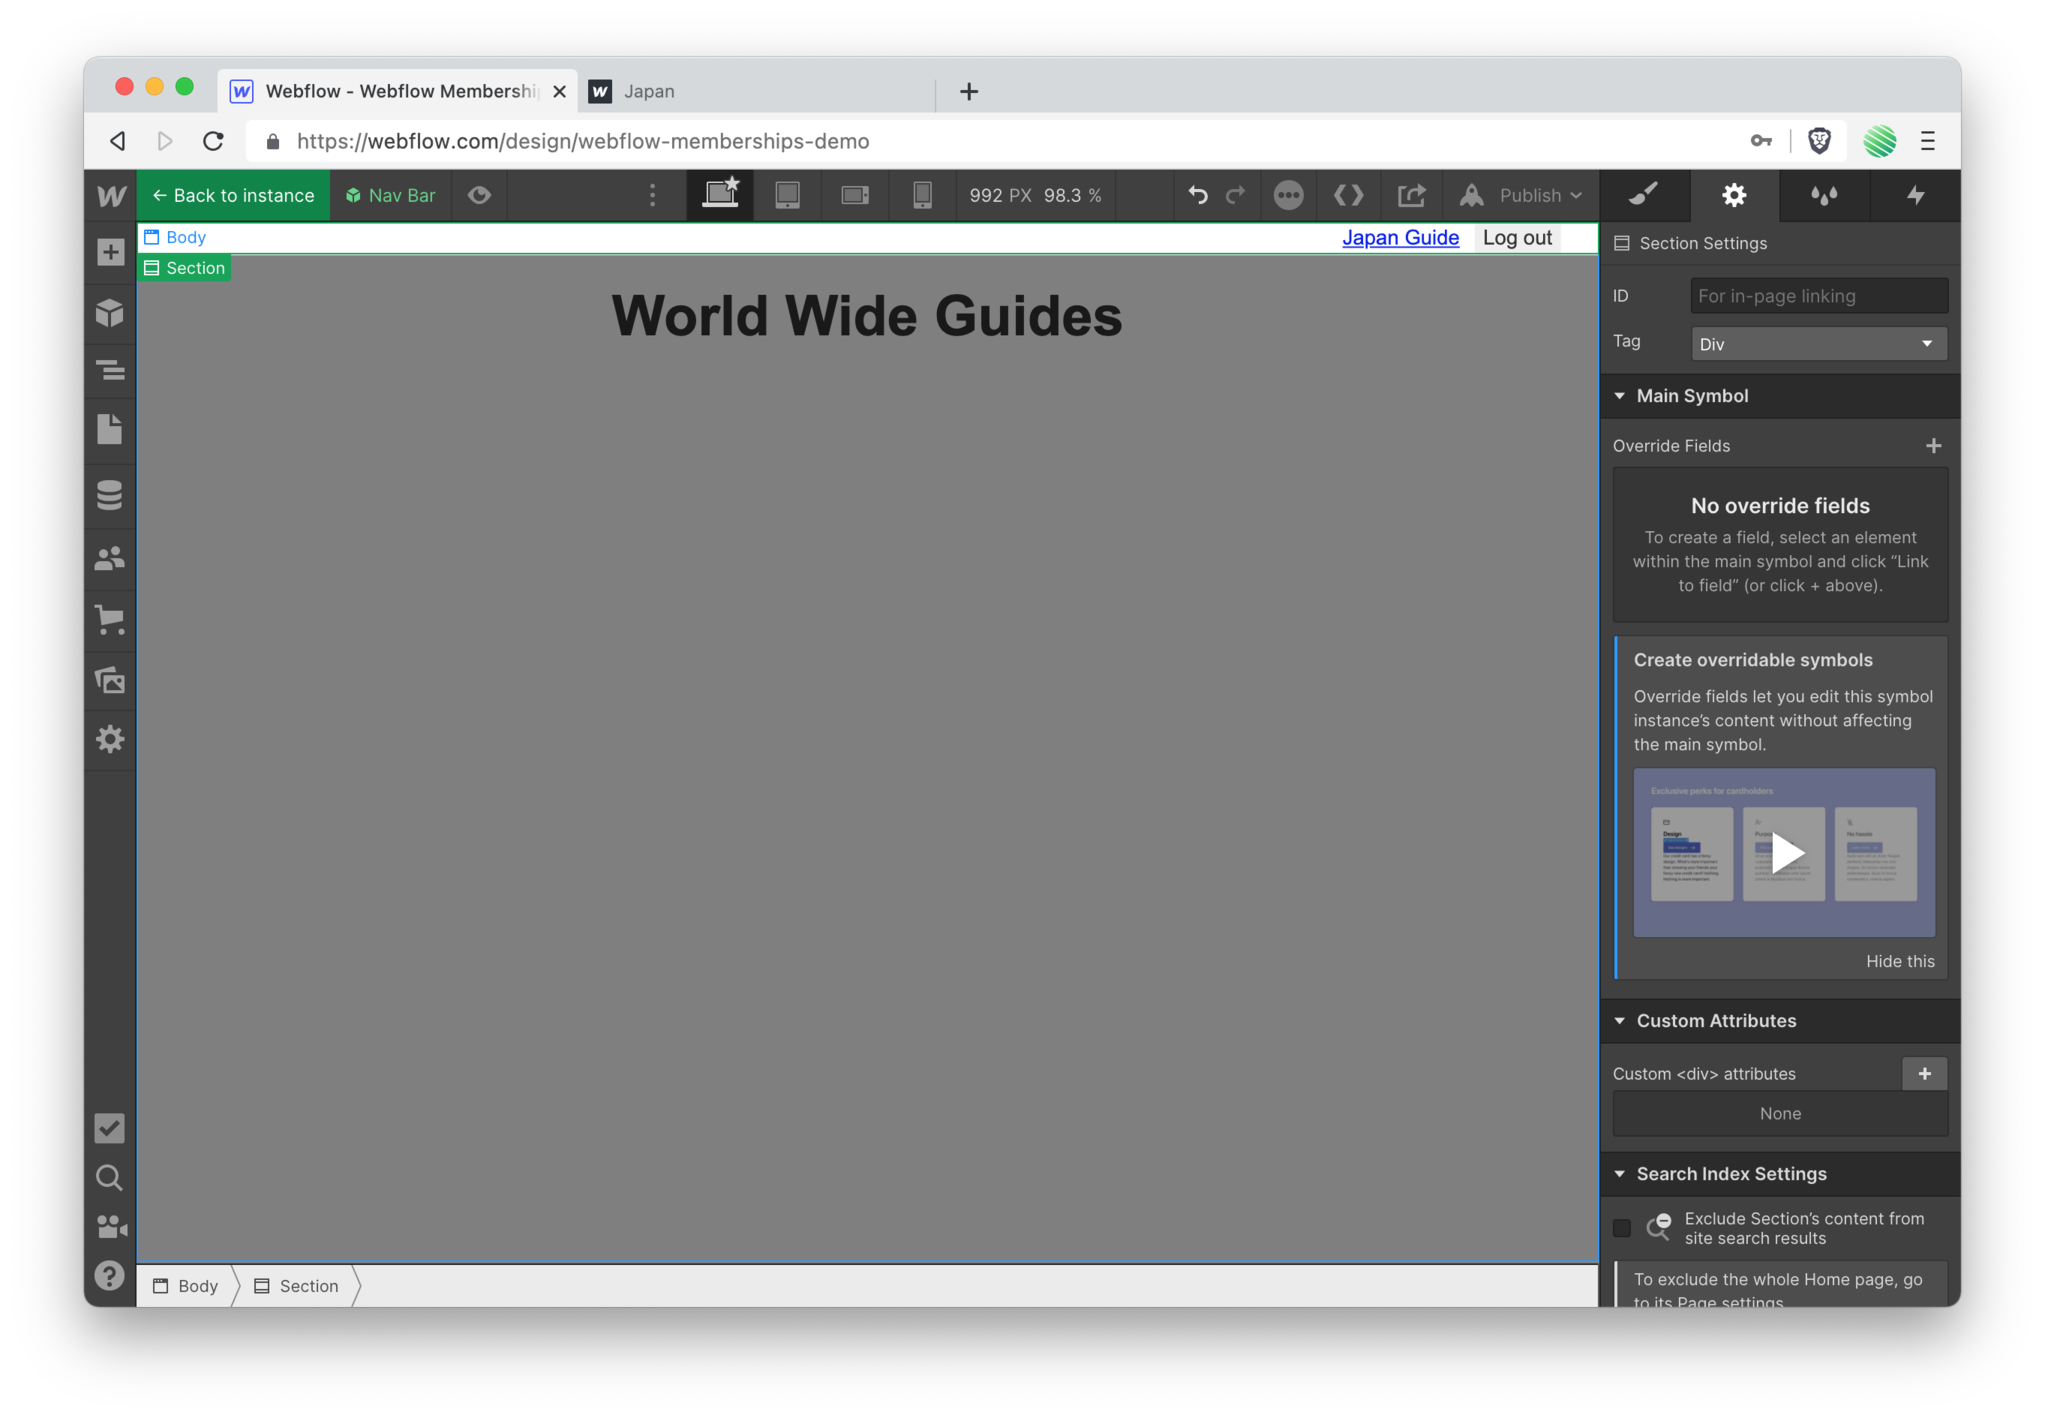 In the Symbol editor go ahead and name it “Nav Bar”
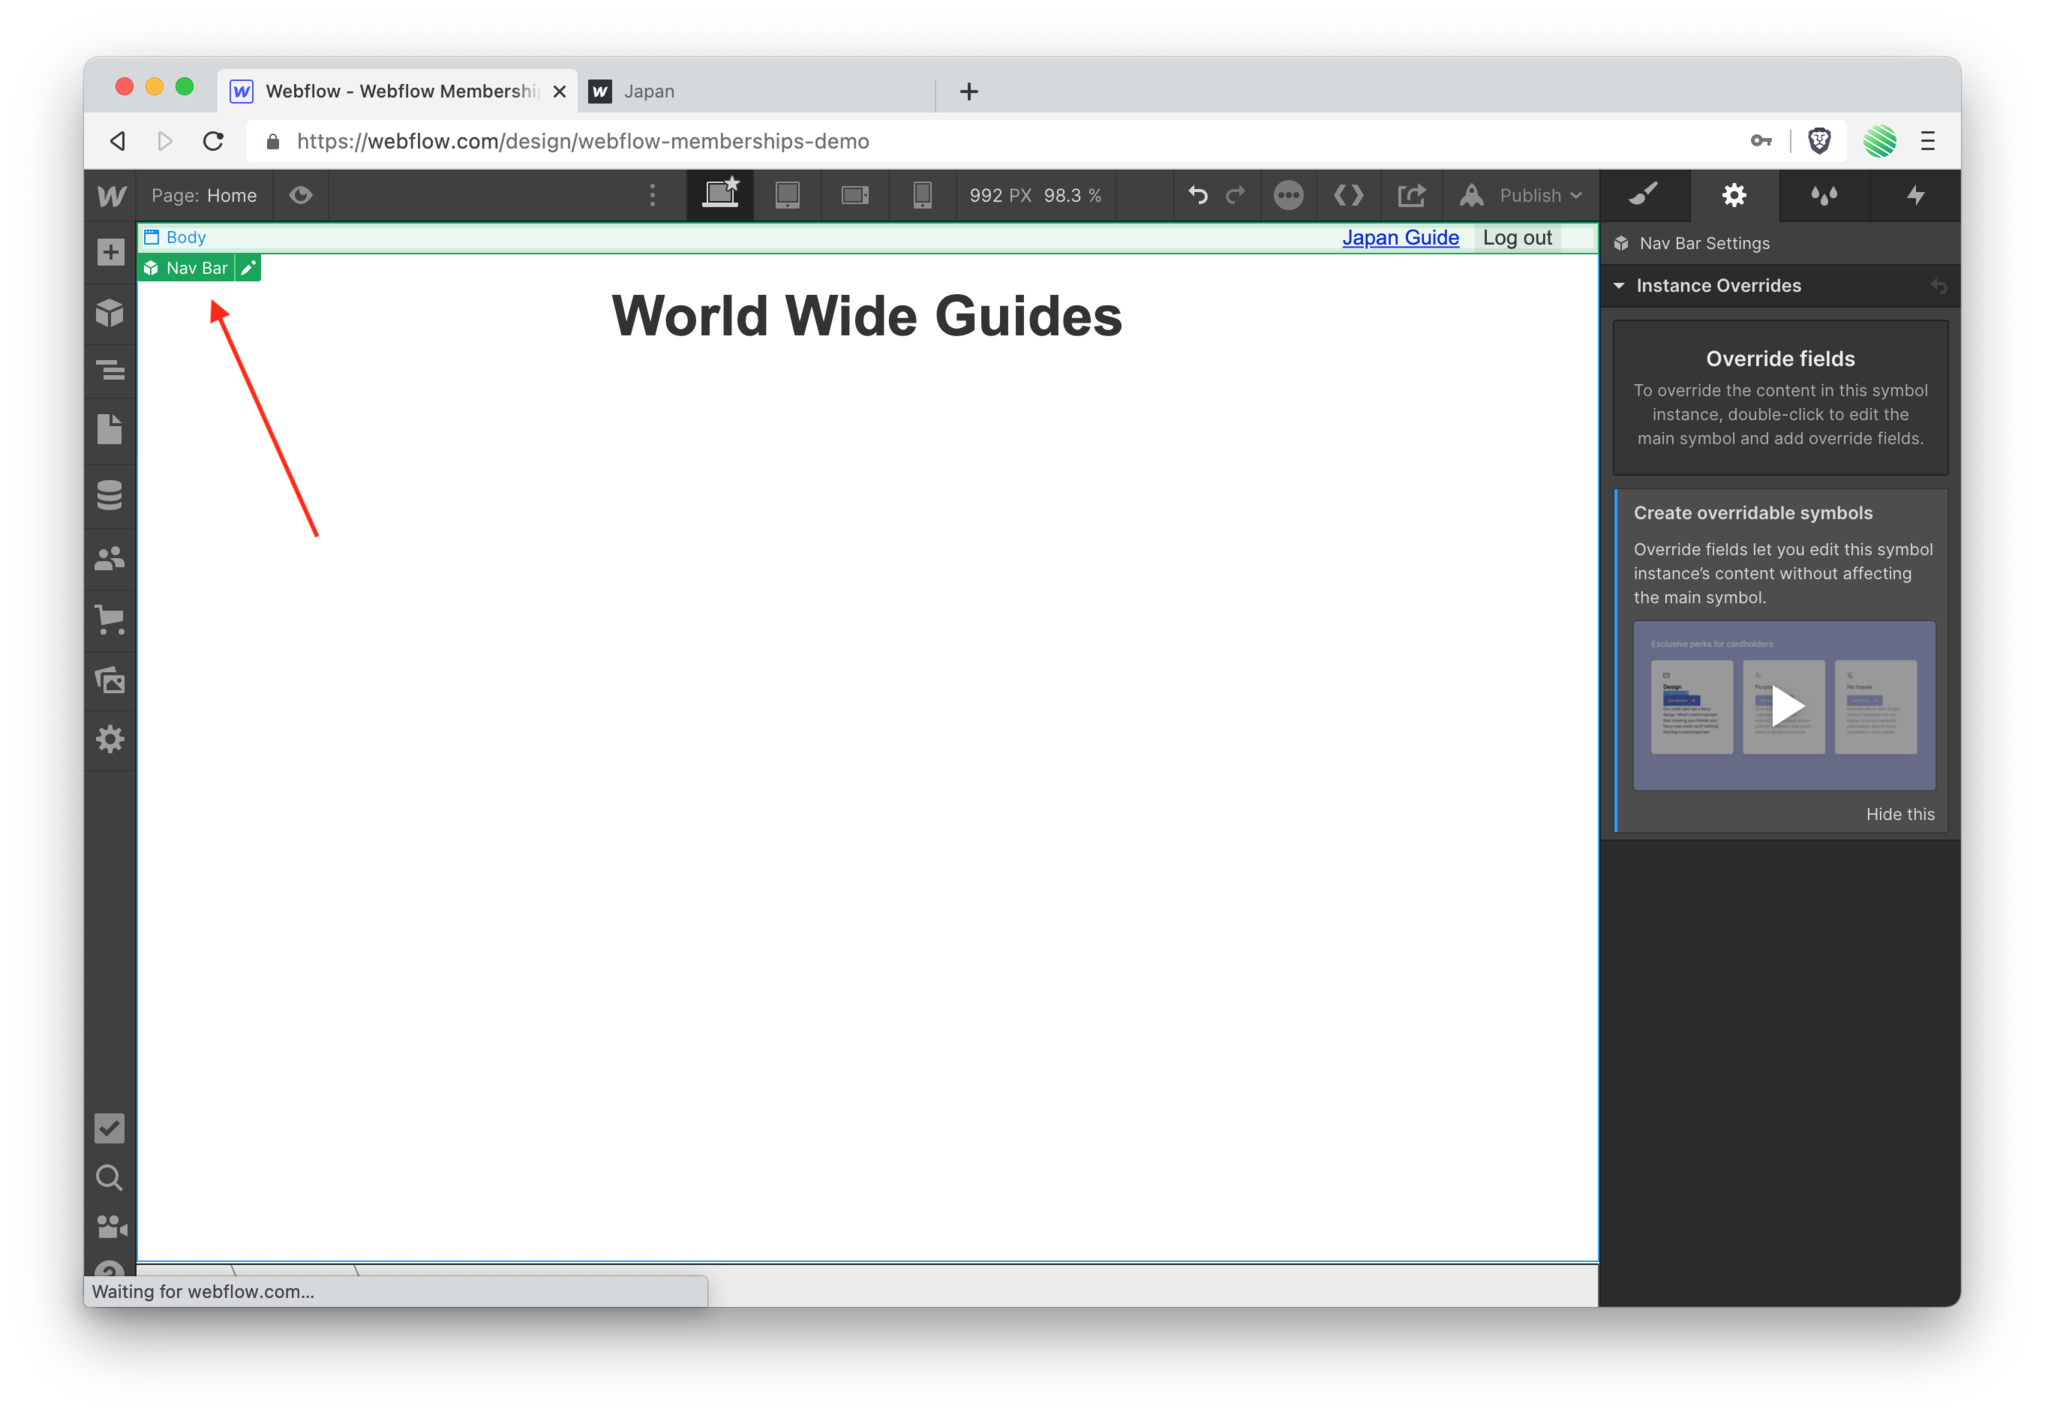 It should look like the screenshot above when you’re done.
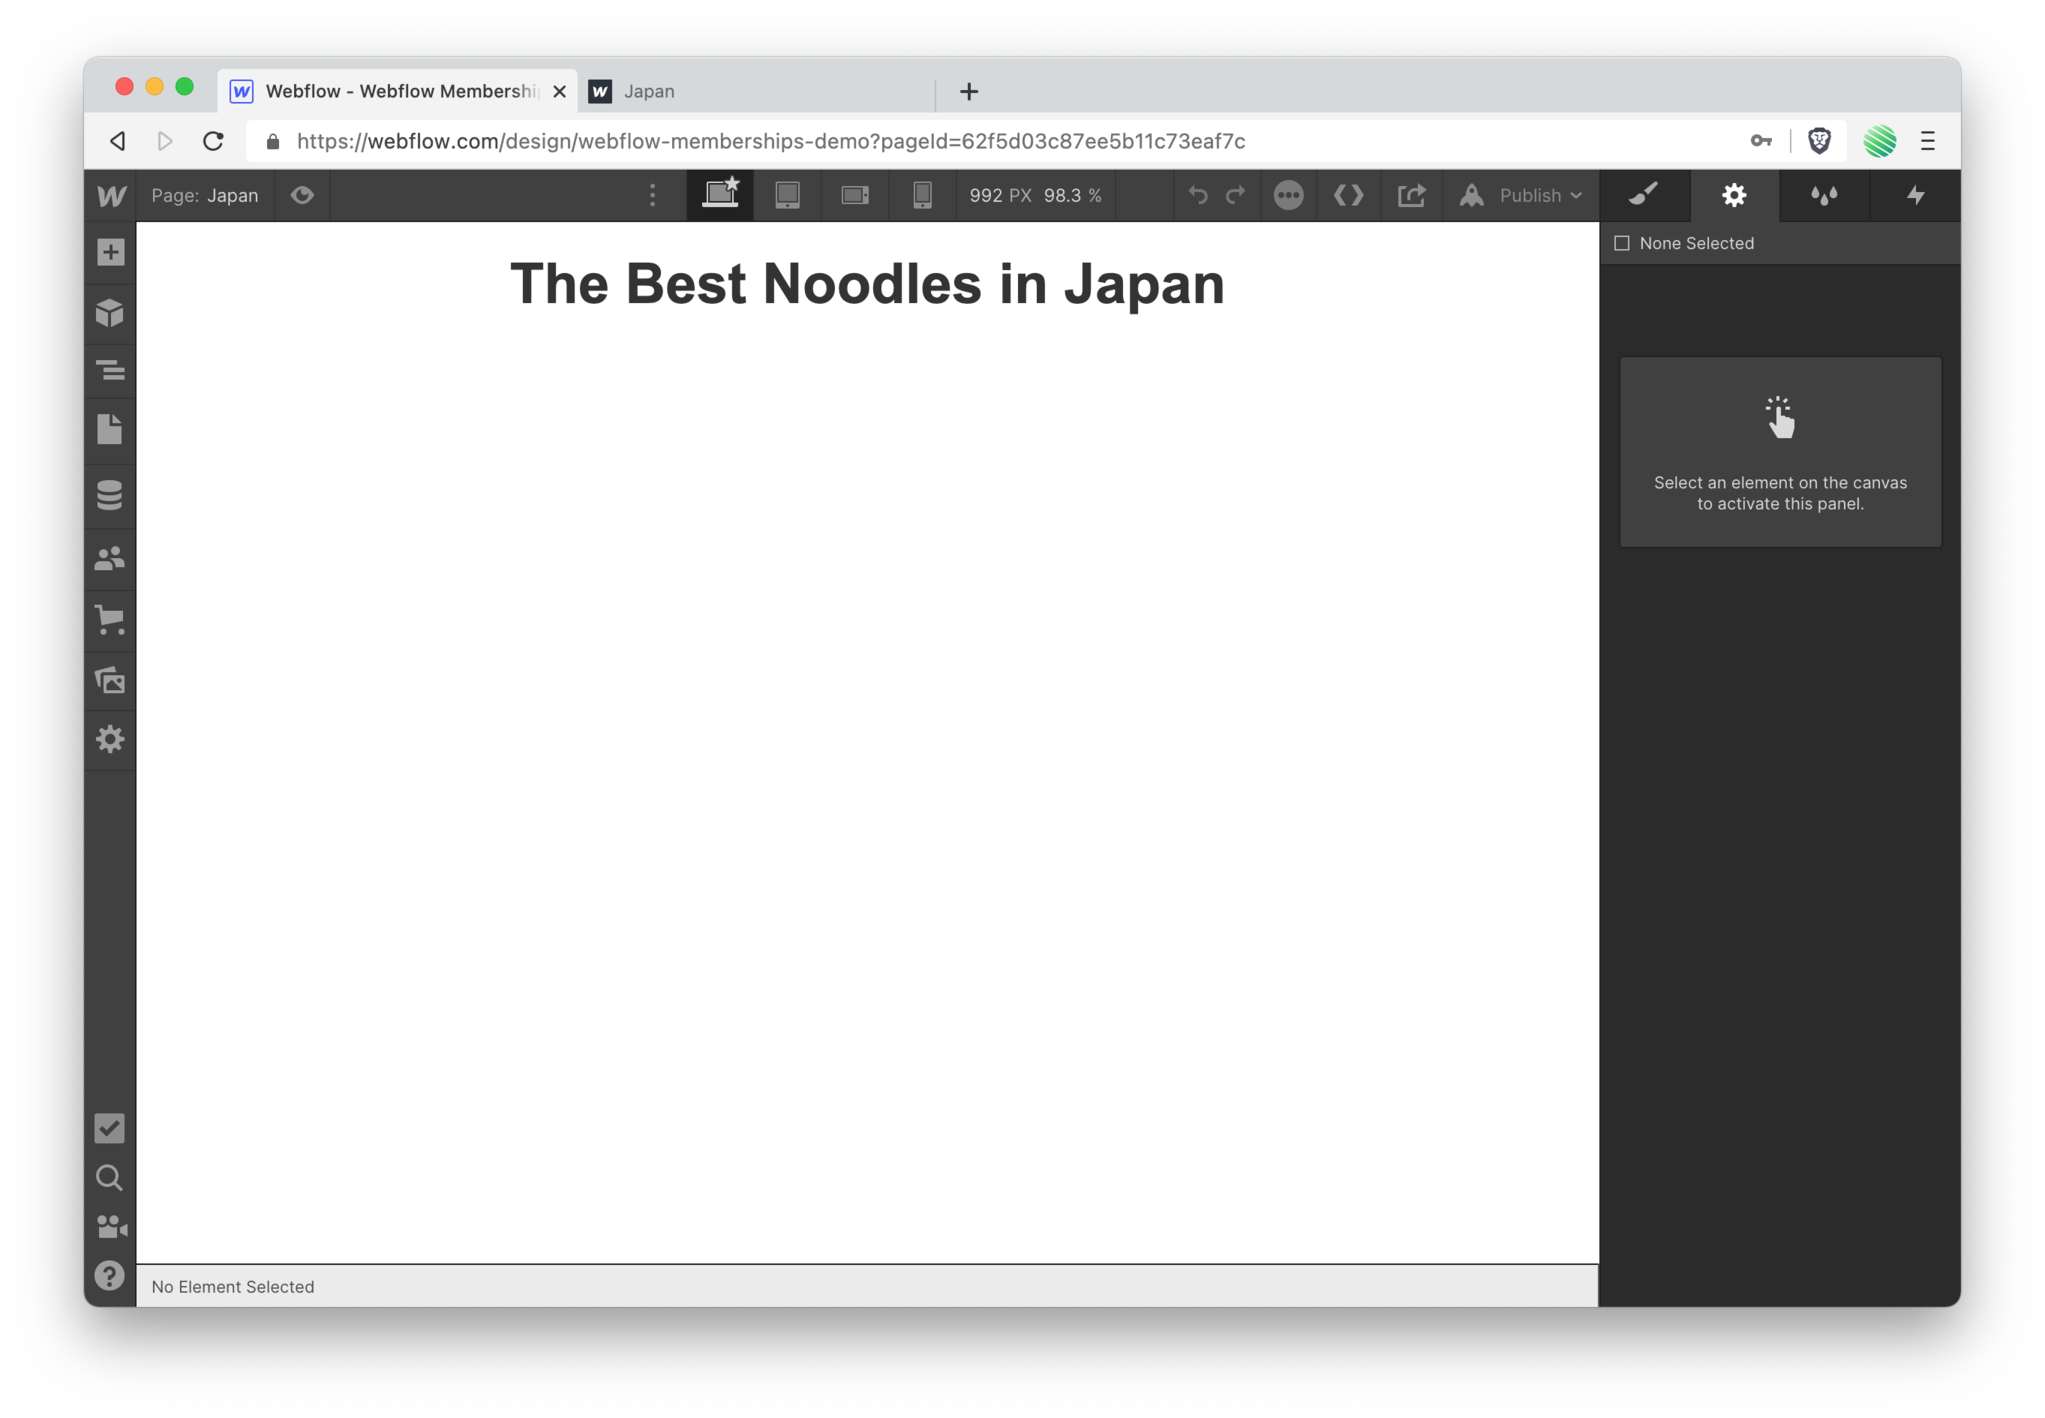 Go to your password protected page.
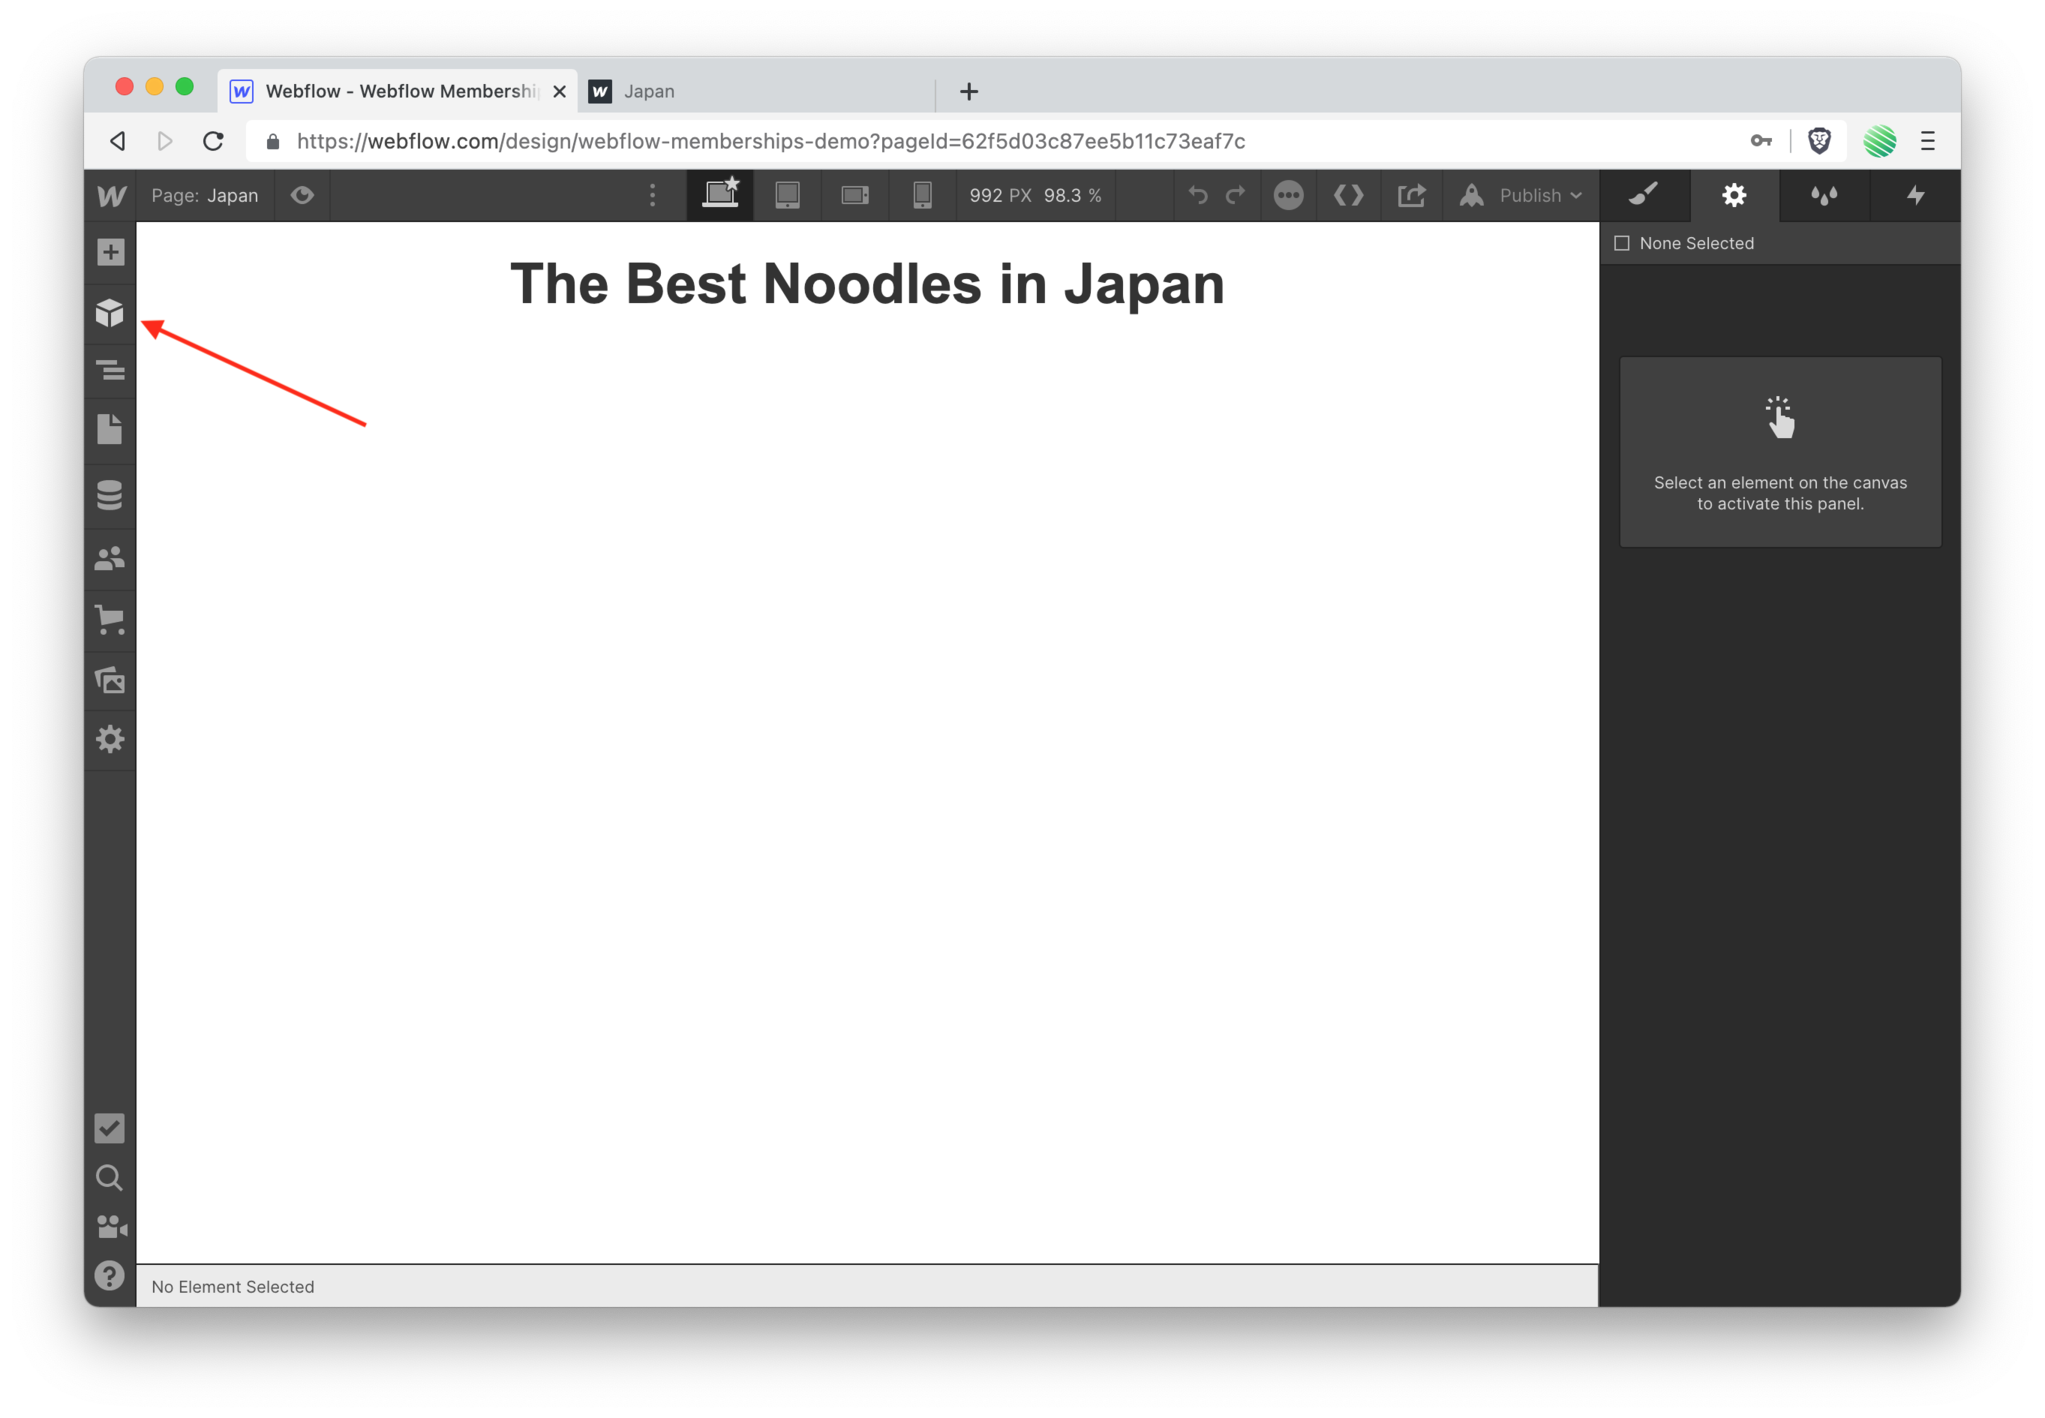 Open up the Symbol pane.
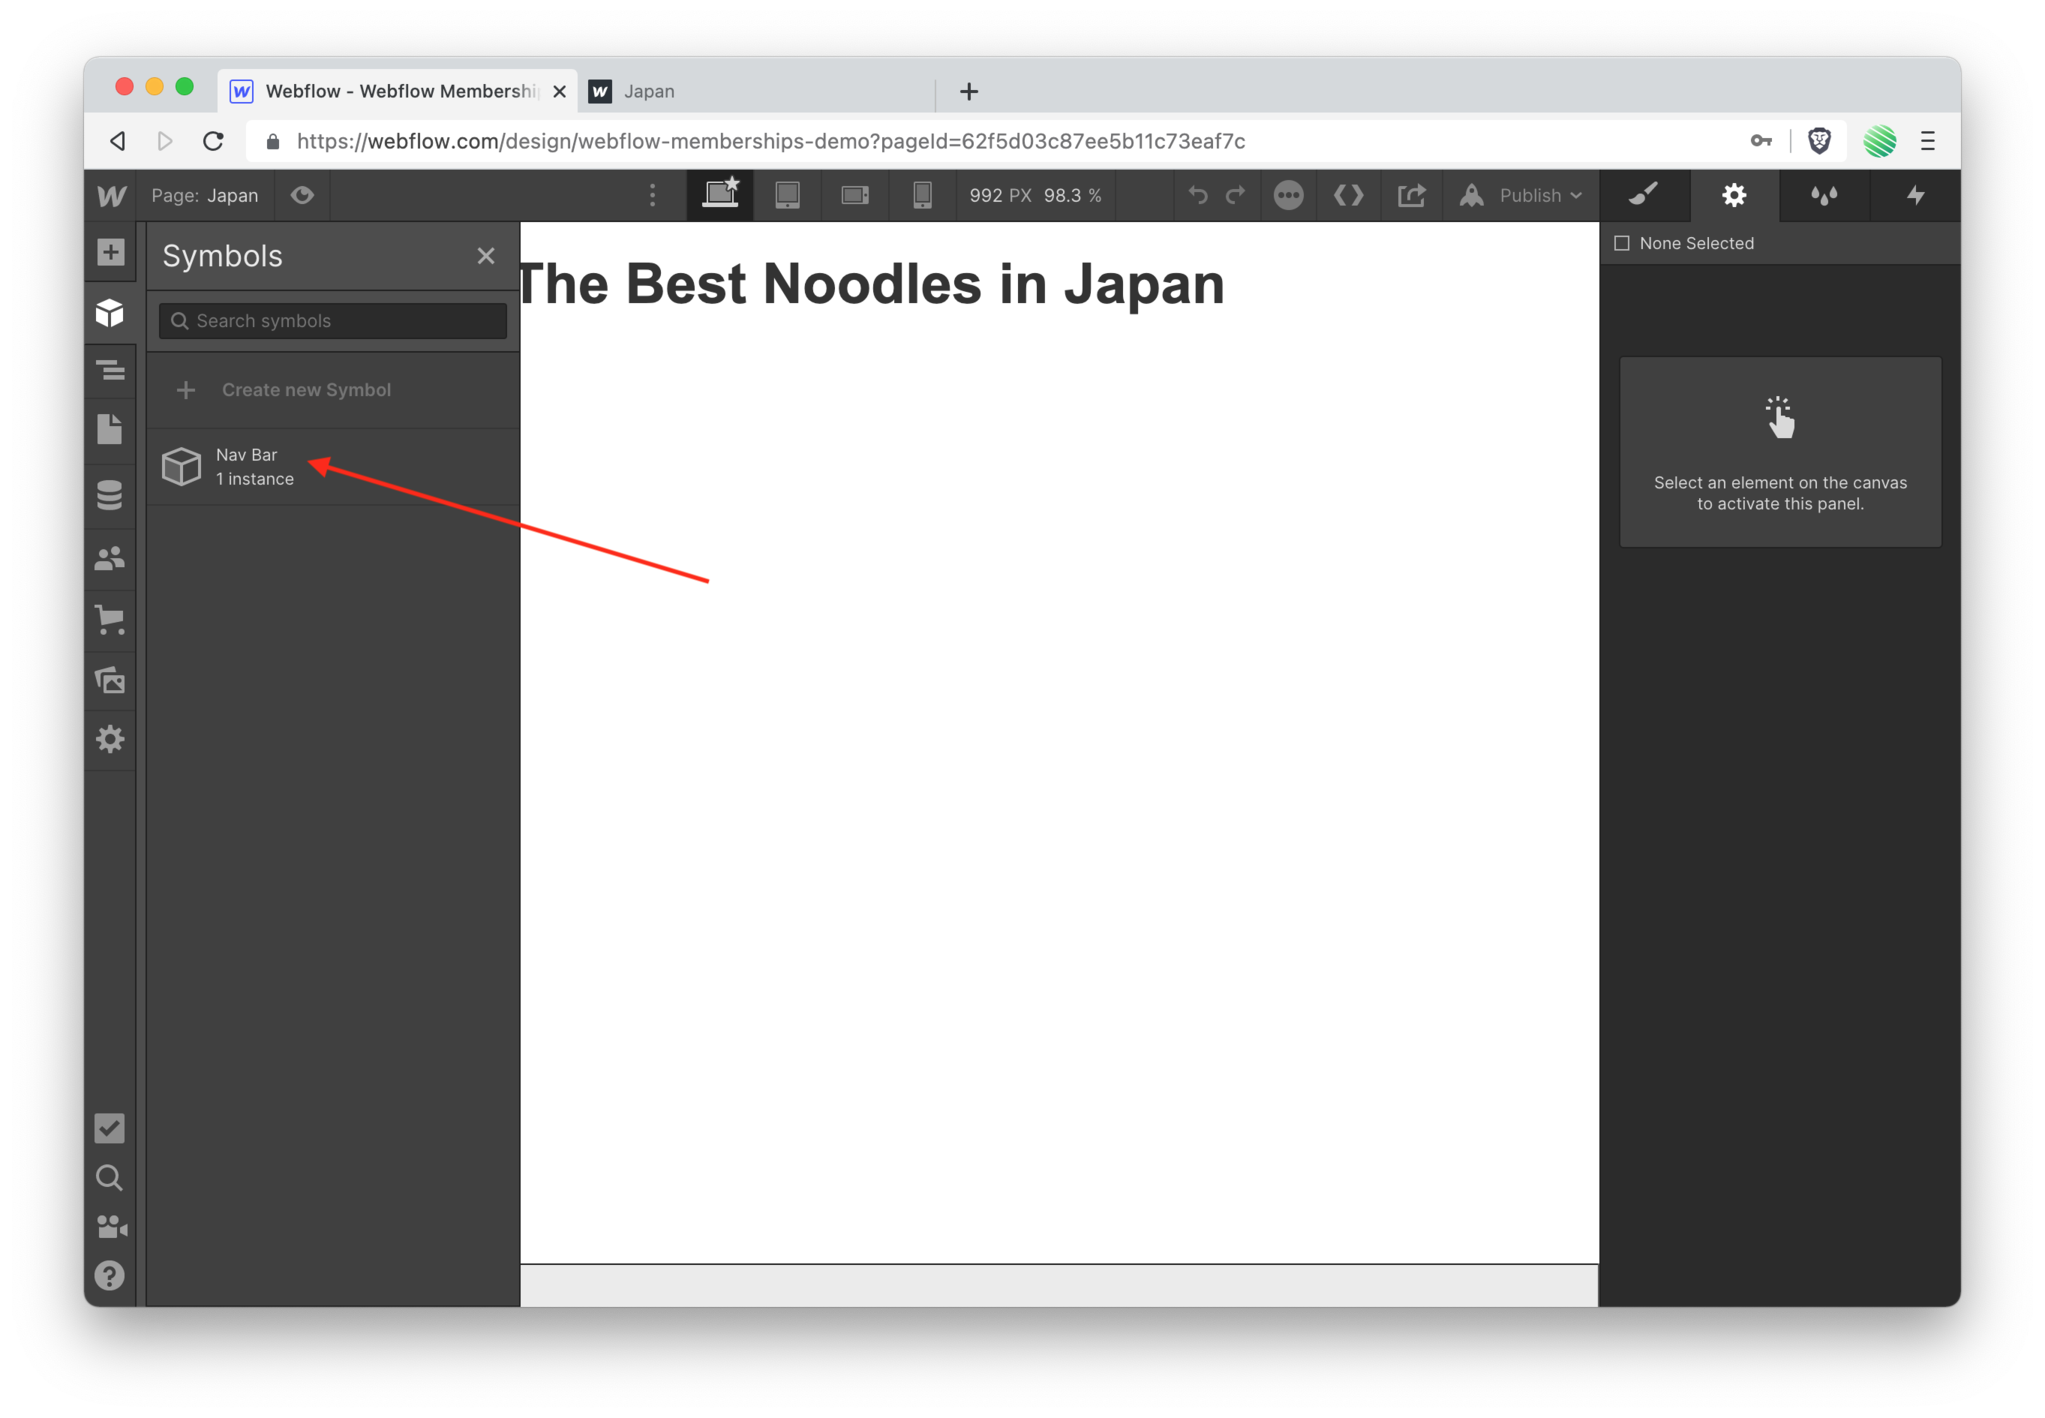 Drag & drop your new Symbol onto the page.
But that’s not enough. You need to add a home page link to every page, and to do that you need to add a new link to your Symbol. Once a new link is added it’ll show up on every page that this Symbol resides upon.
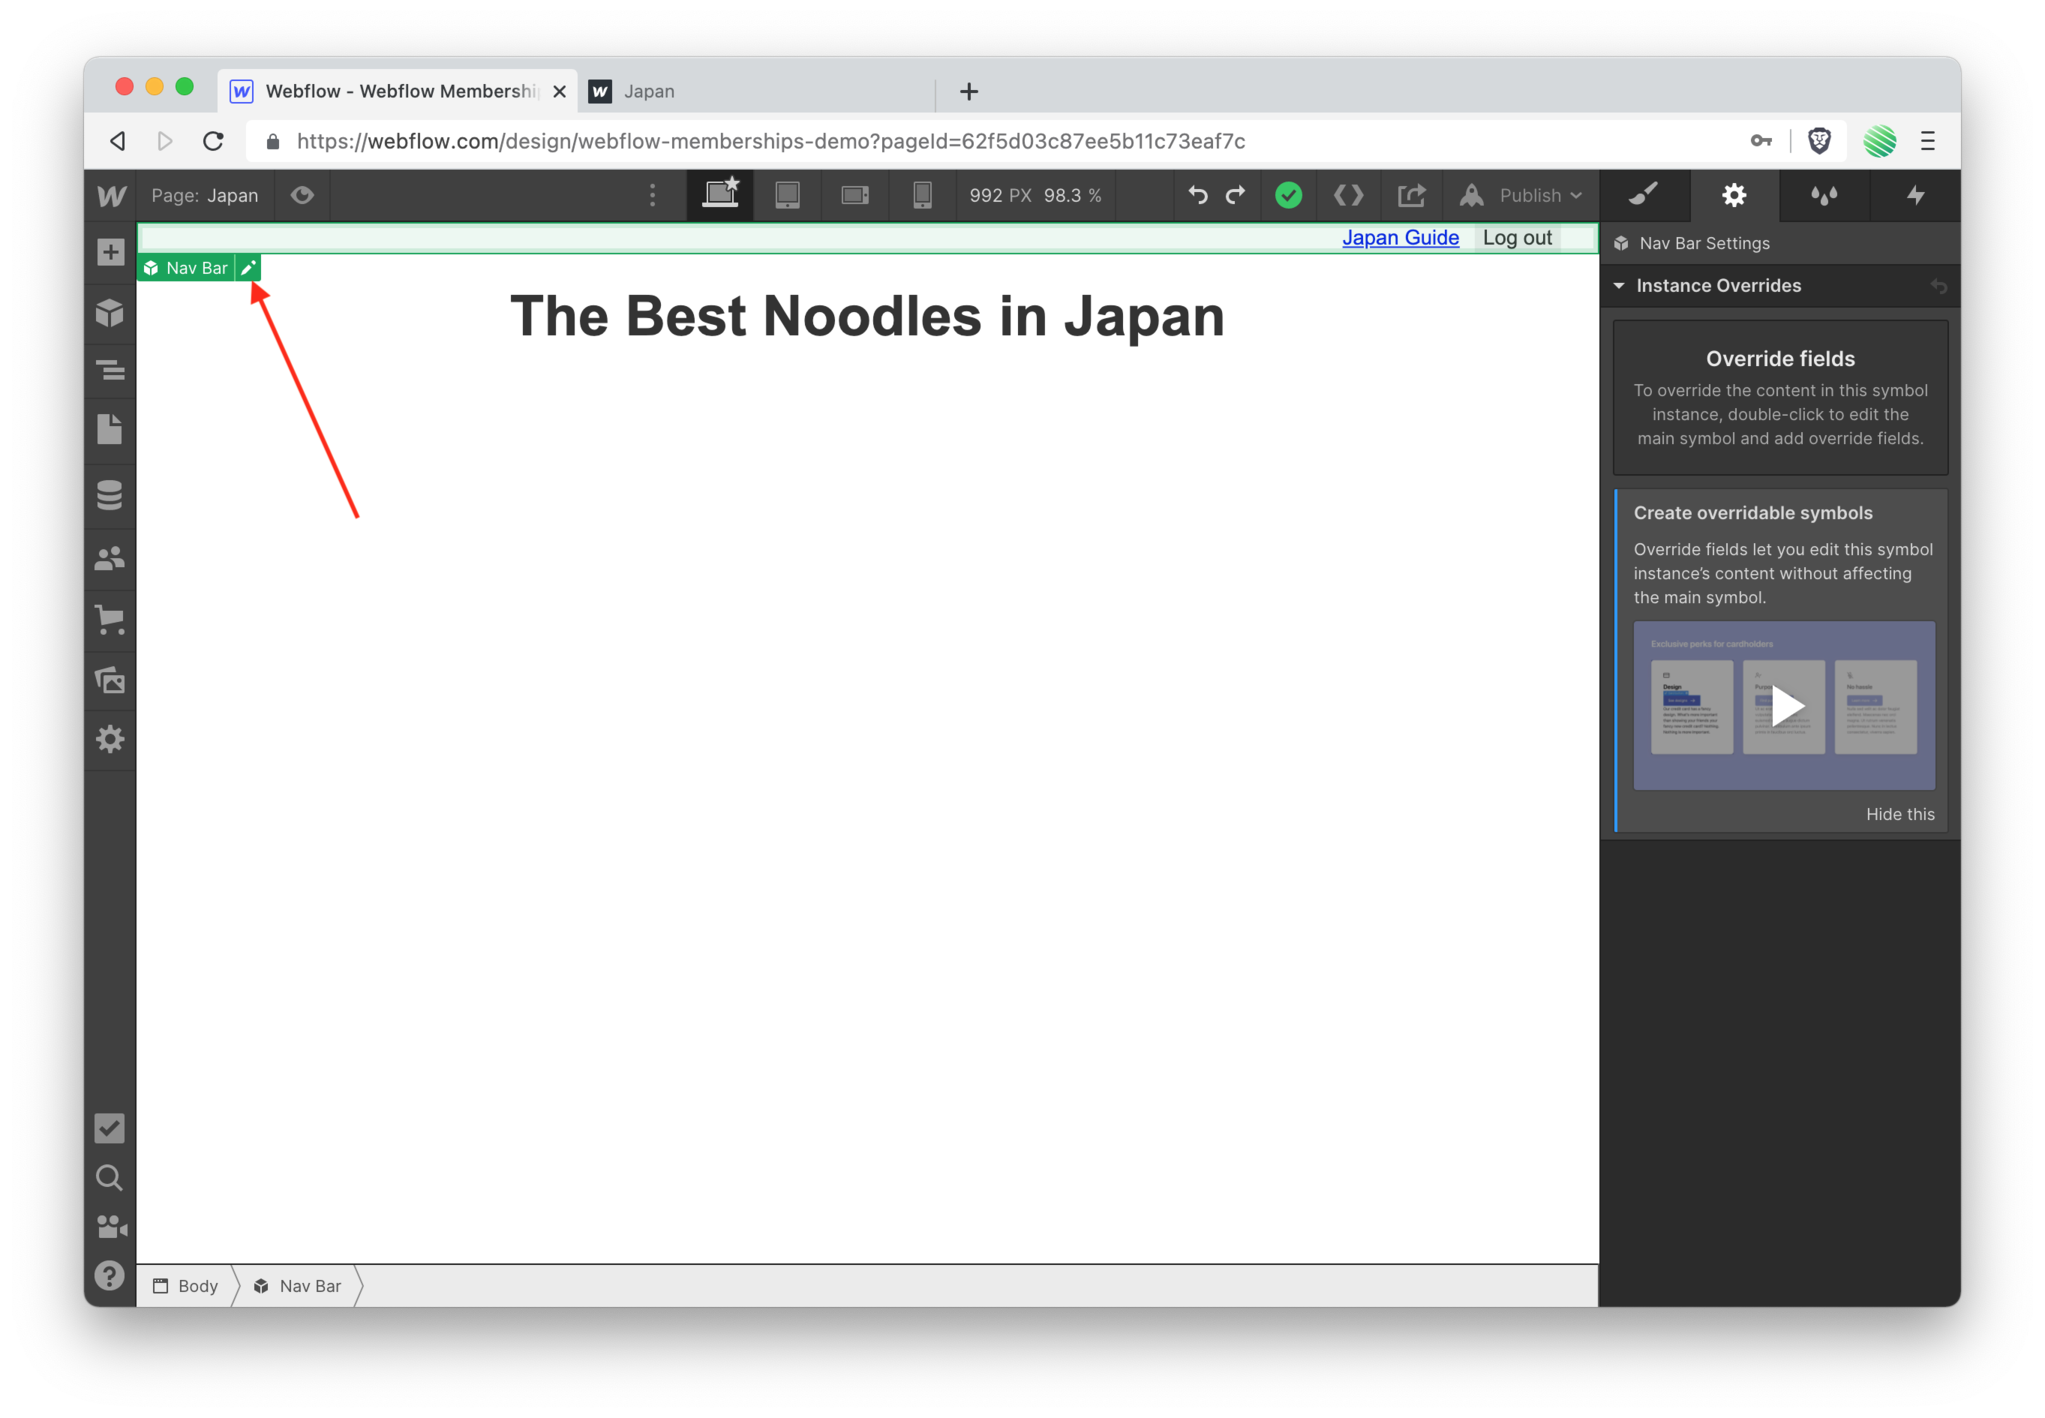 Tap on the edit button for your new Symbol.
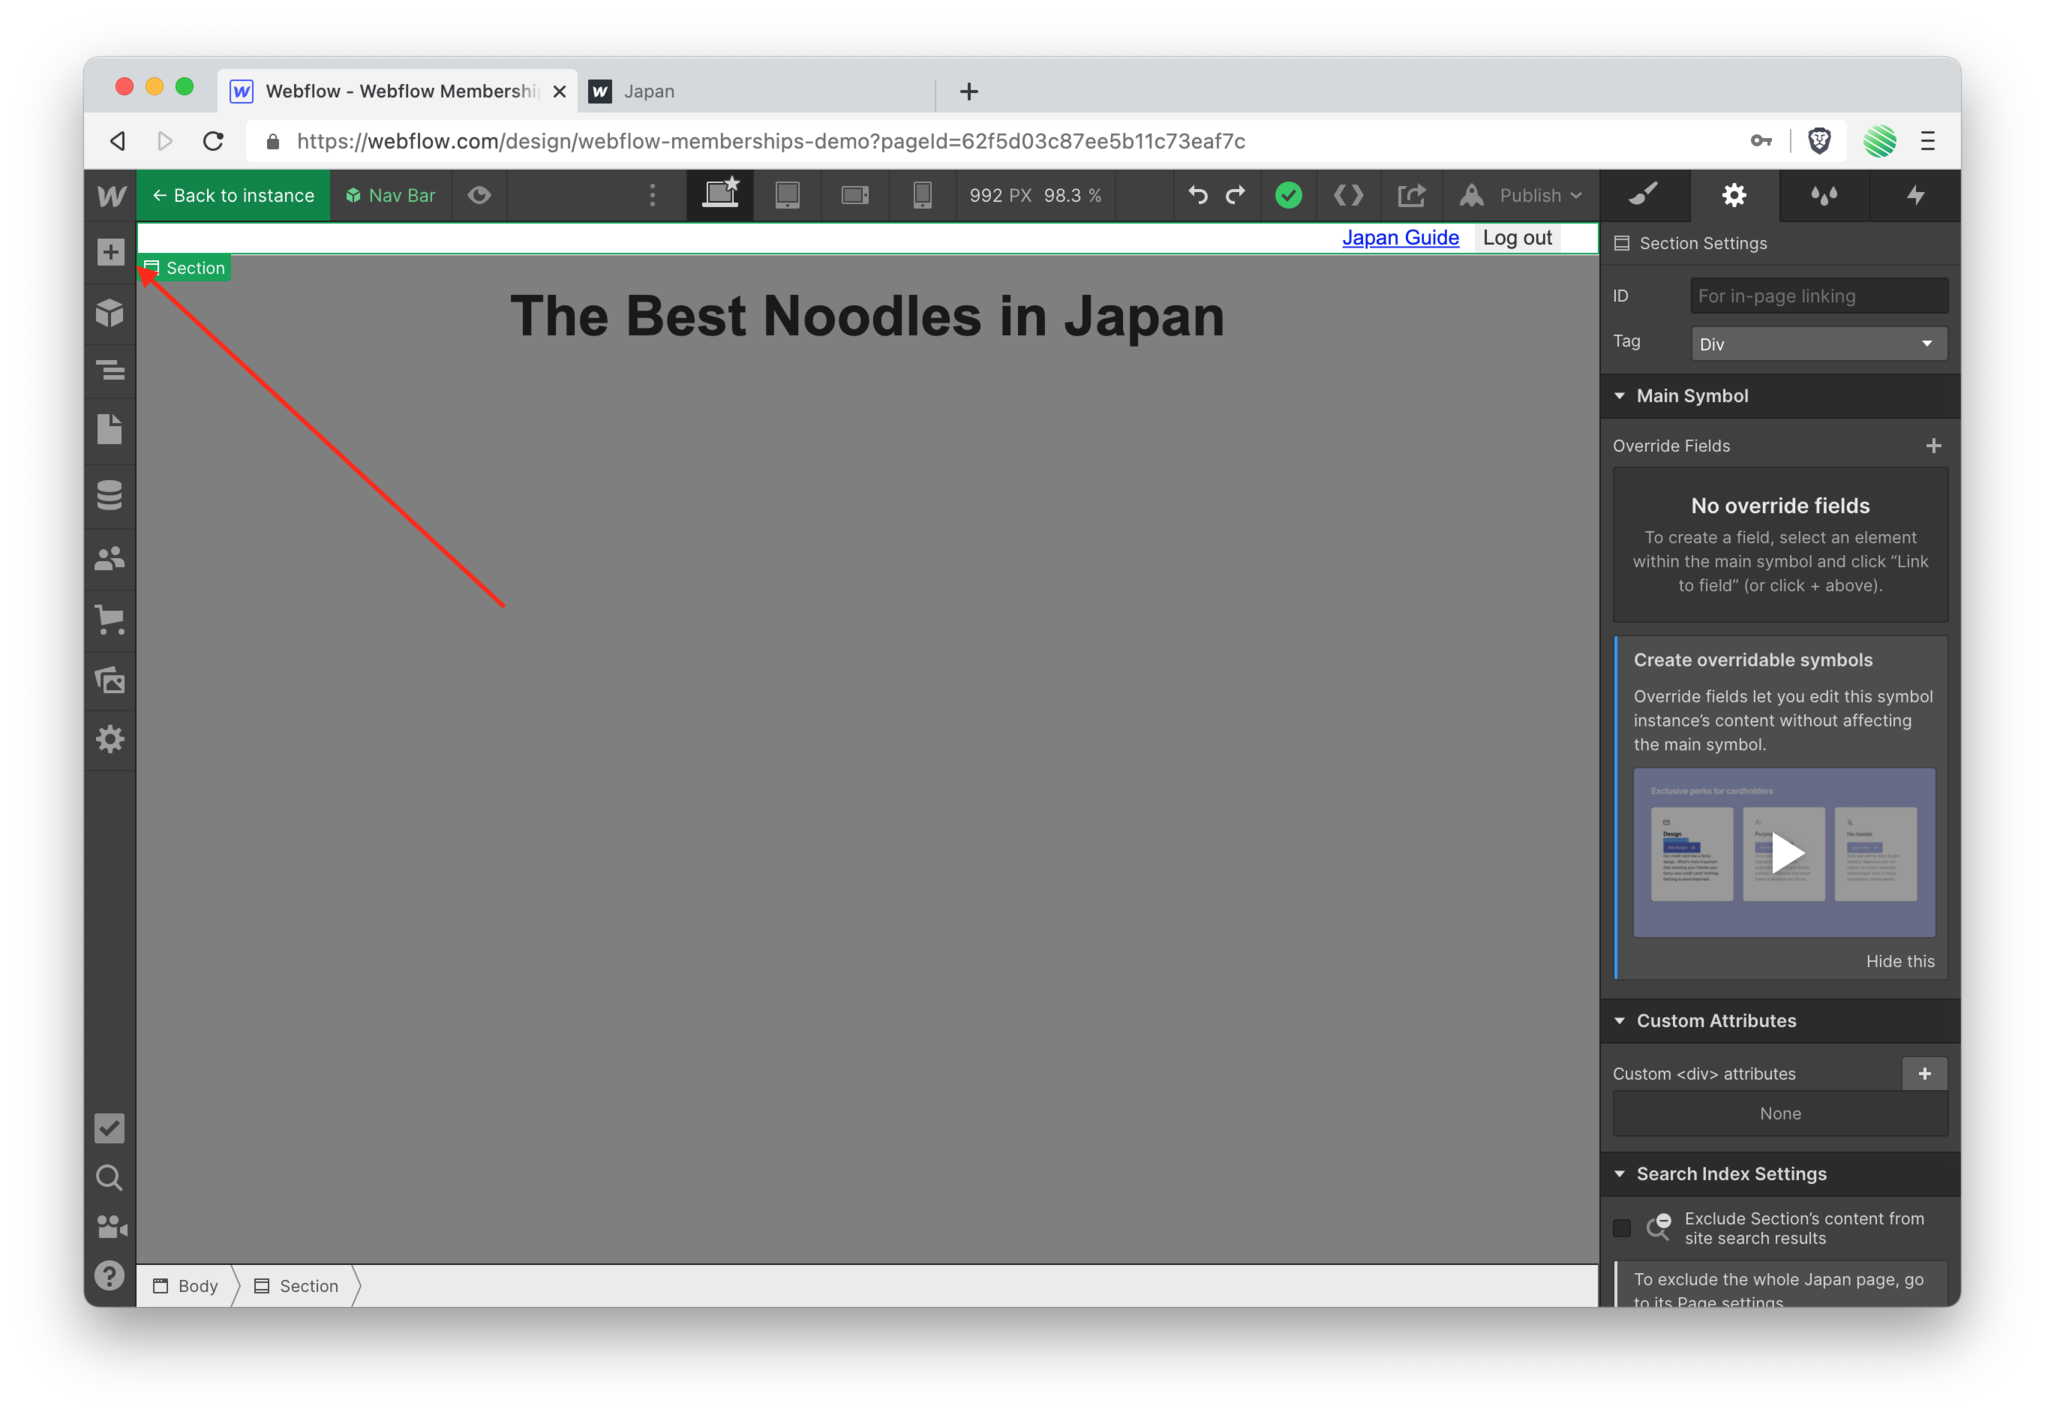 Open the add element pane.
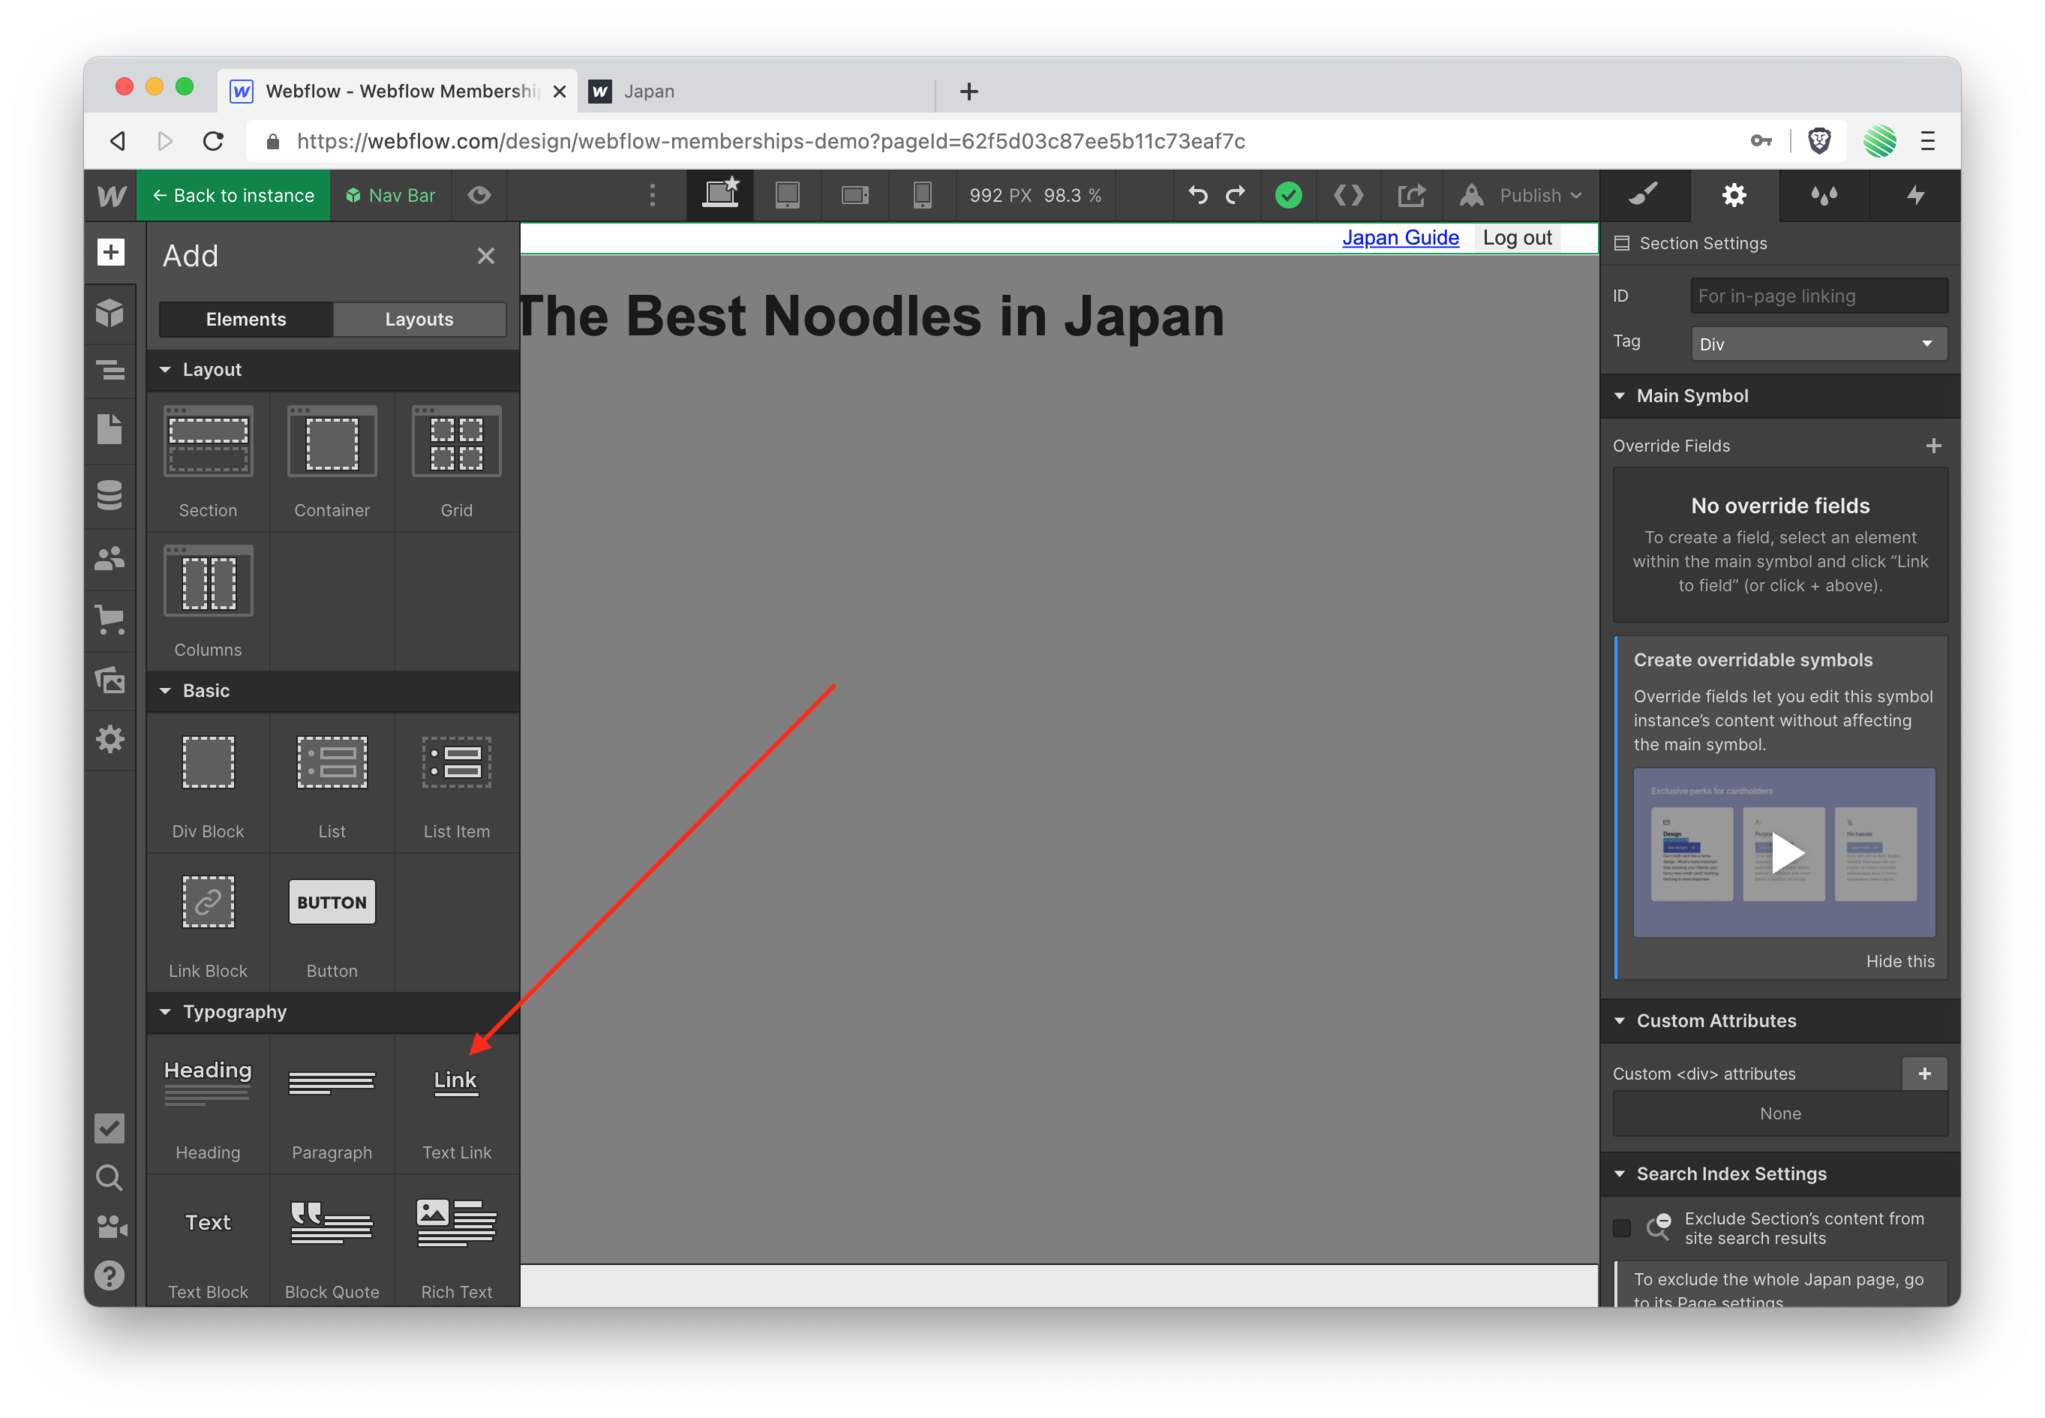 Drag & drop a new text link element onto the Symbol.
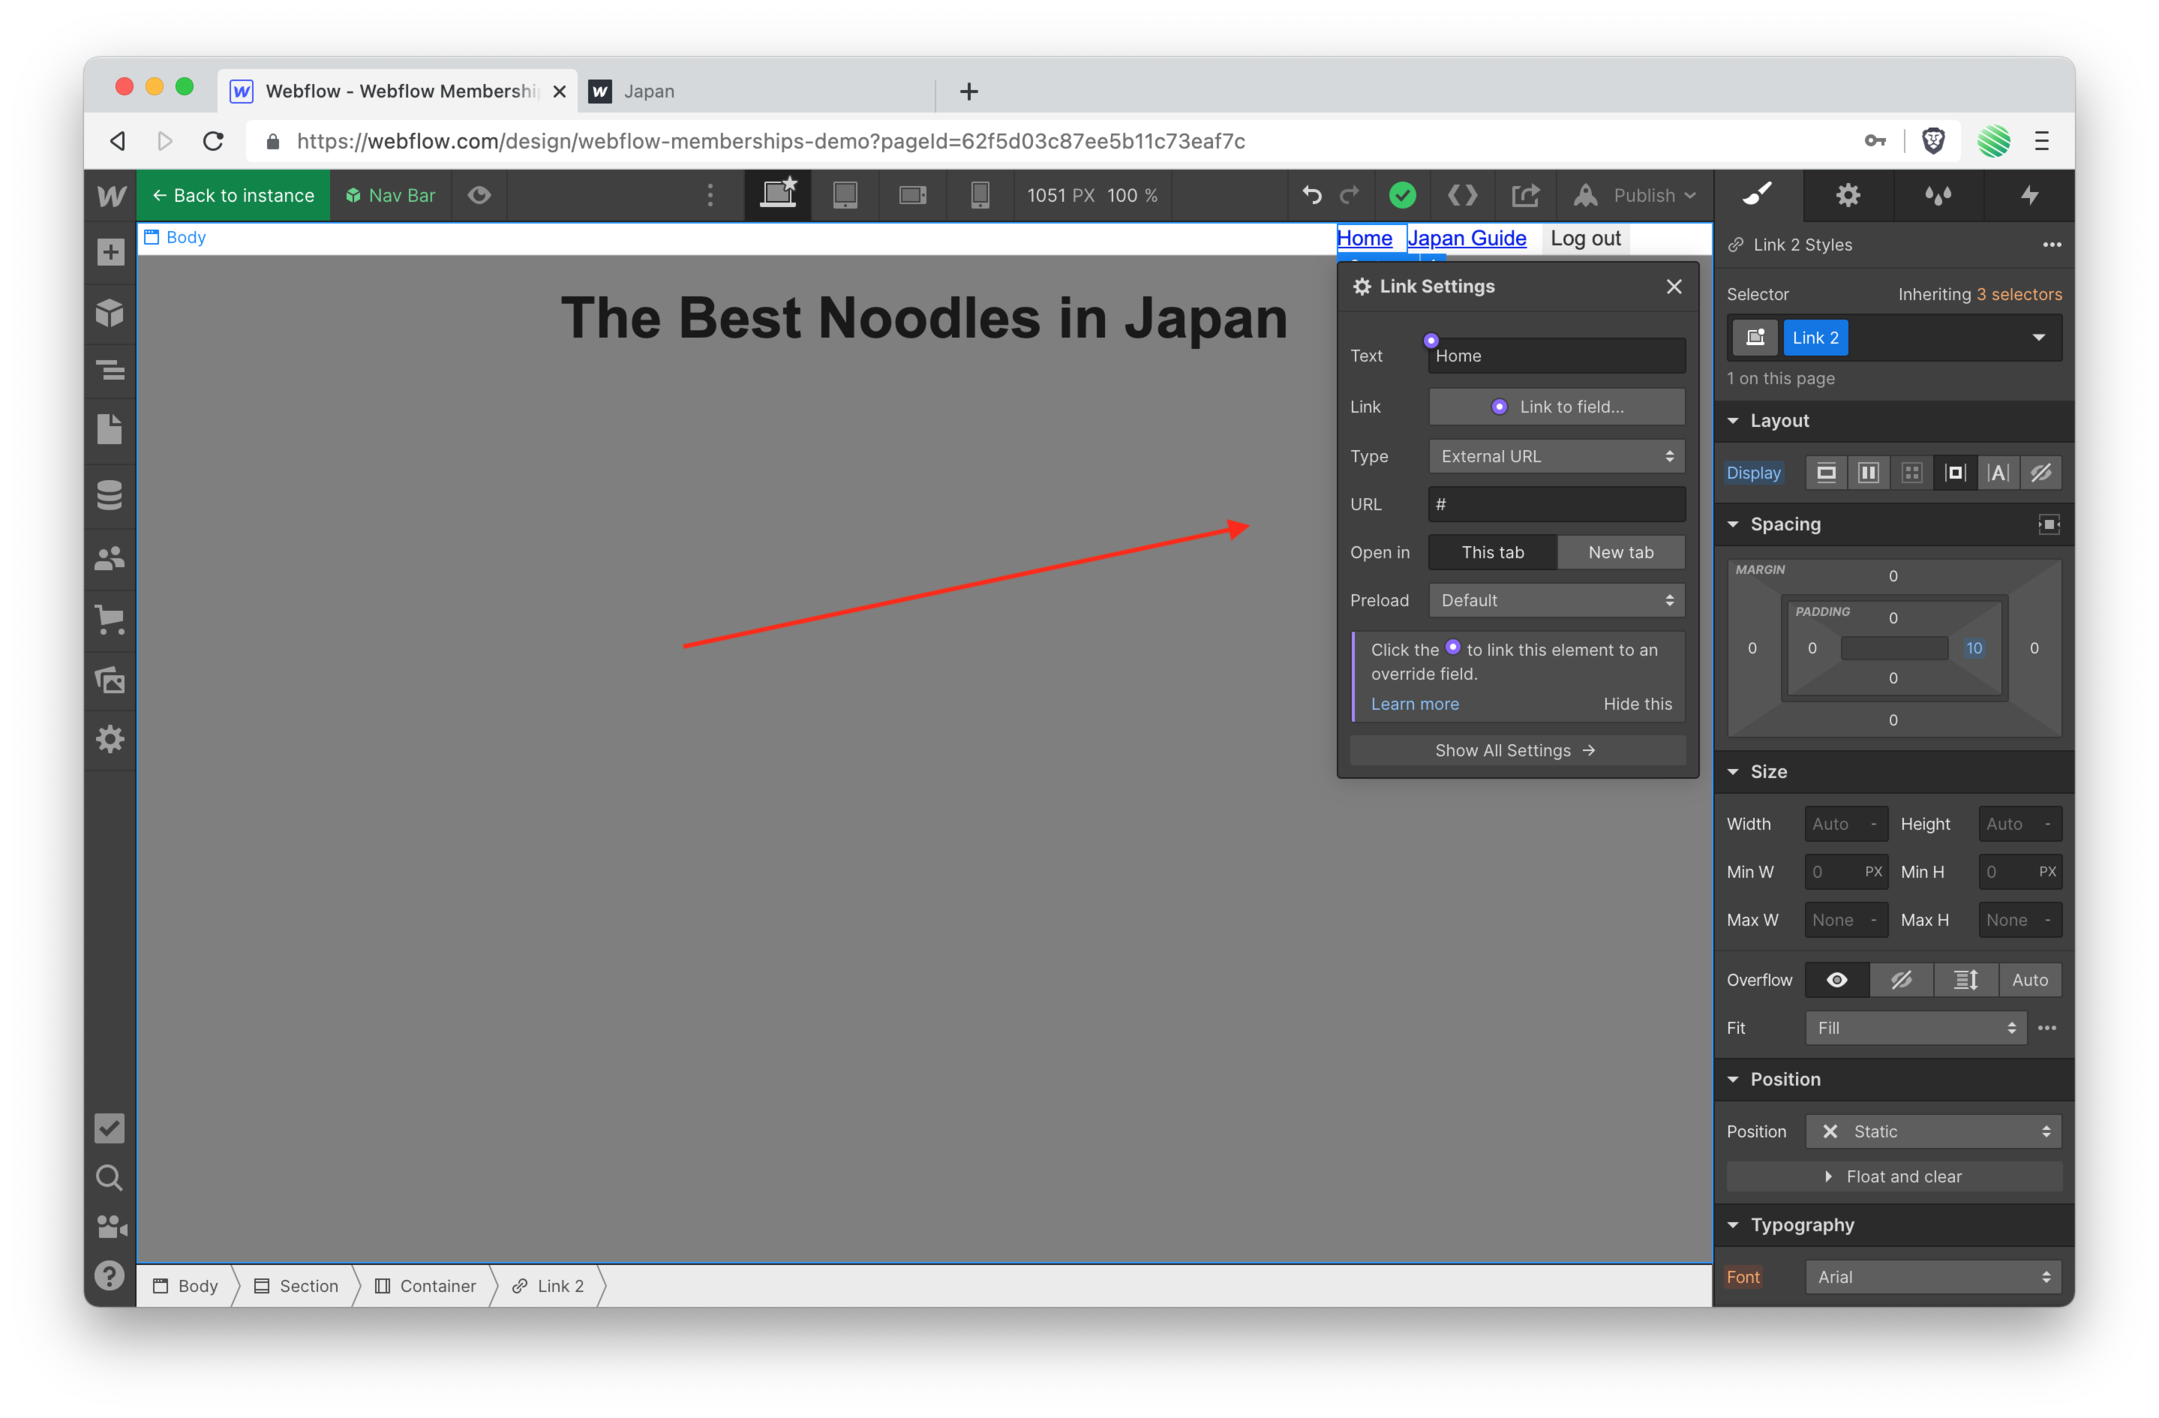 Rename it to “Home” and find the “Type” field.
 Change it from “External URL” to “Page” from within the dropdown options.
 Find the “Page” field and select “Home” from the dropdown options.
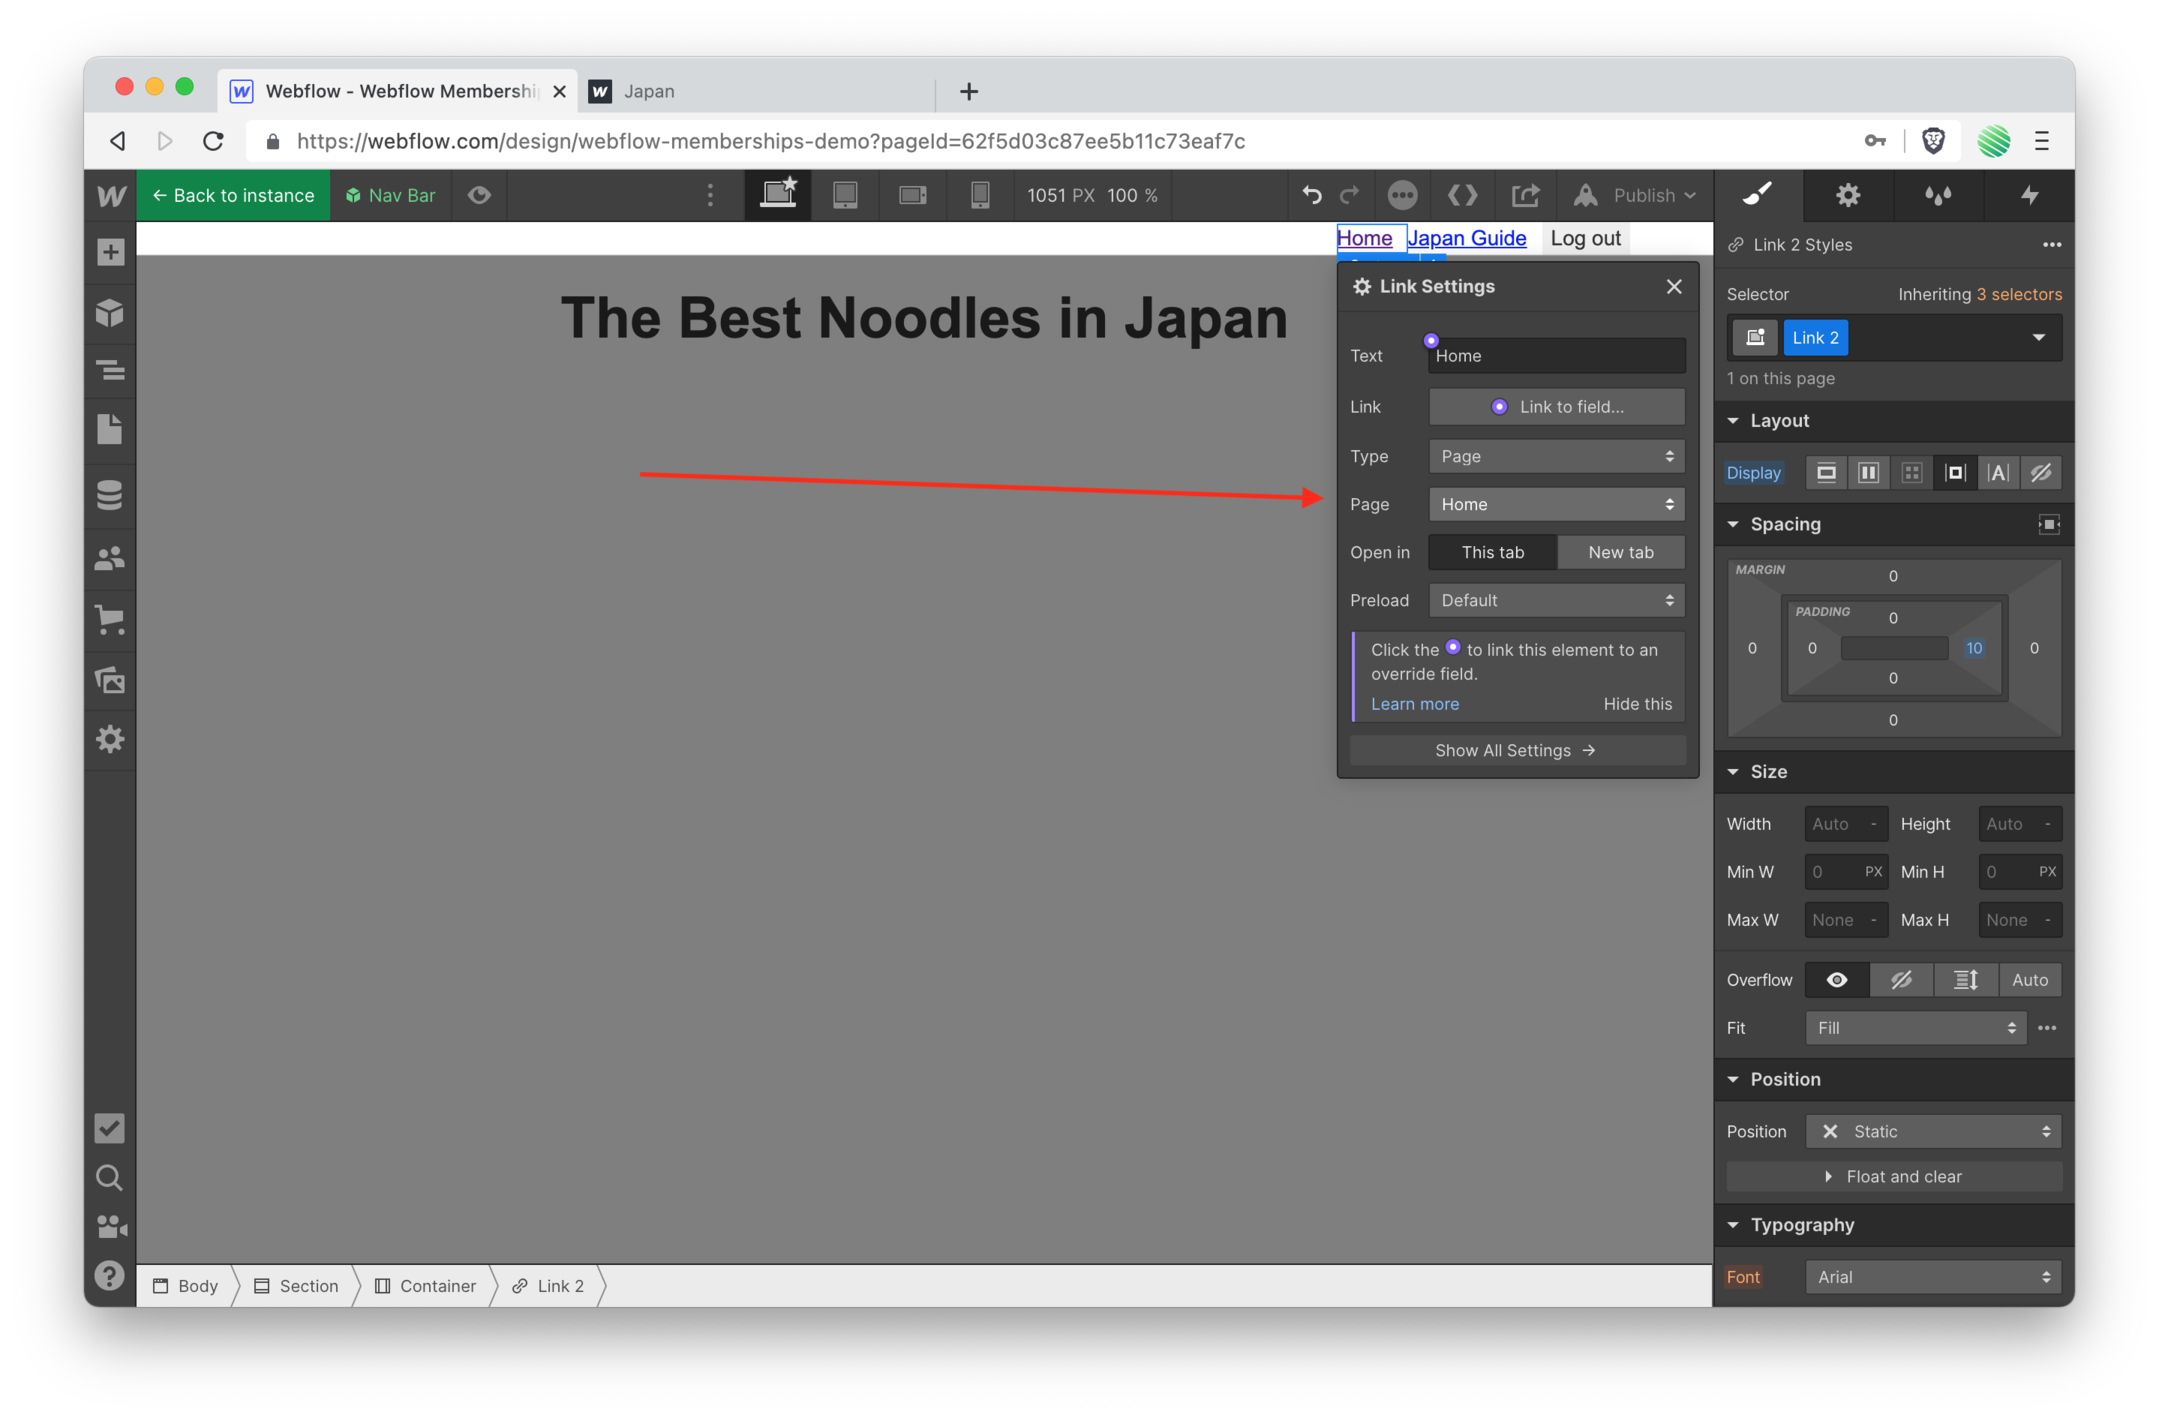 Now the Type field is set to “Page” and Page field is set to “Home” meaning when a user taps on this link it’ll take them to your Webflow home page.
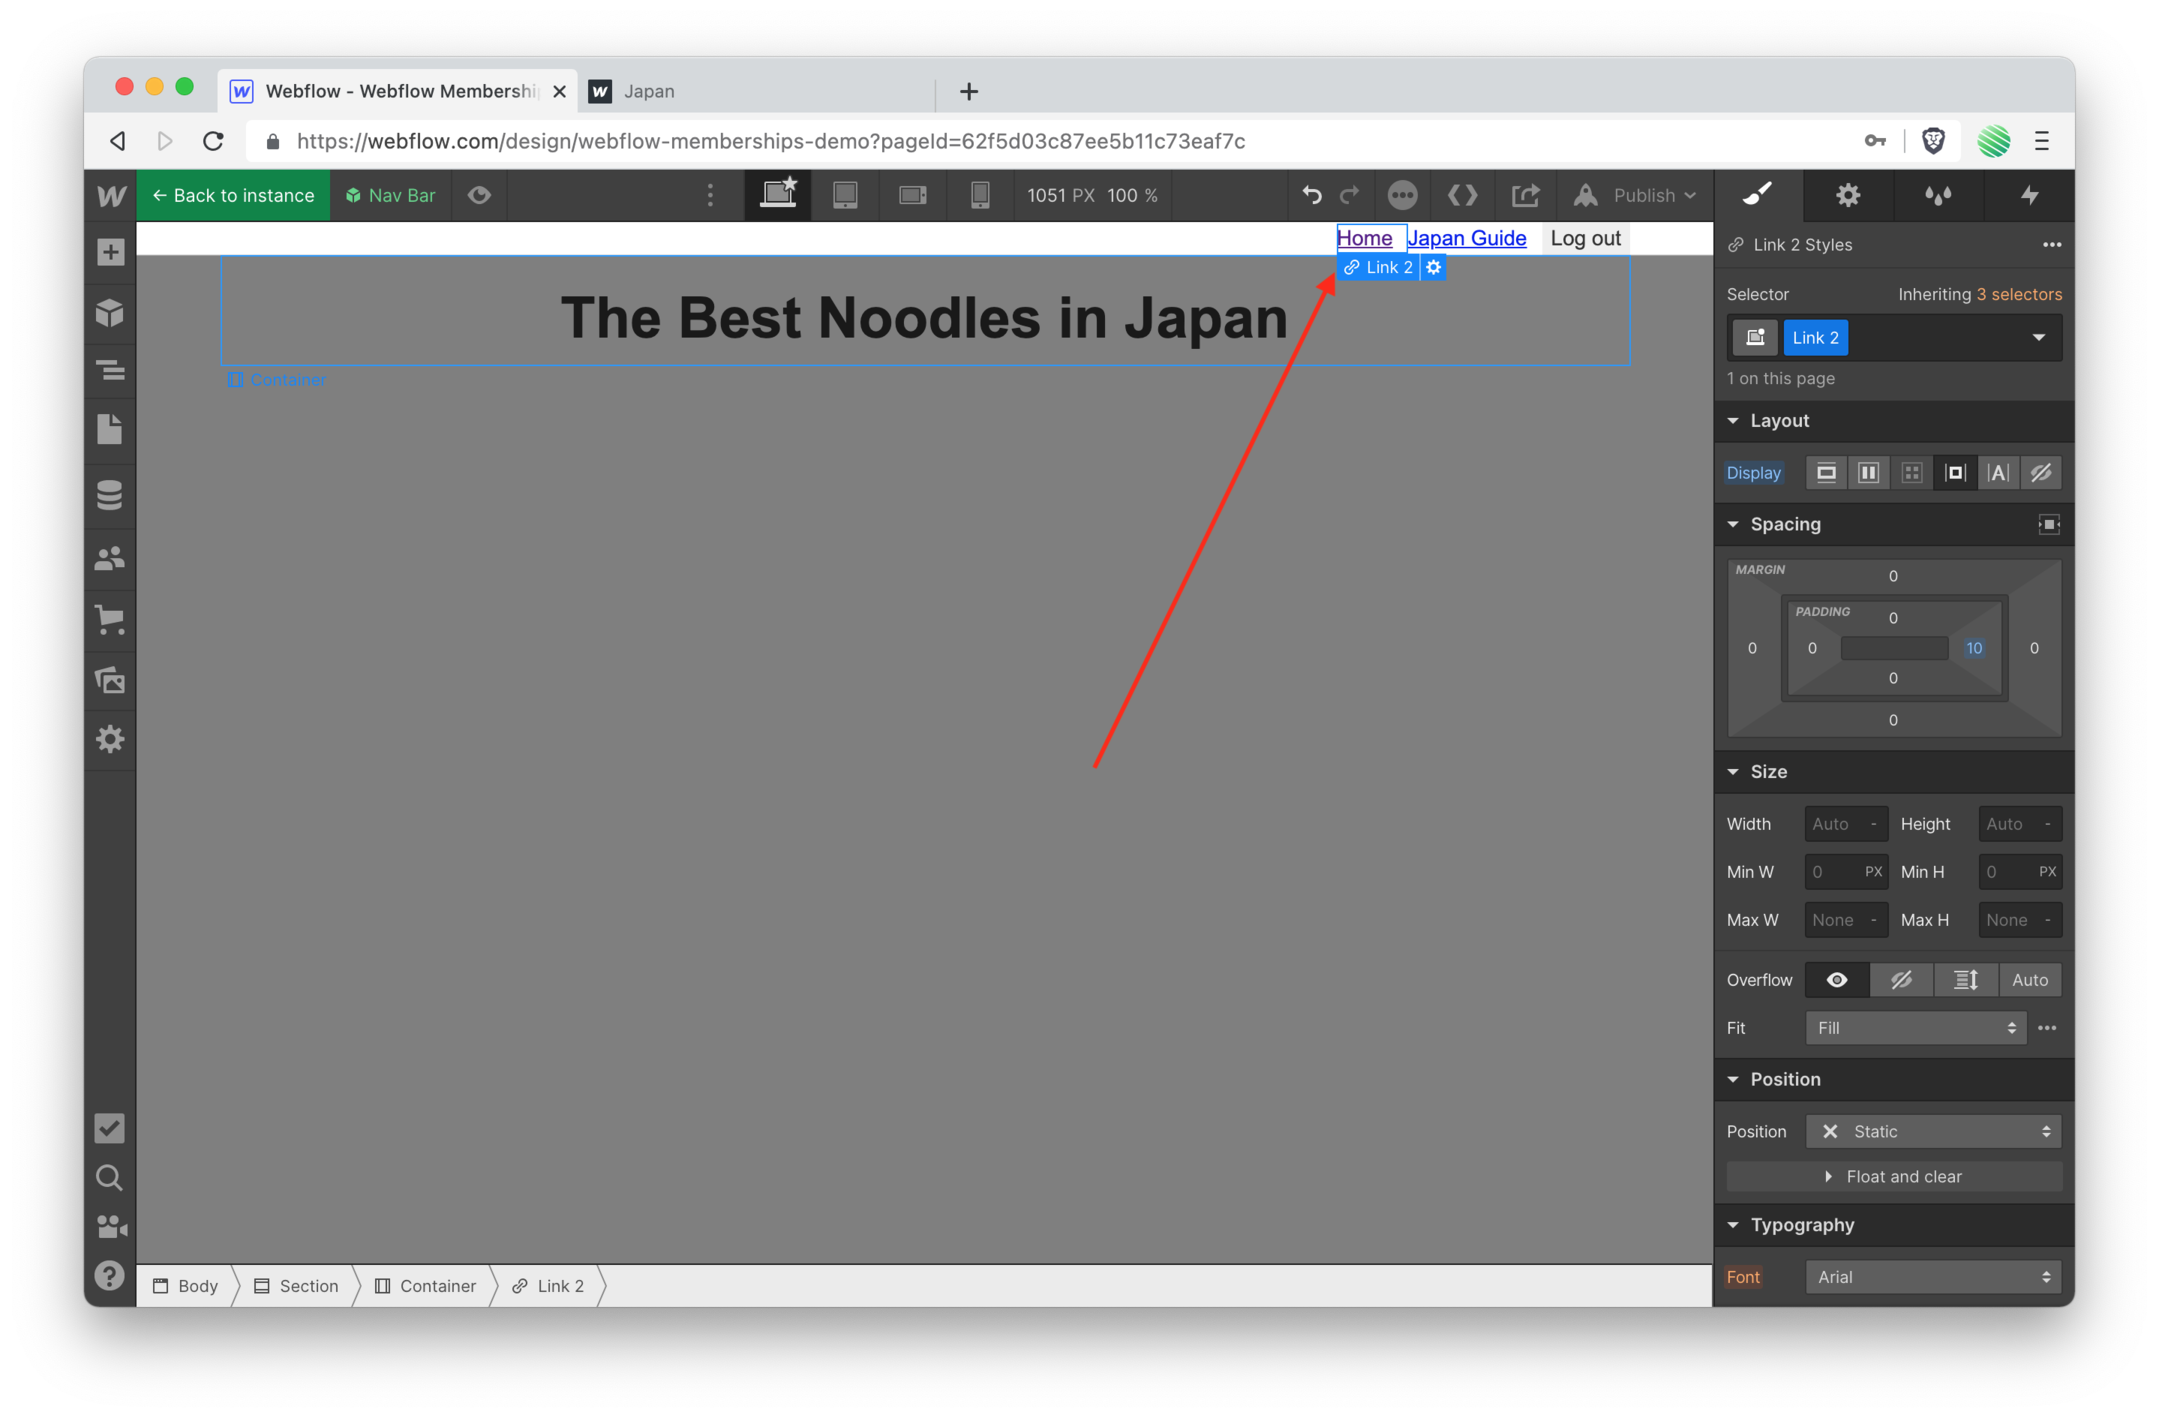
 Okay, looks good!
 Re-publish your site.

 Flip back to the live site tab.
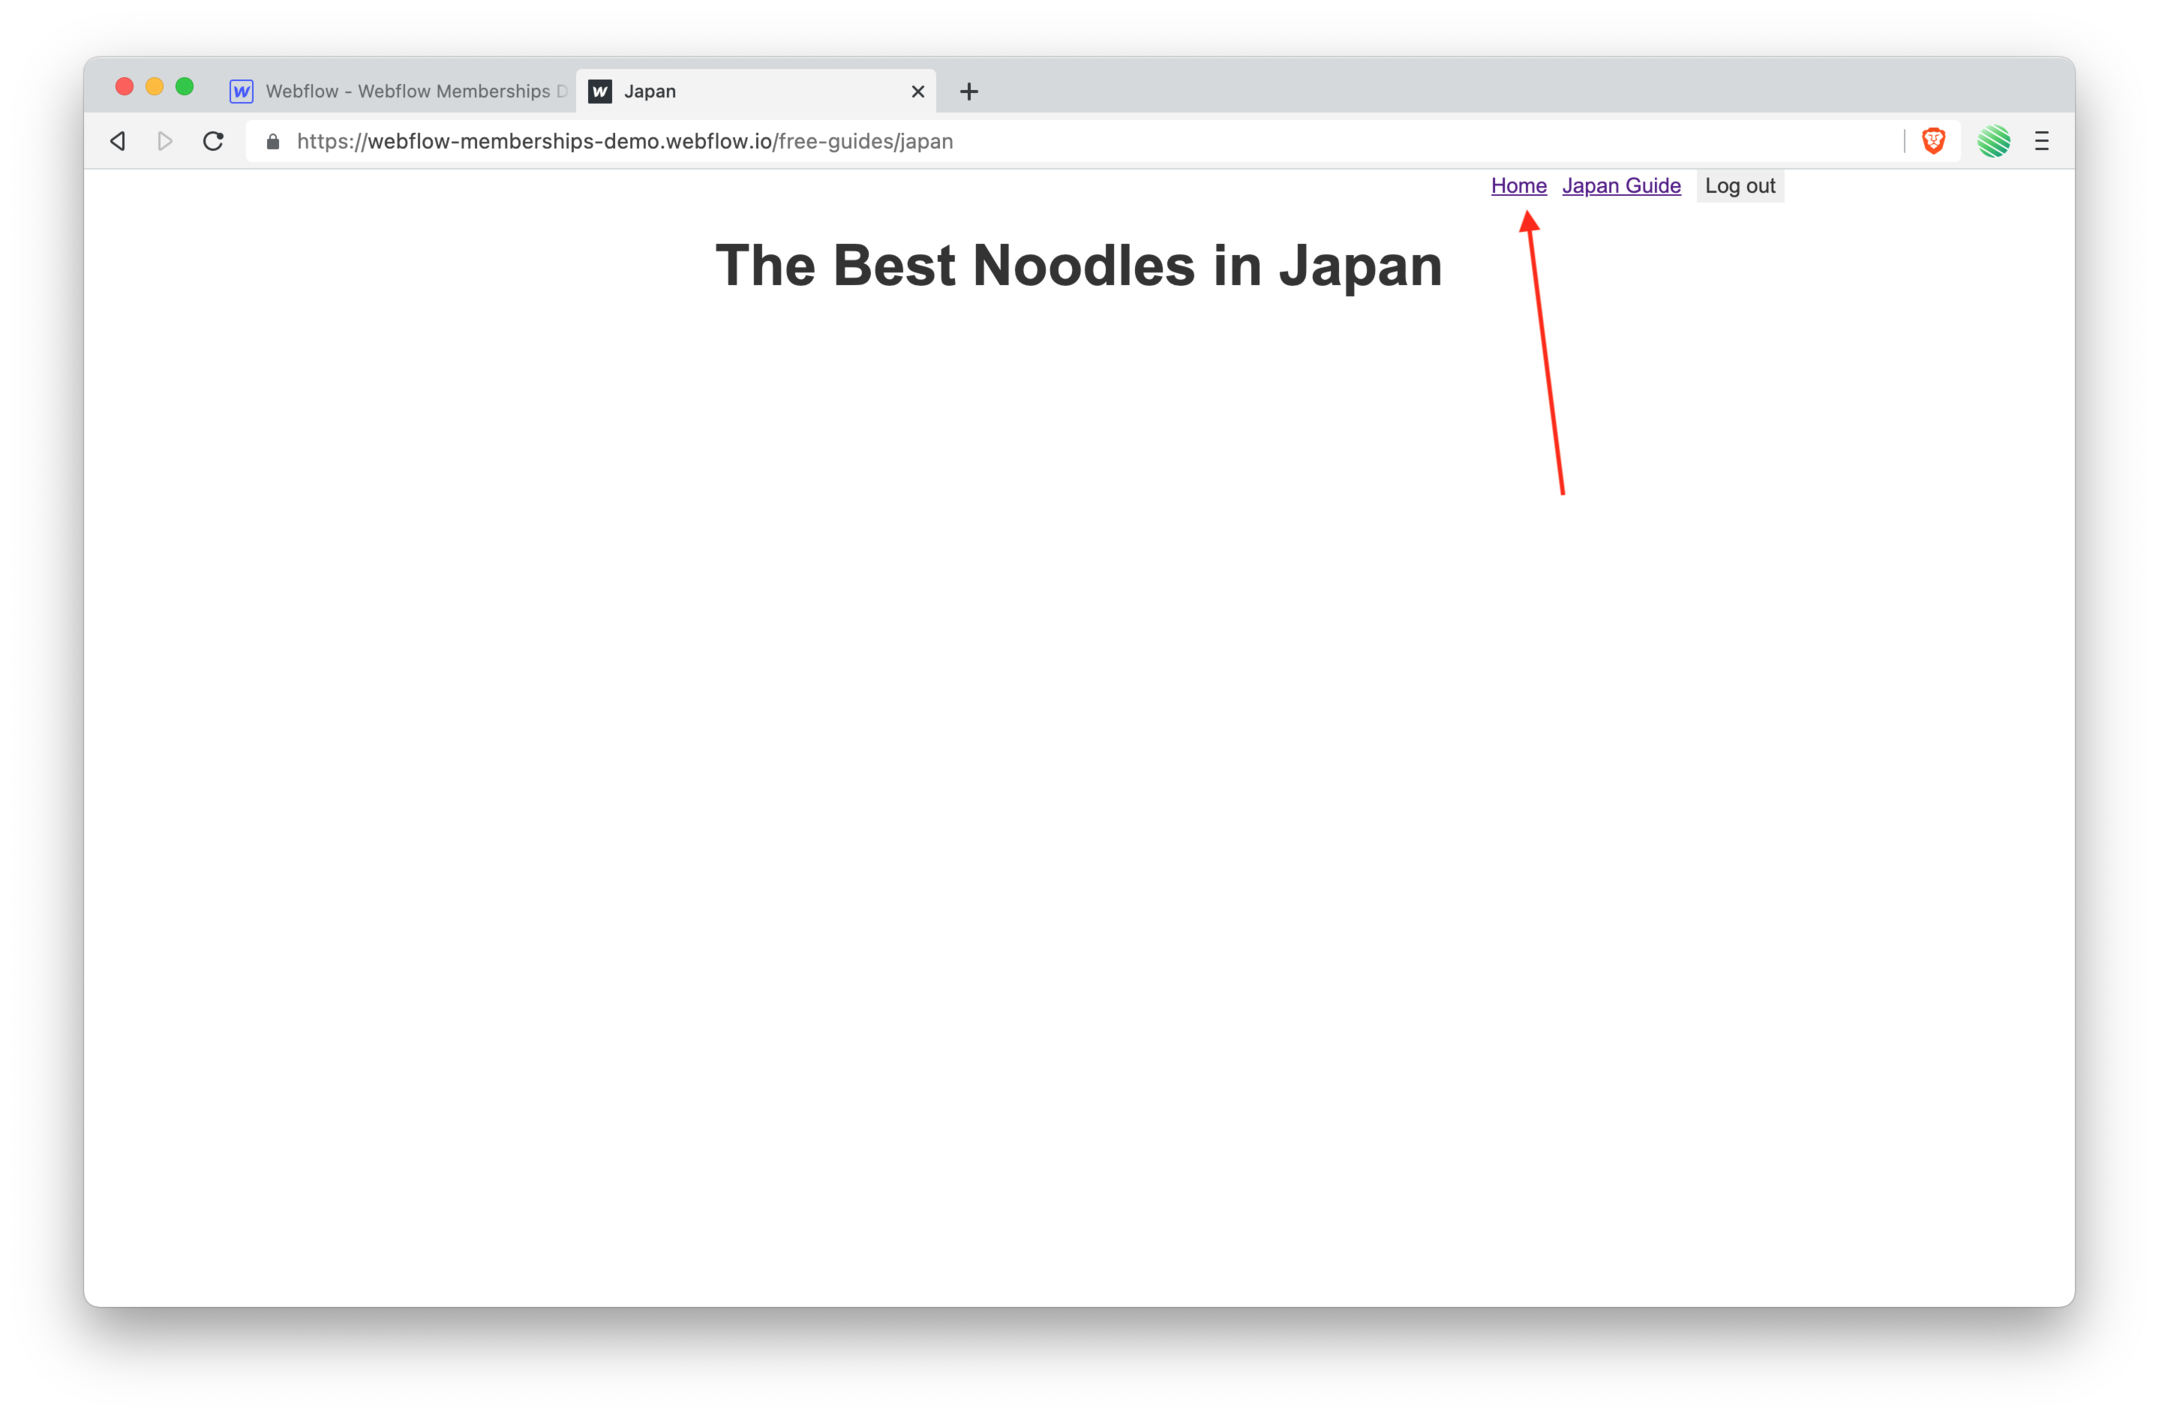 Reload this browser tab and find your new home page link showing up.
 Tapping it does just as you’d expect it to.
Summary
And that’s it!
Once you’ve got your head wrapped around this you’ll find it to be super simple and uber quick to setup, tweak, extend, and maintain.
Once you’ve added your email…
➡️ Run through my walk through using Webflow Logic to submit Webflow forms directly into the CMS without a 3rd party service.
➡️ Checkout out my build using Native Airtable Webhooks to submit Webflow forms directly into your Airtable base (no 3rd party services required).