“Hey all, I need a little help…
I’m trying to set up a new Webhook so that I can receive data every time a Webflow CMS item is changed in a specific Collection.
I’ve successfully set up a Webhook to get data when any of my Webflow CMS items change, but how do I narrow it down to a specific Webflow CMS Collection?"
Yup, it’s a common problem.
You know Webflow Webhooks are the secret weapon to building advanced solutions for you ( and your clients ).
But every time you set one up, it’s triggered on all Webflow CMS updates instead of only the Collection you want.
Not a problem!
You’re using Make (formerly Integromat) or maybe even Zapier as your destination when popping off a Webflow Webhook.
So… easy peasy, you just add a filter.

Problem is…
Filters only run AFTER your Webhook has run.
You have a lot of Webflow CMS Collections.
…and you have a lot of CMS Items.
…and this eats up a lot of Make operations (or Zapier tasks).
…and this costs a bunch of money for operations you never need to use 😡
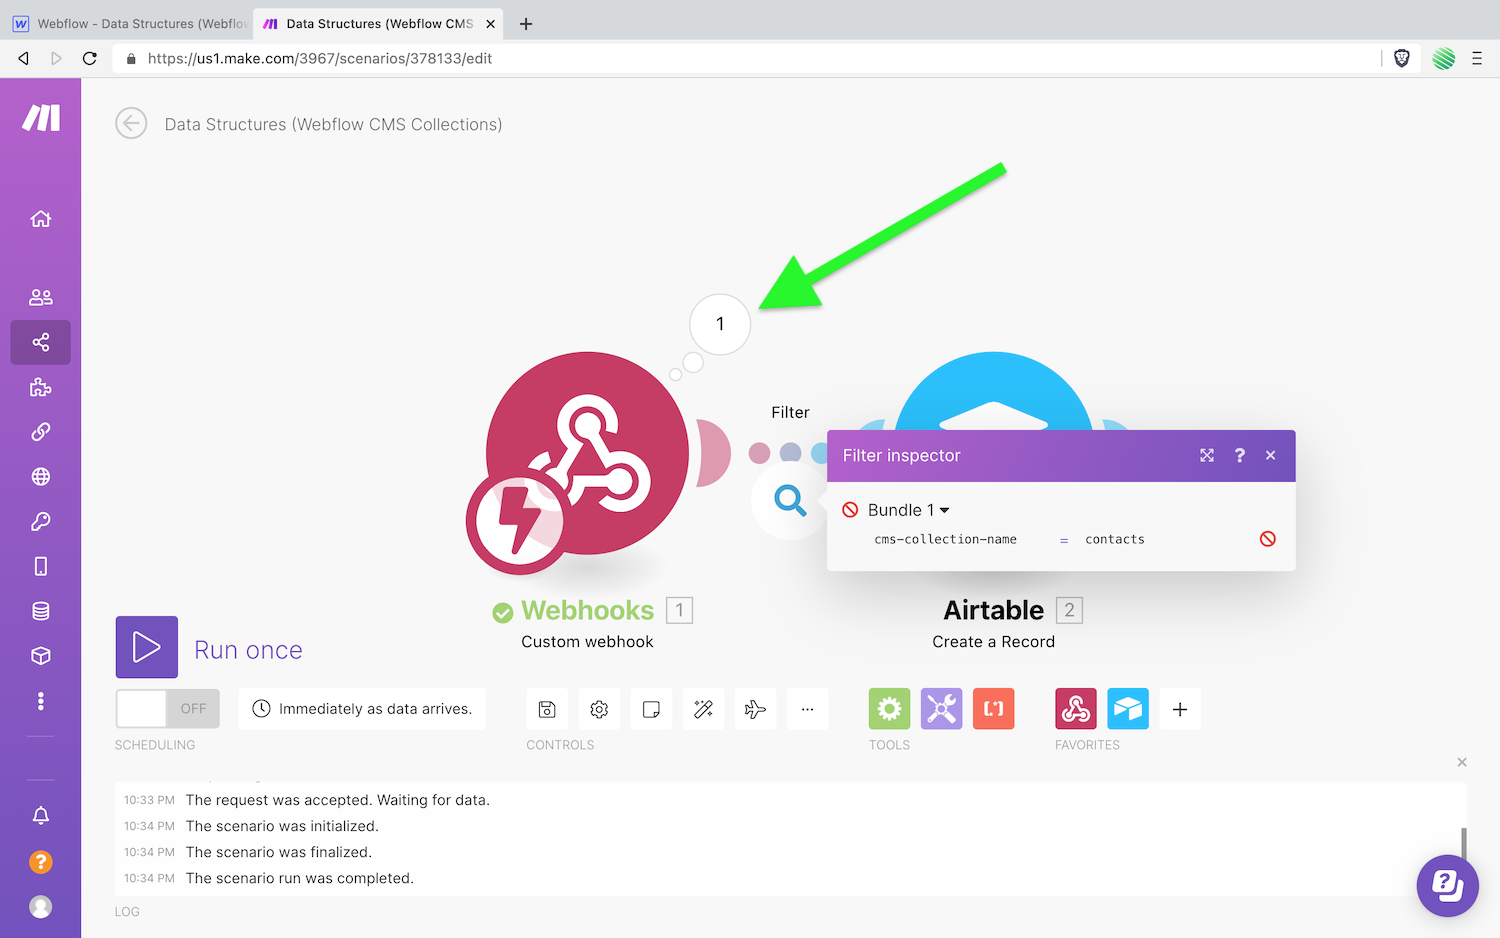
In the screenshot above, your filter runs AFTER you’ve spent money on an operation.
It would be awesome to filter BEFORE your Webhook runs.
Then you could send as much data to it as you like, filter for exactly what you need, and only get charged for what you use.
Well, you can’t do that with Zapier 😡
🤩 But you can with Make!
And the way you do that is using something they term as a “Data Structure”.
Data Structures filter your data BEFORE it runs your Webhook operation 🤯
If your Webhook is not run, you are not charged for an operation.
Now you can send all of your Webflow CMS items into your Make Webhook, filter for what you need, and only be charged for what you actually use.
Magic 🧙♂️
But these filters, that run before your Webhook, are hidden. Not on purpose, they’re just complicated. Too advanced for most people.
But not for you. Not after you create one with this walk through 😍
So let’s run through the high level of what Data Structures are right quick. They are less than straight forward and getting the basics down first, will allow you to build exactly what you need.
Then, you’ll walk through building one, step-by-step.
Let’s get started.
What is a Data Structure?

The drawing above is a Data Structure. It may (or may not) look familiar, but it’s a JSON Data Structure.
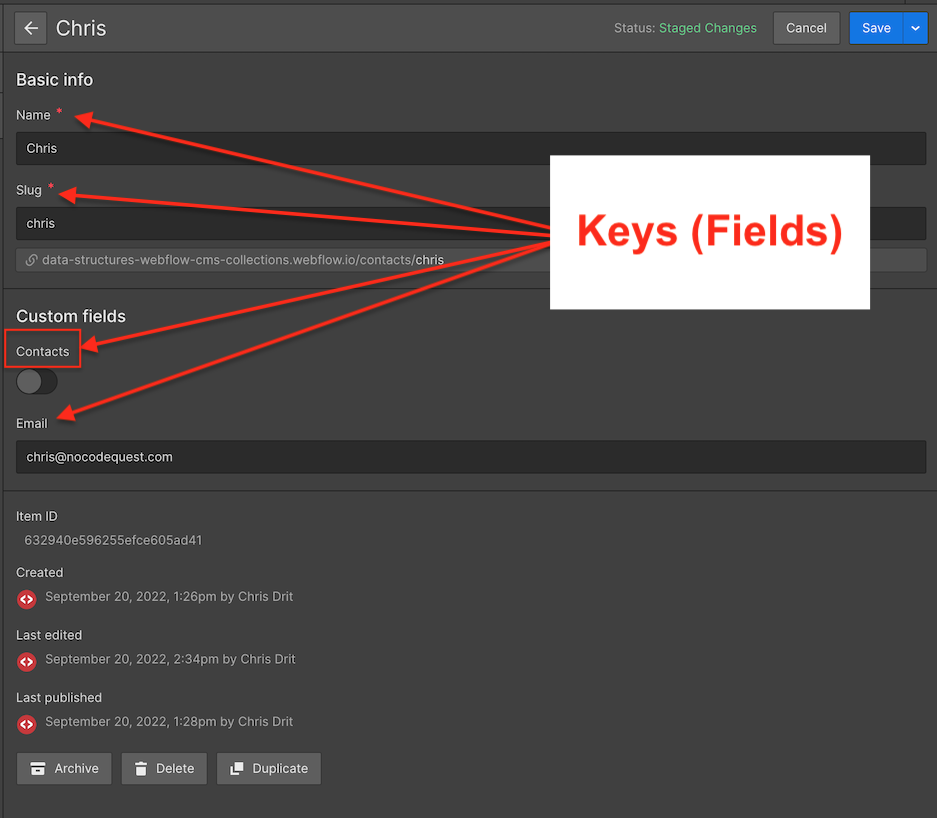
A Data Structure has two parts…
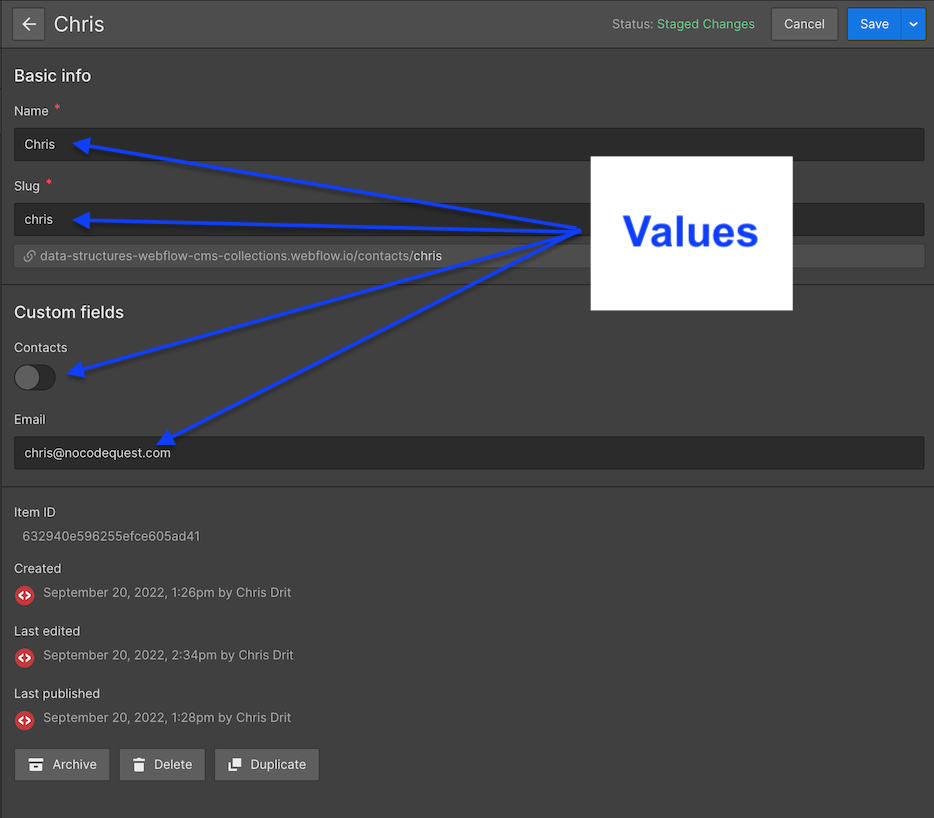
A way to describe the data (keys):
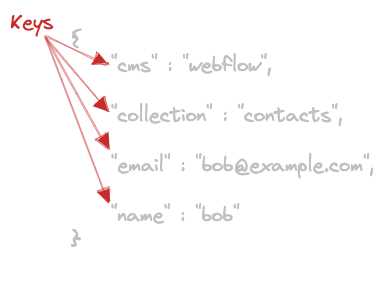
And the actual data itself (values):
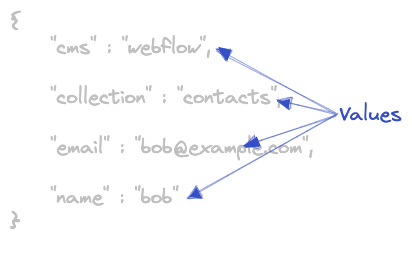
The keys are what structure the data. When you have lots of data the keys, or the structure, stays the same but the values change.

Normally when you filter data, you filter on the values. You’re looking for a specific email address, or name, etc…
So you type “bob@example.com” into your filter, and you’ll get all the data with the value “bob@example.com” in it.
But instead… when you filter on Data Structures, you’re filtering on the keys, not the values.
So when you type “collection” into your filter, you’ll get all the Data Structures with the key having “collection” in it.
But why would you ever do that?
It’s kinda of a weird way to think about searching (or filtering) data, isn’t it?
But it works great!
And in your case, you’ll add a Data Structure filter to your Webhook.
Before your Webhook runs, the filter will check if there is a specific key in it. If there is, it’ll run the Webhook.
If there isn’t, it won’t run the Webhook and you’ll never be charged for any operations 🤯
I know, I know…
It is a difficult concept. But the best way to get your head wrapped around difficult things is to get your hands dirty building them 🤣
So let’s do just that.
Create your Webflow CMS Collection
Create a new Webflow CMS Collection. I named mine “Contacts” and you should do the same for this walk through.
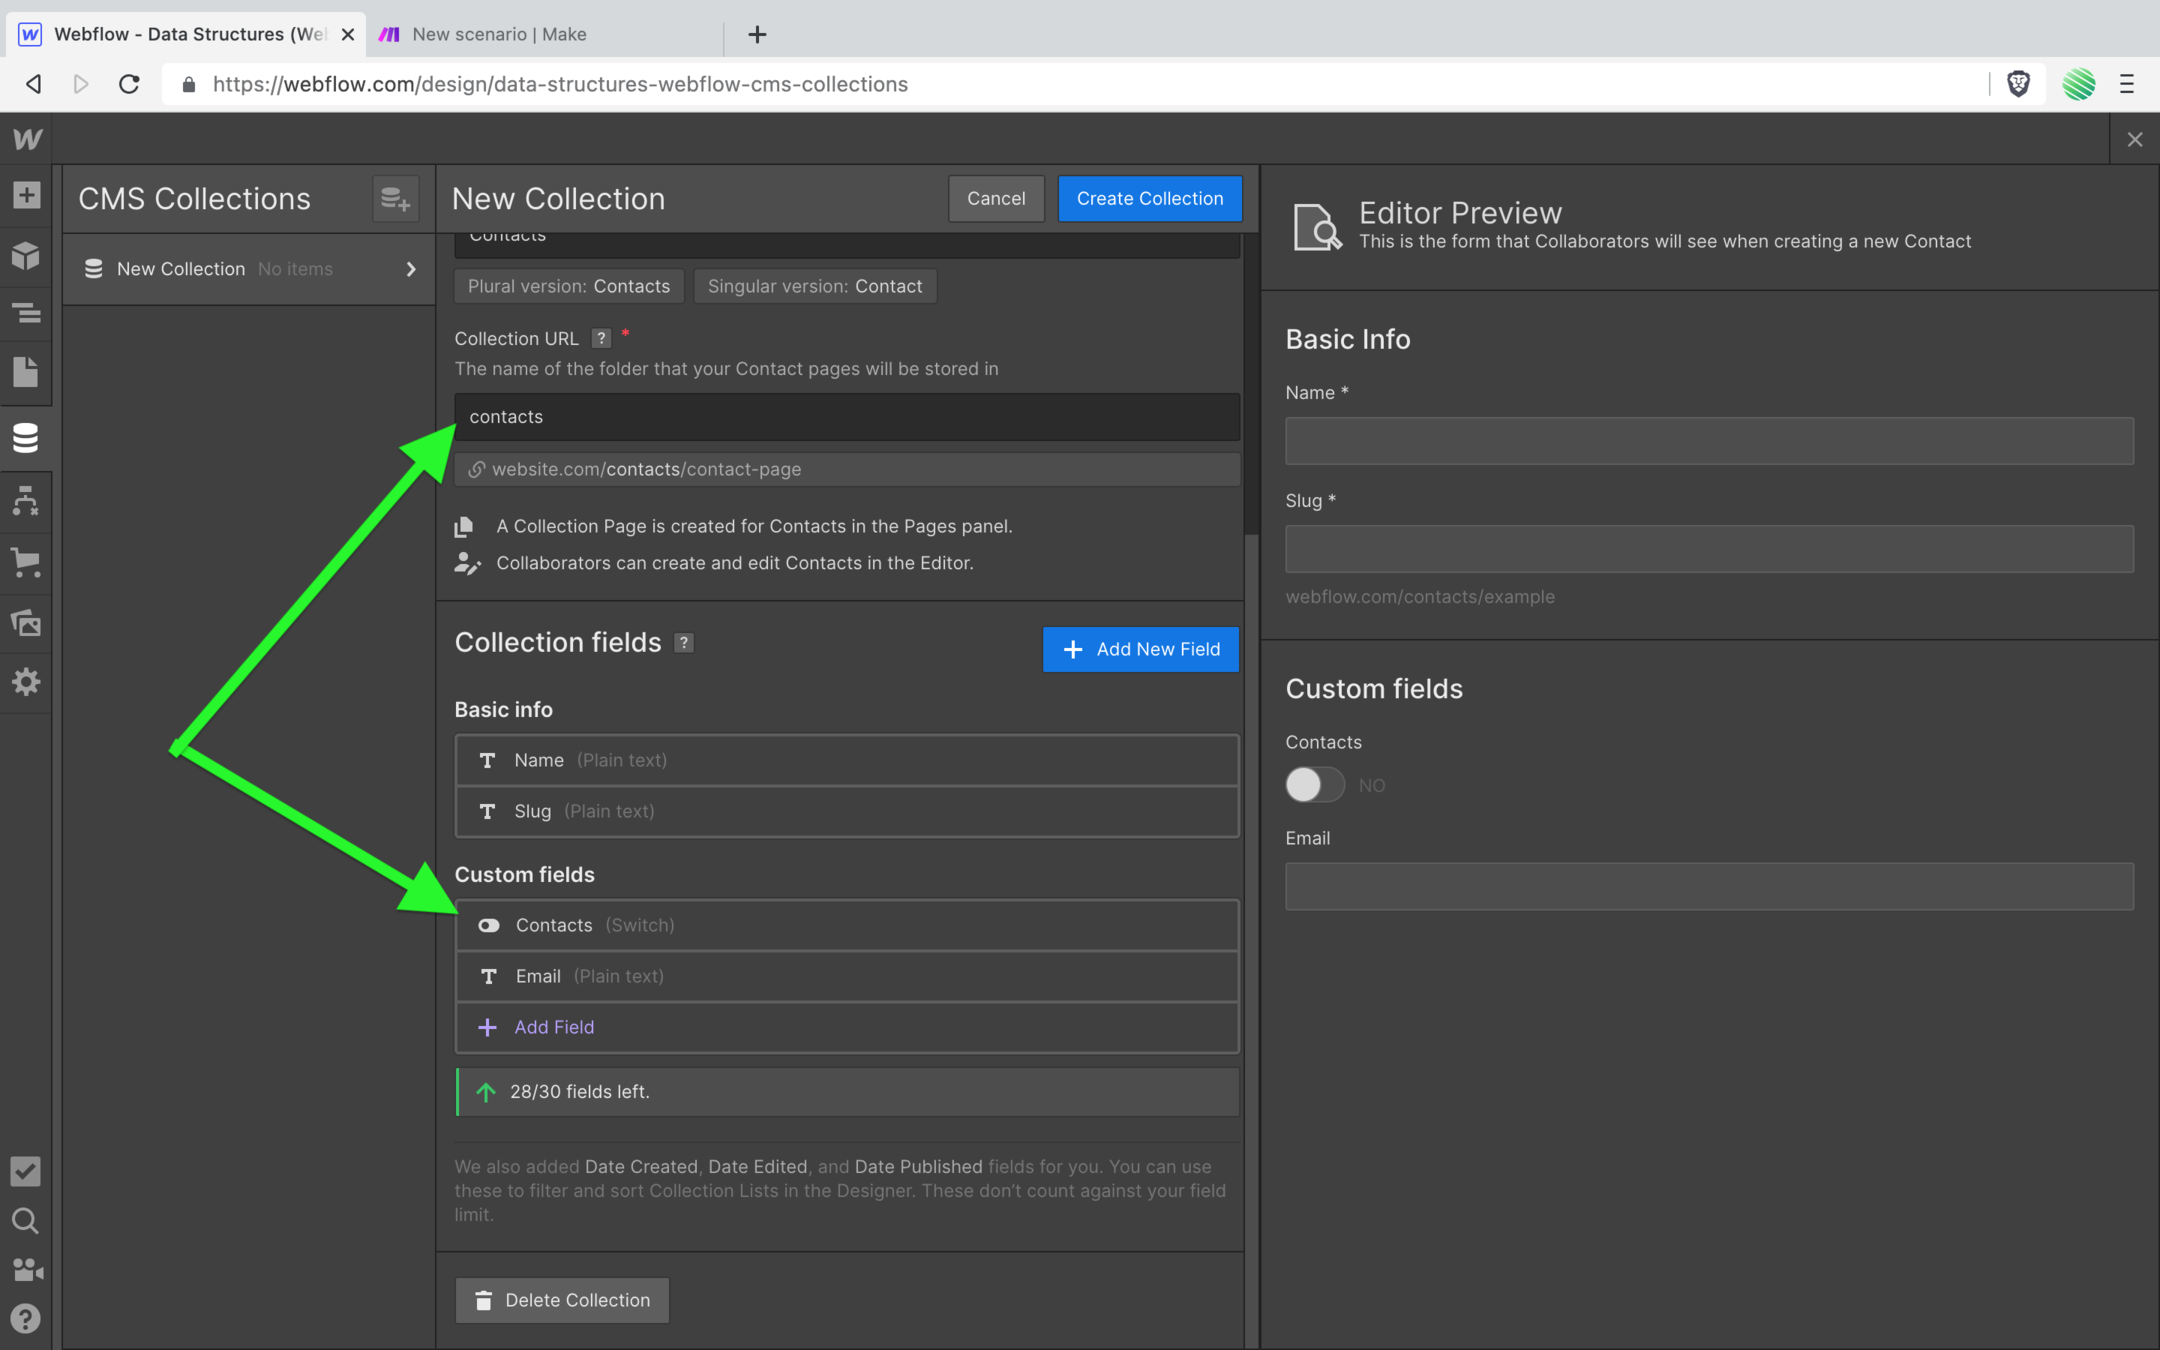
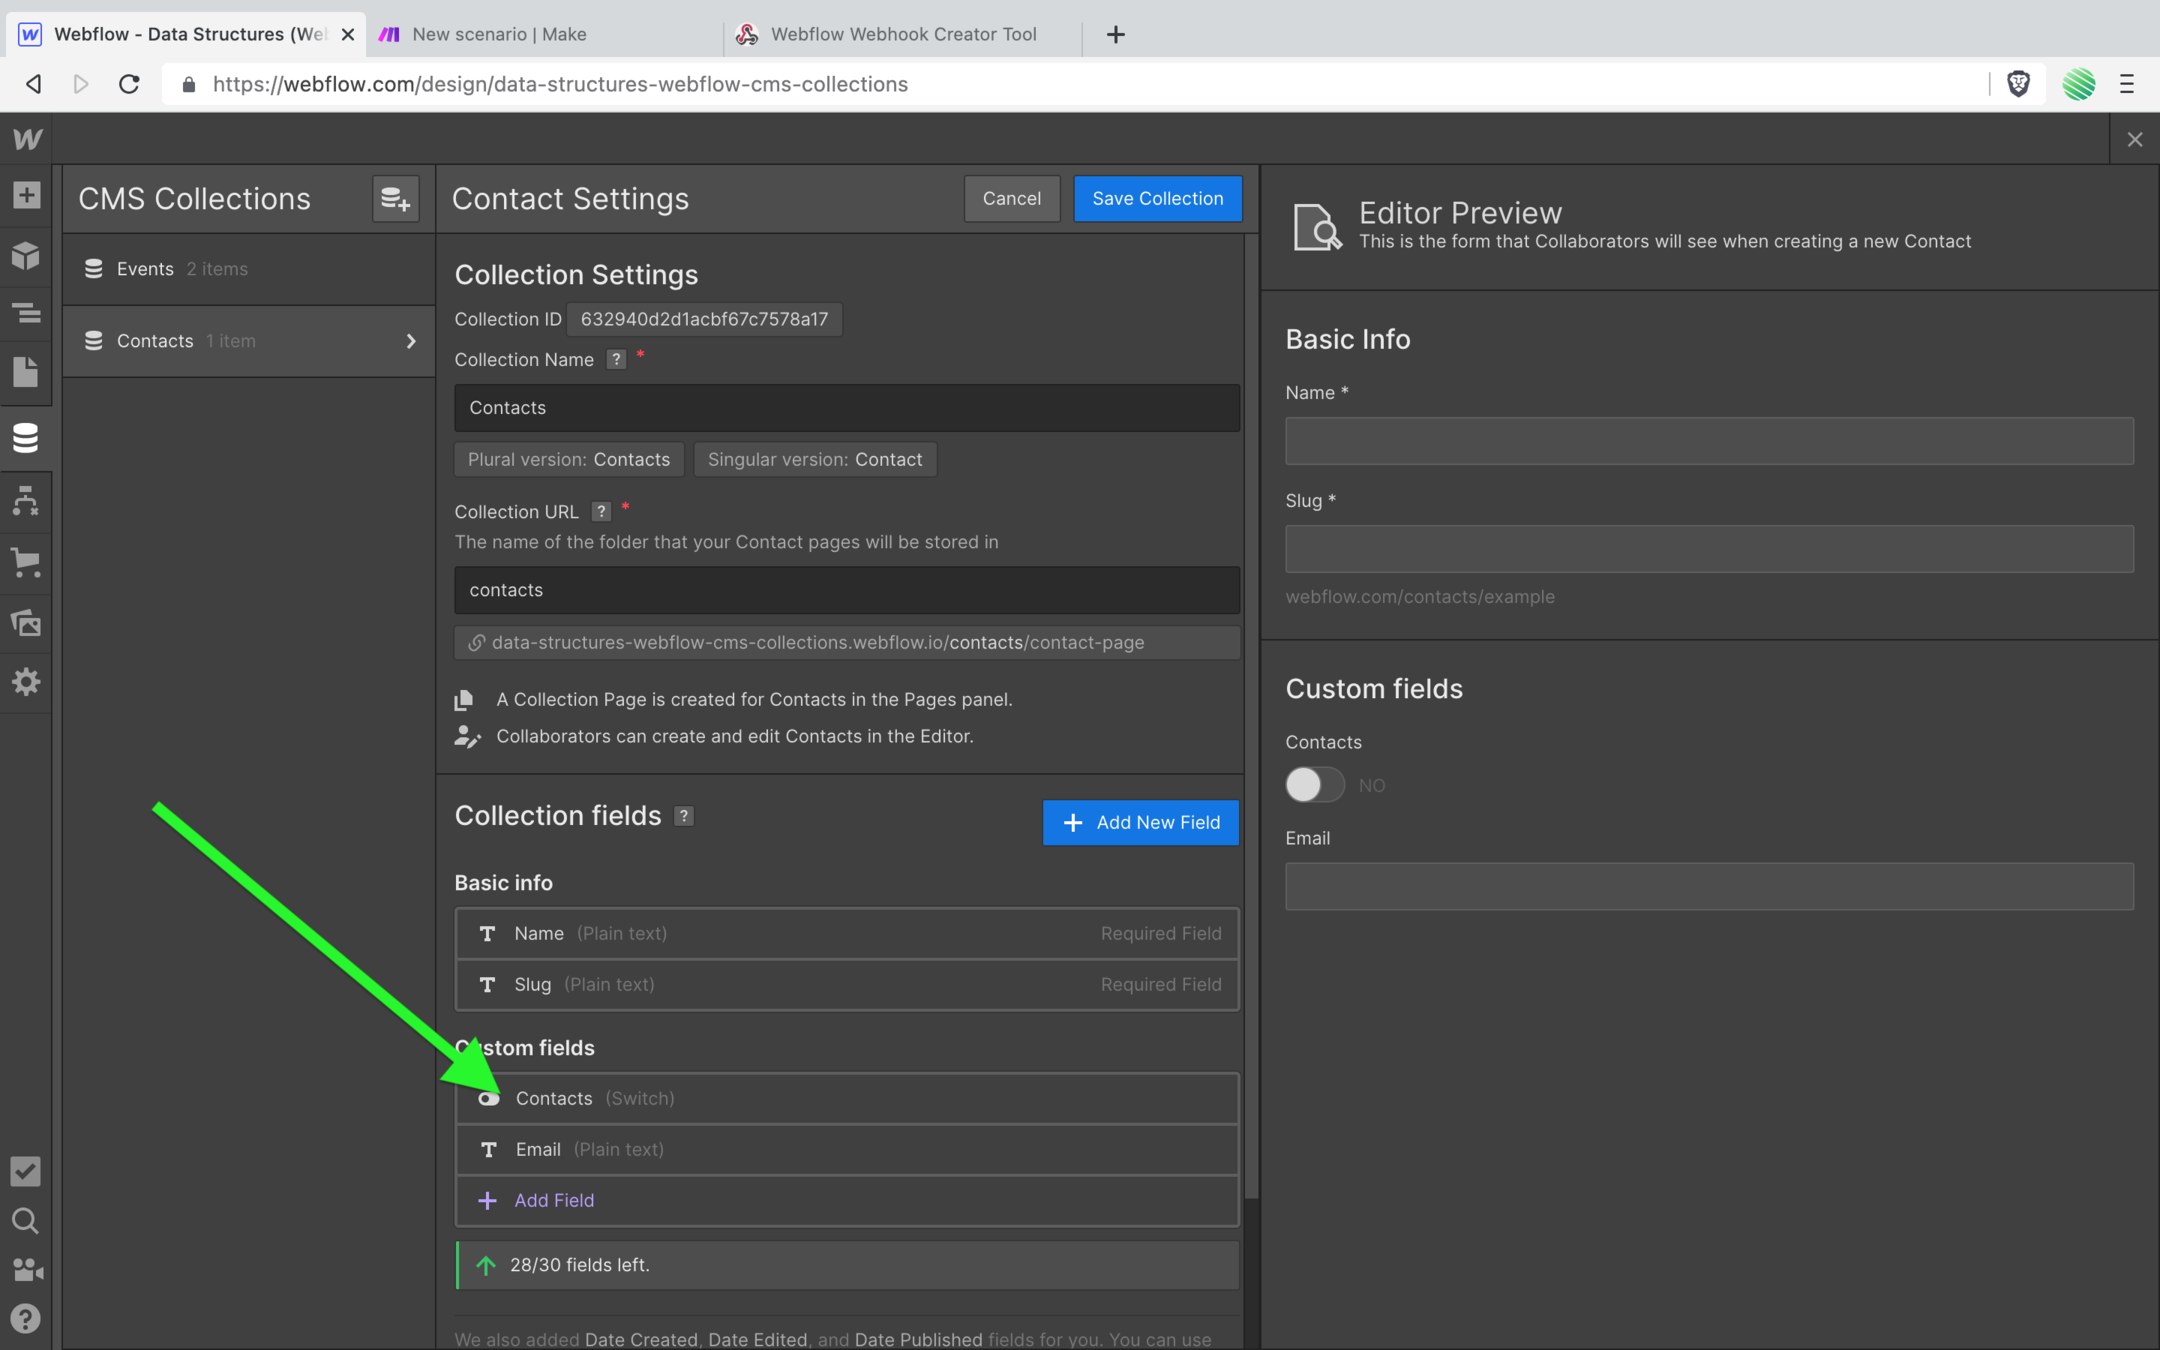
Add a new field.
I’m using the “Switch” field type for a very specific reason. Just follow along for now and I’ll explain why in just a moment. But there is a very specific reason why.
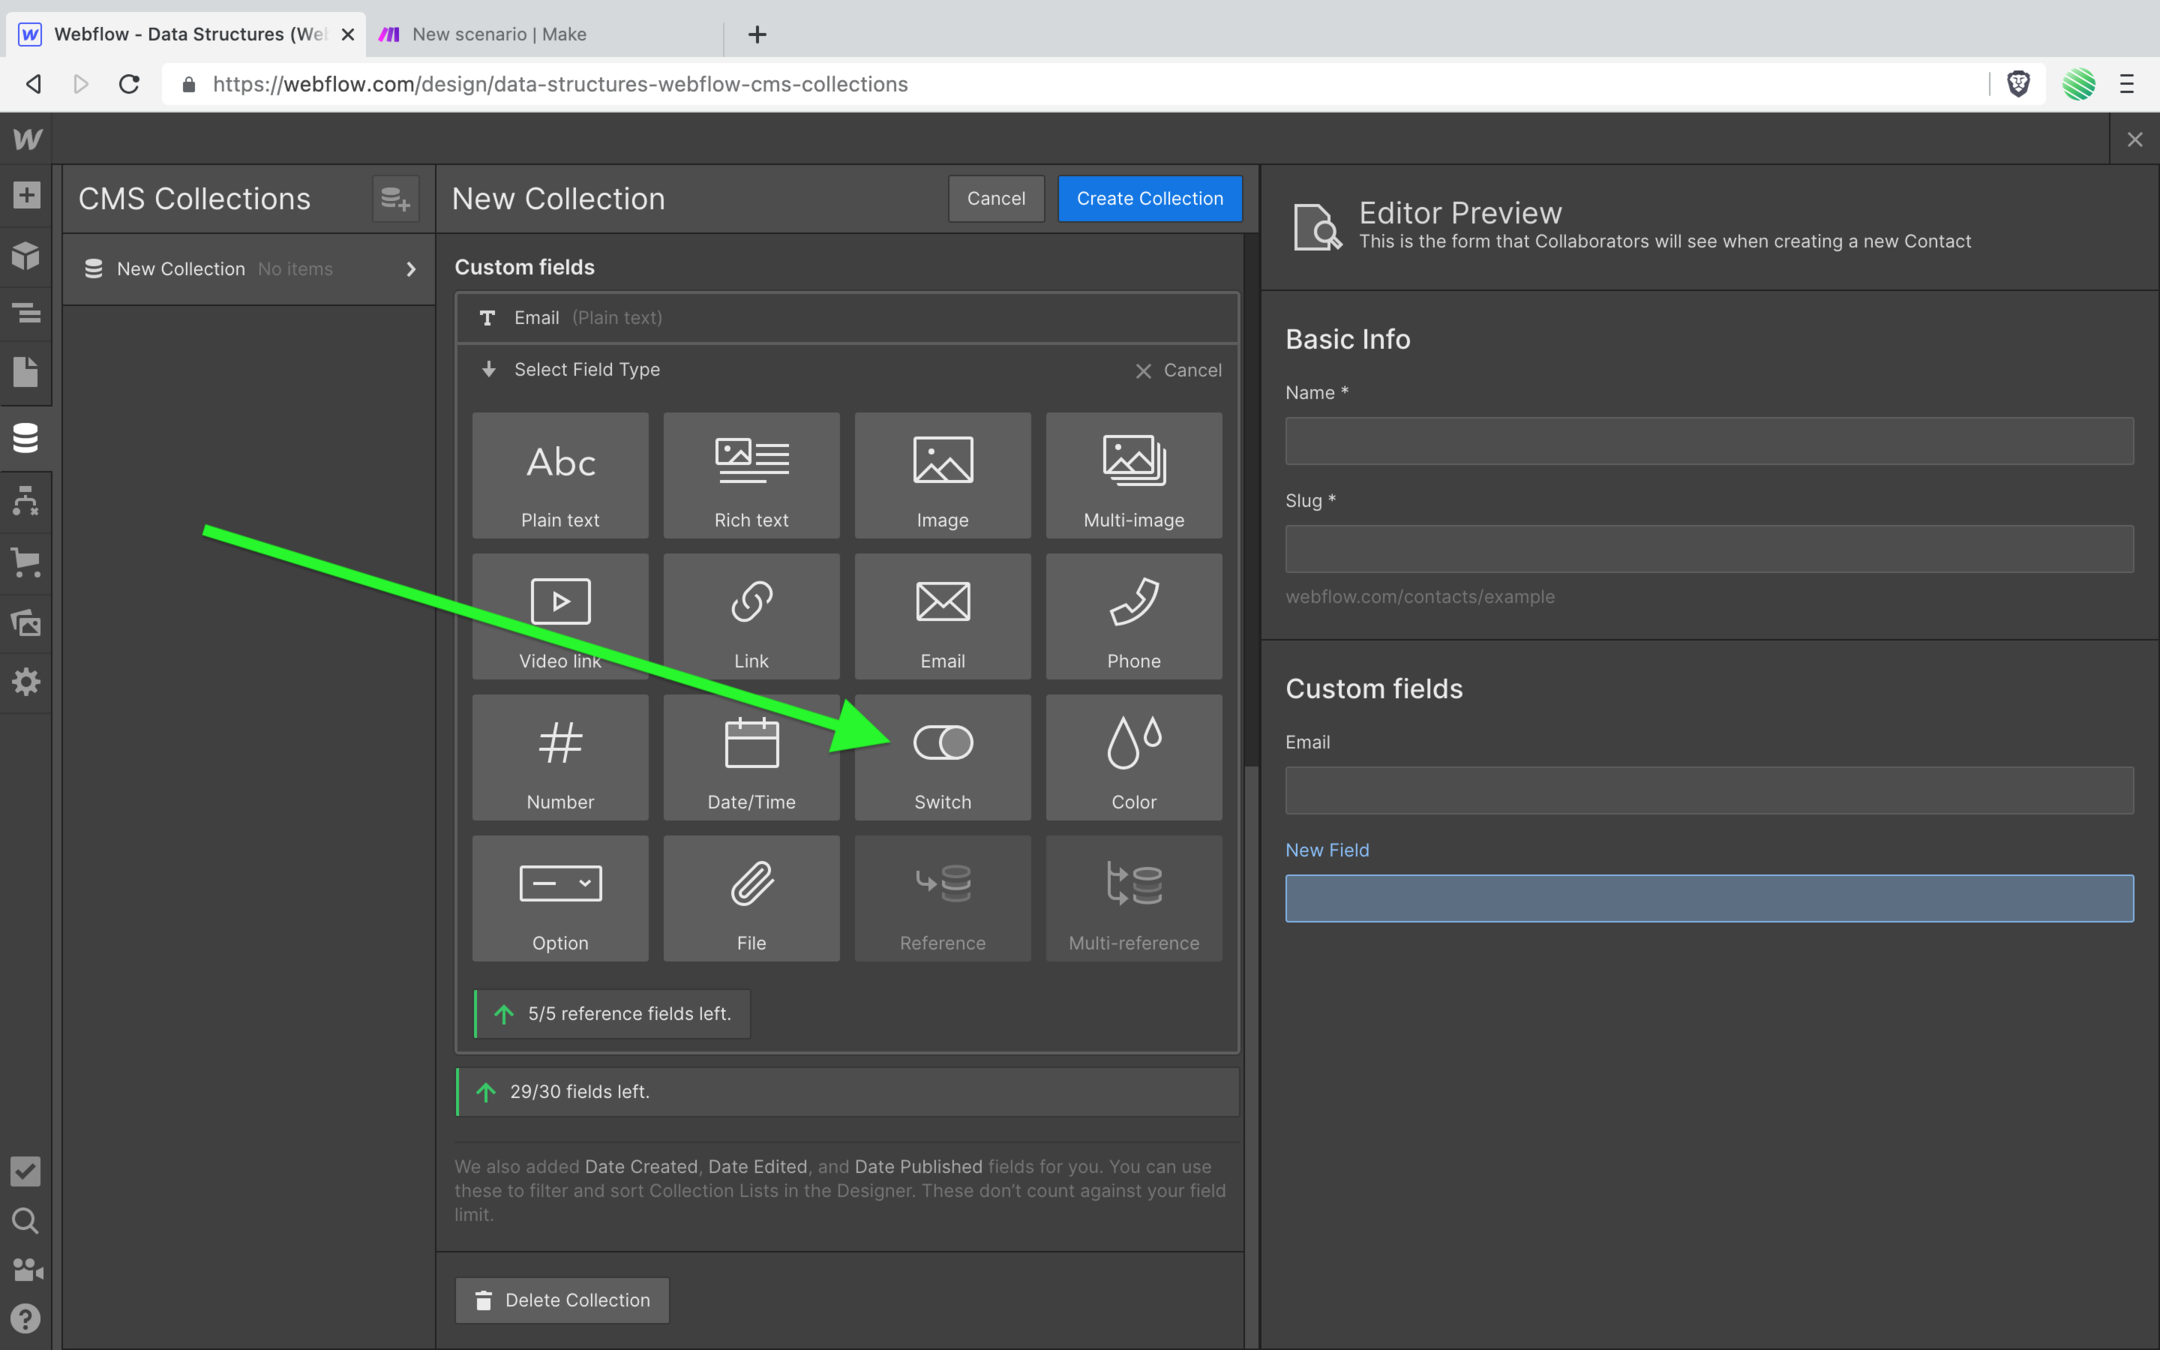
A little preview…
This is the field, or better said the “key” that you’ll filter your Data Structure on within your Make Webhook. Every Collection you’d like to filter will have it’s own unique key.
I’ll dig deeper into this soon.
Next… Name the field the same name as your Collection. In this case name the field “Contacts”.
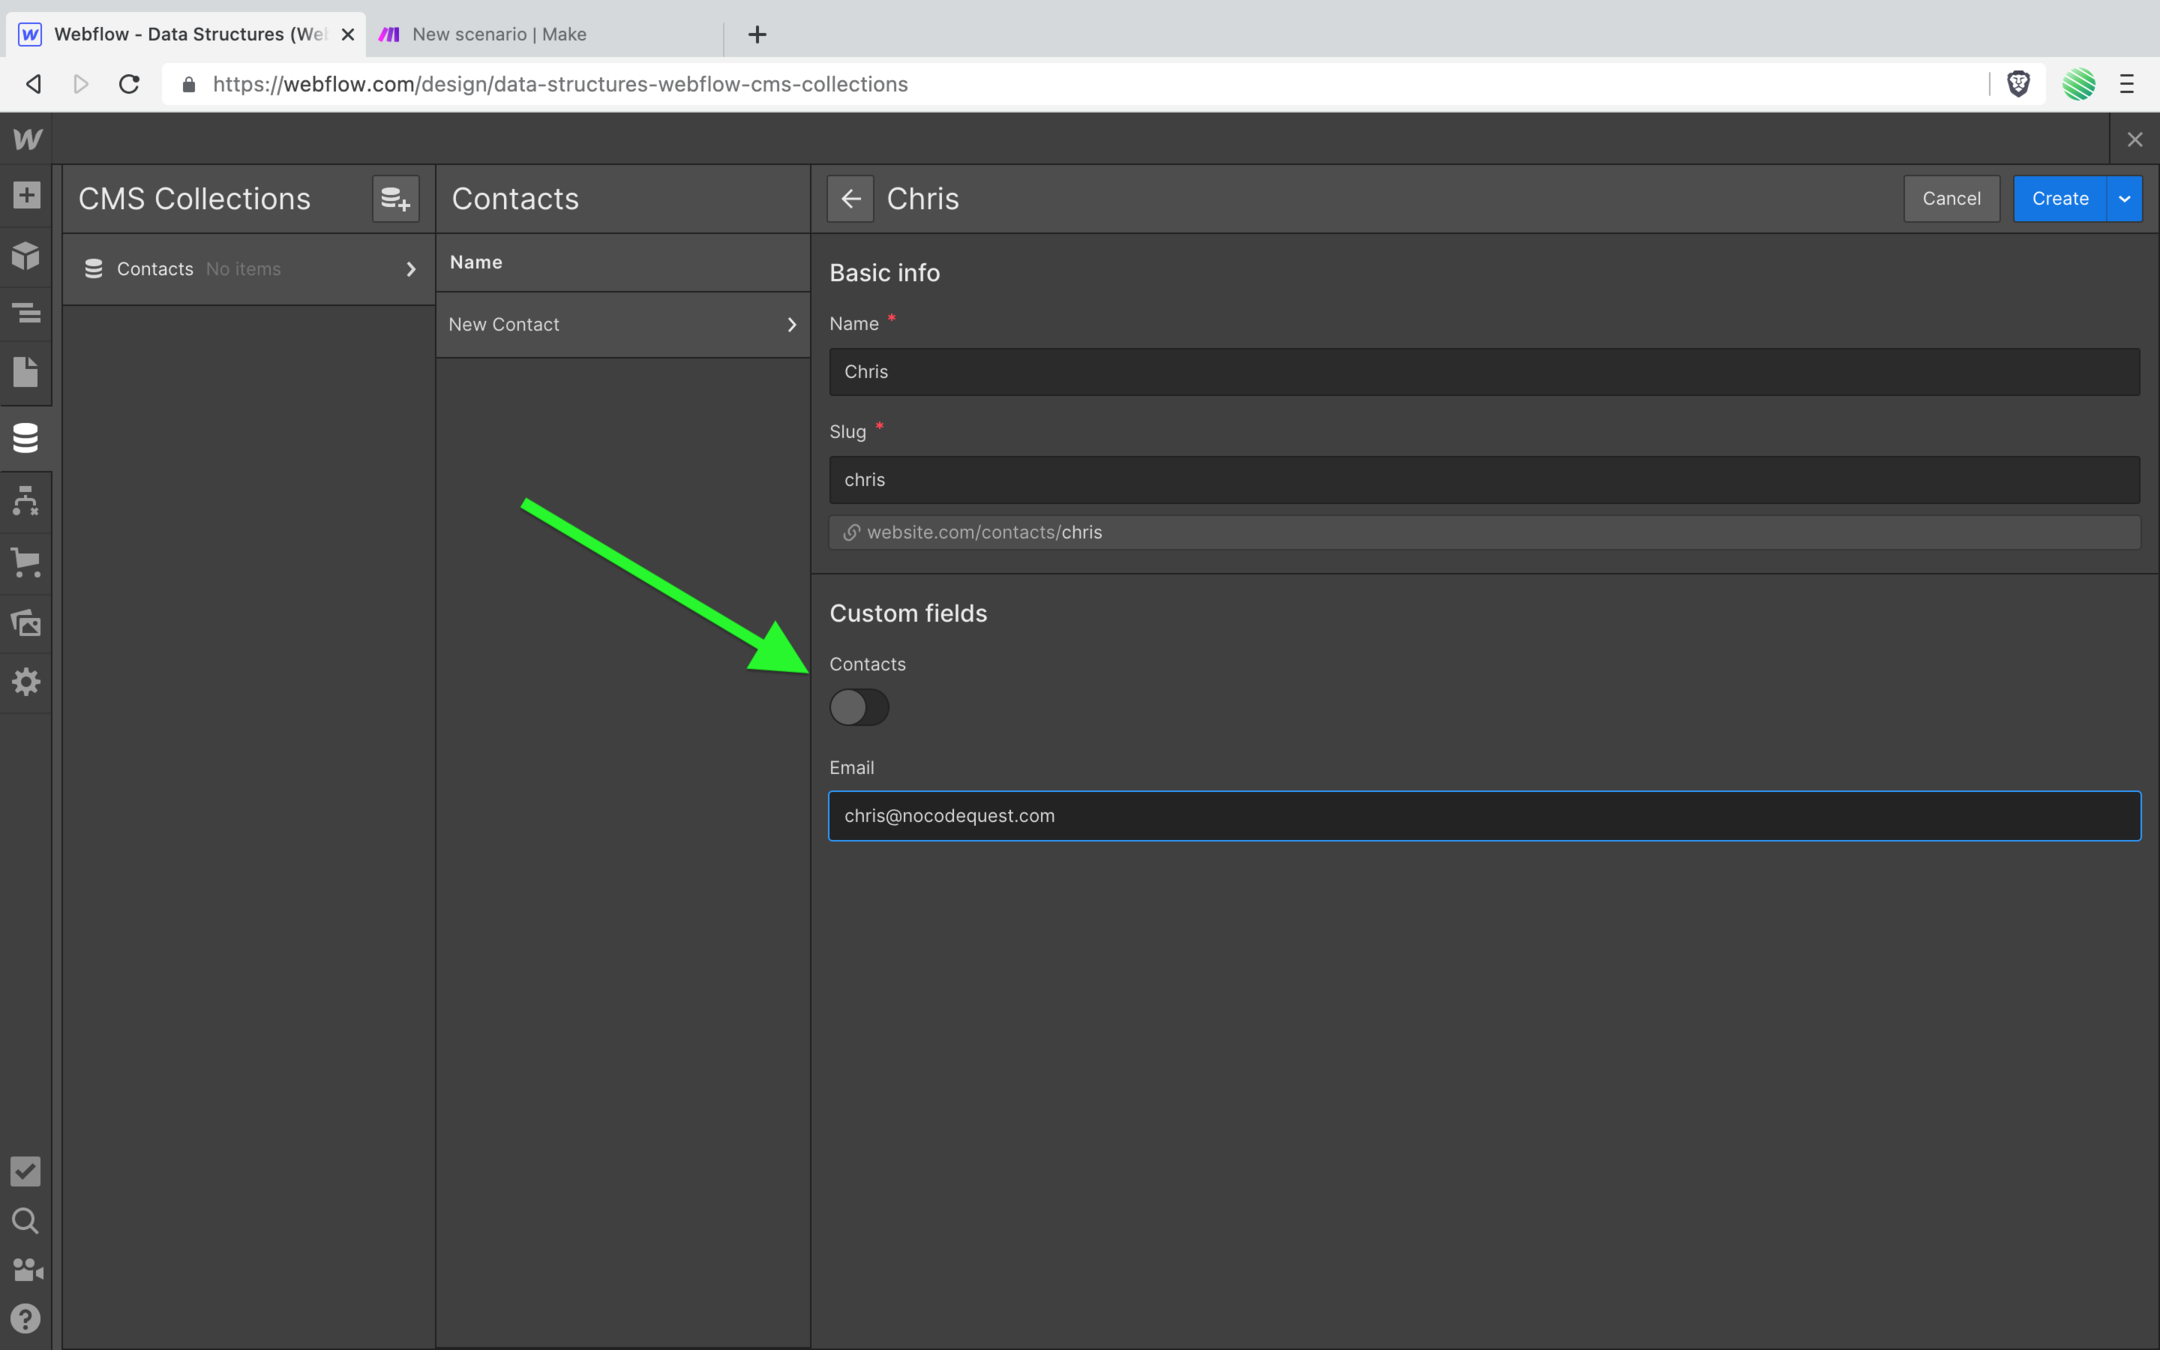
Now create a new item within your Collection.
Notice the Switch field you created. You can leave it off, it doesn’t matter what the “value” is.
Remember, we are just looking for the “key” which describes the structure of your data. Not the value of that key.
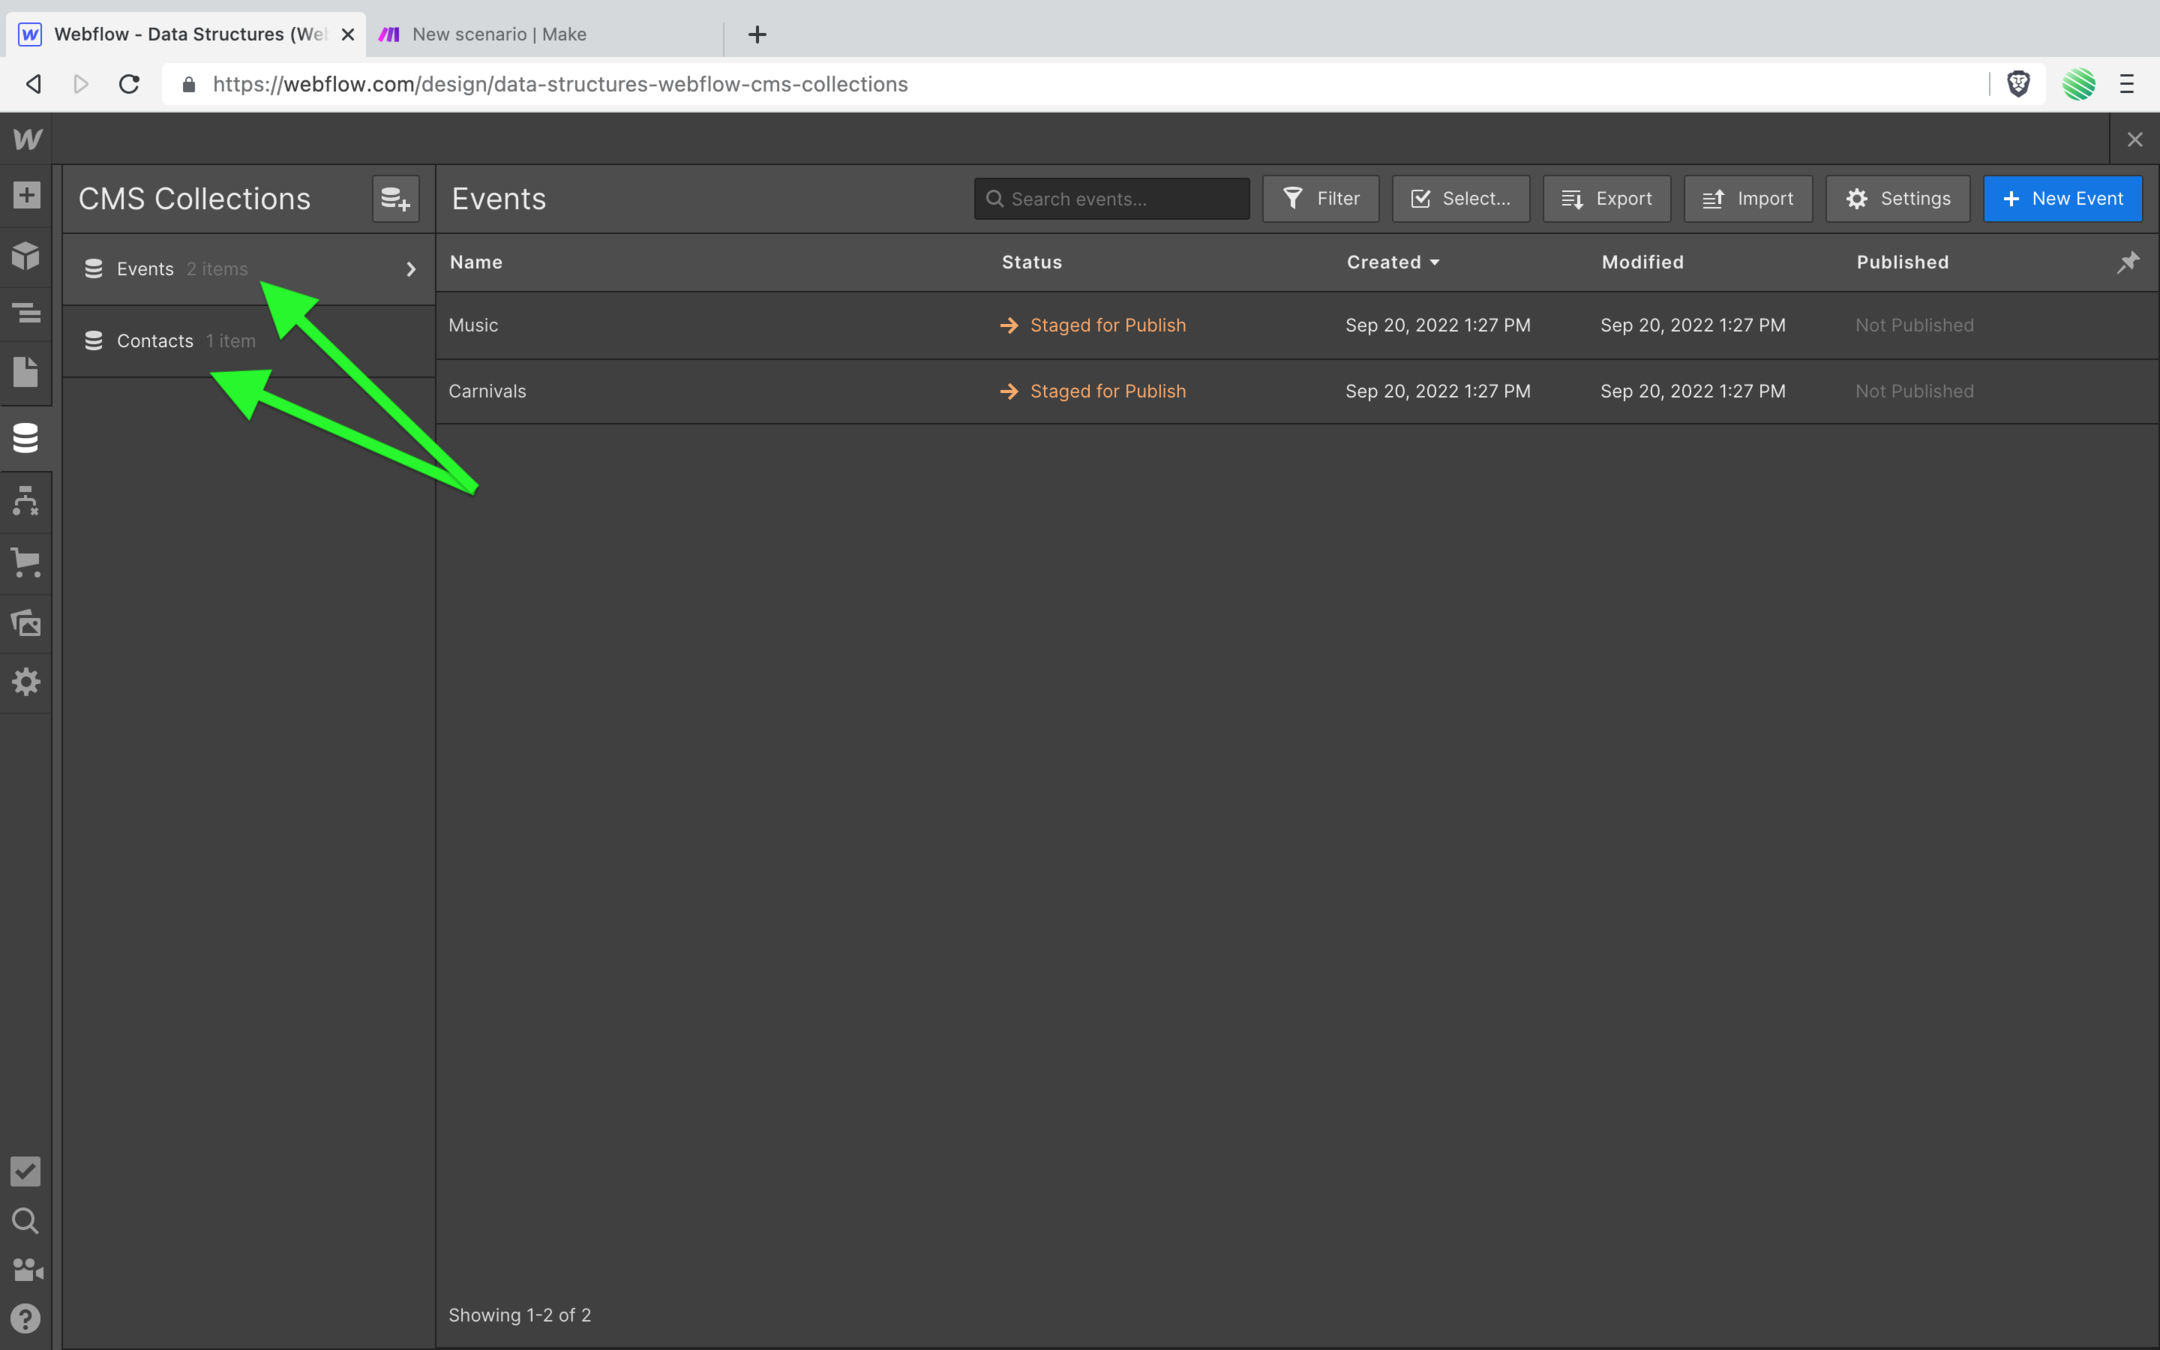
Next, create a new Collection.
This Collection will not have the same key as your “Contacts” Collection so you’ll see the filtering in action when you create your Make Webhook.
I named this Collection “Events”, the name doesn’t matter for this Collection.
Create a couple of items within your new “Events” Collection. Doesn’t matter what they are, anything will do just fine.
Publish your Webflow project.
Generate your Webflow API key
Next, open up your project settings.
Tap on the integrations tab.
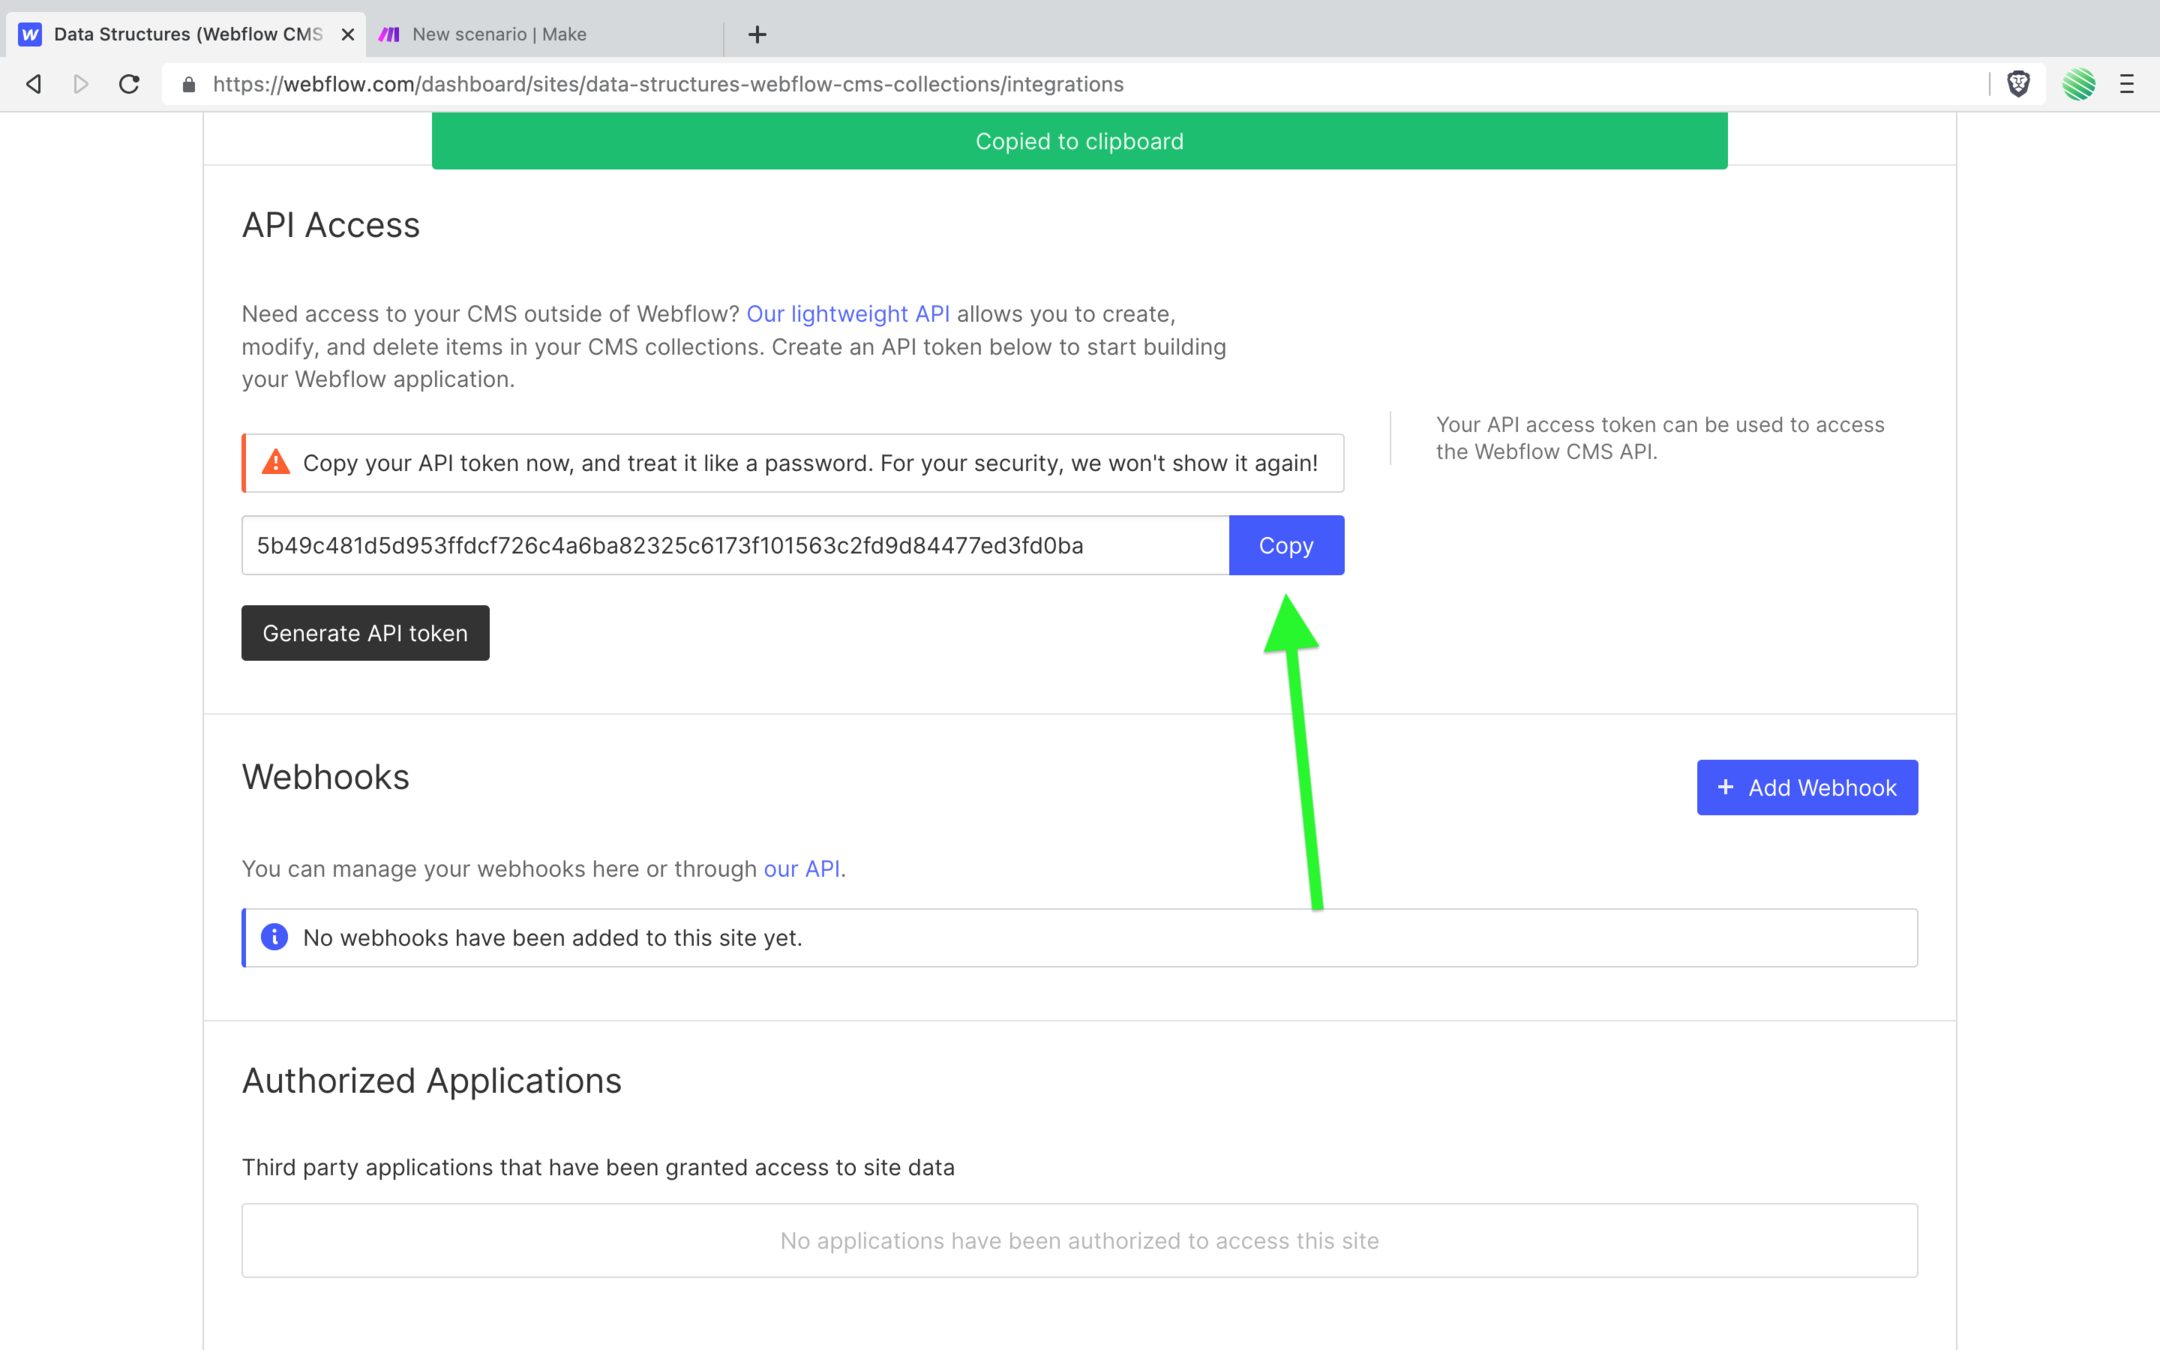
Scroll down and tap on the “generate API token” button.
In a moment you are going to create a new Webflow Webhook and you’ll need an API key to do so.
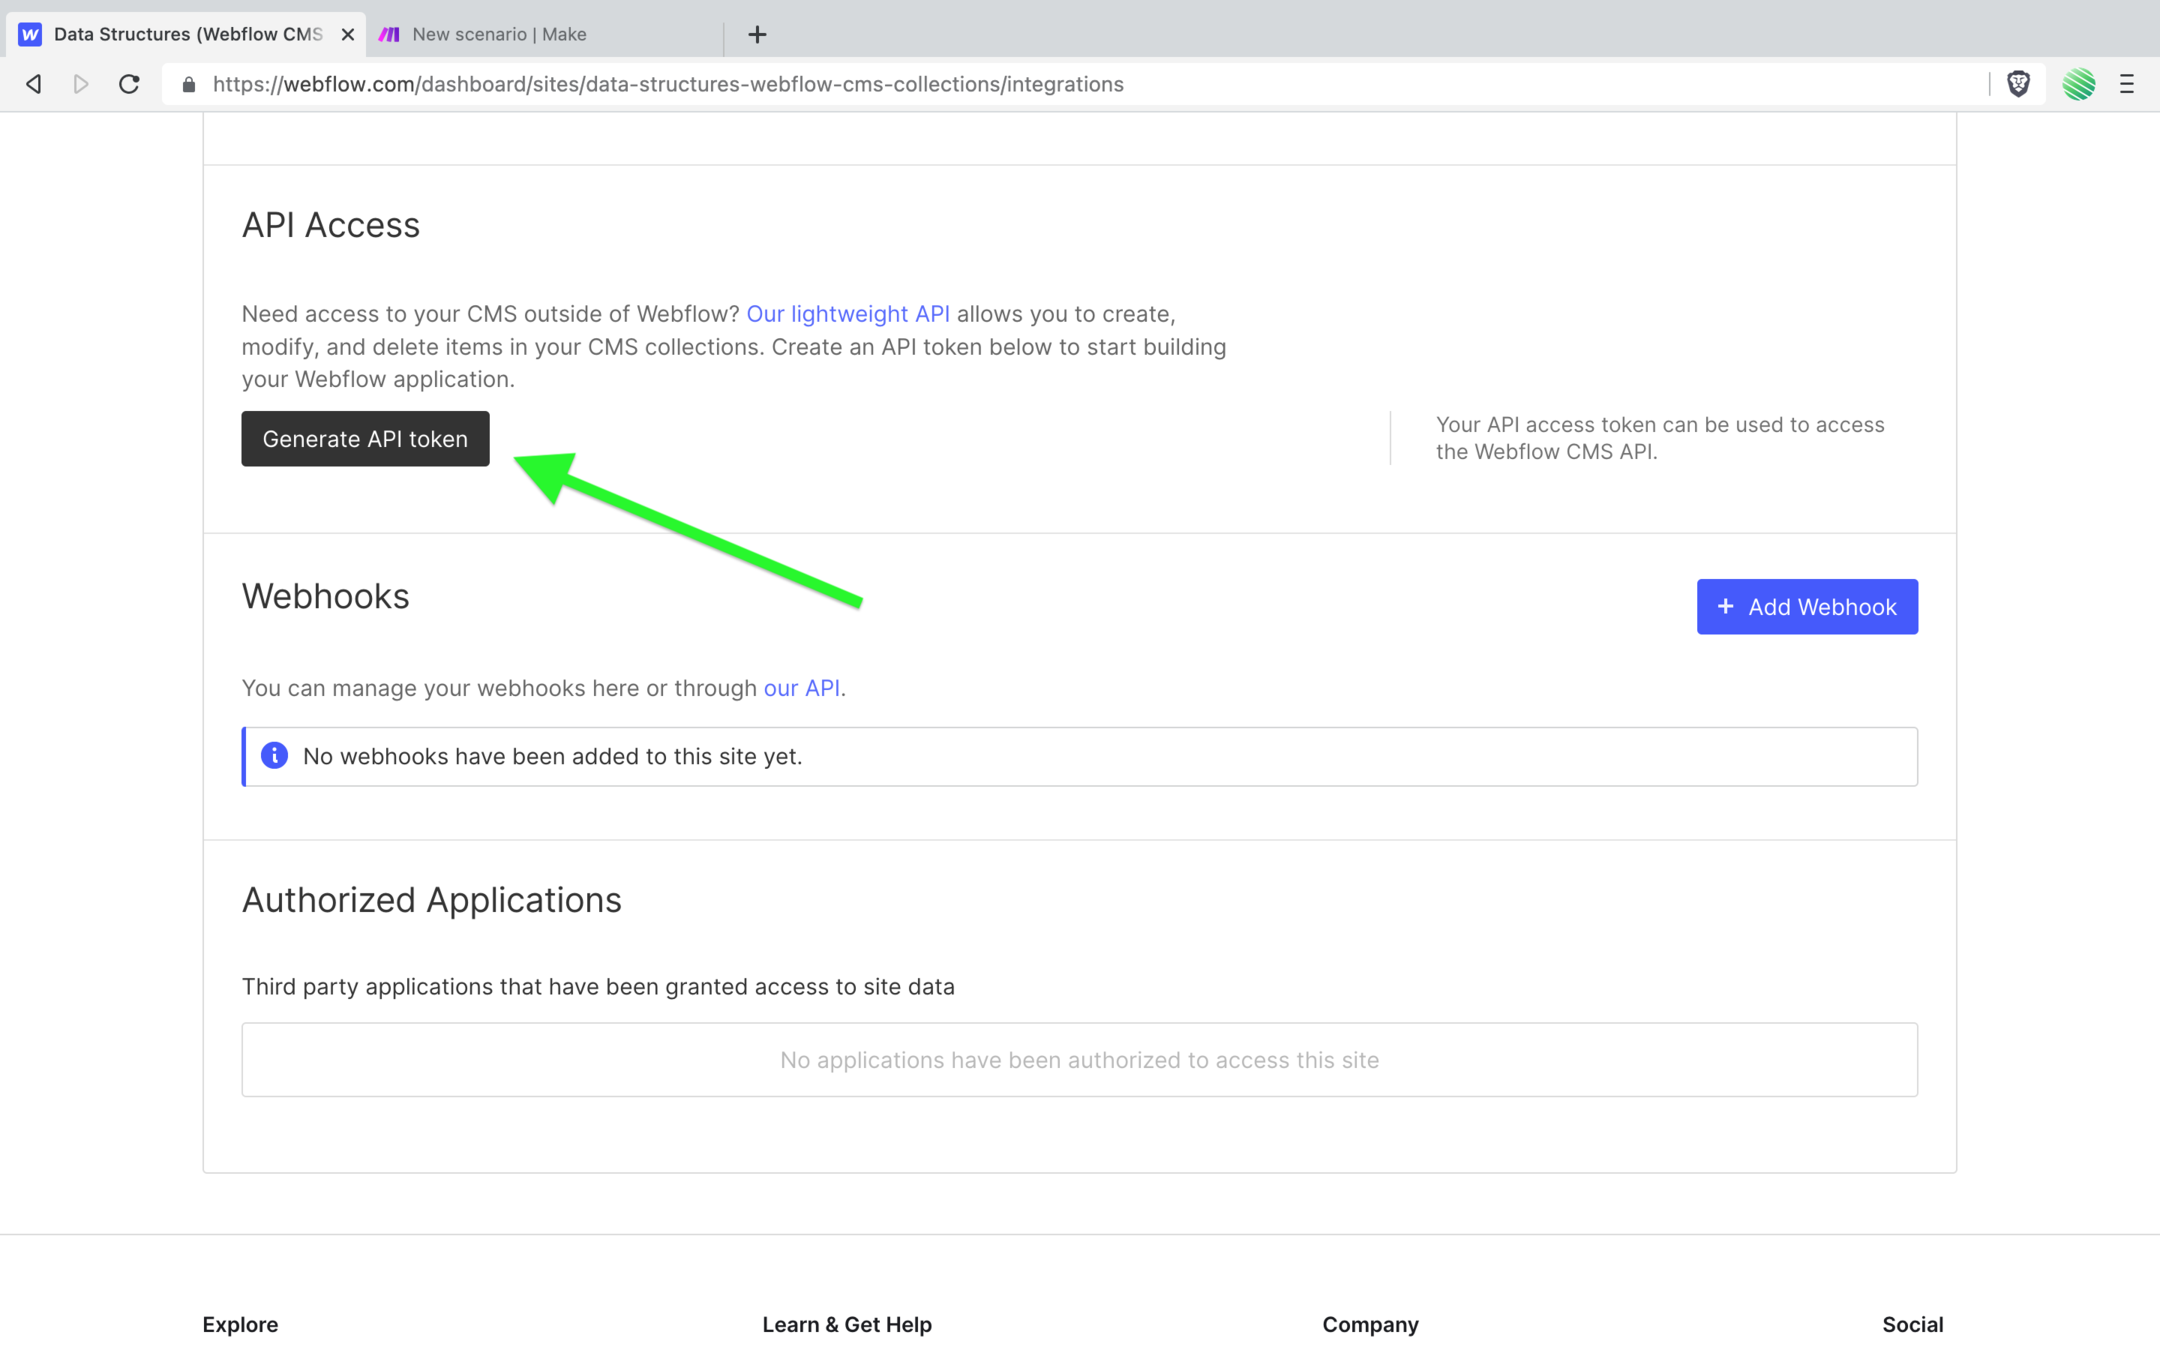
Copy the newly generated API key to your clipboard.
Create your Webflow Webhook
This is traditionally the tricky part. But I’m going to show you the simple way of doing it.
Webflow doesn’t give you many options to create a Webhook.
If you go to the project settings page, tap on the integrations tab, scroll down and tap on the add webhook button…
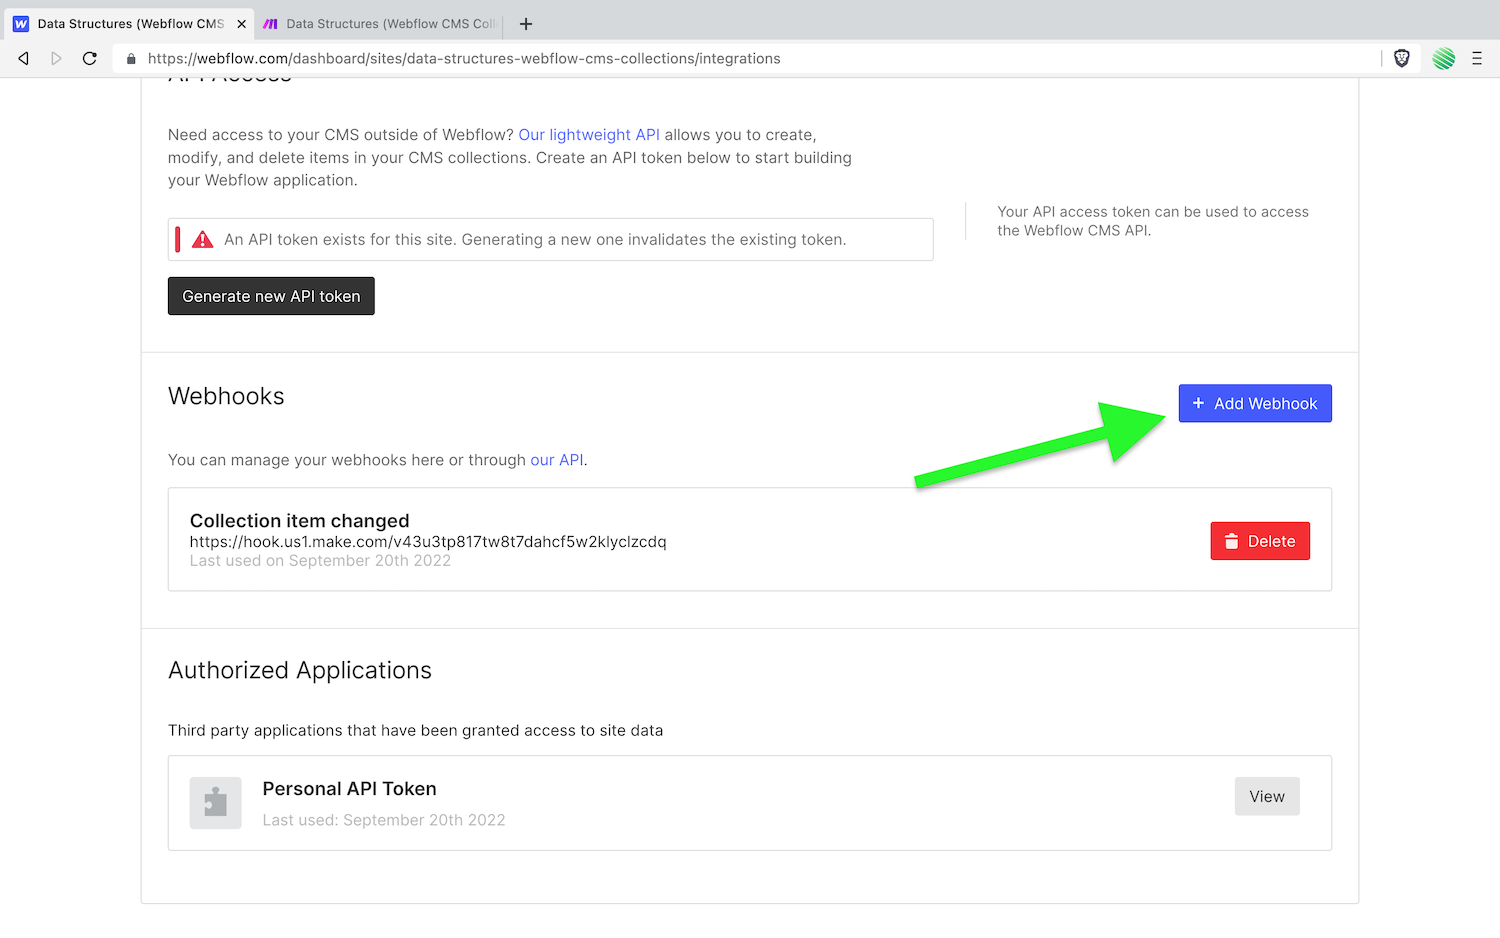
You get a popup with the Webhook trigger types available to you.
The problem is, they only give you 2 trigger types. Neither of them are the CMS triggers that you need.
 You want to trigger a Webhook when a CMS item is created, updated, or deleted.
But there is no option to do that from within Webflow. There are some very specific reasons for this.
To get around this limitation, you could use a software engineers tool like Postman or Insomnia.
There is a learning curve if you new to all of that. You’ll be scratching your head, getting frustrated, and definitely wasting some time getting it to work.
Instead…
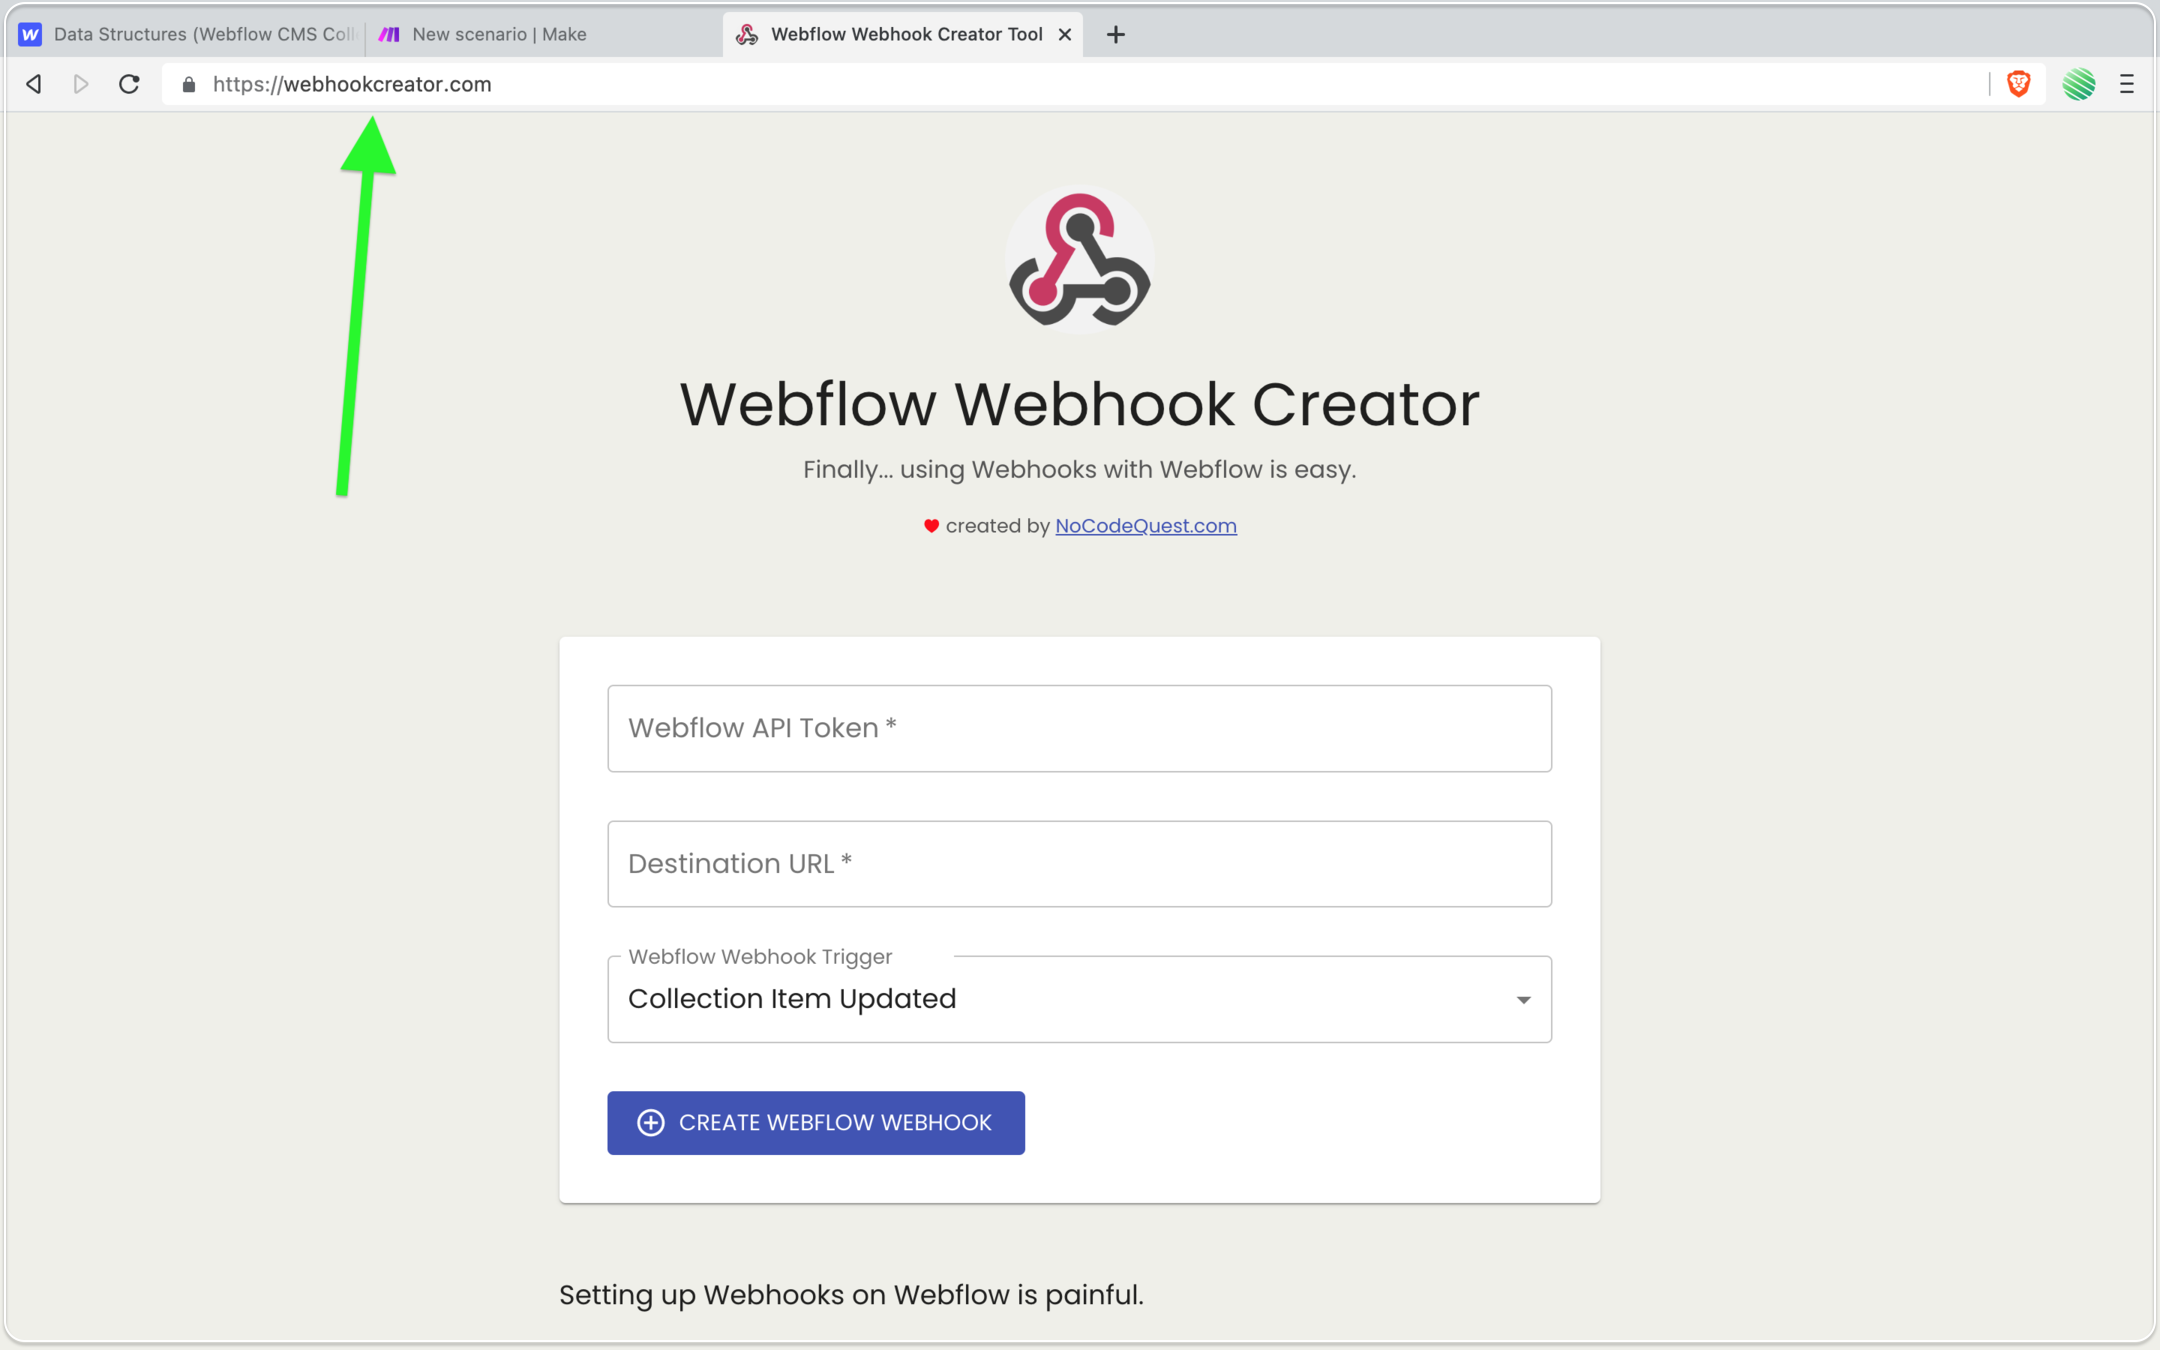
I’ve created a free tool to bypass all of that frustration and it allows you to get a Webflow Webhook setup quick & easy.
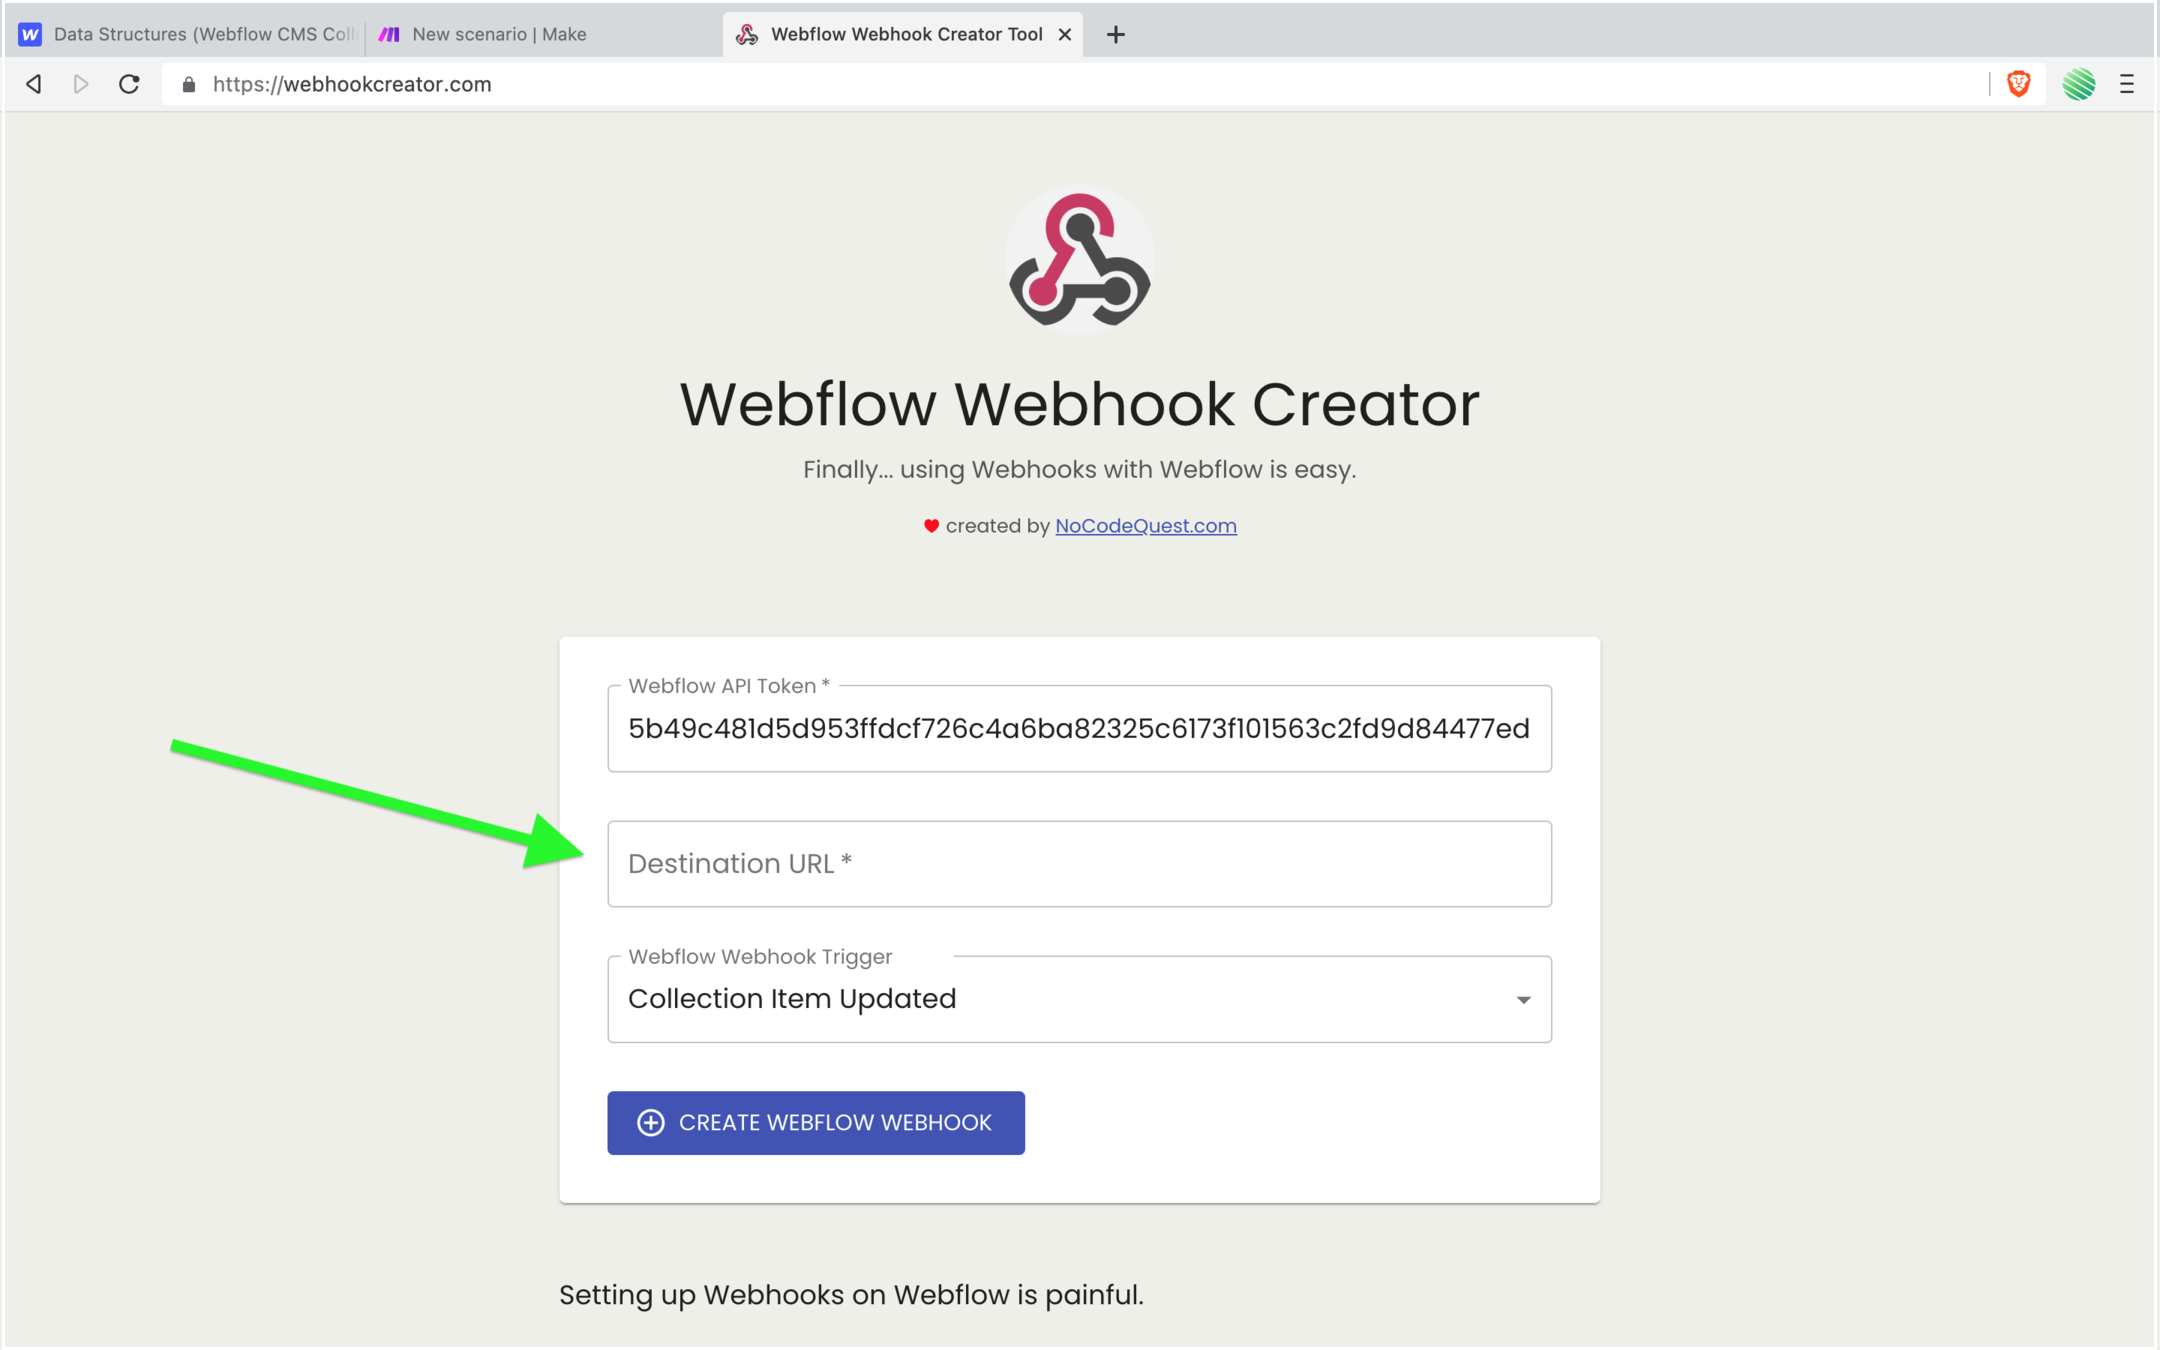
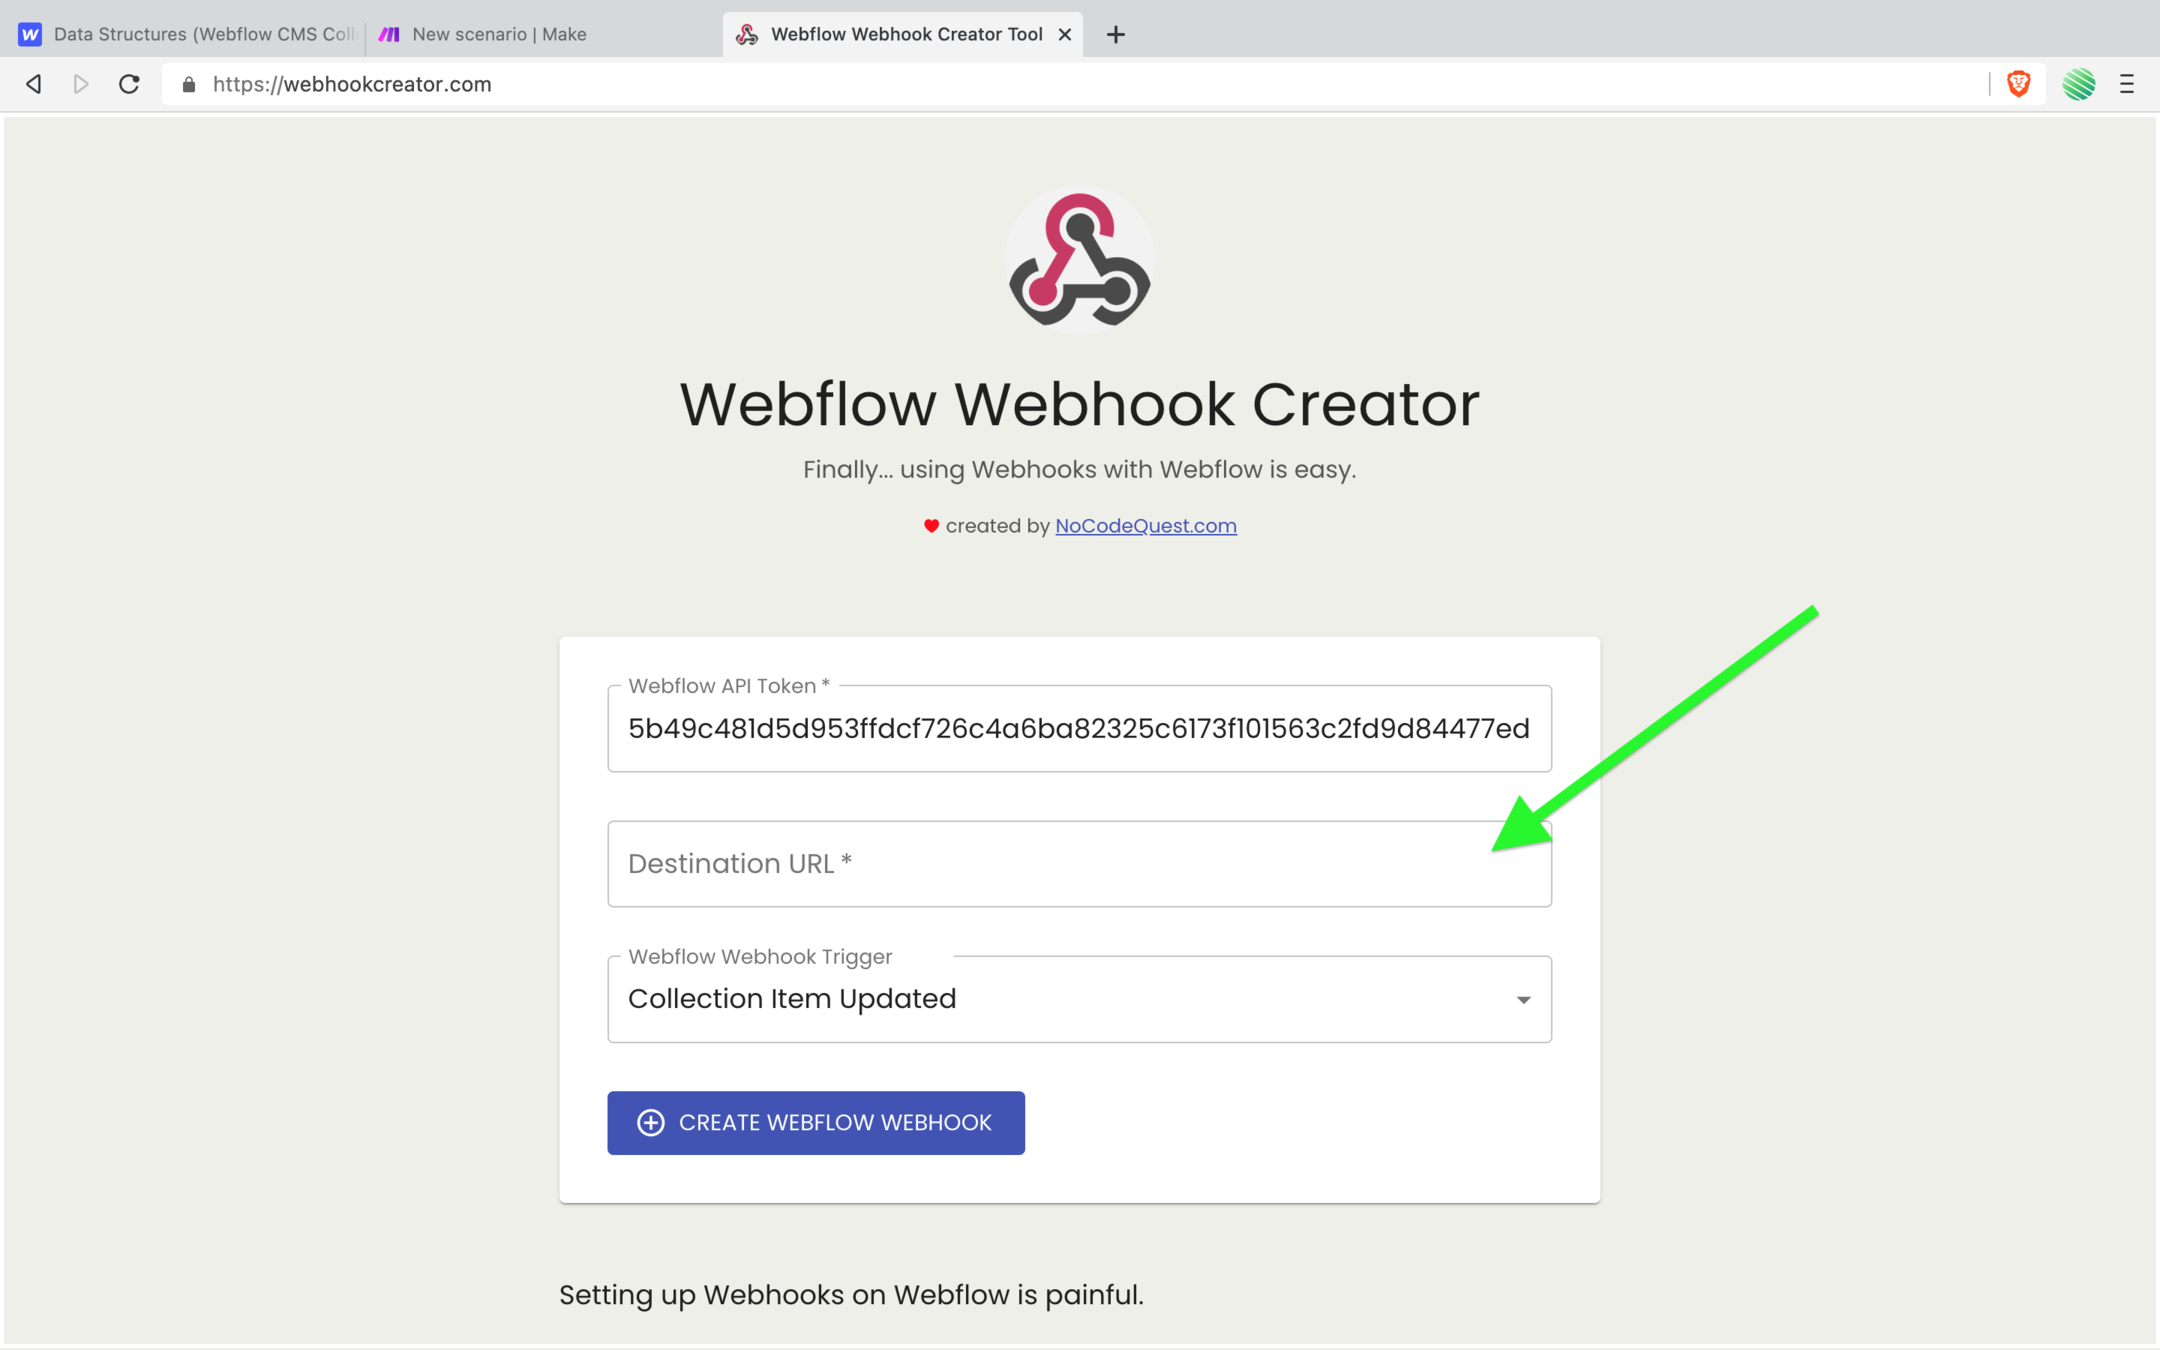
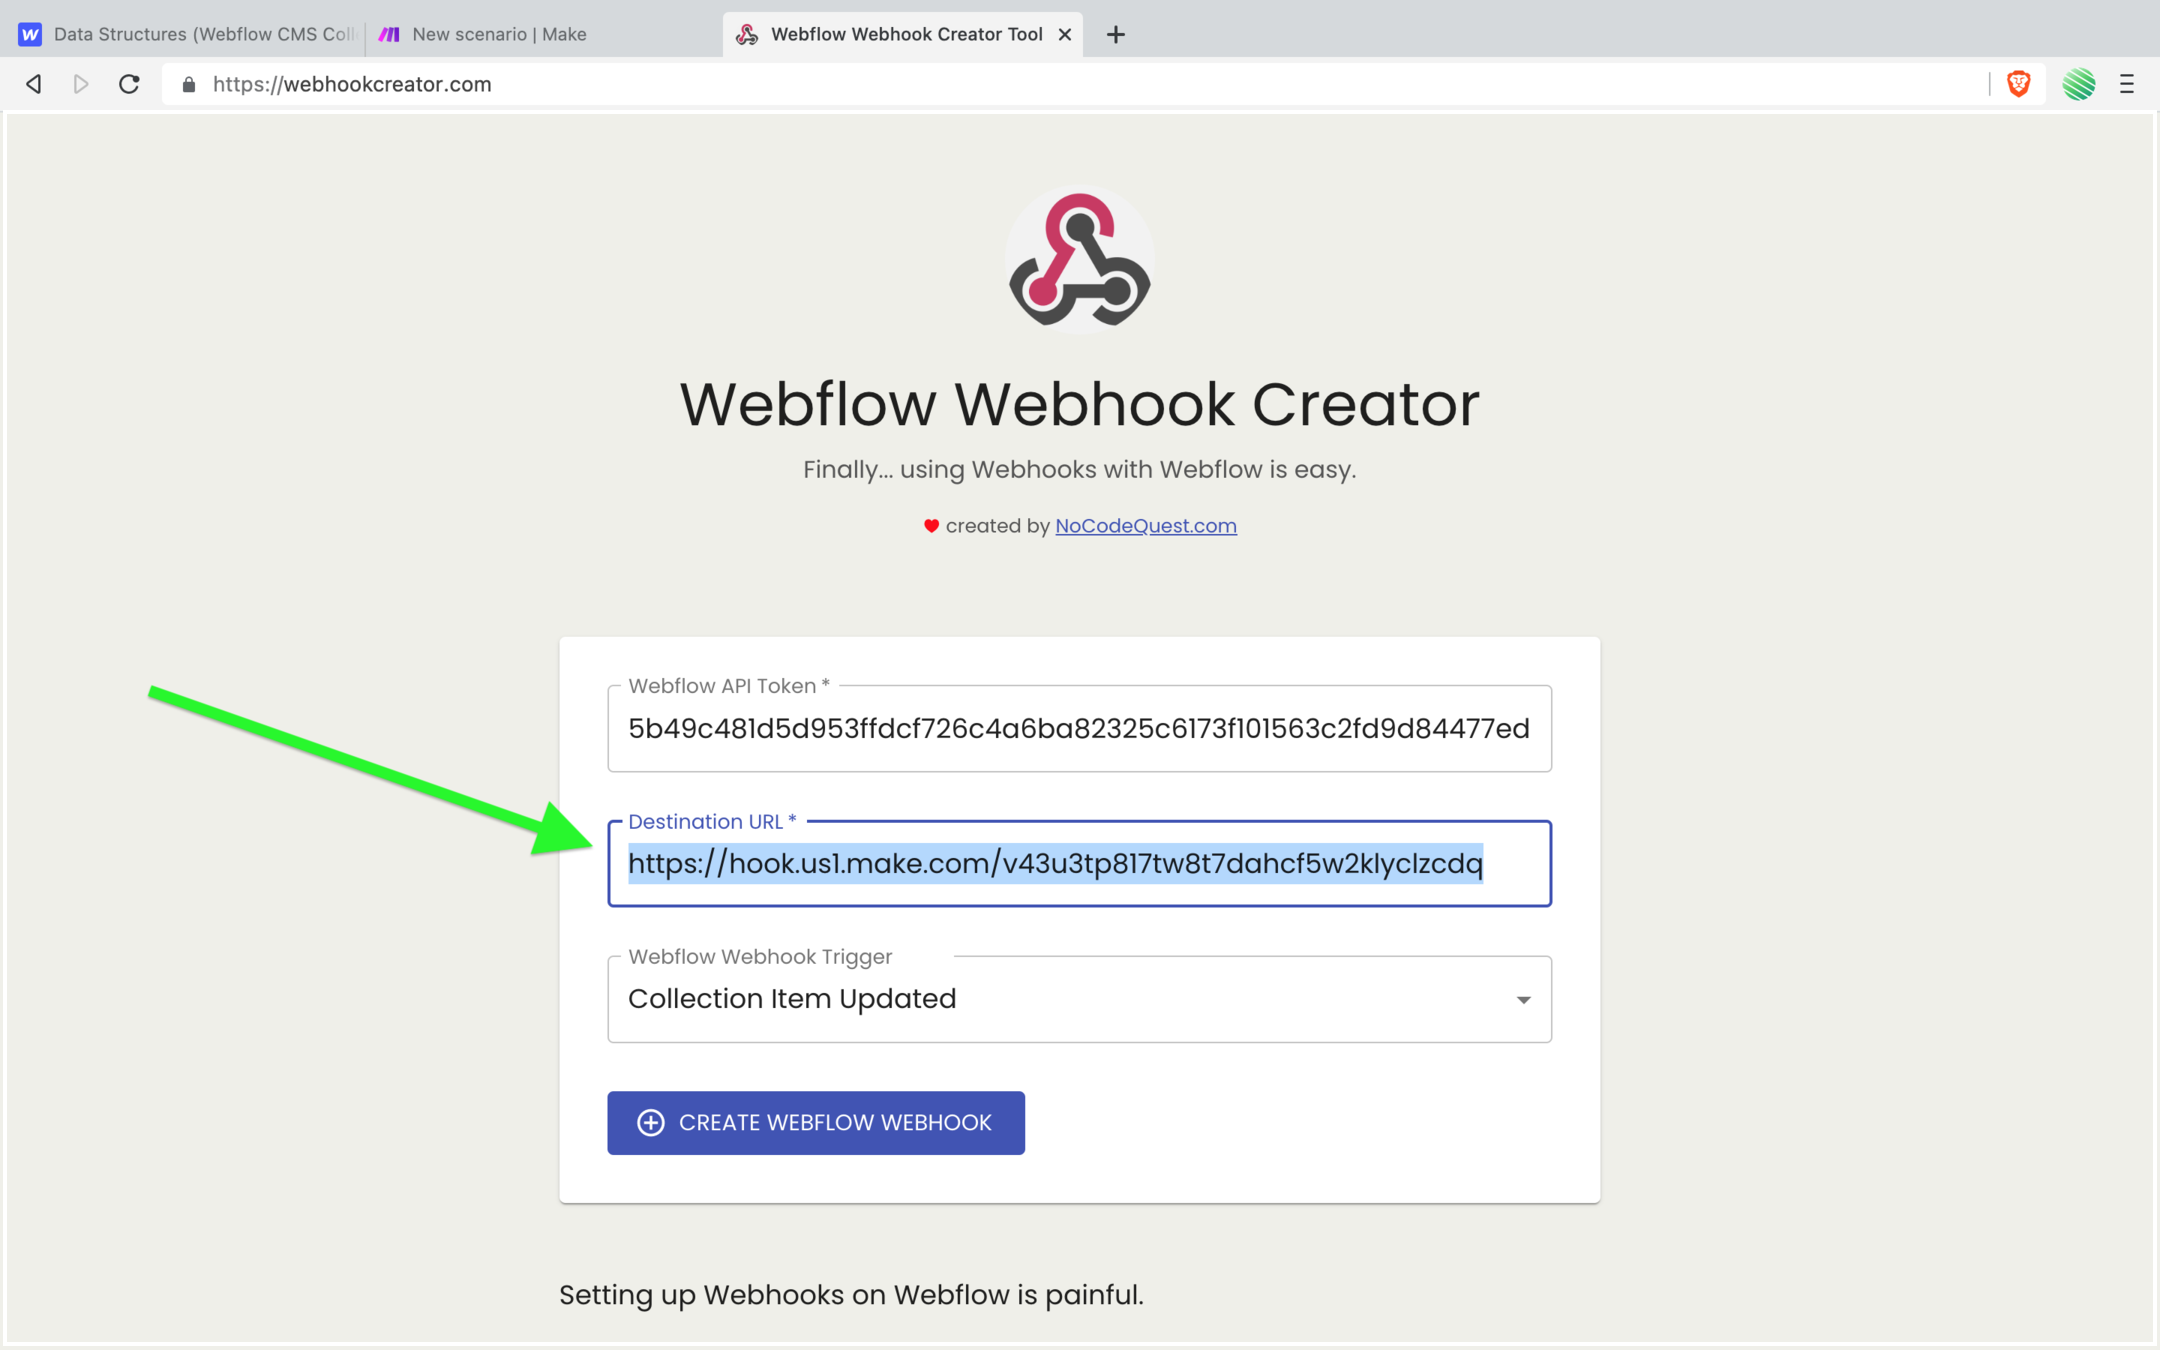
Go to this free tool, and add 3 simple things.
Your Webflow API key (you just copied that into your clipboard).
The destination URL (that’s your Webhook URL).
And what you want the Webhook to trigger on (notice you have TON more options now).
First thing, paste in the Webflow API key you copied to your clipboard.
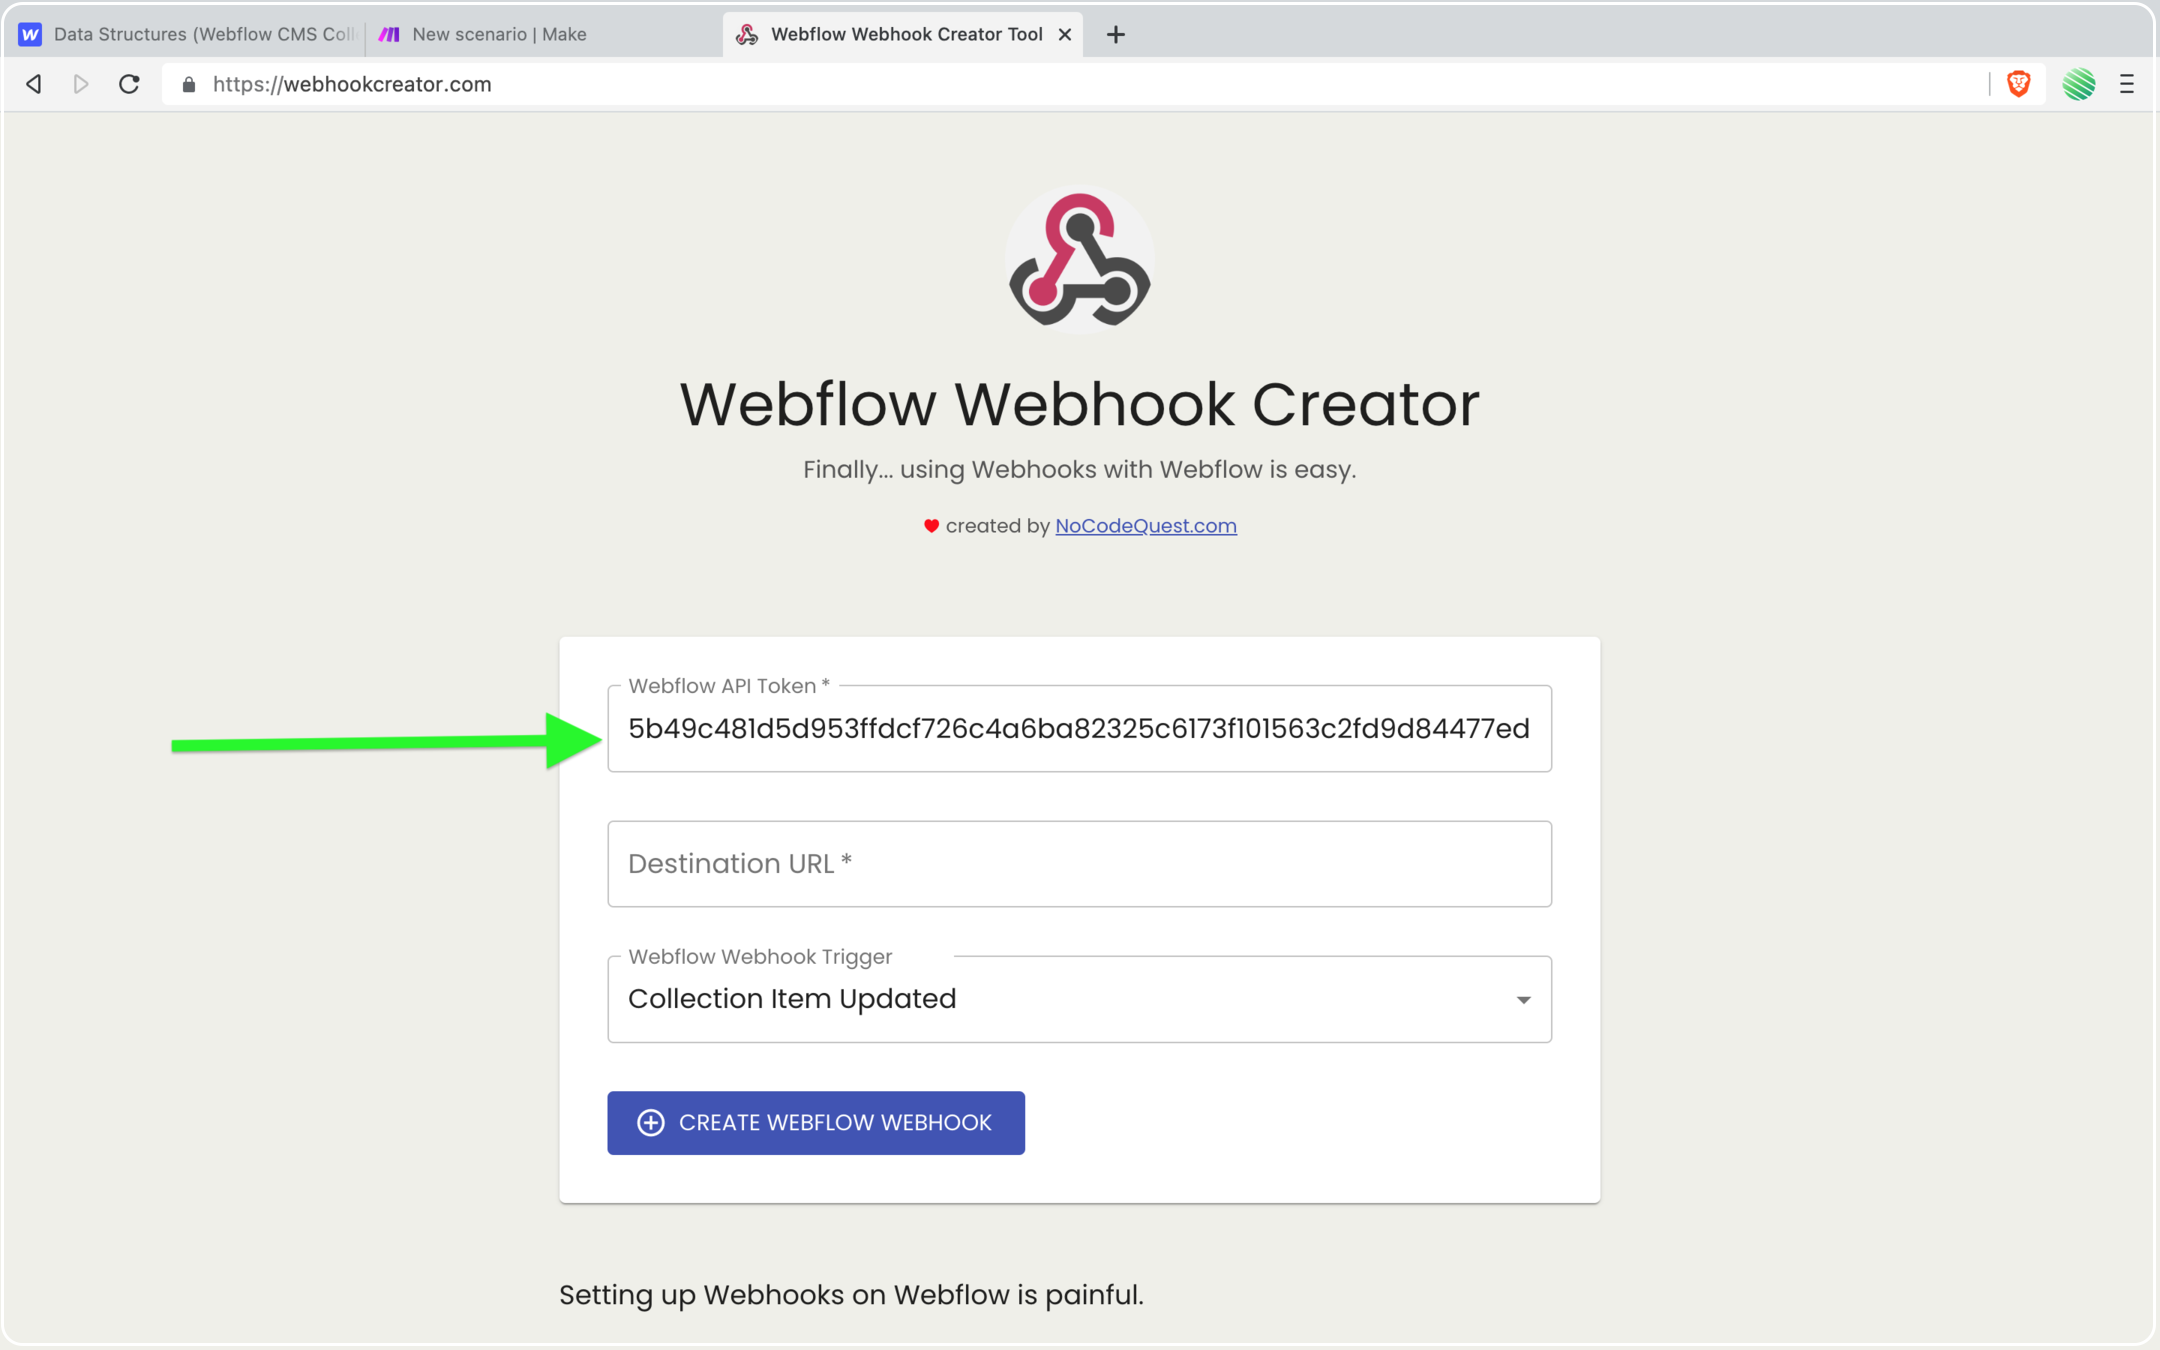
Next, you need the destination URL.
This is the Webhook URL.
But you don’t have that yet. You need to head over the Make (formerly Integromat) and create a new Webhook.
That’s where you get the URL you’ll paste here.
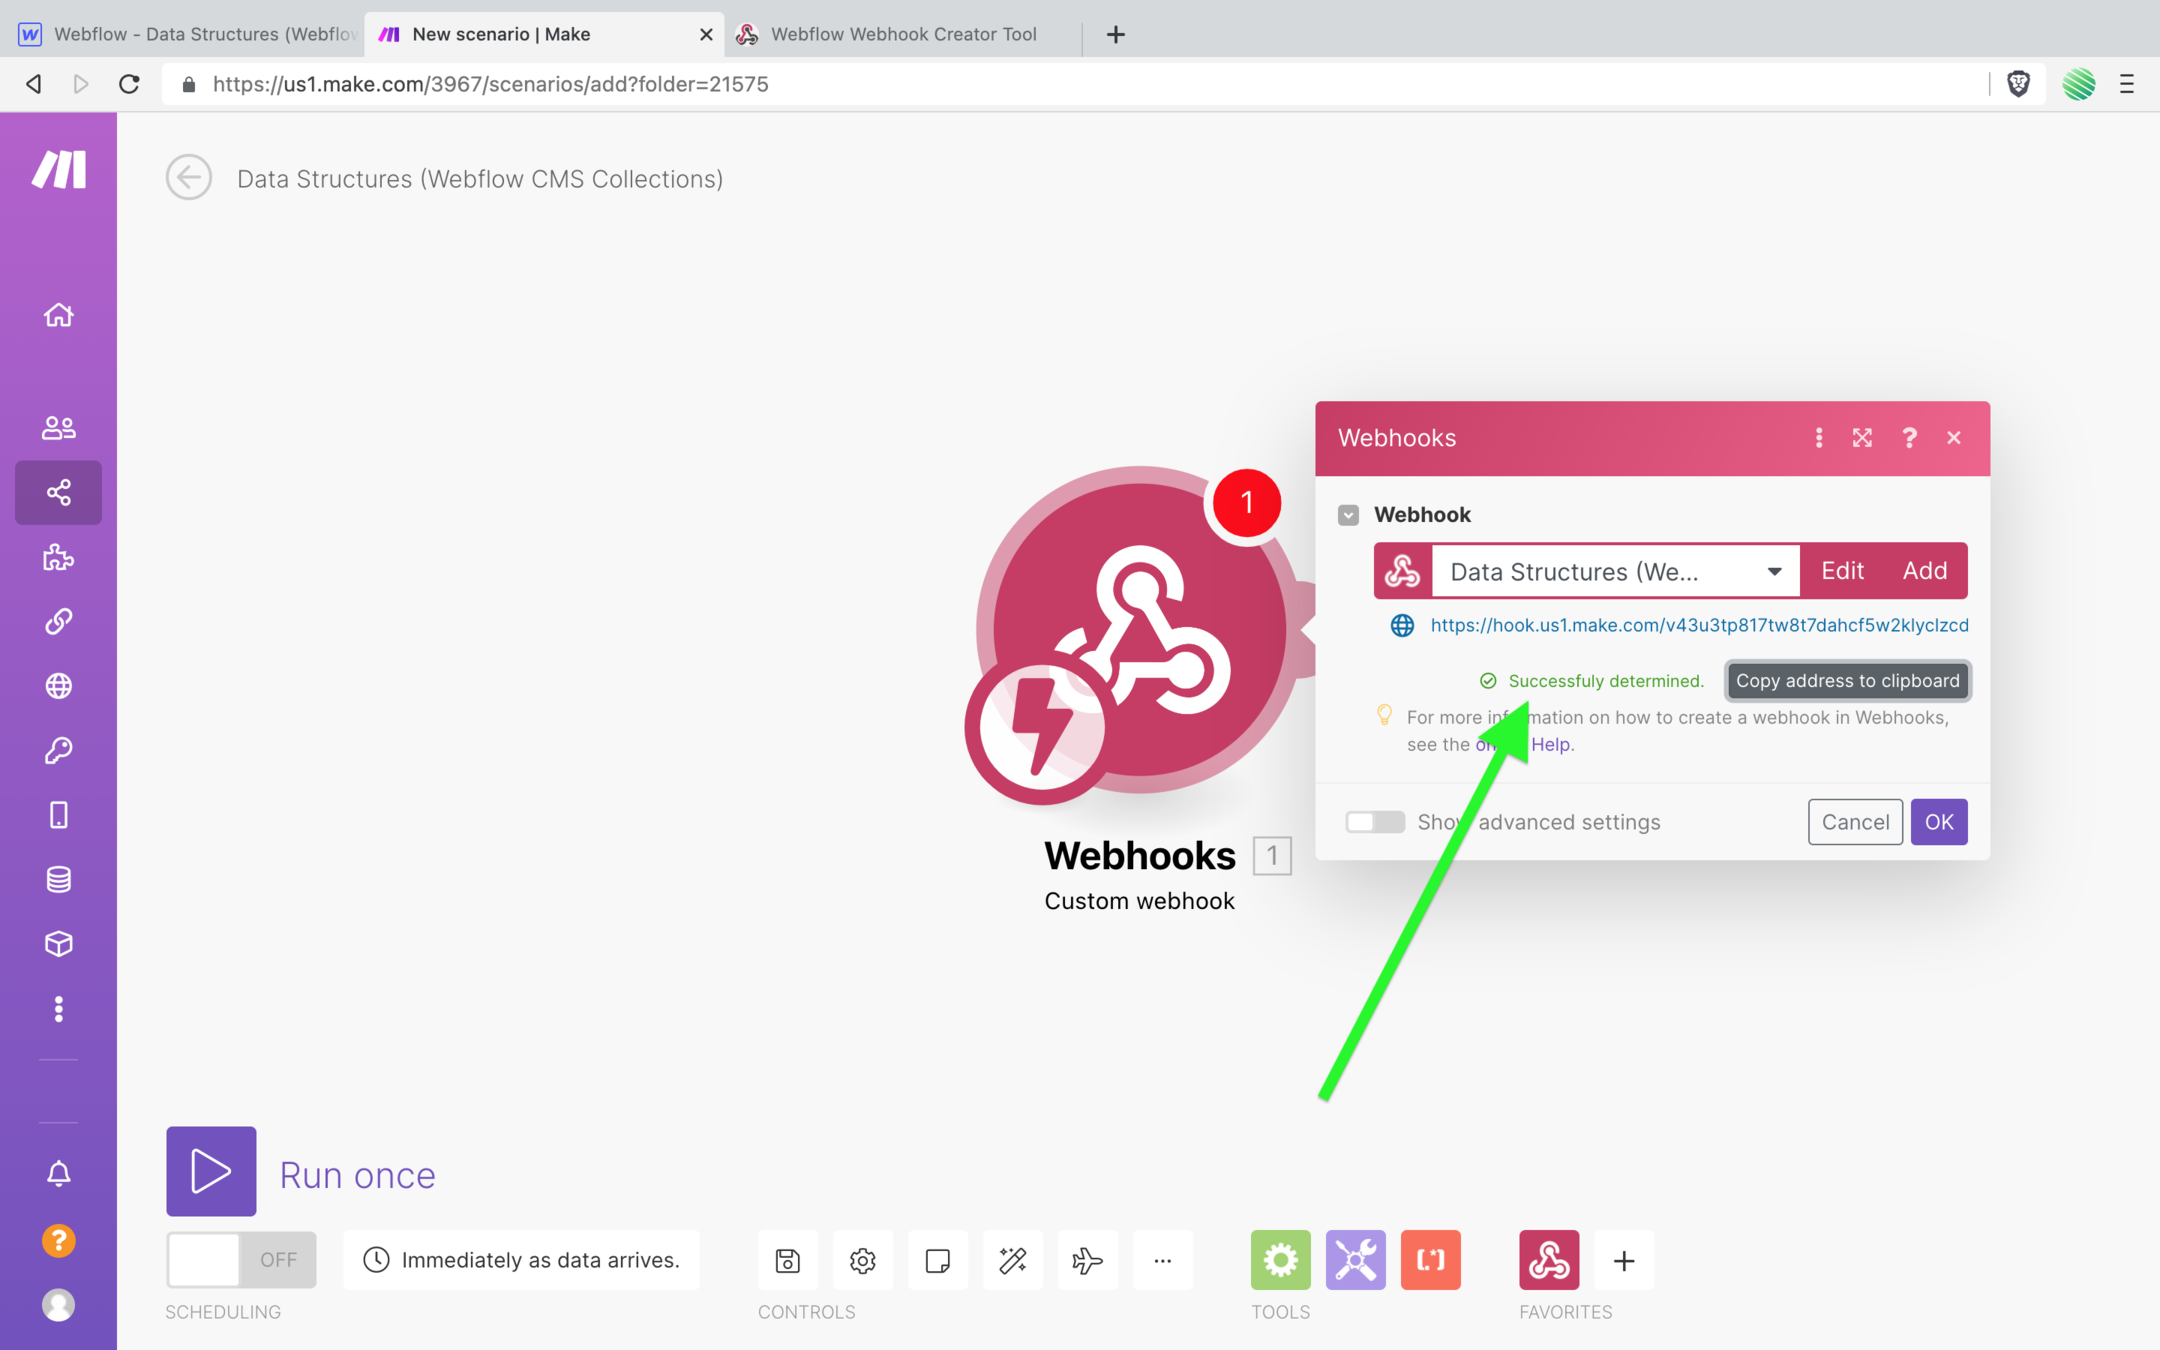
Open up Make.com and create a new scenario.
Search for and select Webhooks, then choose “custom webhook” from the list of options.
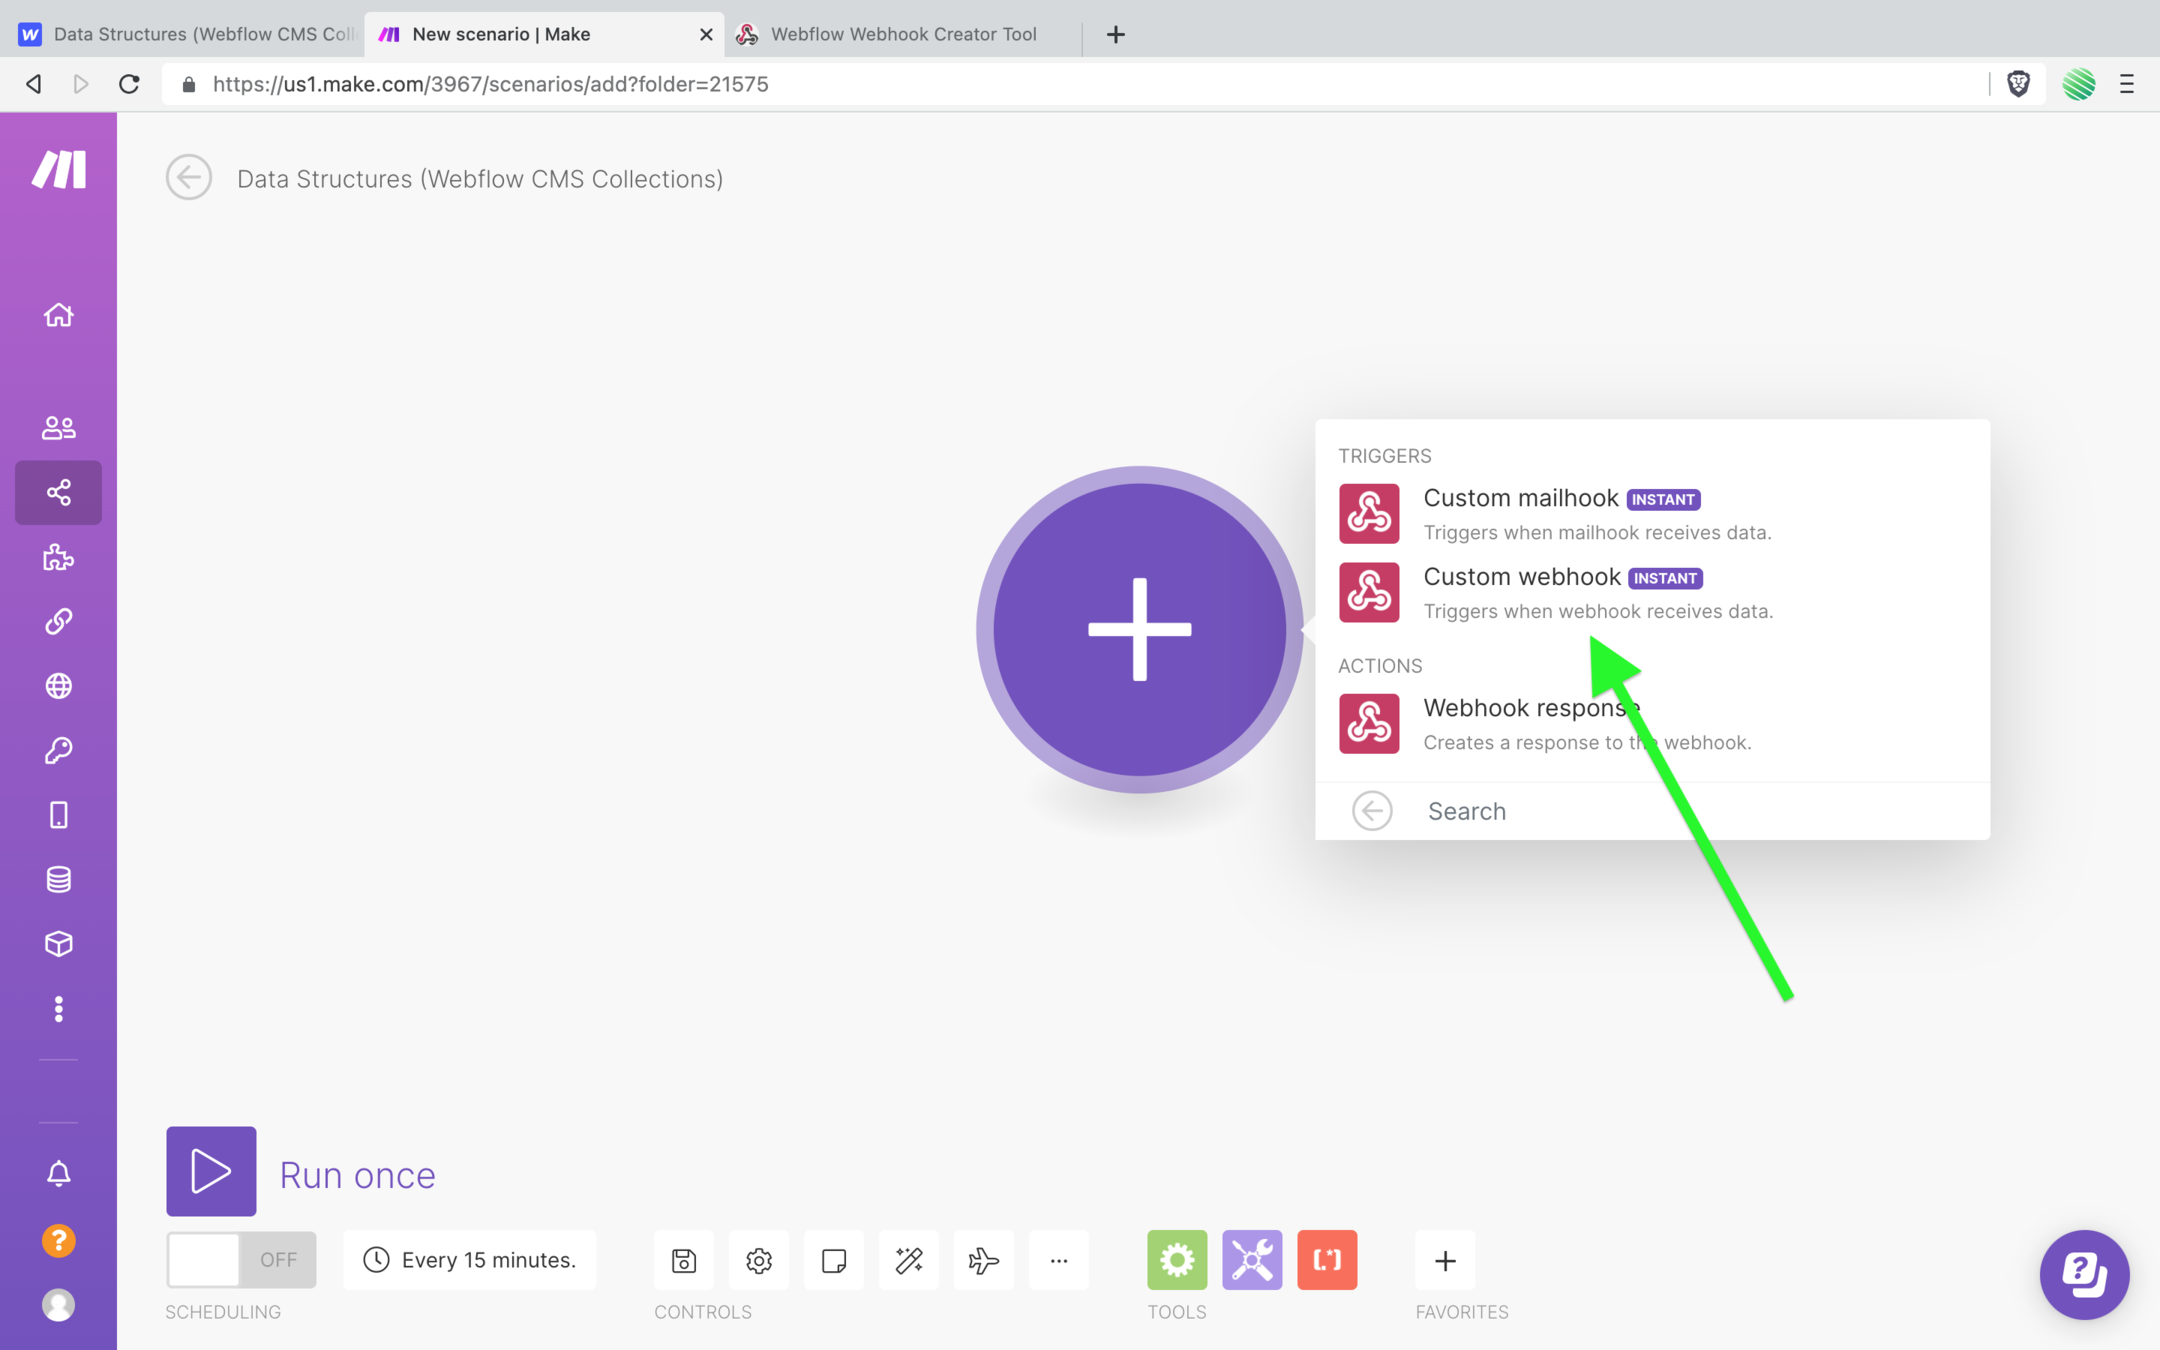
Great, all created.
Create your Webhook Data Structure
This is the secret sauce you’ve been waiting for 😄
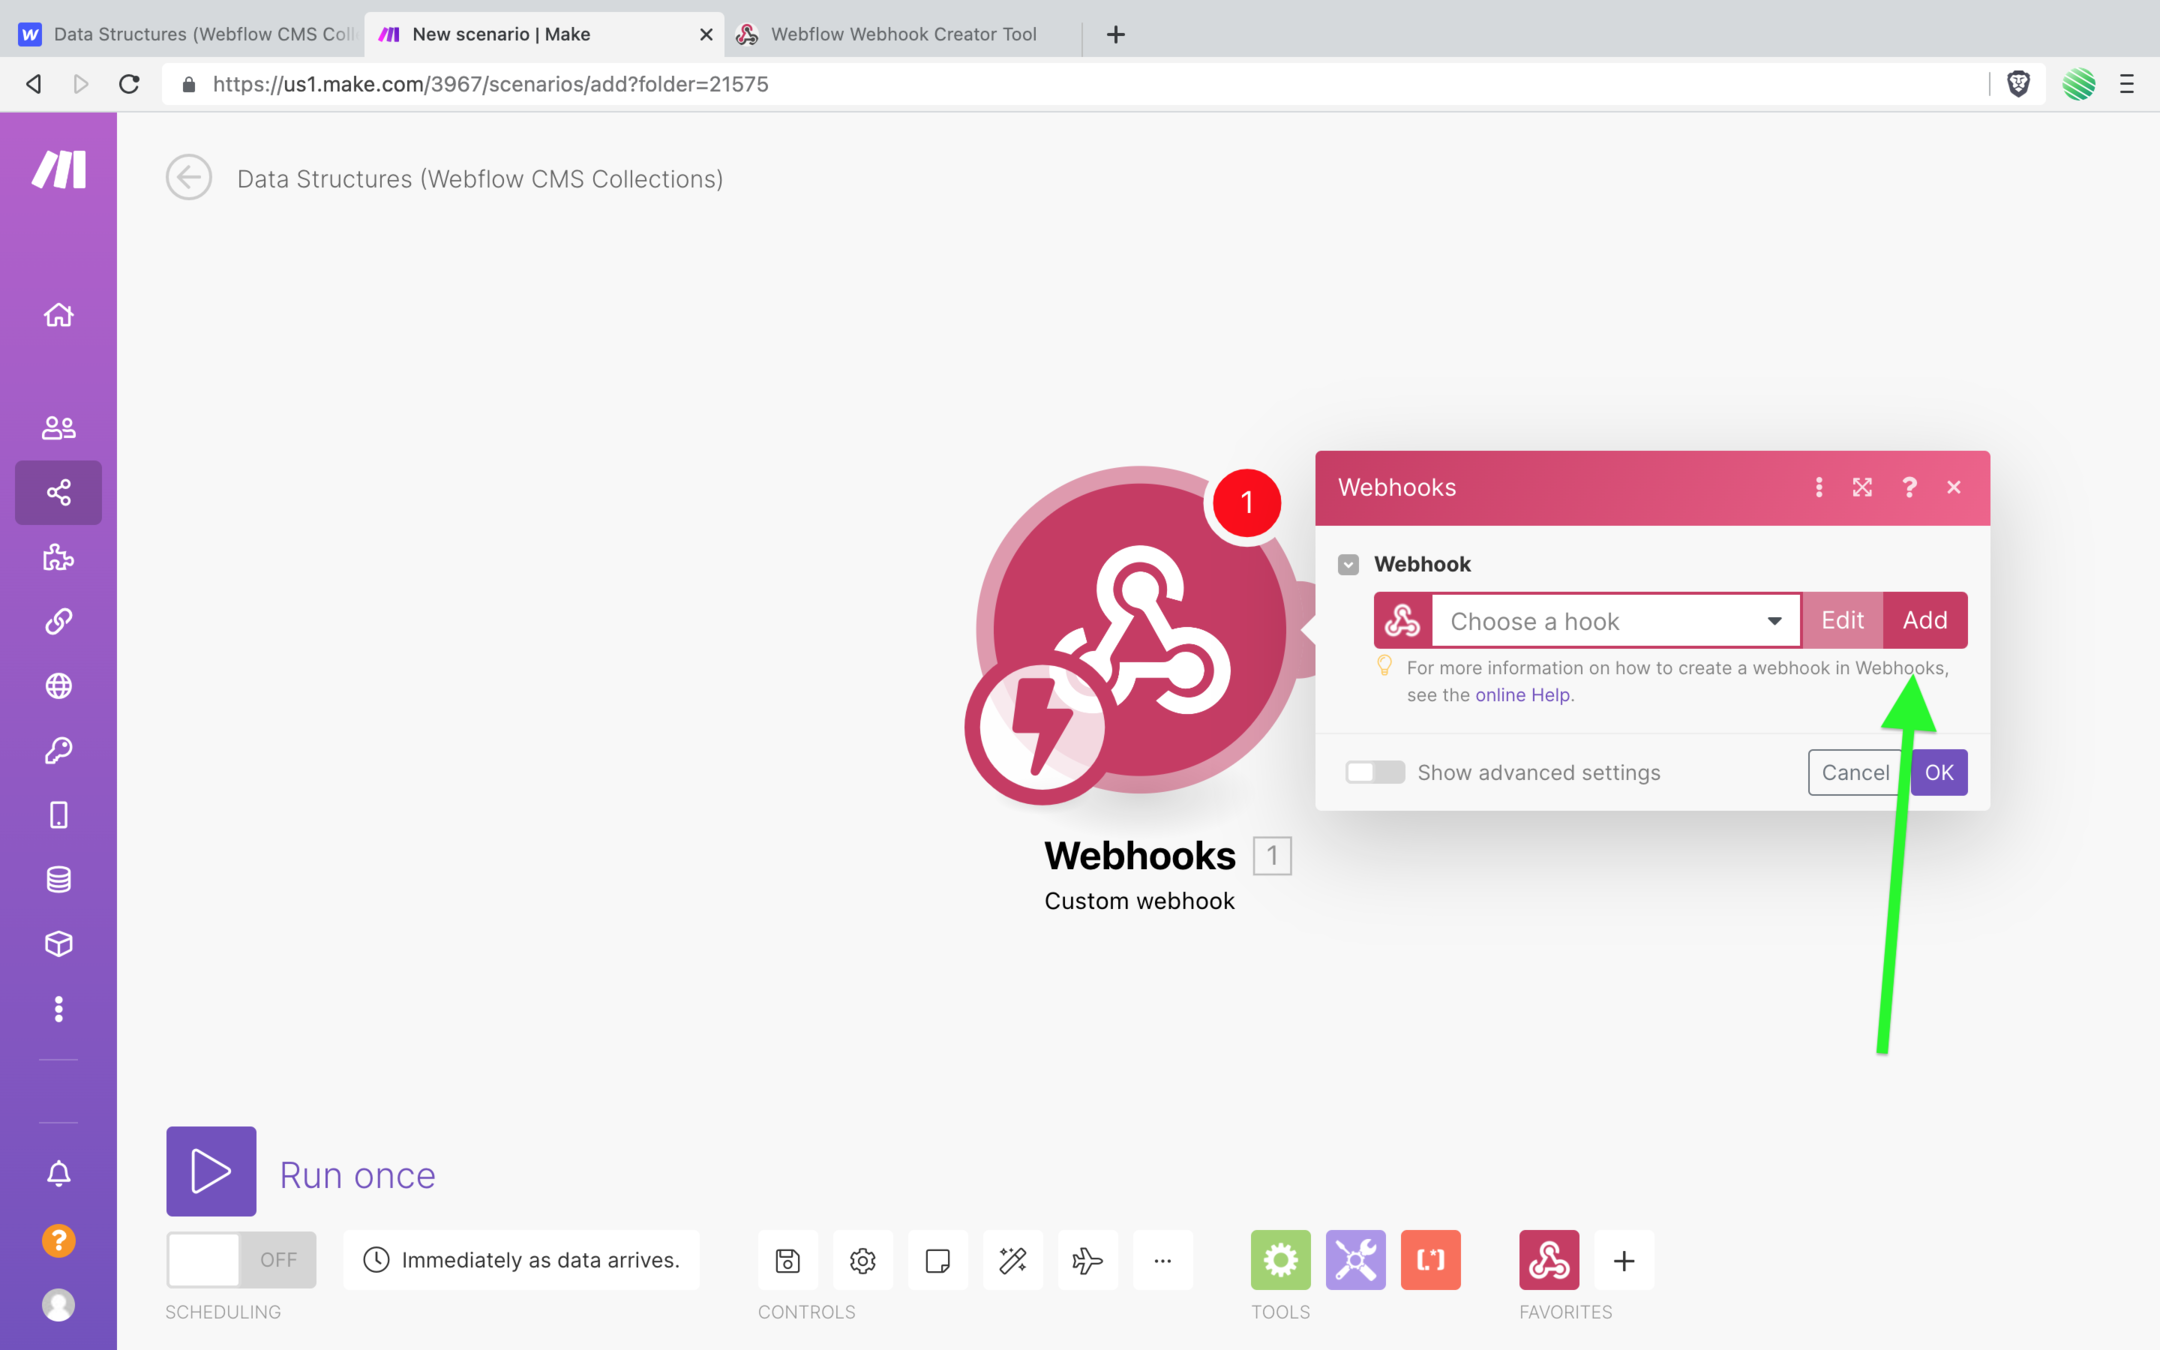
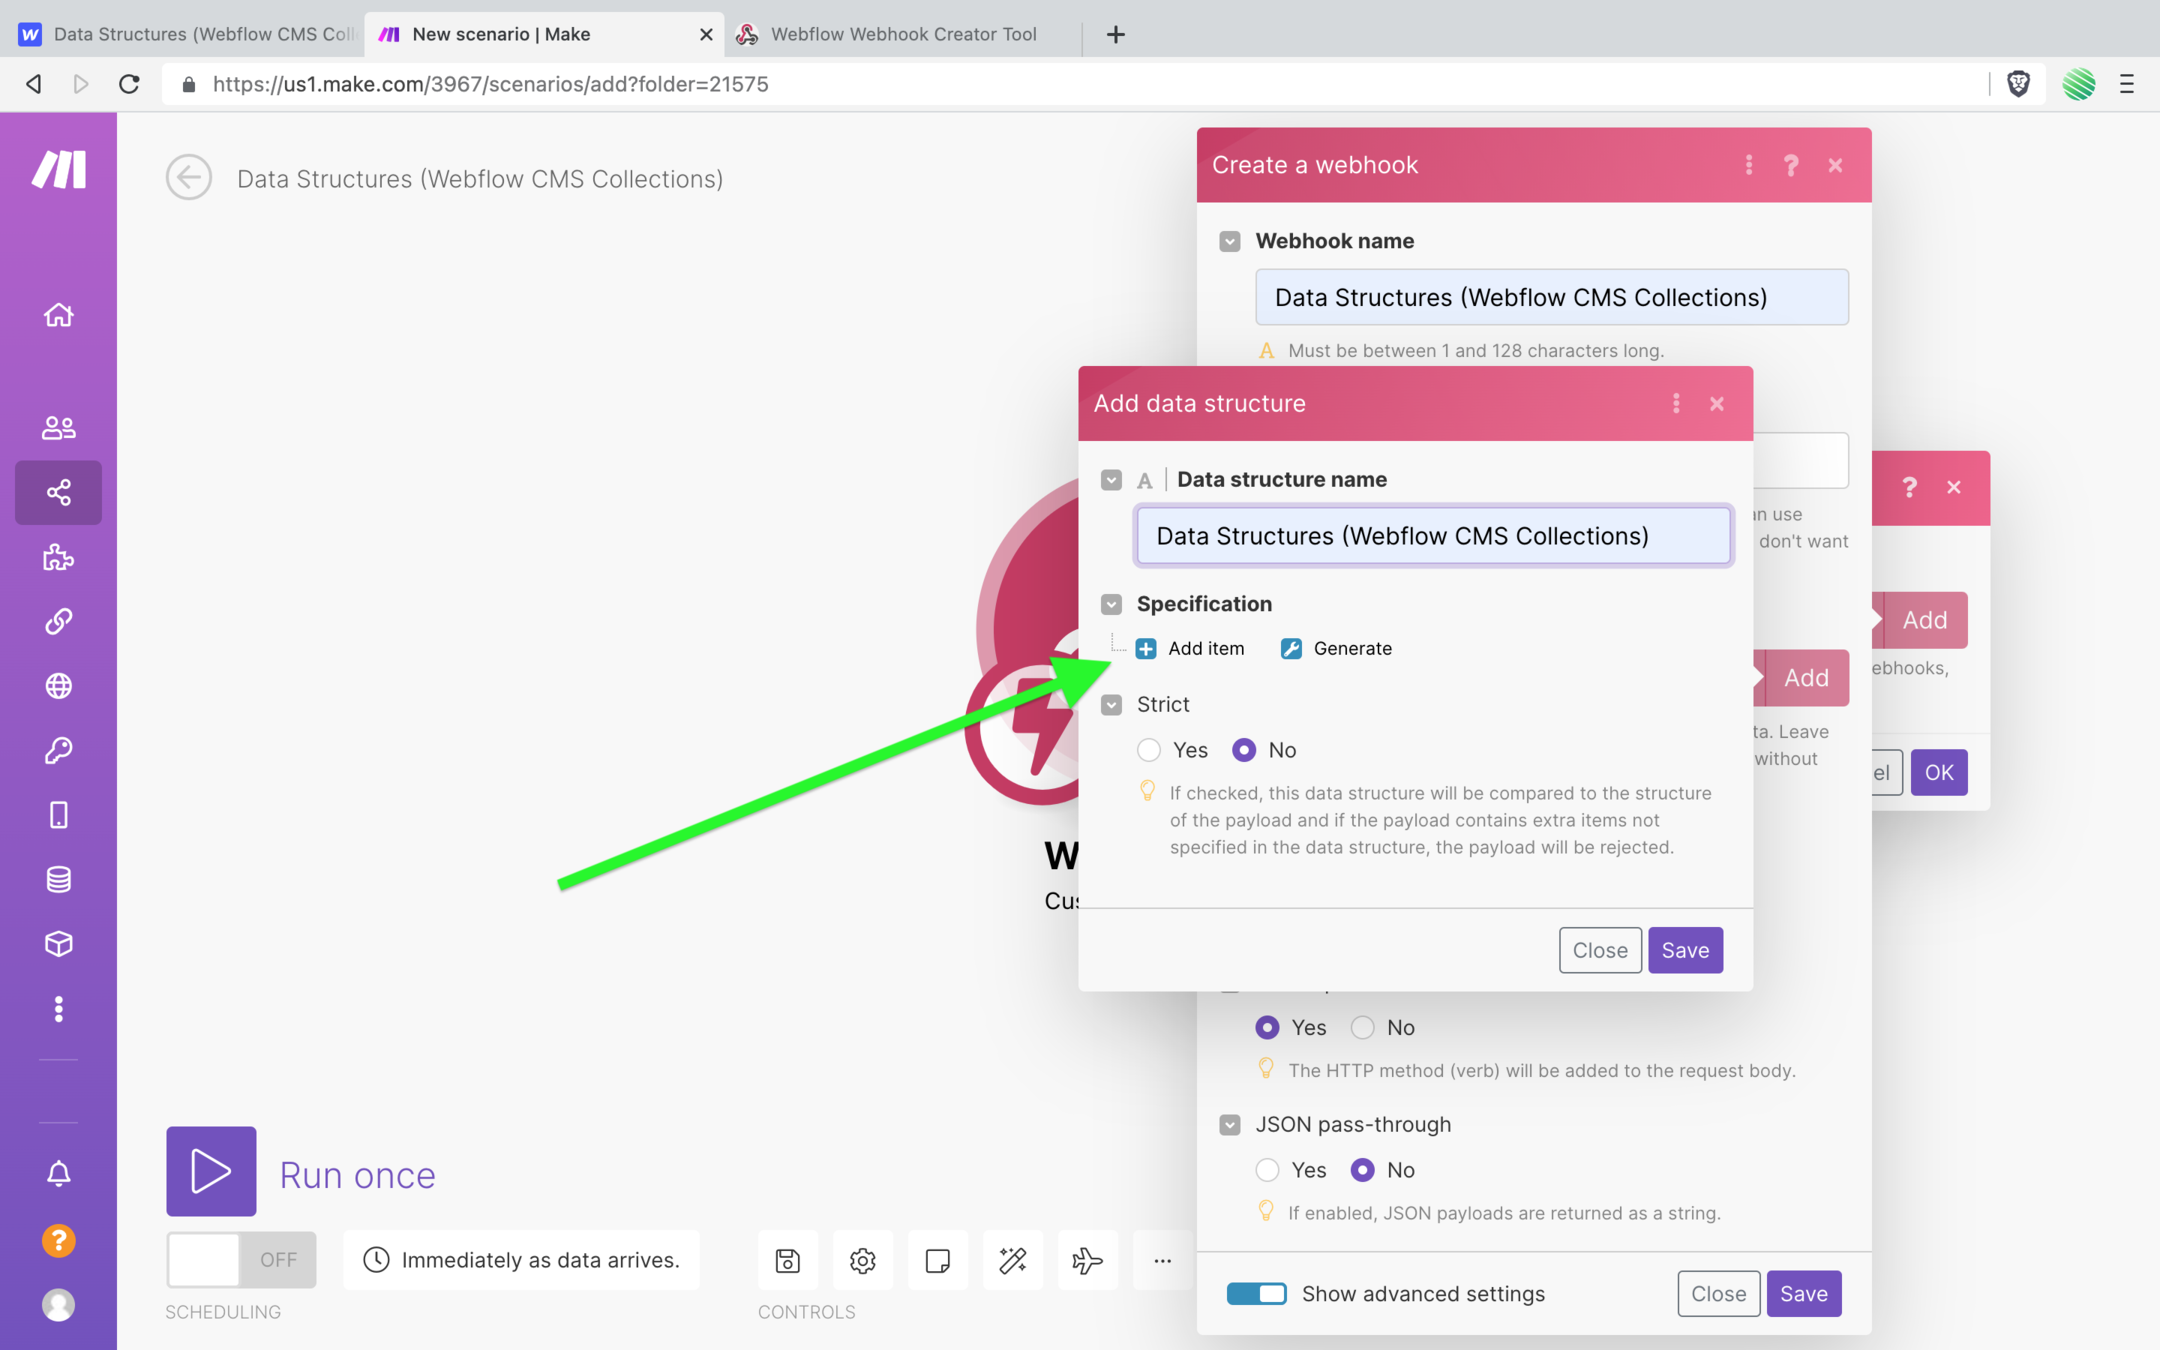
Tap on the add button.
Give your Webhook a descriptive name.
Then, toggle on the “show advanced settings” at the bottom of the popup.

Under the “Data Structure” section, tap on the add button.
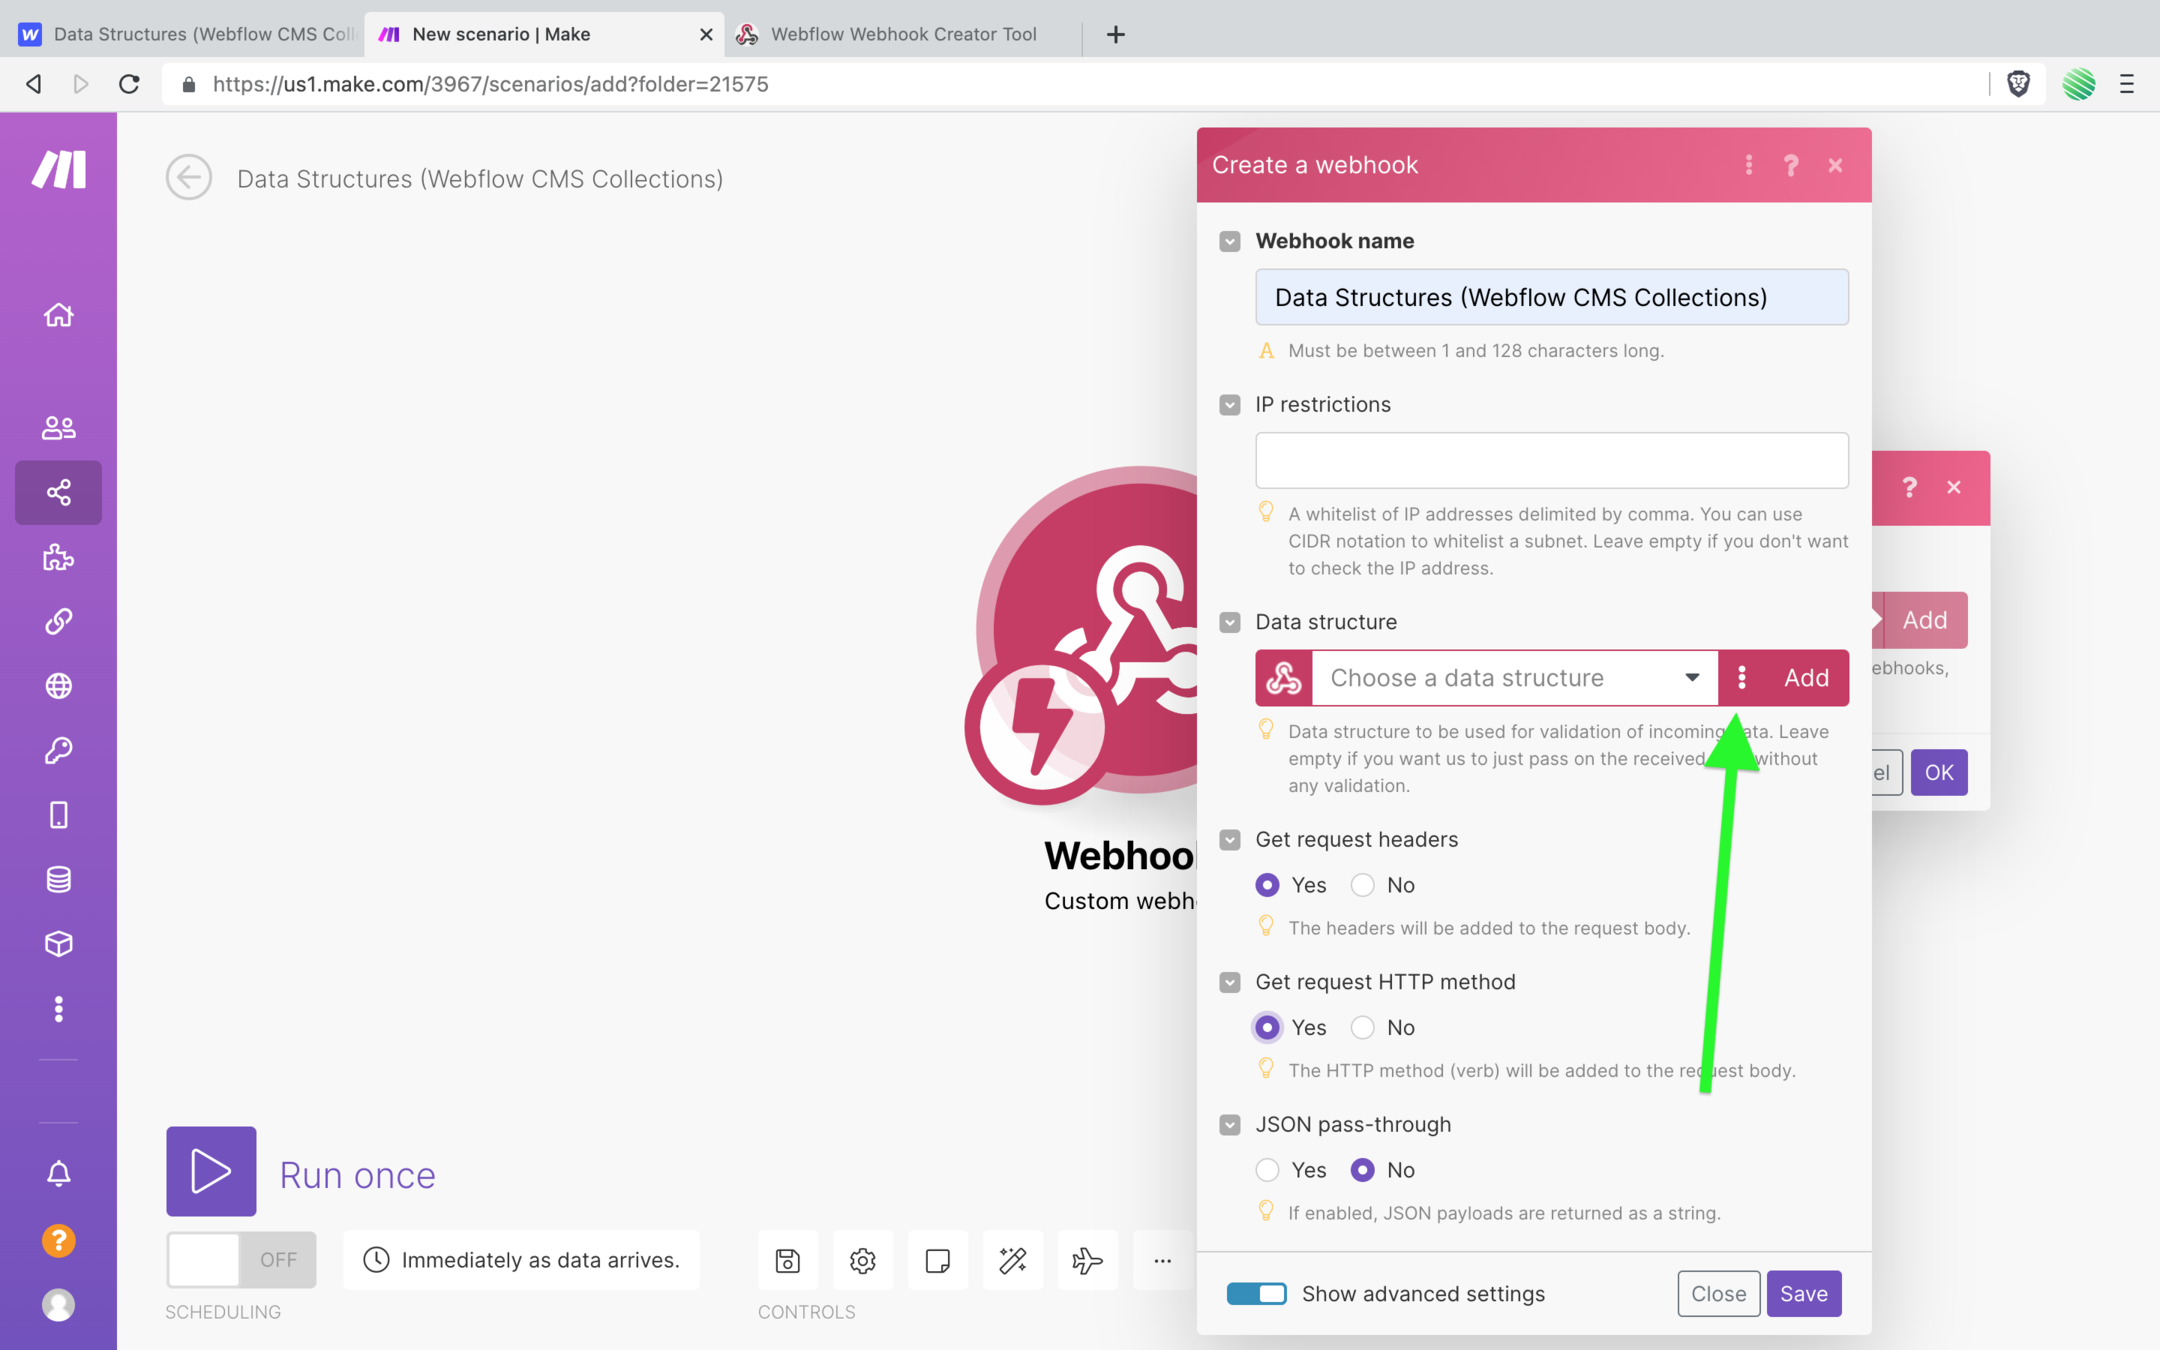
This is where you define the Data Structure that you’ll filter on.
Remember, this filter runs BEFORE your Make Webhook.
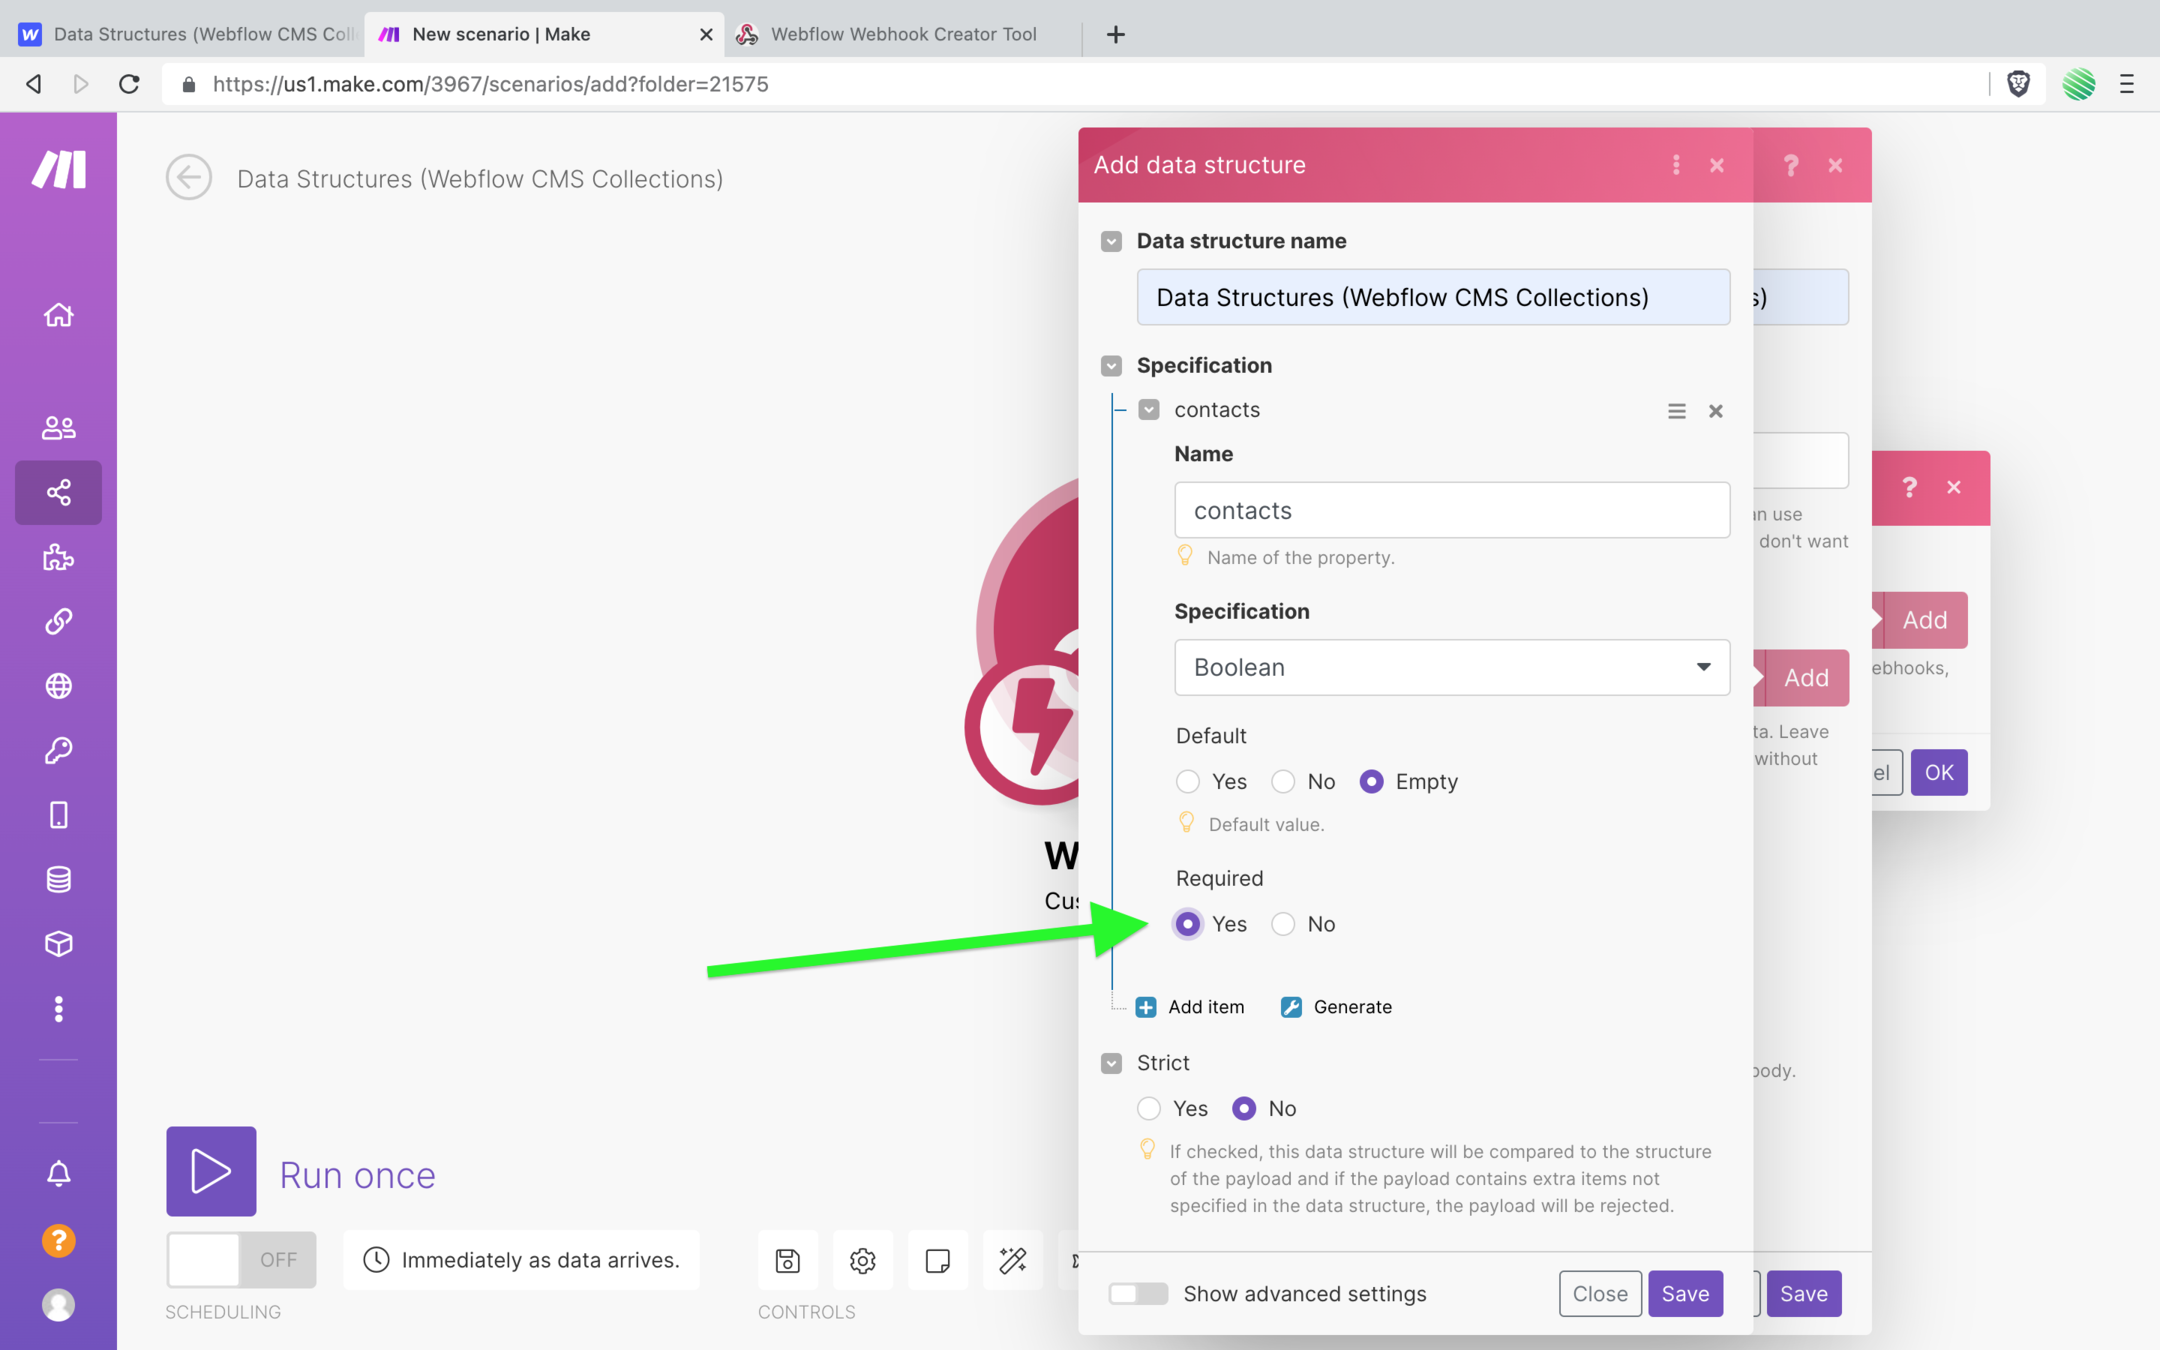
Tap on the add item link…
And add “contacts” to the name field.
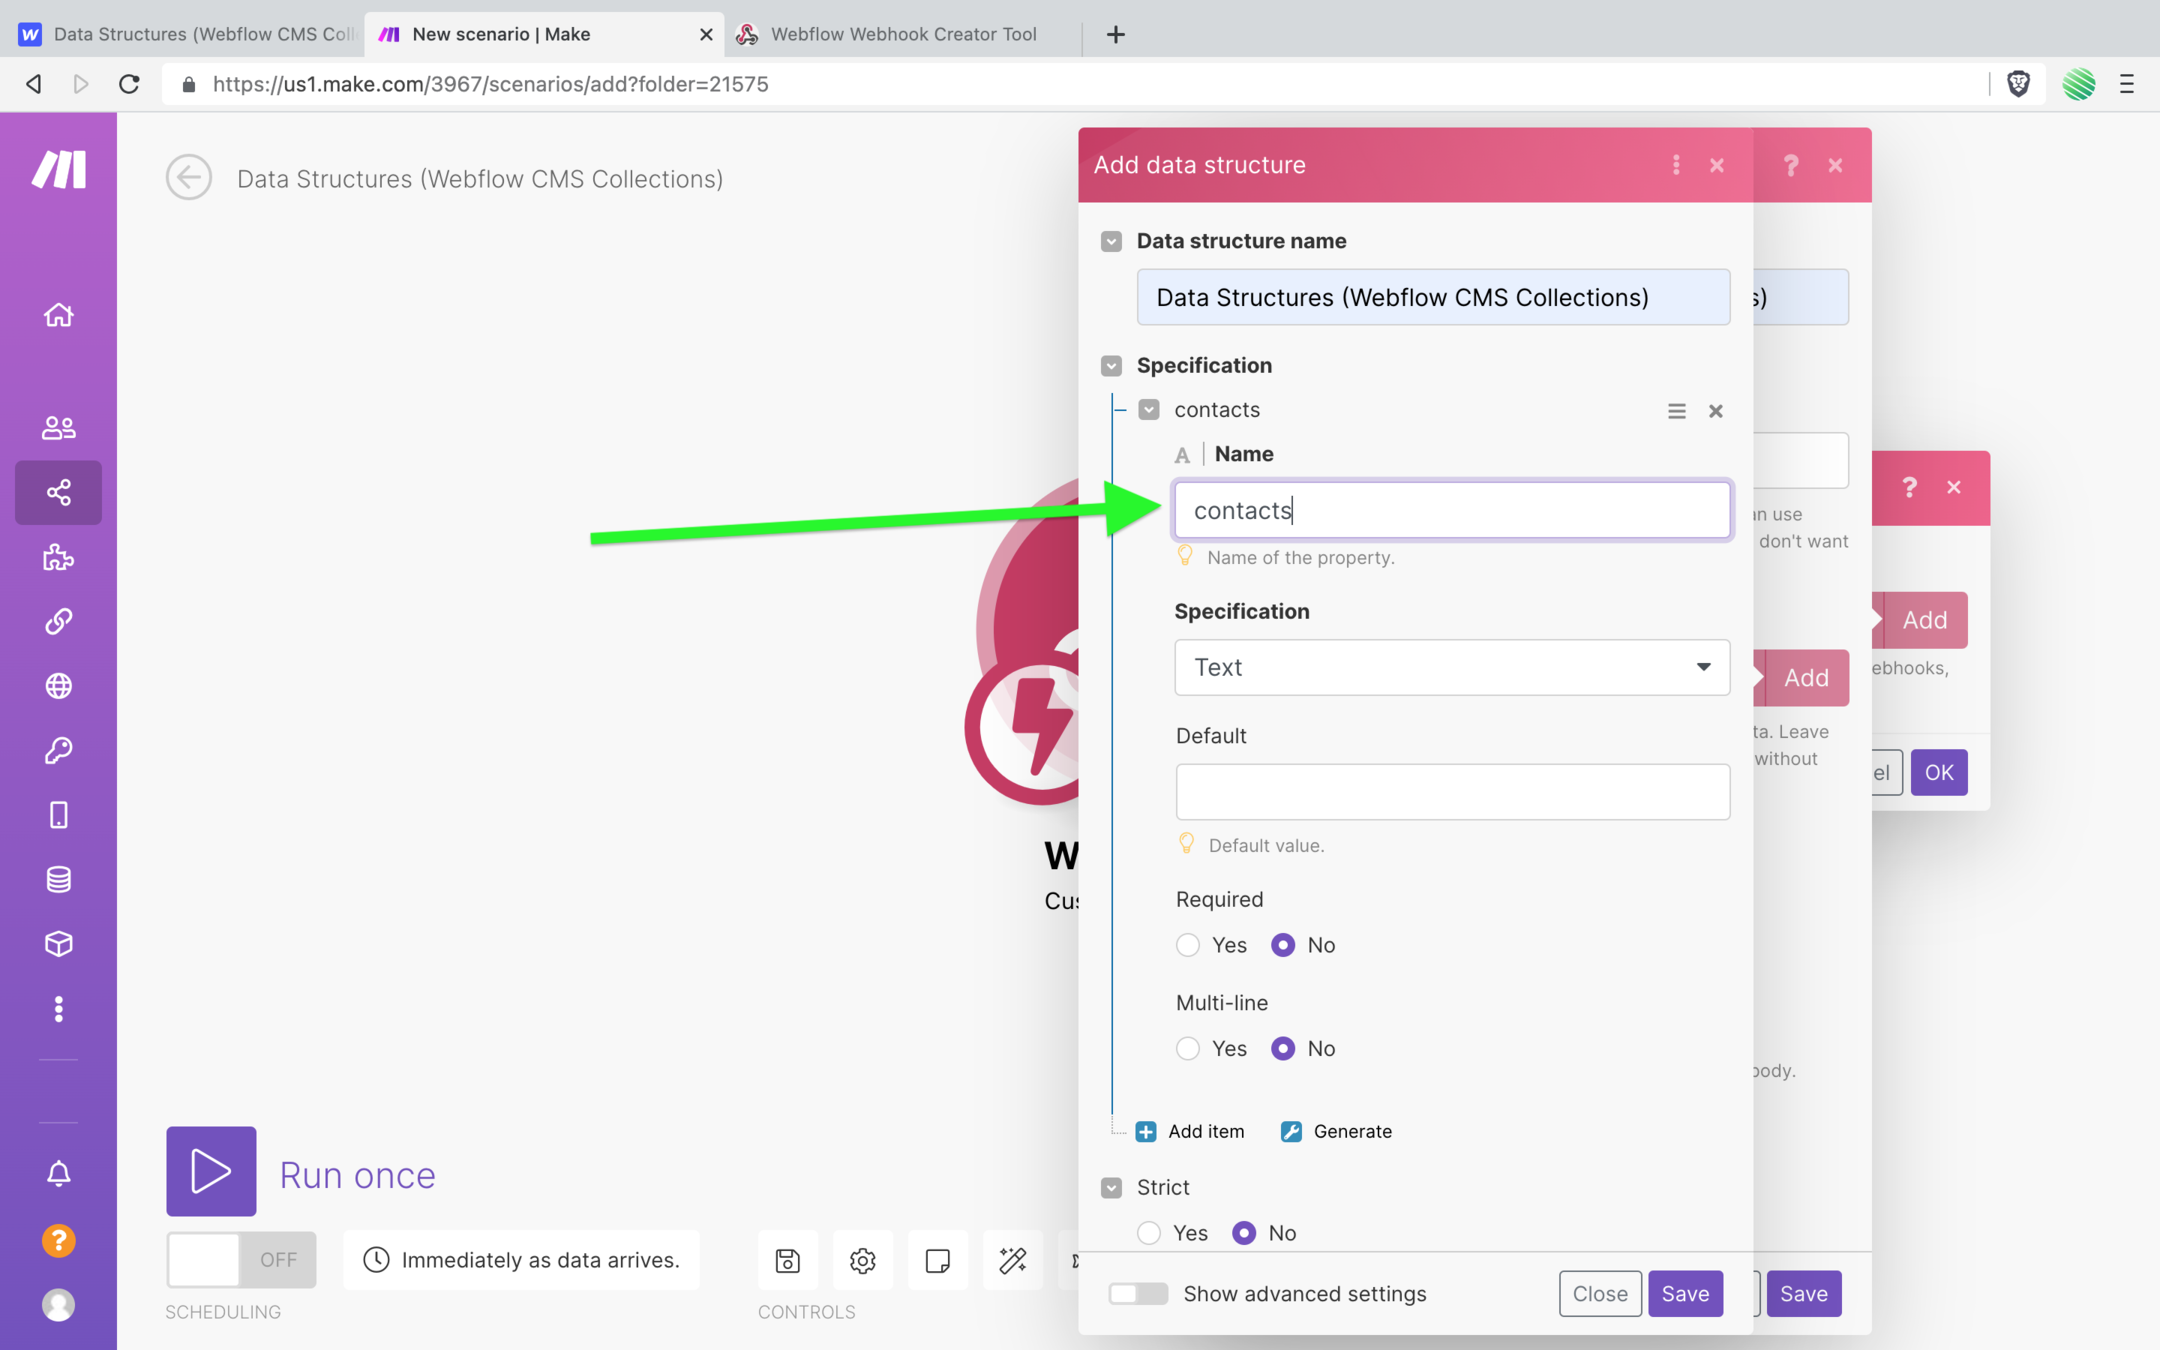
Recall, “contacts” was the name of the field (or key) in your Webflow CMS Collection.
Here’s a look back at that:
In a CMS a “field” is the same thing as a “key” in a Data Structure.
It’s confusing that they have different names, unfortunately they do, but they mean the same thing.
So what you just entered above, within your Make Data Structure…
Was the Webflow CMS Collection field, or better said as key.
Not the value of the field (key).
So every time your Webflow Webhook triggers for this Collection, it’ll have that key name in it (regardless of the value).
If your Webflow Webhook triggers for any other Collection, for example the “Events” Collection, that key name will not exist.
If the key name does not exist then it will not pass your filter and your Make Webhook will not run.
Phew! 😅
I just hit you with a lot of info, still with me?
Good!
Let’s keep going. You’ll run through this a few times and it’ll make more sense.
Next…
Find the “Required” section. It should be defaulted to “No”.
You want to select “Yes” for this field.
What this does is to say if the “contacts” key does not exist within the Data Structure sent to this Webhook, then ignore it. Don’t continue to run.
Alright, done!
Time for you to finish creating your Webflow Webhook now that Make is all set up.
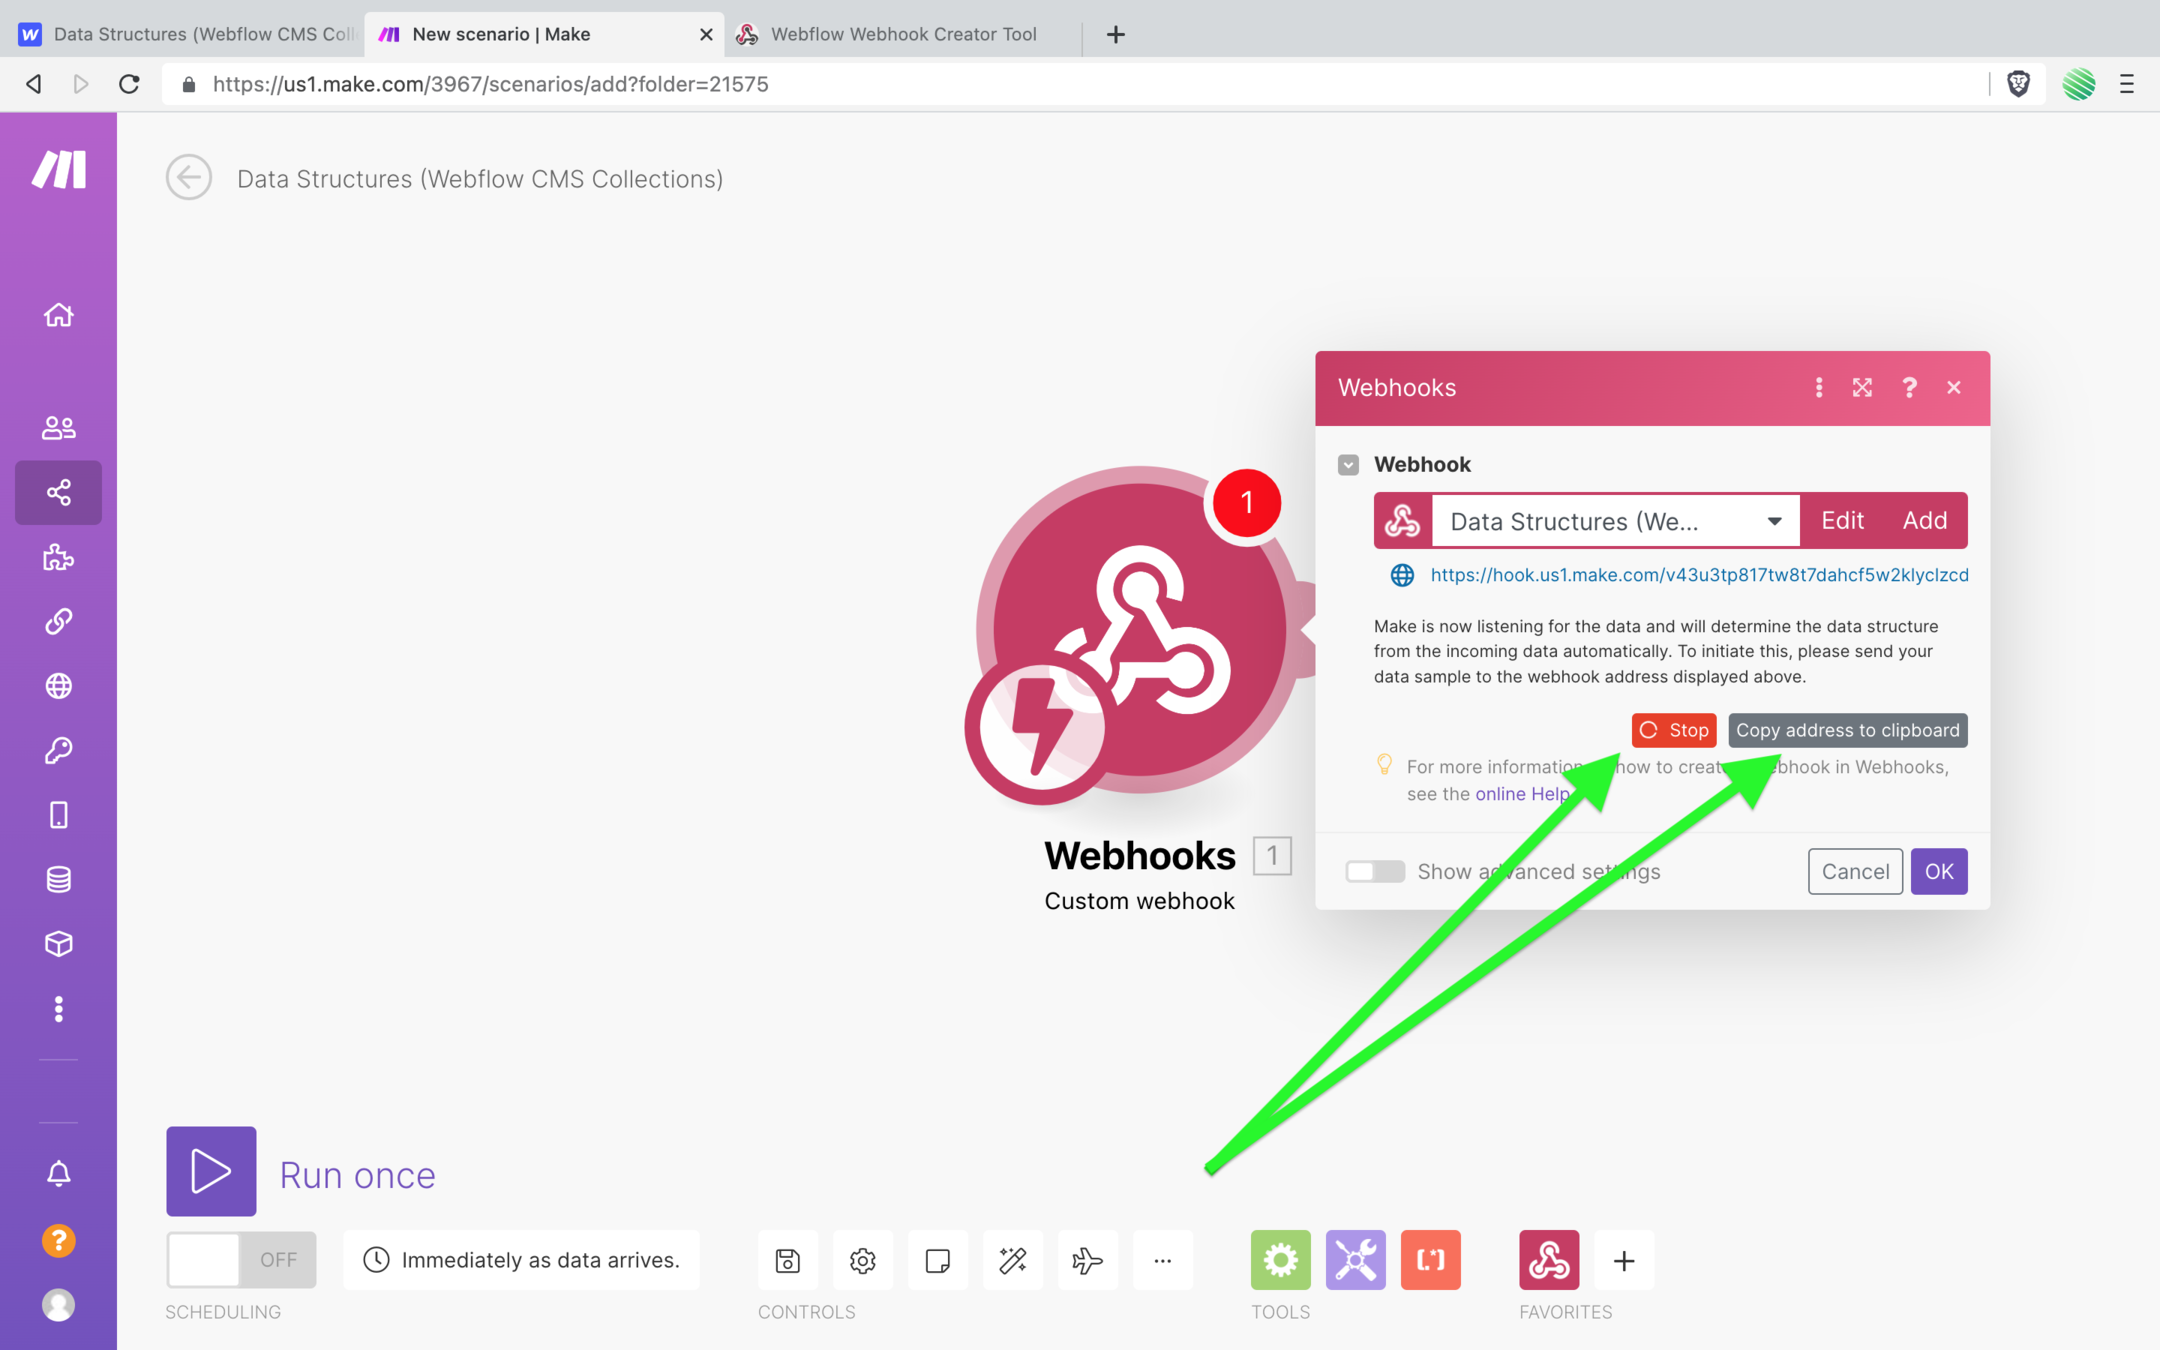
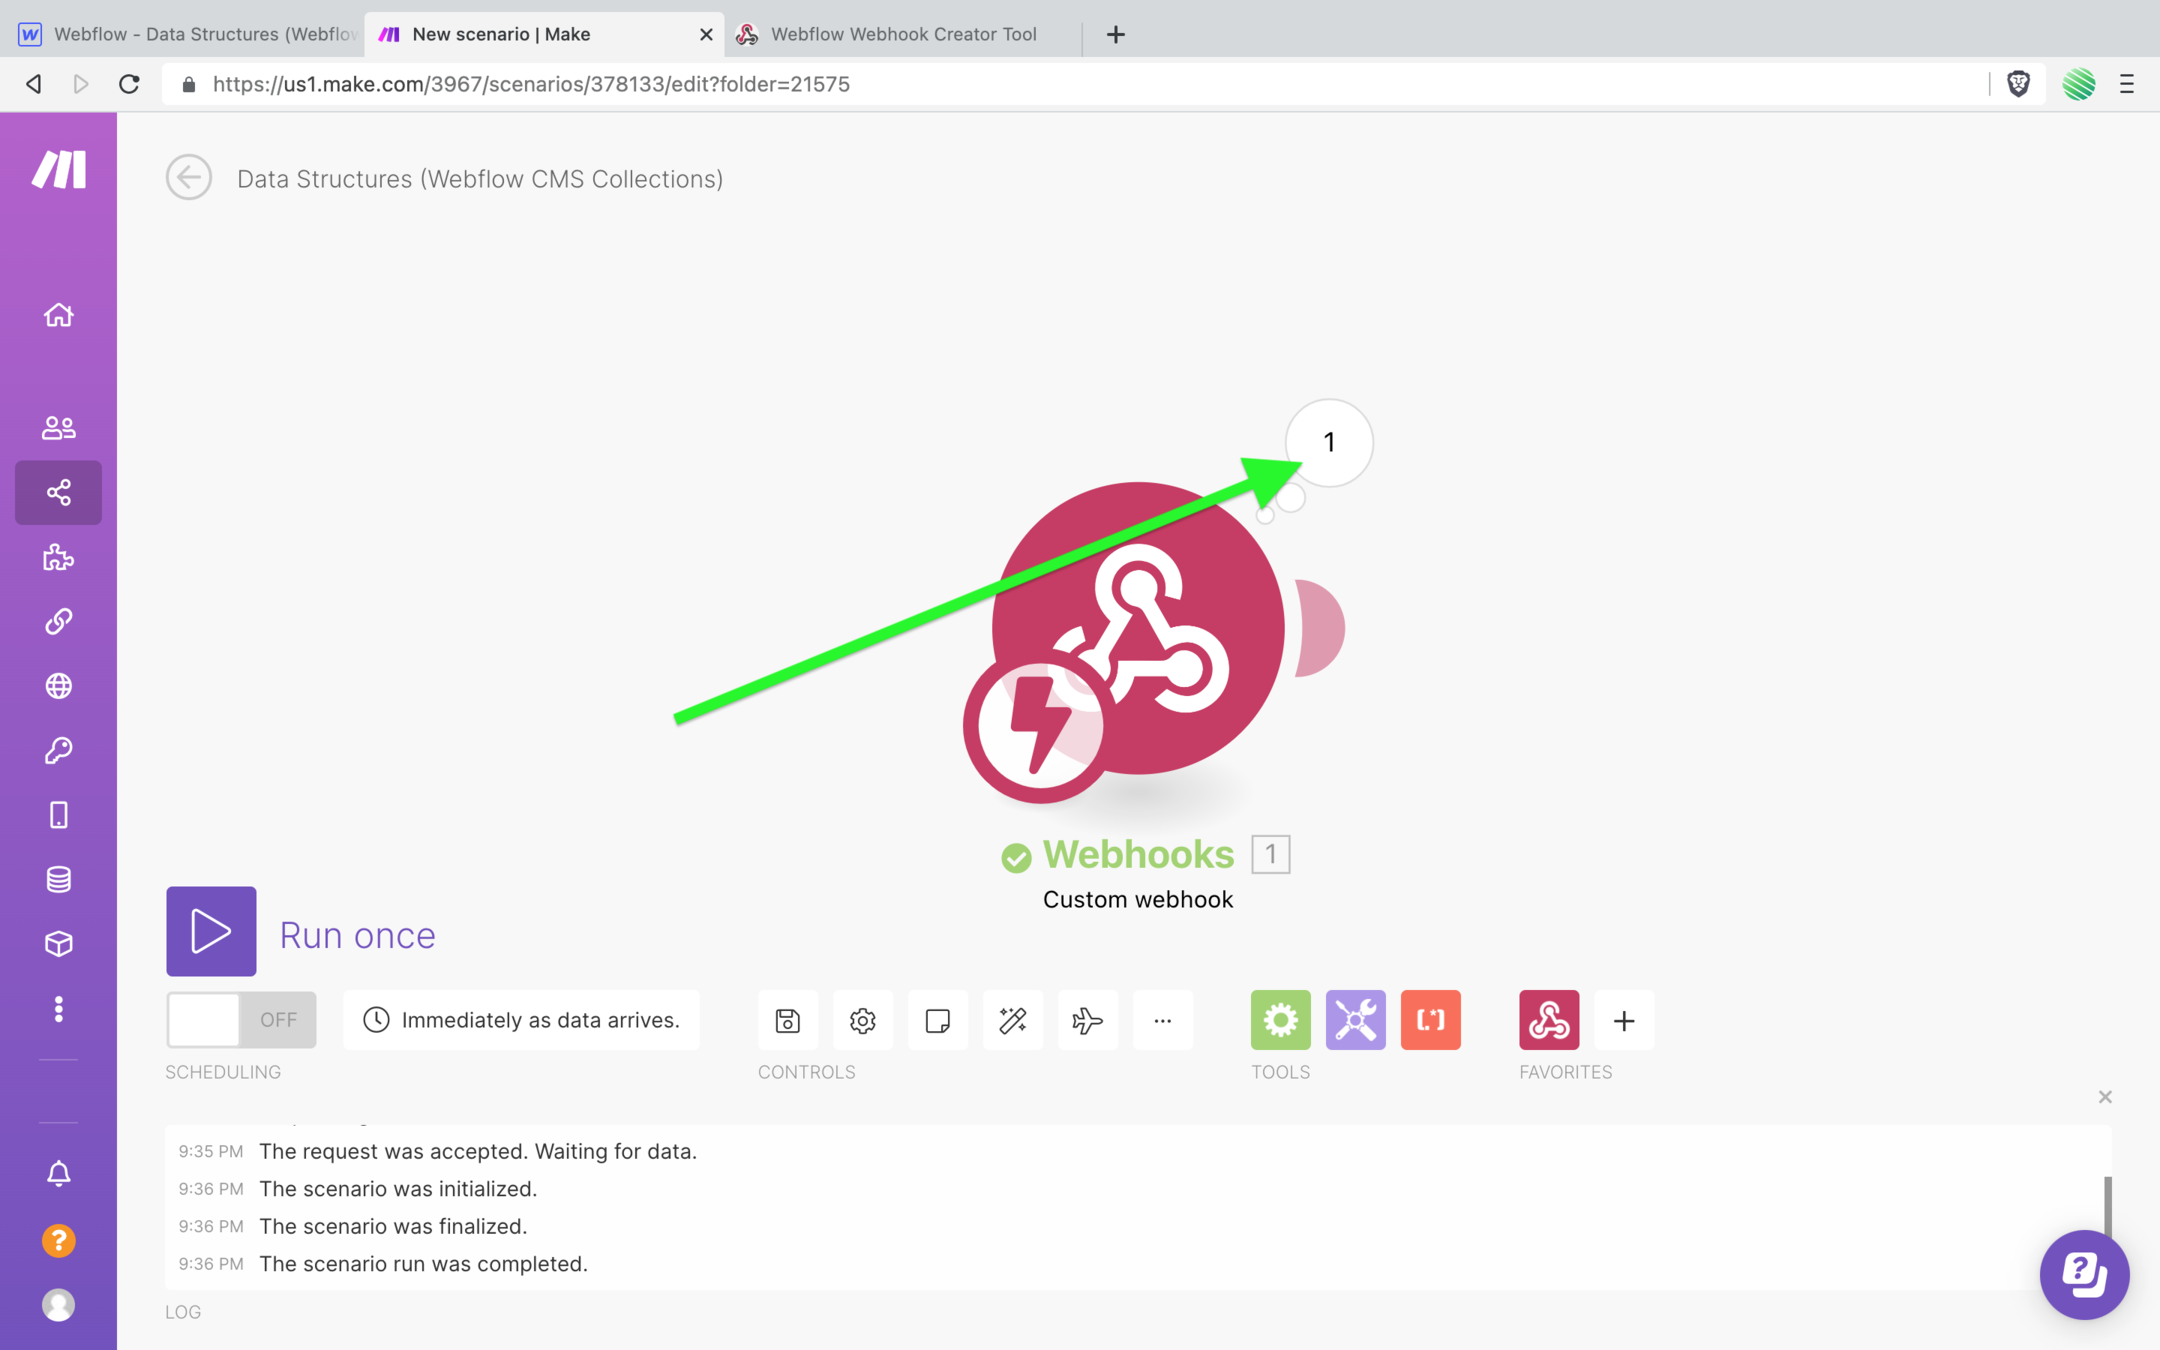
Tap on the “copy address to clipboard” button and notice the red button with a spinner and the word stop in it.
When everything works as it should that red button with a spinner will change to a green success message.
You’ll see that in just a moment.
With your Webhook URL copied to your clipboard, go back to my Webflow Webhook Creator tool and paste it into the destination url field.
Pretty simple!
Also make sure you’ve selected “collection item updated” as the trigger.
This says… anytime a CMS item is updated, trigger this Webhook sending the CMS item to the destination URL 😎
Tap the “create webflow webhook” button and all should be good.
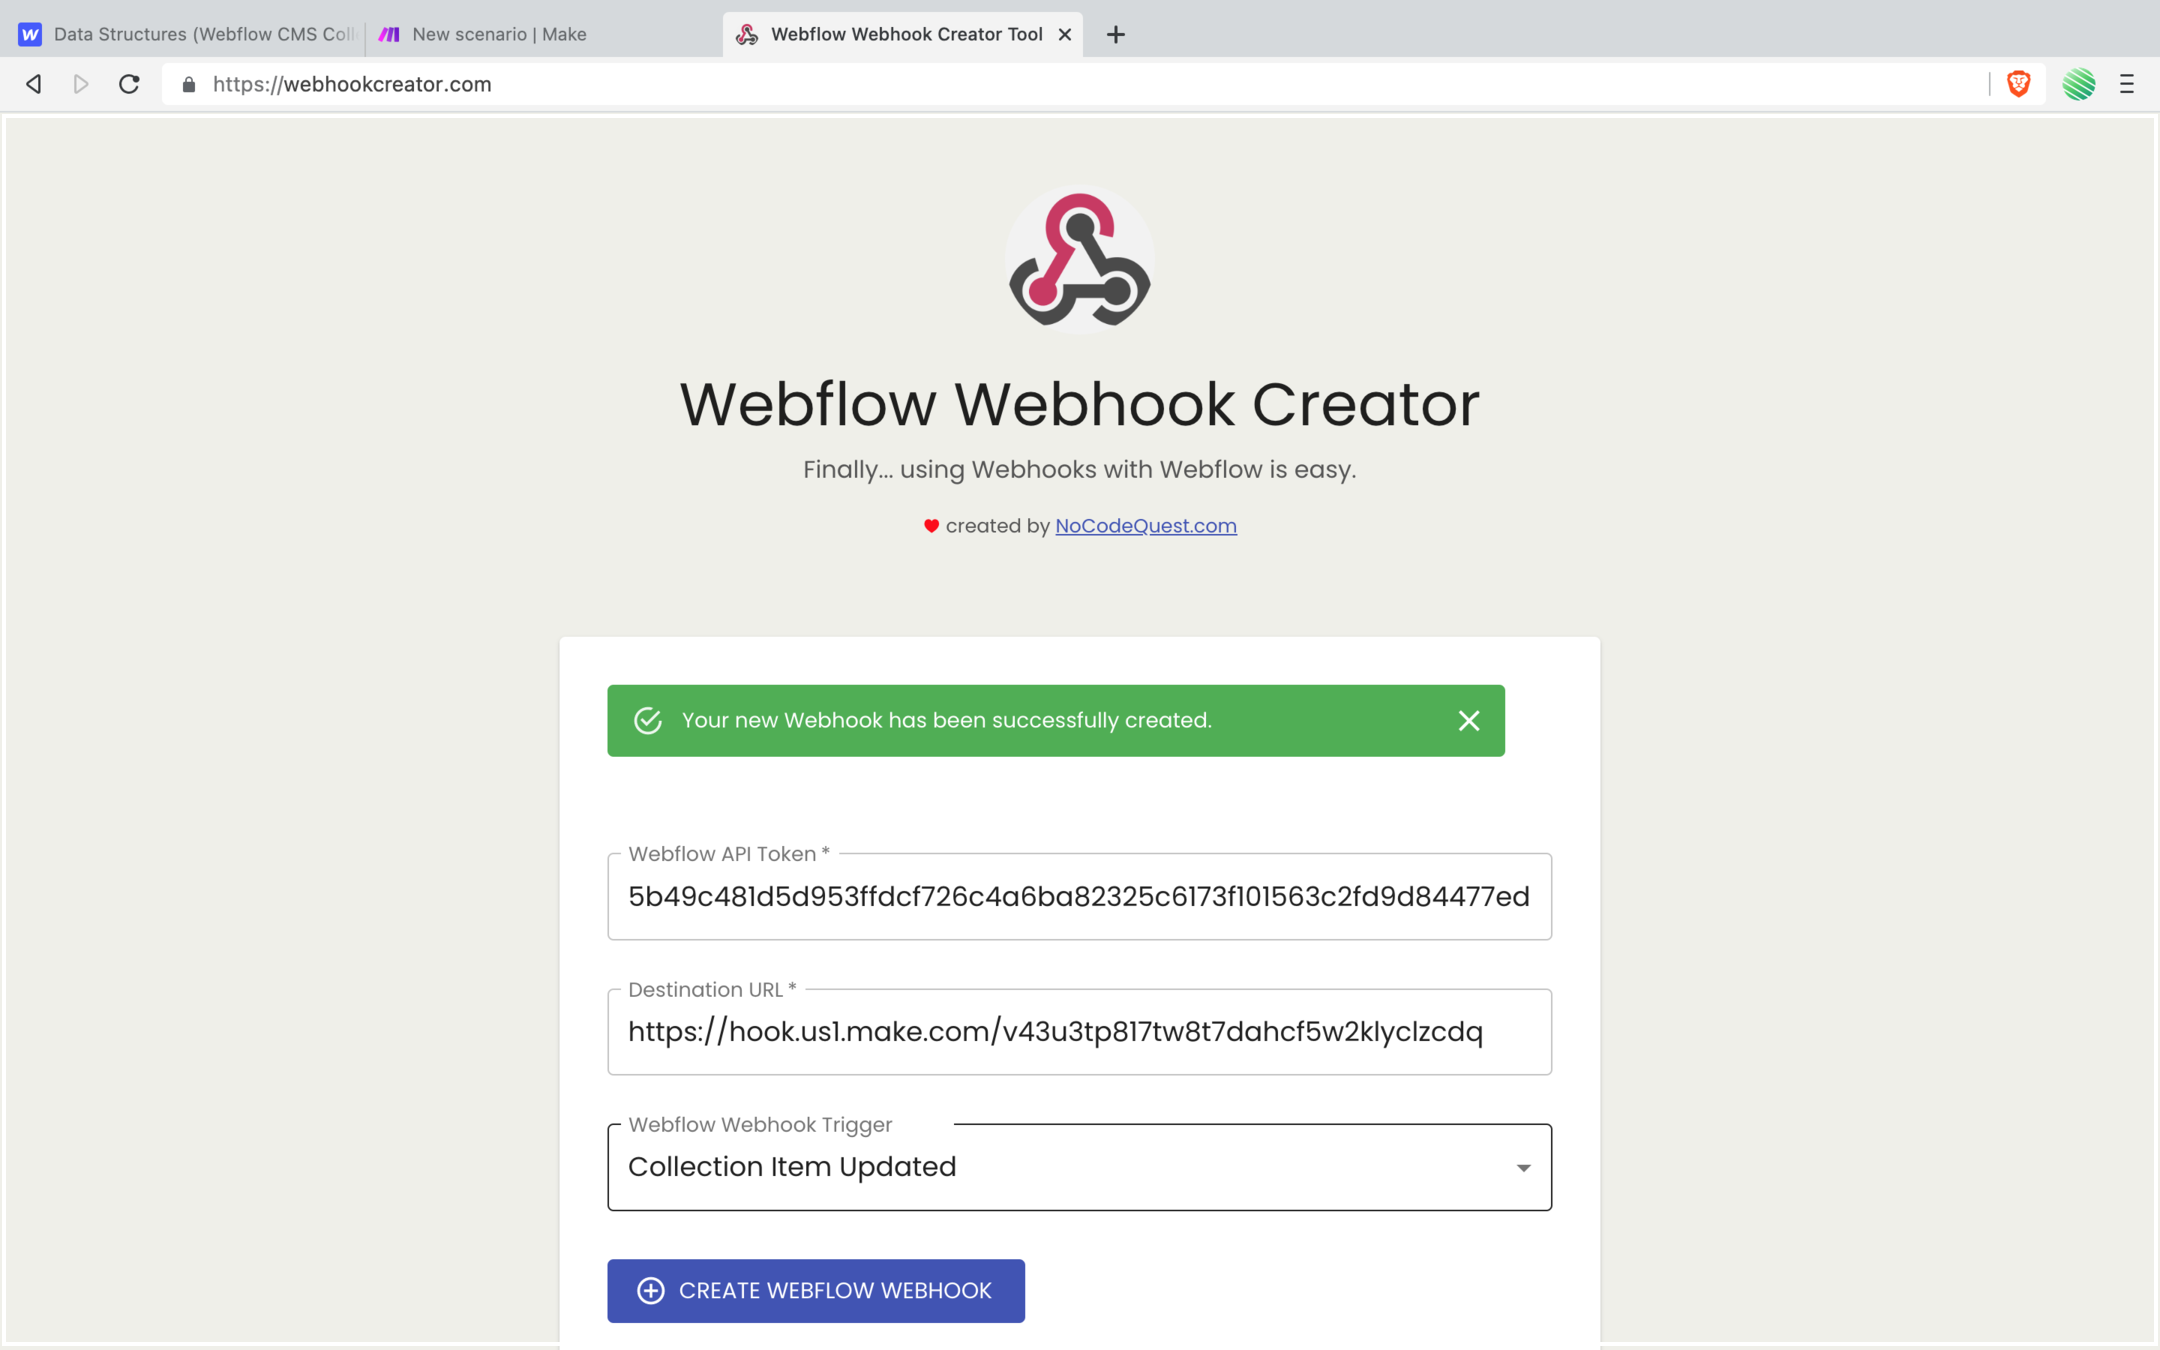
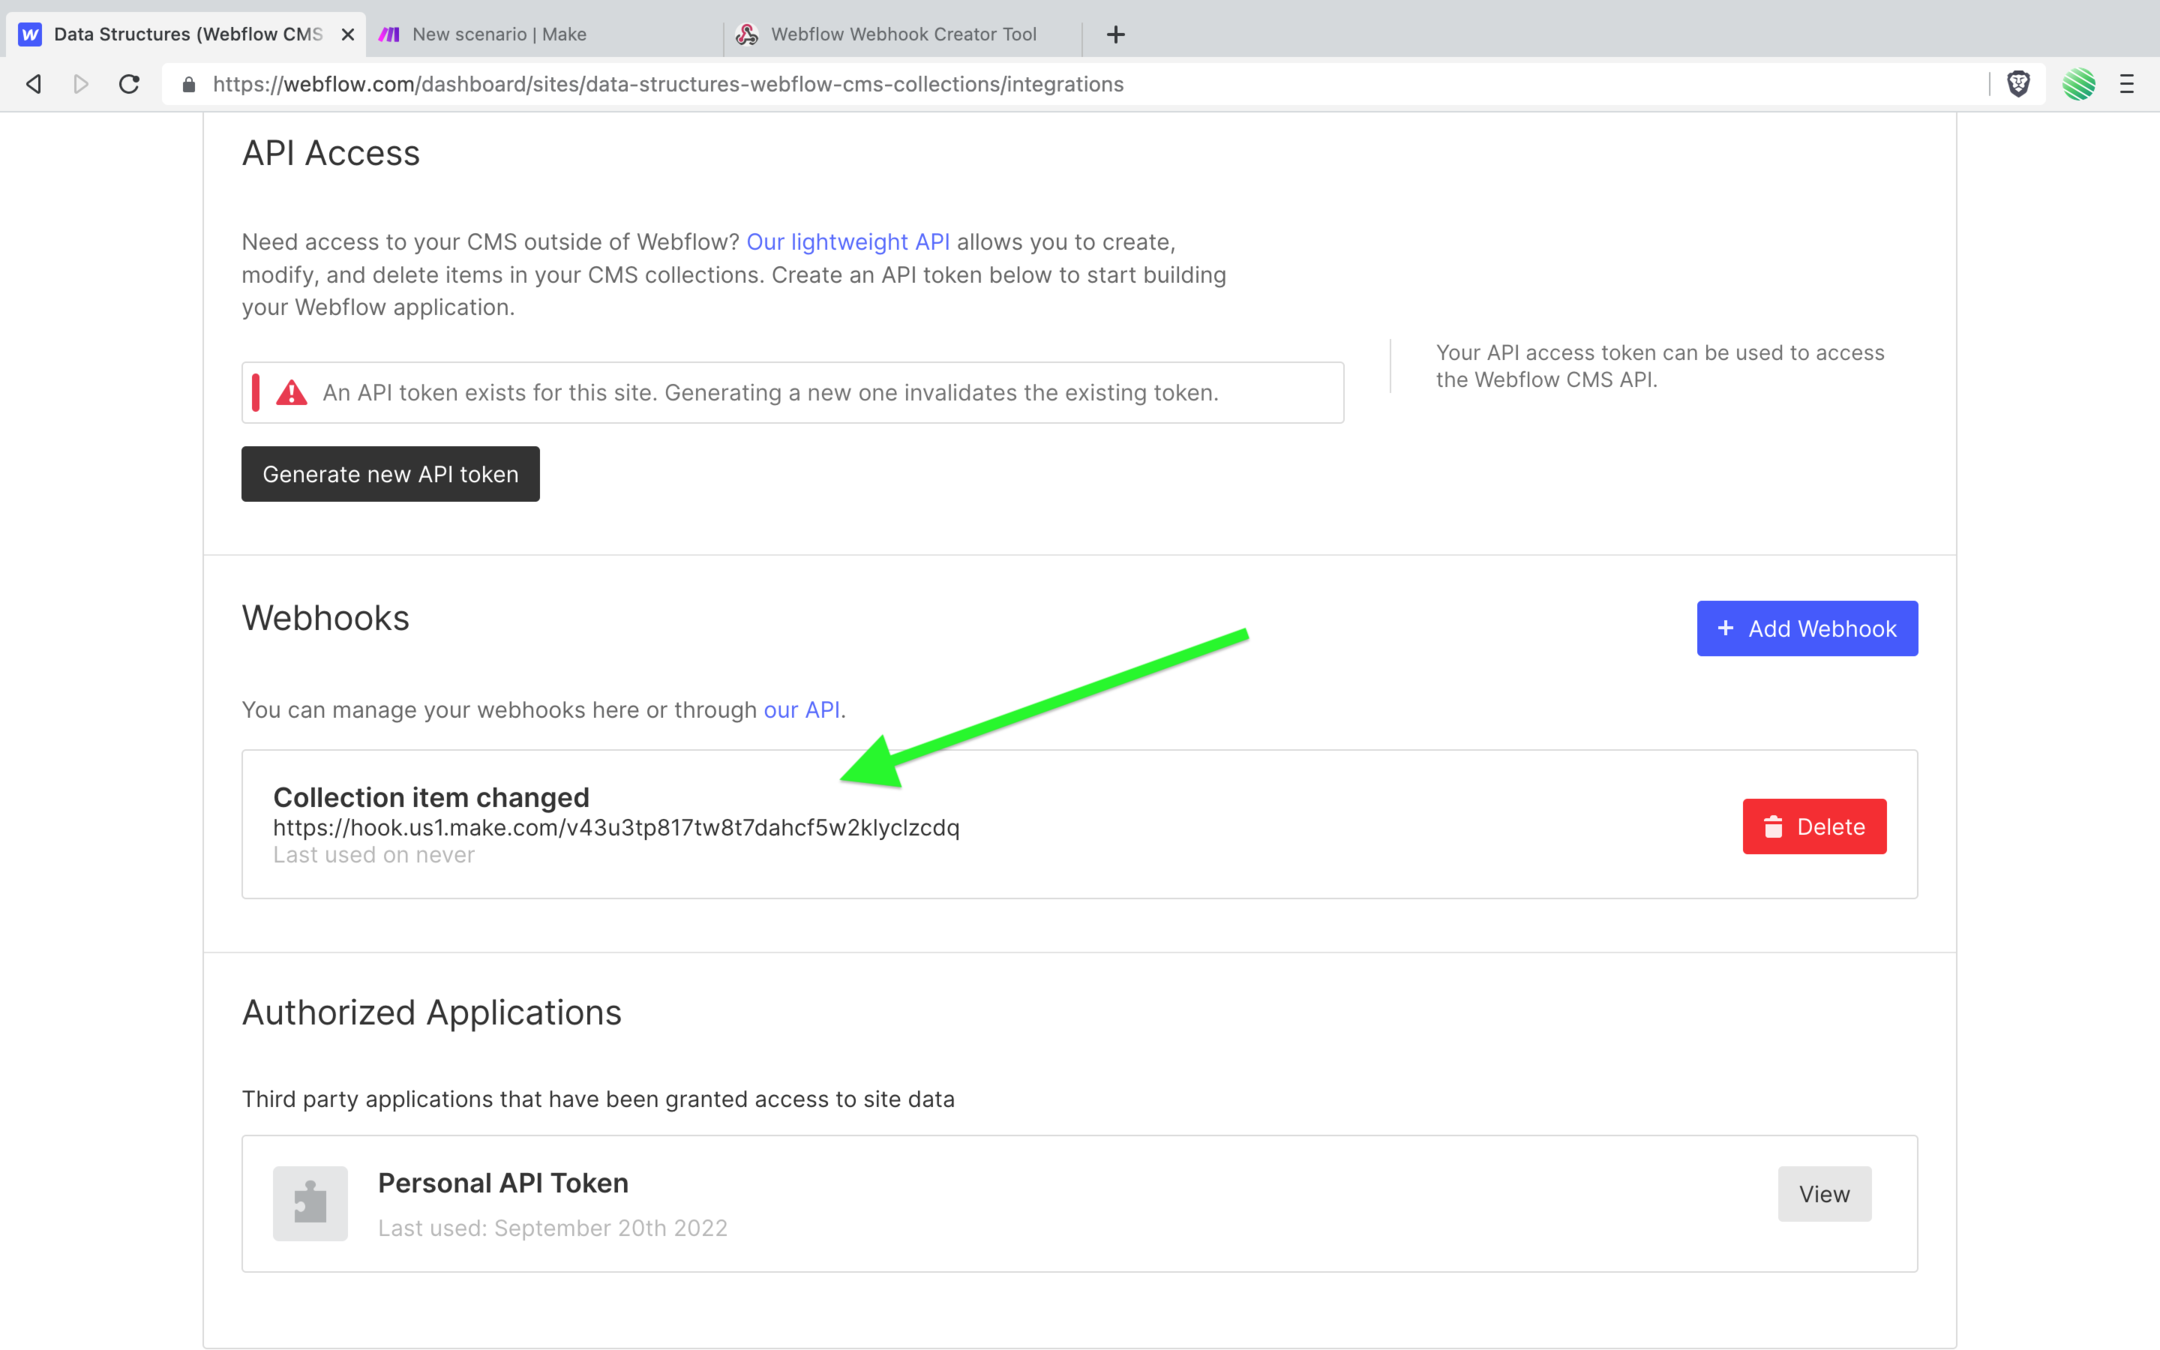
Go back to your Webflow project settings page, reload the browser window and find your new Webhook listed 👍
Head over to the Webflow Designer, open the CMS editor, and update an item in the Contacts Collection.
Back to Make and your Webhook module should be showing a green success message 👍
Tap the “run once” button.
Go back to the CMS item you just updated, and update it again.
Back to Make and it should have captured that Webflow Webhook.
If you open up the results you’ll see that it did!
You also have your “contacts” key clearly showing up.
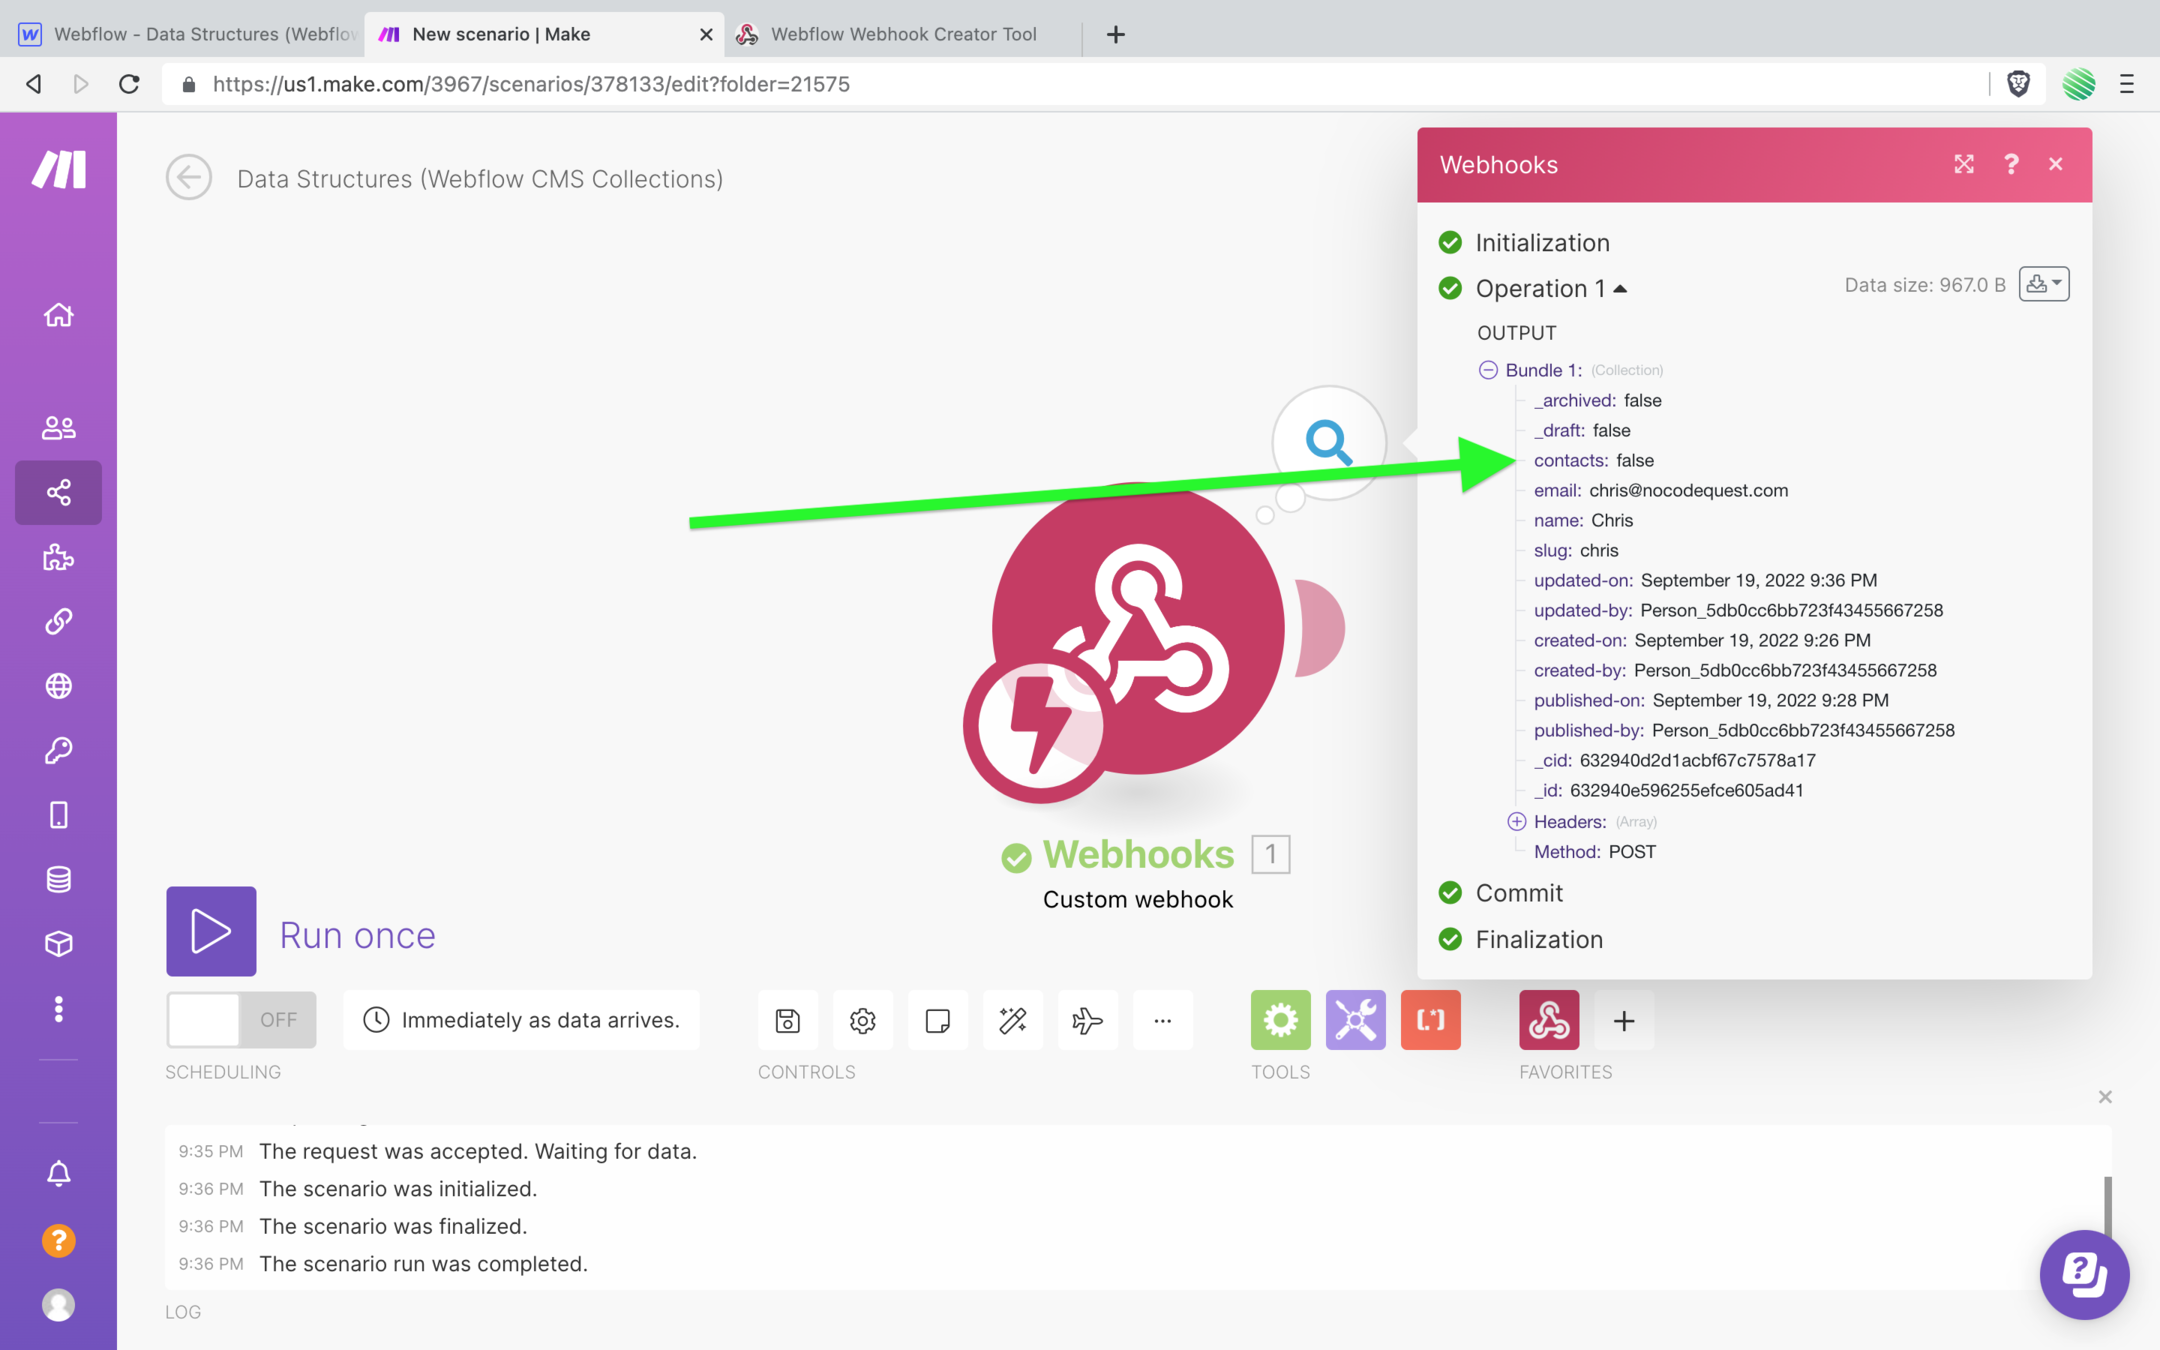
If that key didn’t exist, this Webhook operation would never have run.
Note, this is why the value of the key doesn’t matter.
This filter is not concerned if your ‘Switch” is toggled on or off, if it sends true or false. It’s only concerned whether the key exists or not.
Let’s test it!
Run once again.
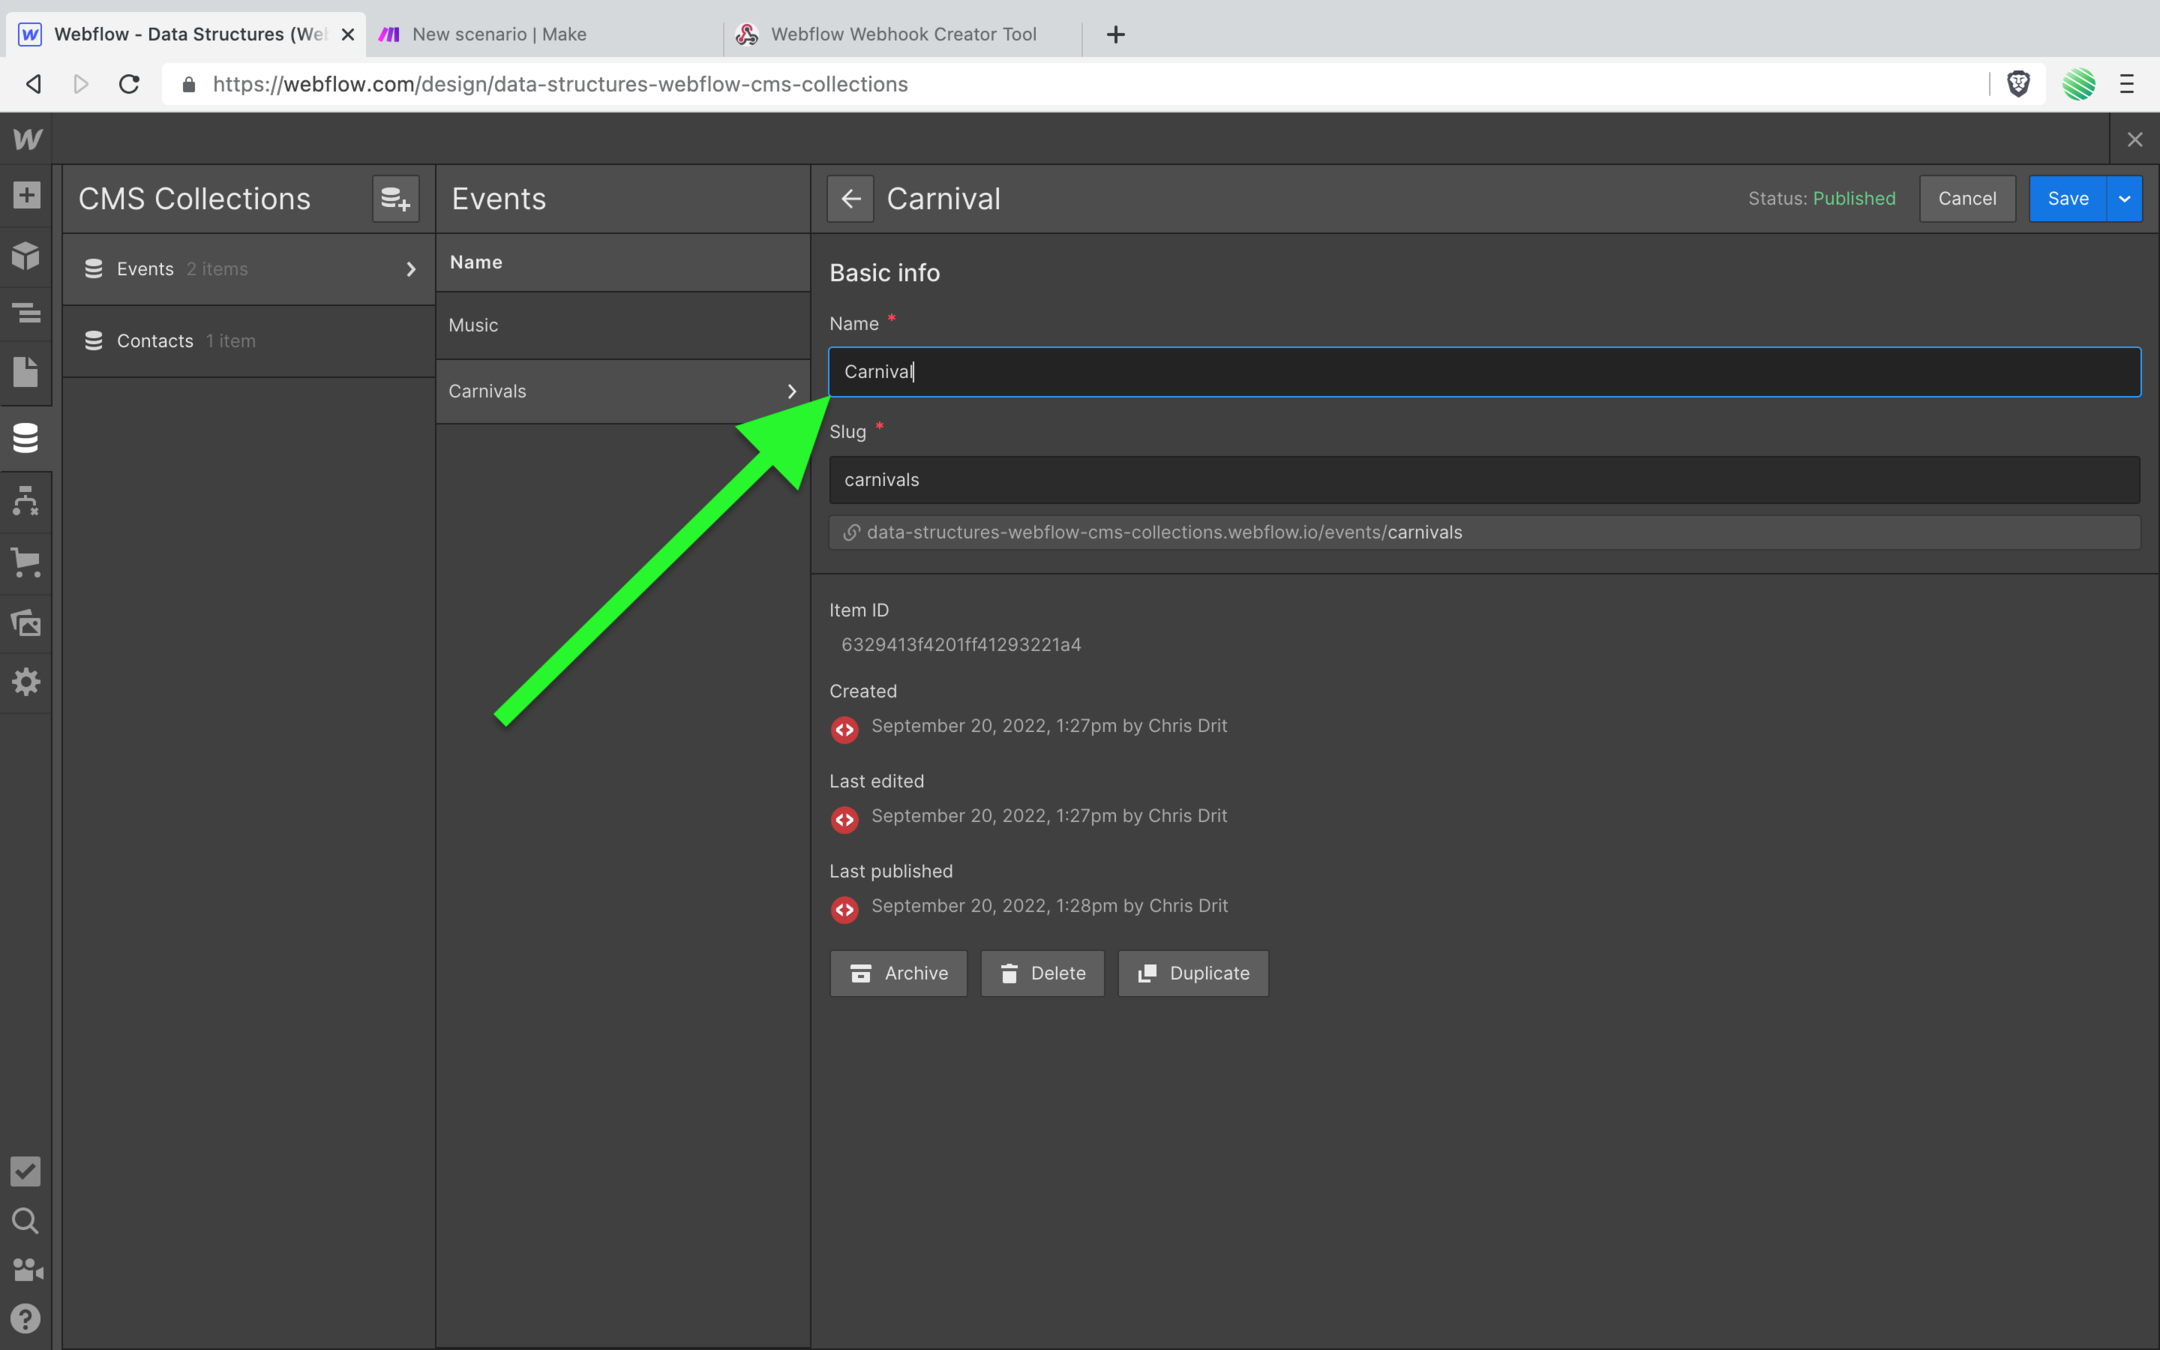
Now back to your Webflow CMS and open up your Events Collection.
Remember this collection does not have the “contacts” field (key) in it.
Your Data Structure filters on keys, and you set it up to look for the “contacts” key.
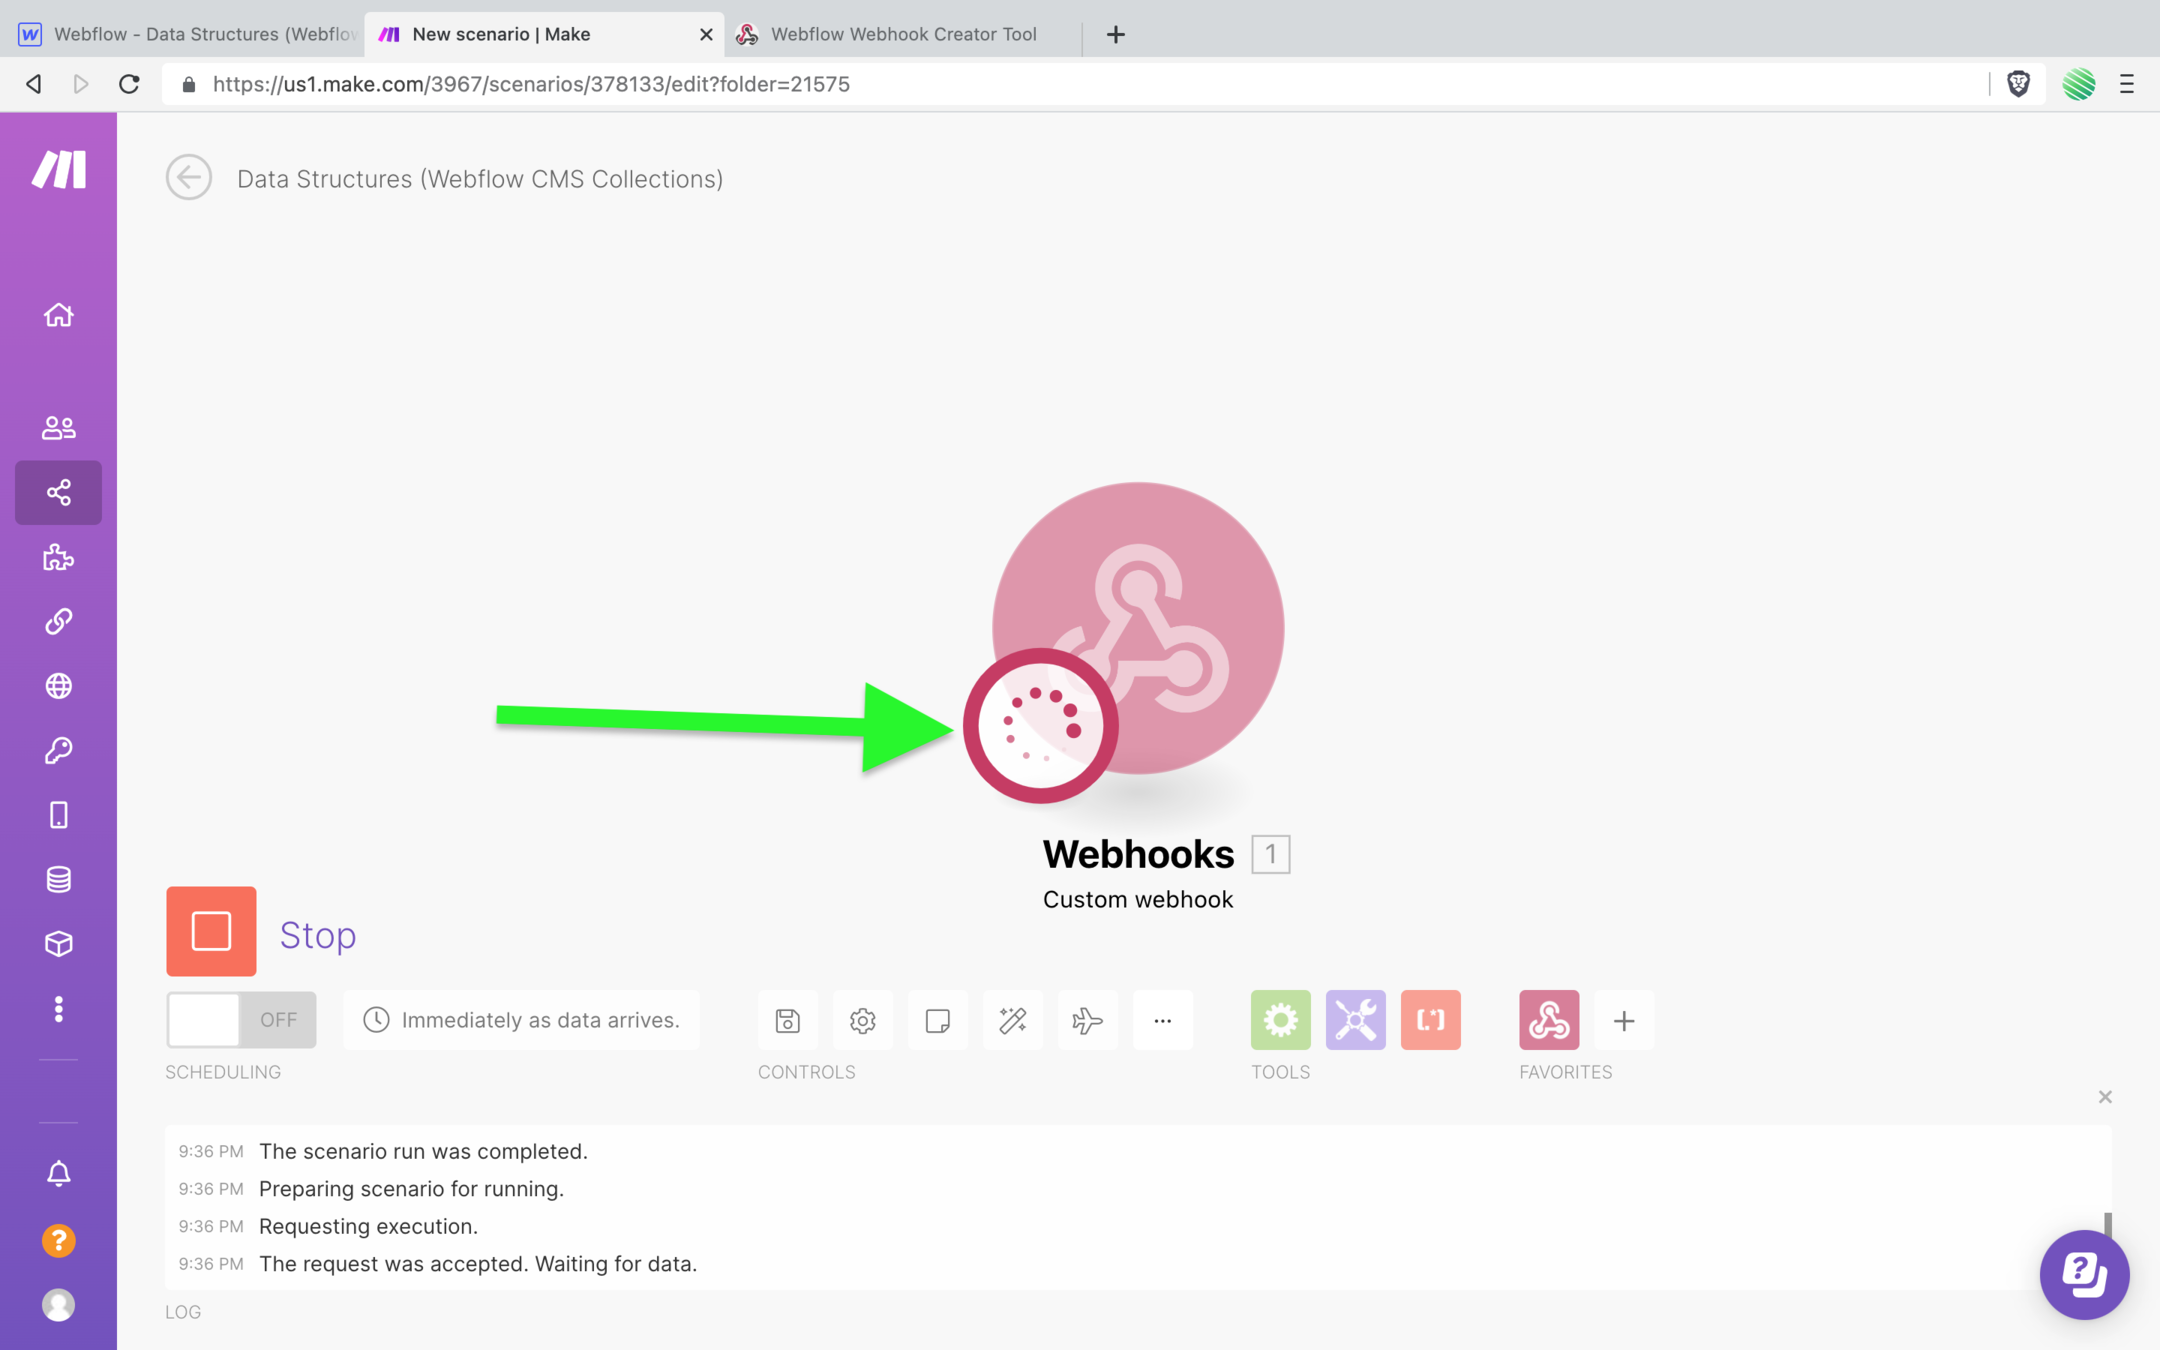
Updating this CMS Collection should not run your Make Webhook.
…and sure enough. You tapped on the run once and it never runs!
So your operation just sits there, waiting forever.
And you can confirm this by reviewing the history of operations for this Scenario.
You can see it only ran once. That run was the first run we did by updating the Contacts collection.
If you want to confirm that, tap on the blue “details” button to dig into it even more.

Summary
Once you’ve got your head wrapped around this you’ll find it to be super simple and very quick to setup, tweak, extend, and maintain.
It won’t matter how many Webflow CMS Collections you do, or don’t have.
Using this technique will simplify your workflows and save you Make (Integromat) operations.
Once you’ve added your email…
➡️ Run through my walk through using Webflow Logic to submit Webflow forms directly into the CMS without a 3rd party service.
➡️ Checkout out my build using Native Airtable Webhooks to submit Webflow forms directly into your Airtable base (no 3rd party services required).