You’ve already collected a bunch of email addresses through your existing workflow, and Webflow’s new Membership feature has caught your eye 🤩
But how can you automatically import them all into Webflow Memberships?
Easy.
Use the Make ( Integromat ) API to send email invites.
-
- Send your existing emails into Make.
-
- Have Make pop off an Invitation API call.
-
- Triggering Webflow Memberships to send out email invites 🤯
Before you get started…
First:
You have to create a new Memberships site within Webflow. If you don’t yet have access to Memberships go here and request it. Once you’ve got it, enable in one of your Webflow projects.
Second:
You’ll be starting on step 2 from above. Why not step 1? That’s a topic all itself and there are many ways to approach it. If you want me to create that tutorial sooner rather than later, shoot me an email.
Alright, let’s walk through how to build steps 2 & 3 right now.
Open up Make and create a new Scenario.
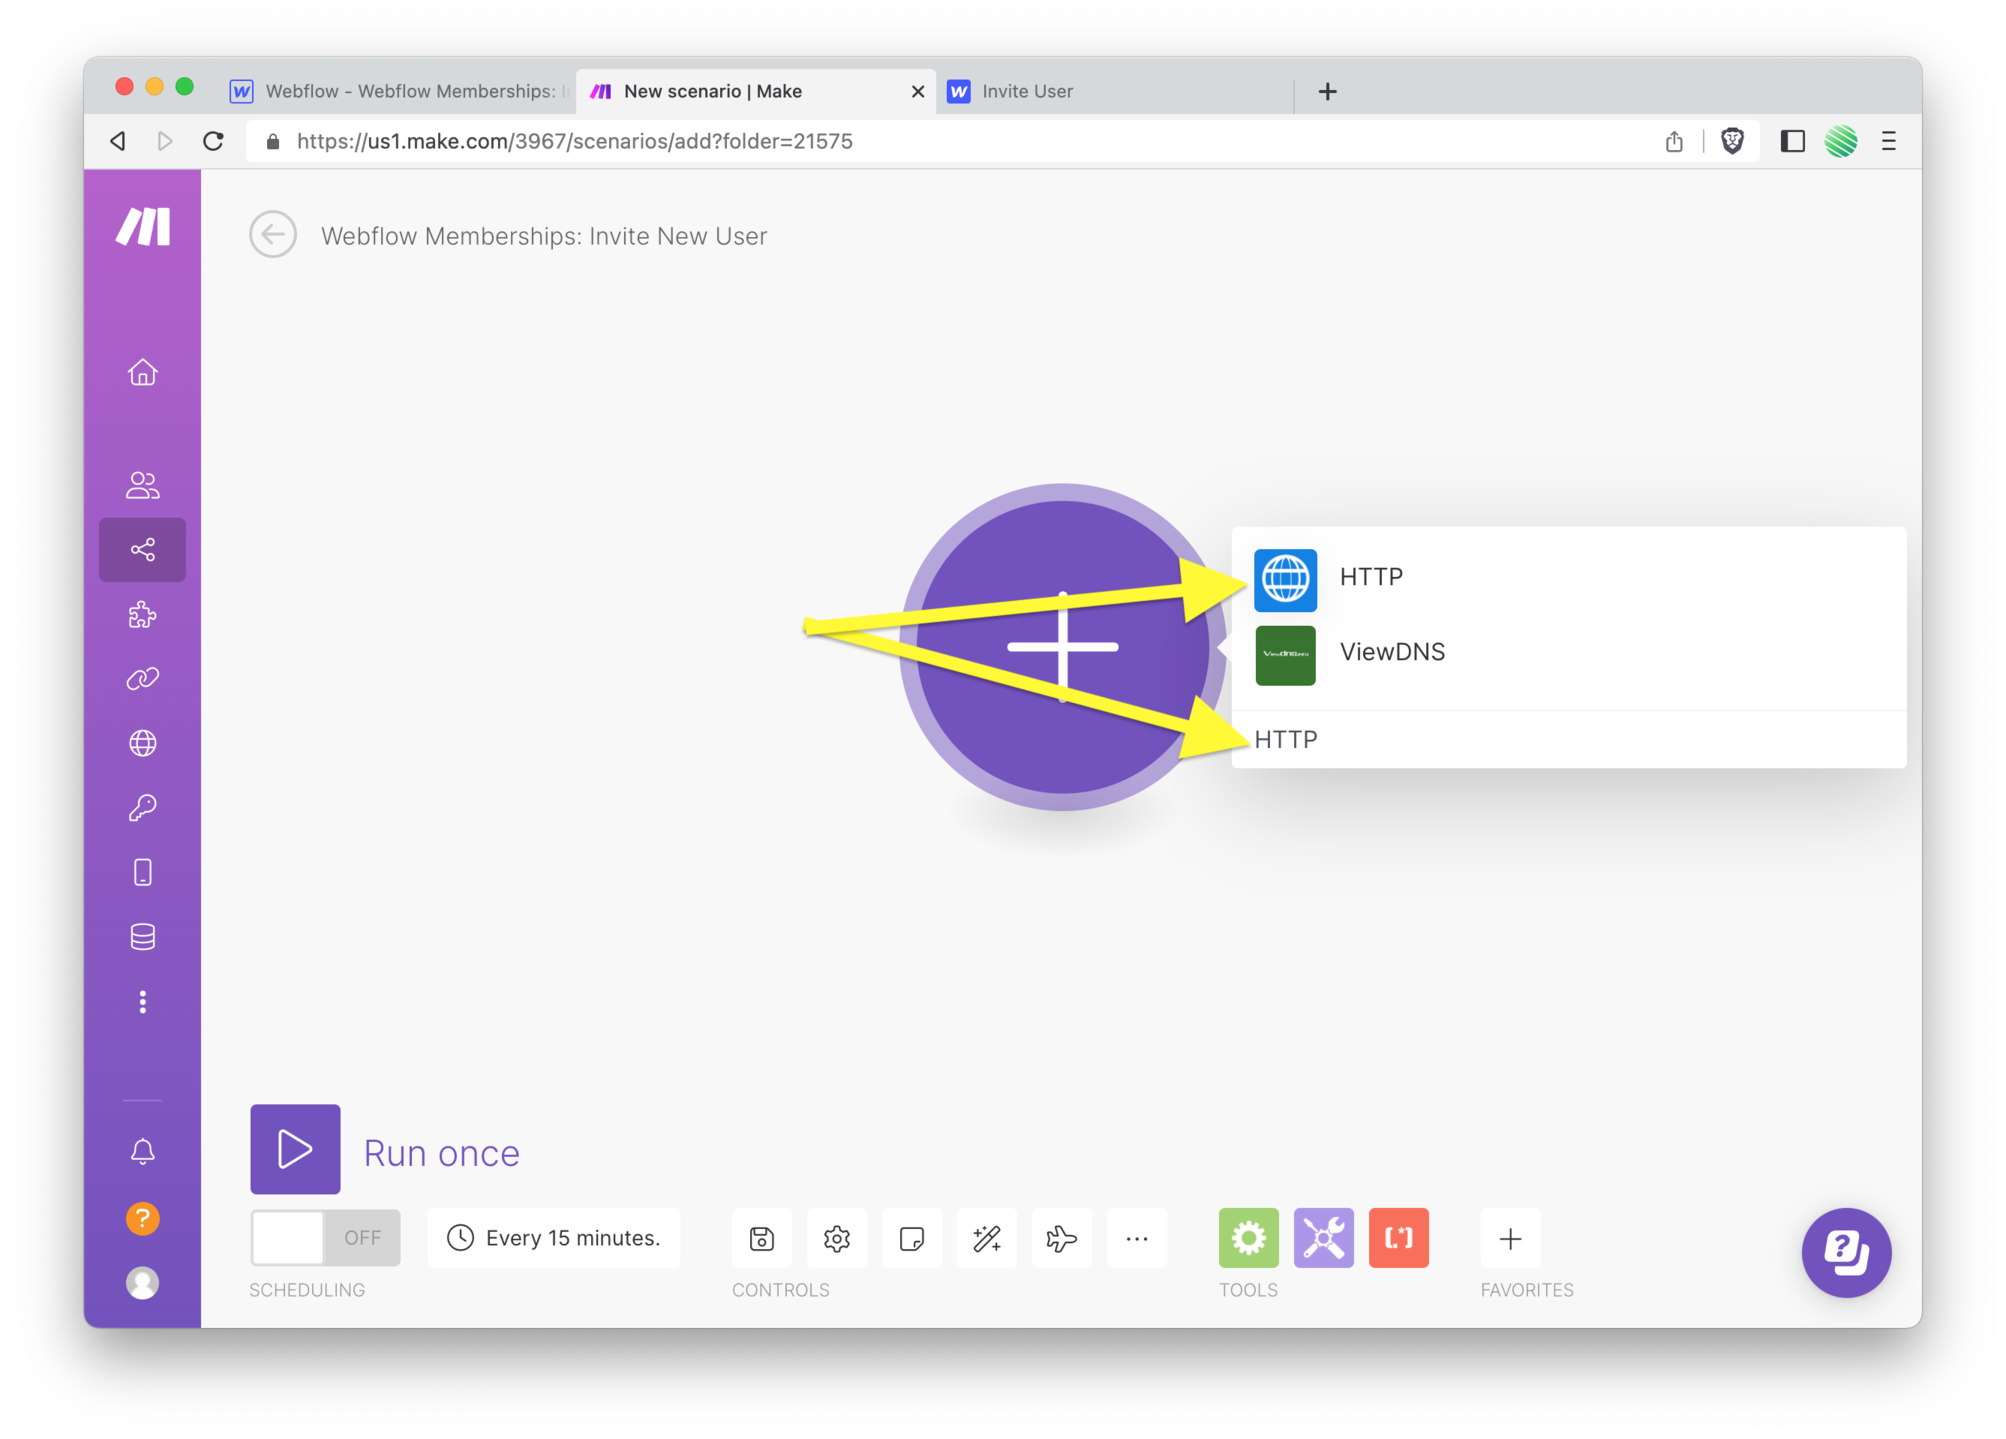
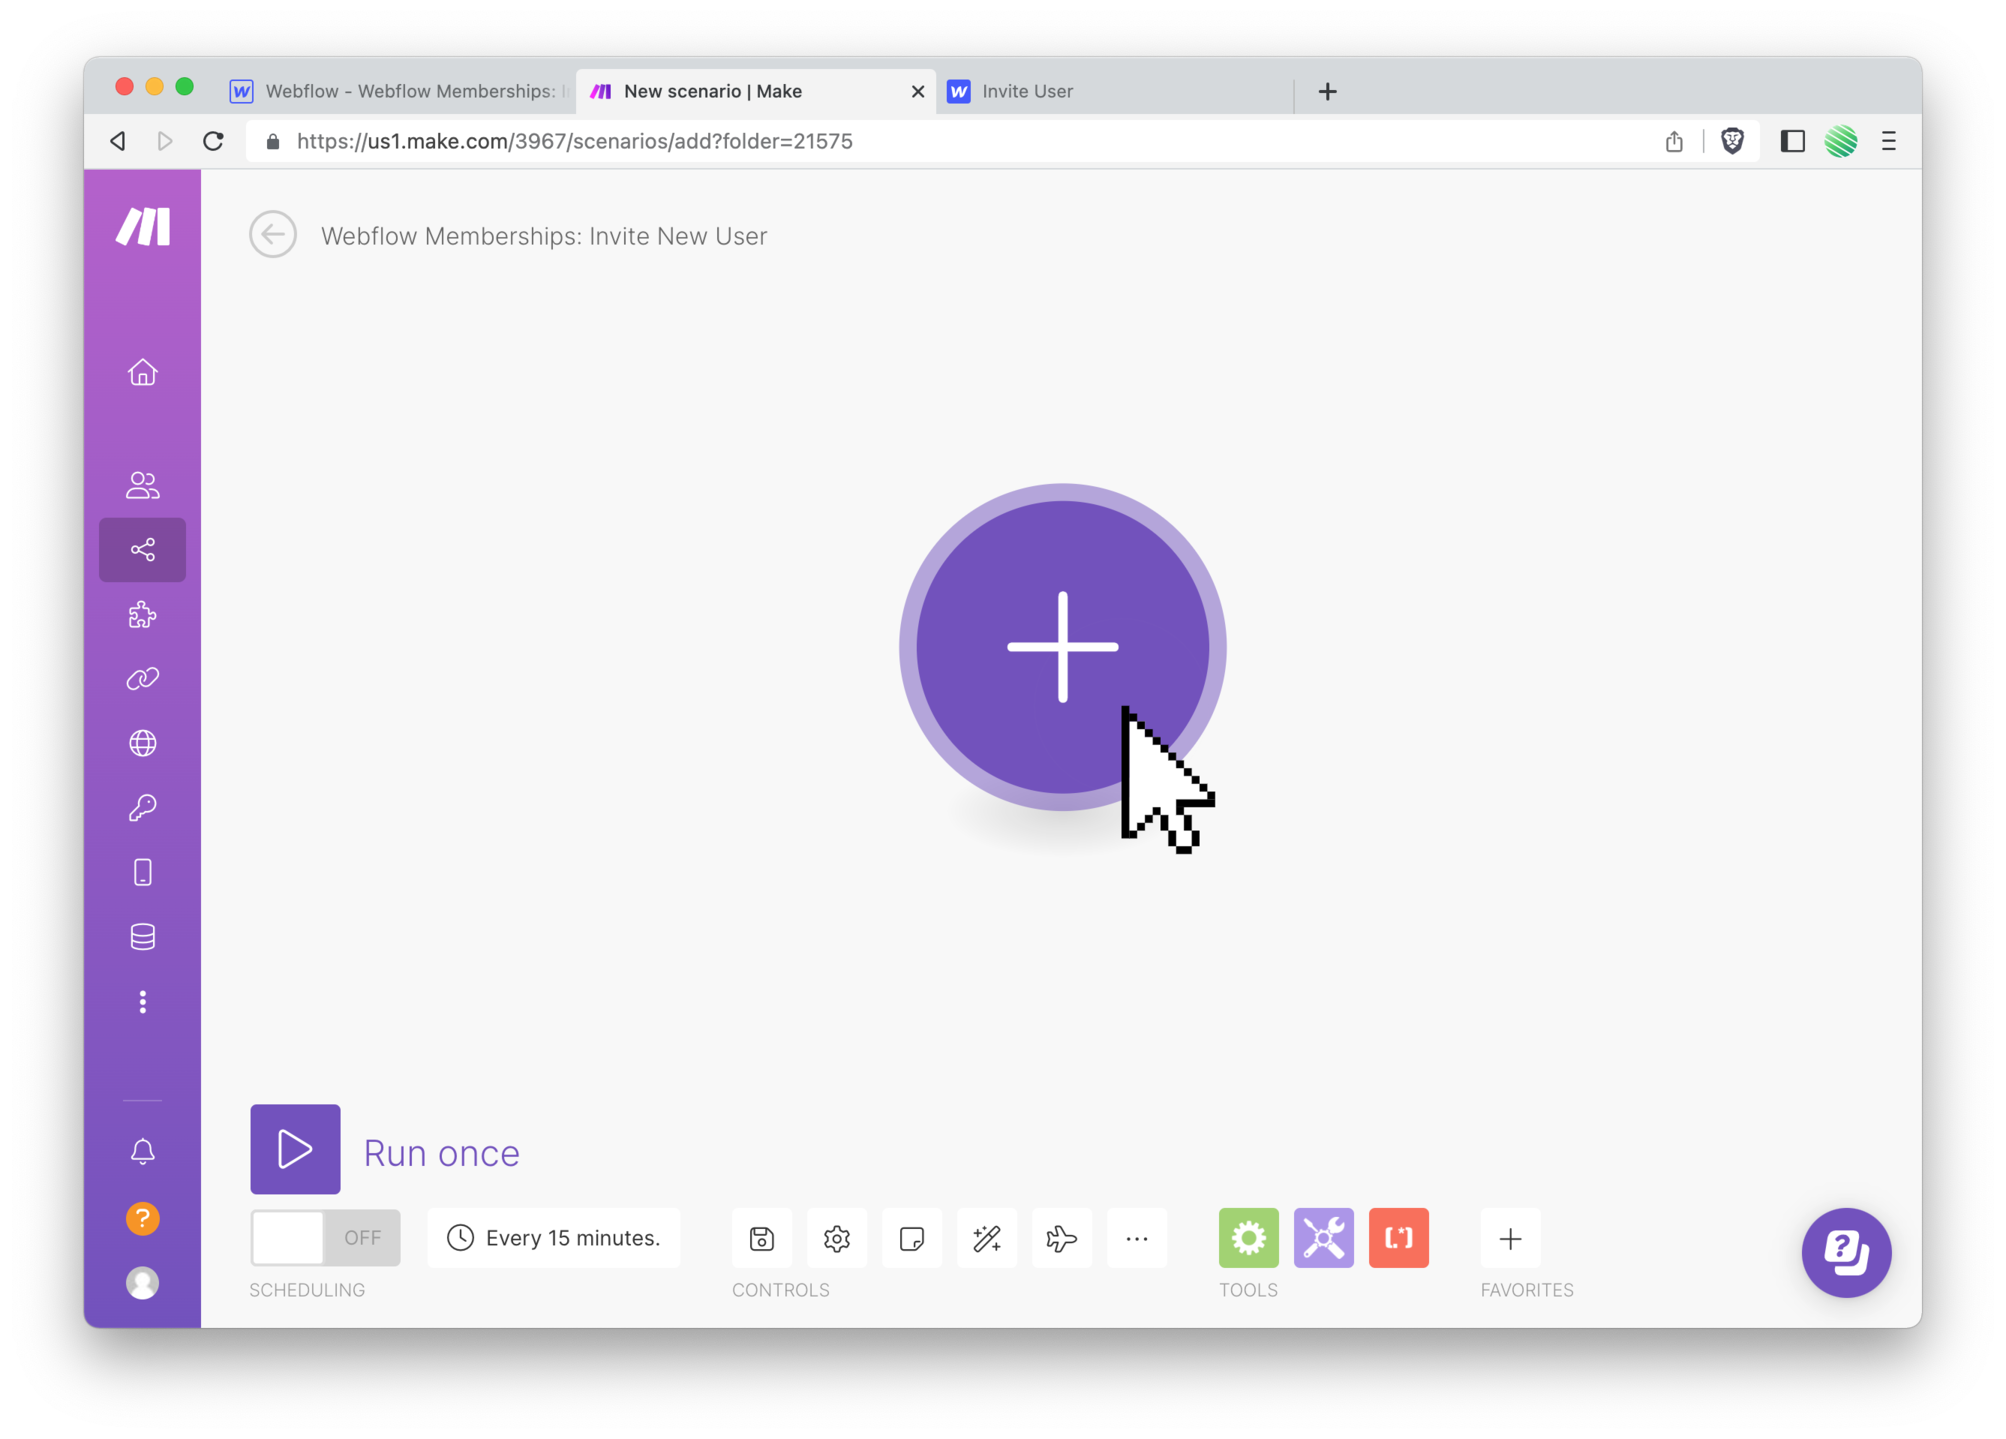 Search for and choose the HTTP Module.
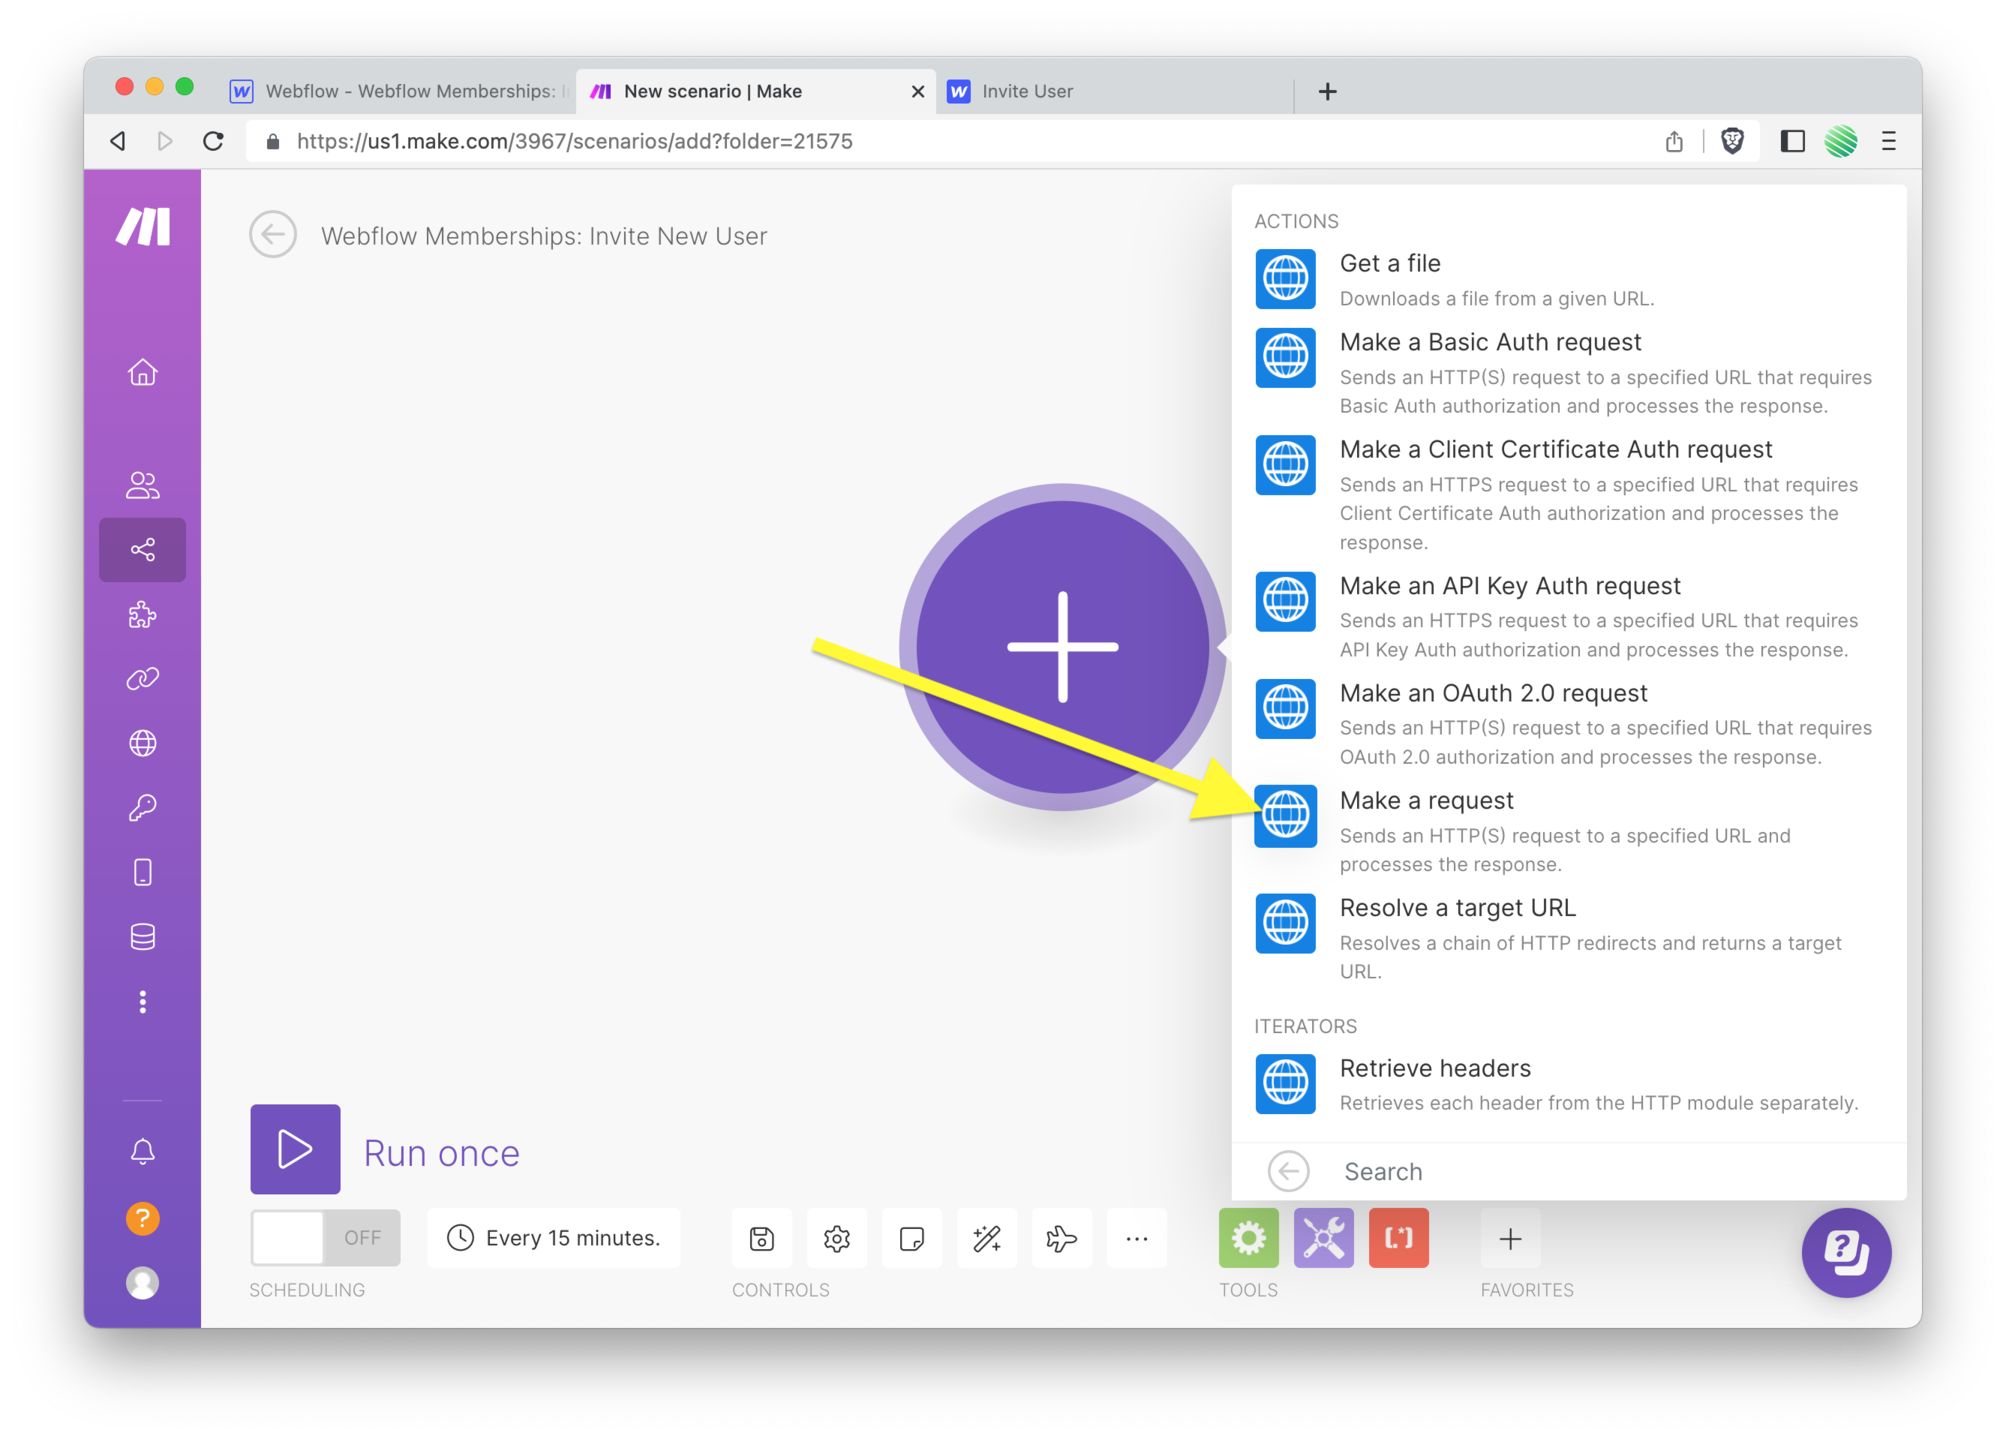
 Select the "make a request" option.
 Now you'll be presented with a configuration screen for this module.
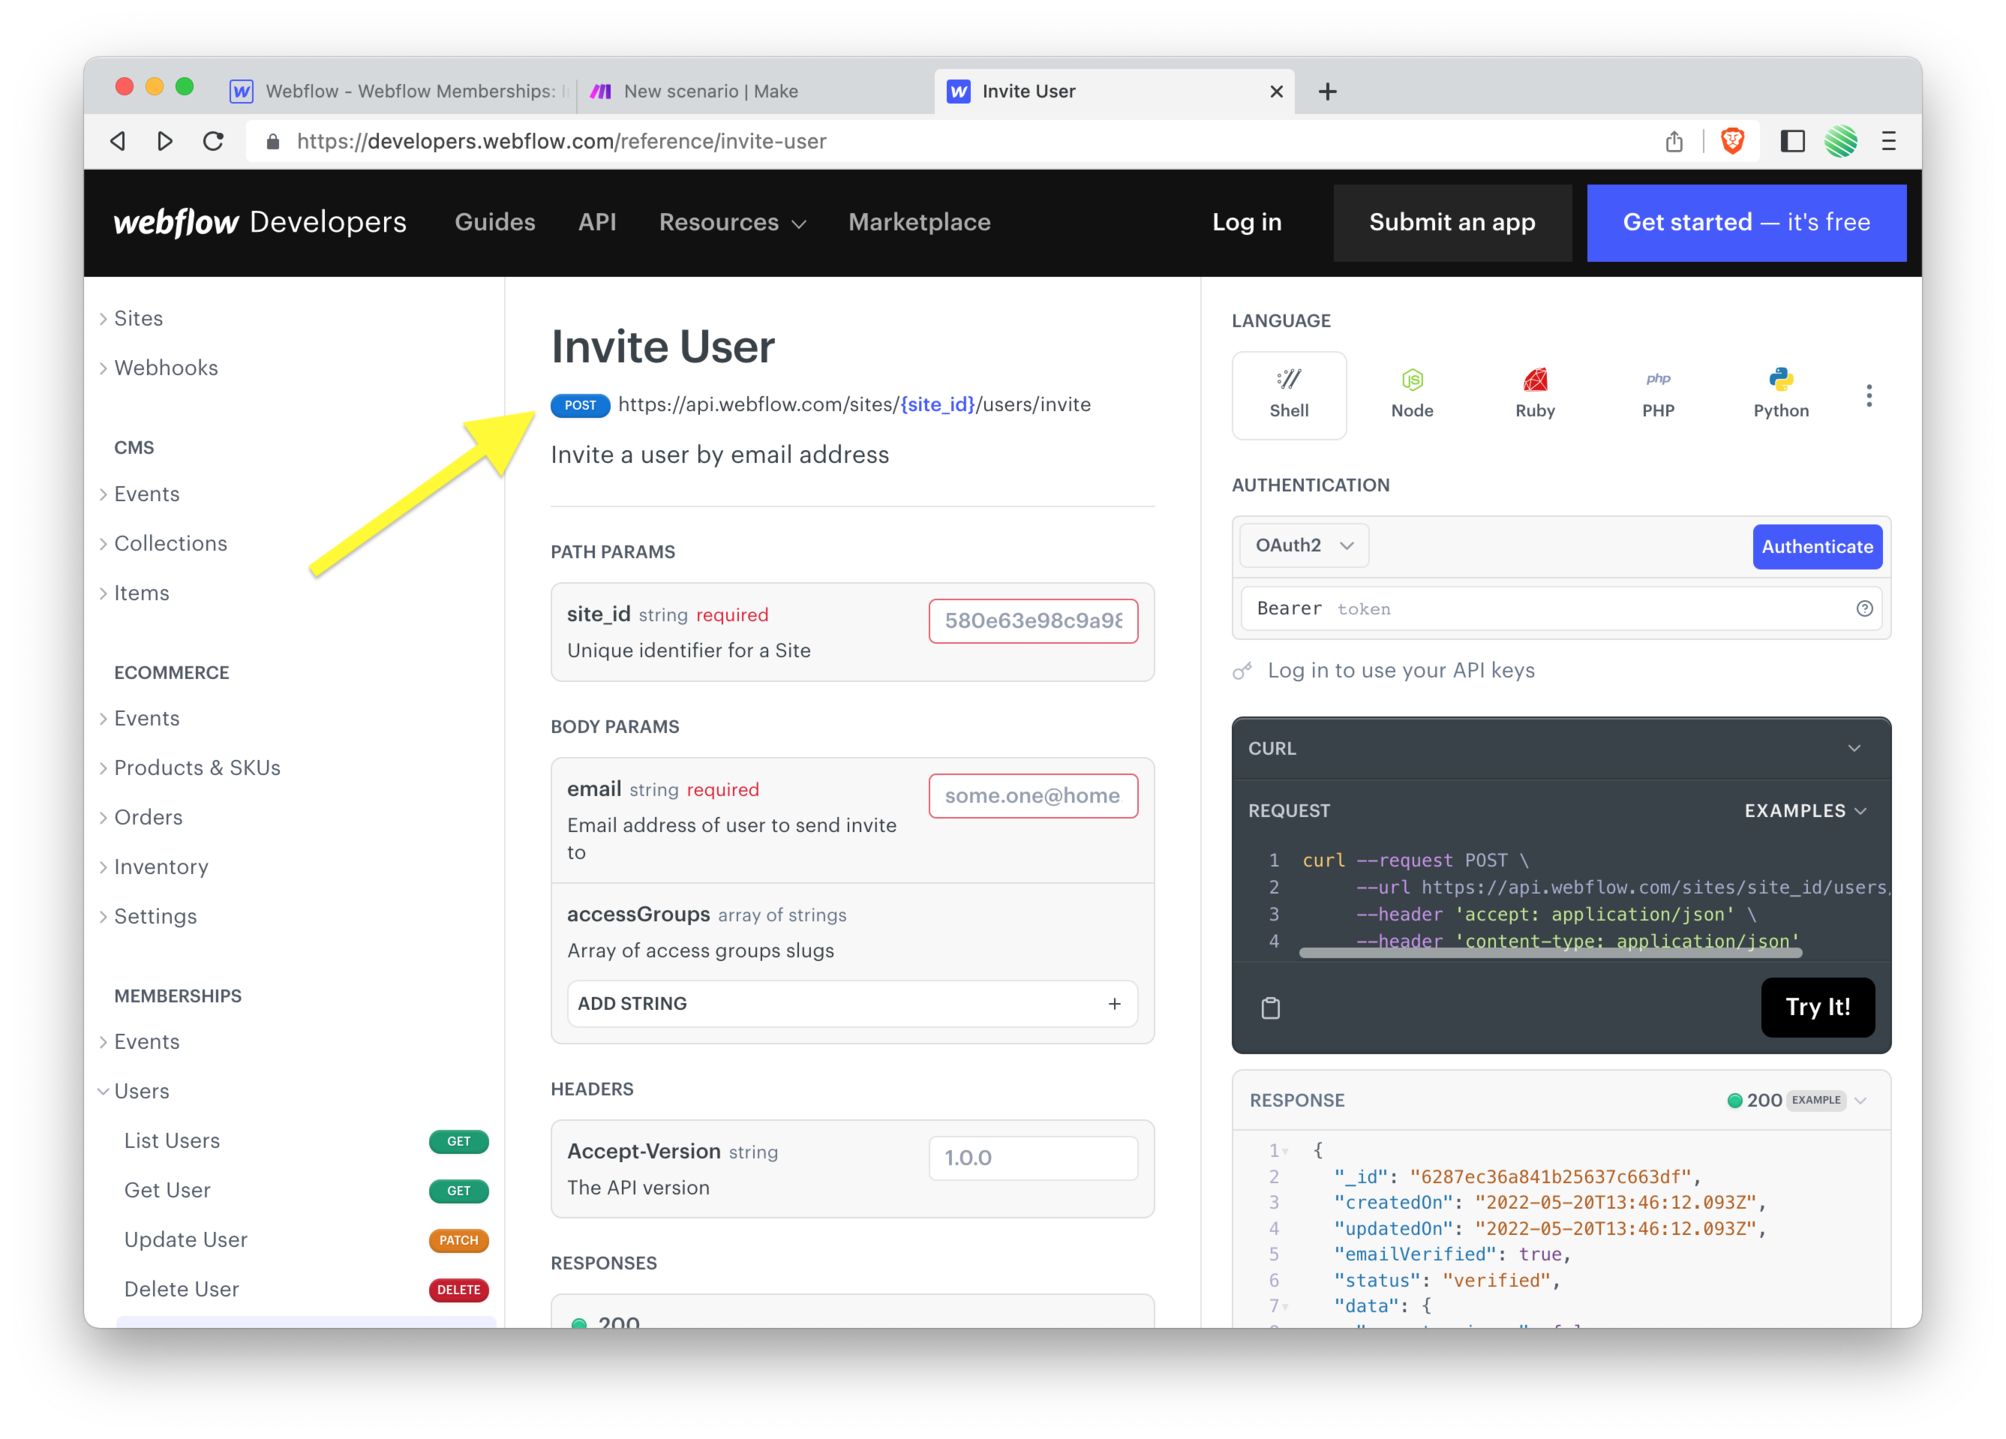
But first, you need to hop over to the Webflow API docs.
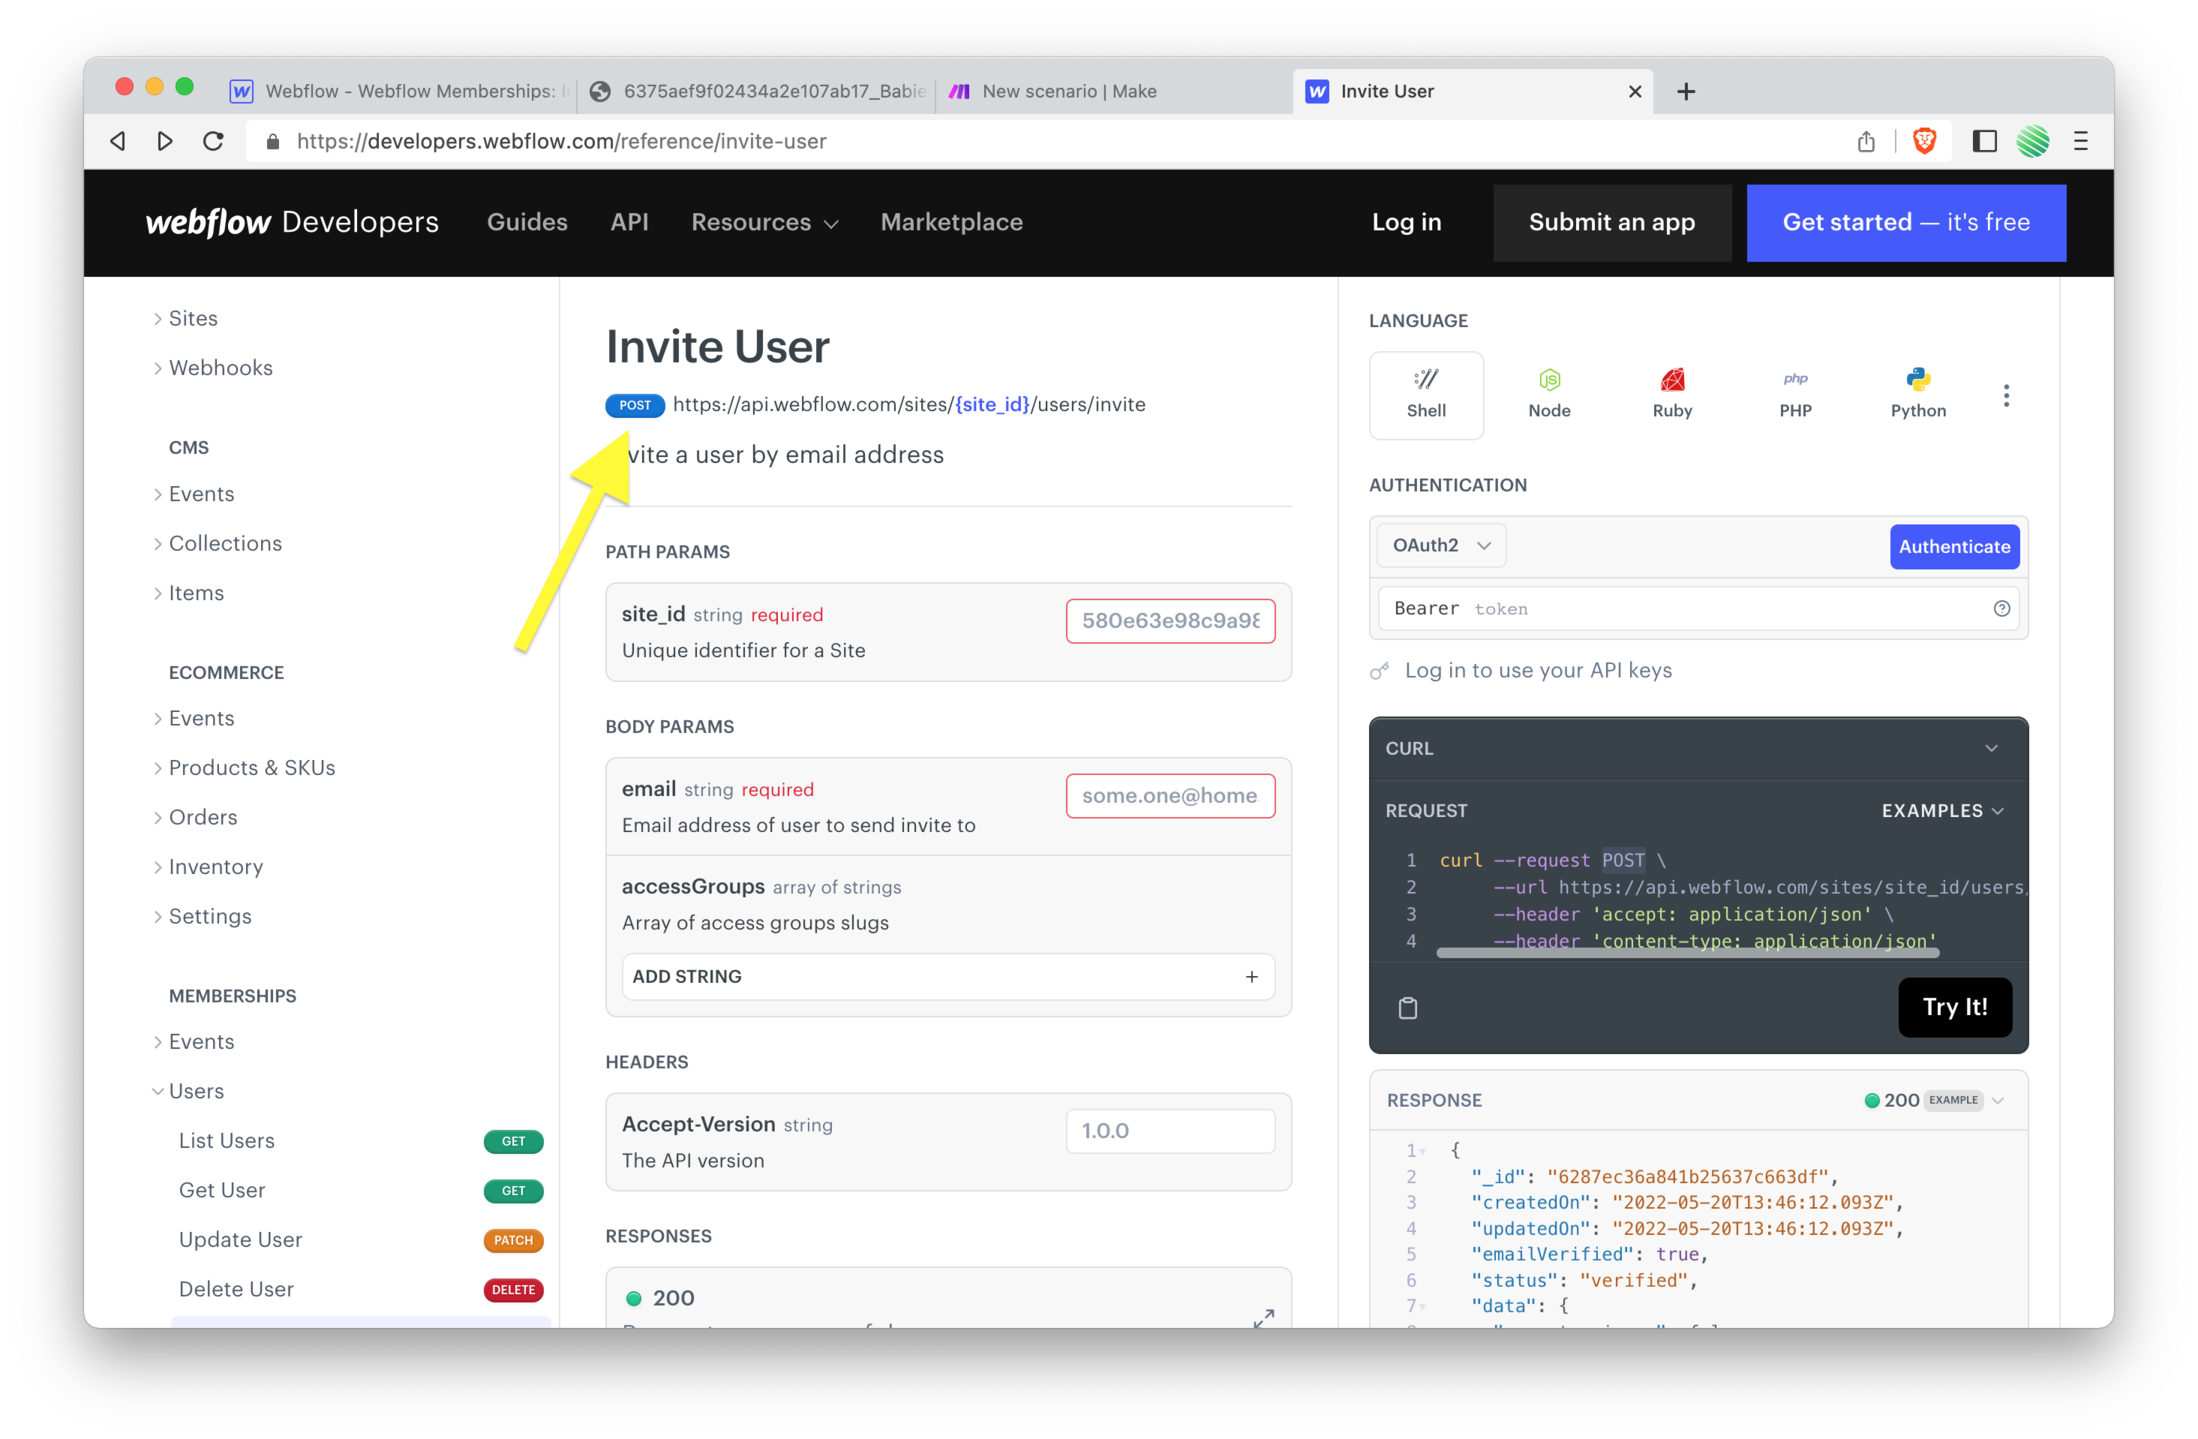
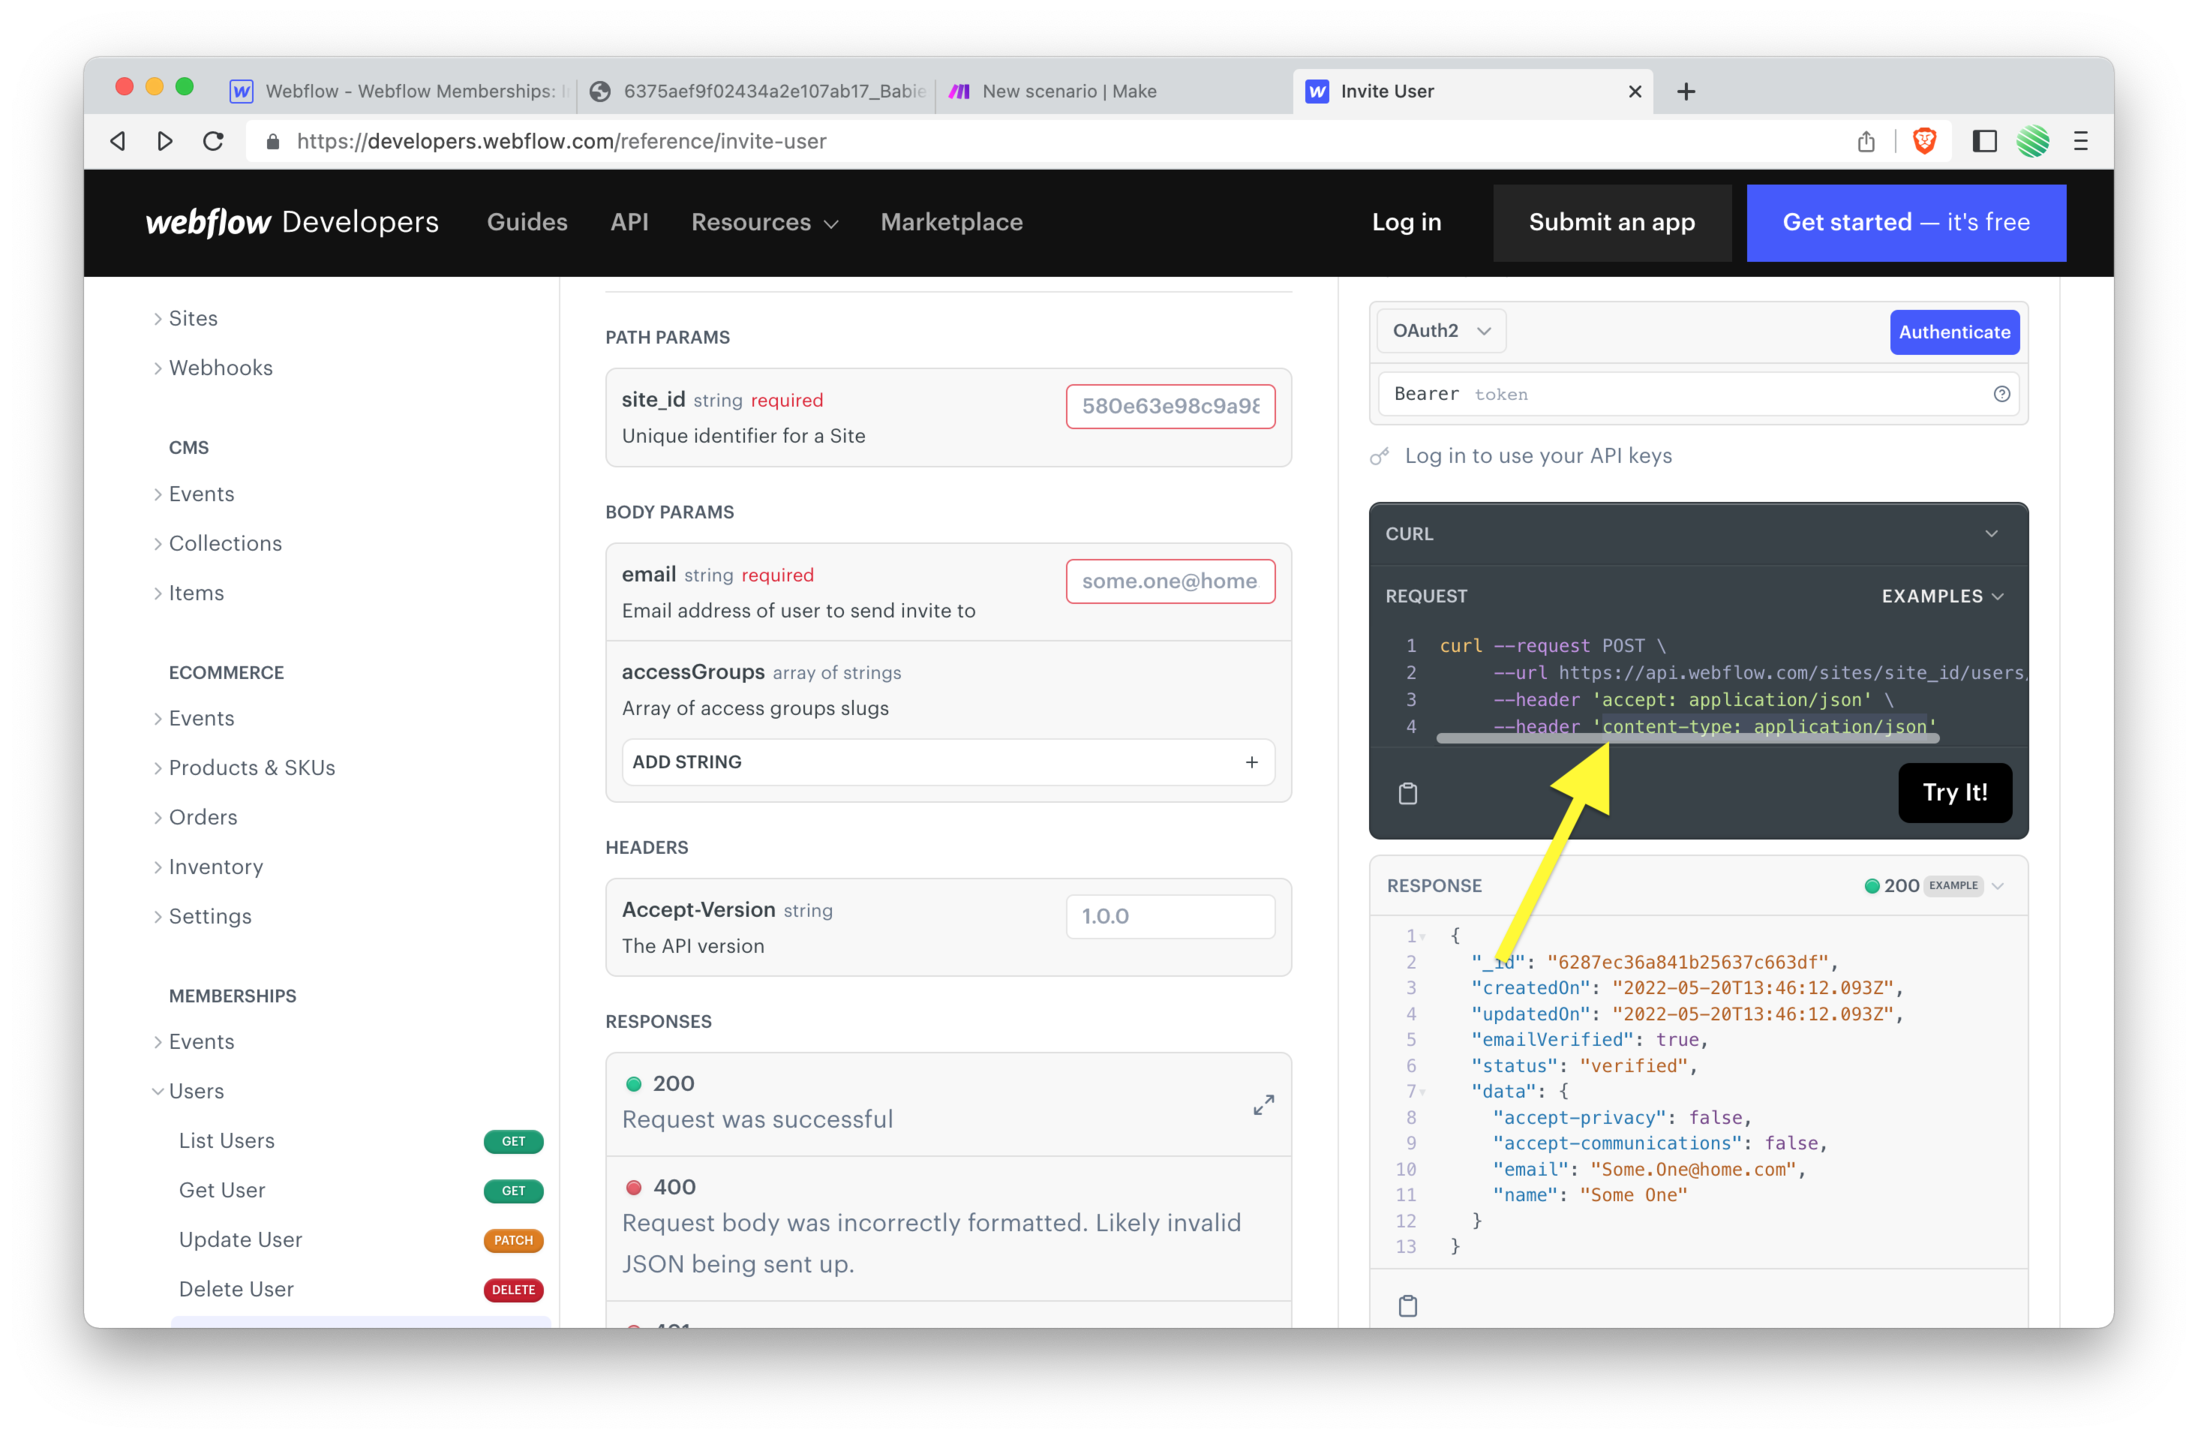
Go to the Invite User API section.
And copy the URL shown in the below screenshot.
https://api.webflow.com/sites/{site_id}/users/invite
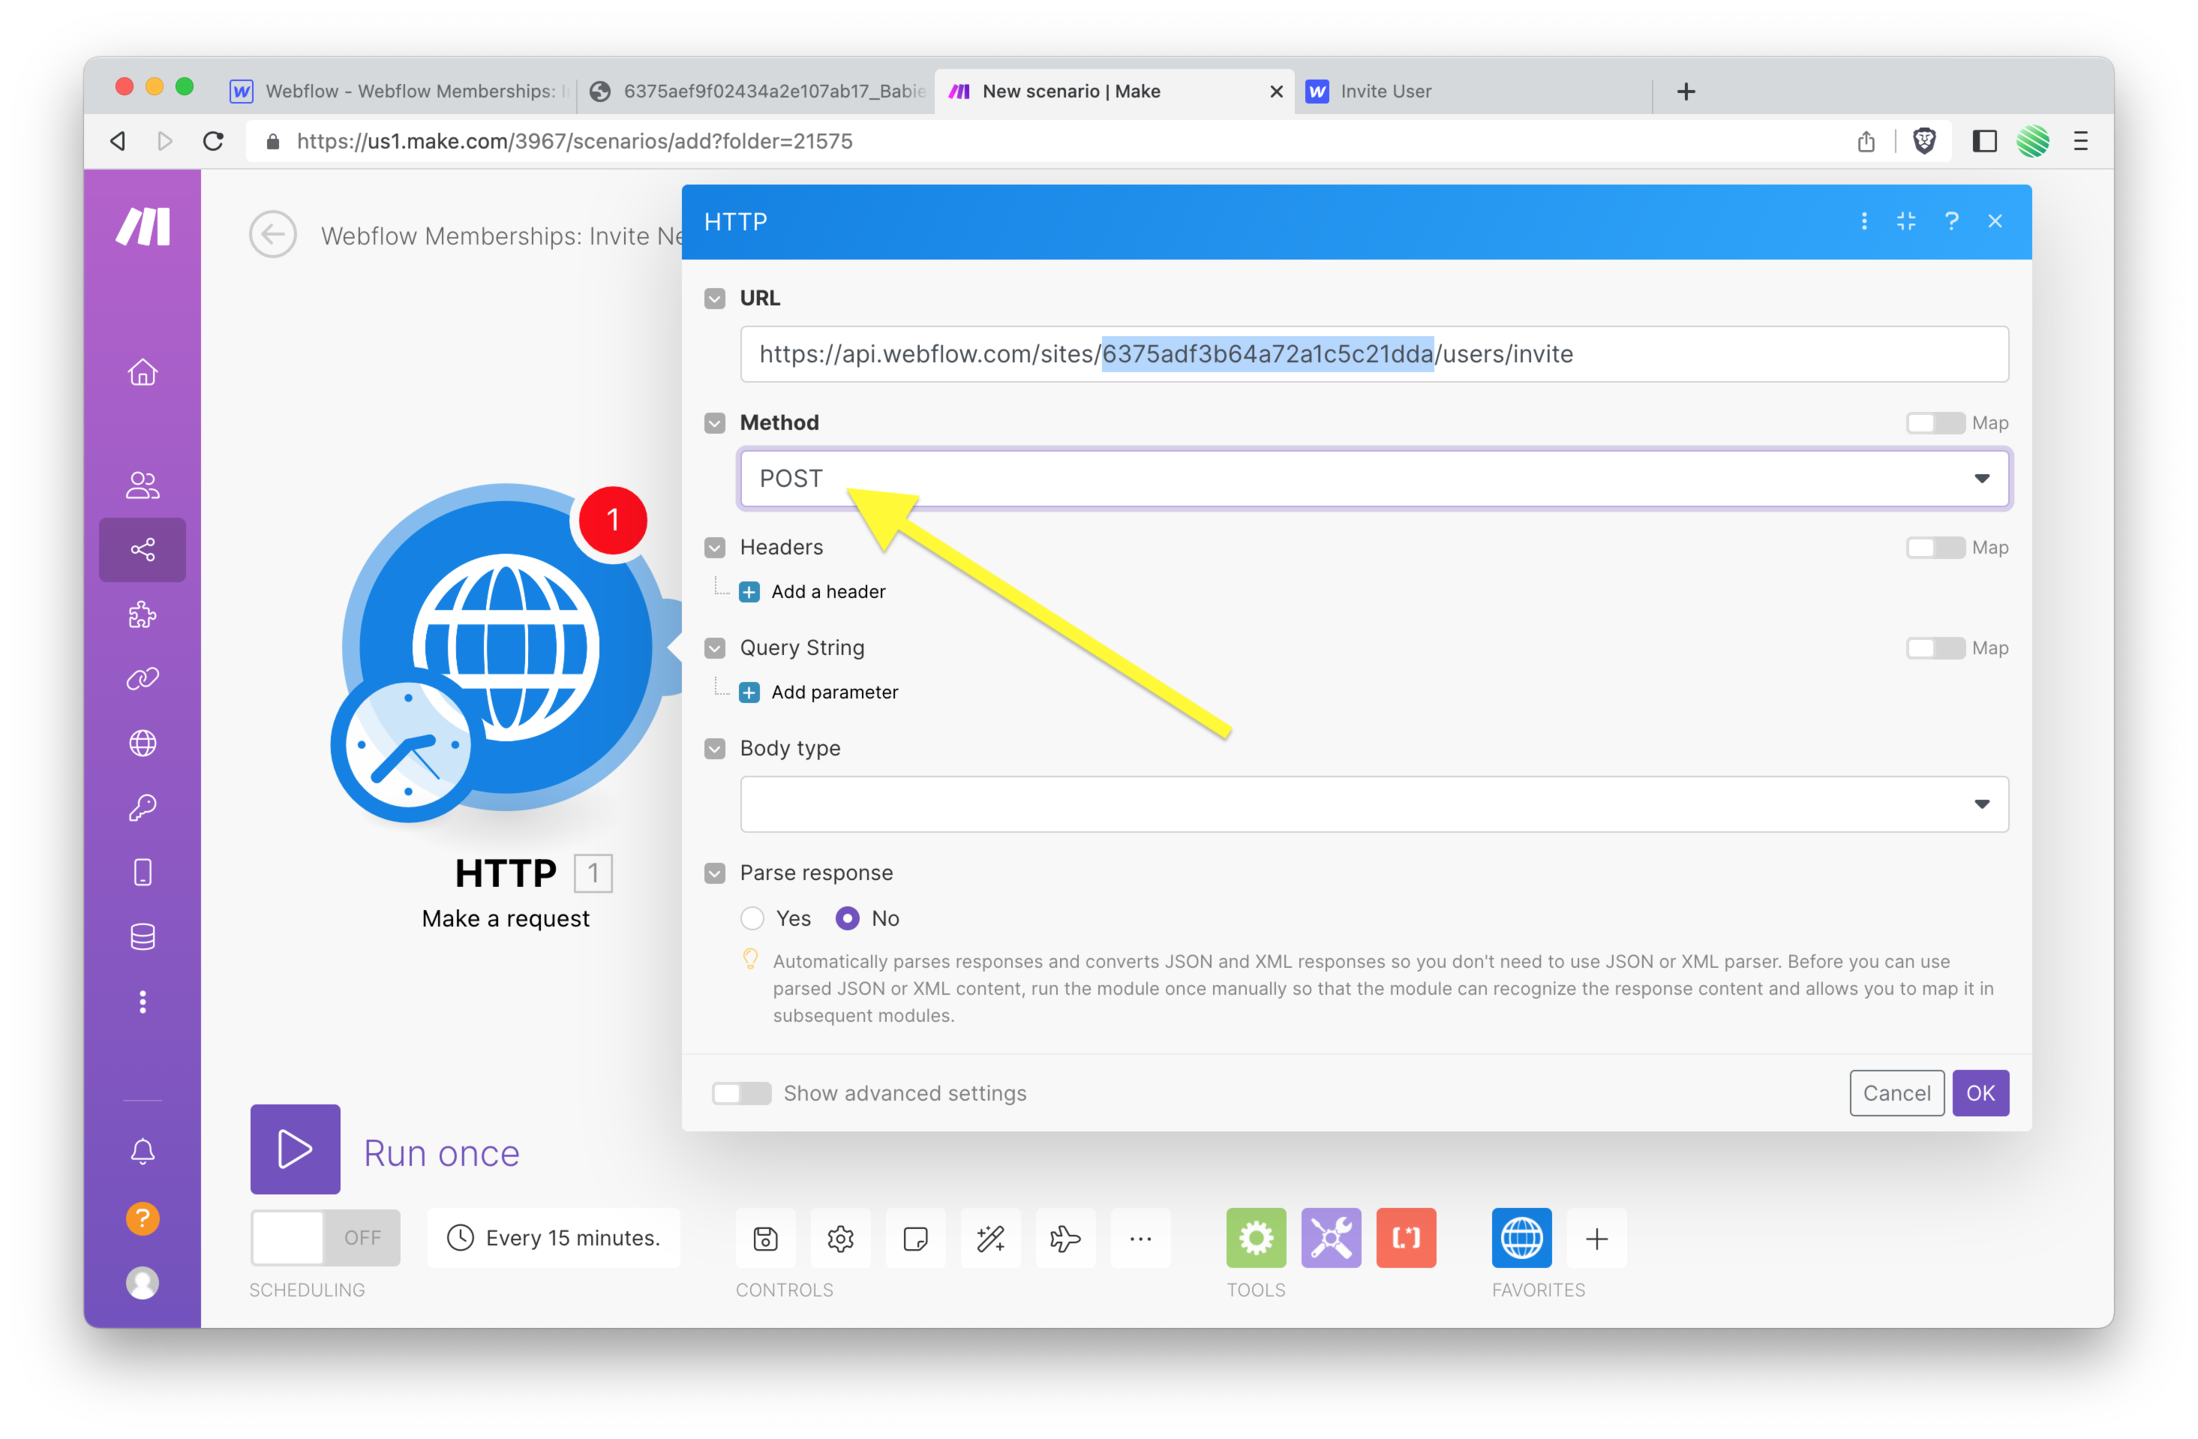
 Now paste that into the URL field back on your Make HTTP Module.
 Notice the `{site_id}` in the URL.
You’re going to replace that with your own Webflow Projects site ID.
 There are several ways to get your Webflow projects site ID. Unfortunately none are super obvious. But here’s a fun & fast way that I like to do it sometimes.
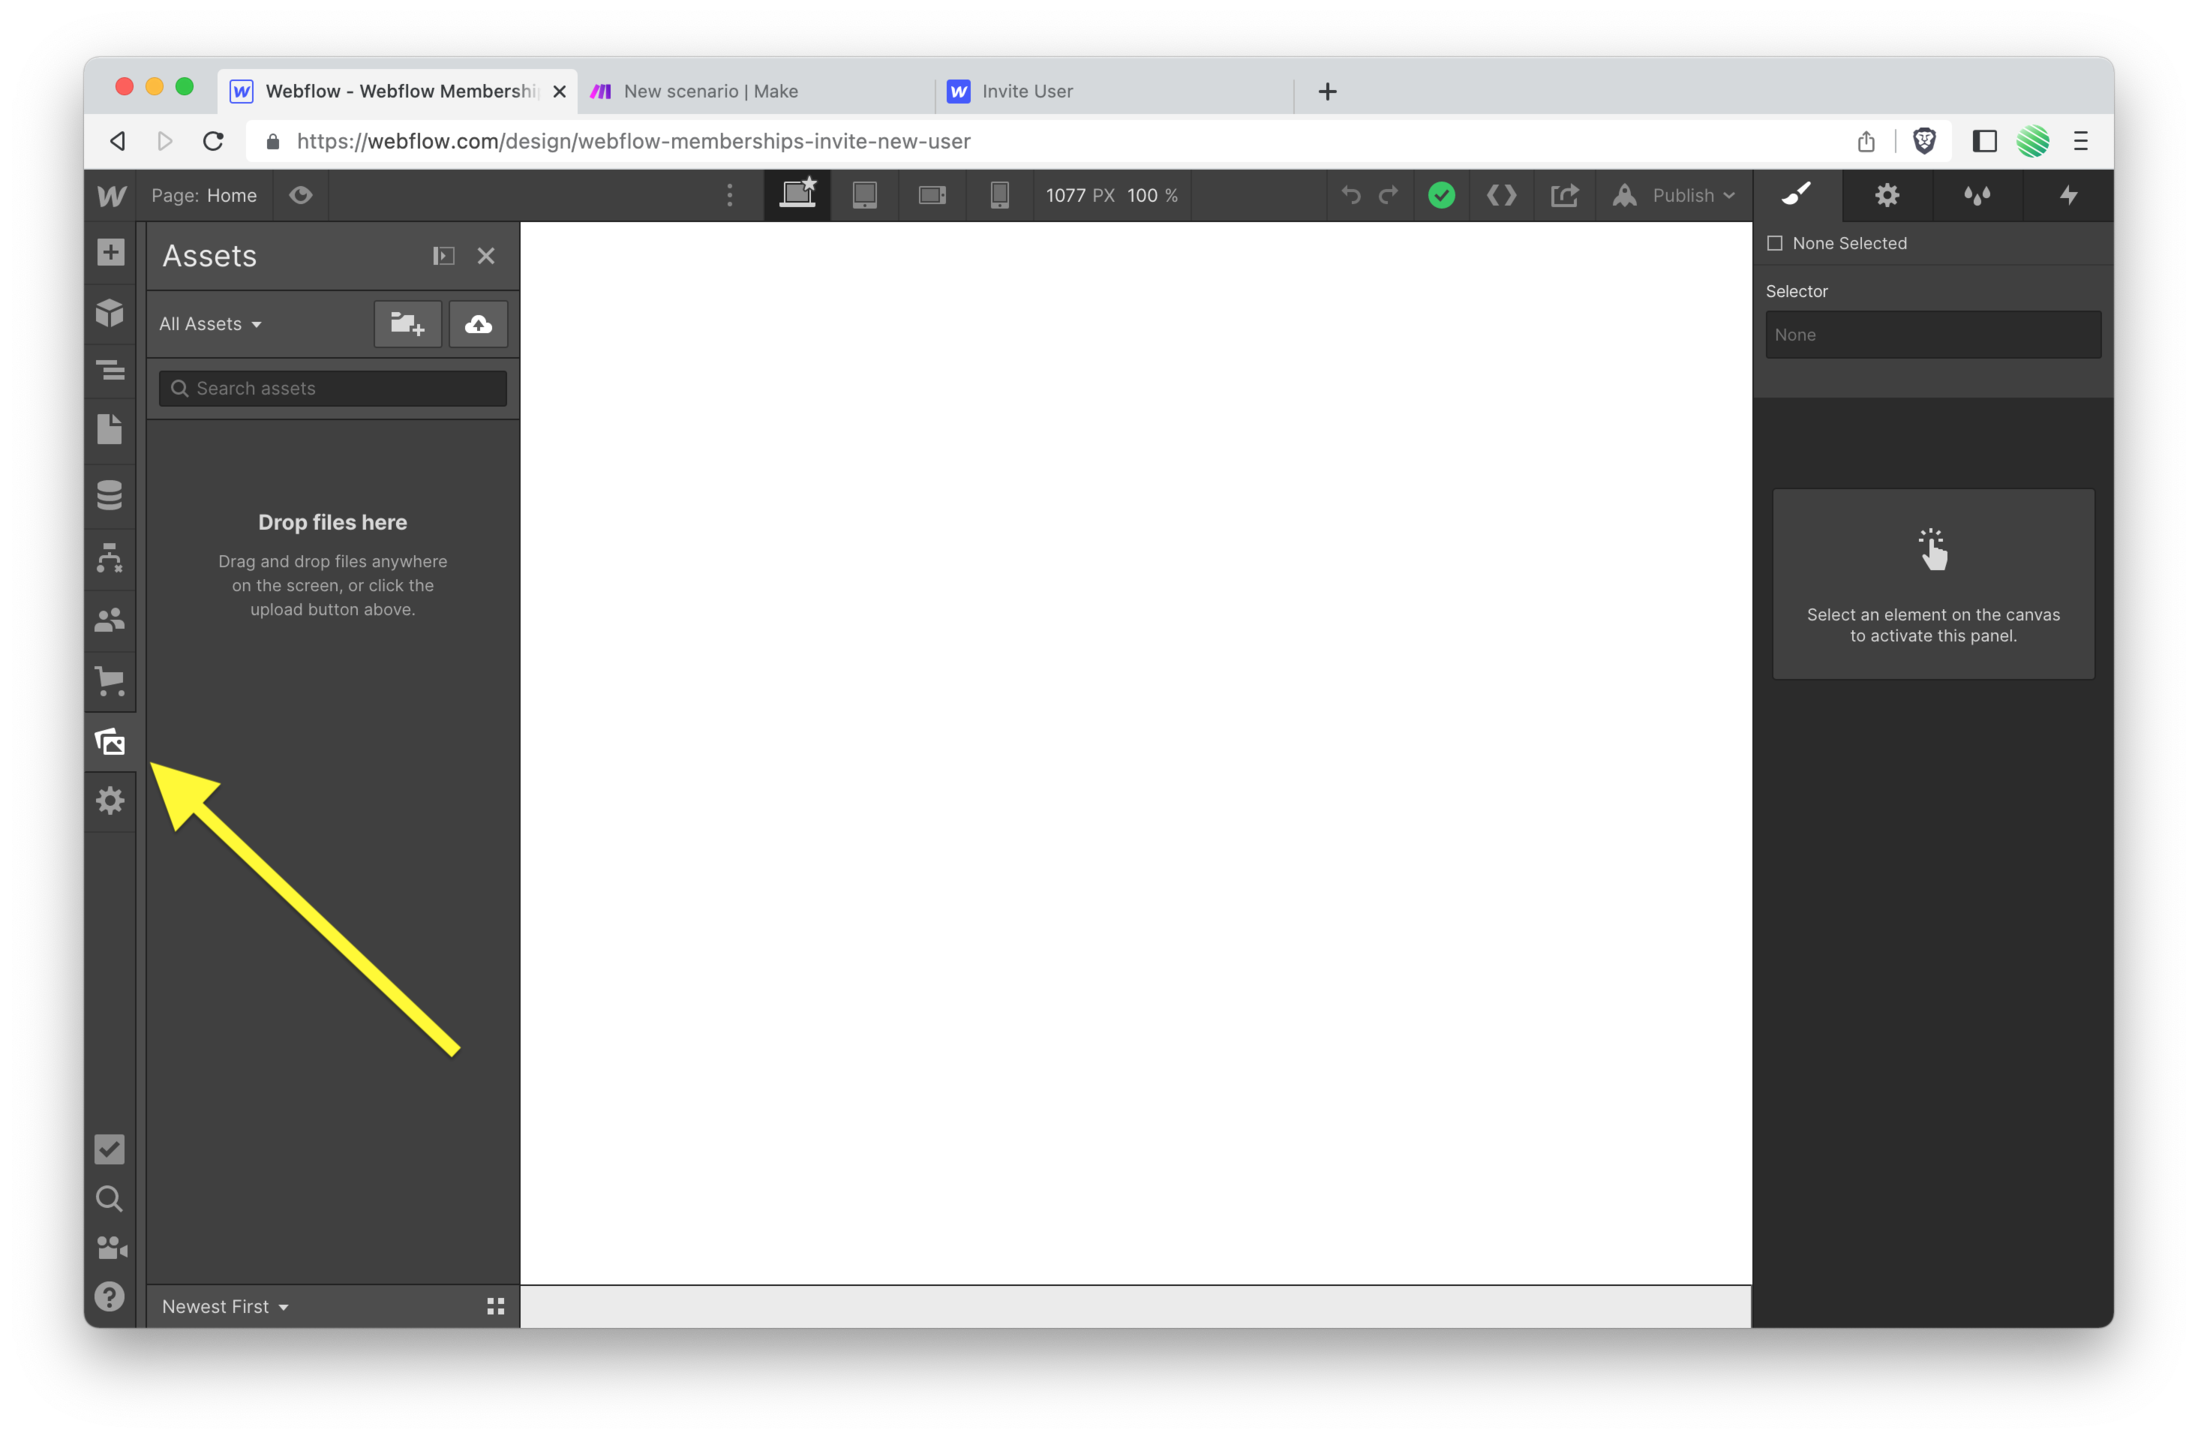
Open up your Webflow Designer and tap on the assets menu.
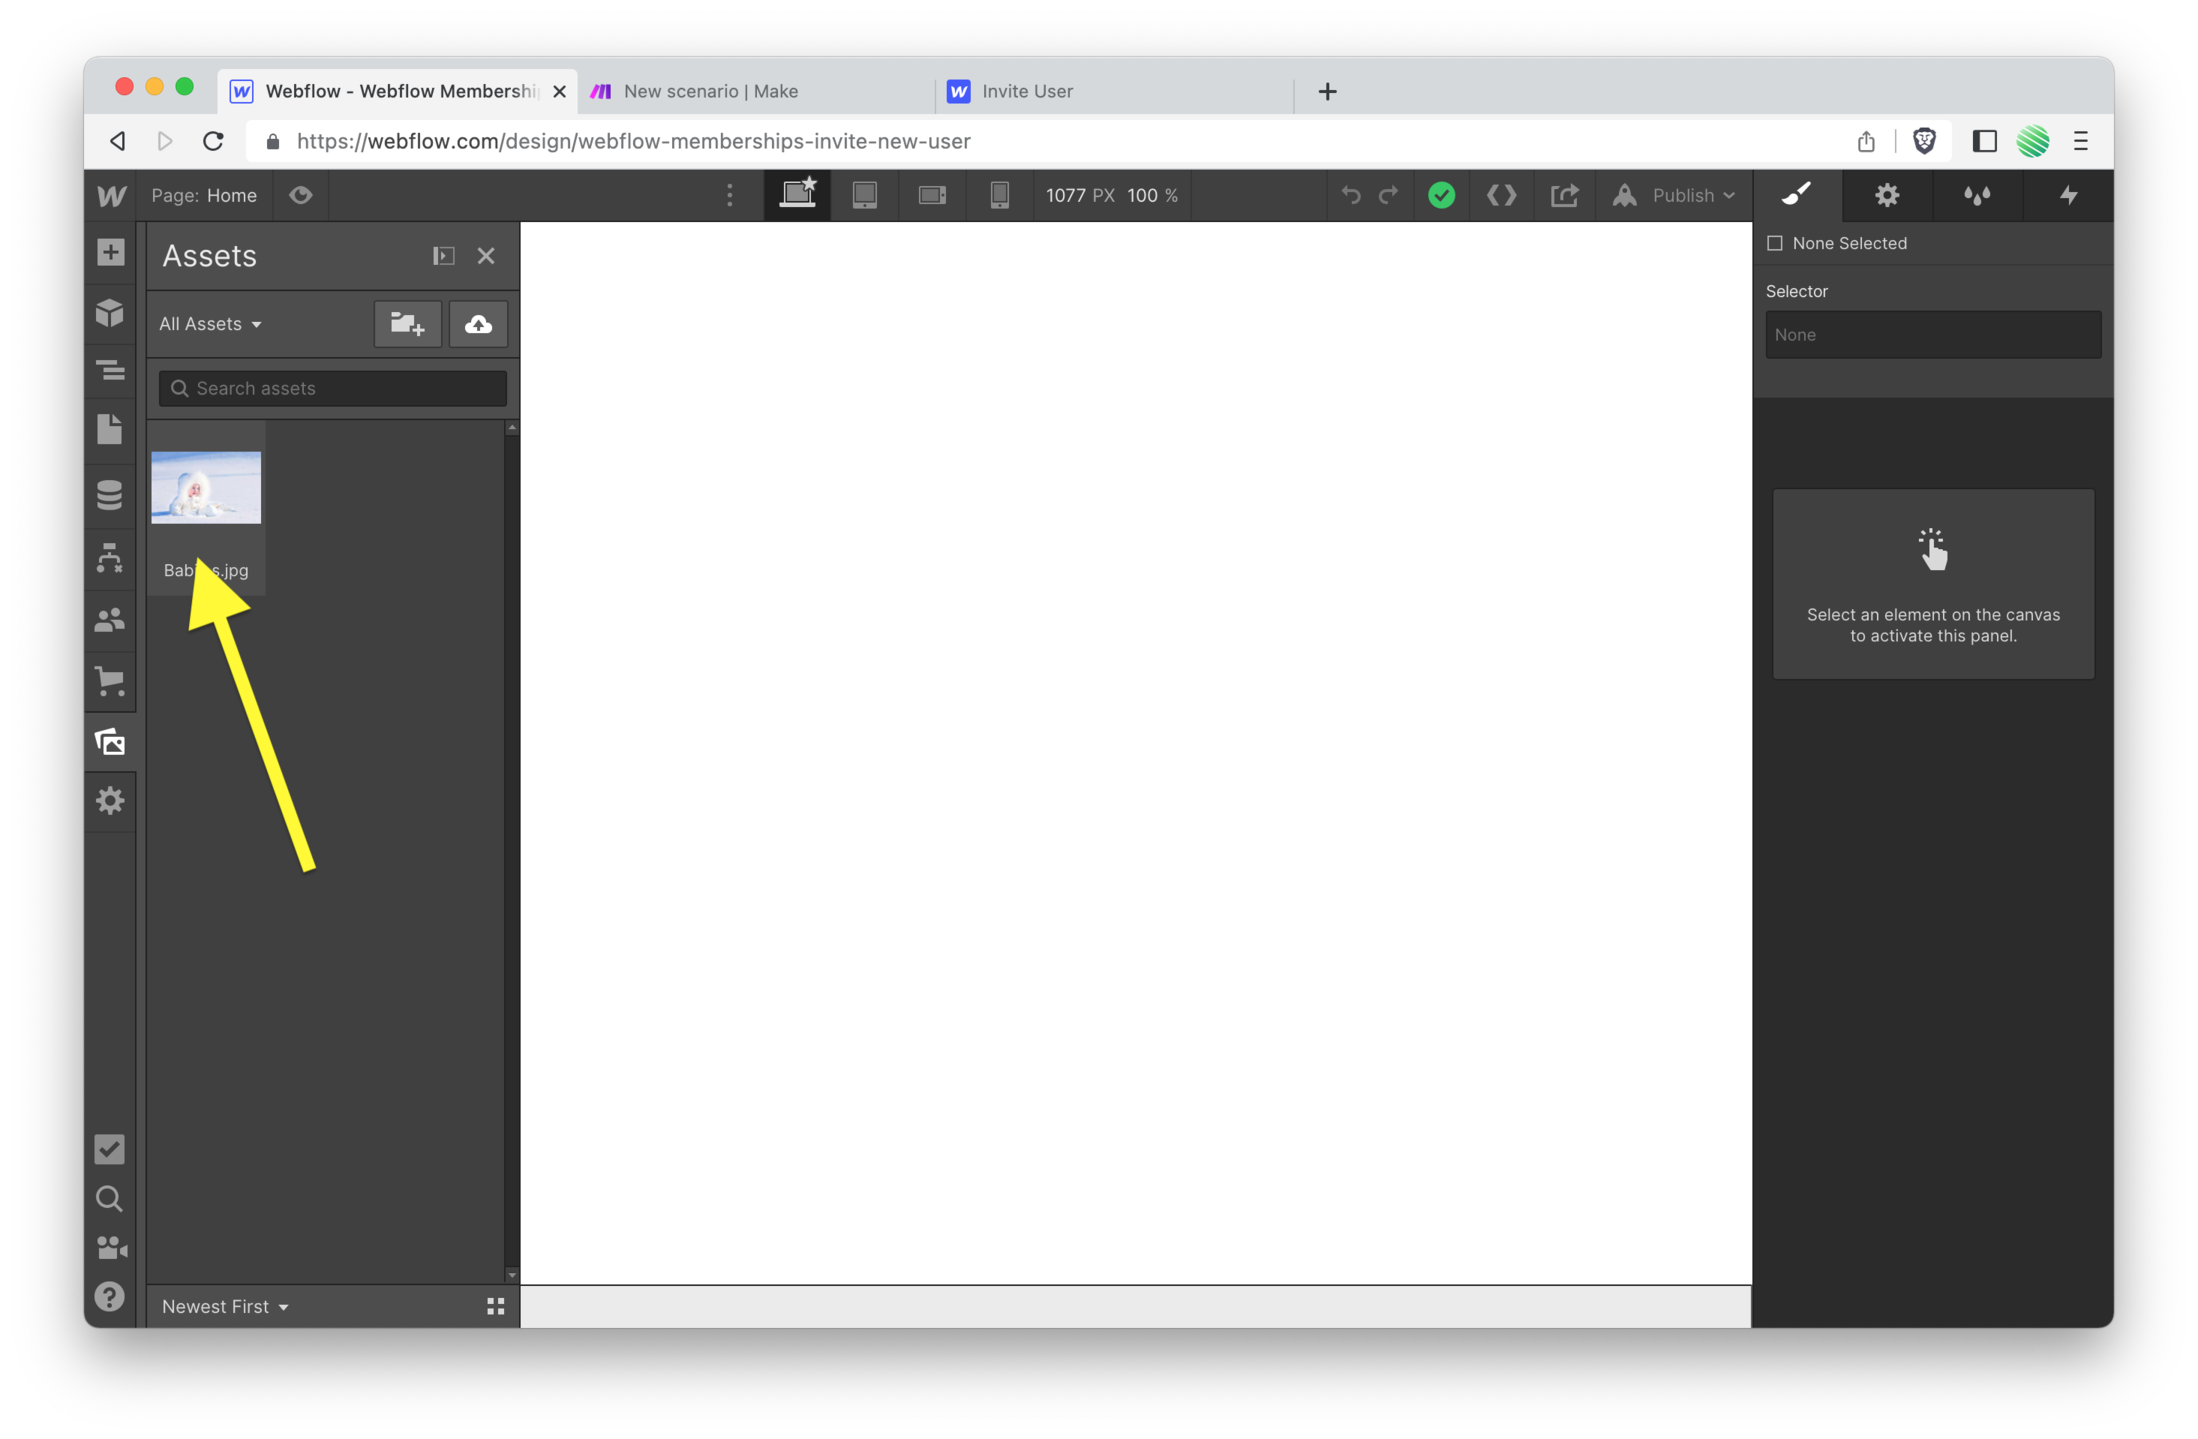
 Upload a test file.
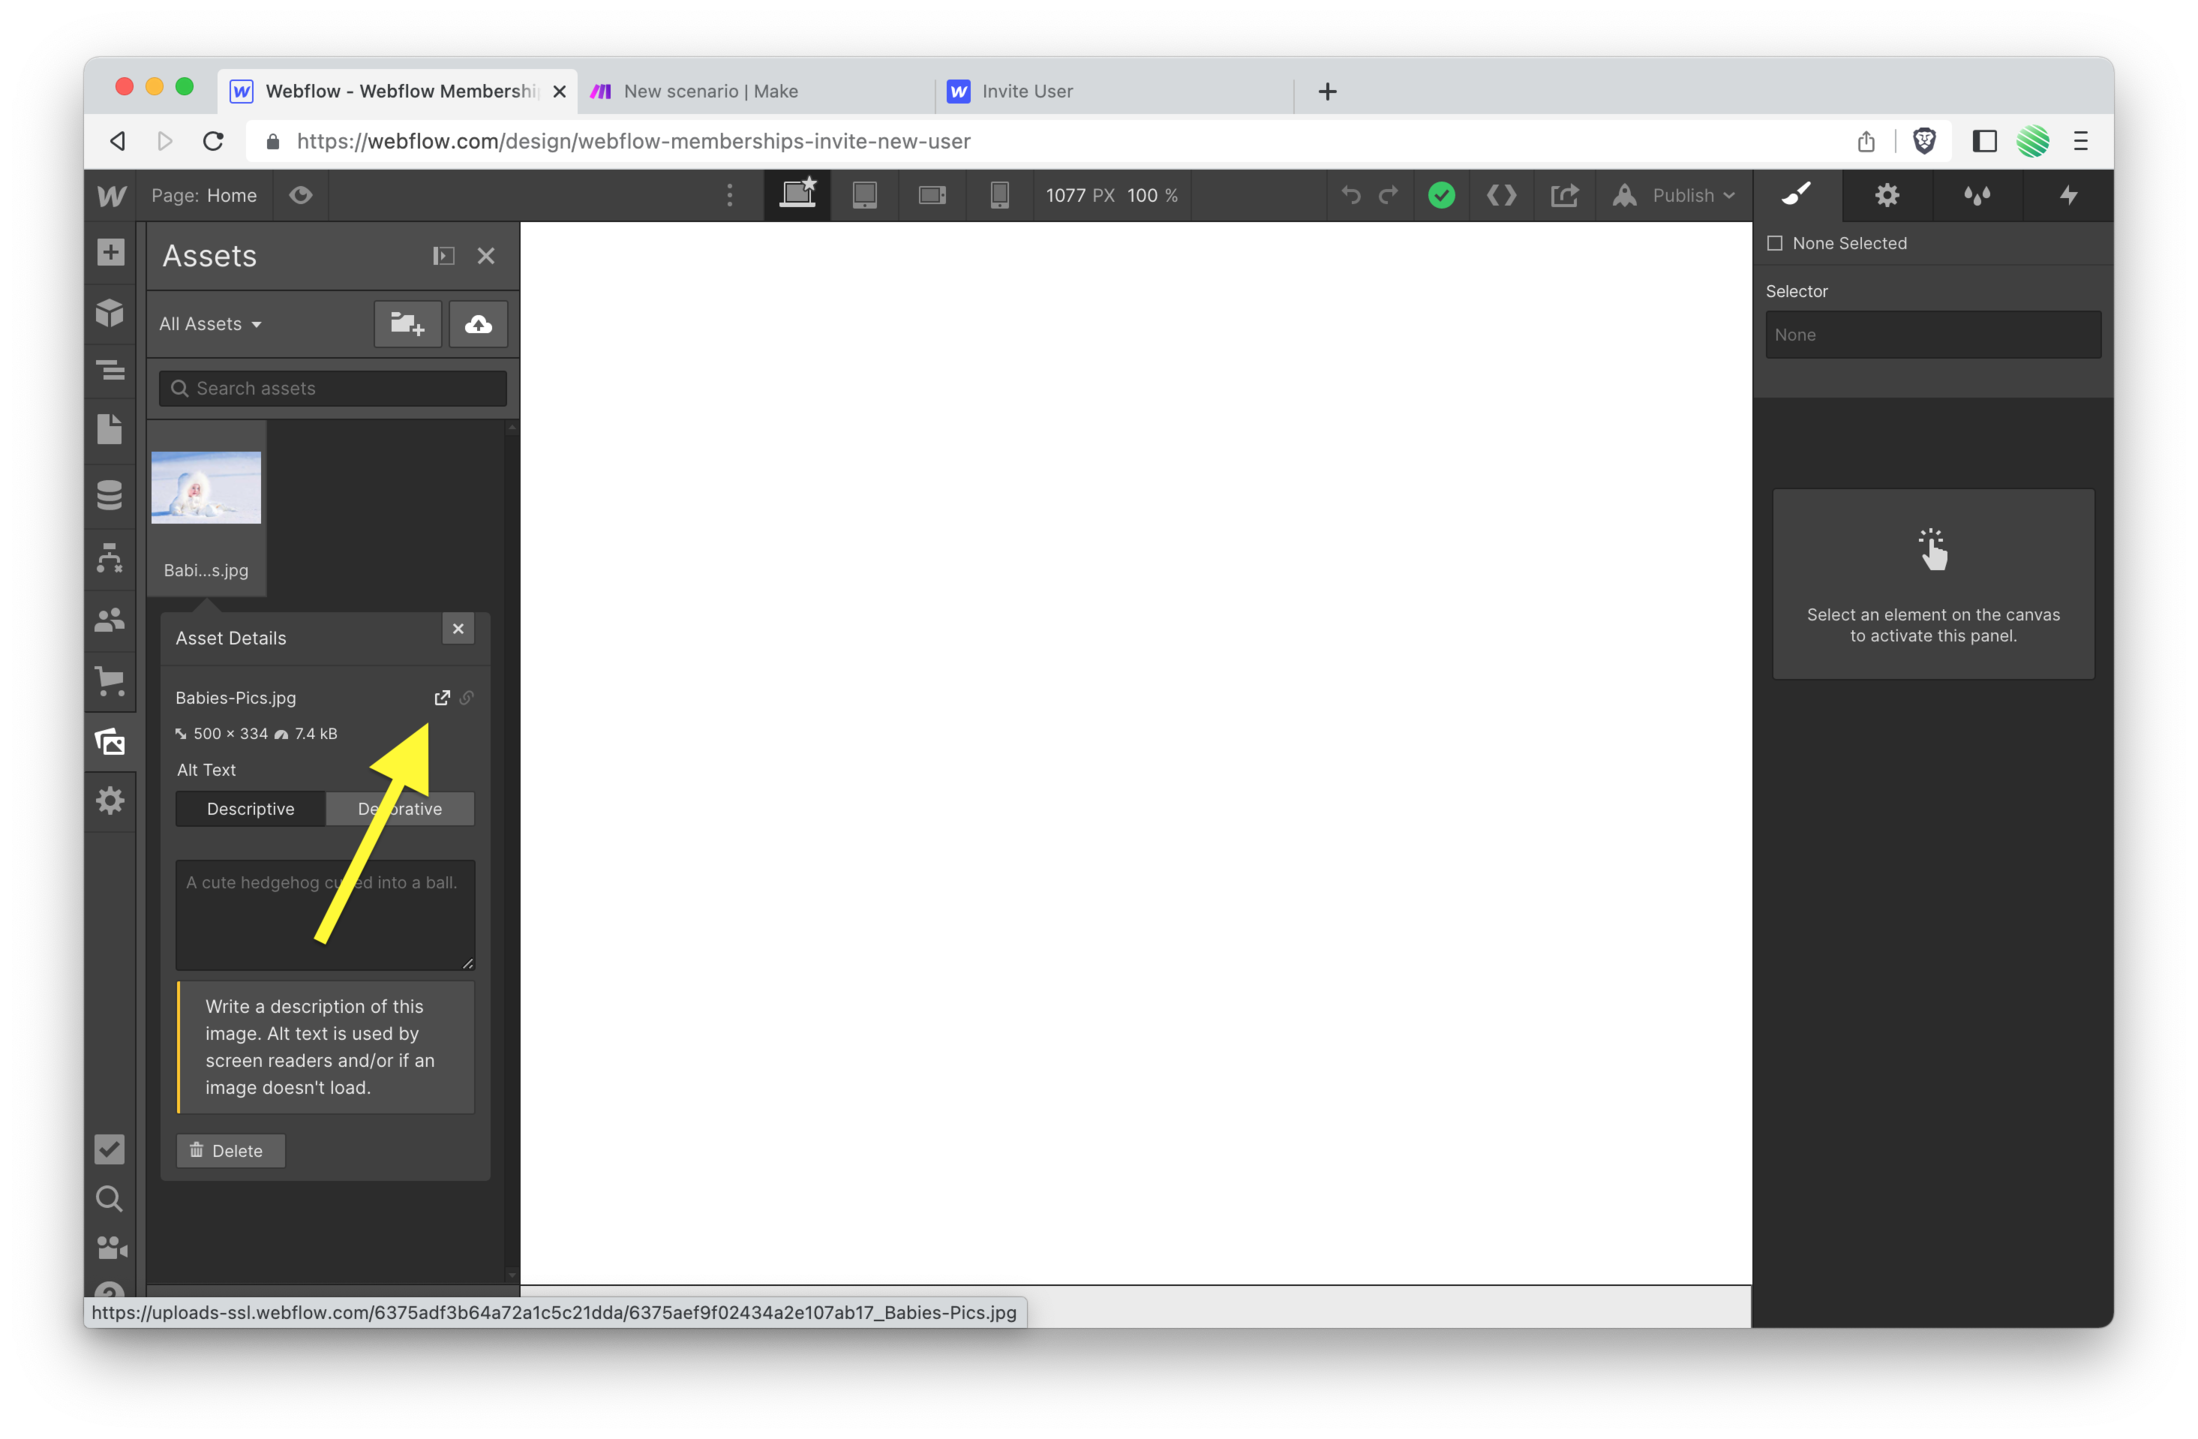
 Open that file in a new tab.
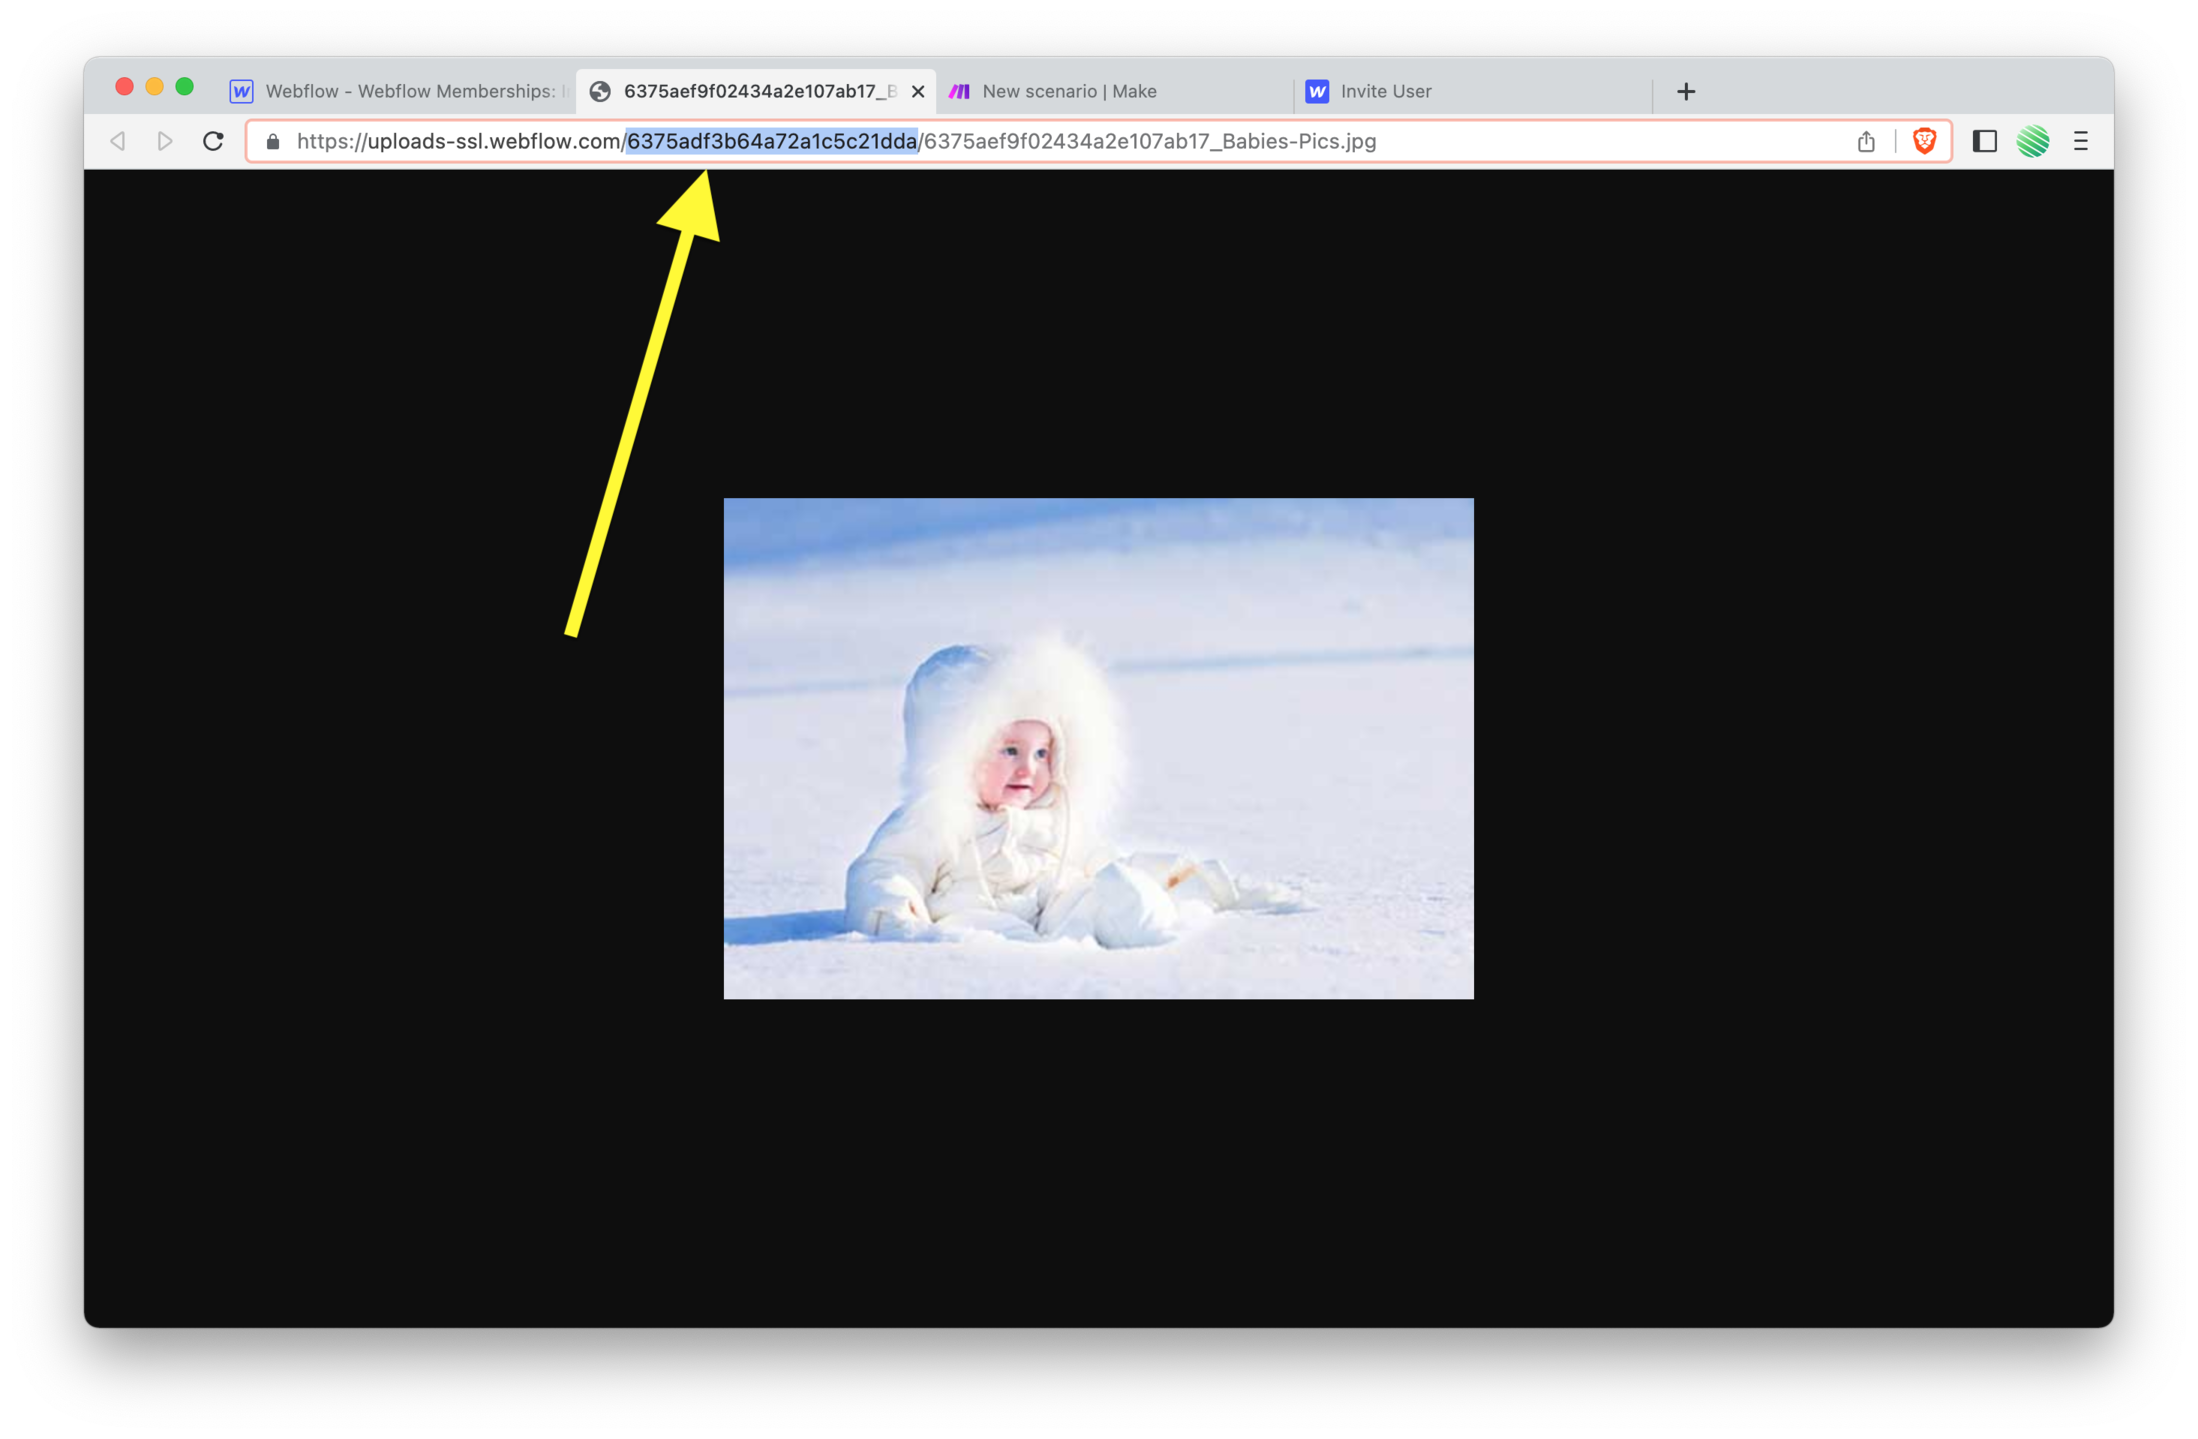
 And if you look at the screenshot below, I've highlighted the part of the URL that shows your `{site_id}`.
Go ahead and copy that.
 Now replace
 {site_id} within the URL field back on your Make HTTP Module with what you just copied.
Mine looks like this, yours will be different:
https://api.webflow.com/sites/6375adf3b64a72a1c5c21dda/users/invite
 Great!
Now you have a API call to this URL ( also known as an ‘endpoint’ ) with your Webflow projects site_id embedded into it.
Flip back to the Webflow API docs and notice the “method” of this API URL ( screenshot below ).
It’s a POST method.
What is a POST method?
It’s one of the different ways that data is sent to the endpoint URL.
With a POST method it takes all the data you want to send and bundles it up into the body of the message.
For example, if this was a GET method, it would take all of the data you want to send and appends it to the URL.
You’ve probably seen URLs that look something like this:
https://example.com?username=chris&color=brown&location=earth
With a GET method you’re limited to how much information you can add to a URL. So when you have a lot of data to send to a URL endpoint, you bundle it up into a POST method which sends it in the body of the request.
The body of a request has much more wiggle room than appending it to a URL.
Now that you’ve confirmed what the Webflow API endpoint expects, you can set that in your Make HTTP Module. See the screenshot below.
 Back to the Webflow API doc’s.
We need add something called a header.
What’s a header?
A header is a bit of space that is used to send extra information to the URL endpoint. The header is a well known spot and the endpoint server will be looking for it when it receives your request.
A header is like the address you put onto the outside of an envelope when you snail mail a letter.
The envelope has the “to address”, the “return address”, and some postage.
The mail carrier always knows to look at the same spot on an envelope for that information.
Same goes for a header.
The URL endpoint knows to look at that same spot for specific information it needs to grab.
What’s a message body?
I mentioned this earlier and didn’t really explain it. But now is a good time too.
A message body in a request is the same thing as the letter folded up inside of an envelope.
The letter contains a lot of information, while the outside of the envelope only contains a small bit of very specific information.
Headers and message bodies are just the same as a snail mail envelope and letter.
Alrighty, let’s continue…
Copy that first header listed in the screenshot below.
accept: application/json
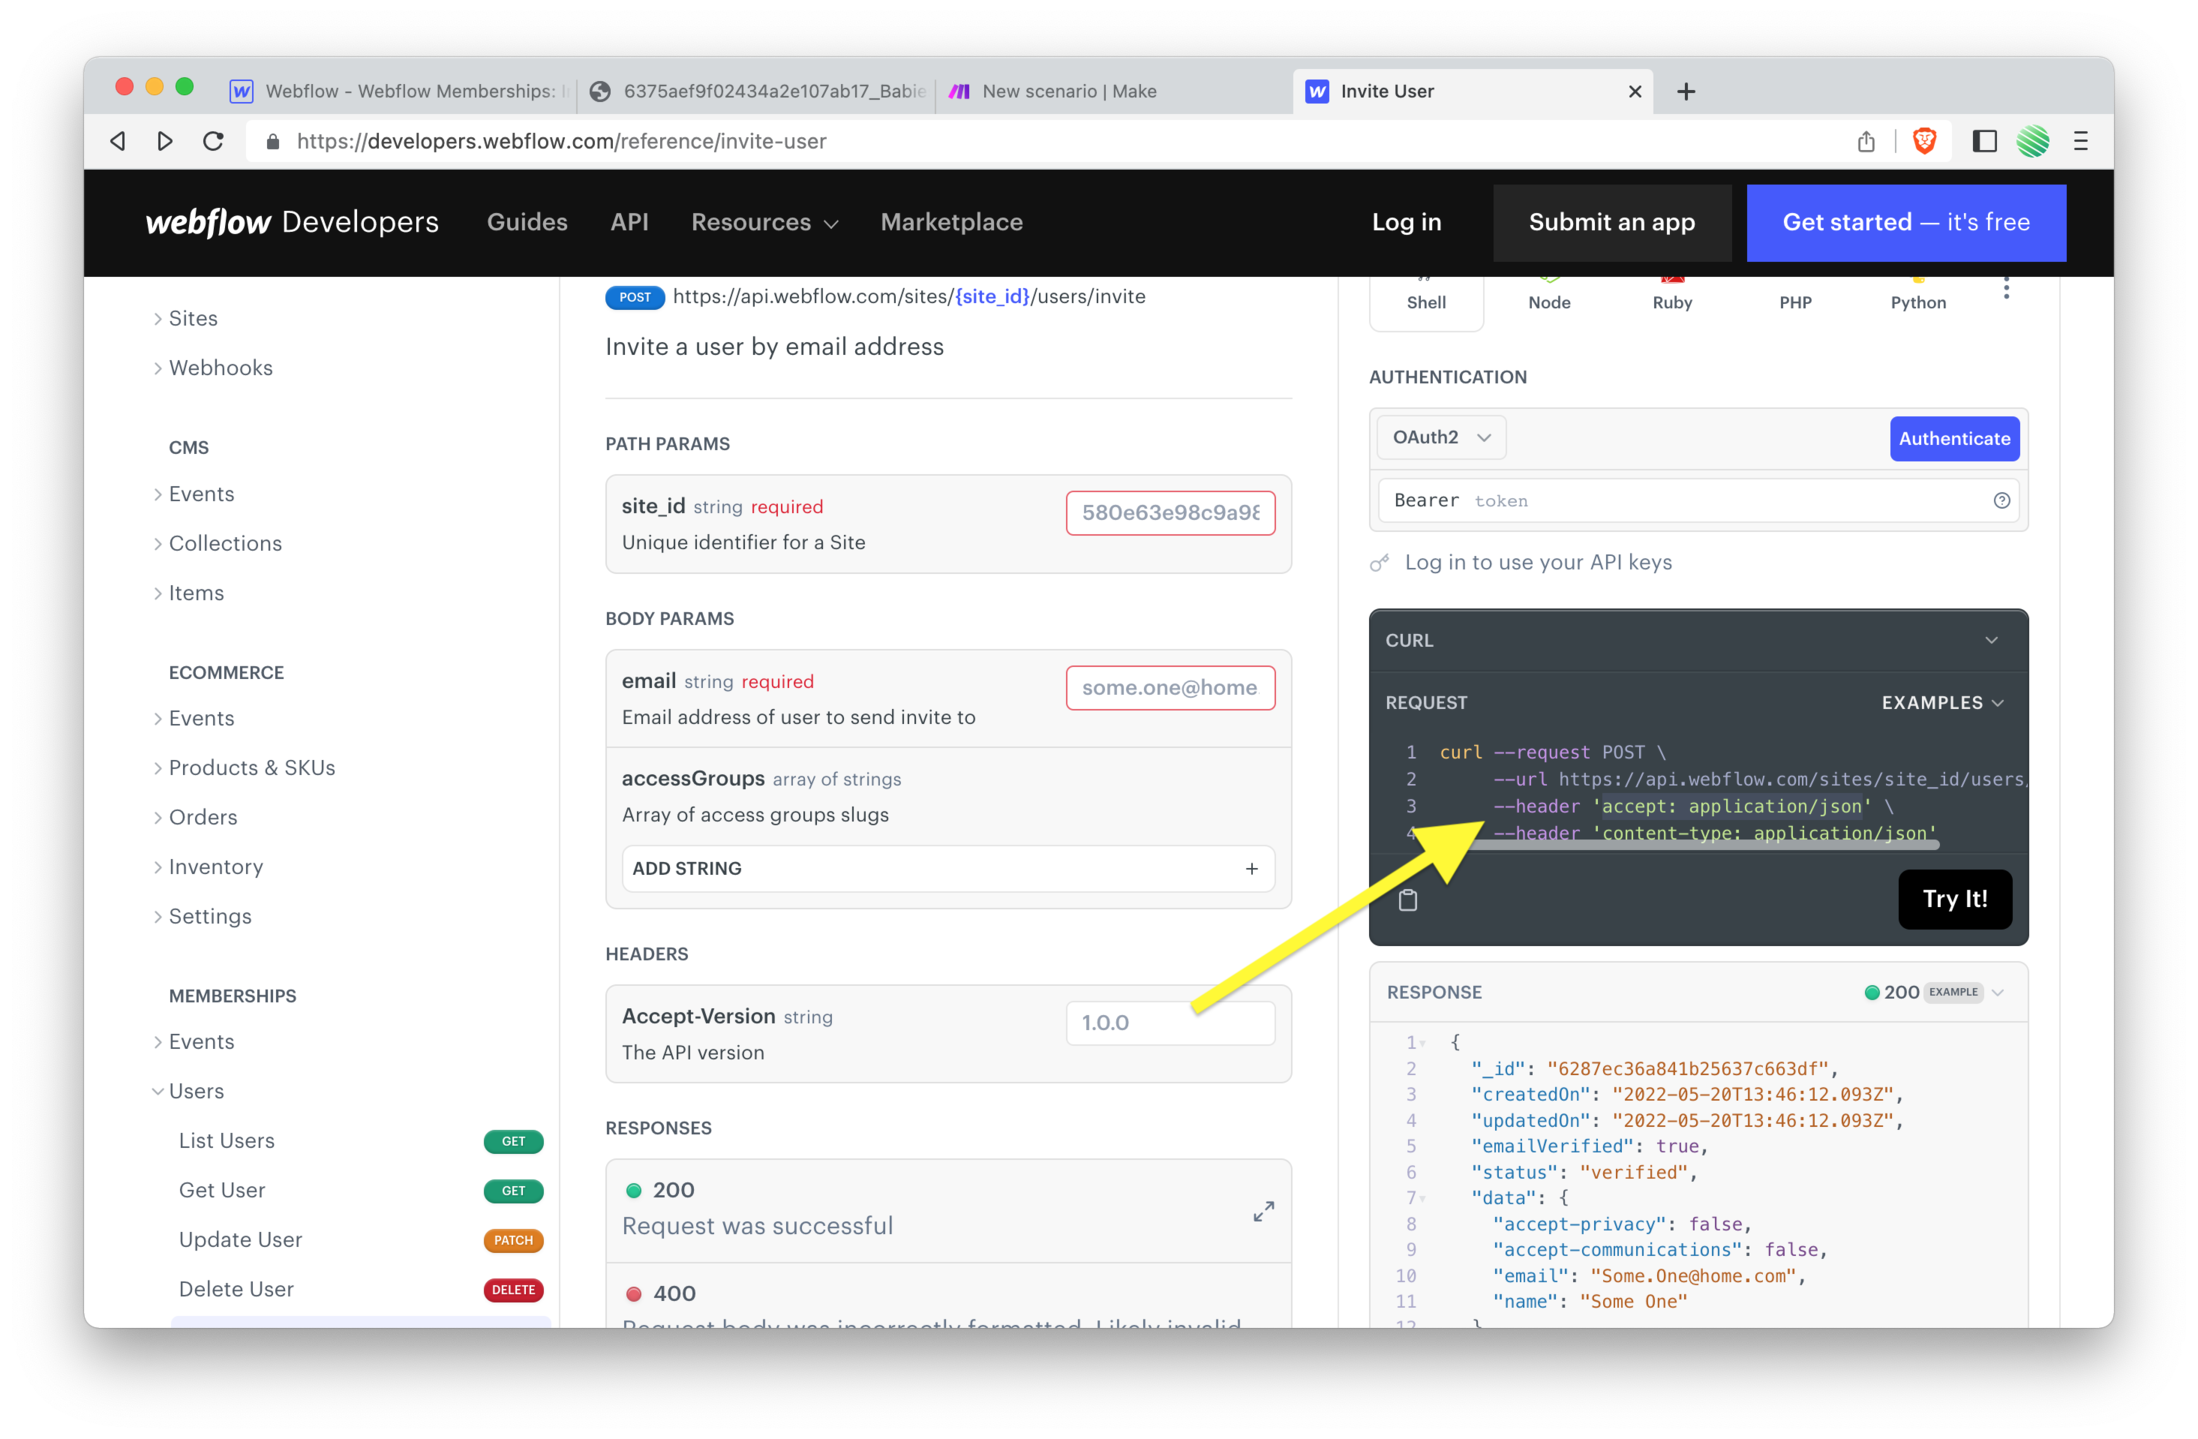 You're going to break that apart a bit and add it to a new header within your Make HTTP Module.
Copy how I’ve done it in the screenshot below.
One thing to note…
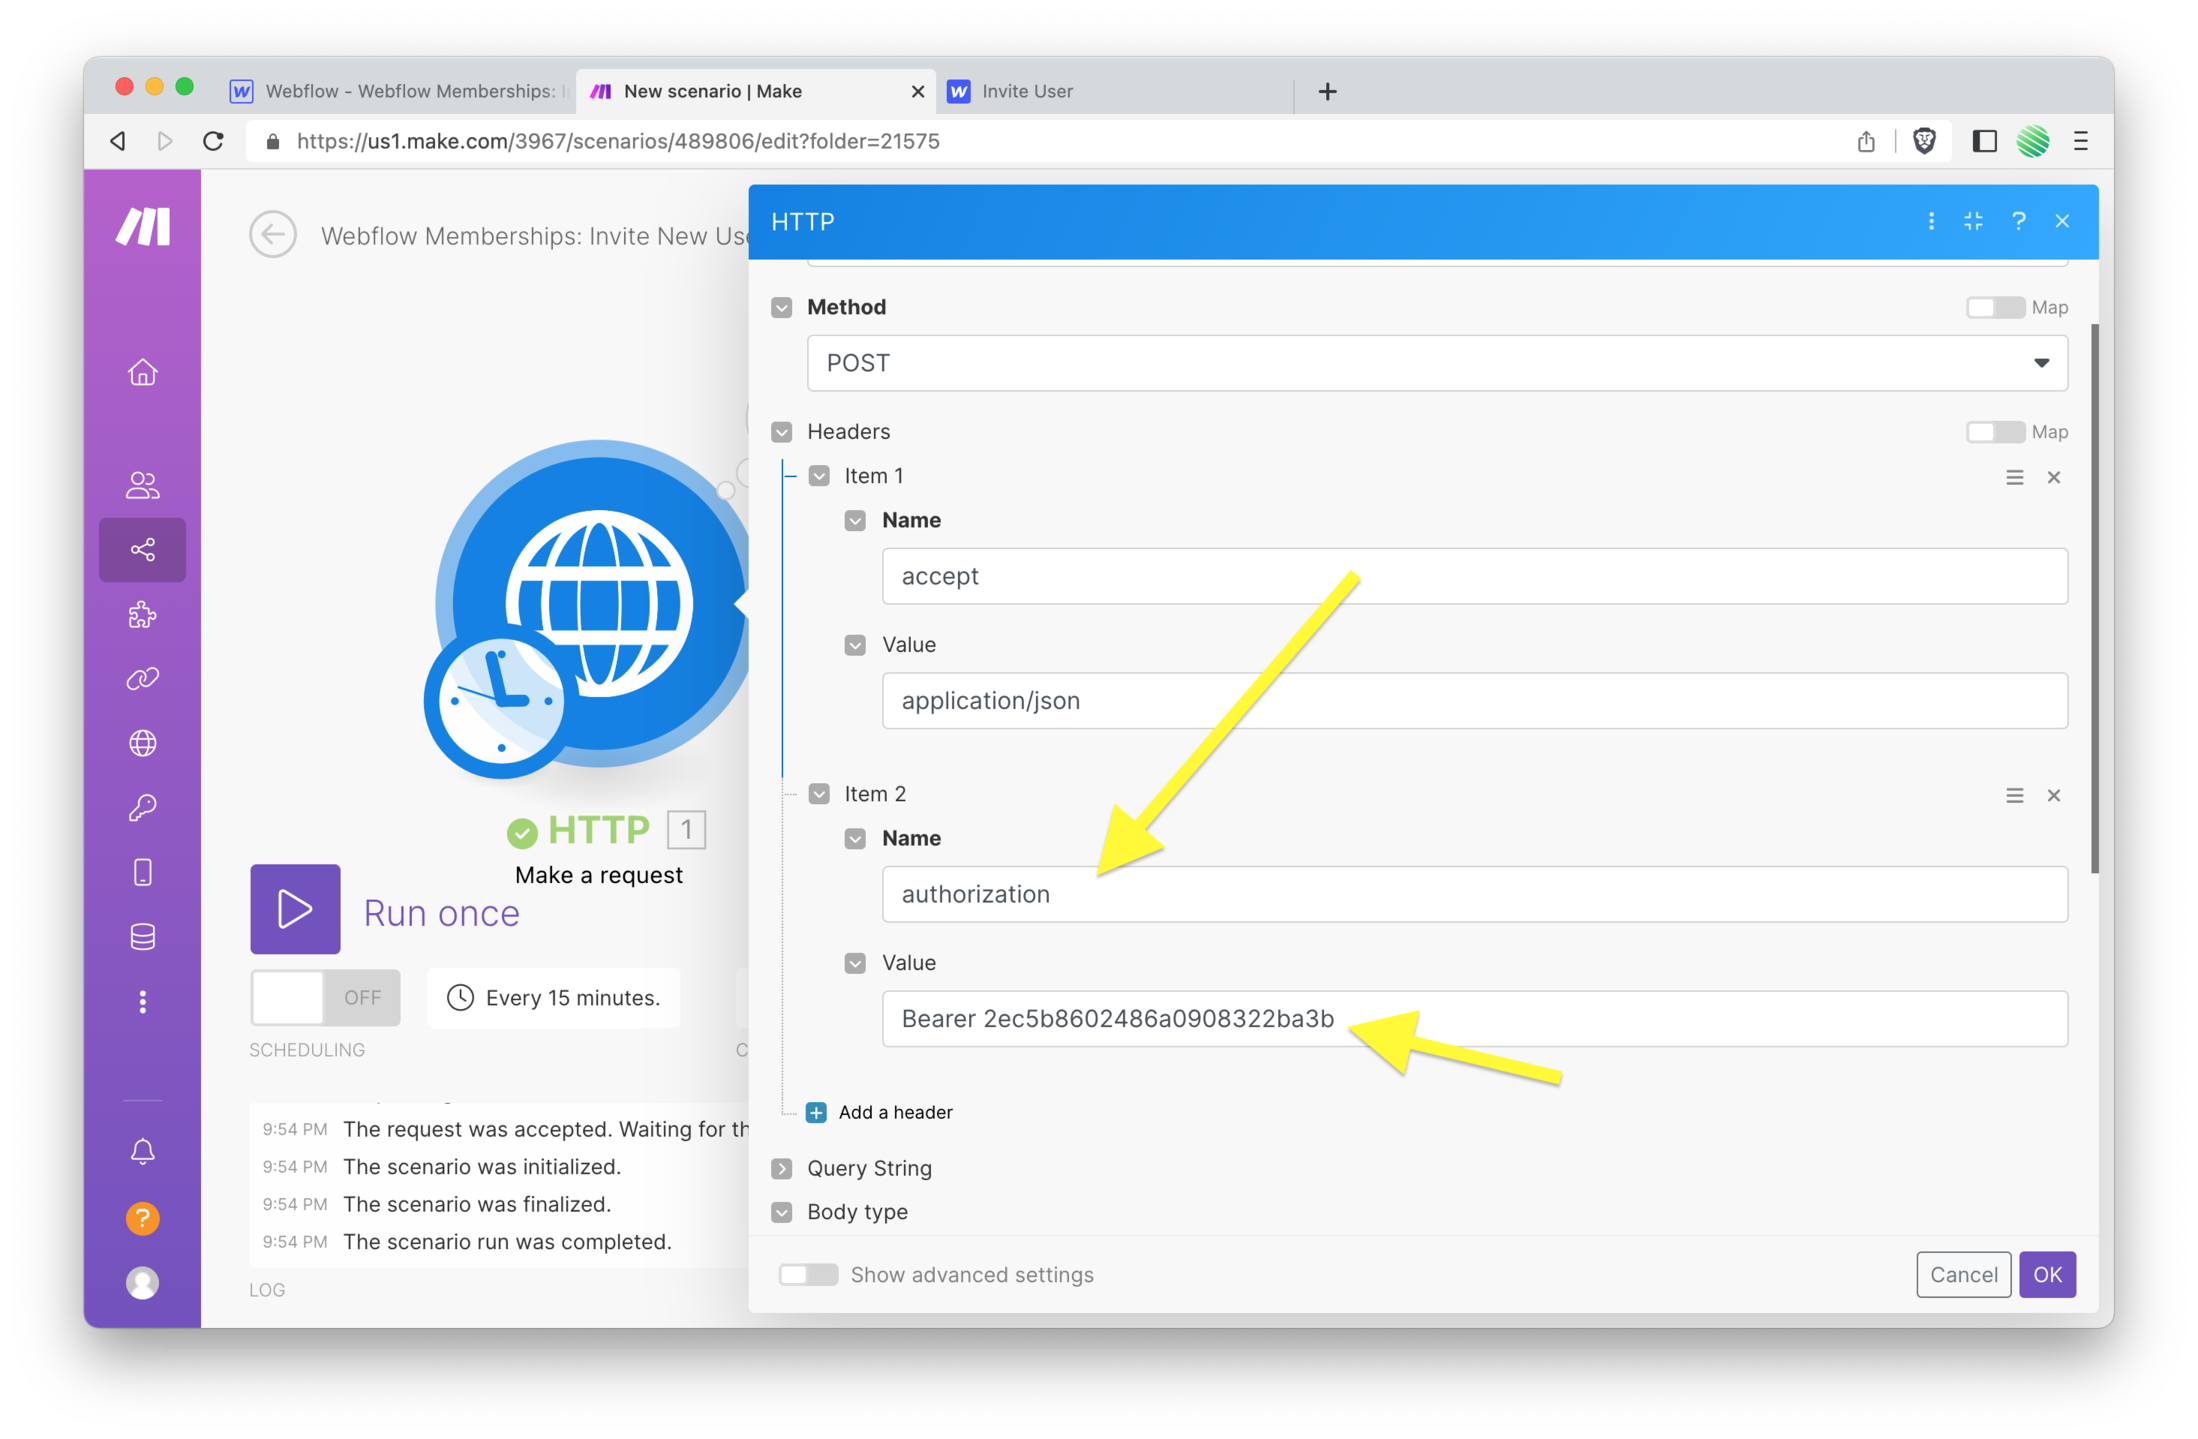
Notice the colon ( : ) in the header you copied ( accept: application/json ) is removed when you add it to Make.
Make sure to remove that!

Next you need to add your Webflow API key to another Make HTTP Module header.
The URL you’ve added to Make has your Webflow project site_id in it. So it’s understood which site you are inviting the user to.
Now you need to tell Webflow that you’re authorized to add this information to that specific site.
You do that through your Webflow project’s API key.
There are a bunch of ways to get this as well, but here’s a fun new way I just discovered.
Flip back to the Webflow API doc’s and tap that “authenticate” button shown in the screenshot below.
 You'll be confronted with a new window asking you to log into Webflow ( if you're not already ) and pick the Webflow project you want the API key for.
Go ahead and do that now.
Once done, you’ll notice a new header entry that didn’t exist before. See the screenshot below.
Go ahead and copy that.
 Back to your Make HTTP Module, add another header and paste in the information just as I've shown in the screenshot below.
Be on the lookout for the colon ( : ) it’s important to remove.
 Okay, you’re done with this part.
…and let me just stop here and say if you’ve made it this far, you’re doing great! There are a bunch of little details that you have to get “just right” otherwise it doesn’t work.
Keep at it!
Okay, flip back to the Webflow API doc’s and you may have noticed a third header ( screenshot below ). But you can ignore that for now.
Your Make HTTP Module is going to add that for you based on the settings you’re about to create.
 Back to your Make HTTP Module. I've collapsed the headers section so it's easier to see what's next in the screenshot below.
Select the Raw option from the body type dropdown.
 Select "`JSON (application/json)`" from the content type dropdown.

What is JSON?
“JSON is a lightweight format for storing and transporting data.”
Basically, most servers understand how to read JSON because of its wide use. The Webflow API understands, and expects that you send it JSON.
It’s just a common way to structure data on the web.
Now you can enter the actual JSON blob into the request content field.
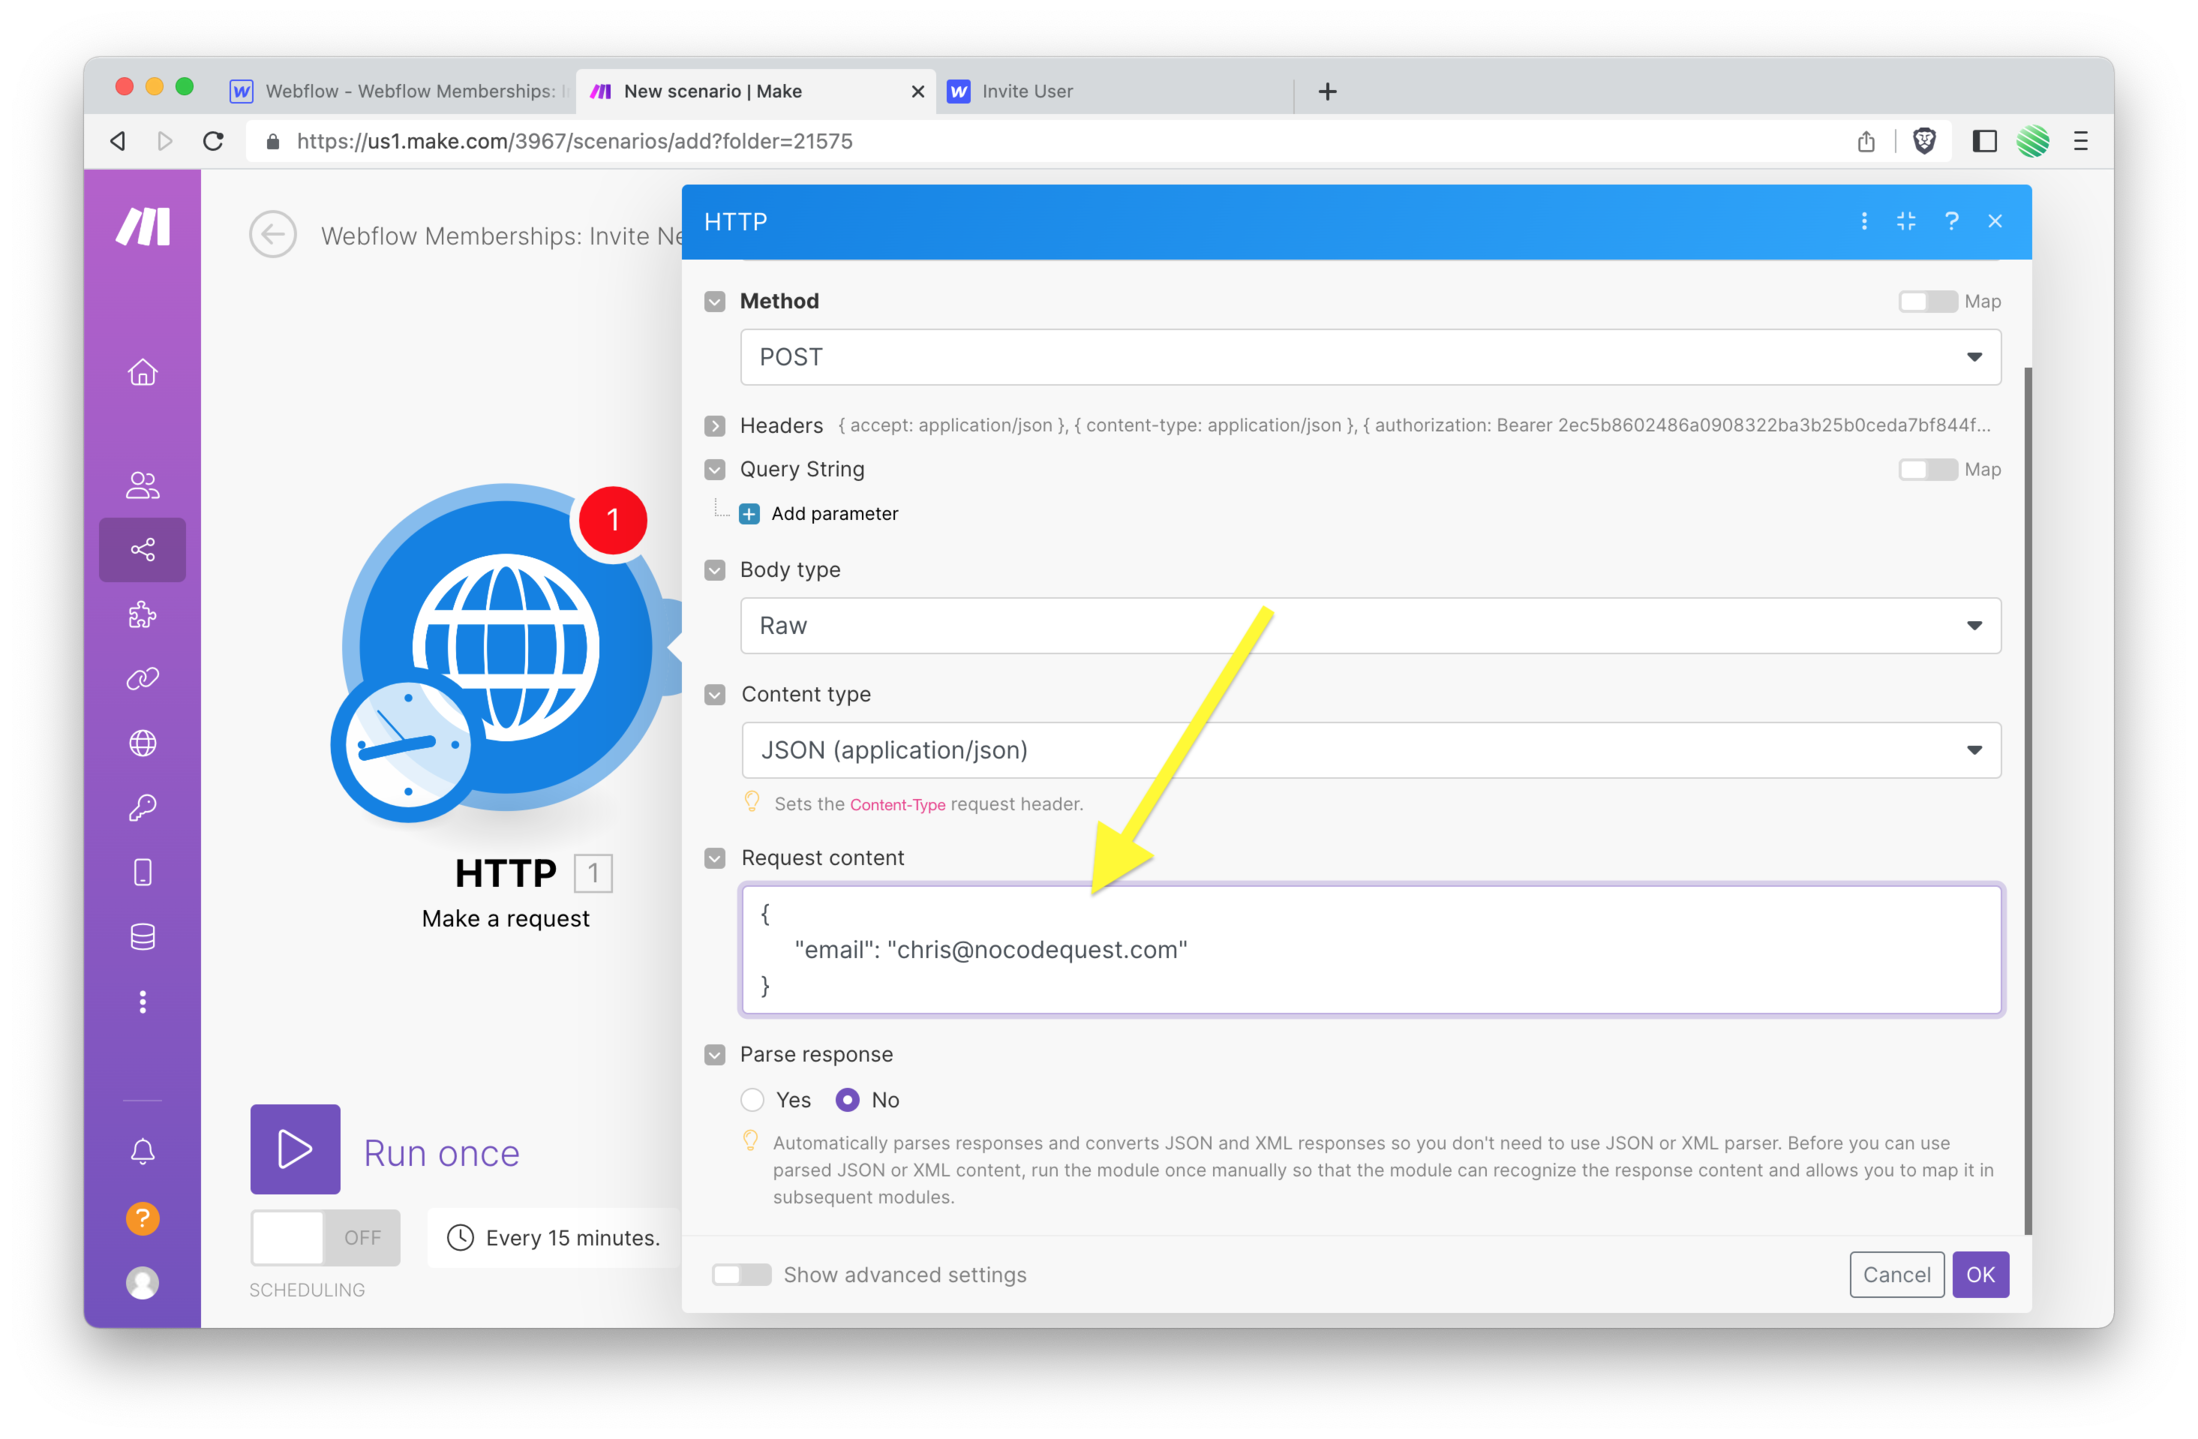
{
	"email": "chris@nocodequest.com"
}
Make sure to replace my email with yours. You’ll be receiving a real email invitation so it needs to be a working email address that you have access to.
To make life easier, copy & paste your JSON blob into this site: https://jsonlint.com/
It will tell you if you’ve made a mistake.
Once you know you’re specific JSON blob is good to go, paste it into the request content field.
By the way… this is the “message body” I was talking about earlier 😉
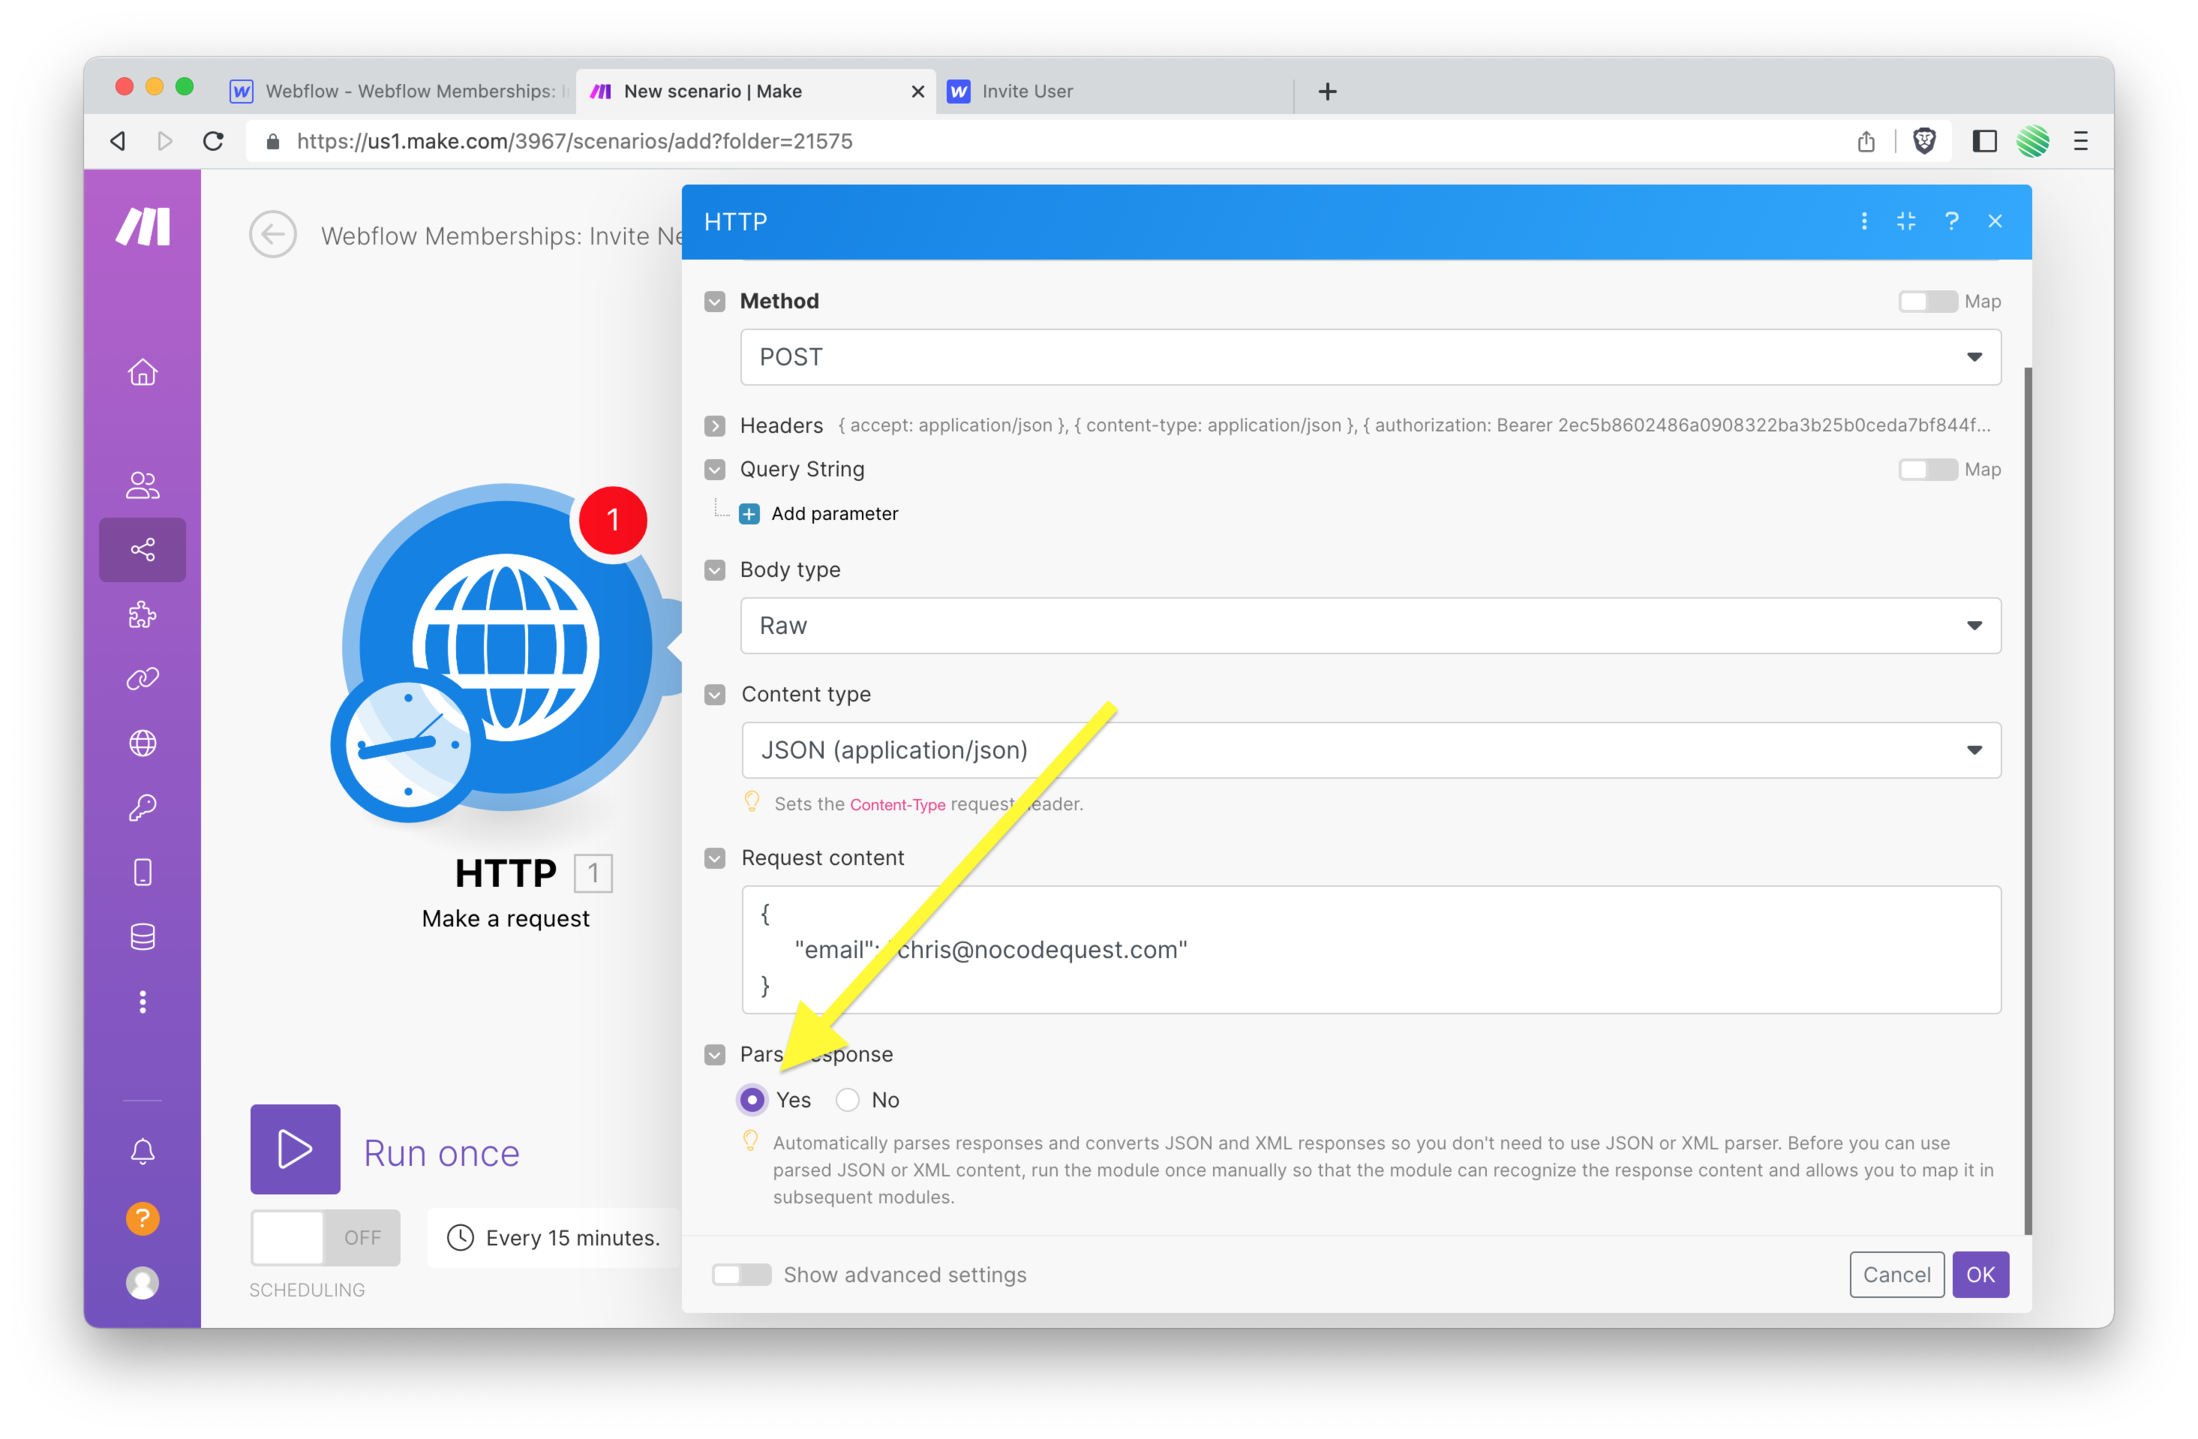
One last thing!
Make your life easy and choose the option you see in the screenshot below.
This tells Make to create readable output, otherwise it’ll just be one big blob of text and hard to read.
I’ll show you an example of this momentarily.
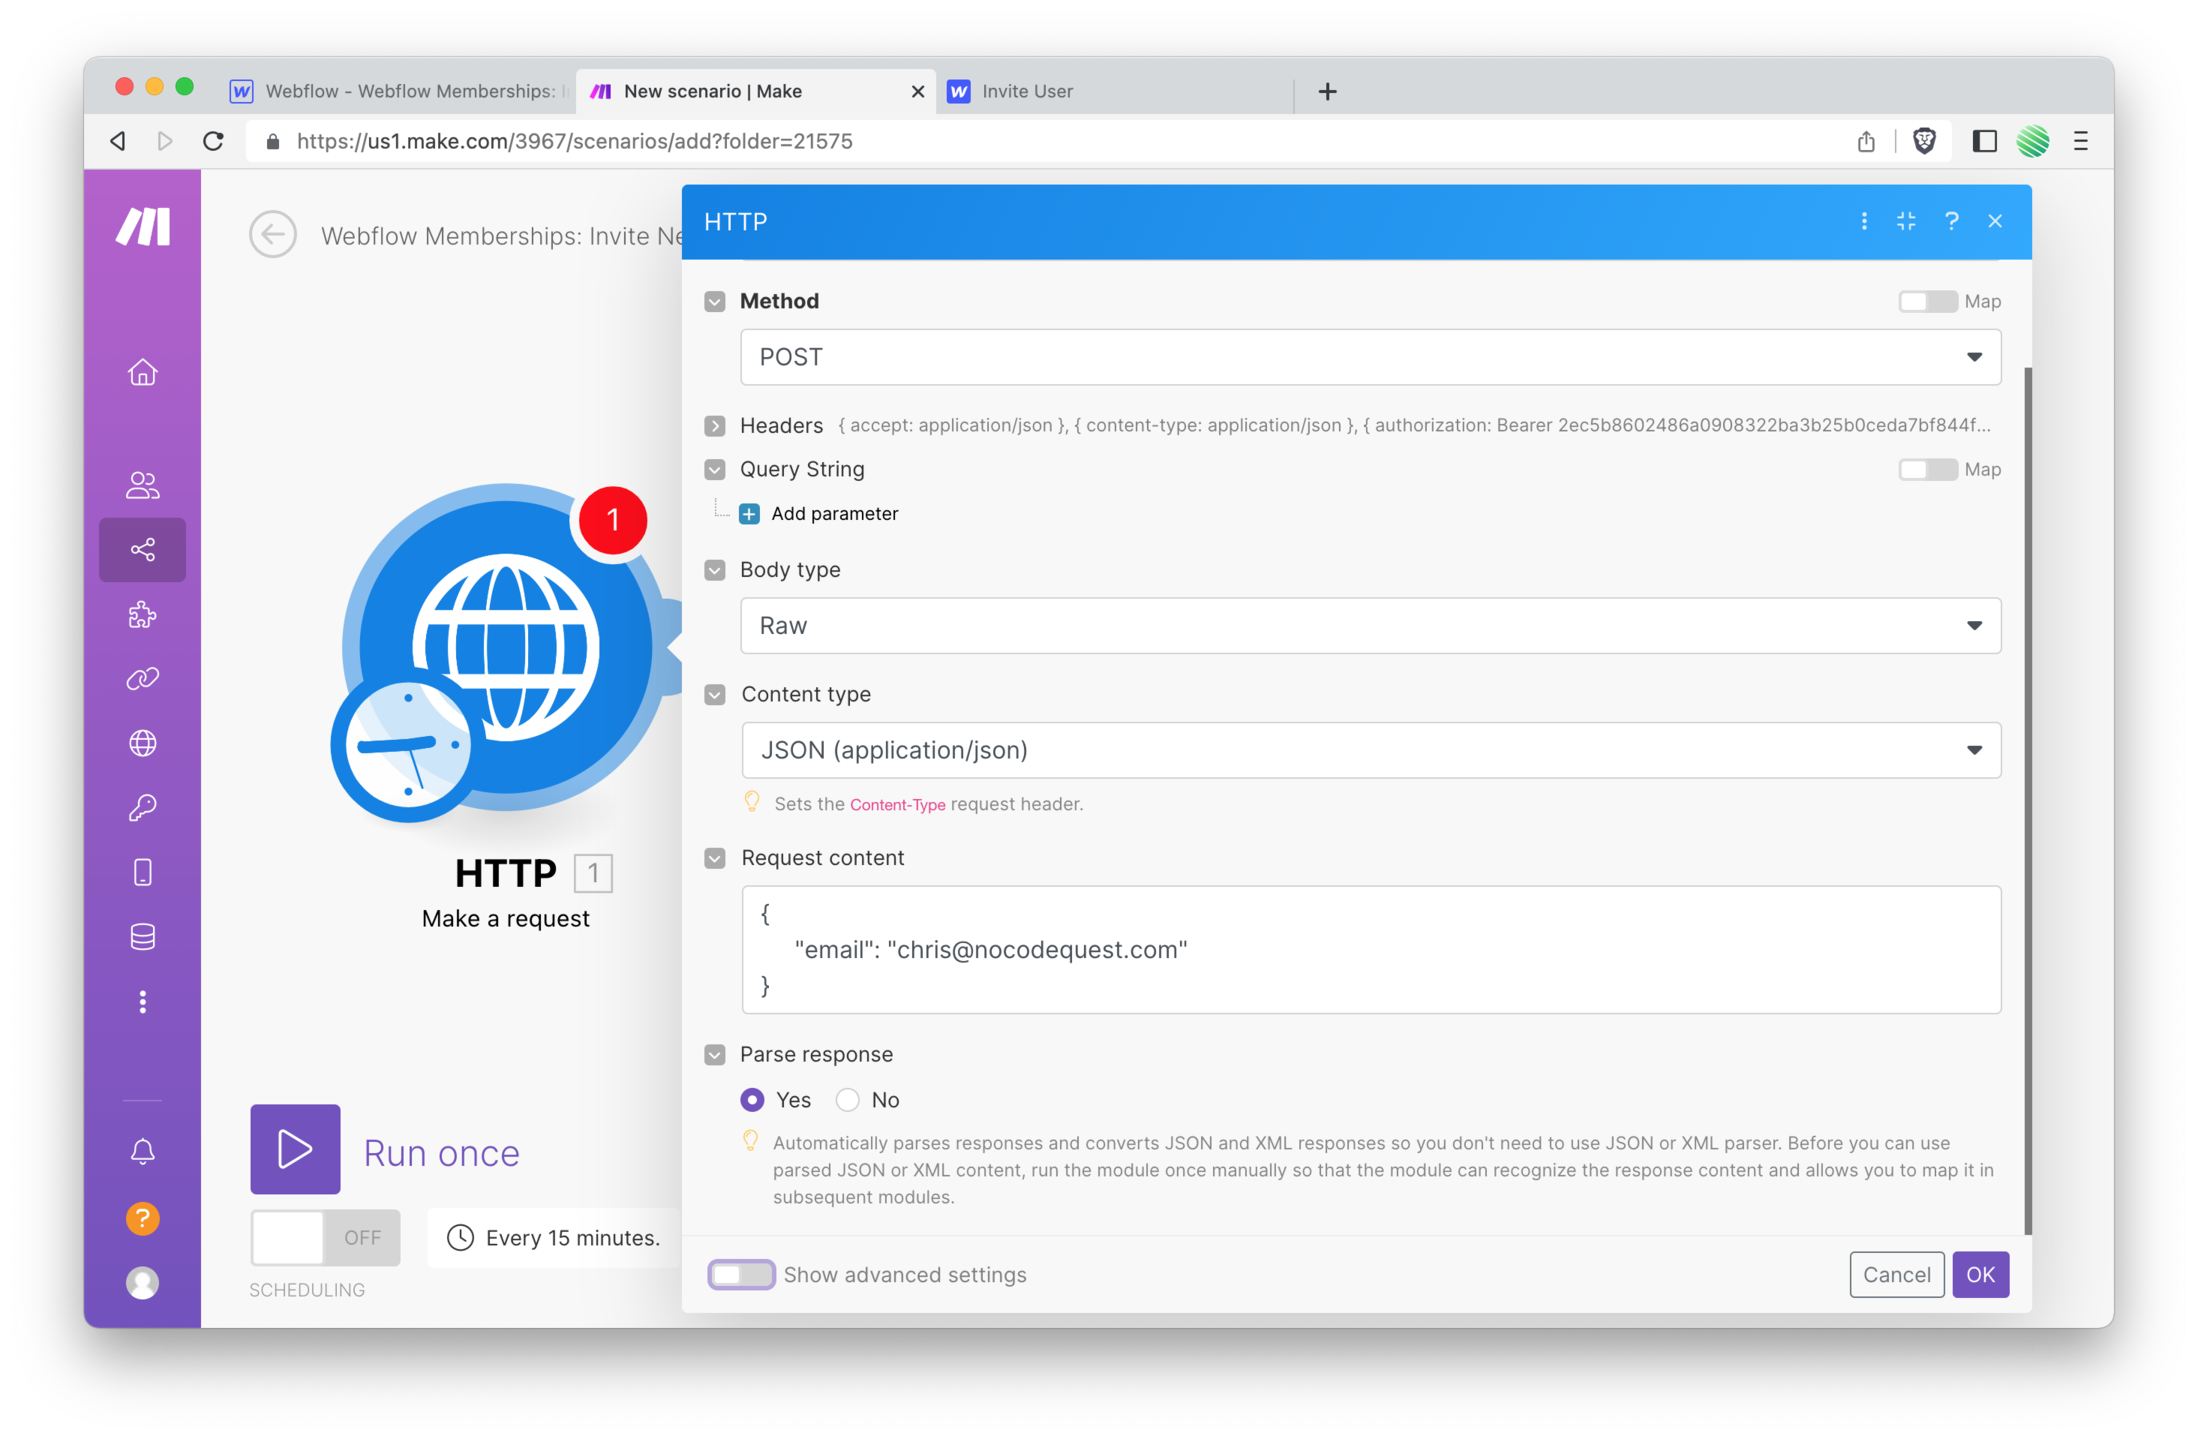 Okay! You're done.
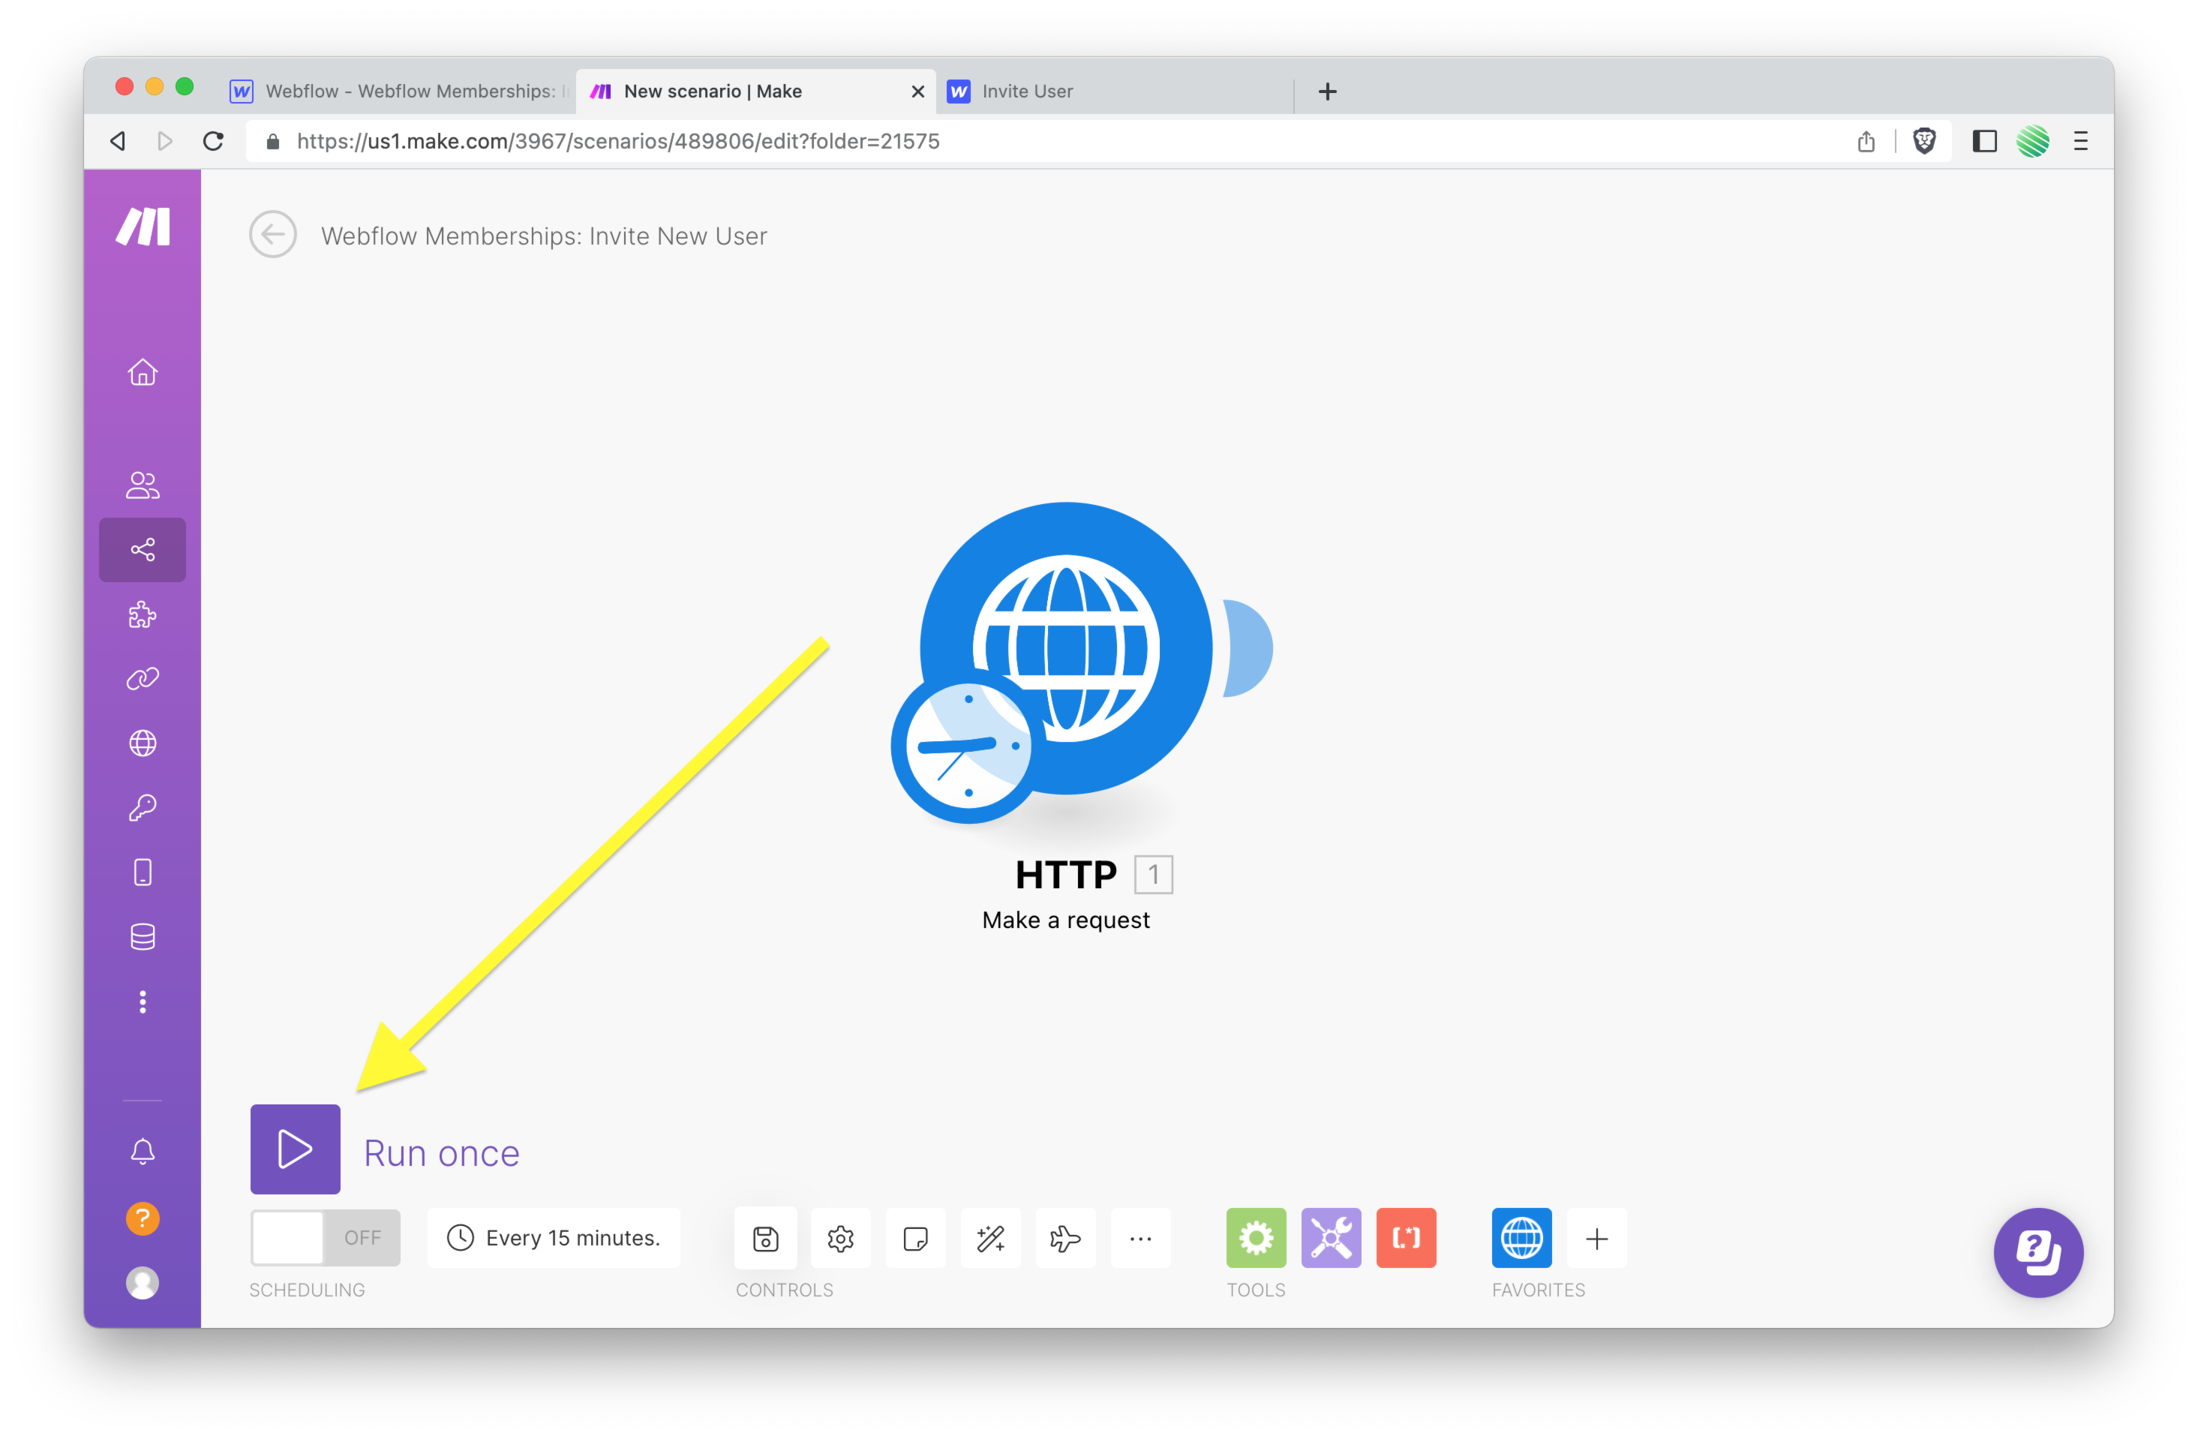
Tap on the “run once” button, this is where the magic happens 🦄
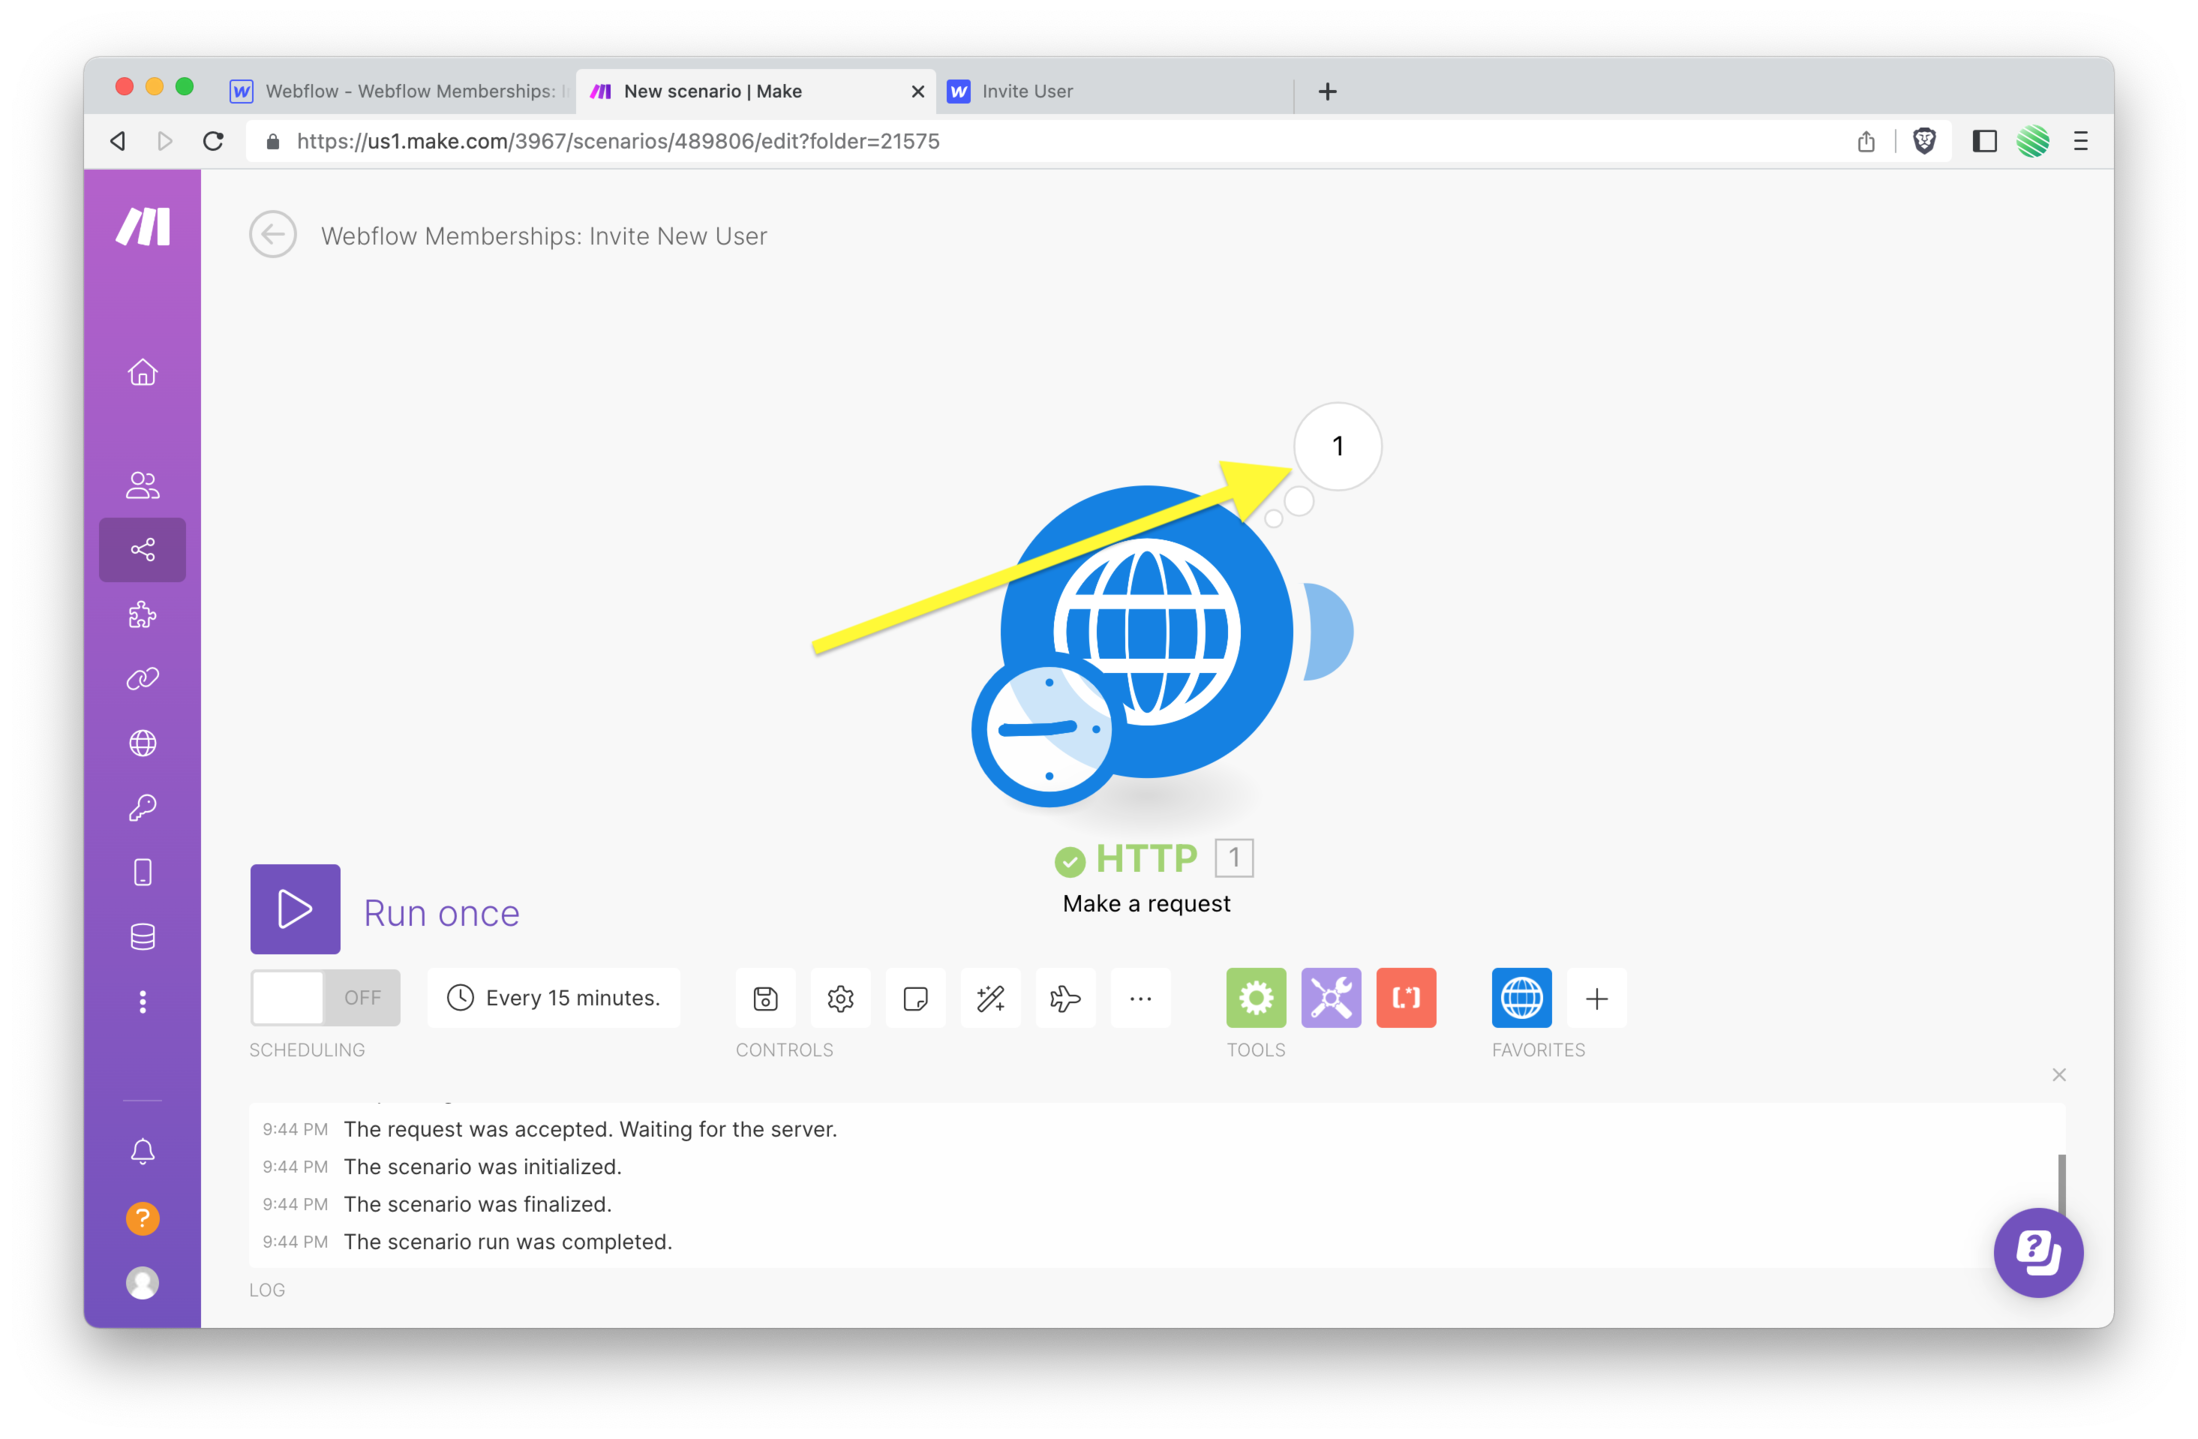
 Tap on the little popup bubble to see some results.
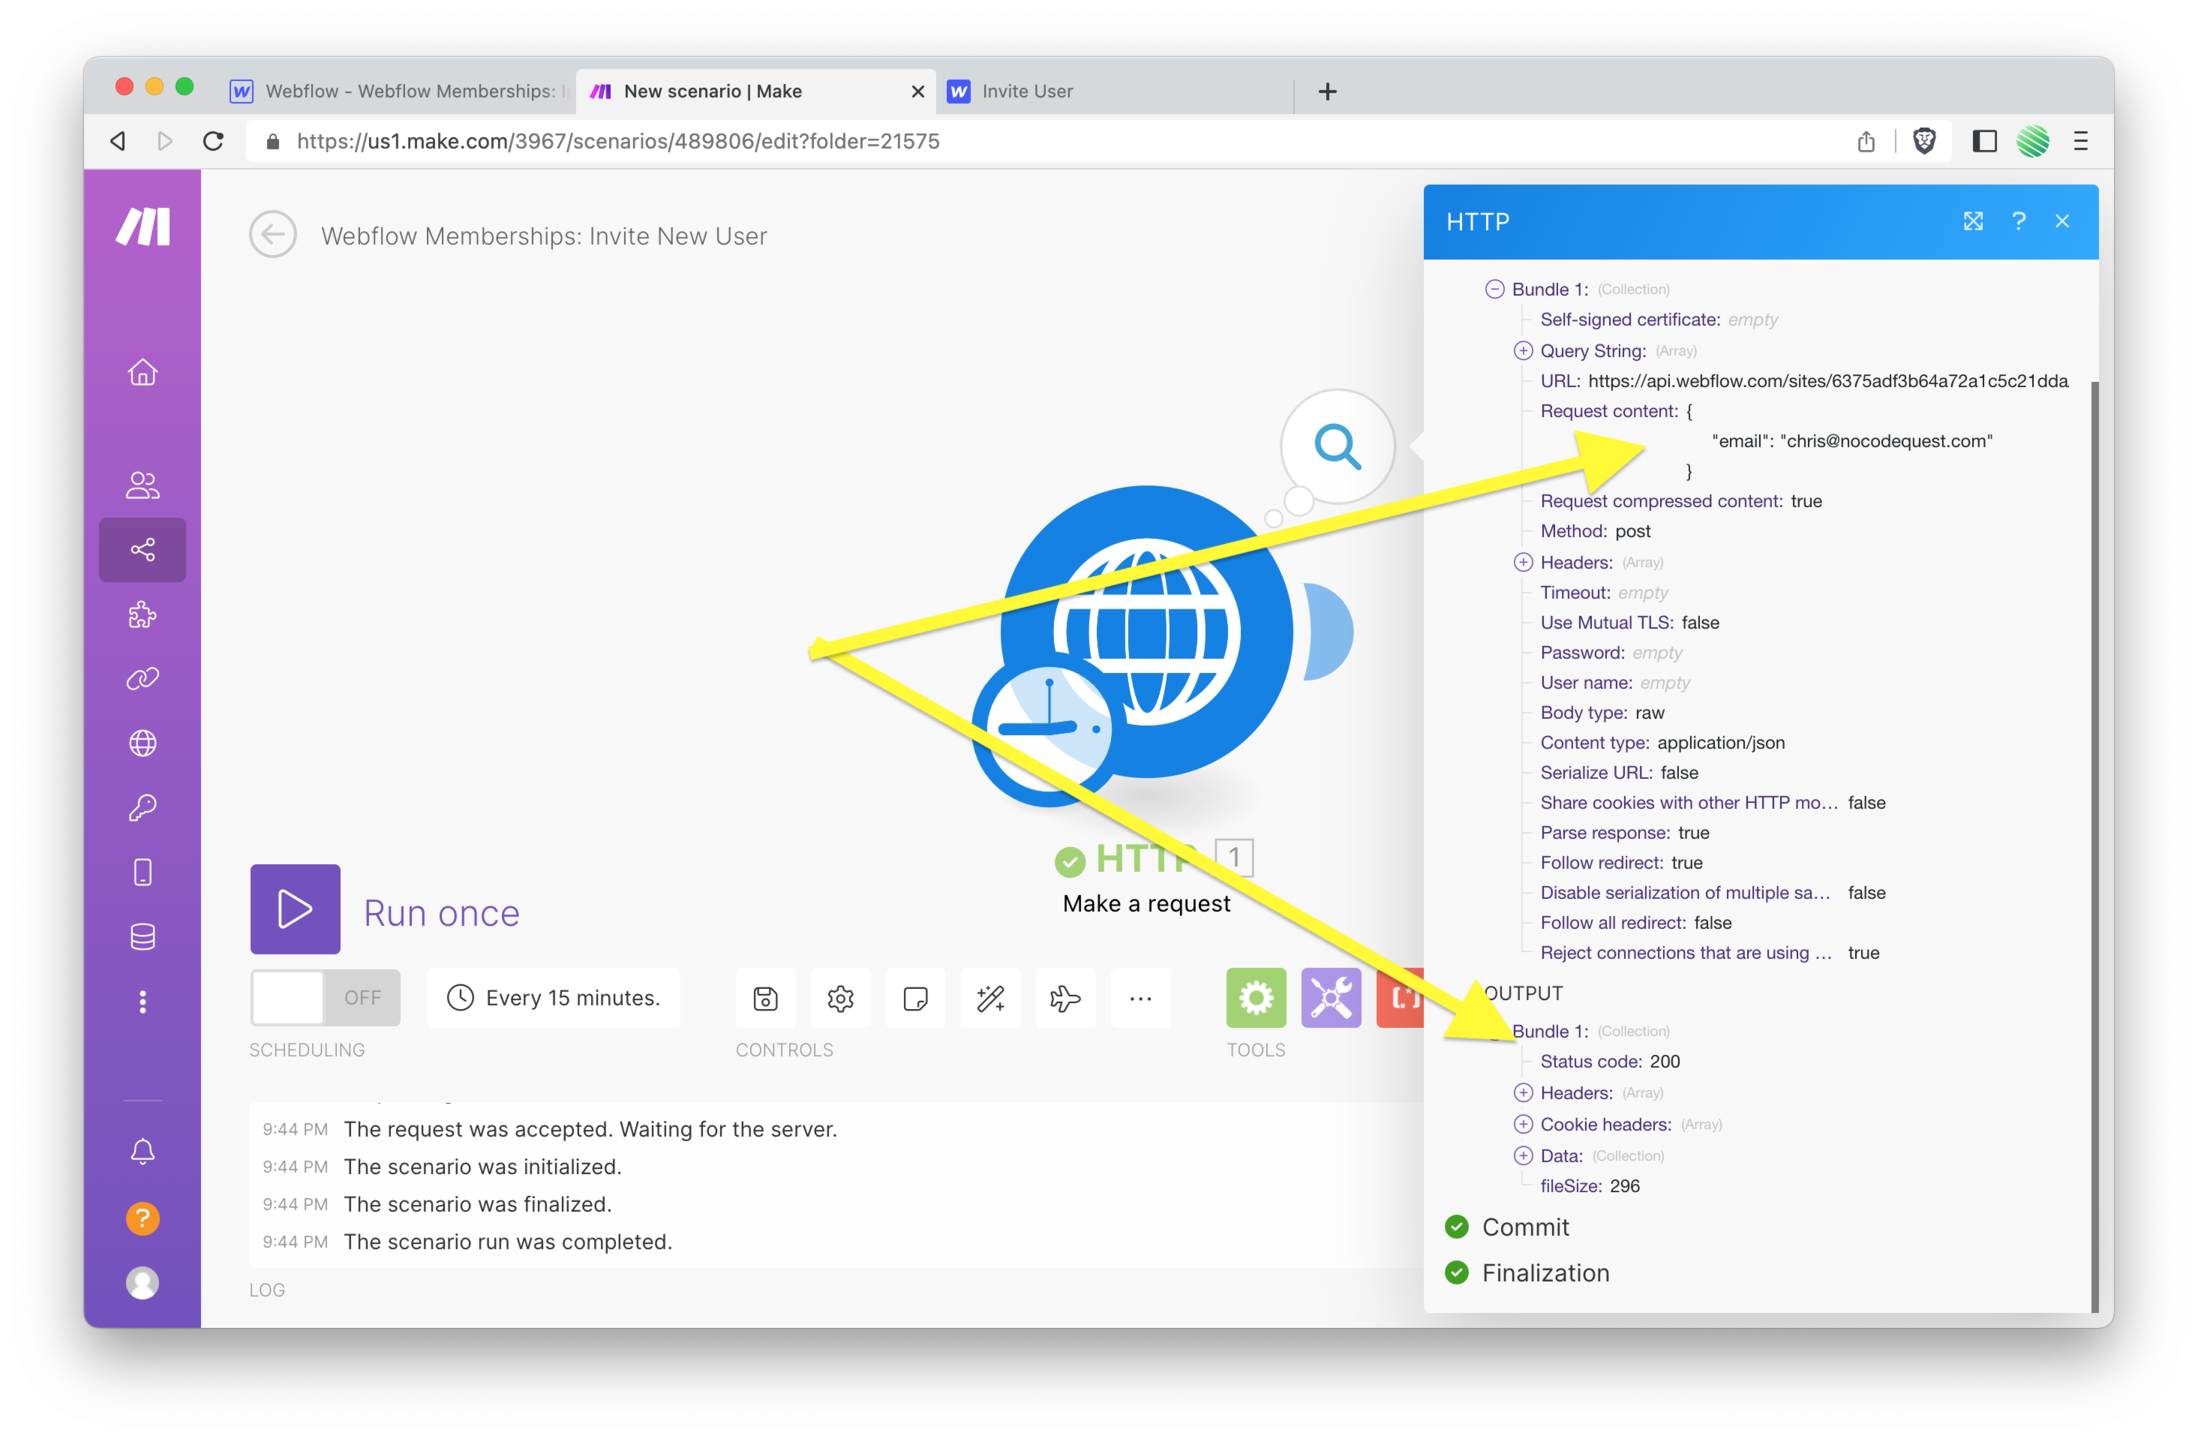
 This is where that little option I had you choose a moment ago comes in handy. All of this information is formatted nicely, with little expand / collapse arrows, etc... versus one giant blob of text.
Notice it says you sent JSON that included your email ( first yellow arrow ).
And the output says a “Status code: 200” which is technical server speak for “it worked!” ( second yellow arrow ).
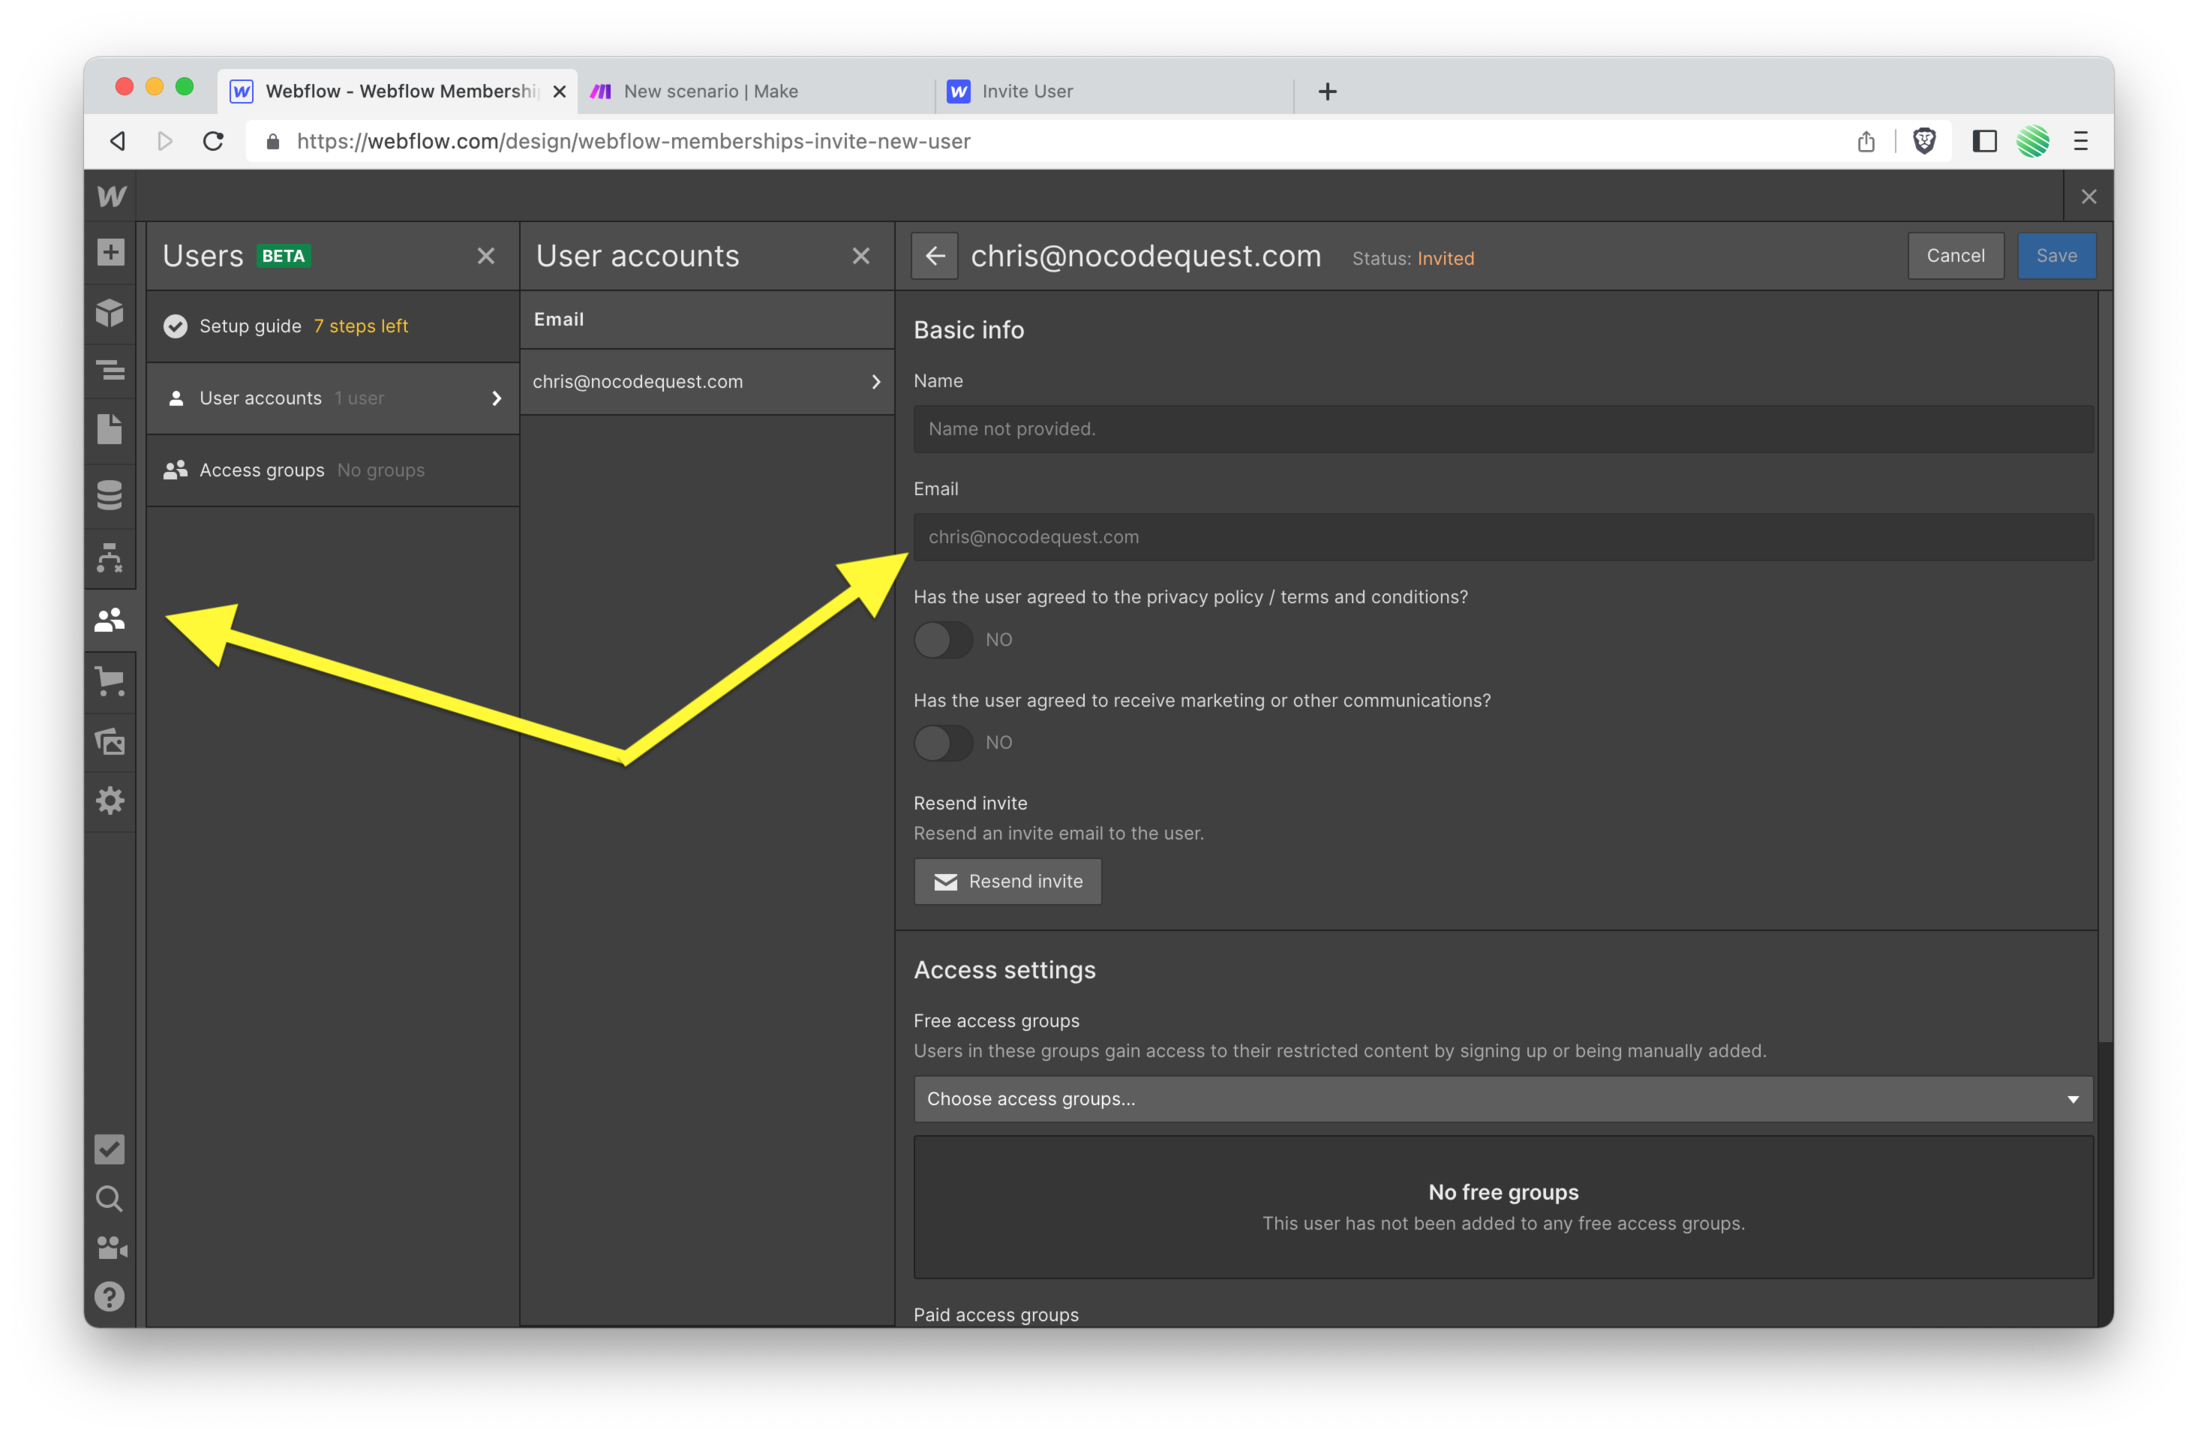
 Open up your Webflow Memberships and find the newly invited member with the email you sent in your JSON blob.
 Open up your email client and you should have received an email invitation!
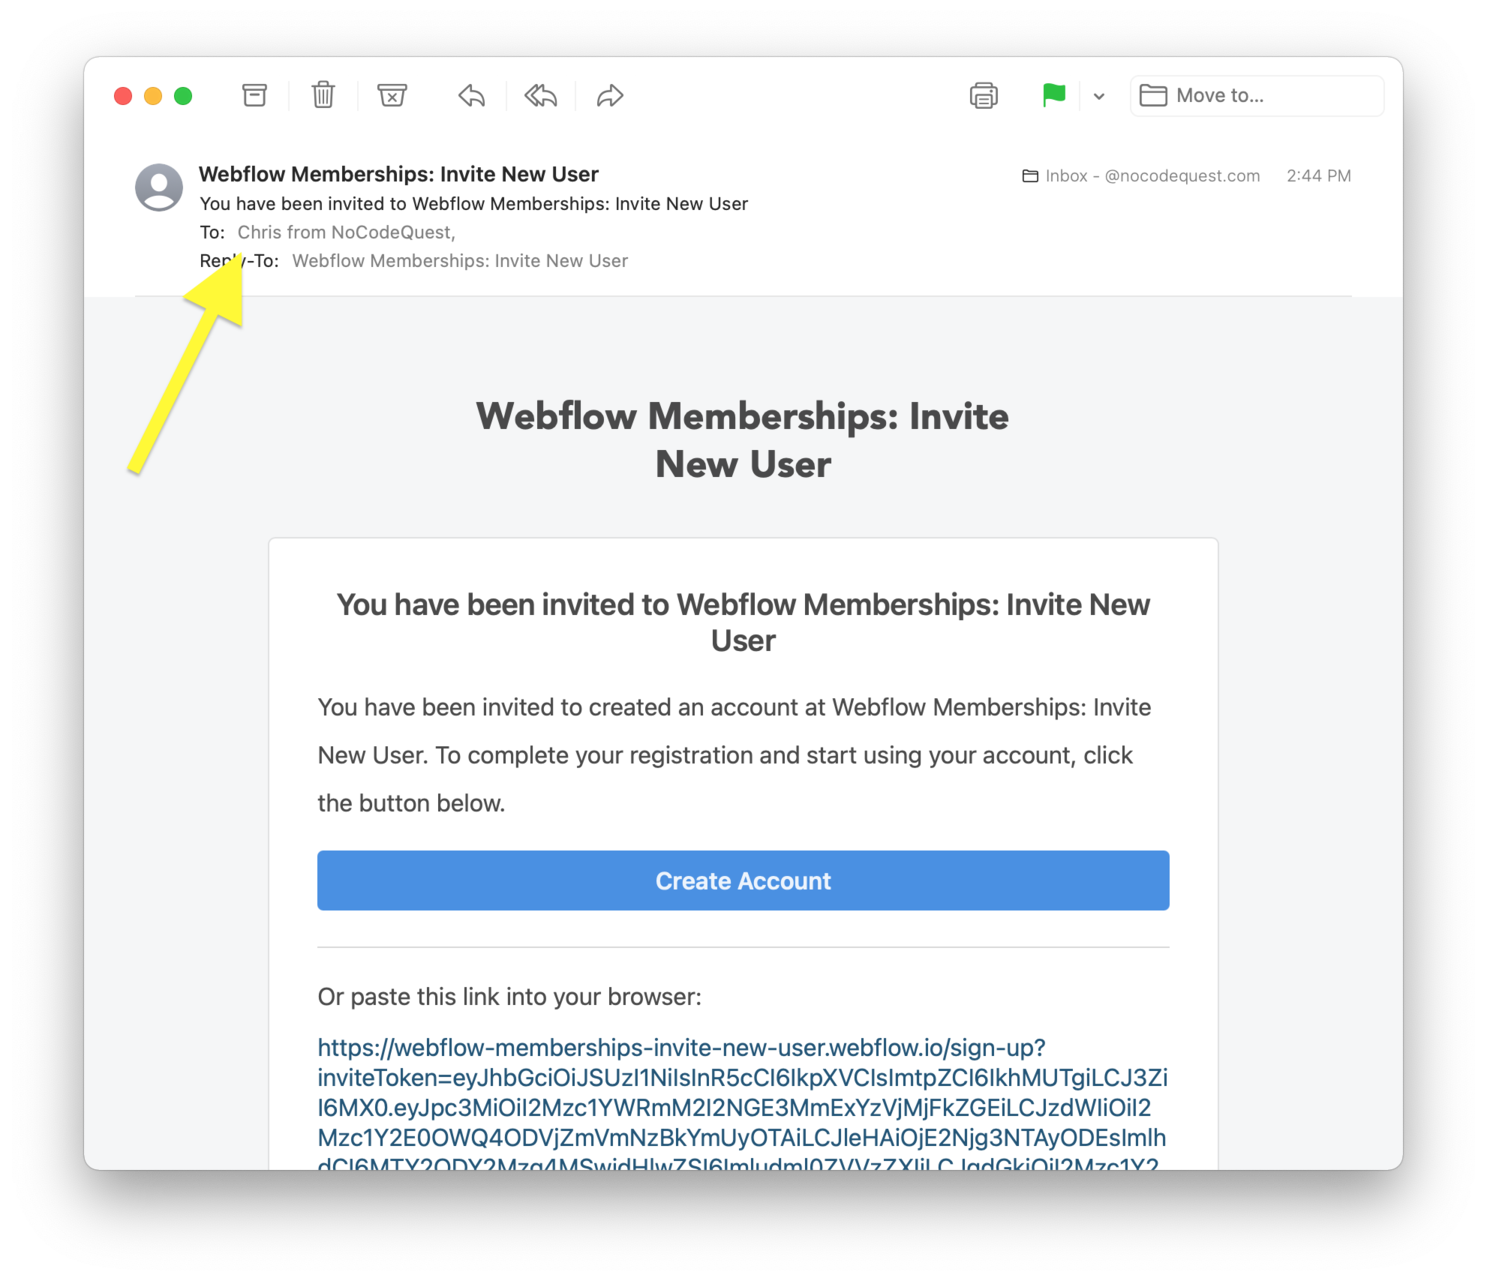 Life. Is. Gooooood 🍻
Once you’ve added your email…
➡️ Walk through my Webflow Memberships guide: How to Setup Native User Logins & Memberships in Webflow.
➡️ Using Webflow Memberships with their Logic feature is a snap. Get up to speed with it by Submitting Webflow Forms Directly into the CMS with Webflow Logic.
➡️ Get a better understanding of Make ( Integromat ) with my screencast: Simple Webflow form submissions with Integromat.